
I know you love all the photos you take and include in your scrapbooks, but every once and a while there’s a photo you really want to place prominently and feature on your page, right? I enjoy double and triple matting photos to set a photo apart from the rest, but another way is to put the focus on frames to enhance your photos.
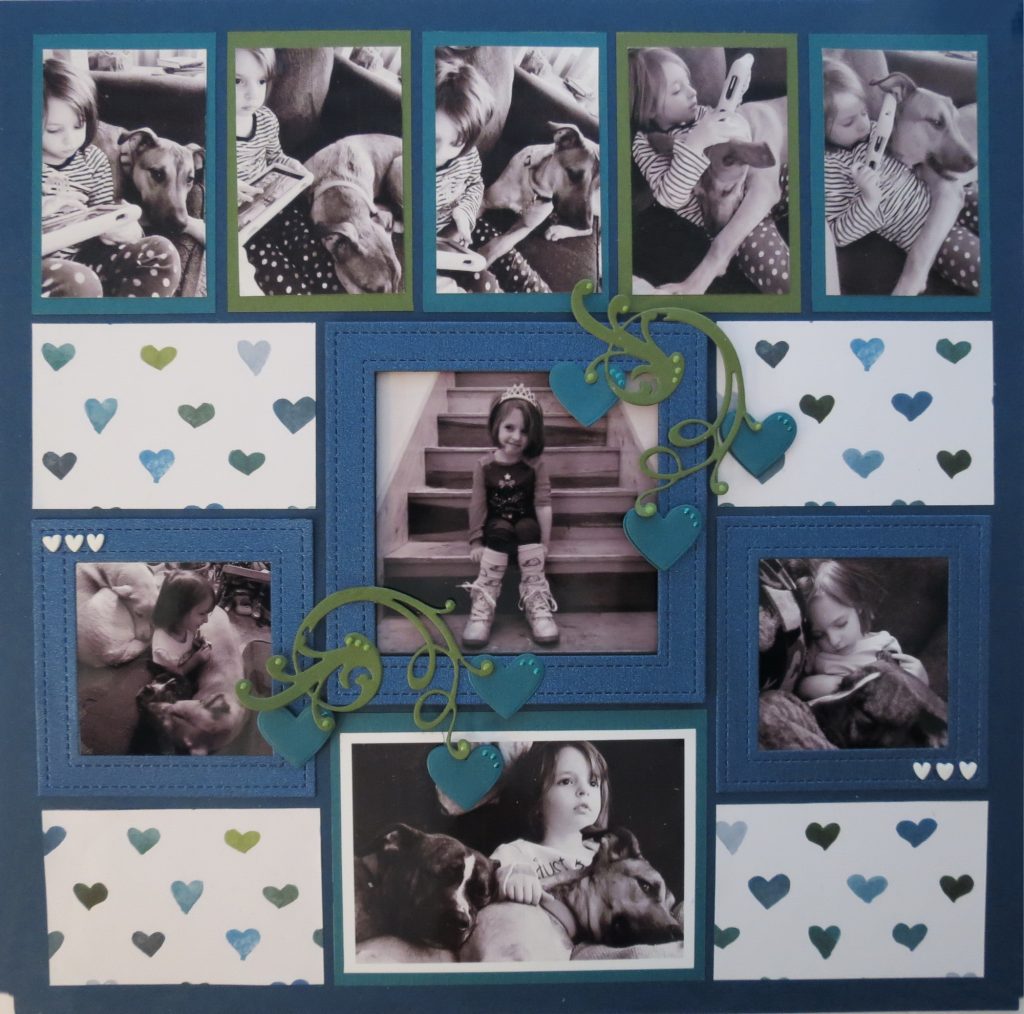
For this page, I wanted to use the new Stitched Frame Dies. I love the stitched details created with these die sets and the wider border that definitely appears as a frame for your photos. The 4×4 will be the main focus and using the 3×3 for two side photos. They are unified by the shimmery cardstock paper I’ve used for the frames.
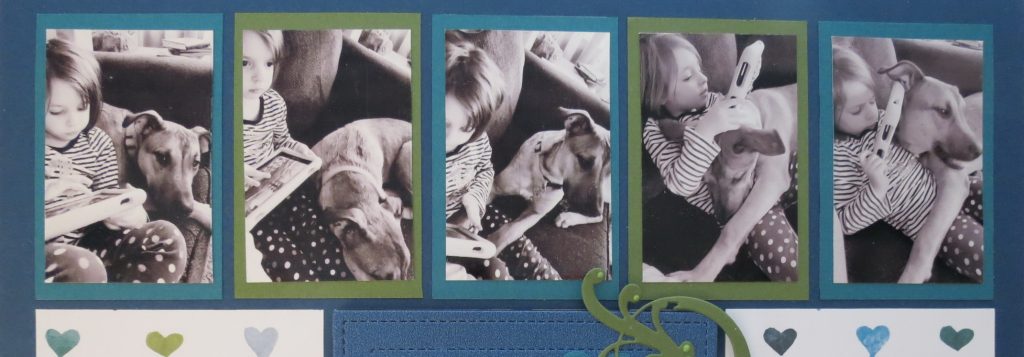

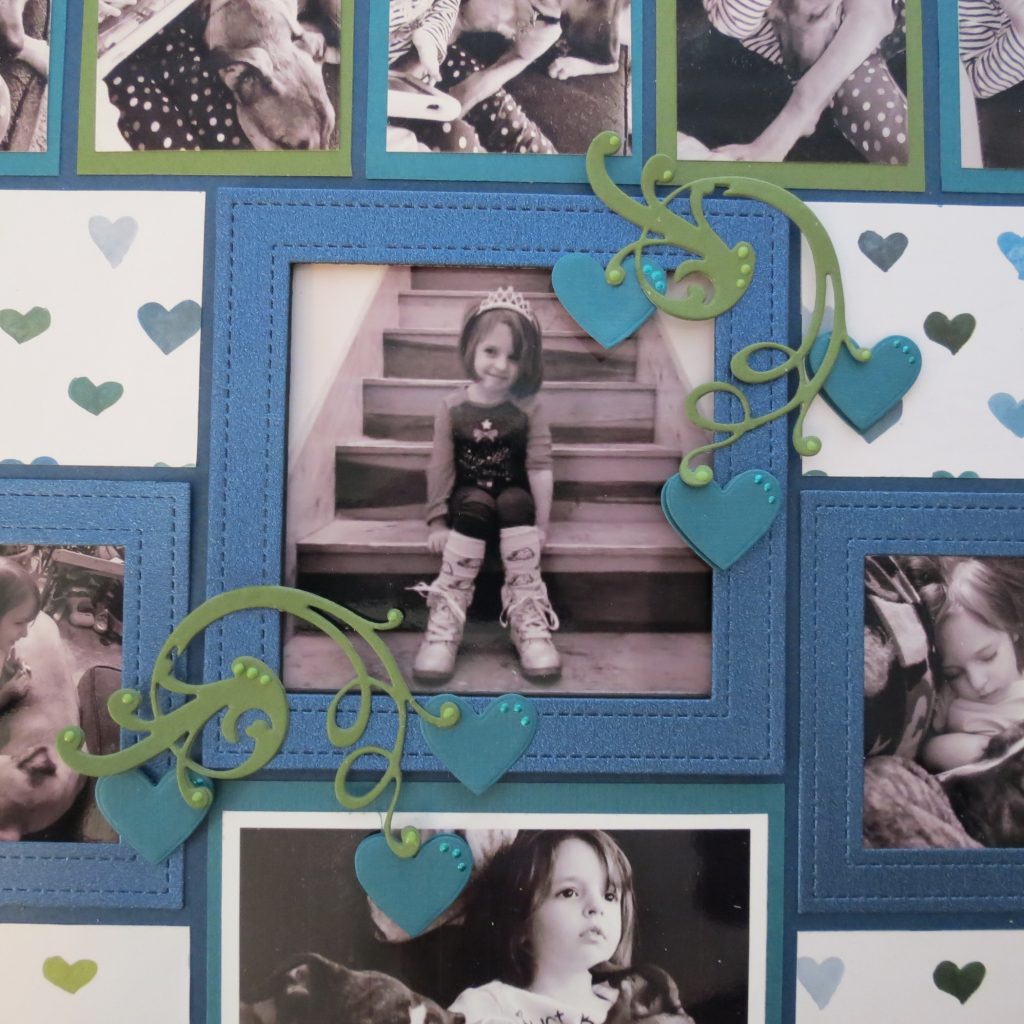
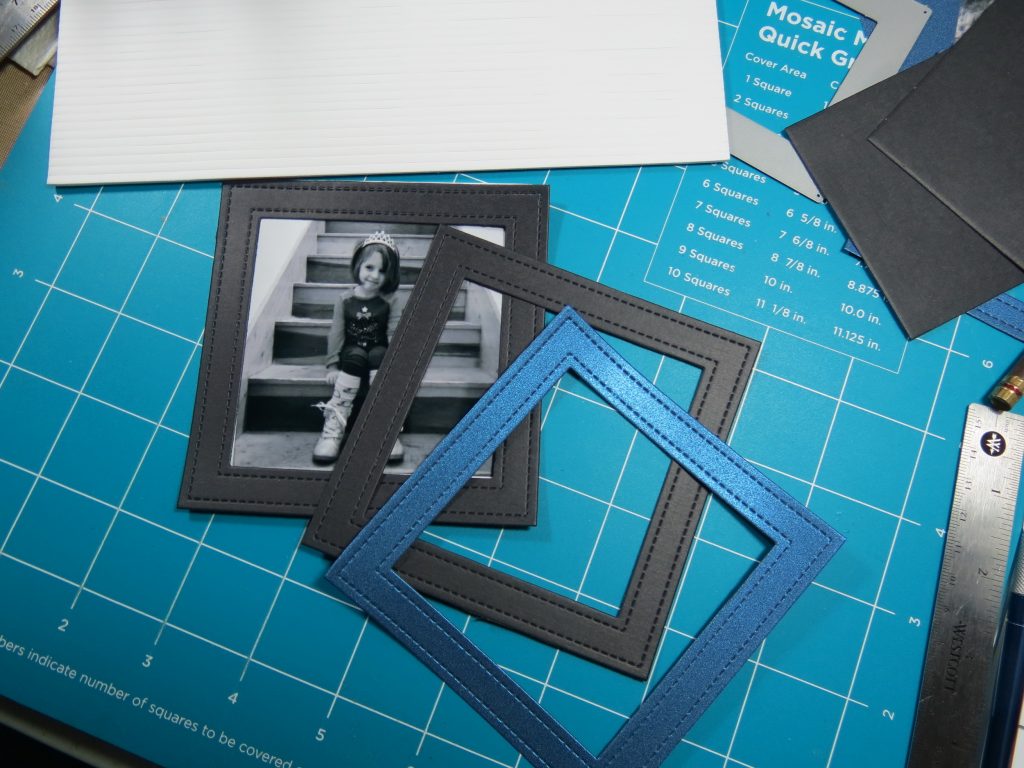
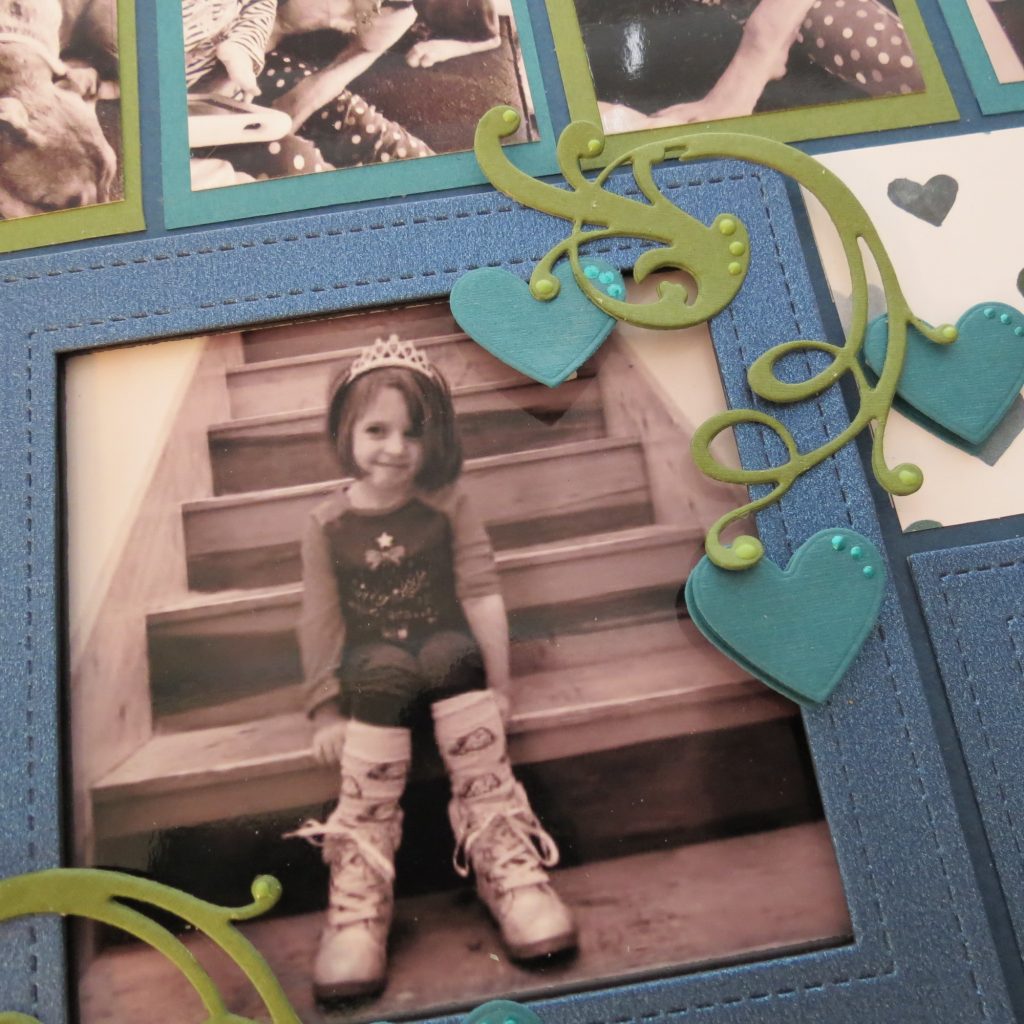
The photos are random photos of one child. I have a series of photos along the top row with one dog desperate for her attention, a photo of her and the three dogs surrounding her, another with two dogs sleeping on her lap and a third of her and one dog, fast asleep together. The center focal photo is of her alone in her tiara (she told my mum “you can call me, ‘Your Majesty’”) and her new sparkly boots.
As you can imagine there are many colors in the photos so I turned them into B&W to eliminate the distractions and to unify them. This lets the colors of the papers play a more prominent role in the layout and the interaction with her and her dogs rise to the forefront.
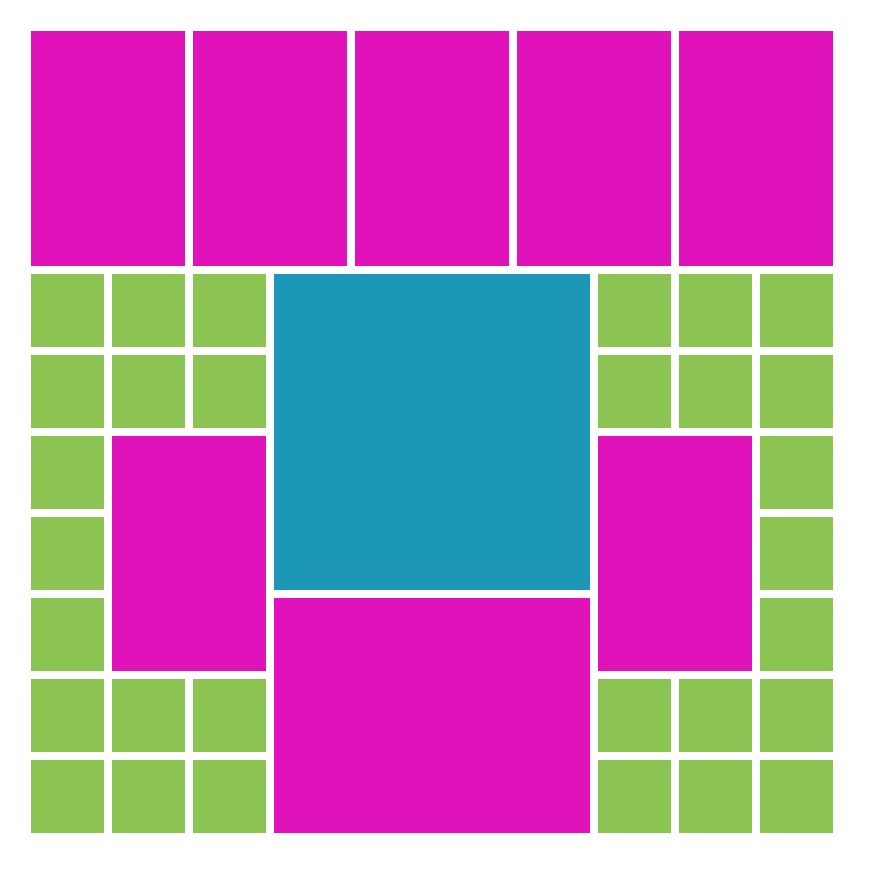
The pattern is Pattern #188 a mostly mosaic pattern. You might question that as I don’t have a single 1” sq. on the page. Yes, I did modify the pattern. I began with turning the 2×3 blocks into 3×3 squares to use that 3×3 frame die. This left groups of 1” squares above and below those squares. I wanted my patterned paper to be here but did not like how it broke up the heart pattern on the paper, there’s just too much space between hearts and it looked off-balance, so the change was to 2×3 blocks for the paper. A simple modification.
There’s now a central grouping of framed photos created with the same family of border dies. The task is to make that center photo pop up from the others.
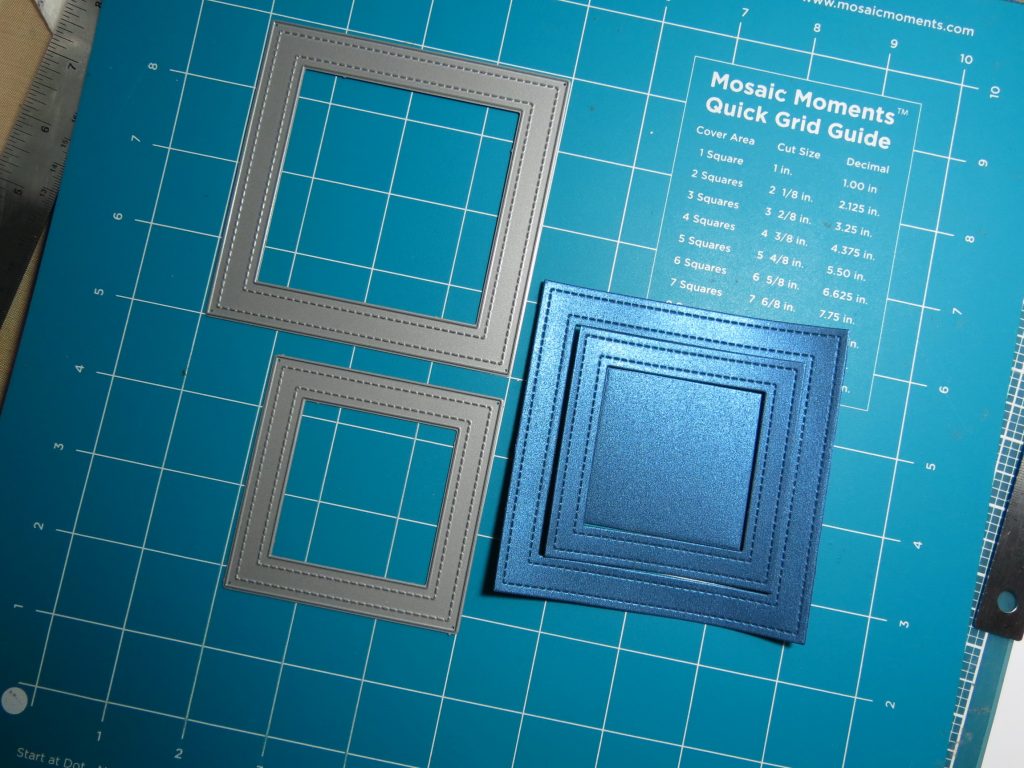
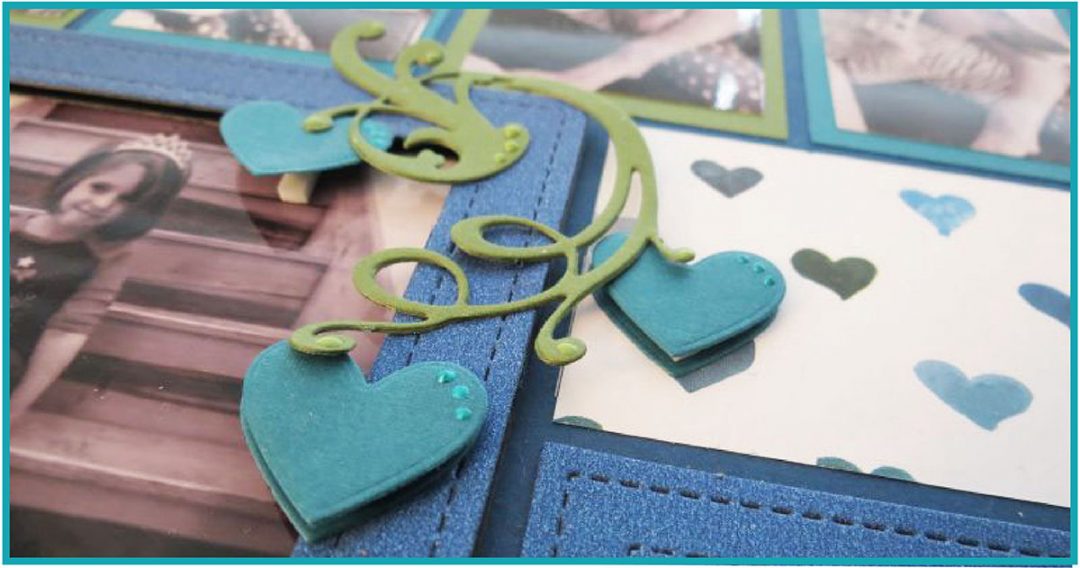
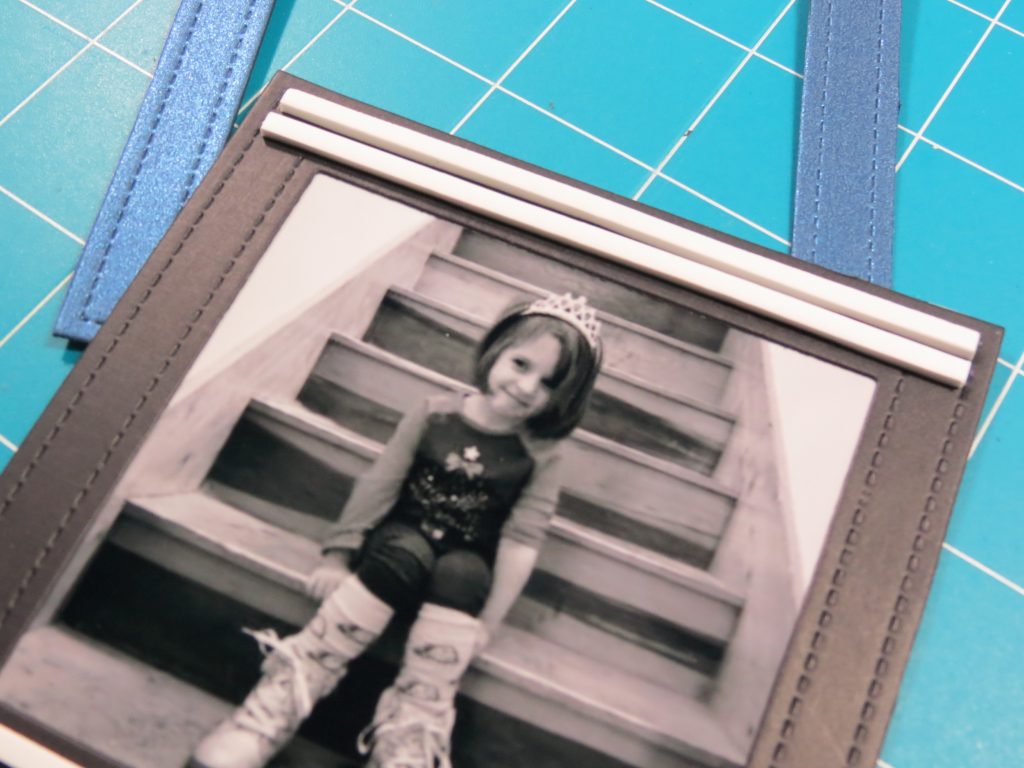
For the center frame, I’ve done a couple of things to add dimension and depth. I have cut two of the 4×4 frames in black, one in the blue shimmer paper. One of the black frames stacks under the blue frame adding another layer. The second black frame is placed on the photo covering the photo edges and creating a shadow edge when the next layer is applied.
It now gets depth added using a narrow 1/8” foam mounting tape that I use for shaker boxes. This lets me add the tape on all sides just in from both edges to keep from being seen once the top frame is applied. This adds a little pop, some shadow effect on the center photo and becomes a nice platform to add embellishments.
What I’ve often done to add focus on frames at this point is to embellish a portion of the frame to draw you in. This time I’ve used a flourish to imitate vines and then used random hearts in teal to drop like bleeding heart blooms from the vines. The flourishes are doubled up for stability. The hearts are layered with foam mounting tape between two hearts. Finally, I’ve added pearl drops to the vines and hearts.
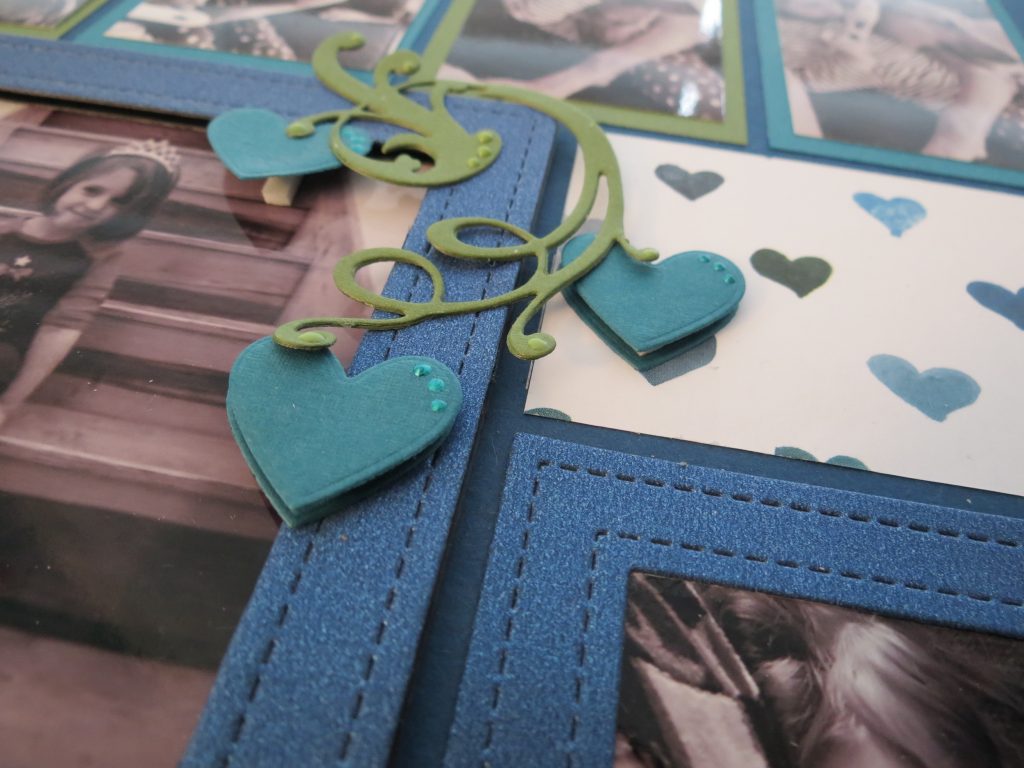
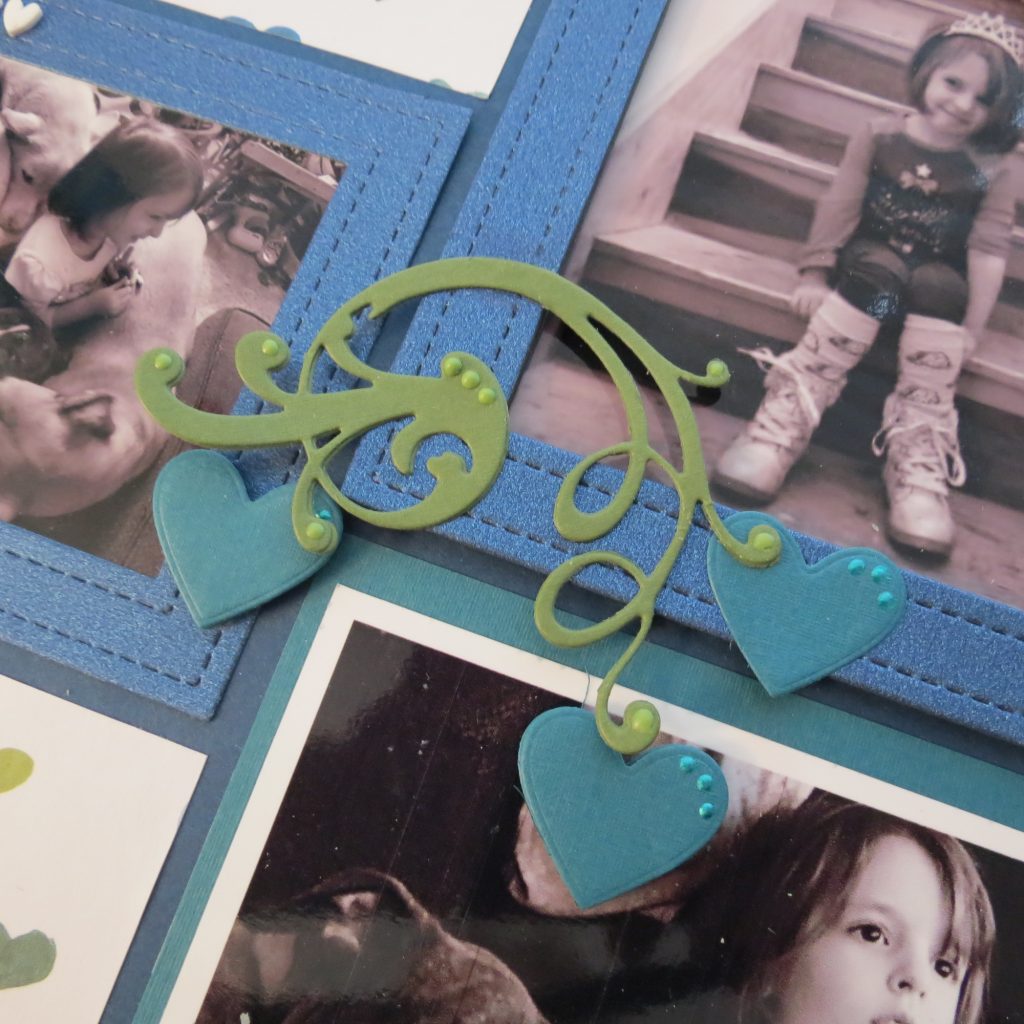
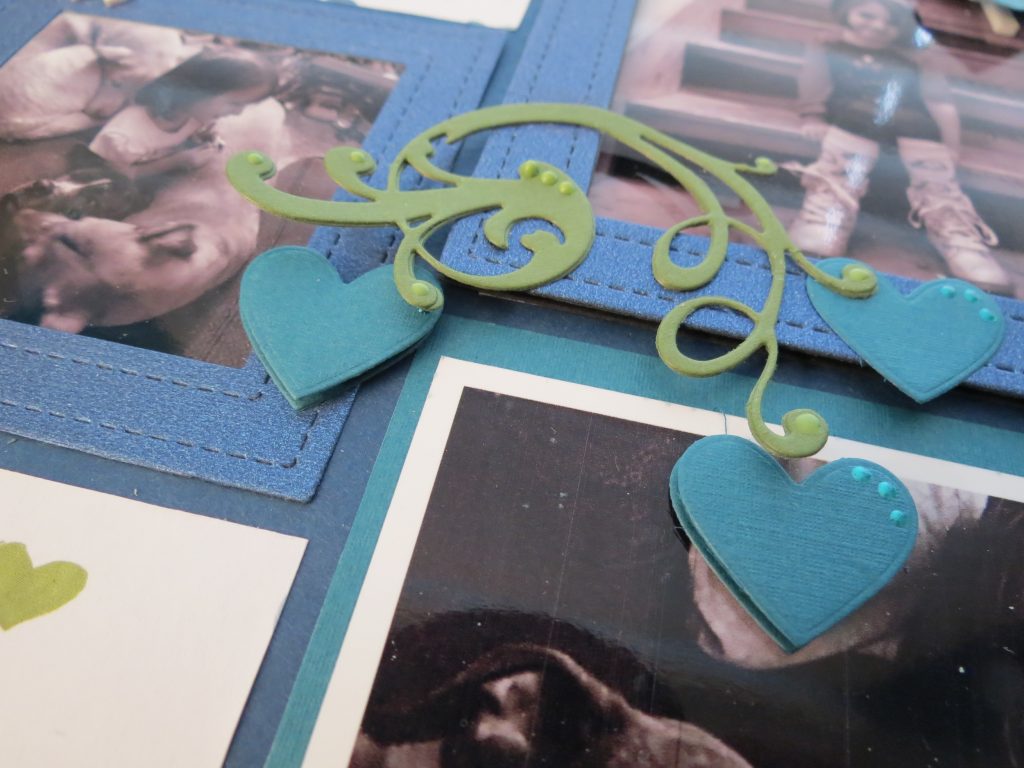
This does a couple of things, it…
- Brings focus to the center
- Connects that photo to the surrounding photos with the vines sweeping up or down into other photos
- Effectively covers a distraction in one photo
- Adds a variety of layers
- Adding pearl drops brings interest, texture, and color
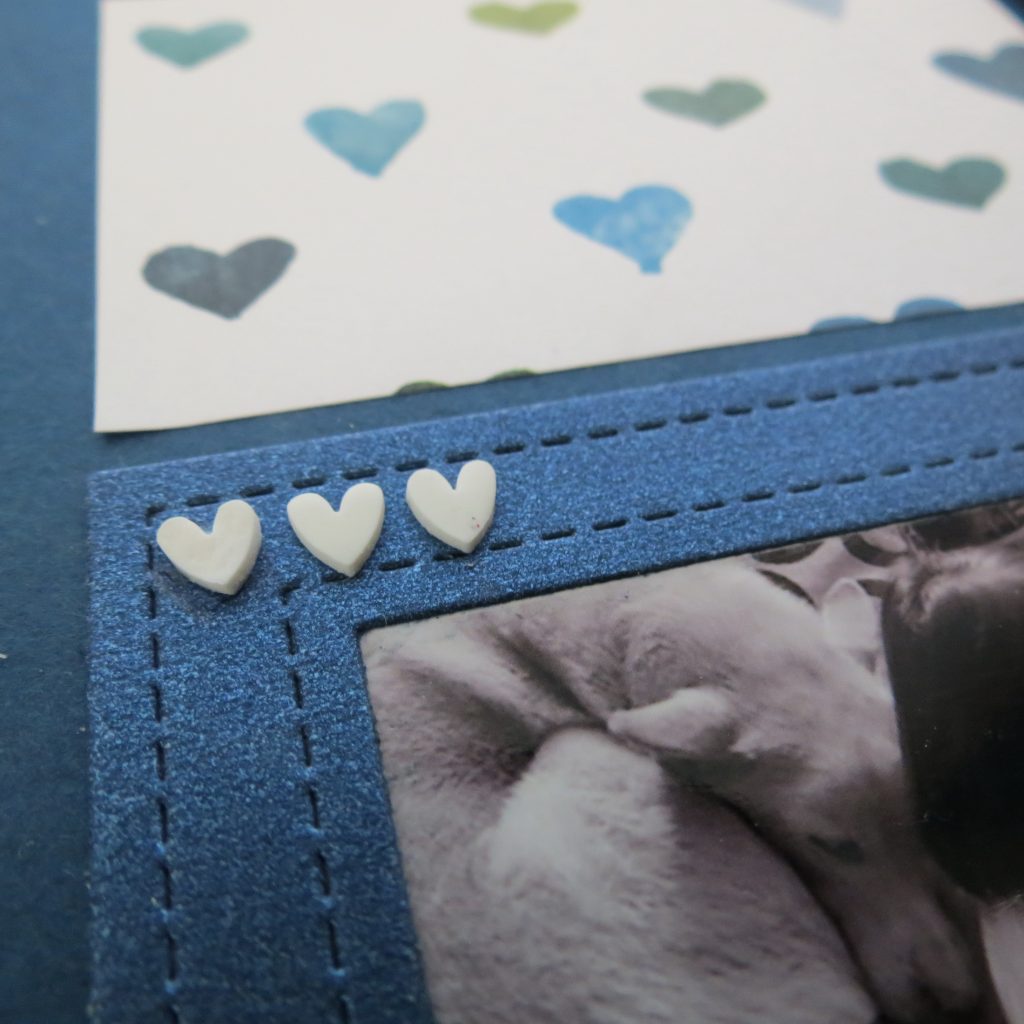
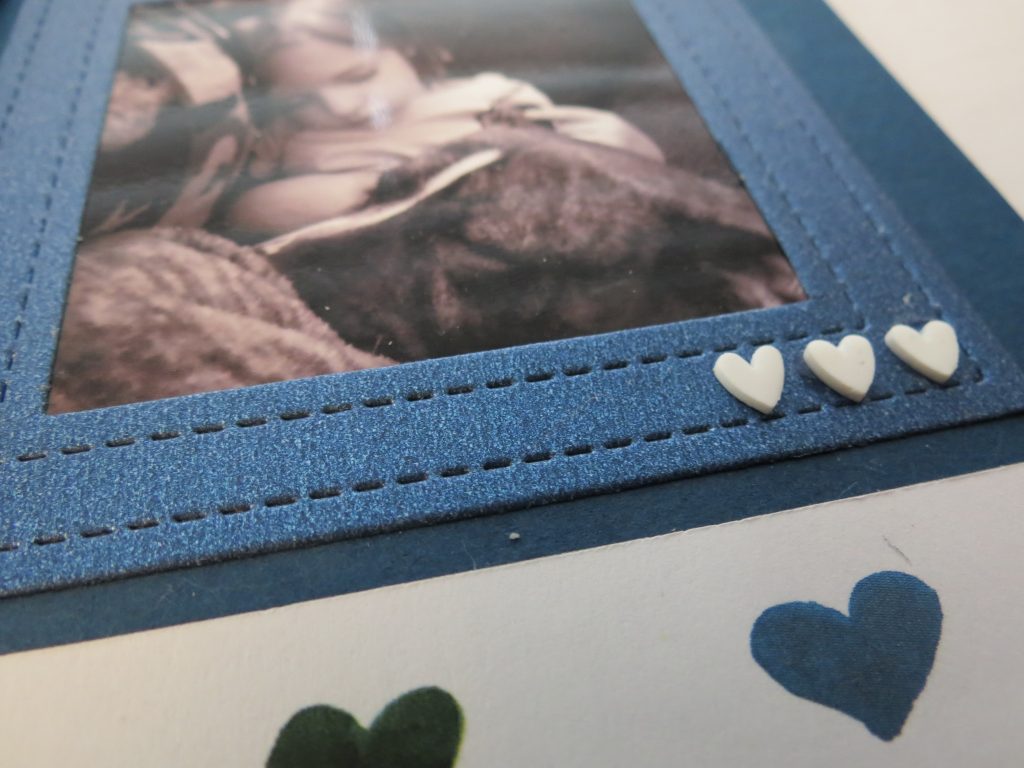
Because I thought the side 3×3’s needed a little something to tie them into the page a bit more I’ve used three tiny white hearts centered between the stitching along one of the top or bottom edges. The white of the hearts draws a connection to the white of the patterned paper. These outside frames are applied directly to the grid.
That’s a few ideas to get you started. If you’d like a few more ideas to focus on frames using other Mosaic Moments frame dies you might like to check out a few of these previously posted pages.
Other Framing ideas:
- Baby’s got Bling
- Shine with Diamond Mine Frame
- Mother’s Day
- Fall Graphics
- Capturing Spring Blooms
- Embossed Ovals
Supplies for this page:
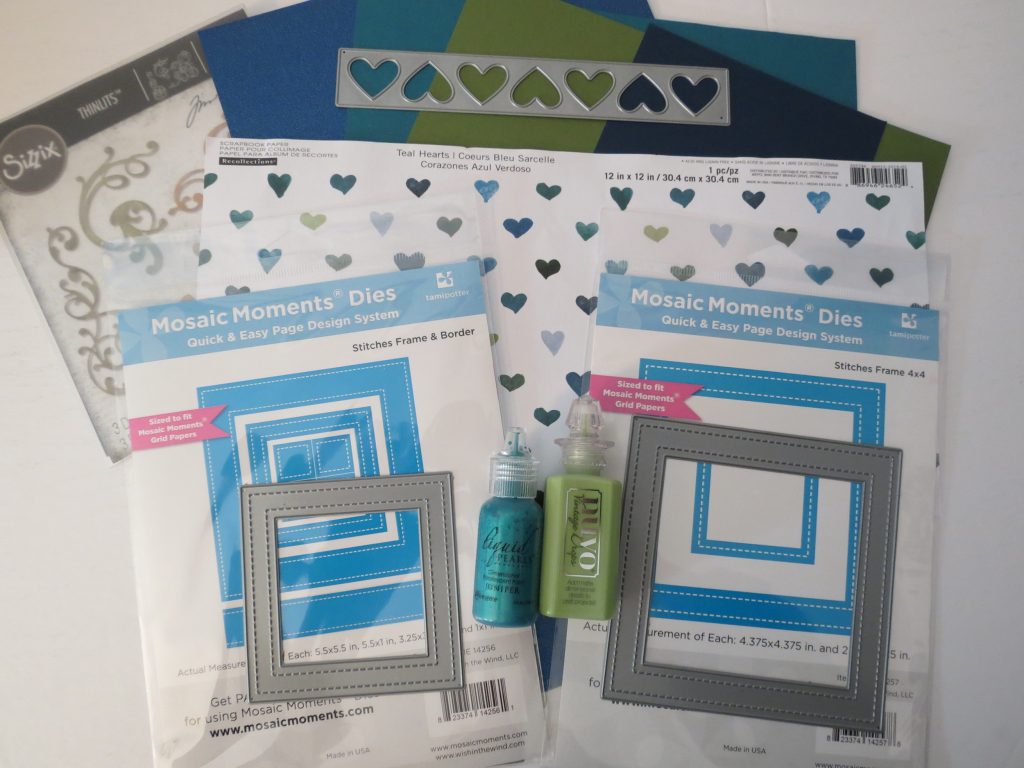
- Mosaic Moments 12×12 Grid Paper – Blueberry (ret.)
- Mosaic Moments Stitches Frame & Border
- Mosaic Moments Stitches Frame 4×4
- Mosaic Moments Row of Hearts Die
- Blue hearts paper – Recollections
- Cardstocks – Recollections – Michael’s
- Foam mounting tape 1/8” strips – scrapbook-dot-com
- Sizzix – Tim Holtz flourishes dies
- Pearls – Nuvo – Vintage Drops: Pioneer Green; Liquid Pearls – Juniper
- Tiny white heart embellishments – Sprinkletz Embellishments by Buttons Galore
Andrea Fisher