
 [/vc_column][vc_column width=”1/3″]
Tip: Before cutting or cropping, determine where to make your first cut. Using a transparent grid overlay is very helpful to this process. (See Mosaic Moments™ Quick Glance Cutting Guide™) As you are cutting, you may want something to fit in one square – such as a person’s head. Before you cut, determine the focal point of the photo. Begin cutting in a place that will leave important aspects of your focal point intact. Cut the remainder of the photograph in one inch increments from that point.
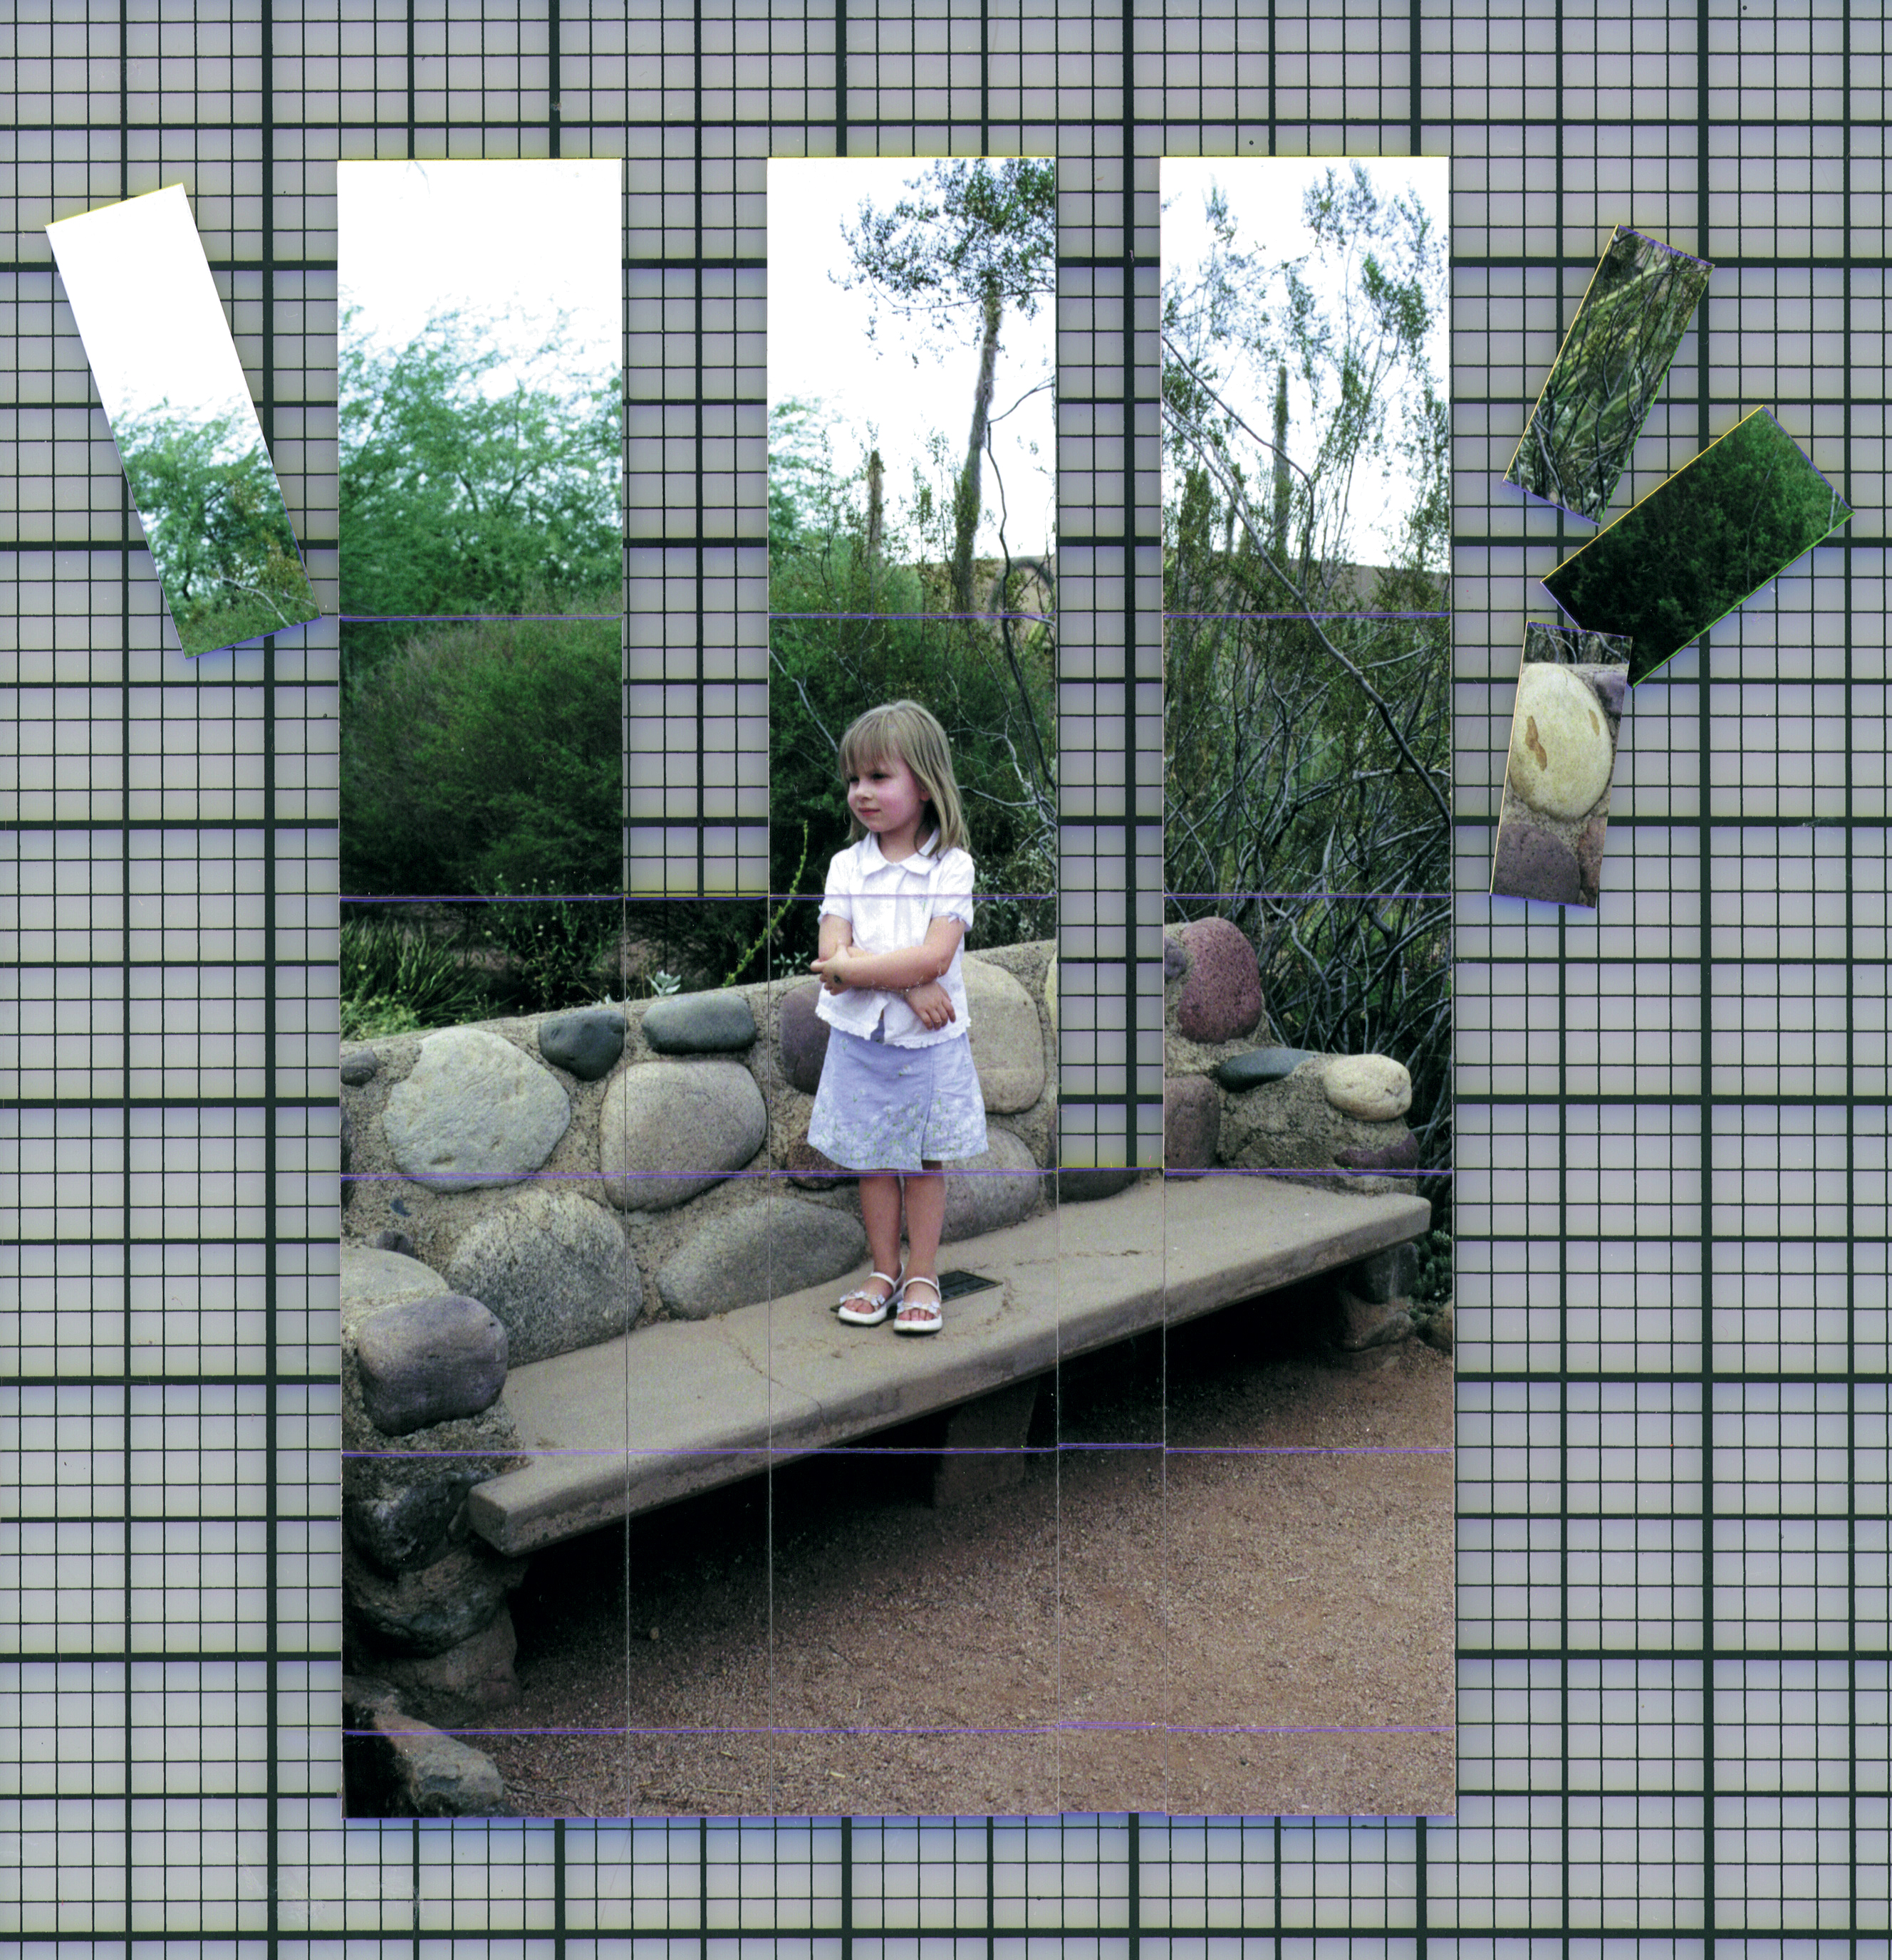
[/vc_column][/vc_row][vc_row no_margin=”true” padding_top=”0px” padding_bottom=”0px” border=”none”][vc_column width=”1/2″]Each time I line up my ruler and take my craft knife in hand, the little adage “measure twice, cut once” comes to mind. Thankfully, digital photos are easy to reprint when the need arises; however, it always feels better to get it right the first time. I find it handy to have a transparent overlay printed with a one inch grid to see exactly where cuts will fall. Using a transparent overlay (see image right) I can see that my standard system of cutting will not work on this photo. If I cut the photo into four even strips, I will cut right through the middle of the child’s head.
 [/vc_column][vc_column width=”1/2″]
My typical solution for this problem is to center the subject’s head between cuts; but, in this case, the sides of the photo (where the arms of the rock bench are located) are important as well. That made the situation a little more complex but not impossible. By eliminating a small strip of photo from each side of the subject, I was able to keep everything I wanted in my mosaic. Each preserved section is one inch wide. I was able to save the arms of the rock bench and keep my subject’s face in one square. In the finished page, (pictured above) the eliminated pieces of the photo are not missed.
[/vc_column][/vc_row][vc_row padding_top=”0px” padding_bottom=”0px” border=”none”][vc_column width=”1/1″]Cutting to Fit the Grid
[/vc_column][/vc_row][vc_row no_margin=”true” padding_top=”0px” padding_bottom=”0px” border=”none”][vc_column width=”1/3″]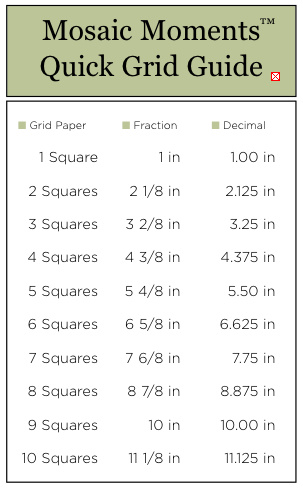 [/vc_column][vc_column width=”2/3″]
- Working with Mosaic Moments™ grid paper does not mean you must cut all of your photos into 1×1 inch squares. You can add interest and emphasize focal points by varying the height or width of your photo and paper blocks. The cutting process can be easily achieved using your Mosaic Moments™ mat with 1/8 inch grid lines.
- When using Mosaic Moments™ grid paper, the rule is: add 1-1/8 inch for every additional square to be covered. (See Mosaic Moments™ quick grid guide to left.)
- Simply line up your photographs on the Mosaic Moments™ mat using the 1/8 inch guides. Make cuts based on the number of squares you wish to cover.
- Don’t forget to use your Mosaic Moments™ Quick Glance Cutting Guide™ to help you make your cutting/cropping decisions. Use the decimal point conversion on the Mosaic Moments™ Quick Grid Guide (pictured left) when creating a title or journaling block in your word processing program.