There are so many amazing design options with the X-Factor Collection. You can create lovely lines that lead the eye around the page, frame detail photos, and make entirely new shapes.
Check out these layouts to get your design wheels turning ...
Surround a Photo
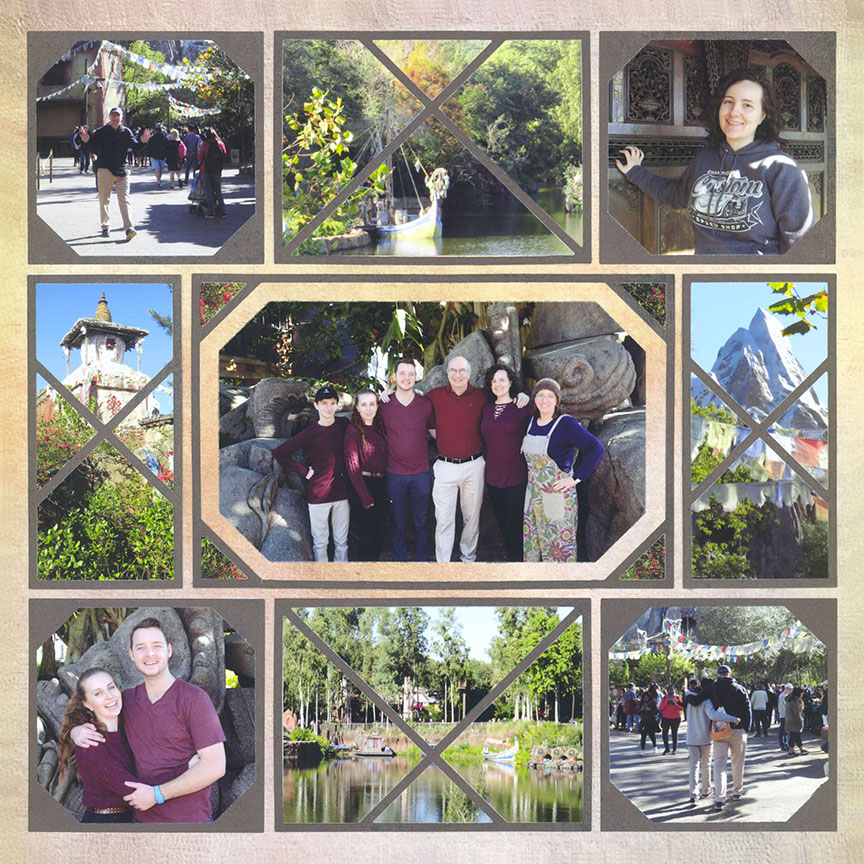
"Walk Through India" by Paije - Pattern #477 (Rotated)
Use the X-Factor 4x6 Die as the focal point right in the center of the page. Then, surround it with the 3x4 and 2x4 X-Factor Dies. Notice how the corners of the feature photo line up with the lines in the other dies? This unique feature carries your eyes all around the layout.
Create a Double Feature
Place two equally important photos side-by-side with the 3x4 X-Factor Die for a unique focal point.
On this layout, Paije repeated the corners from the focal-point double feature on each side by using the 2x4 X-Factor Die on either side of them. She filled in the center triangles with the same paper she used on the corners of the photos to tie them all together.

"Soccer" by Paije - Pattern #371
Add Colorful Accents
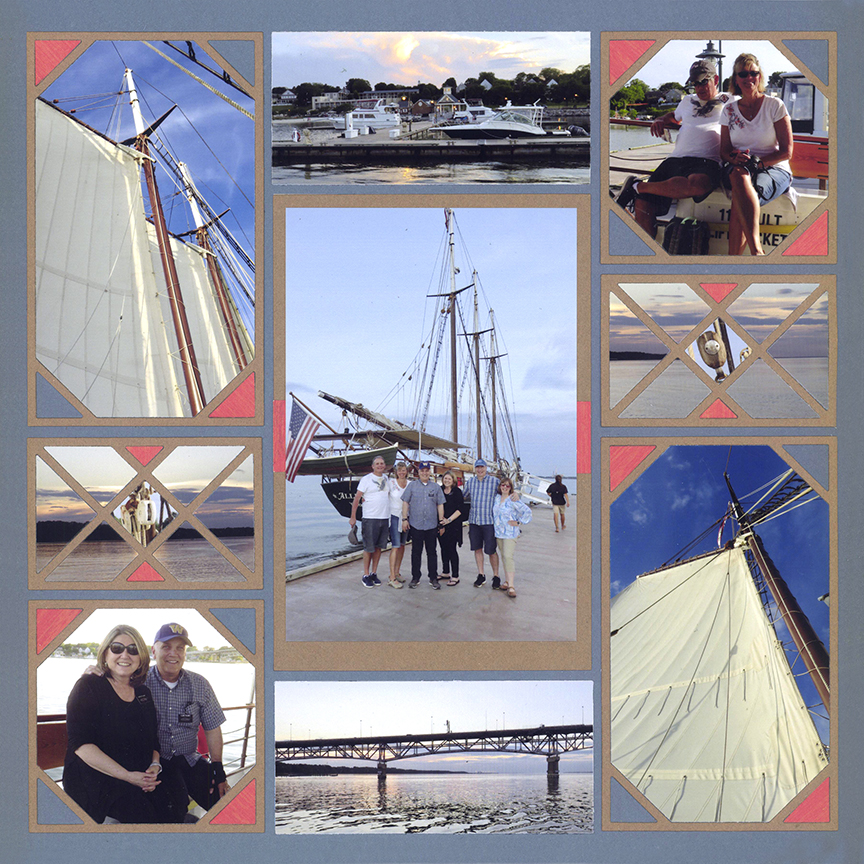
"Sailing on the York" by Paije
Paije only used the X-Factor Collection Dies on the left and right columns of this layout. The larger photos are framed using the 3x5 X-Factor Die and the 3x3 X-Factor Die.
In the middle of each of the columns, she used the 2x3 X-Factor Die to showcase the sunset. Then, she added detailed photos to the center diamond of each one.
Soft coral used thoughtfully in the corners balances it all out.
Make a Pinwheel Design
On this layout, the 4x4 X-Factor Die frames the restaurant name in the center.
Then, each side of the pinwheel includes a photo framed with the 3x3 X-Factor Die.
And, in each corner, Paije created an embellishment with the 2x3 X-Factor Die.
The repetition of blue paper carries you around the design.
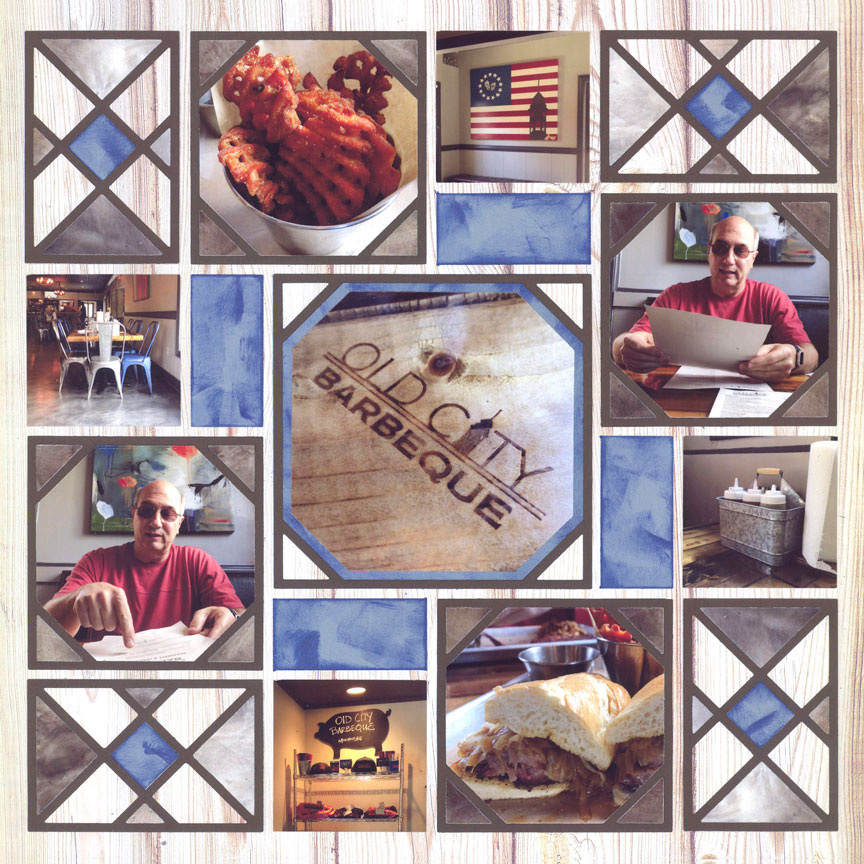
"Old City Barbeque" by Paije - Pattern #340
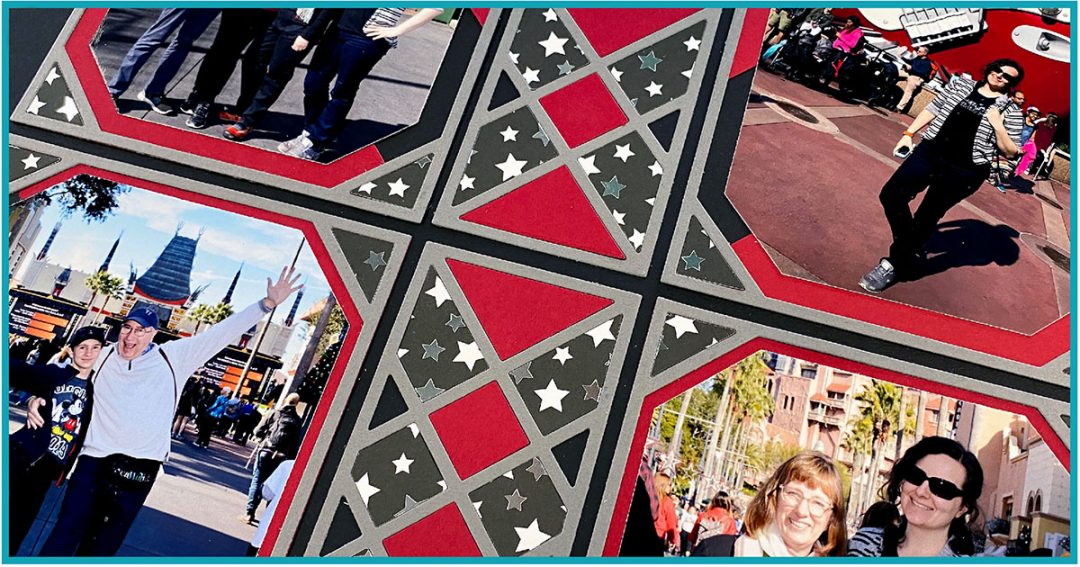
Play Up the Angles
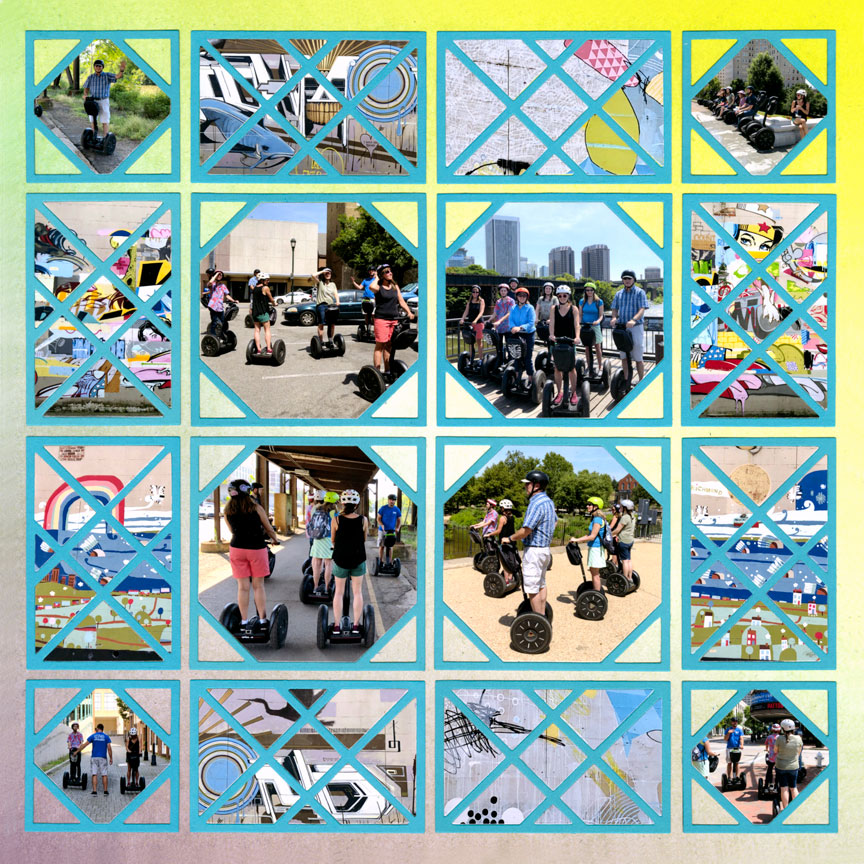
"Segway Tour" by Paije
We love how the lines and angles all connect on this layout. The lines in the corners of each of the four photos in the center (framed with the 3x3 X-Factor Dies) line up perfectly with the lines on the 2x3 X-Factor Dies along the edges.
Paije also used the 2x2 X-Factor Die (part of the 4x6 X-Factor Set) in each corner. While those lines do not match up, they do create an imaginary parallel line. Pretty amazing!
Include the Title
On this layout, the title has been incorporated into the space of 3x4 X-Factor Die around the page.
By placing white patterned paper in the opposite triangles of each of the titles, the 4x4 X-Factor frame in the center is extended to a new shape.
The 3x3 X-Factor Die in each corner allows for additional photos.
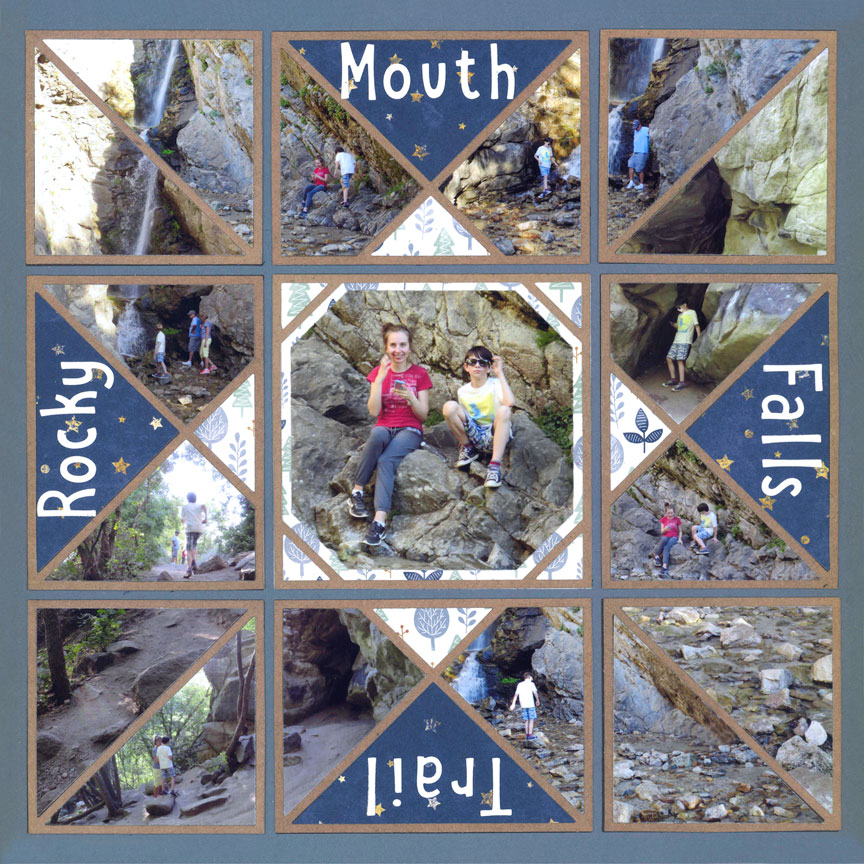
"Rocky Mouth Falls" by Paije - Pattern #344
Create New Shapes
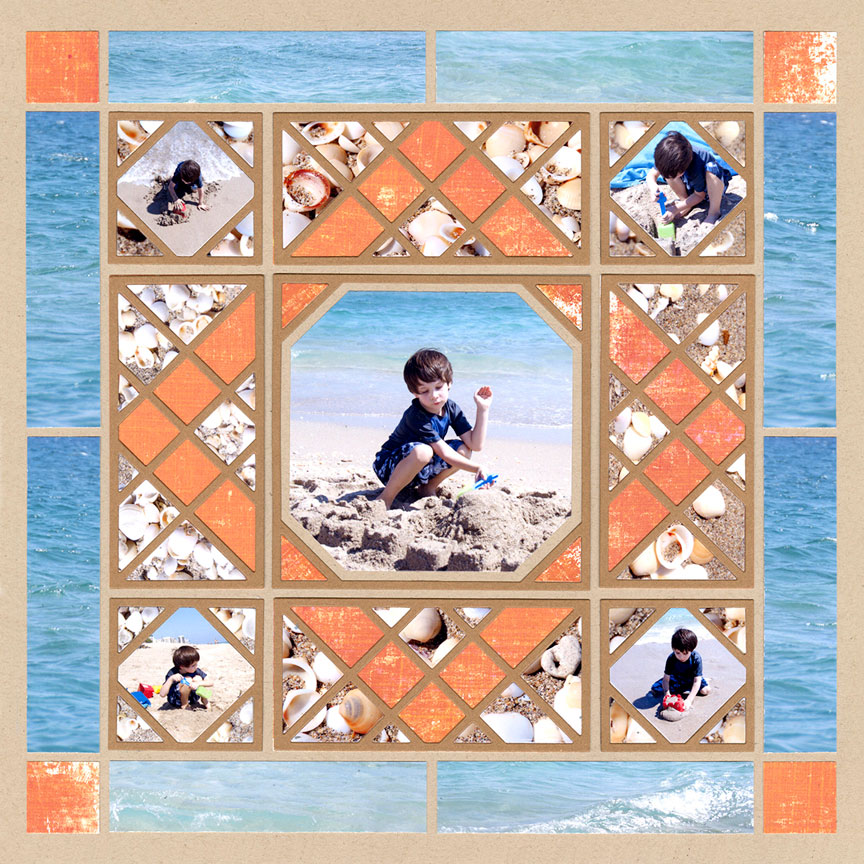
"Florida Beach" by Paije
By using different colored photos and papers, you can create entirely new shapes using the 2x4 Double X-Factor Die. Here, Paije used it to create a giant diamond around the center photo, framed with the 4x4 X-Factor Die.
In the corners, she used the 2x2 X-Factor Die and used the same photo of the seashells in the corners so it helps reinforce the center diamond. Brilliant!
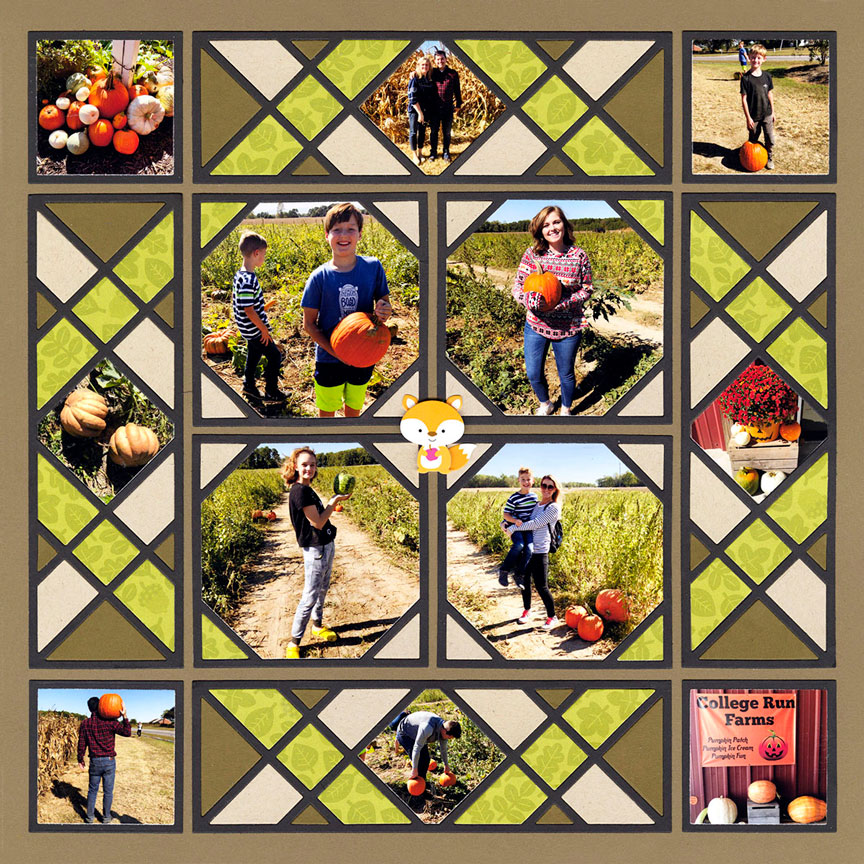
Connect the Photos
On this layout, the 2x4 Double X-Factor and 2x6 Double X-Factor dies are used to connect the photos to each other. Close-up photos of leaves create a diamond-shaped frame around a smaller photo in the top left and bottom right. This is balanced by the solid diamond (also made from a close-up of leaves) in the bottom left and top right.
The photos in the center are framed with the 3x3 X-Factor and the 4x6 X-Factor dies. Notice how some of the photo corners are used to make those diamond-shaped frames. Isn't it amazing?
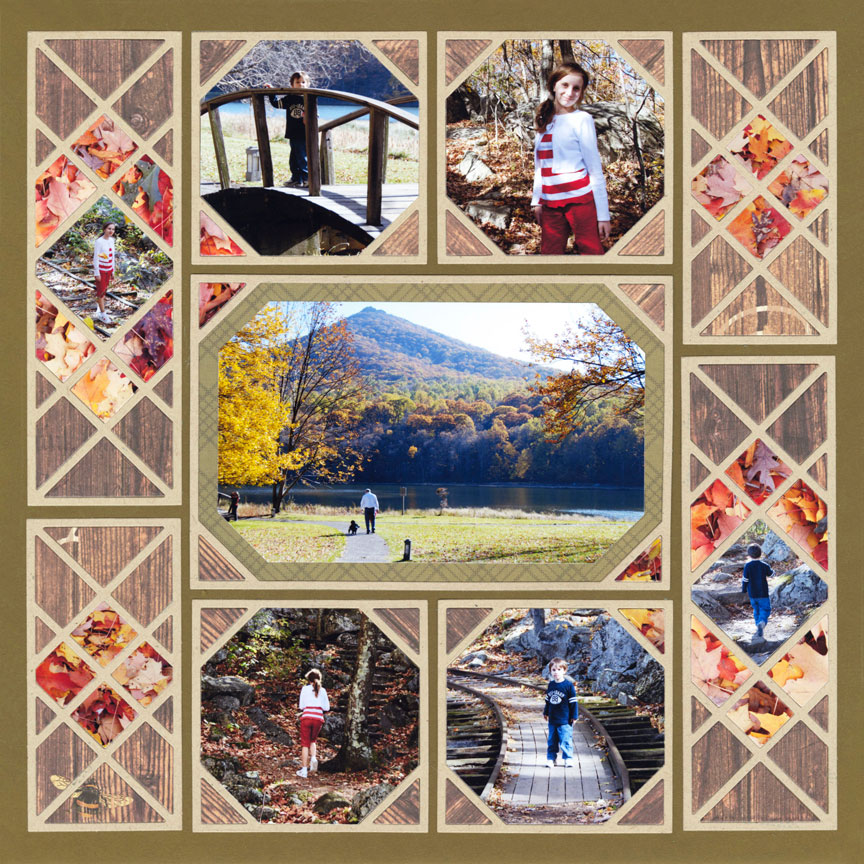
"Autumn Trails" by Paije
Make a Center Border
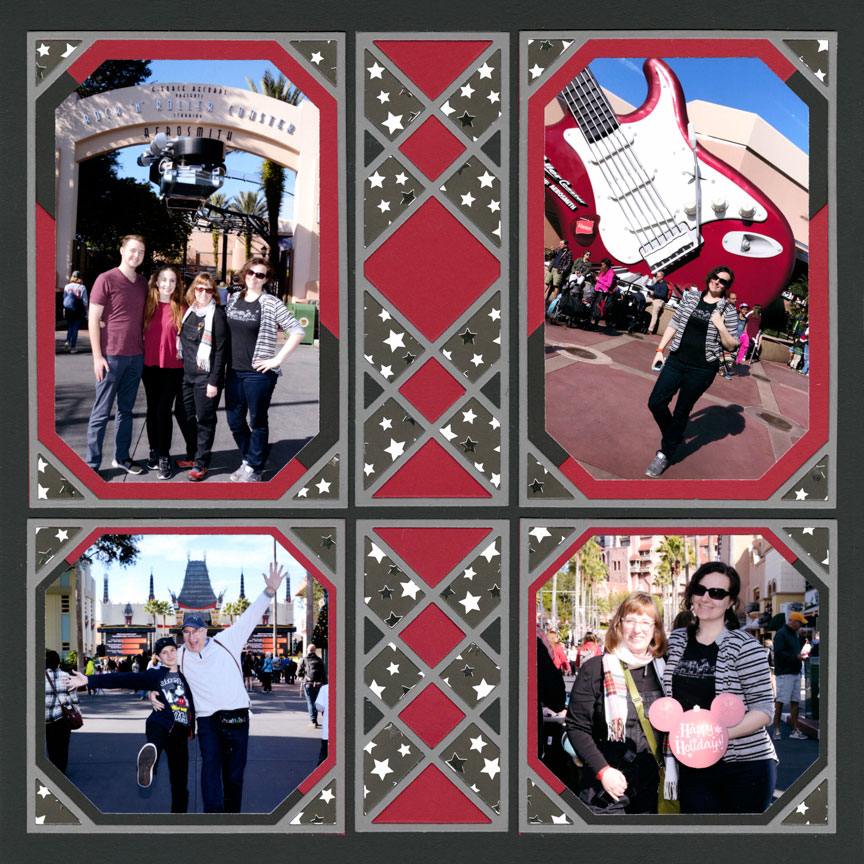
"Rockin' DAy!" by Paije
By stacking the 2x6 Double X-Factor Die on top of the 2x4 Double X-Factor Die, you can create a unique border down the center of the layout.
The side columns feature the 4x6 and 4x4 X-Factor dies.
On this layout, Paije also used 4x4 Corner Dies to make multi-colored photo mats. Way cool!
Create Stained Glass
We love this beautiful stained-glass effect created by surrounding four 3x3 X-Factor framed photos with the 2x6 Double X-Factor Die.
After that is done, fill in pieces with soft monotone patterned paper to provide a stained-glass pattern.