
Spring Break or Summer Vacation…if you’ve been or are headed to the beach, I’ve got a few tips for your Mosaic Moments Scrapbook pages.
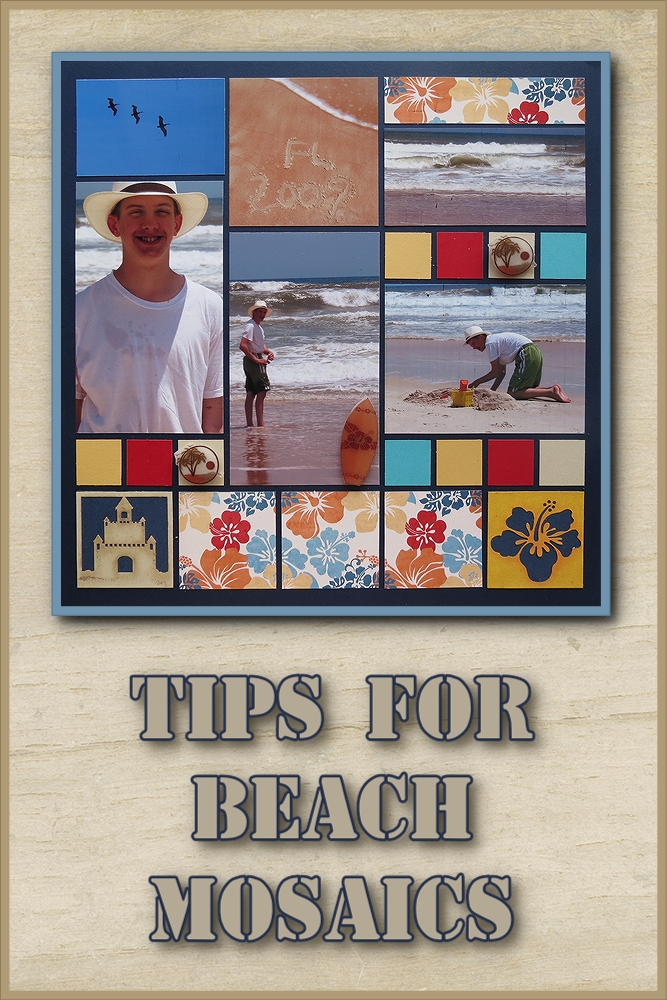
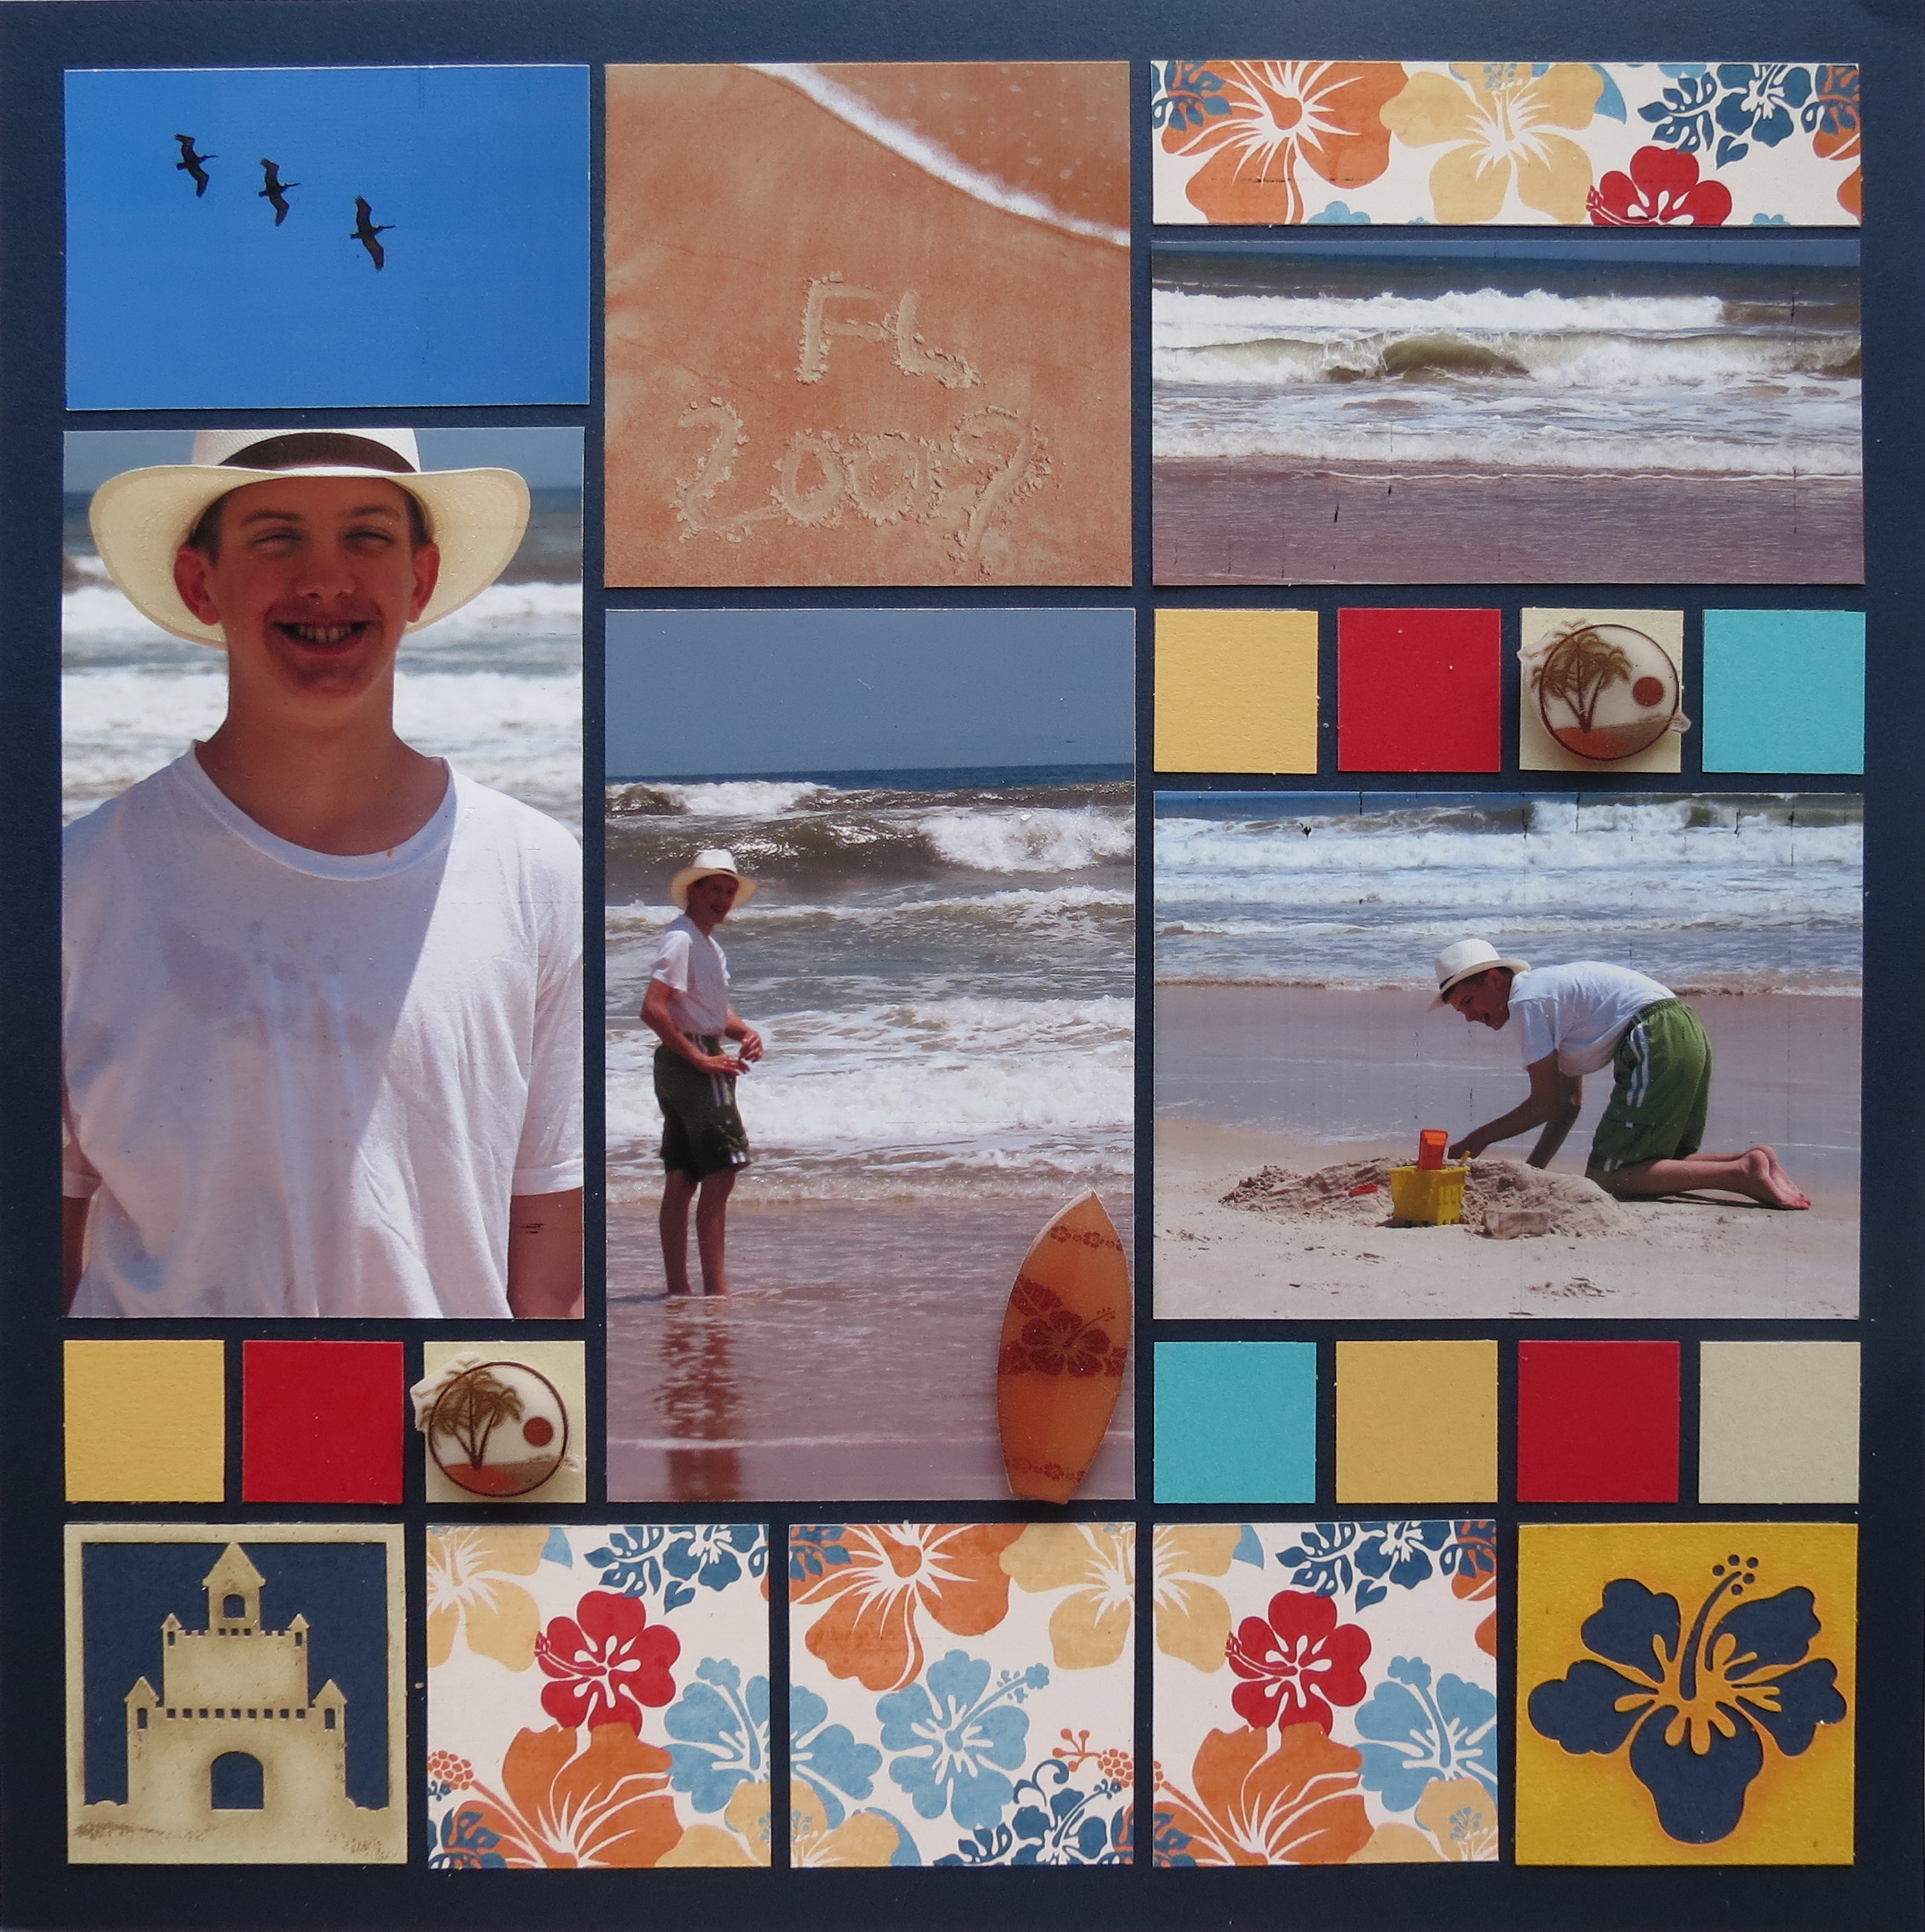
We don’t live near the ocean, so it was a real treat to head to Florida for a Shuttle Launch and fit in a few days to enjoy the beach and the sun. My son loved building sand castles and catching the waves as they rolled in to the shore. I took a lot of photos of endless crashing waves upon the shore. Pelicans flying overhead seemed so close (and look so far away in the photos!) Then of course I took plenty of my boy playing. However…the problem is that in the end, the photos don’t really capture the same feel as being there. So what could I do to make the pages I planned to do, really stand out?
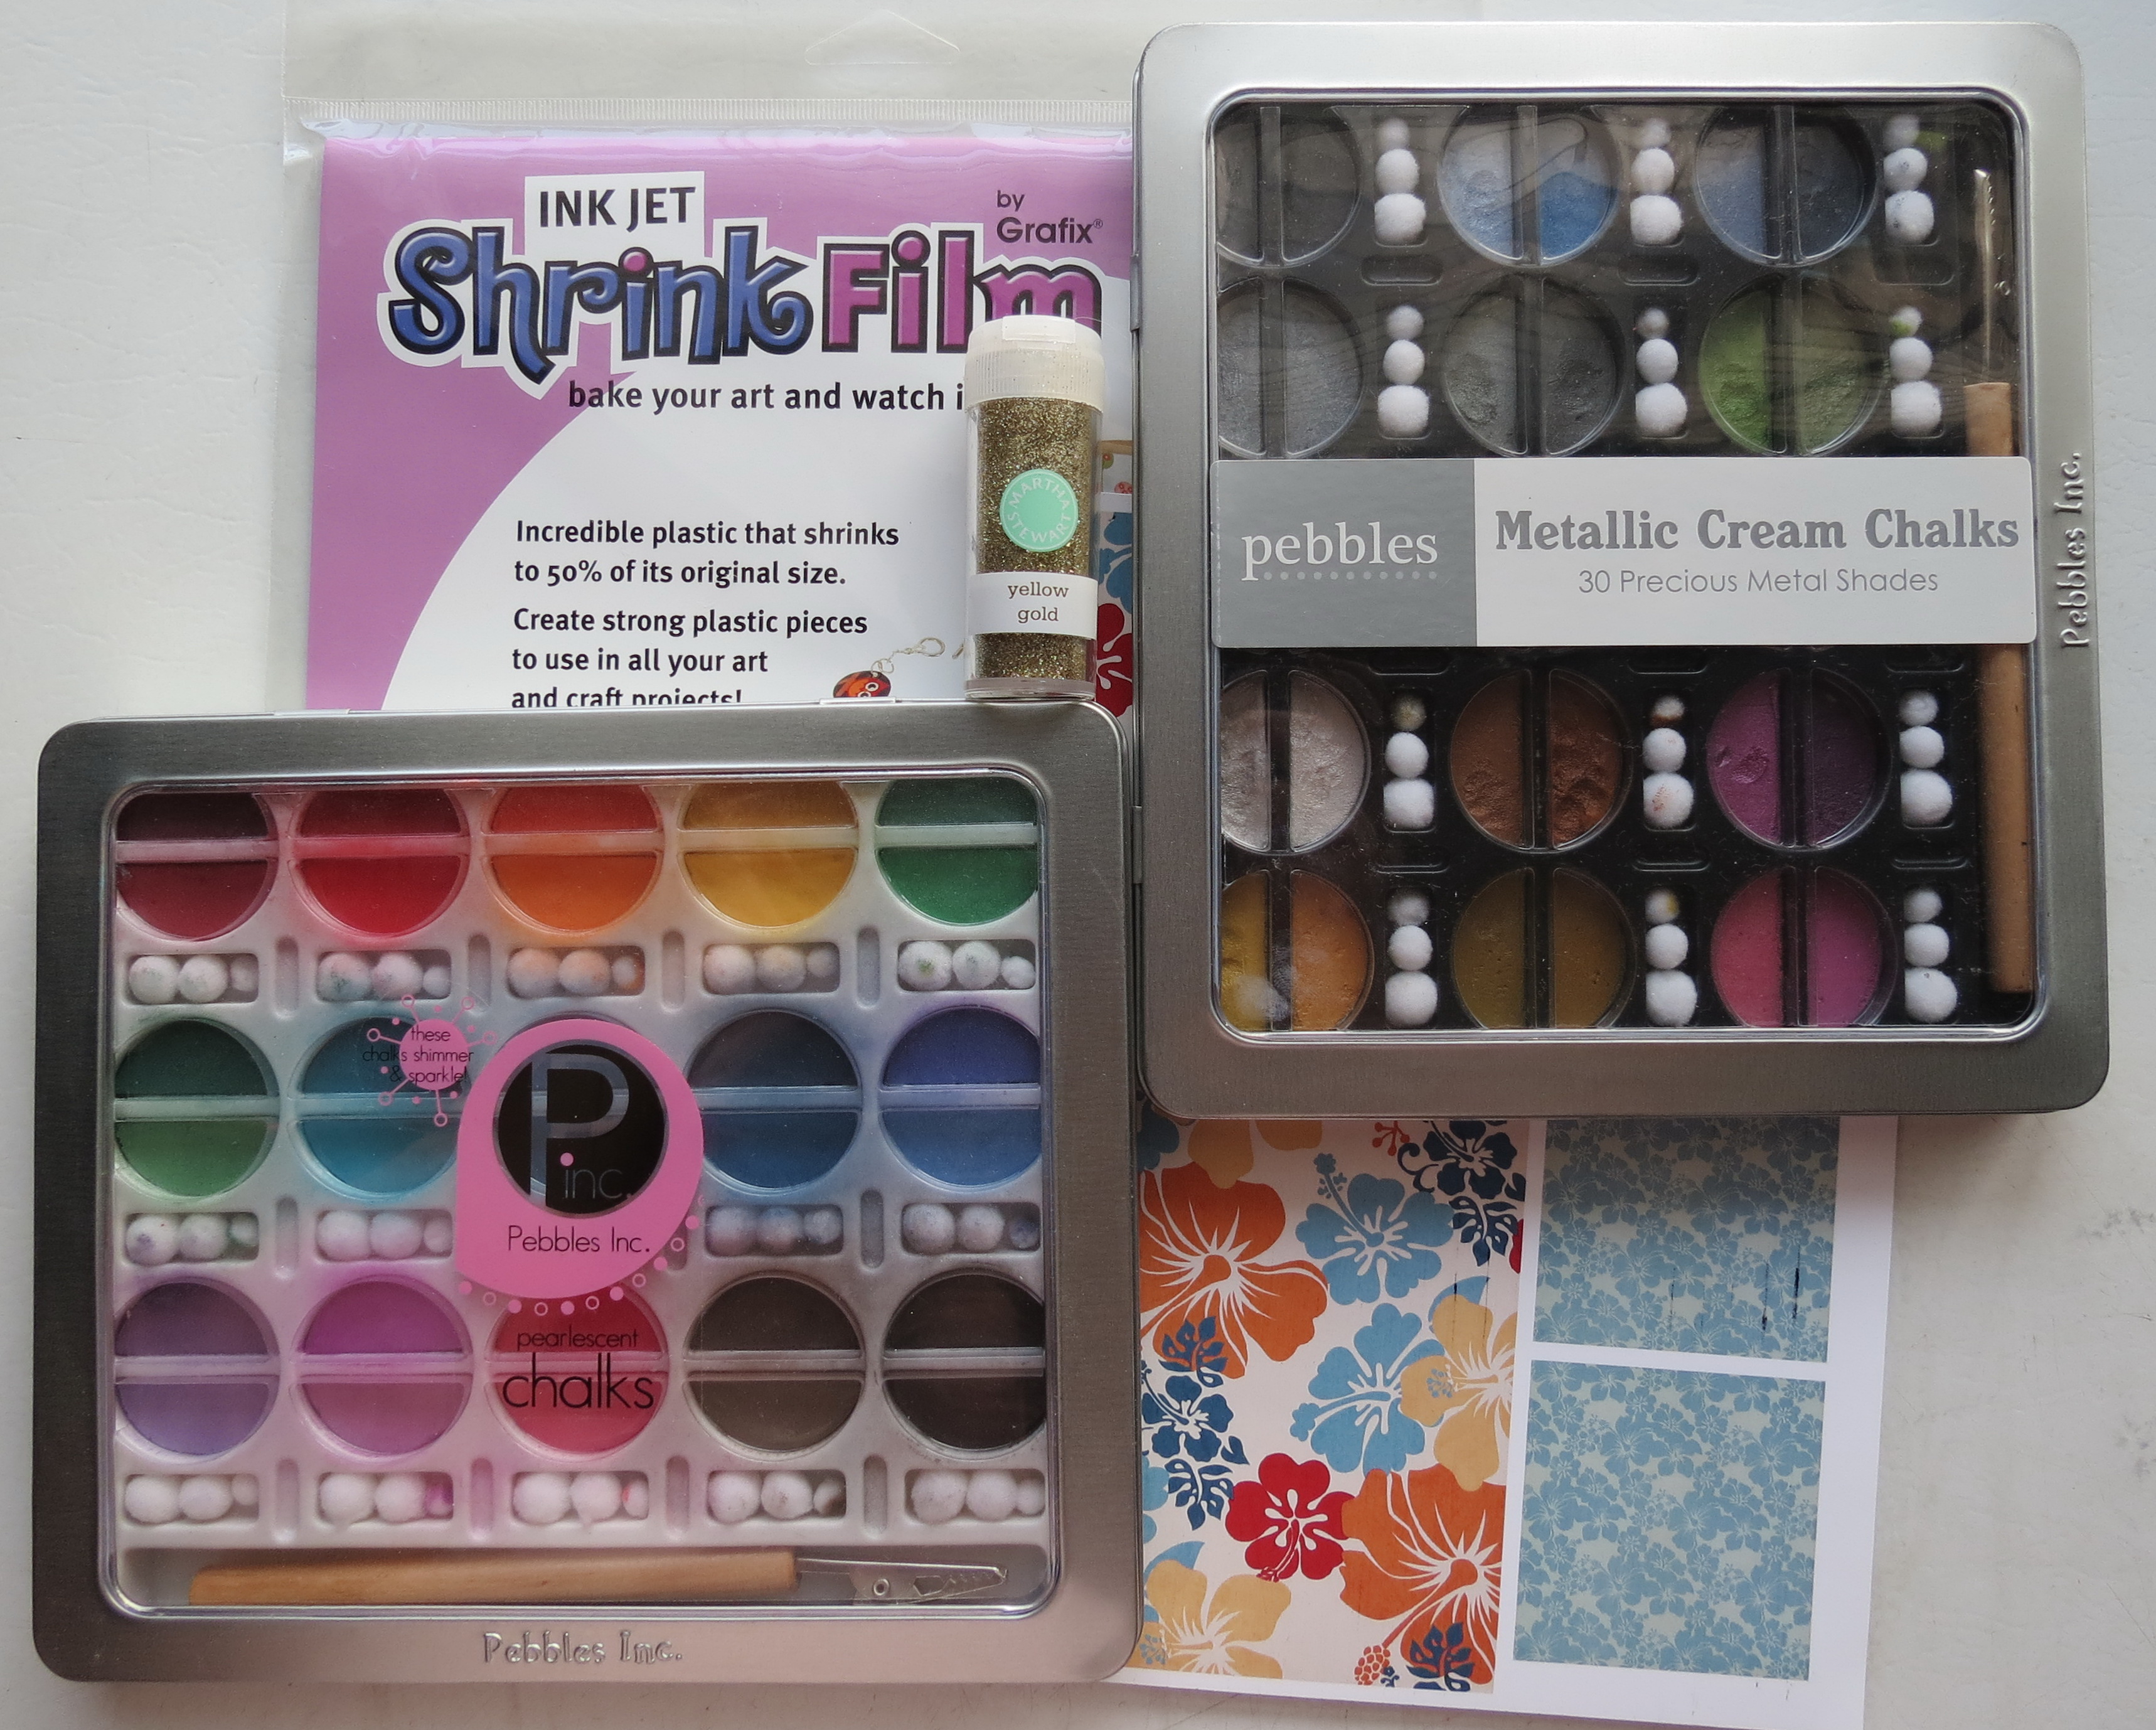
The materials I used for the beach elements.
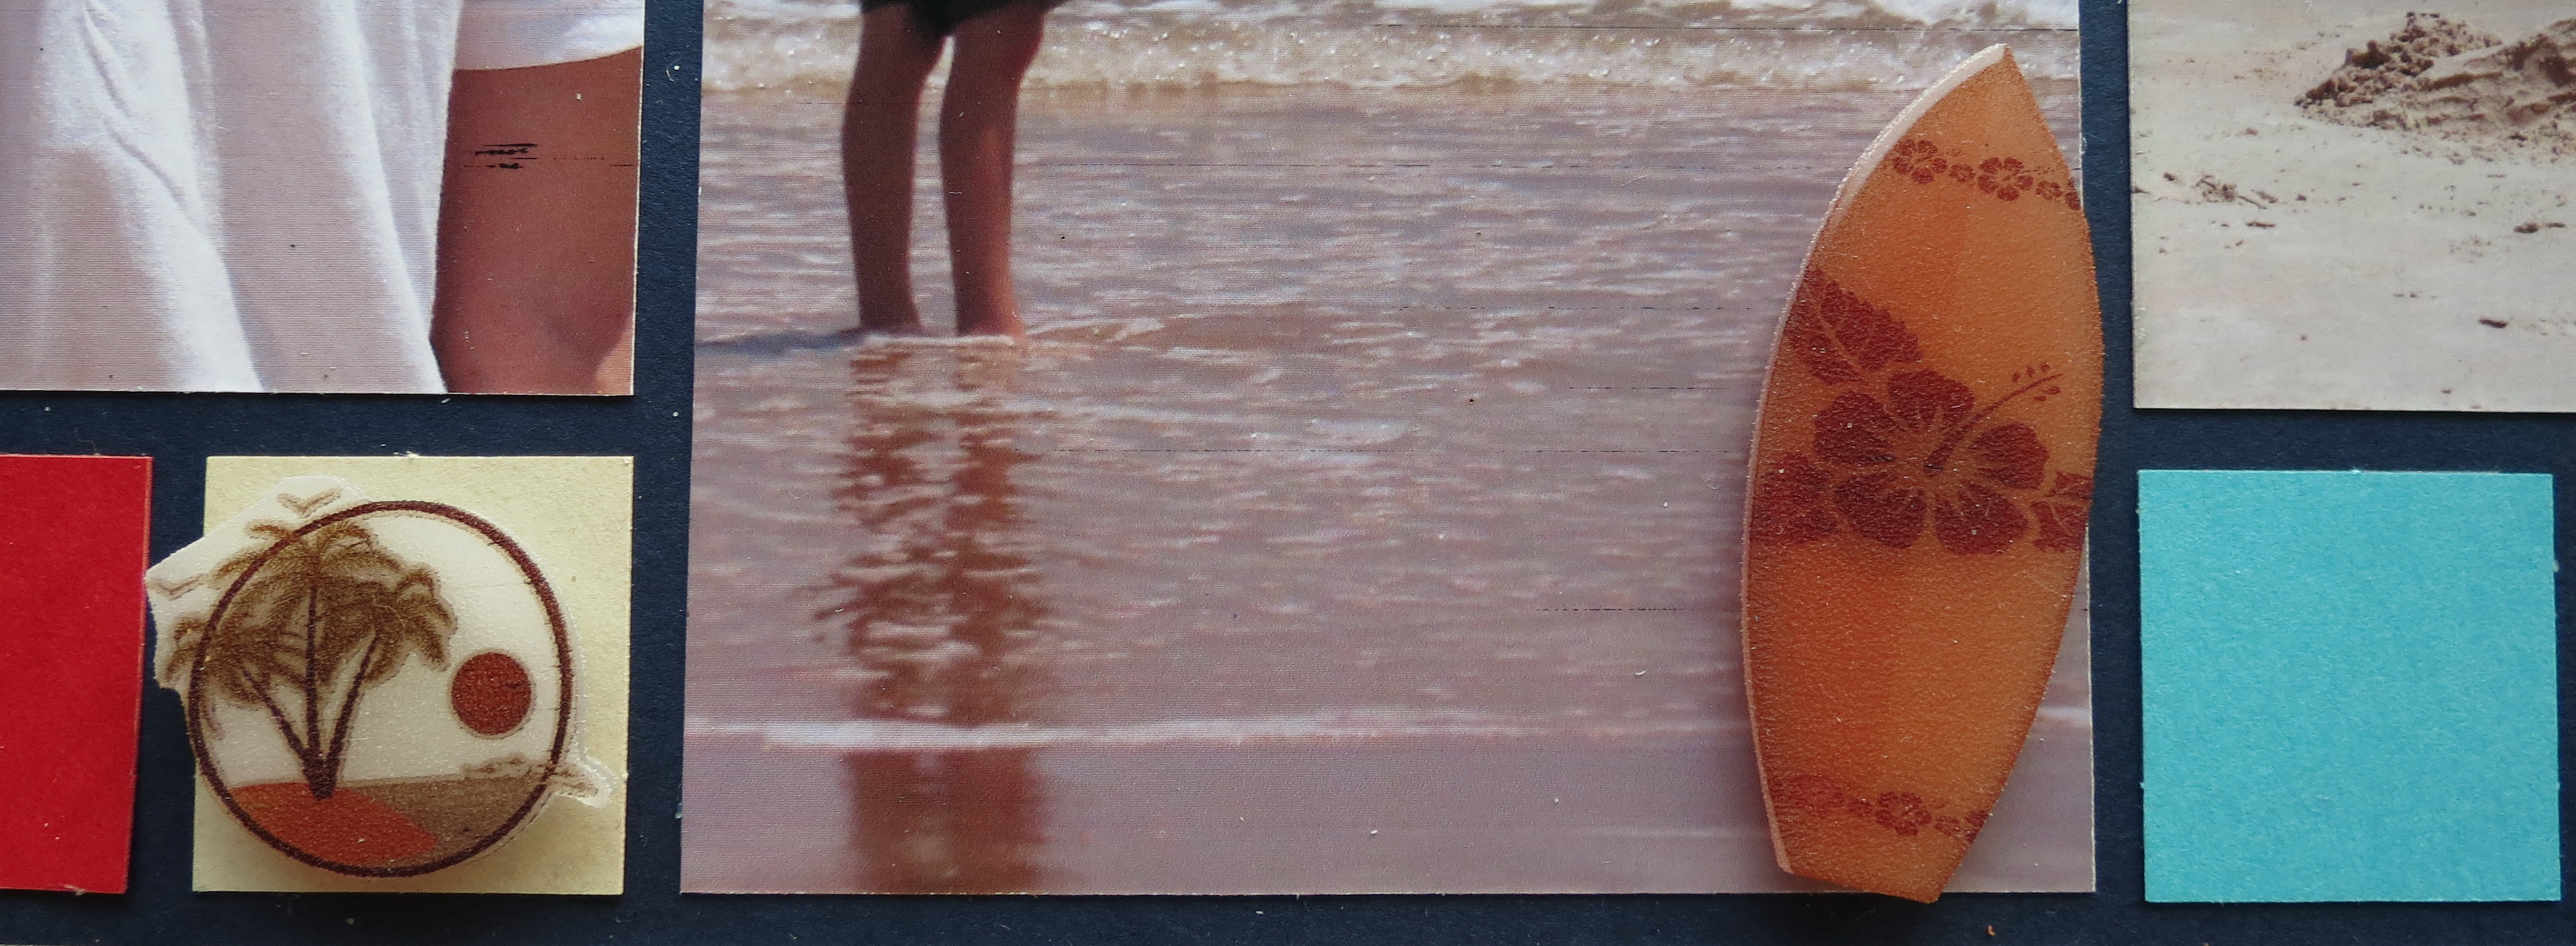
I narrowed down my photos to a few key photos that included a close-up, one in the water, building a sandcastle, one of the waves and another of the pelicans. I have a digital scrapbook kit by FOREVER JOY called Surf Shack that had some nice bold colors that reminded me of our beach umbrella and had a pattern paper with hibiscus flowers. We have a cornerstone tile with the hibiscus flower and another with a sandcastle. I also pulled several paper tiles to coordinate with the patterned paper in sand, medium aqua, brick and caramel and a Navy Blue 12 x 12 Mosaic Moments Grid Page. There were some elements from the digital kit that I wanted to include and I thought I’d try to use some Ink Jet Shrink Film to create them for a new 3-D embellishment, but could also have been printed on cardstock for a similar look. If you’d like to take a closer look at the before and afters of the shrink film pieces, stop in at my personal blog Five Pines Designs for a look.
embellishments using the shrink film and Surf Shack digital kit by FOREVER JOY
For the Cornerstones I used the navy paper tiles for the background to blend into the Navy Grid base. The hibiscus flower that I had was in grapefruit and a bit too bright to fit into the color scheme. I took October Afternoon’s Wheat Field spray ink mister to color the cornerstone to a shade a bit closer to the caramel paper tiles. Then I thought I’d add a little shading in oranges and reds with Pebbles Inc. Pearlescent Chalks that have a really nice shimmer and sparkle that unfortunately does not show up well in the photos.
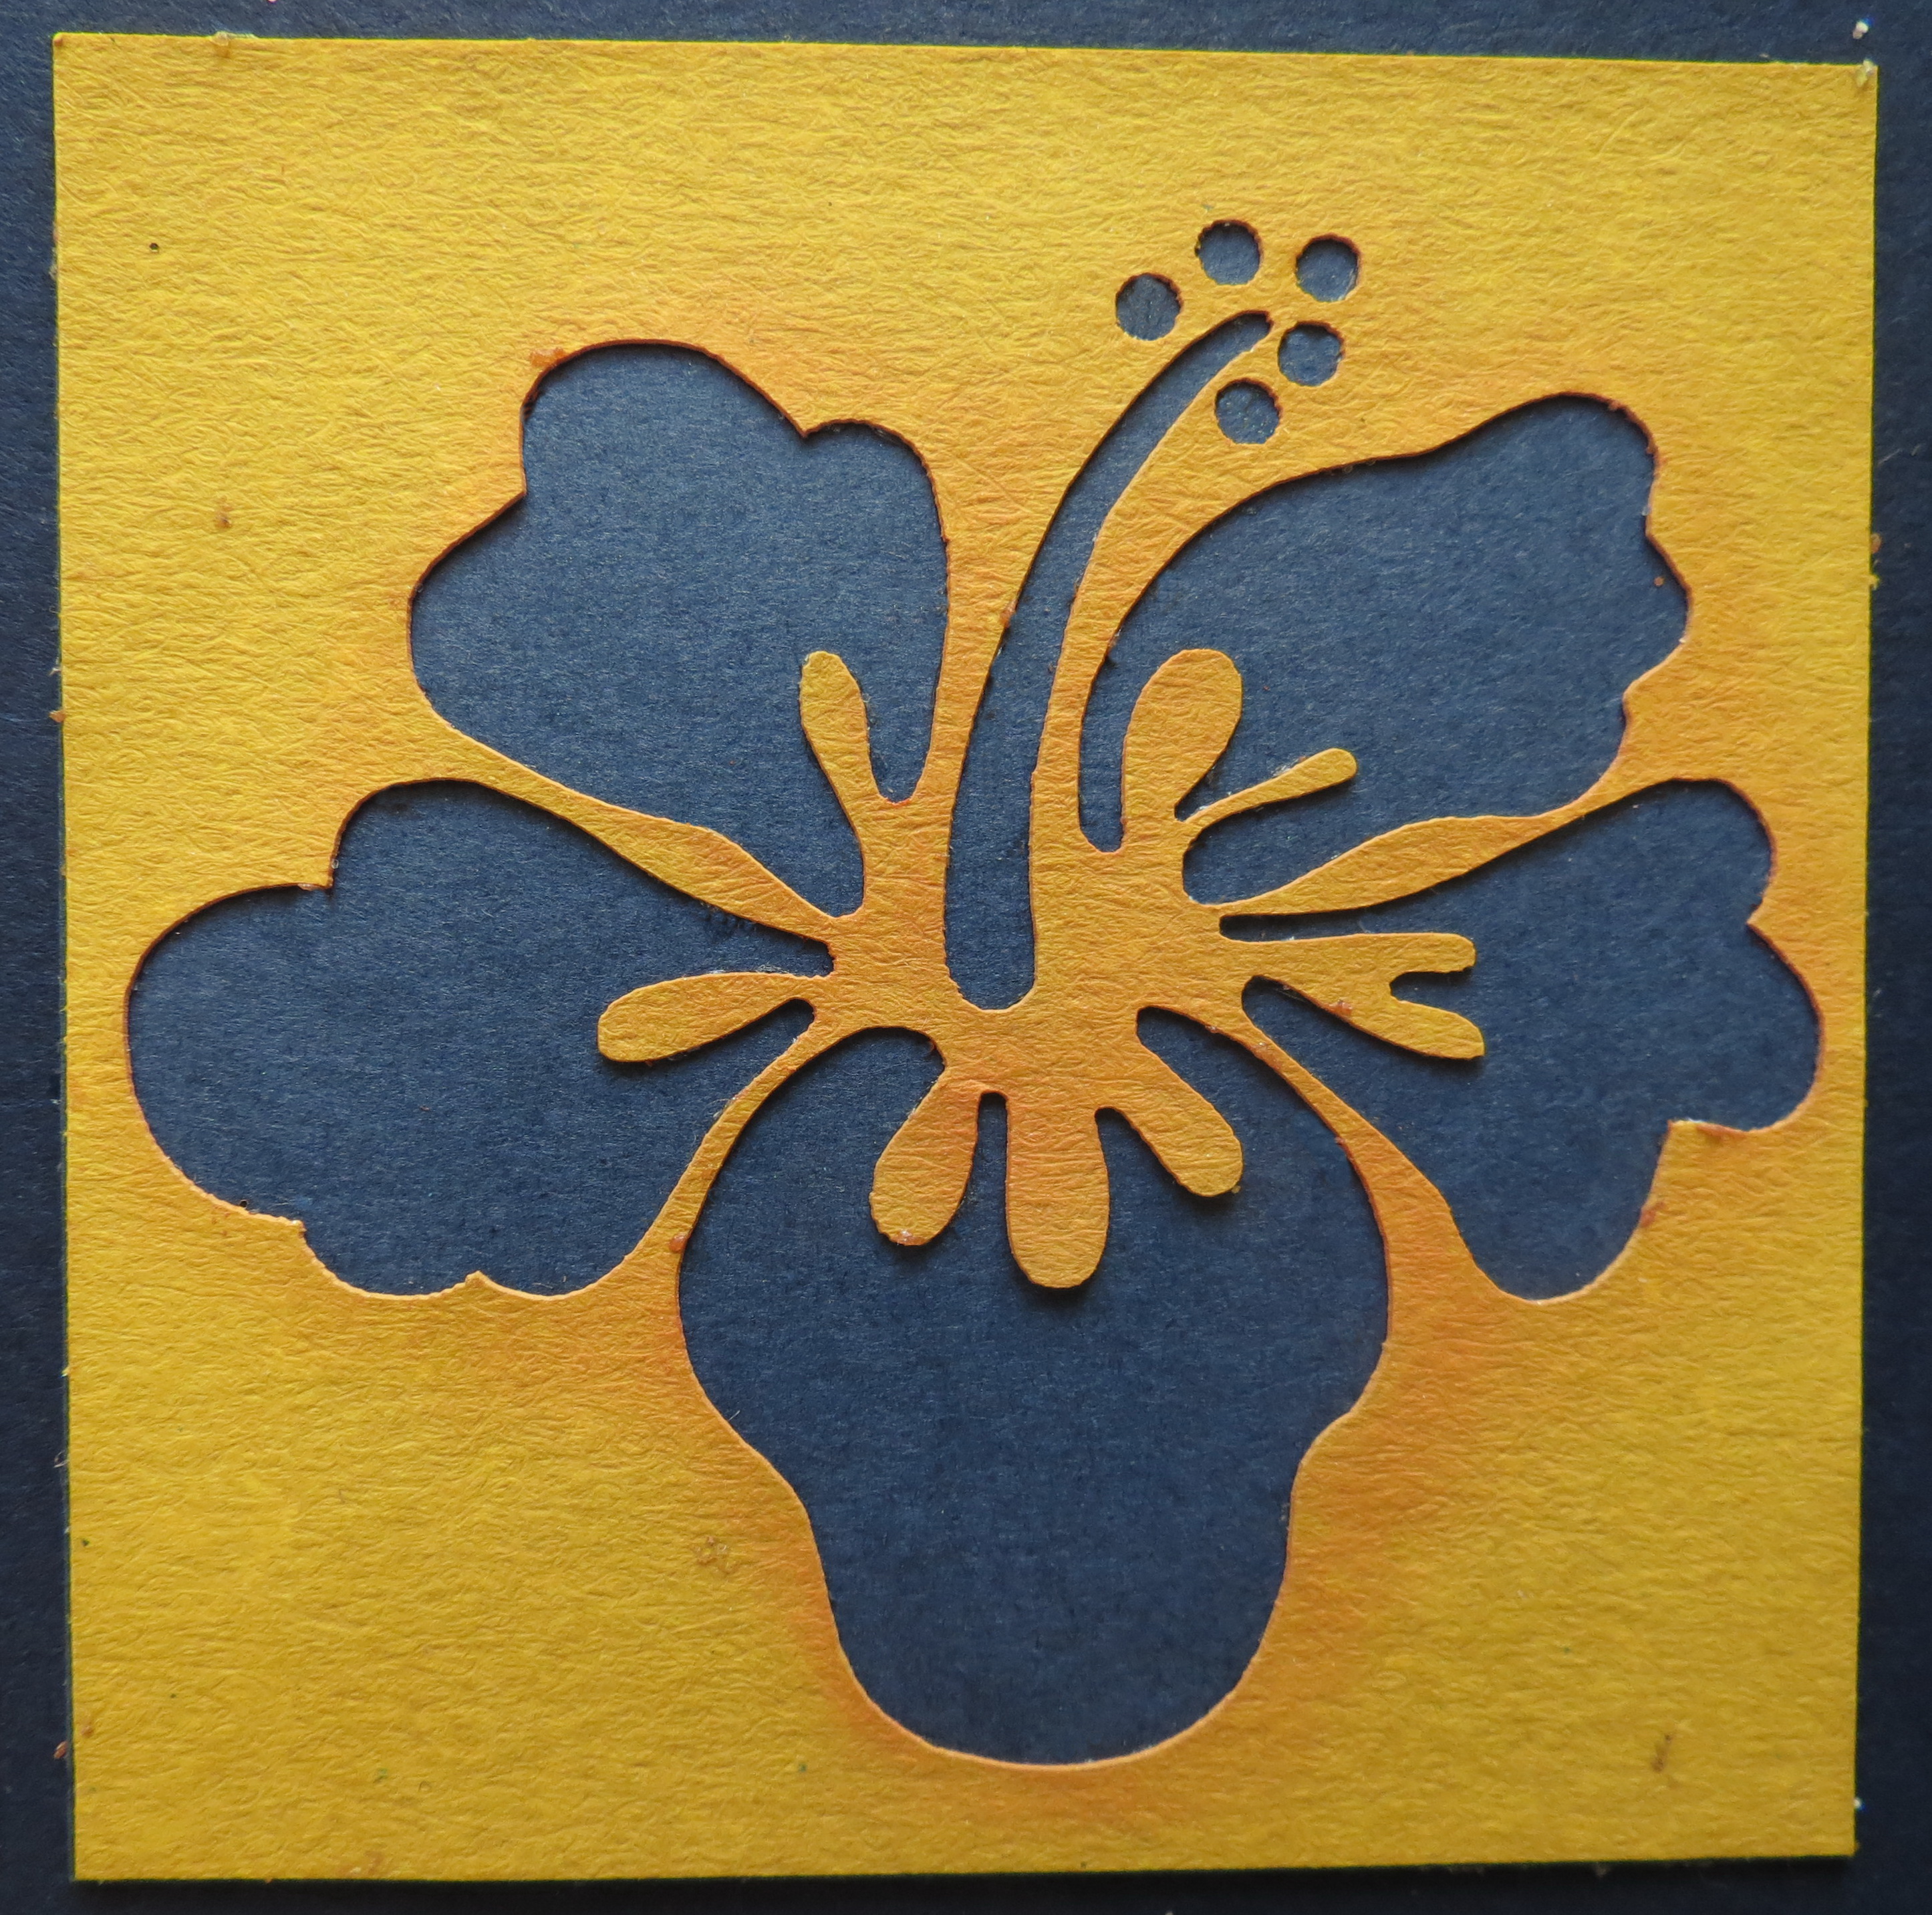
Chalks to accent the cornerstone Hibiscus.
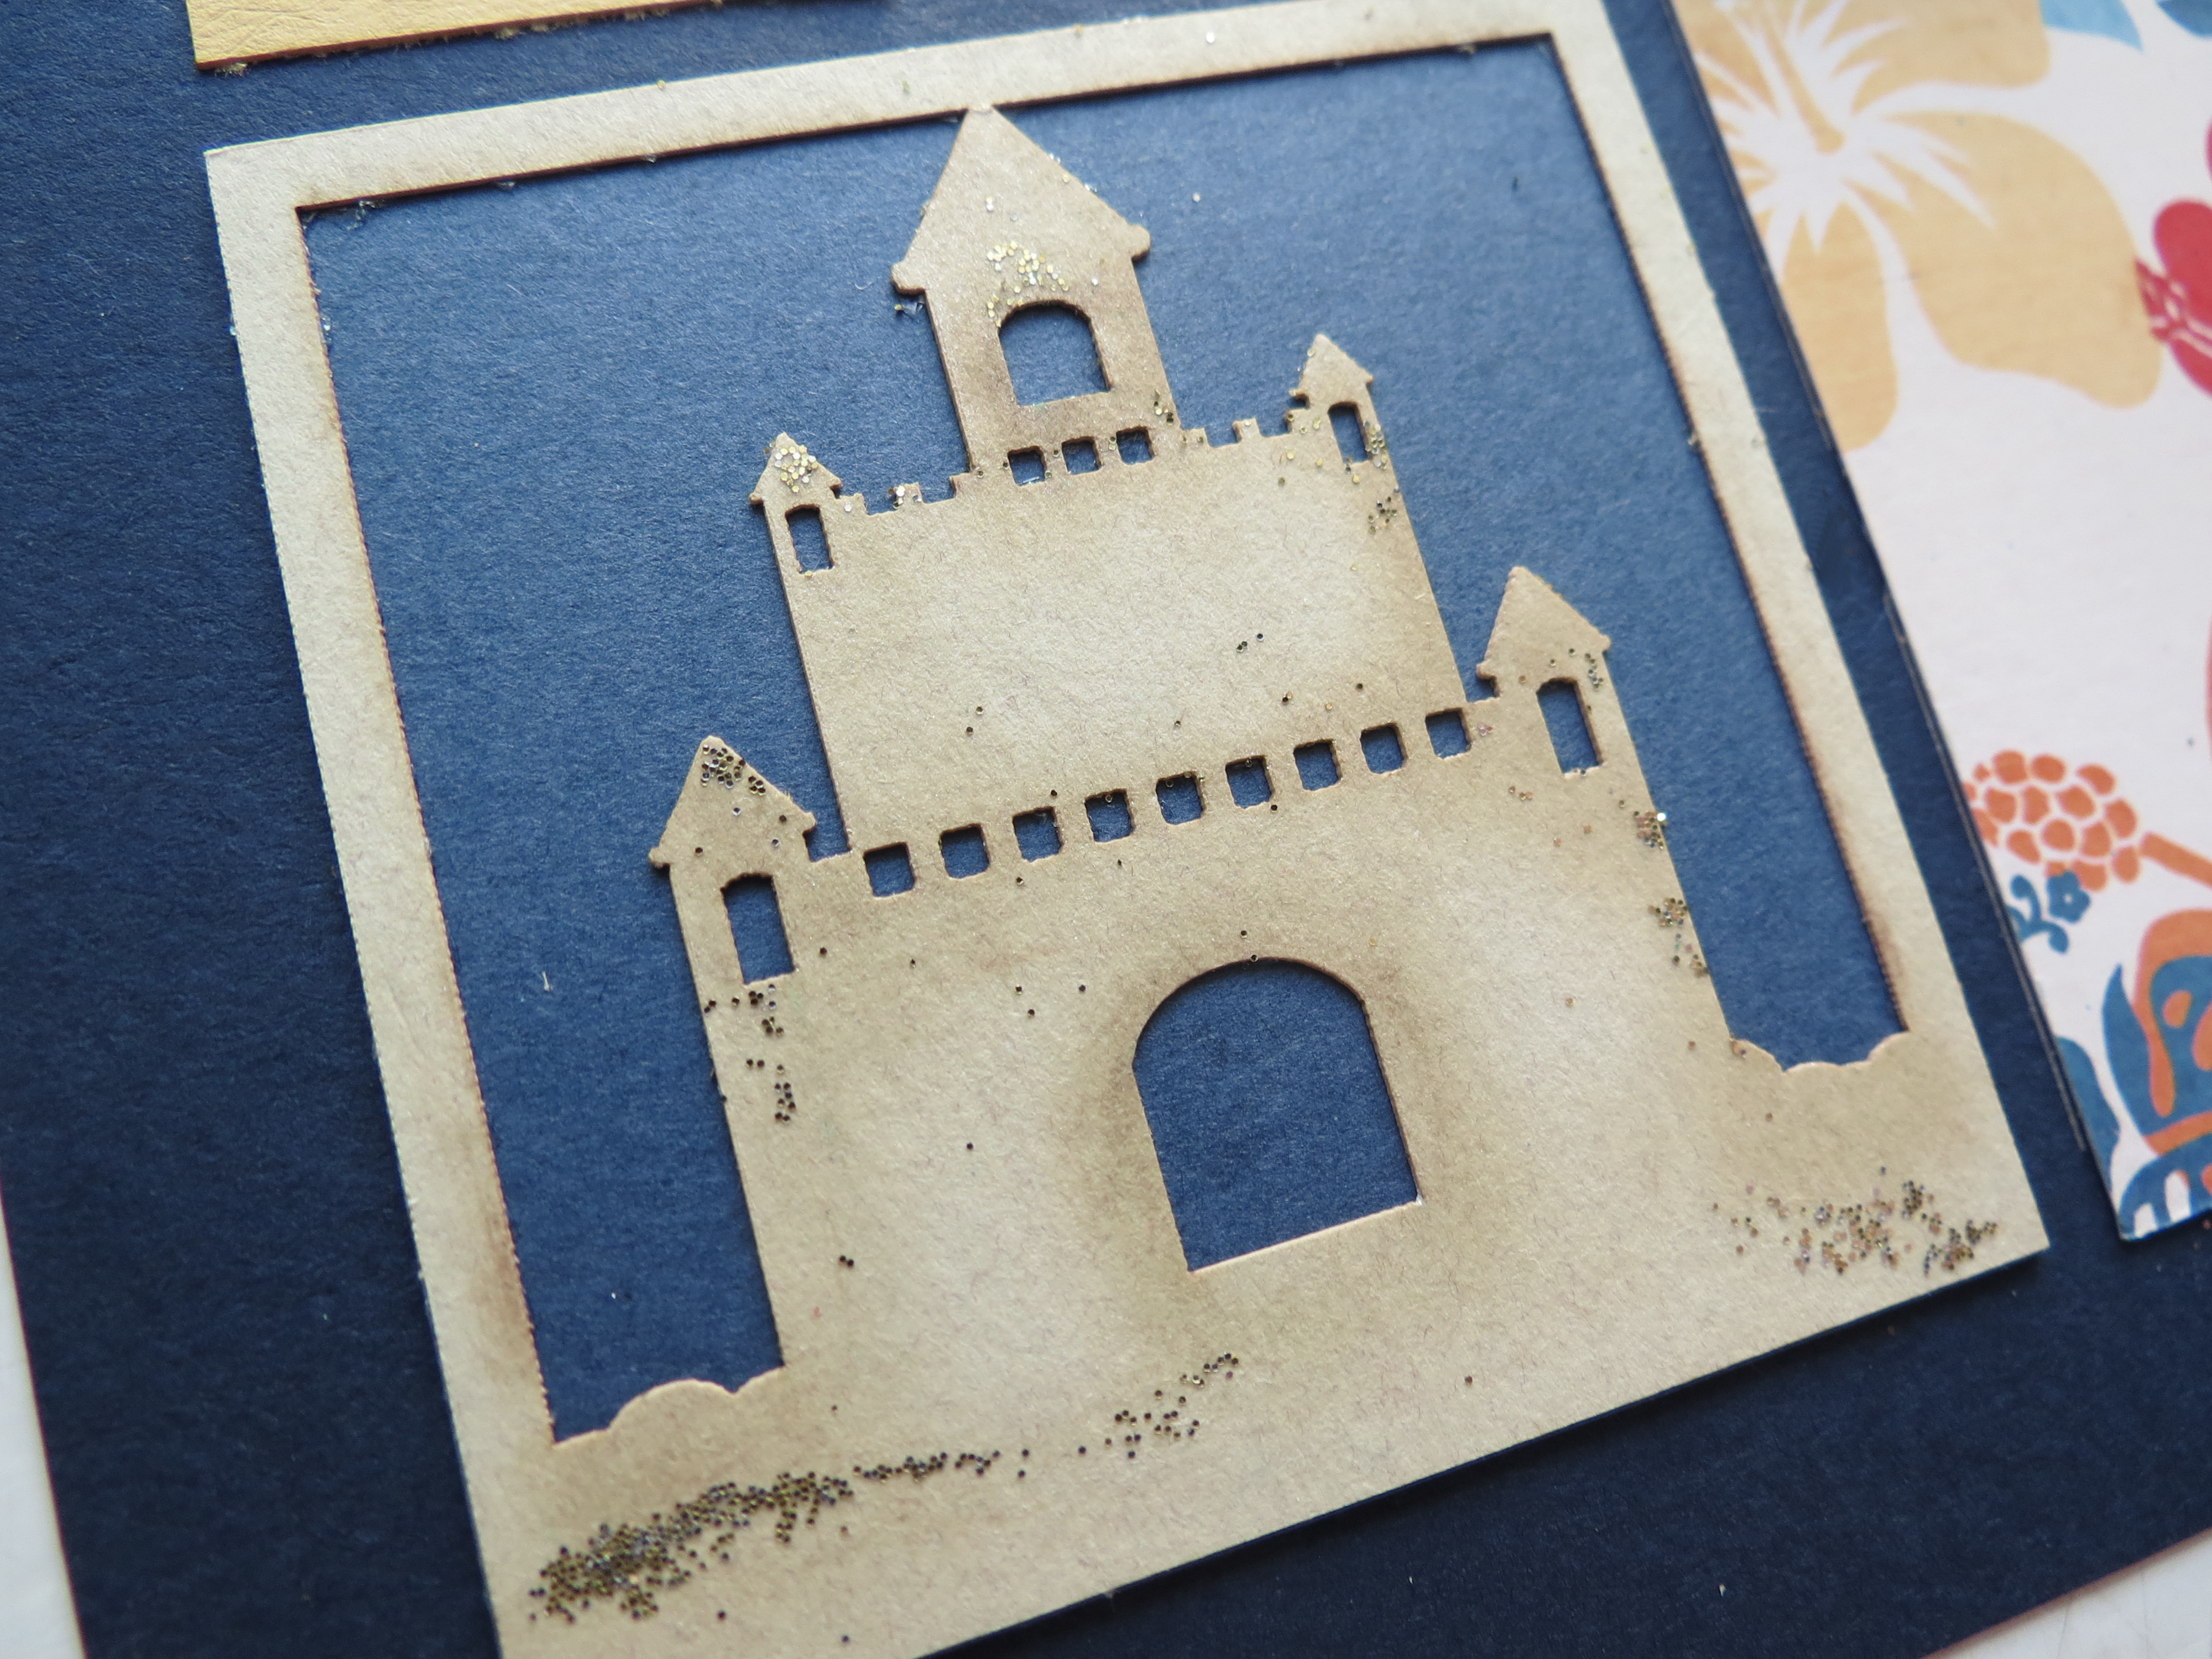
Metallic chalks and glitter to highlight the sandcastle
I used the metallic cream chalks on the sandcastle but I wanted a bit more sparkle like real sand has when you see it in the sun. I thought a little glitter would do the trick, however, I didn’t want a lot, so I used a paint brush and put a small amount of glue on the end of the brush and lightly hit a few spots on the sandcastle then added some of Martha Stewart’s yellow gold glitter and knocked off the access. I continued to apply the glue and glitter to spots to get just enough bling. Now, the pelican shot I mentioned before…where the birds look lost in the vast sky? Well, the solution is to trim it down to fit a smaller space, making the birds more noticeable. I also placed the photo at the top of my page to add to that “in flight” feel.  Something you may do at the beach is write a message in the sand. I knew what I wanted in my photo…the date and place and have the tide roll in at just the right angle…I love all that foamy edge as it ebbs and flows. I won’t tell you how long, how many times I had to re-write it or how many photos I took to get what I wanted…but the boy was contentedly playing in the sand, so why not? I’ve used this photo for a title/date block. Look for ways to incorporate a message, date, or place. If you plan ahead you could even carry a small blackboard and write the name of the spot on it and then take a shot to create a style throughout your trip at your various stops.
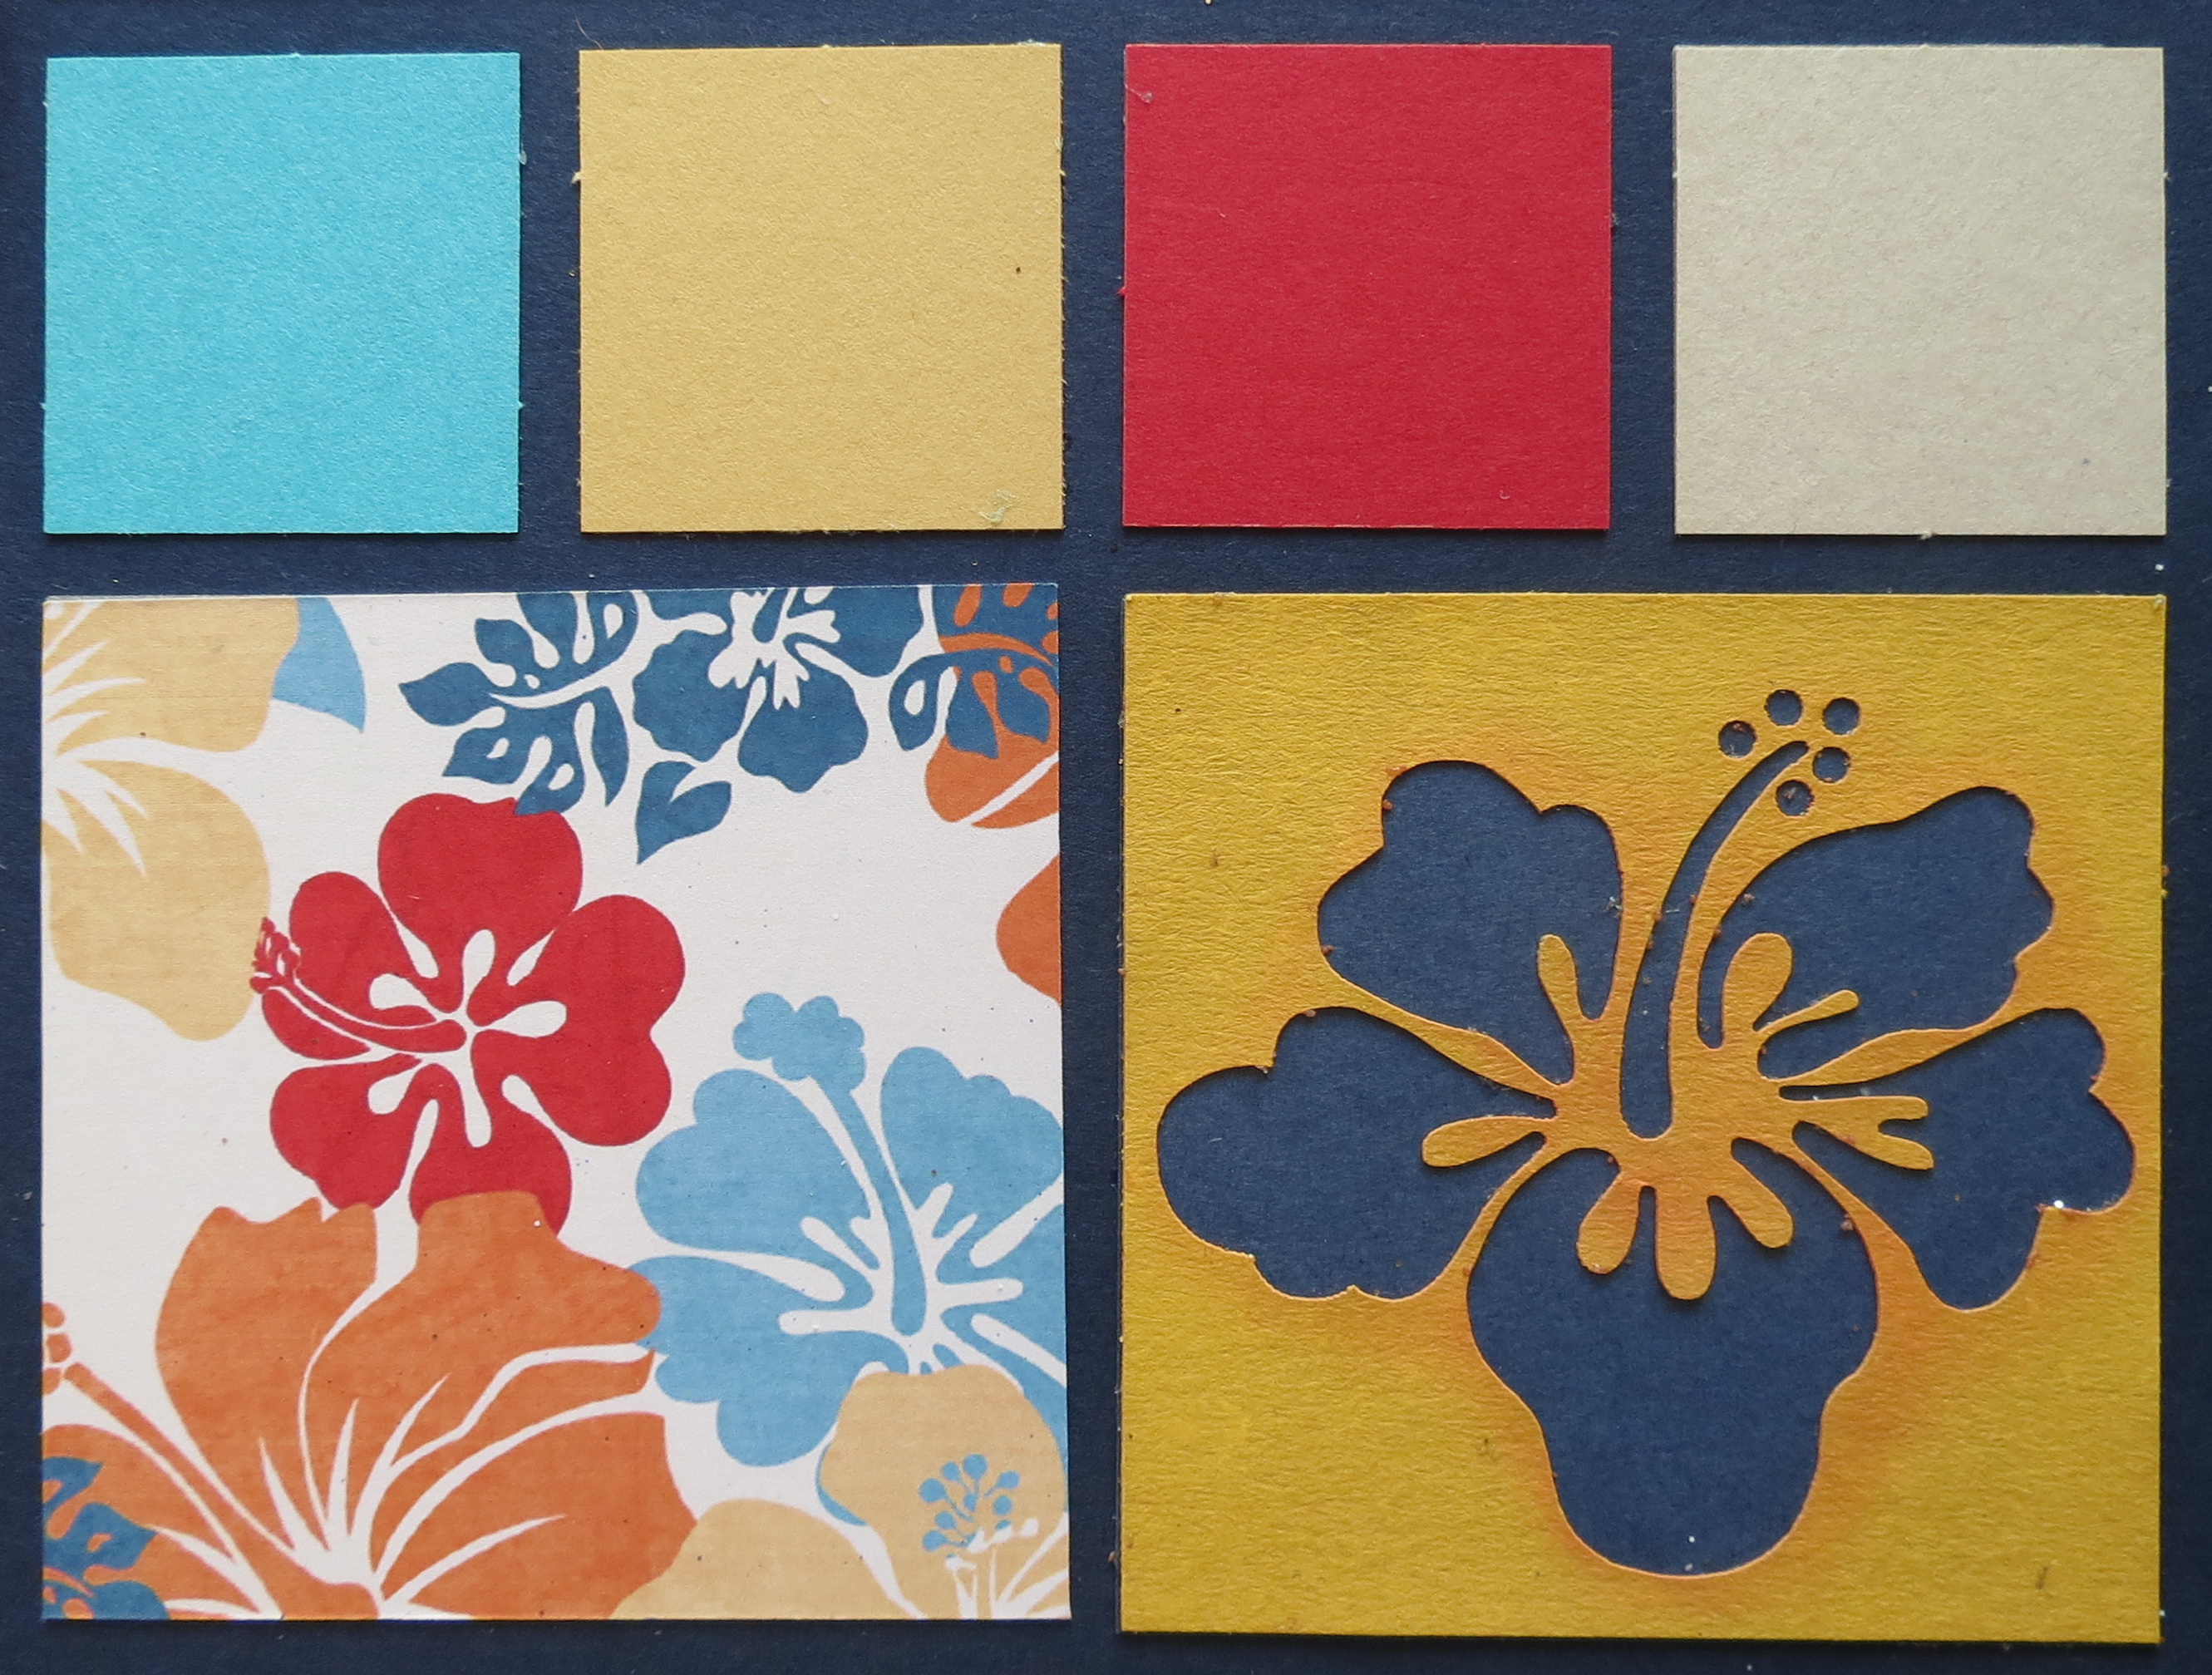
Medium aqua, caramel, brick and sand Mosaic Moments Paper Tiles, Hibiscus cornerstone and printed patterned paper from digital kit.
In this layout incorporating a lot color in small bites is easily accomplished with 1” Paper Tiles. Adding larger blocks of patterned paper combines the colors and adds a pattern that includes the same flower in the cornerstone. There are a lot of digital kits that you can use for a hybrid style scrapbook page by printing your own paper, journal cards and embellishments and you have a lot of flexibility to fit into our Grid System! I love the peaceful ocean views of shades of blues and greens against the light sandy beach; but isn’t it the dots of colors along the shore line in umbrellas and beach towels that add to the atmosphere of the beach, so why not bring some of it to your page?
Tips for Beach Mosaics
We’d love to see what you are doing on vacation this summer, be sure to post your layouts for us to see on Journella! Enjoy the summer!
andrea