
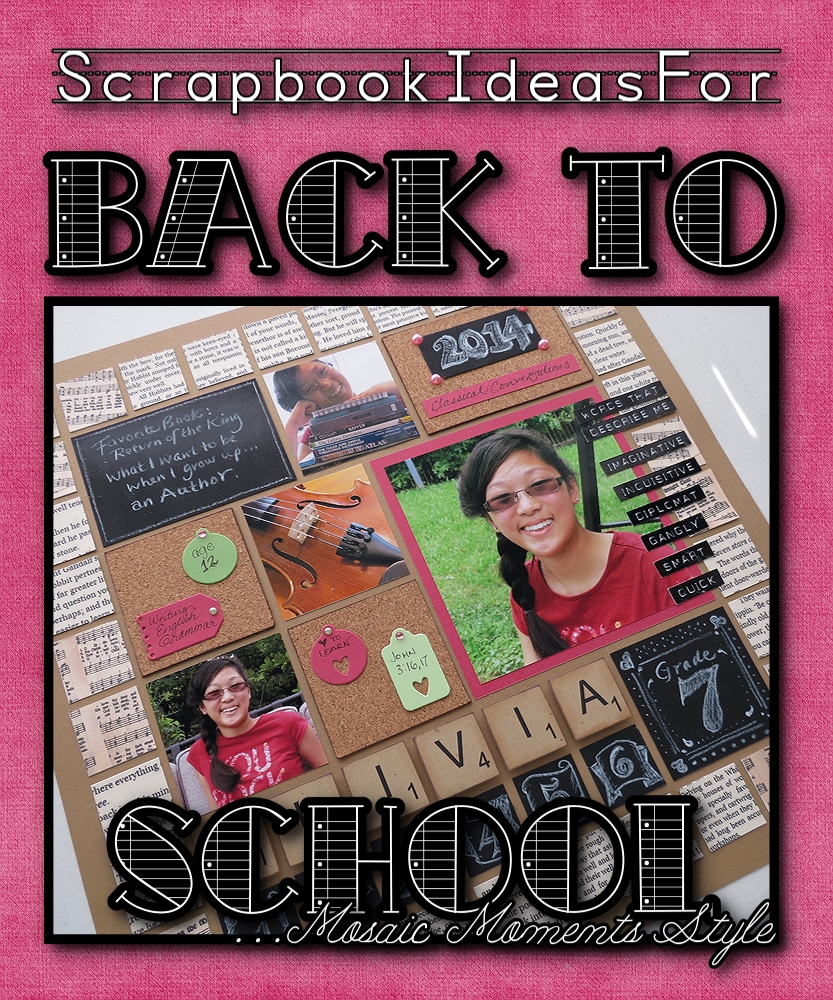
Scrapbooking Ideas for Back to School…Mosaic Moments Style
Do you have your scrapbooking ideas for back to school pages all ready?
I know. You are just beginning to enjoy the summer routine and the school supply lists are in the stores, the supplies are on sale, and all the clothing essentials are filling the racks! What’s the hurry? You have to be prepared for that first day! You can gather all the stuff they have to cart off that first day…but you have to be ready for those snap shots you’ll want to take, too. Some preparation on your part will help get the photos off the camera and on to a page…a grid page, in record time!!
If you search the magazines and the internet there are a lot of ideas and trends waiting for you to use on your grid papers. I’m going to show you a few scrapbook trends and how to incorporate them into your Mosaic Moments Grids with school pages in mind.
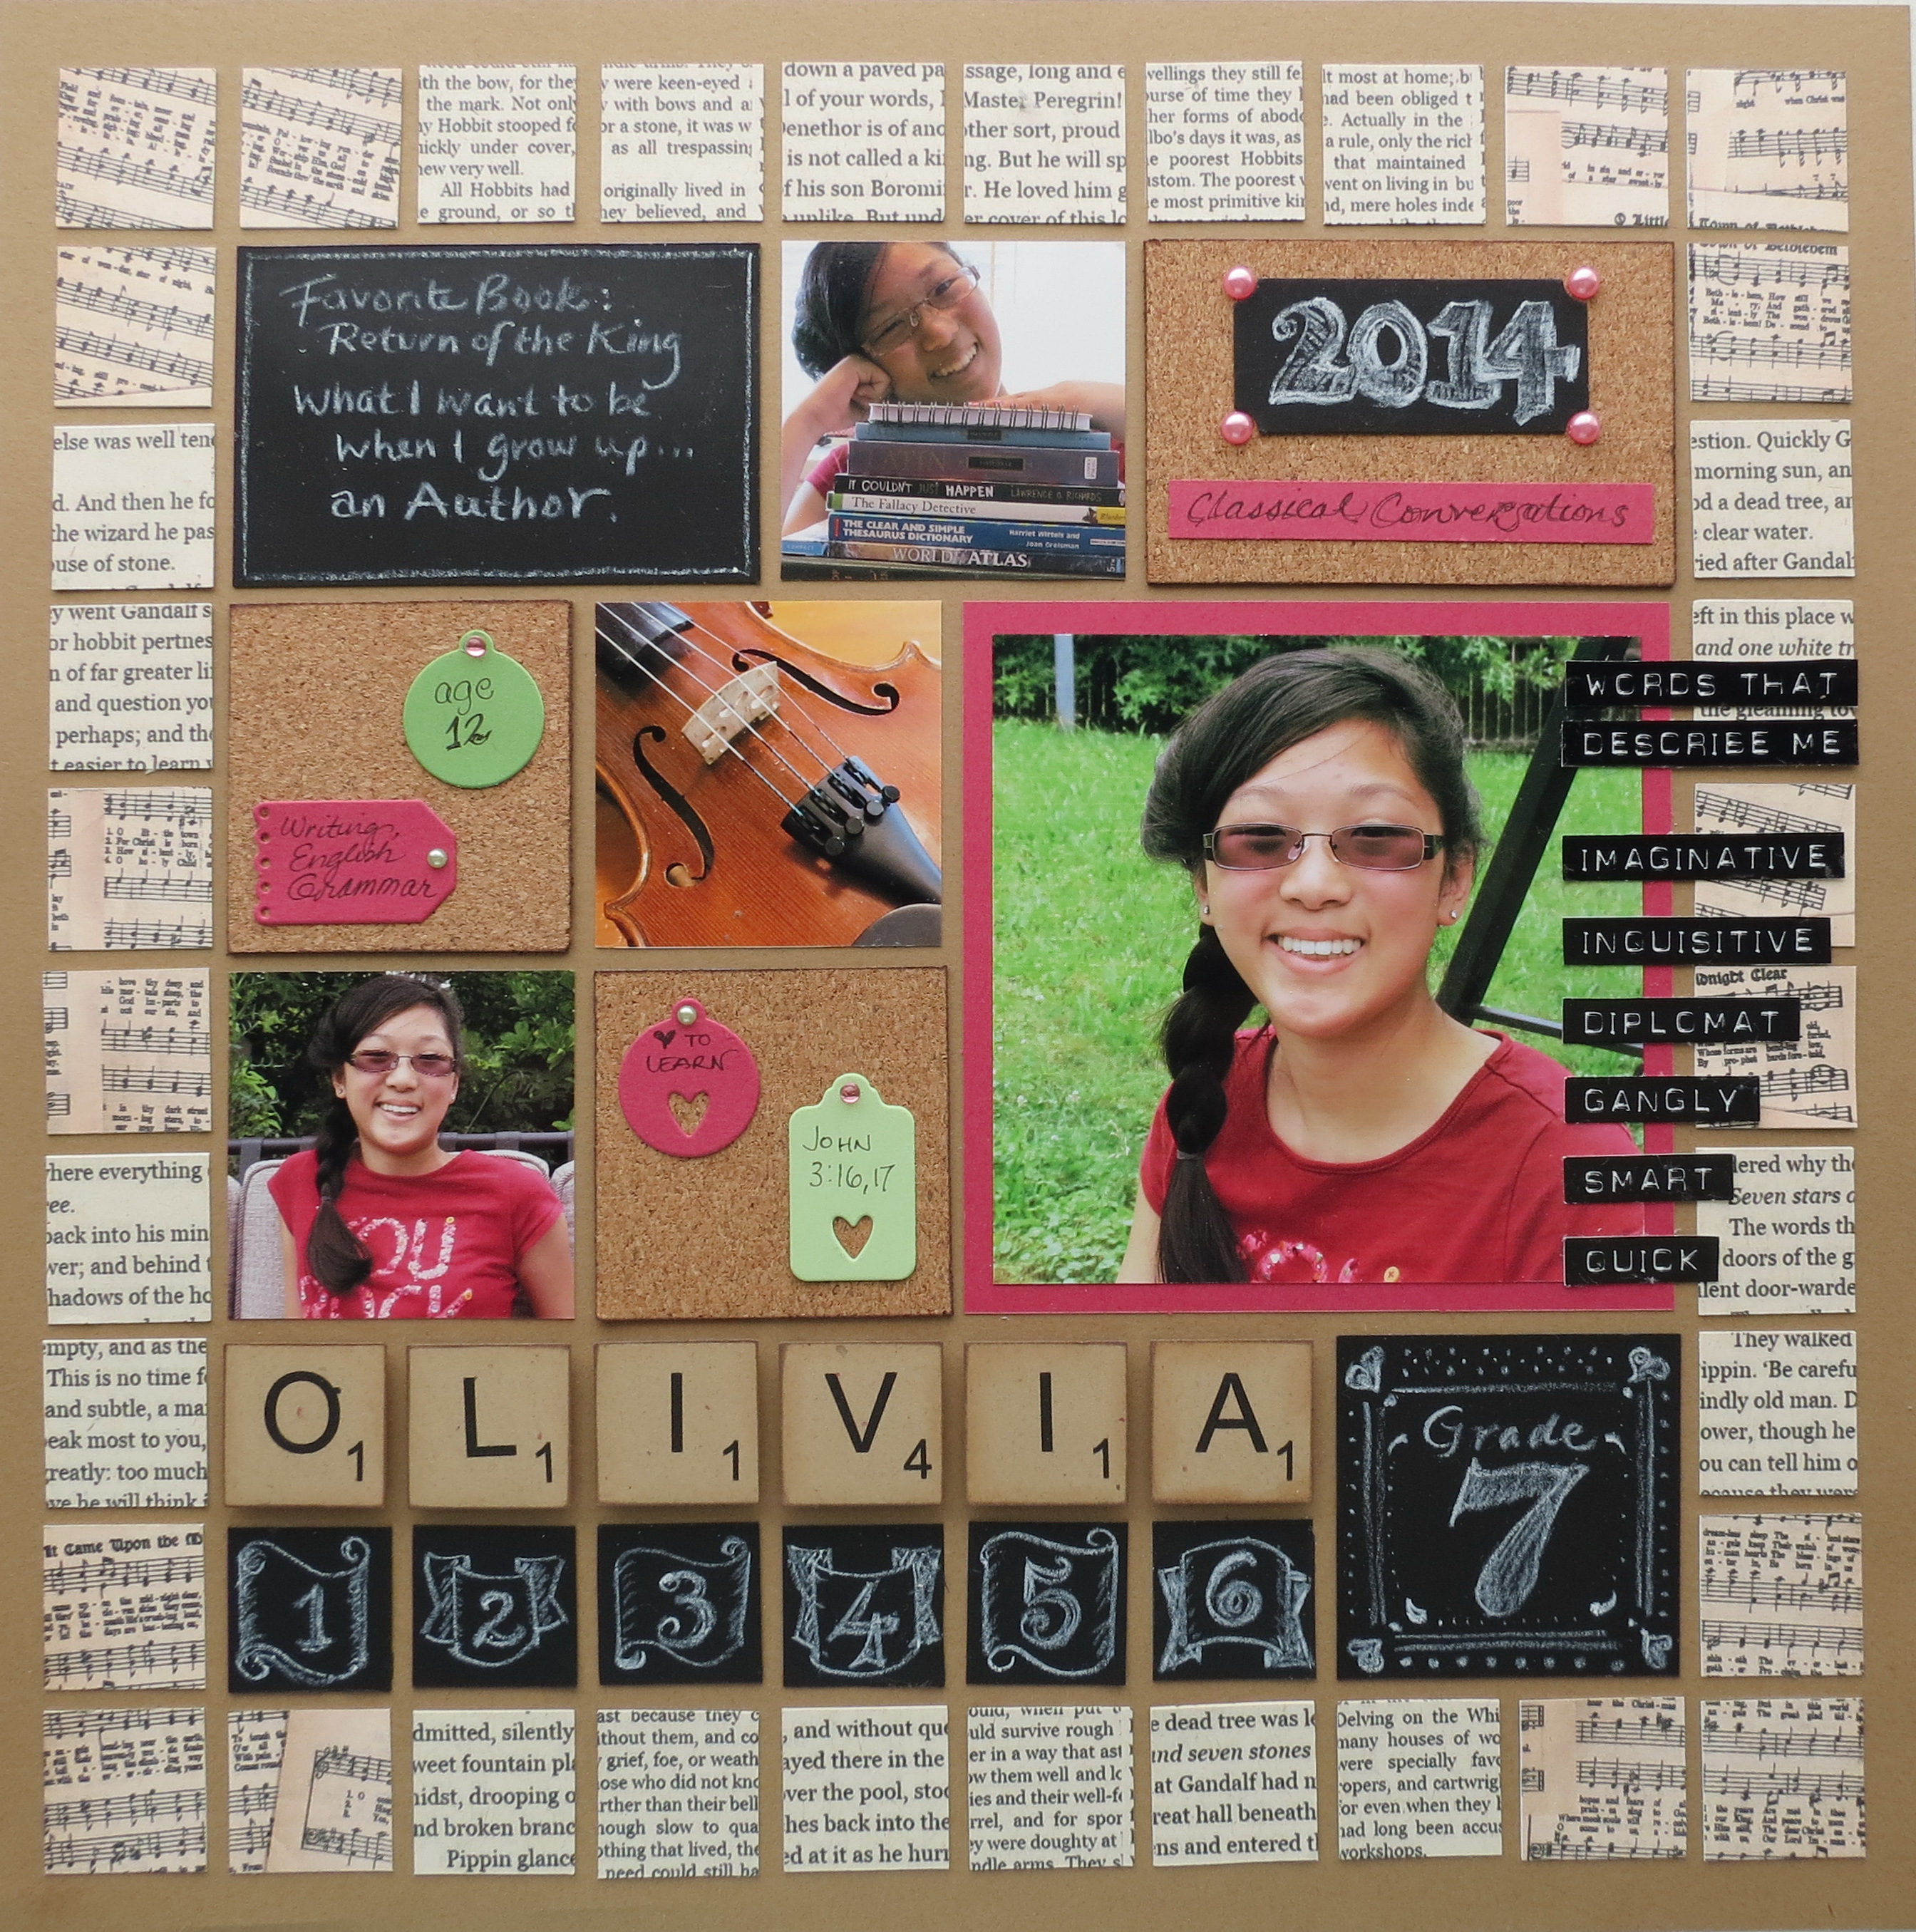
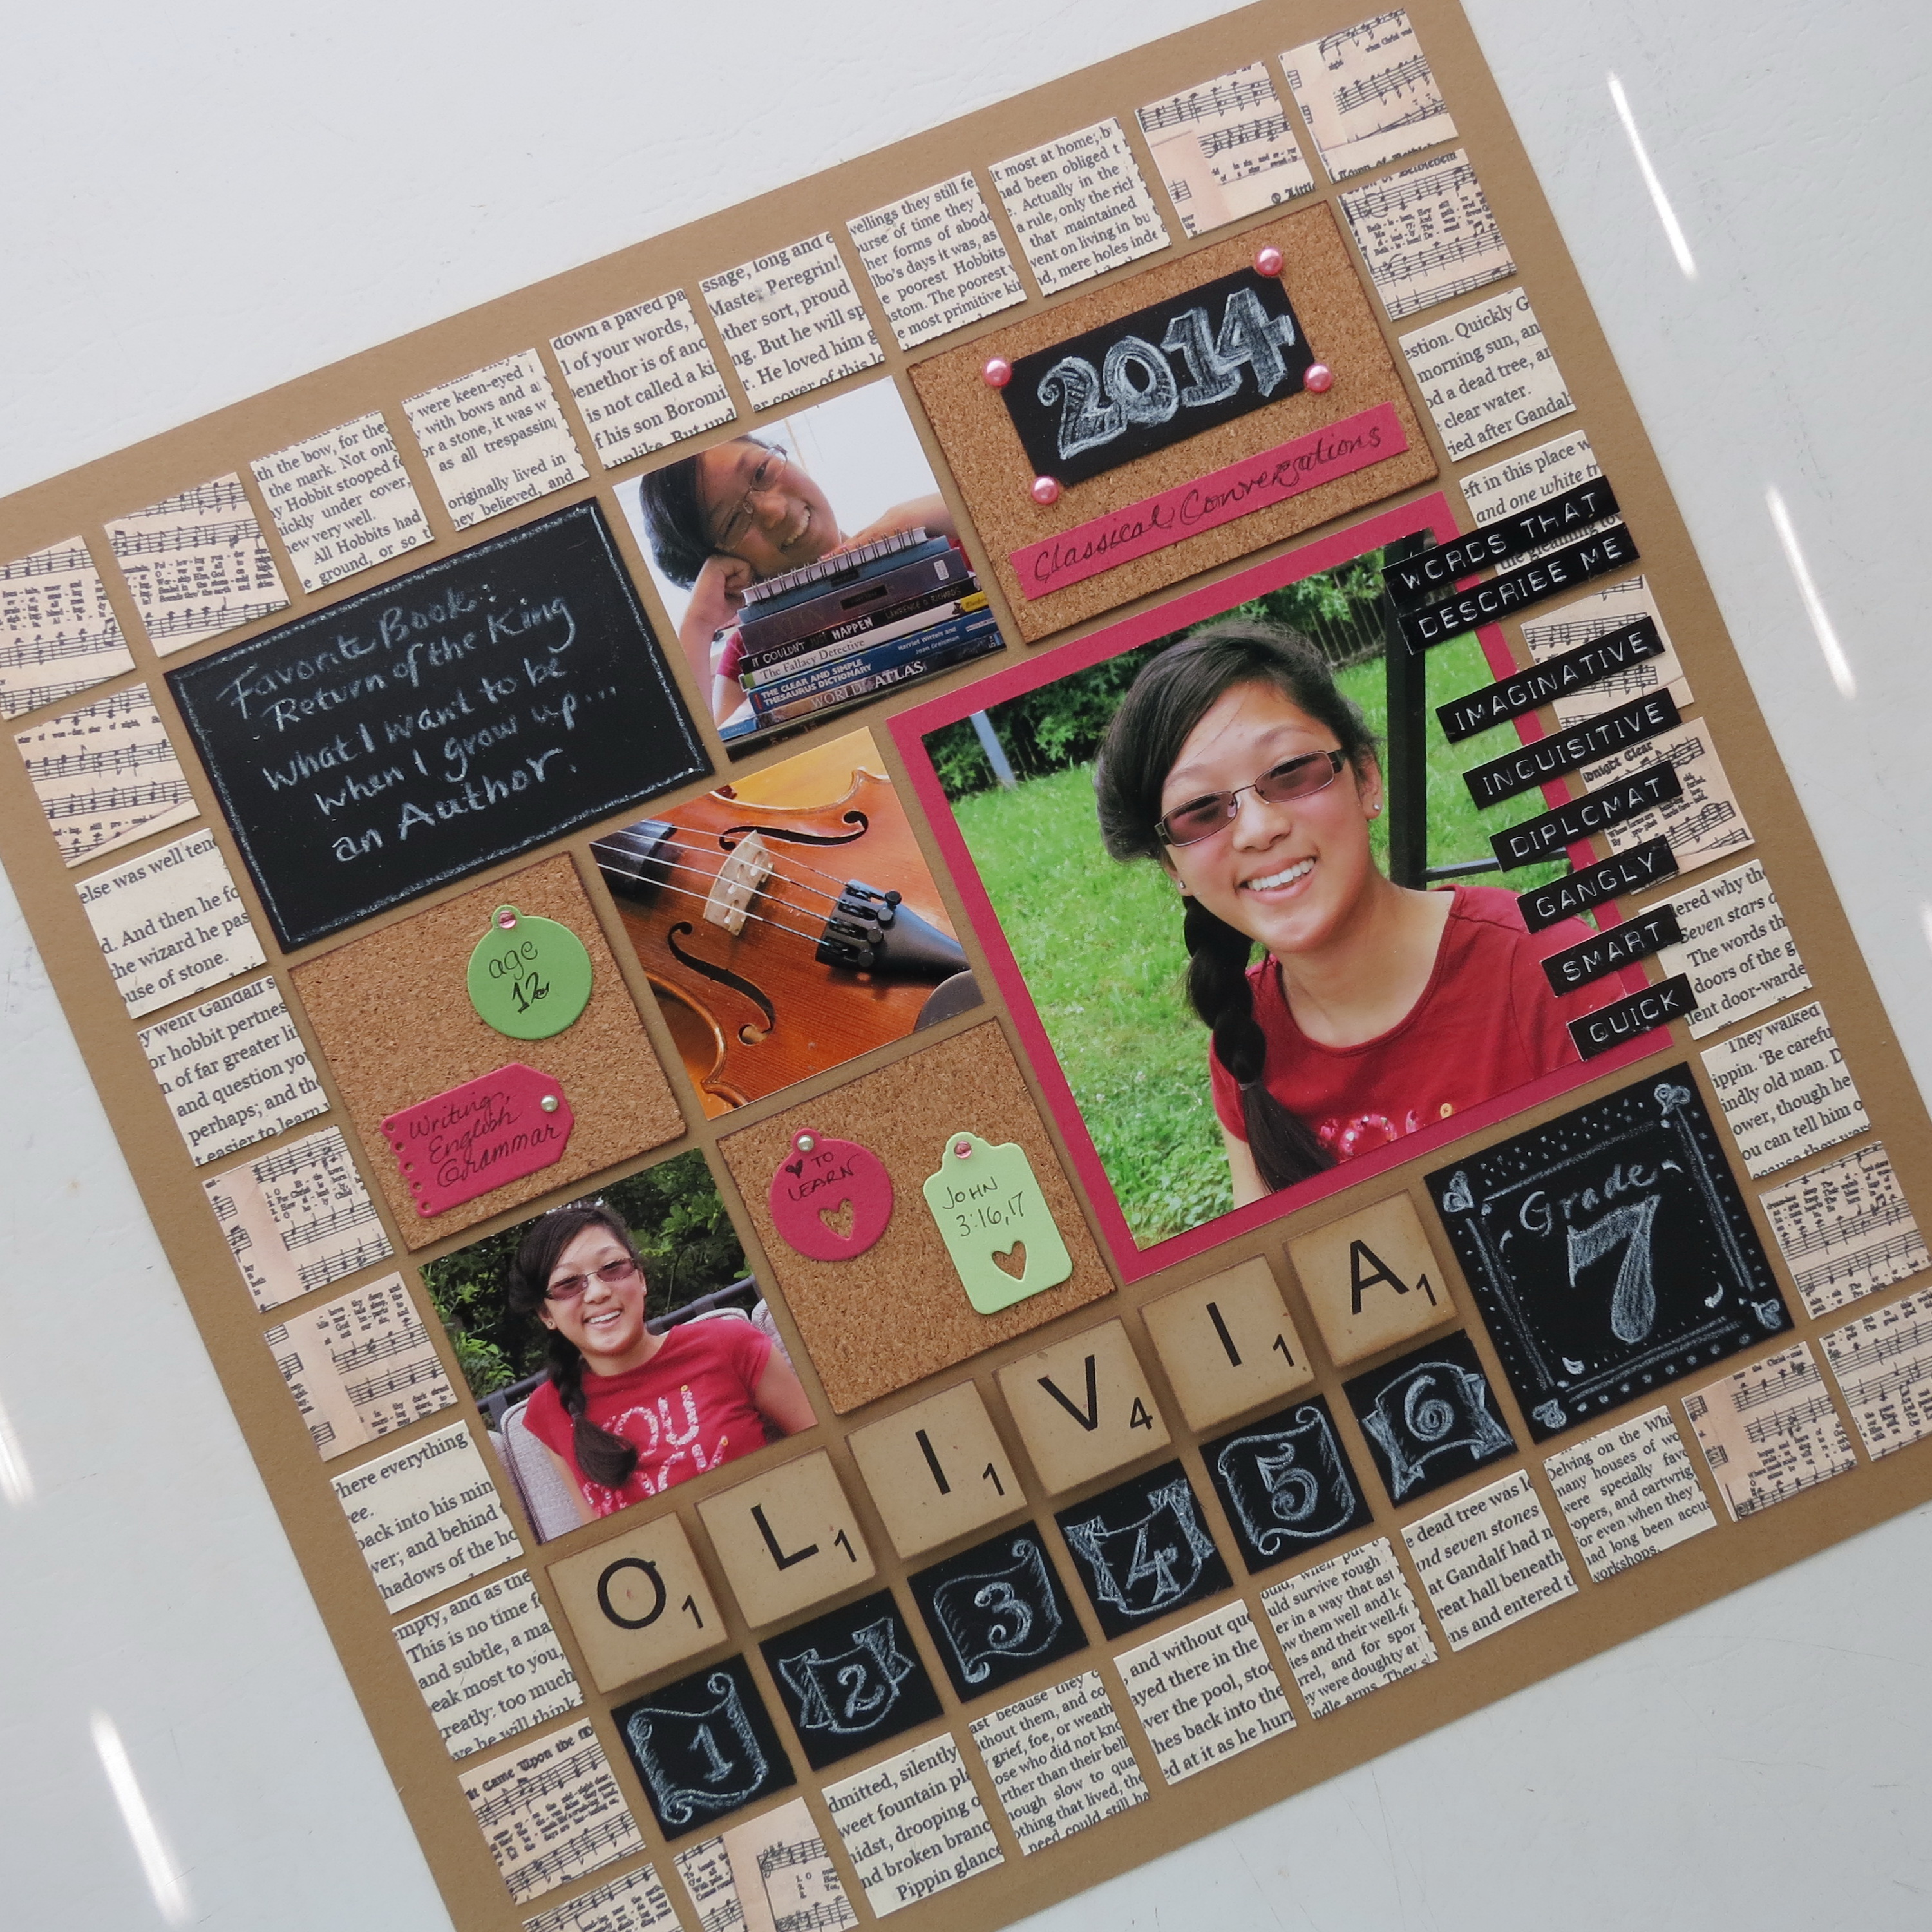
Back to School layout for Olivia
I asked a friend to allow me to use one of her daughters as a subject as all mine are finished with school and the grandbabies are too young. Thanks to both Sheila and Olivia!
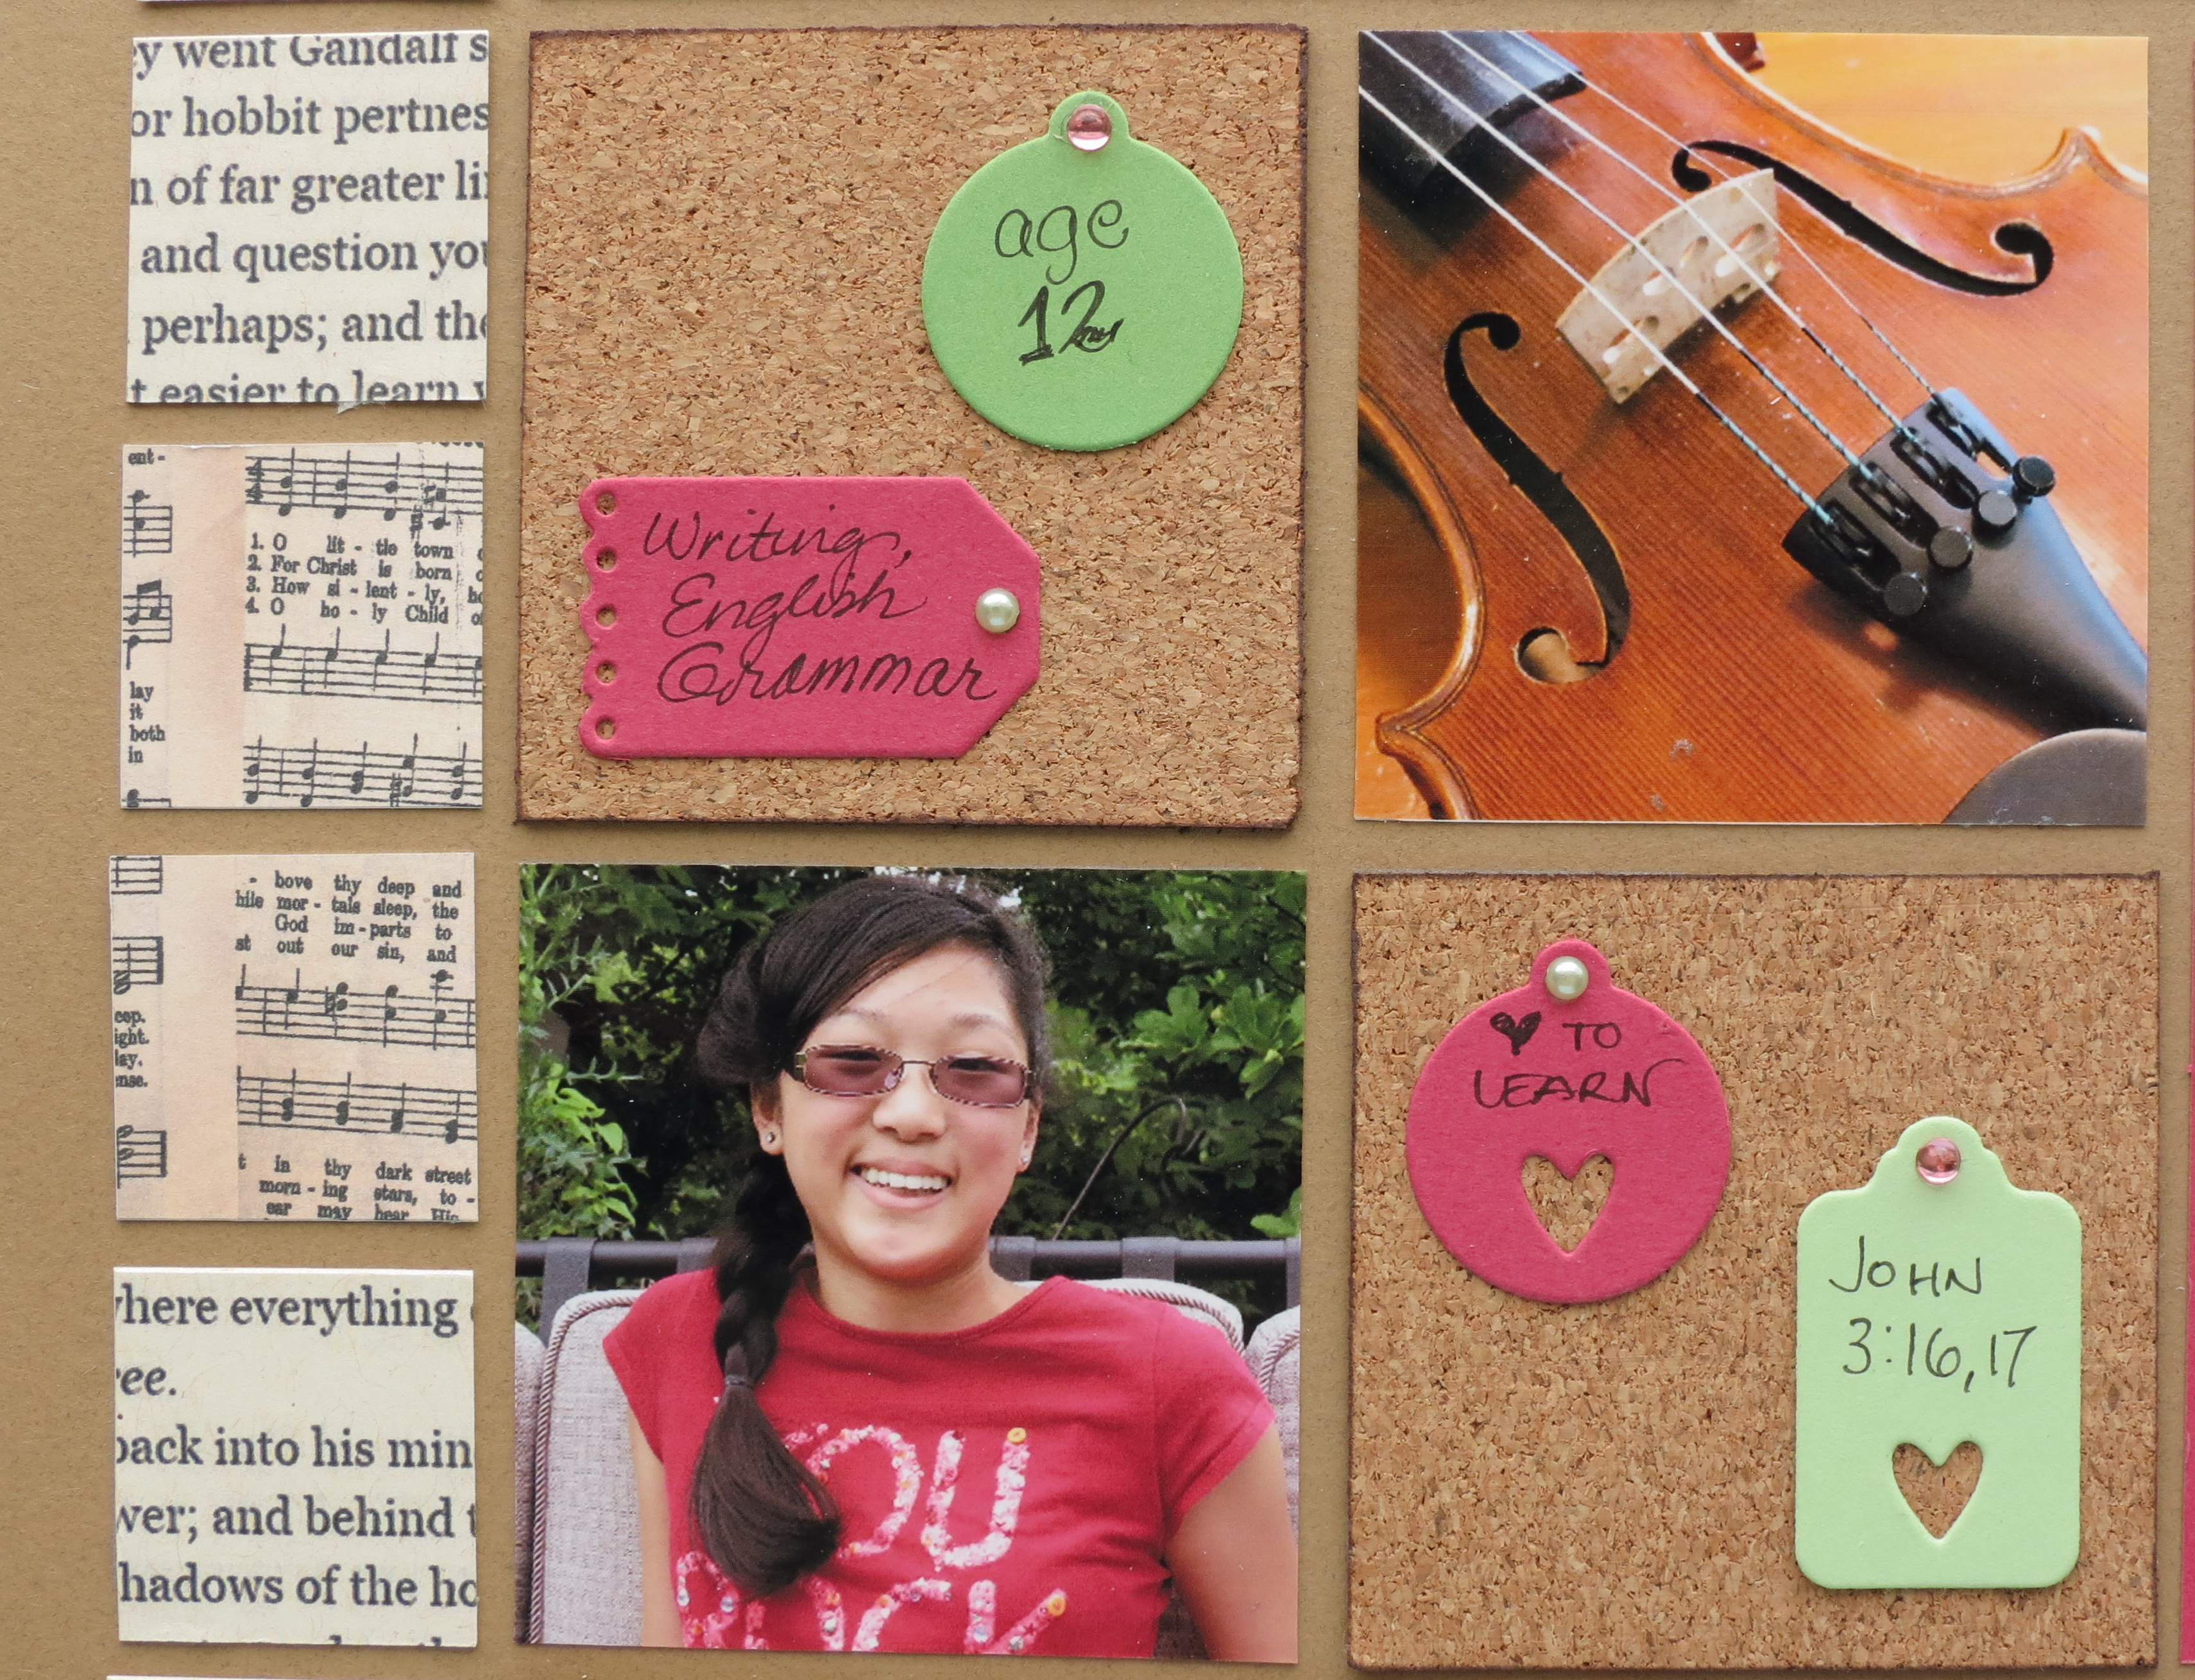
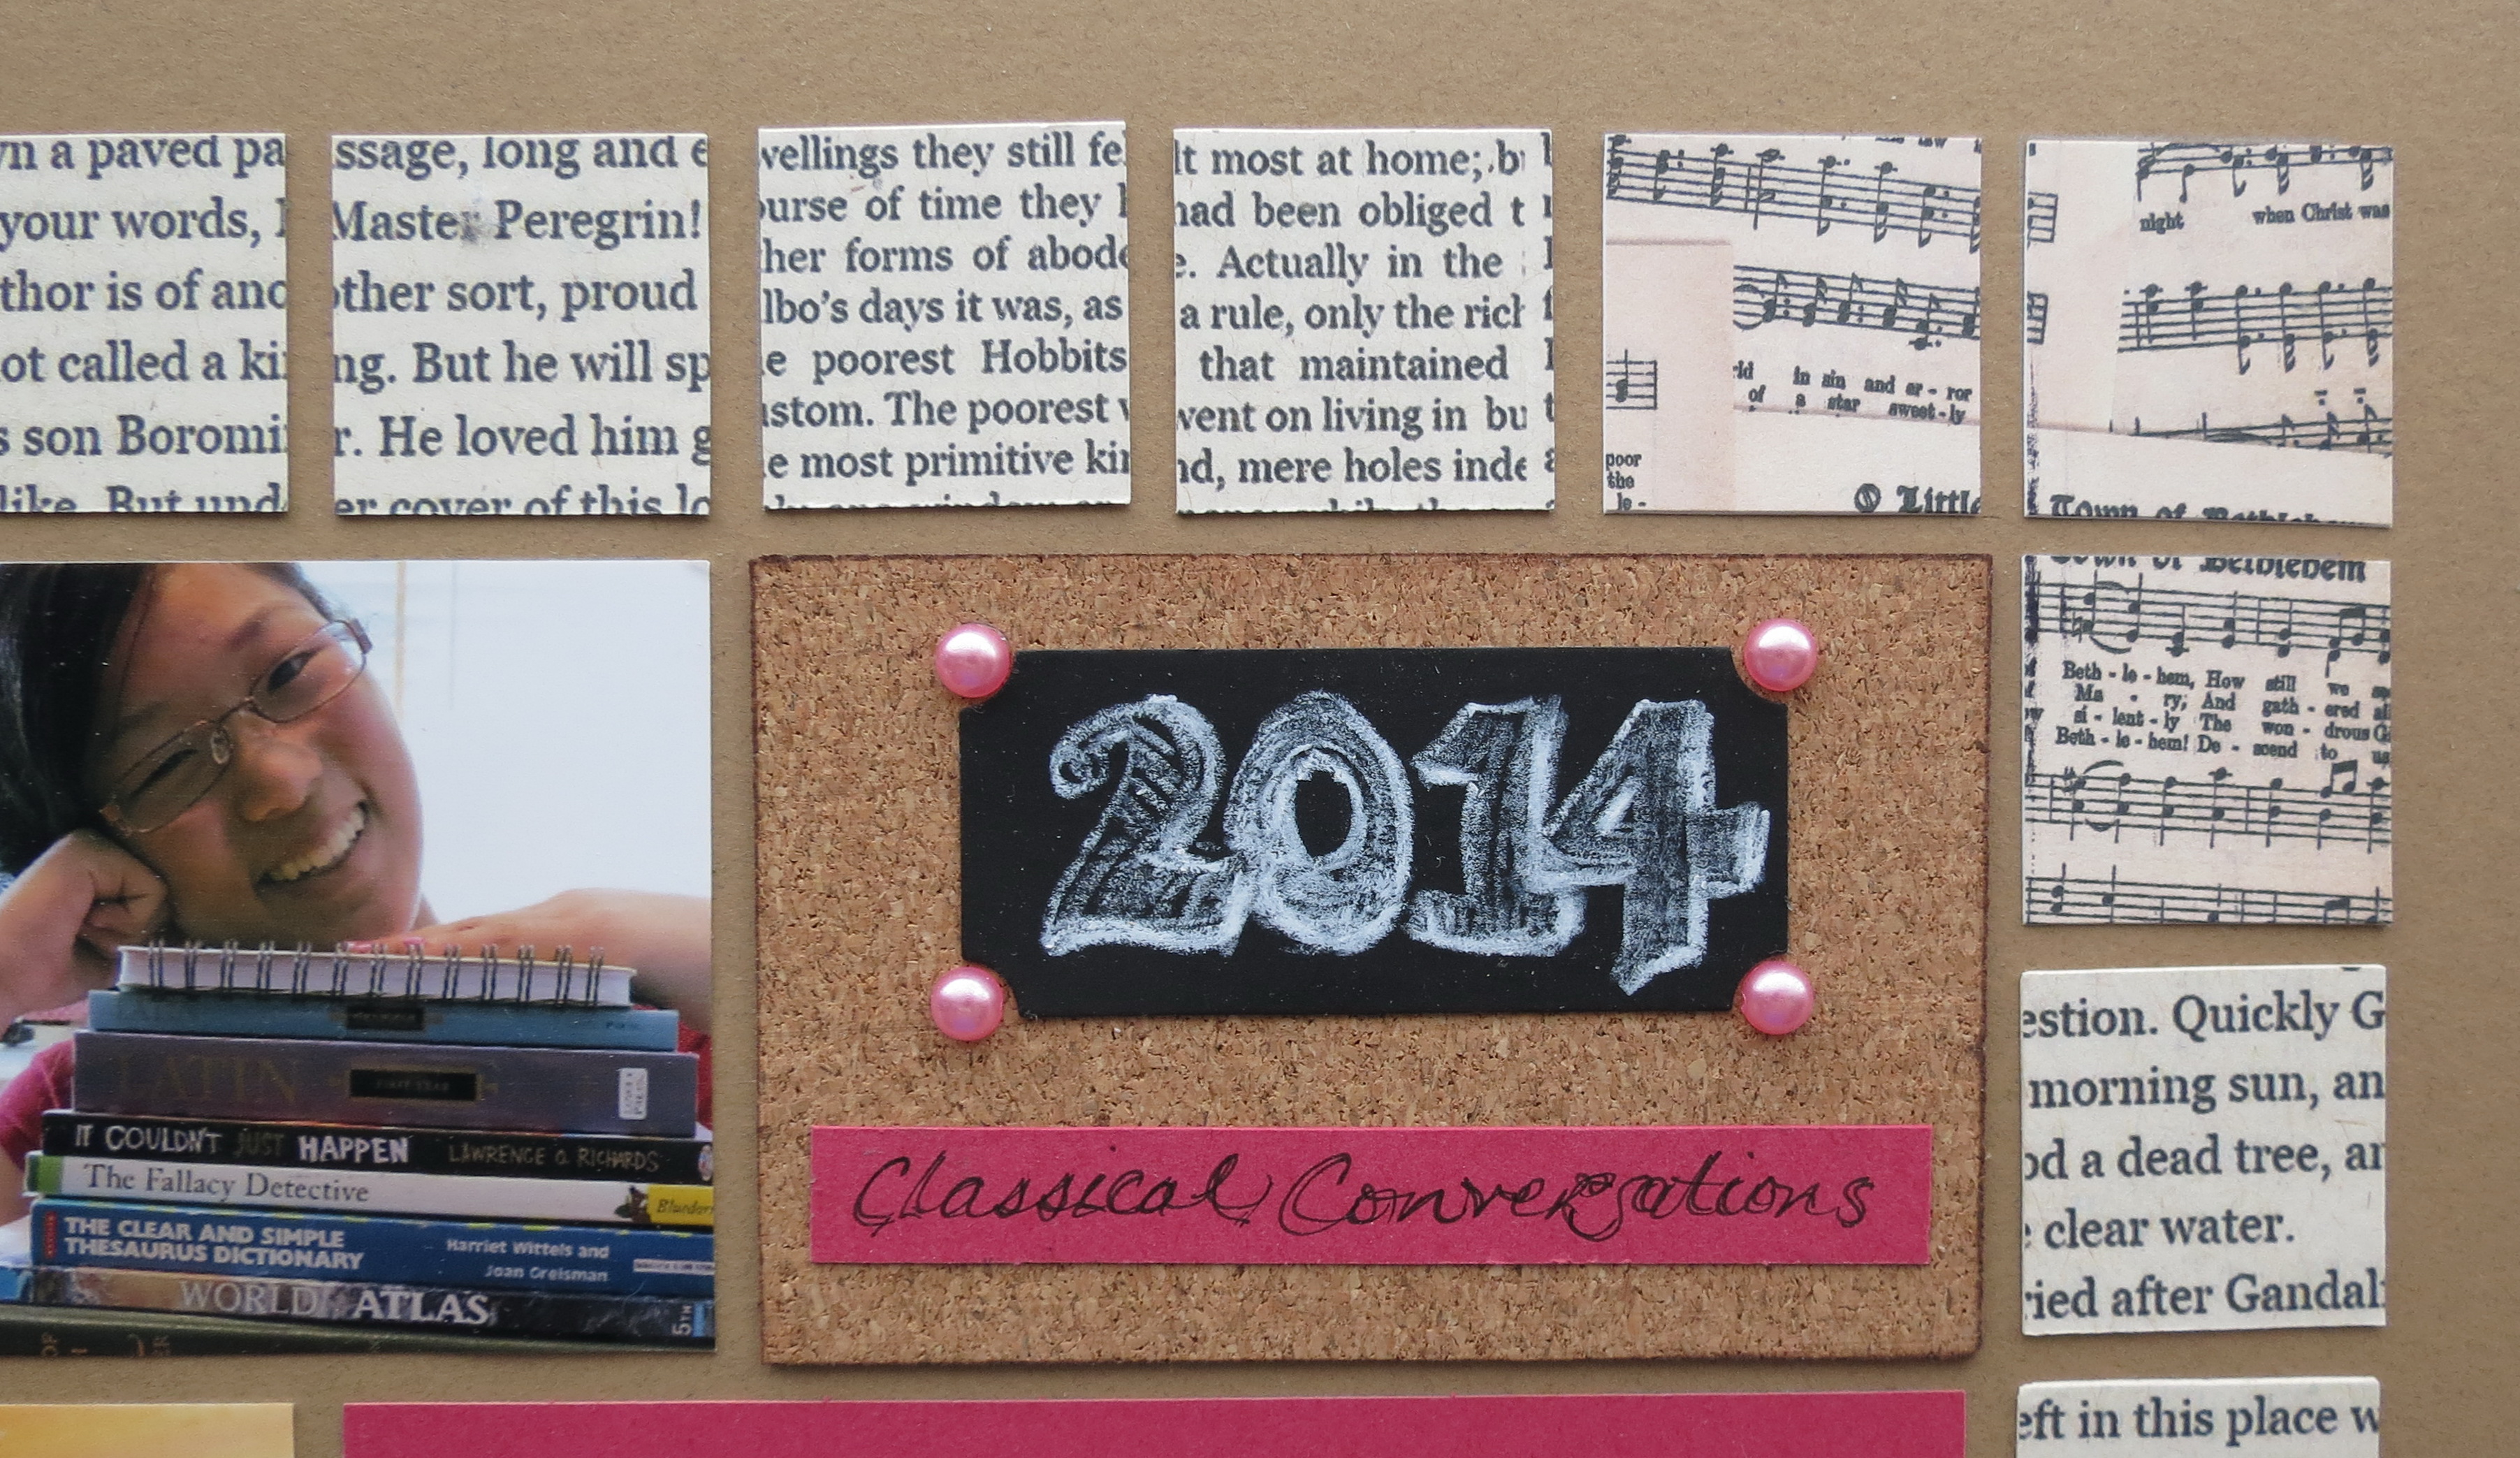
I began with Mosaic Moments 12”x 12” Toffee Grid Paper and Medium Raspberry Paper Tiles. I made tiles for the outer edges using images from sheet music and pages from Olivia’s favorite book, Return of the King from the Tolkien Lord of the Rings trilogy, and printed on ivory cardstock, so that I could incorporate a few of her interests.
I chose a layout and color scheme that resembled a framed chalkboard or cork board. It also reminded me of a game board. Olivia loves Monopoly, especially the Lord of the Rings version, so I thought it had a bit of the same feel.
TIPS:
Tip One: Interview your child.
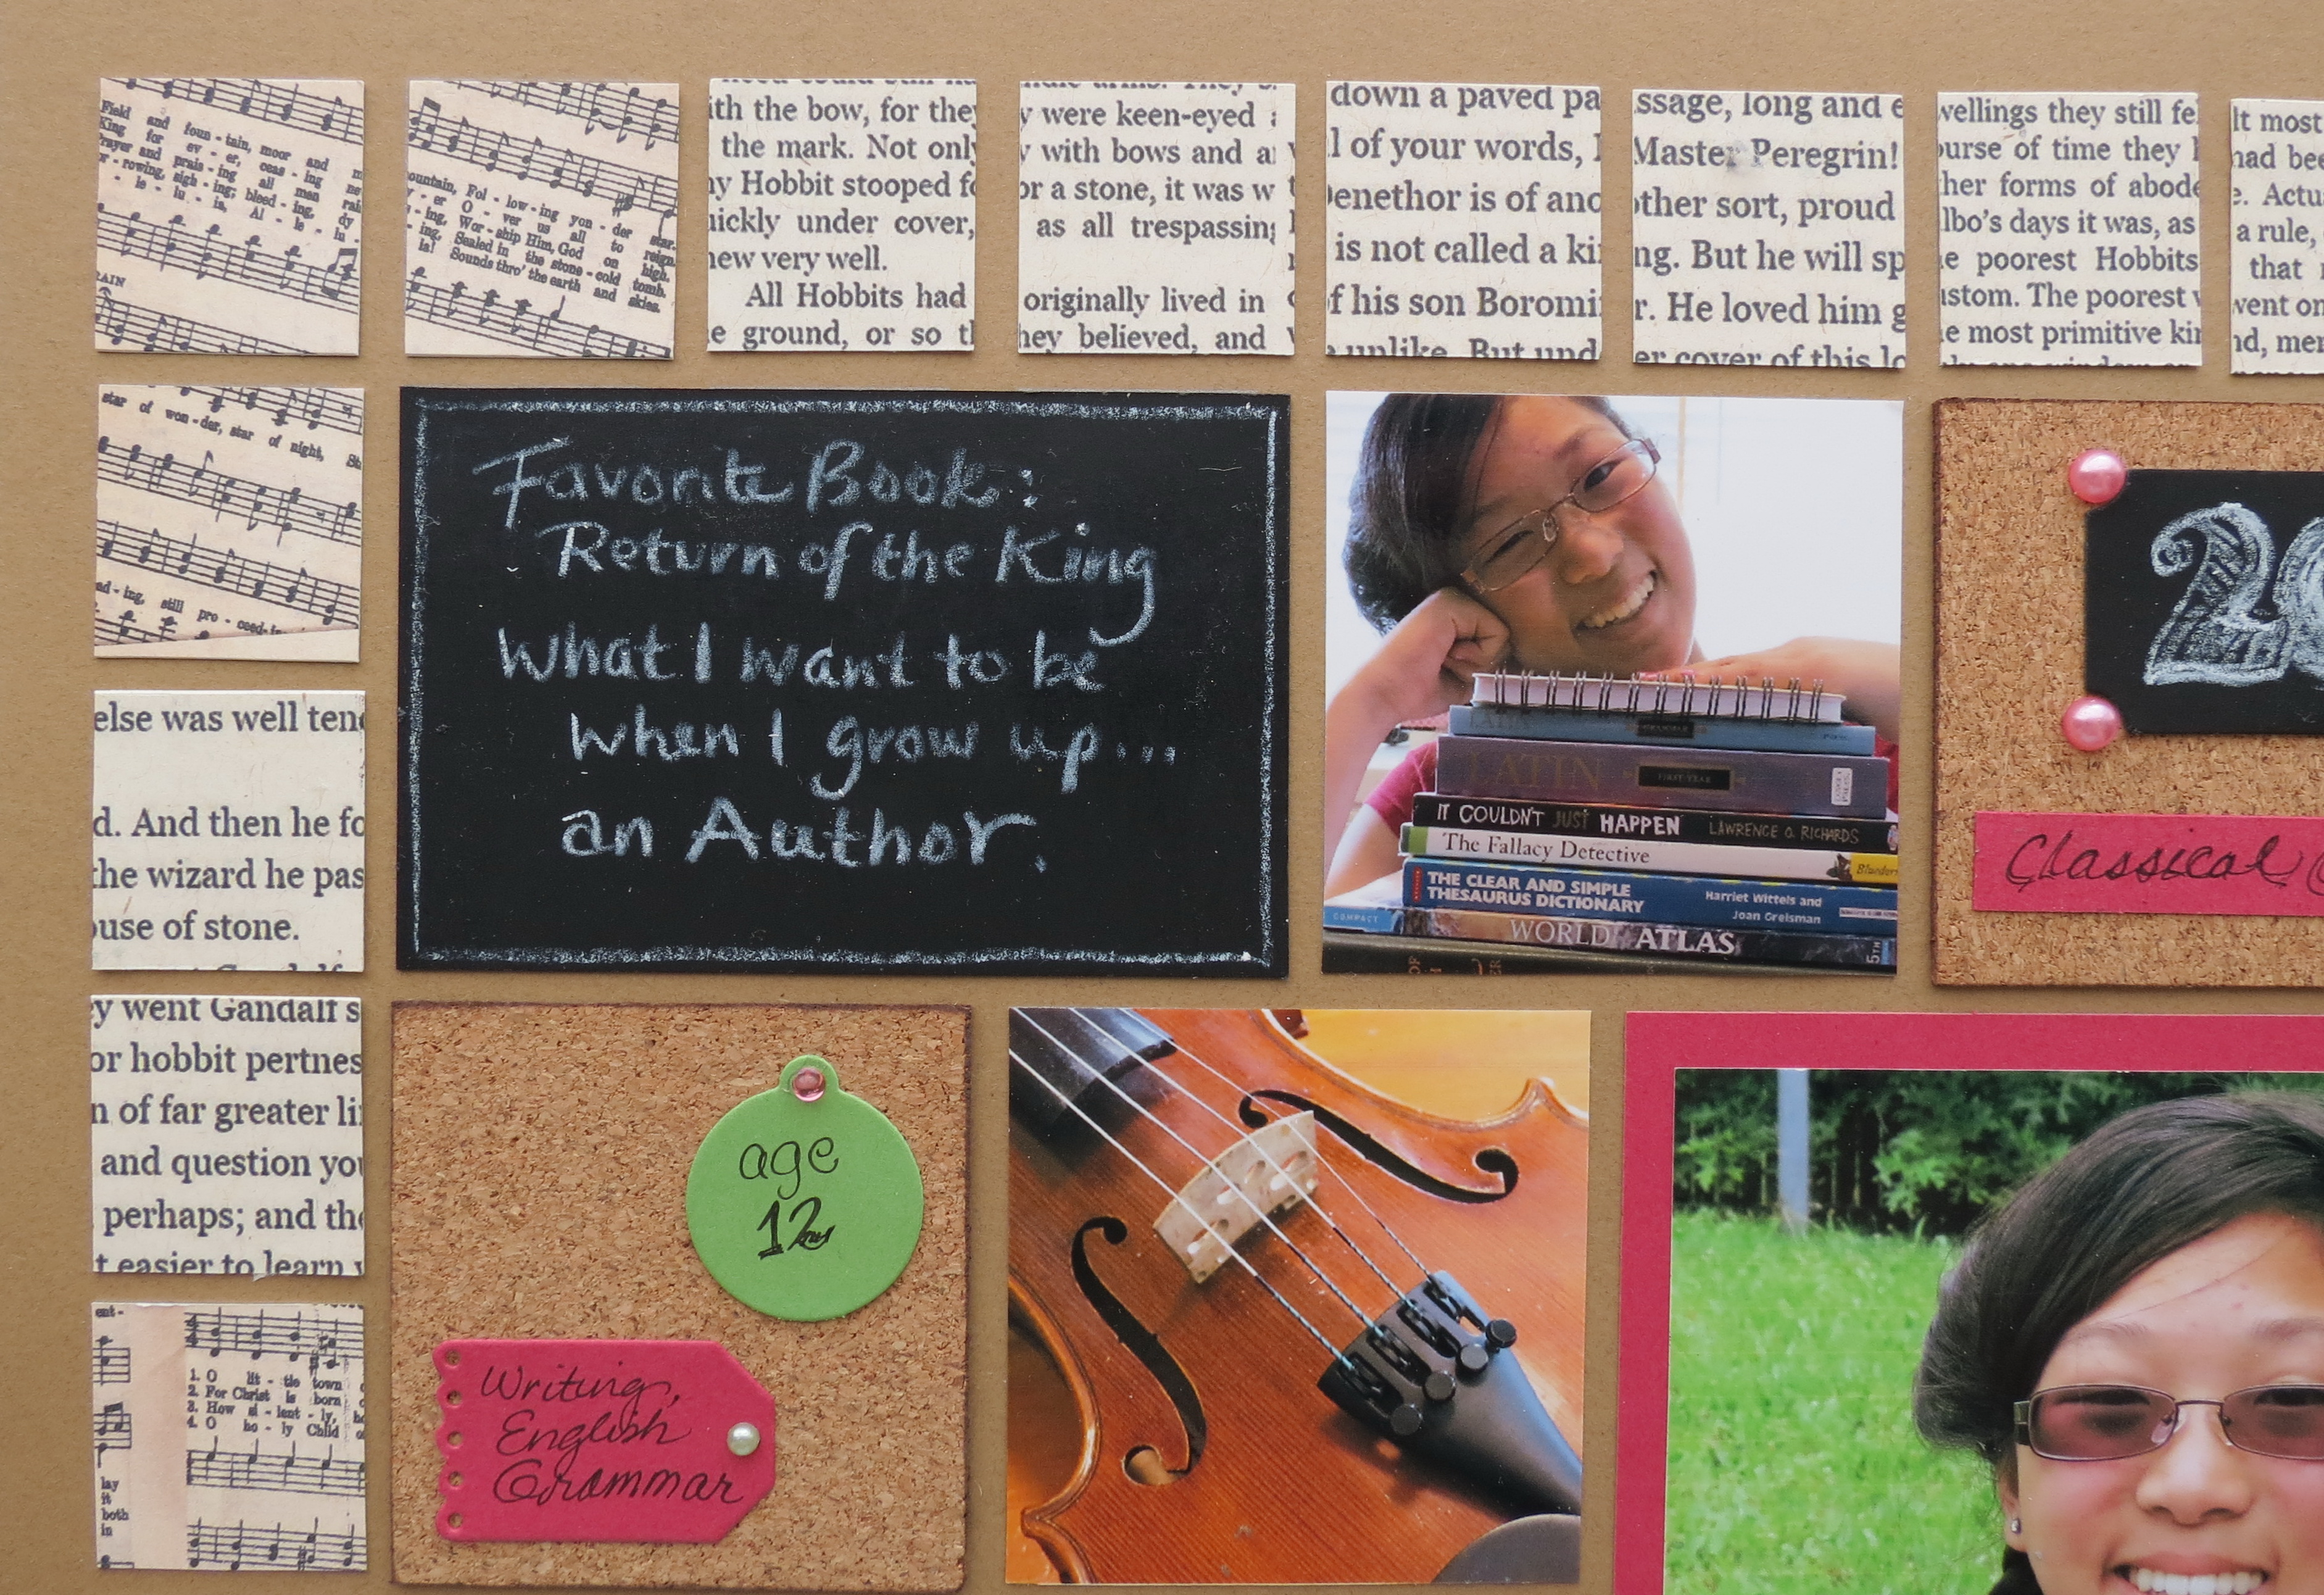
Tip One: Student Interview
Get your child involved in the process. Find out what they are looking forward to this upcoming year…a favorite subject, book, color or activity. What do they want to be when they grow up…this year? These things may change from year to year, so get this year’s info down to remember in years to come. Use what you discover to design their page. Find a way to incorporate it into the layout. You’ll find that they’ll enjoy the page so much more once it’s done and feel like they were apart of its creation!
Tip Two: Ask your child for words that describe themselves.
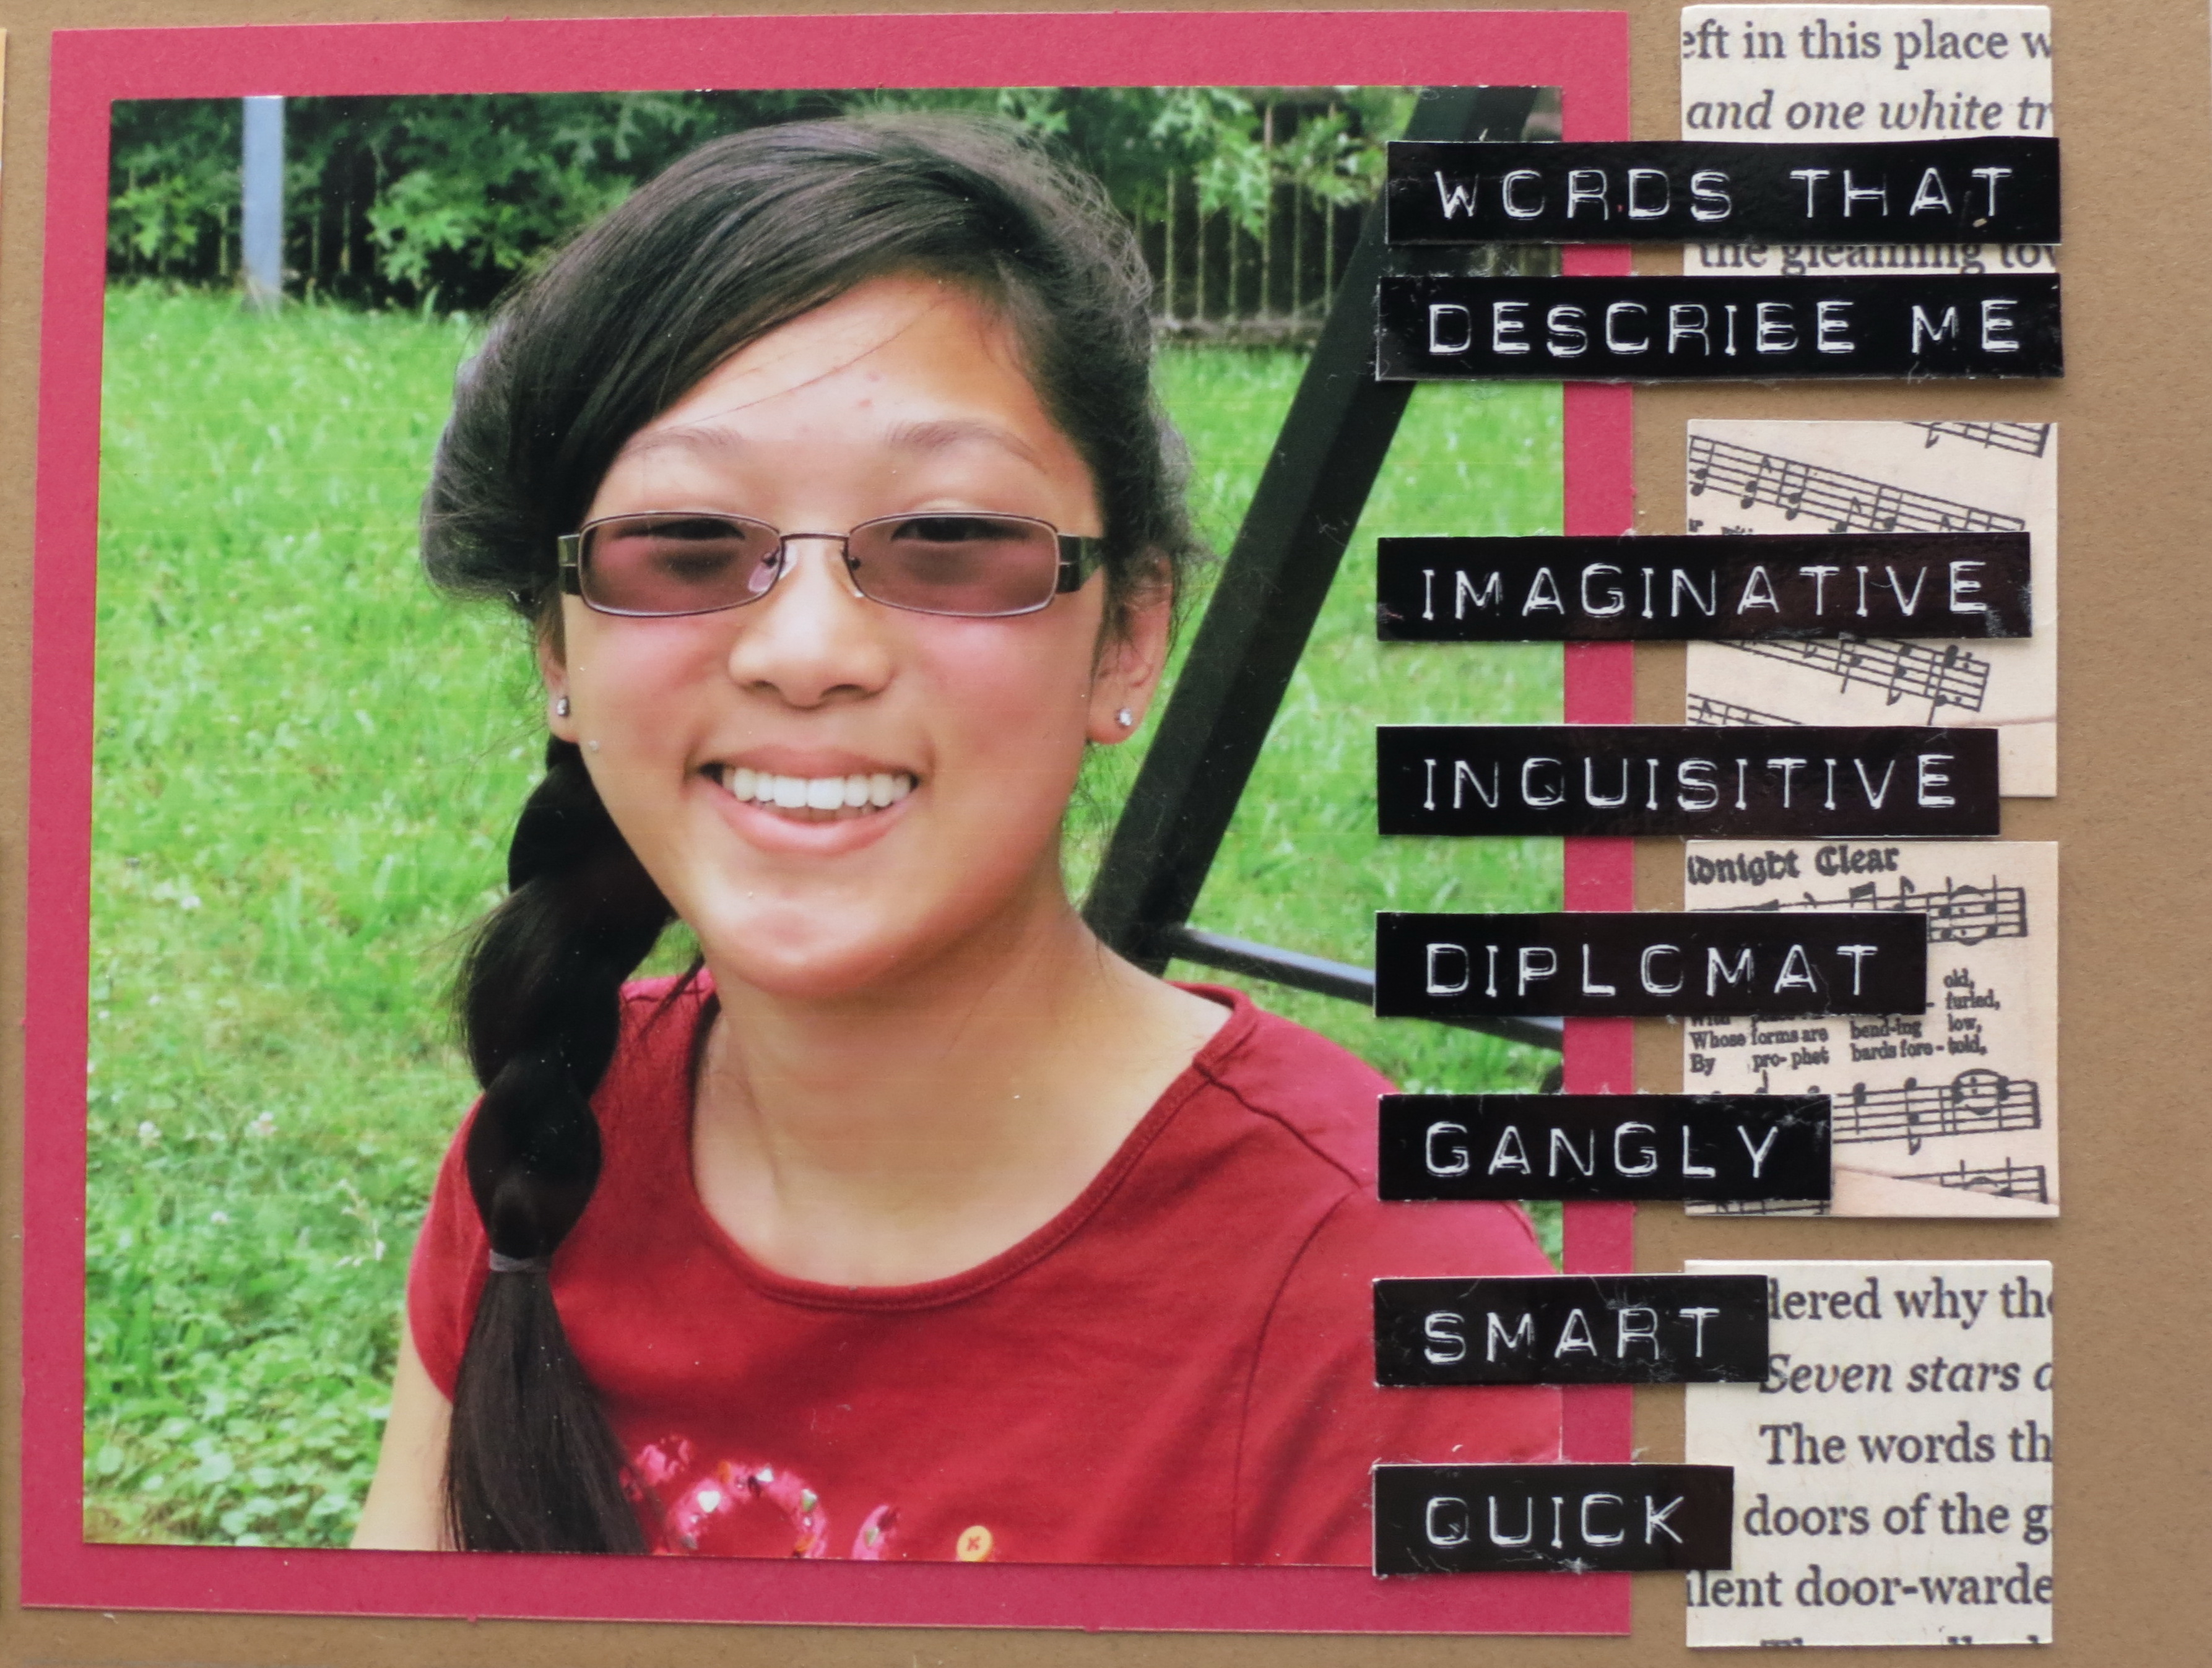
Tip Two: Words to Describe Themselves
Like many things that will change from year to year, how your child sees themselves is one. You can see them grow and watch the changes. See your child as they see themselves, not just the way you do, the insight is invaluable!
I used a font (LD Punch In) to create a look like the old label makers for the words and make the list.
Tip Three: Plan ahead; make a list of the photos you want to shoot.
Take photos of things that make up the things they do…their supplies, their books, their backpacks and shoes. Do they play an instrument; are they artistic or mechanically inclined? Do they love to read or play games? Incorporate some of those things into the page. These can all be done ahead of time.
Olivia is an accomplished musician and performed last year with the Akron Youth Symphony and hopes to return this year, and also volunteers with her sister, Jillian, to play for the Salvation Army collections at Christmas time.
Tip Three: plan ahead include their interests.
Take a photo getting on the bus or off at the end of the day. Walk to school? Take a long shot of your child at ground level, off in the distance, the long sidewalk emphasizing the distance. Take one outside of the school or in front of the school sign, that’s something you can do ahead of time too, as there is often a “Welcome Back” sign the week before school begins. Do you Home school? Gather the family round the table or at the computer, sprawled over the floor or in the great outdoors!
If you have more than one child remember to take a photo of each one individually, group photos are great but one on their own is just as important.
Is there anyone still at home and not going to school? Get one of them too, maybe as they sadly wave good bye, (or jump for joy) watch the bus depart, or maybe even one with their face pressed against the window waiting for it to return?
All photos or pages for that matter don’t have to be about that first day, it can be about what you do to get ready for that first day, the first week, or even that whole year with a left and right page with first day on the left and last day on the right.
Photos can also be taken any time before the first day of school when things are a bit less stressful. Do some close-ups or shots with props. Take your time, don’t be rushed, enjoy it! Especially if your goal is recording your child at this time in their lives, rather than that specific day.
Tip Four: The style you choose should be age appropriate.
There are a lot of papers and products with bold and bright colors for school pages. Some are terrific for younger kids, but your older kids might not care for a juvenile look, be sure to pick something that reflects their personality and suits them…their pages over the years should mature just like them!
Here’s an example of a page for an older teen. For a couple of other Scrapbooking ideas for Back to School pages you can see these that I did about my youngest son for his Senior year in more detail on Journella: Elements of You and Journella: Andrew.
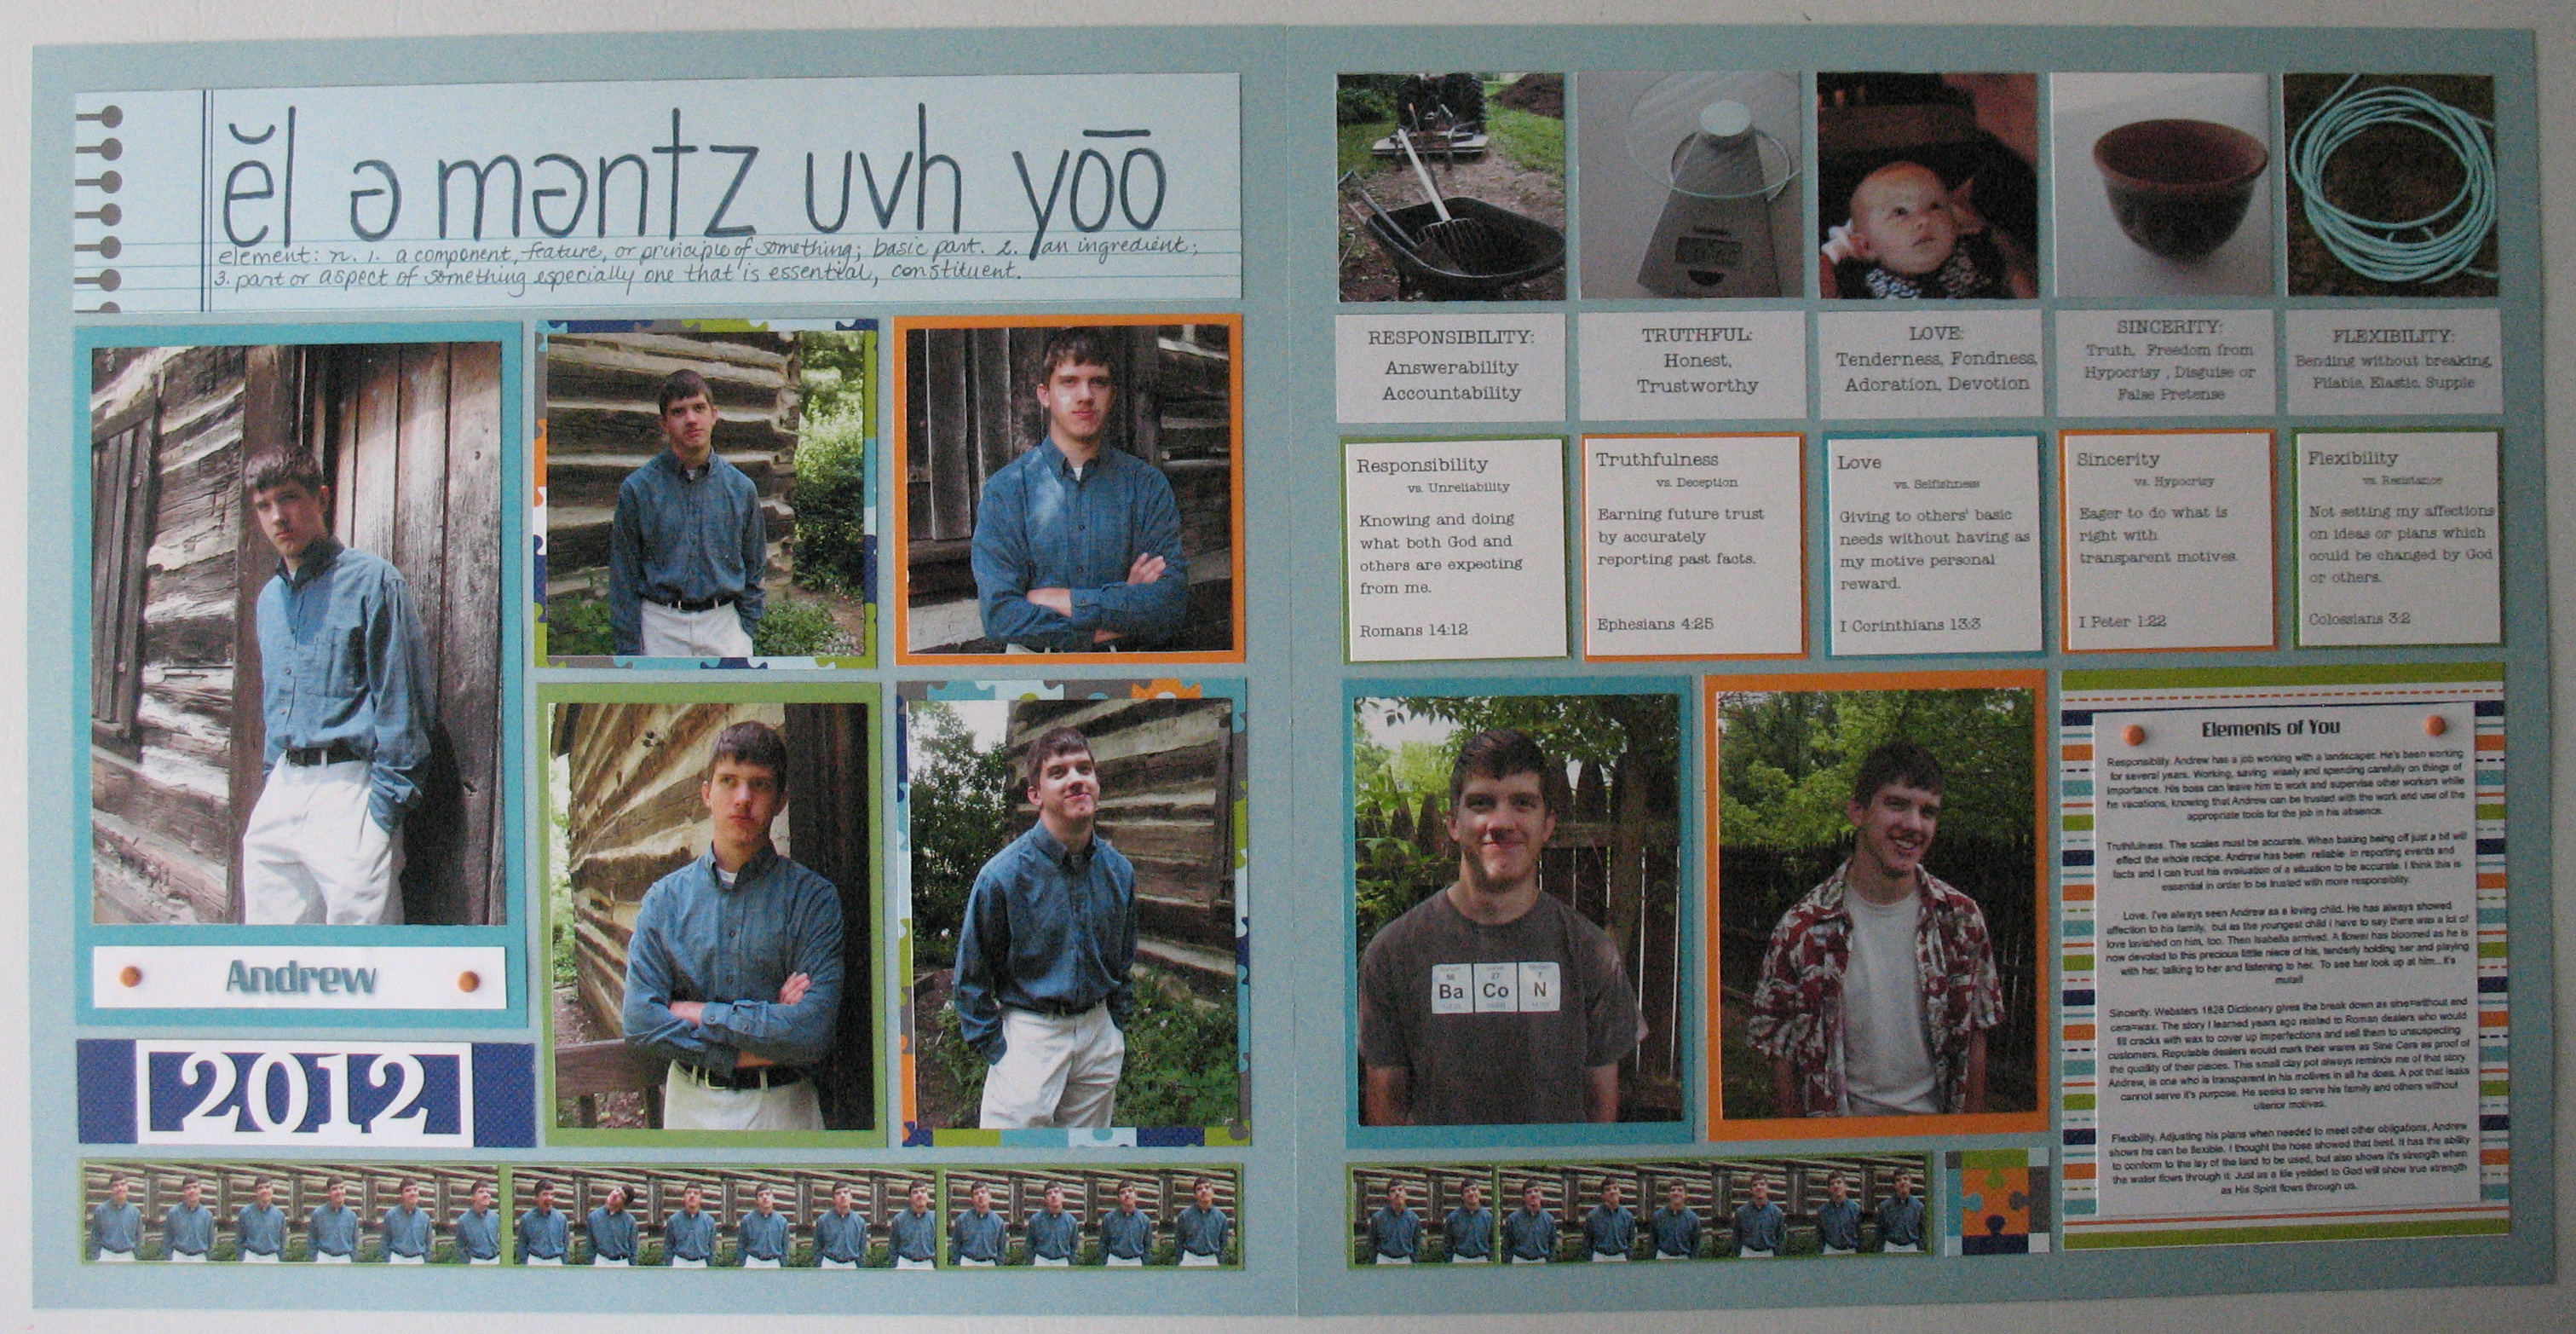
Scrapbooking Ideas for Back to School: Tip Four-age appropriate, a teen boy page and Tip Five: make it about your child.
Tip Five: Make the page about YOUR child!
When it’s all said and done, the page you put together should be about your child…their interests, their personality. All the ideas out there are great; I have a Pin Board full of pages I really like, but not all would be appropriate for my children, it wouldn’t “fit” them, so choose ideas that will really tell their story, not just display the latest products.
I’ve taken a 12 x 12 Granite Grid, page pattern 23 and cork to create this page for…
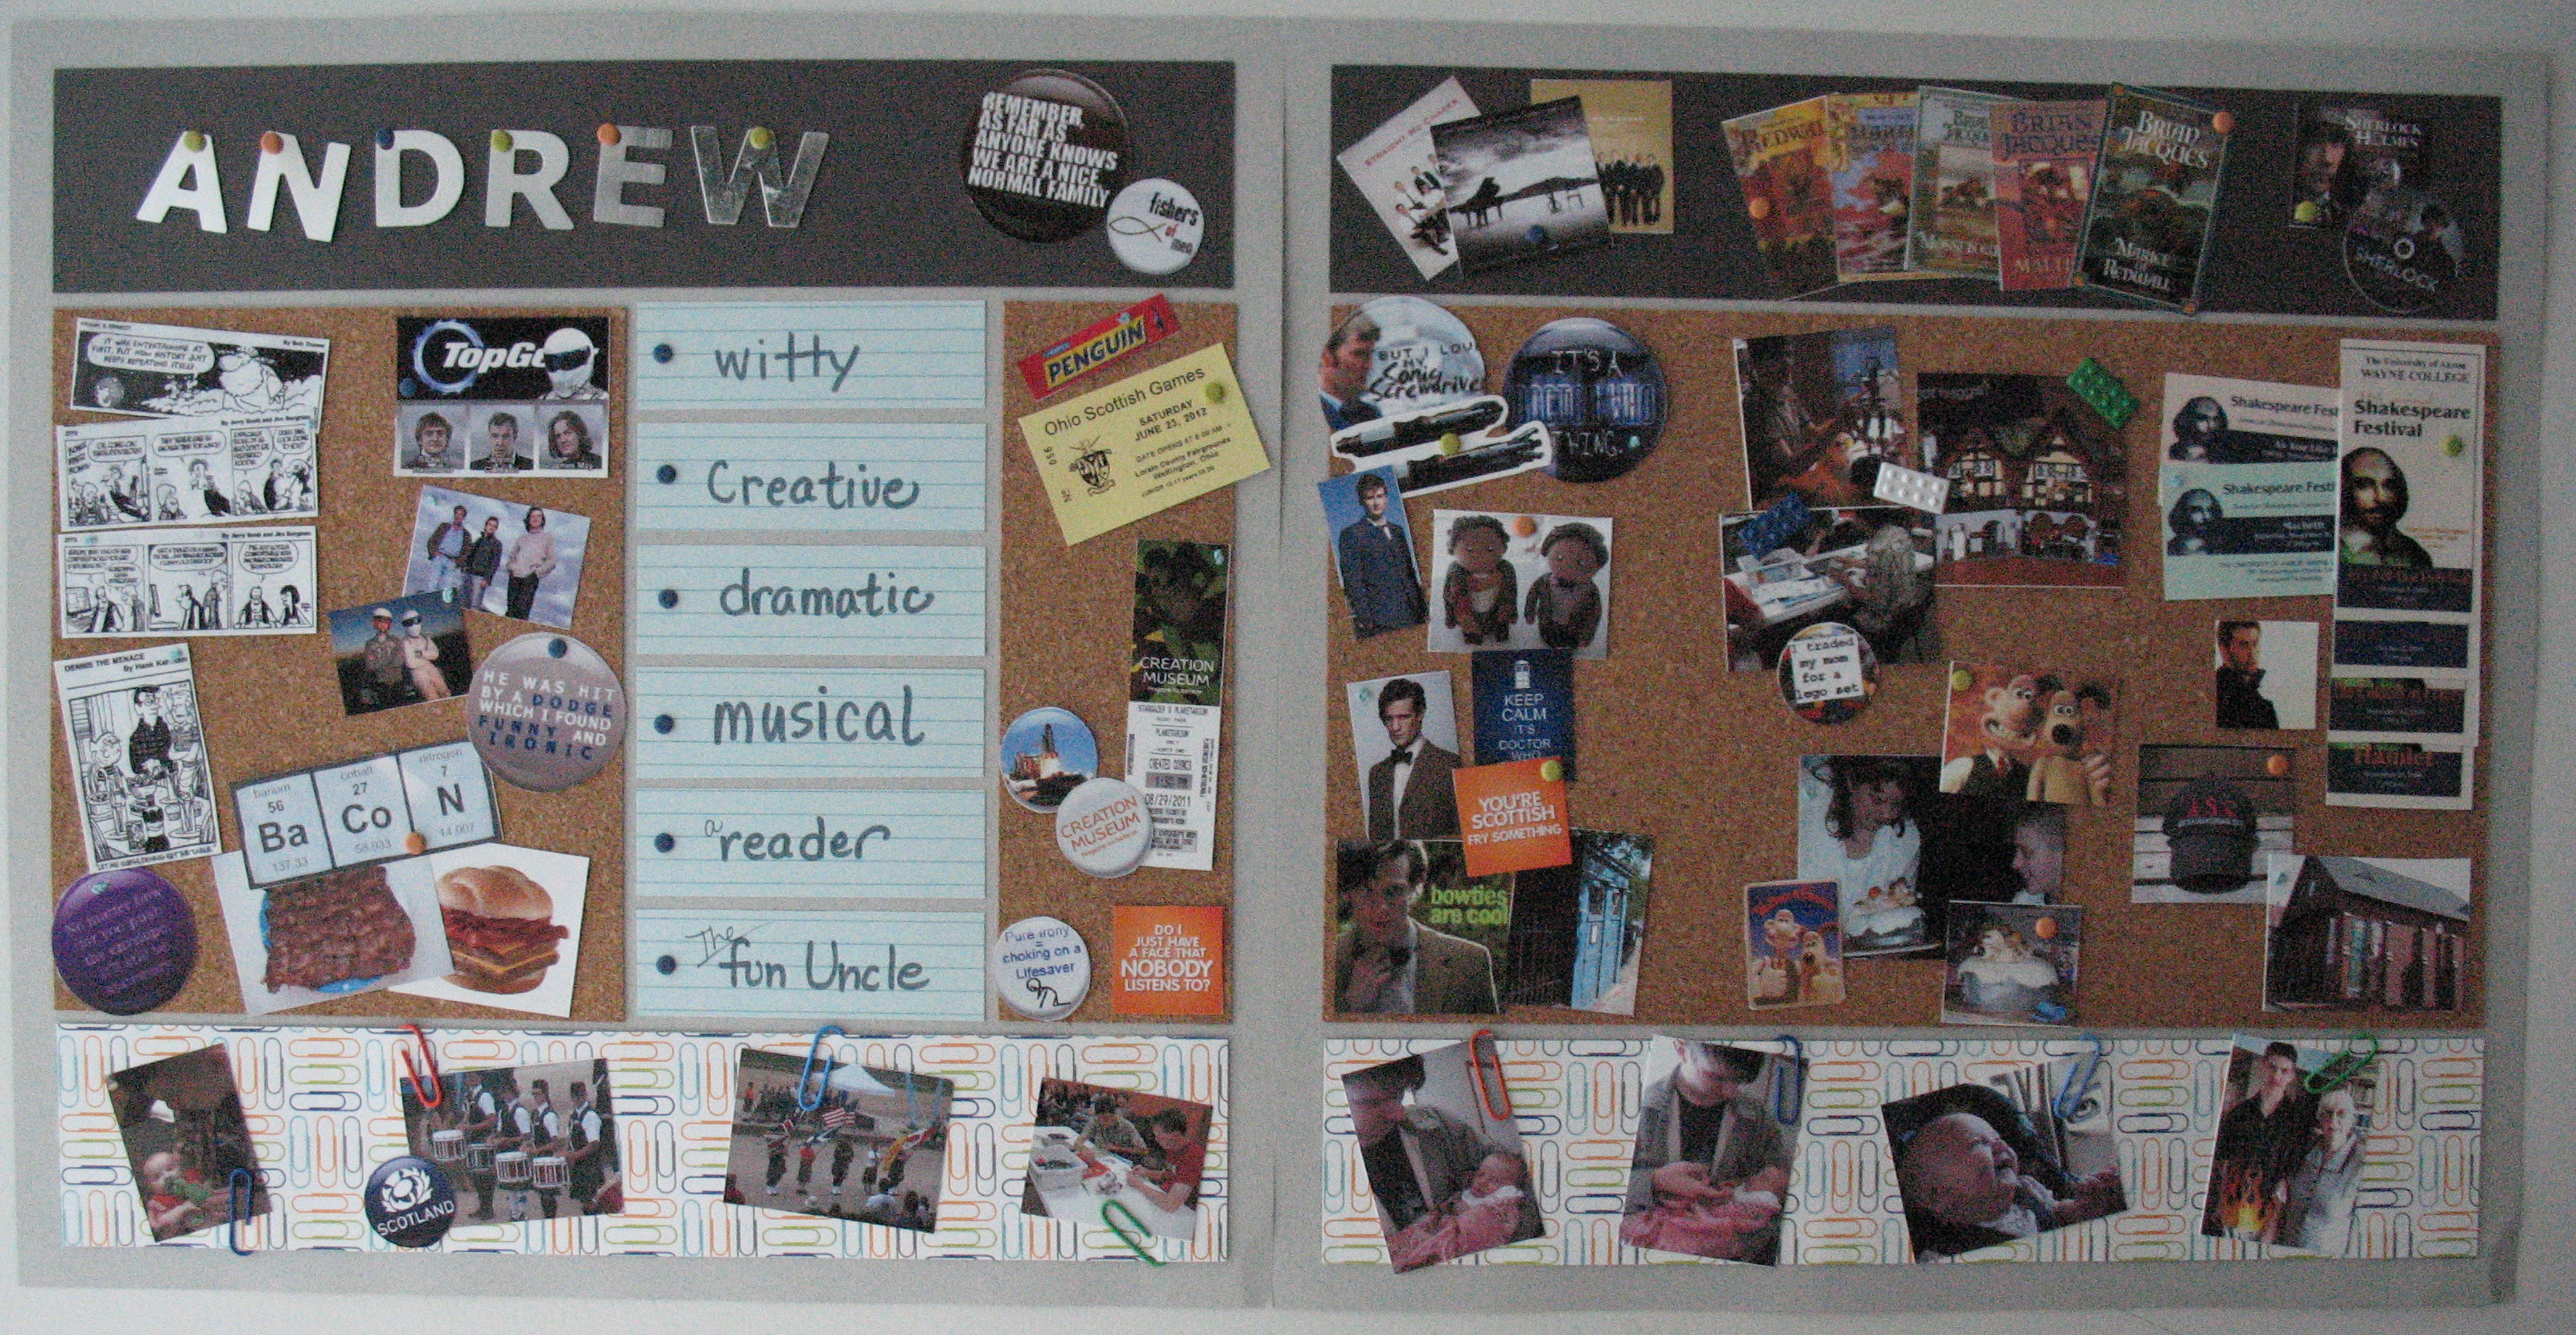
Tip Five: Make it about YOUR child. All the things that make Andrew, Andrew in the final school year. Trend: Cork using Mosaic Moments page pattern 23.
More details on the page HERE and page pattern 23.
and TECHNIQUES
Trend One: Chalkboards
Trends & Techniques: Chalkboards and Scrabble Tiles
Trends: Chalkboards and paper tiles from scanned book and music.
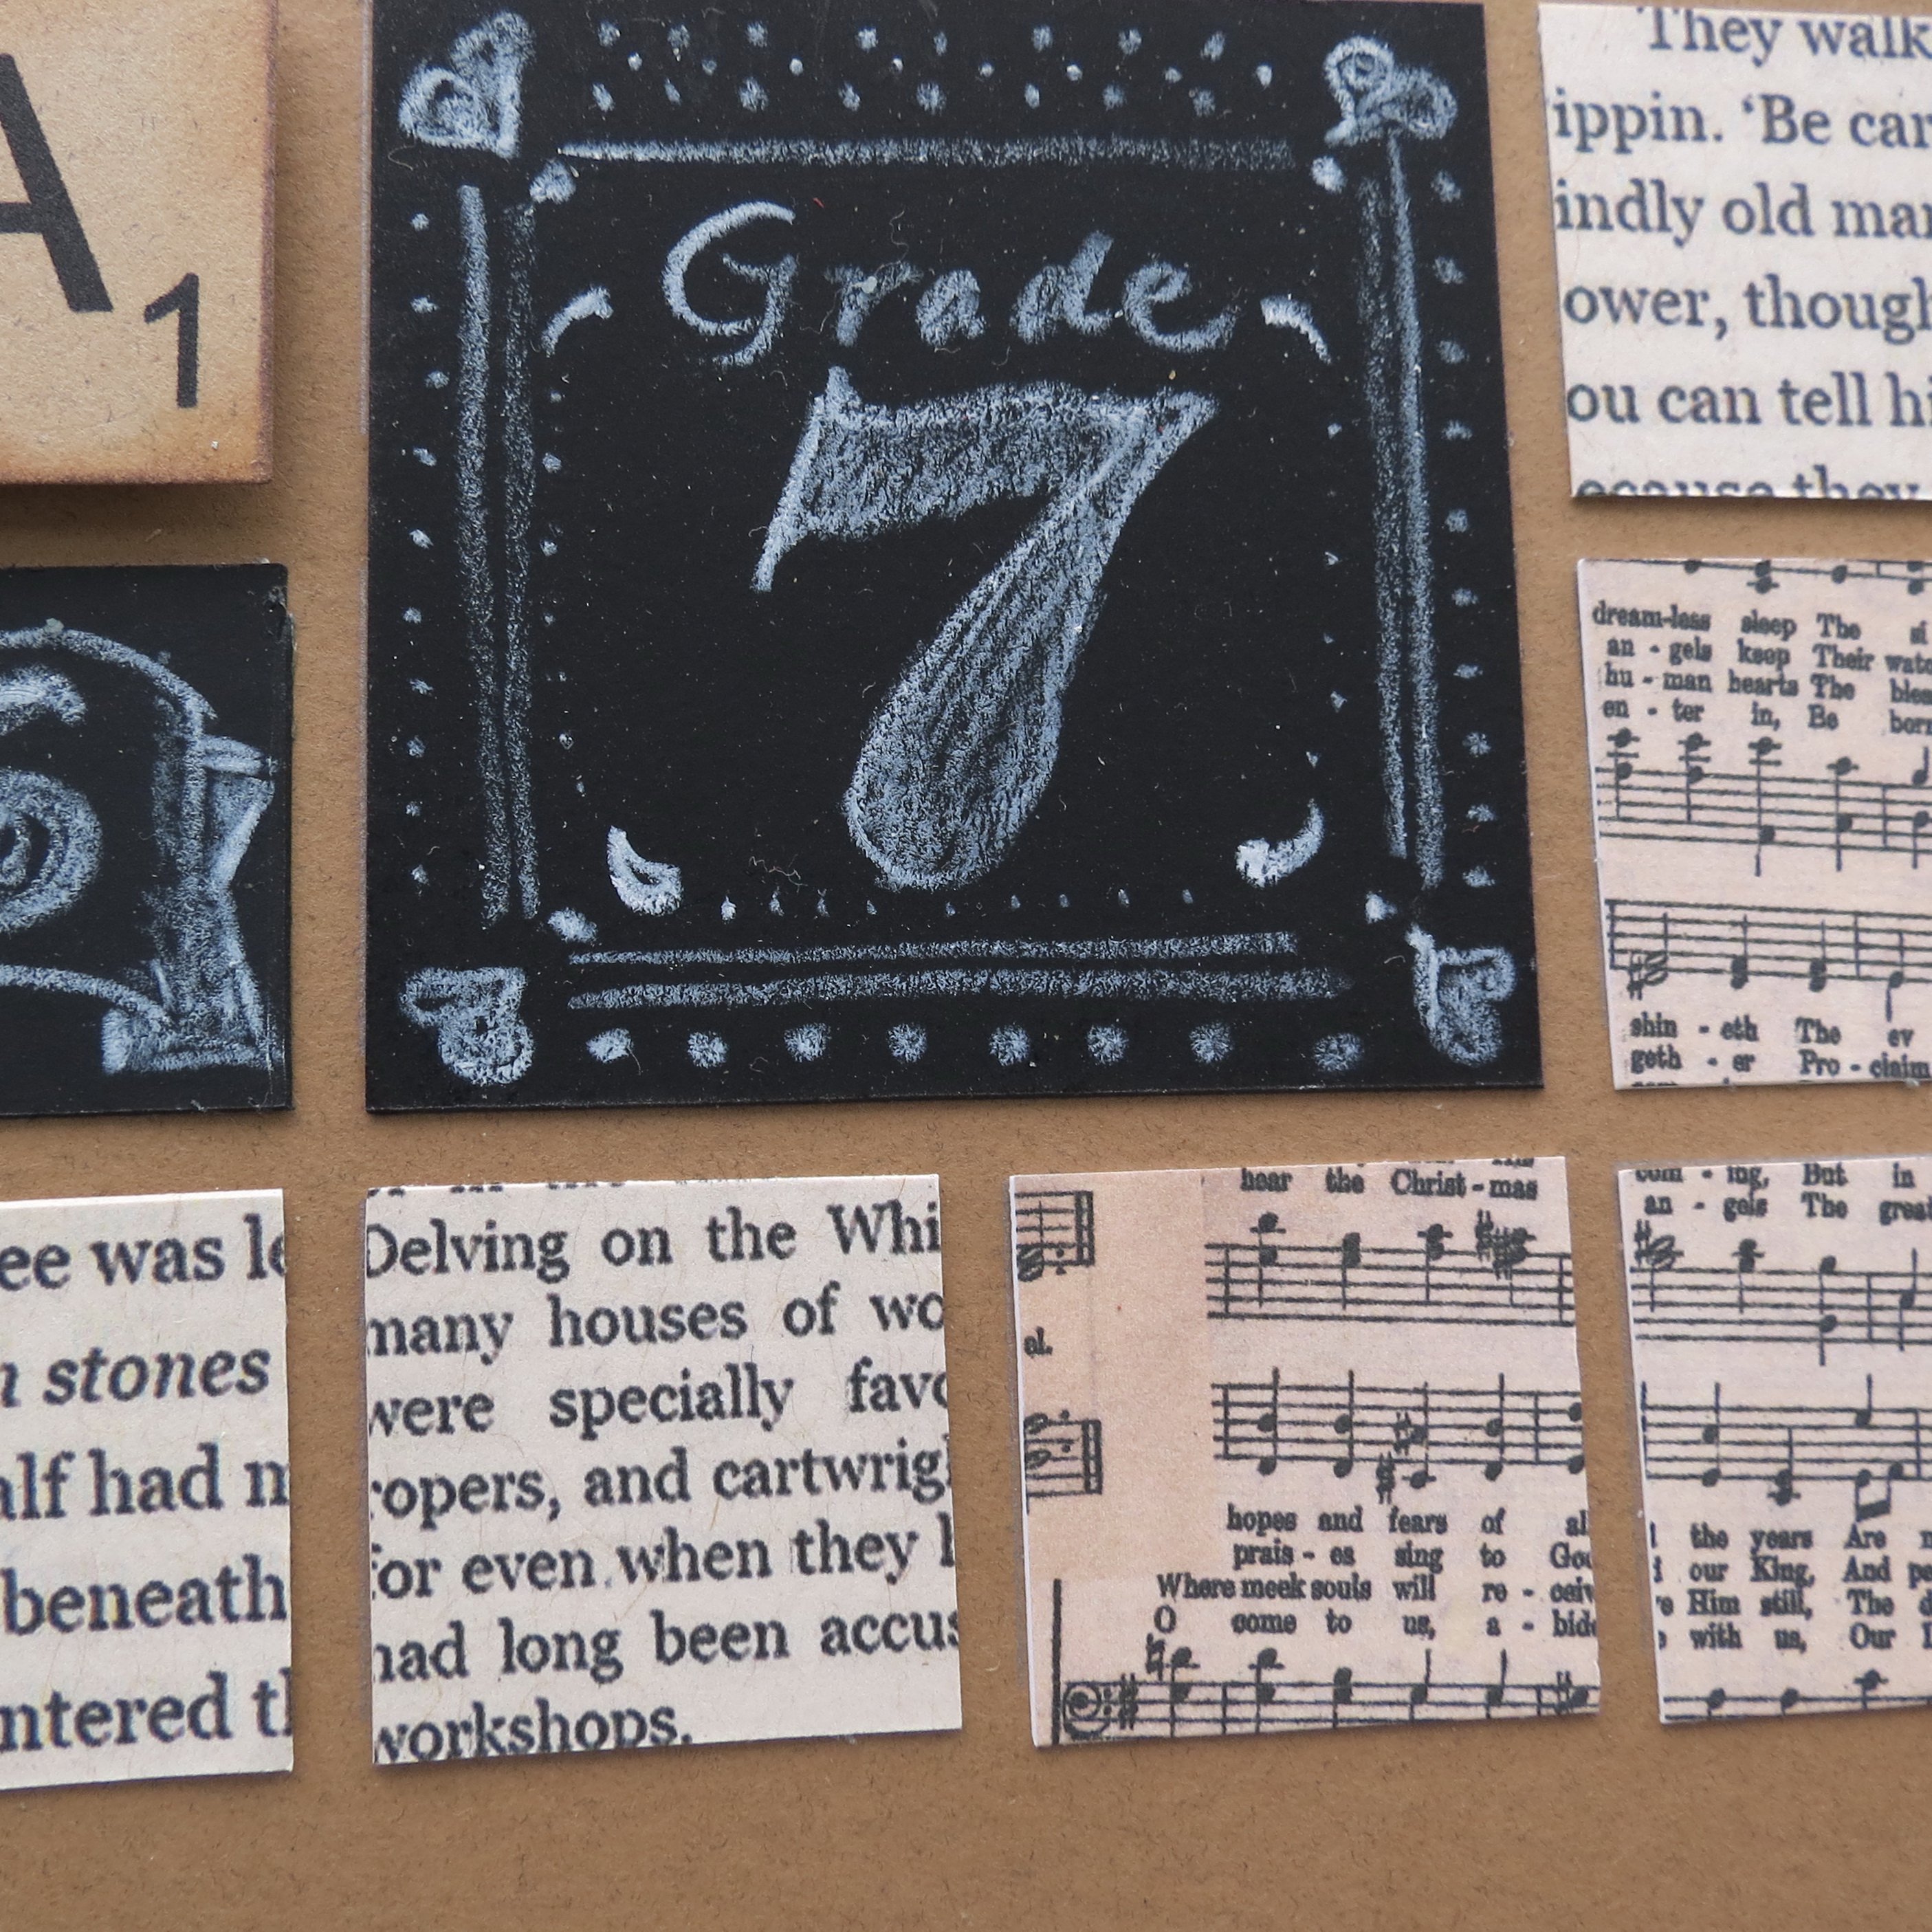
Okay, that one was a no brainer. So, why not use it while it’s still hot on the most obvious theme page? I’ve used Canvas Corp. Chalkstock Tiles (available in both 8”x 8” and artist Trading Cards) several ways on this layout. One, as a spot to list of couple of her favorites, two, a spot for the date, and three, as series of 1” tiles and a 2 1/8” square to be a number line for marking the grade.
Trend Two: Cork
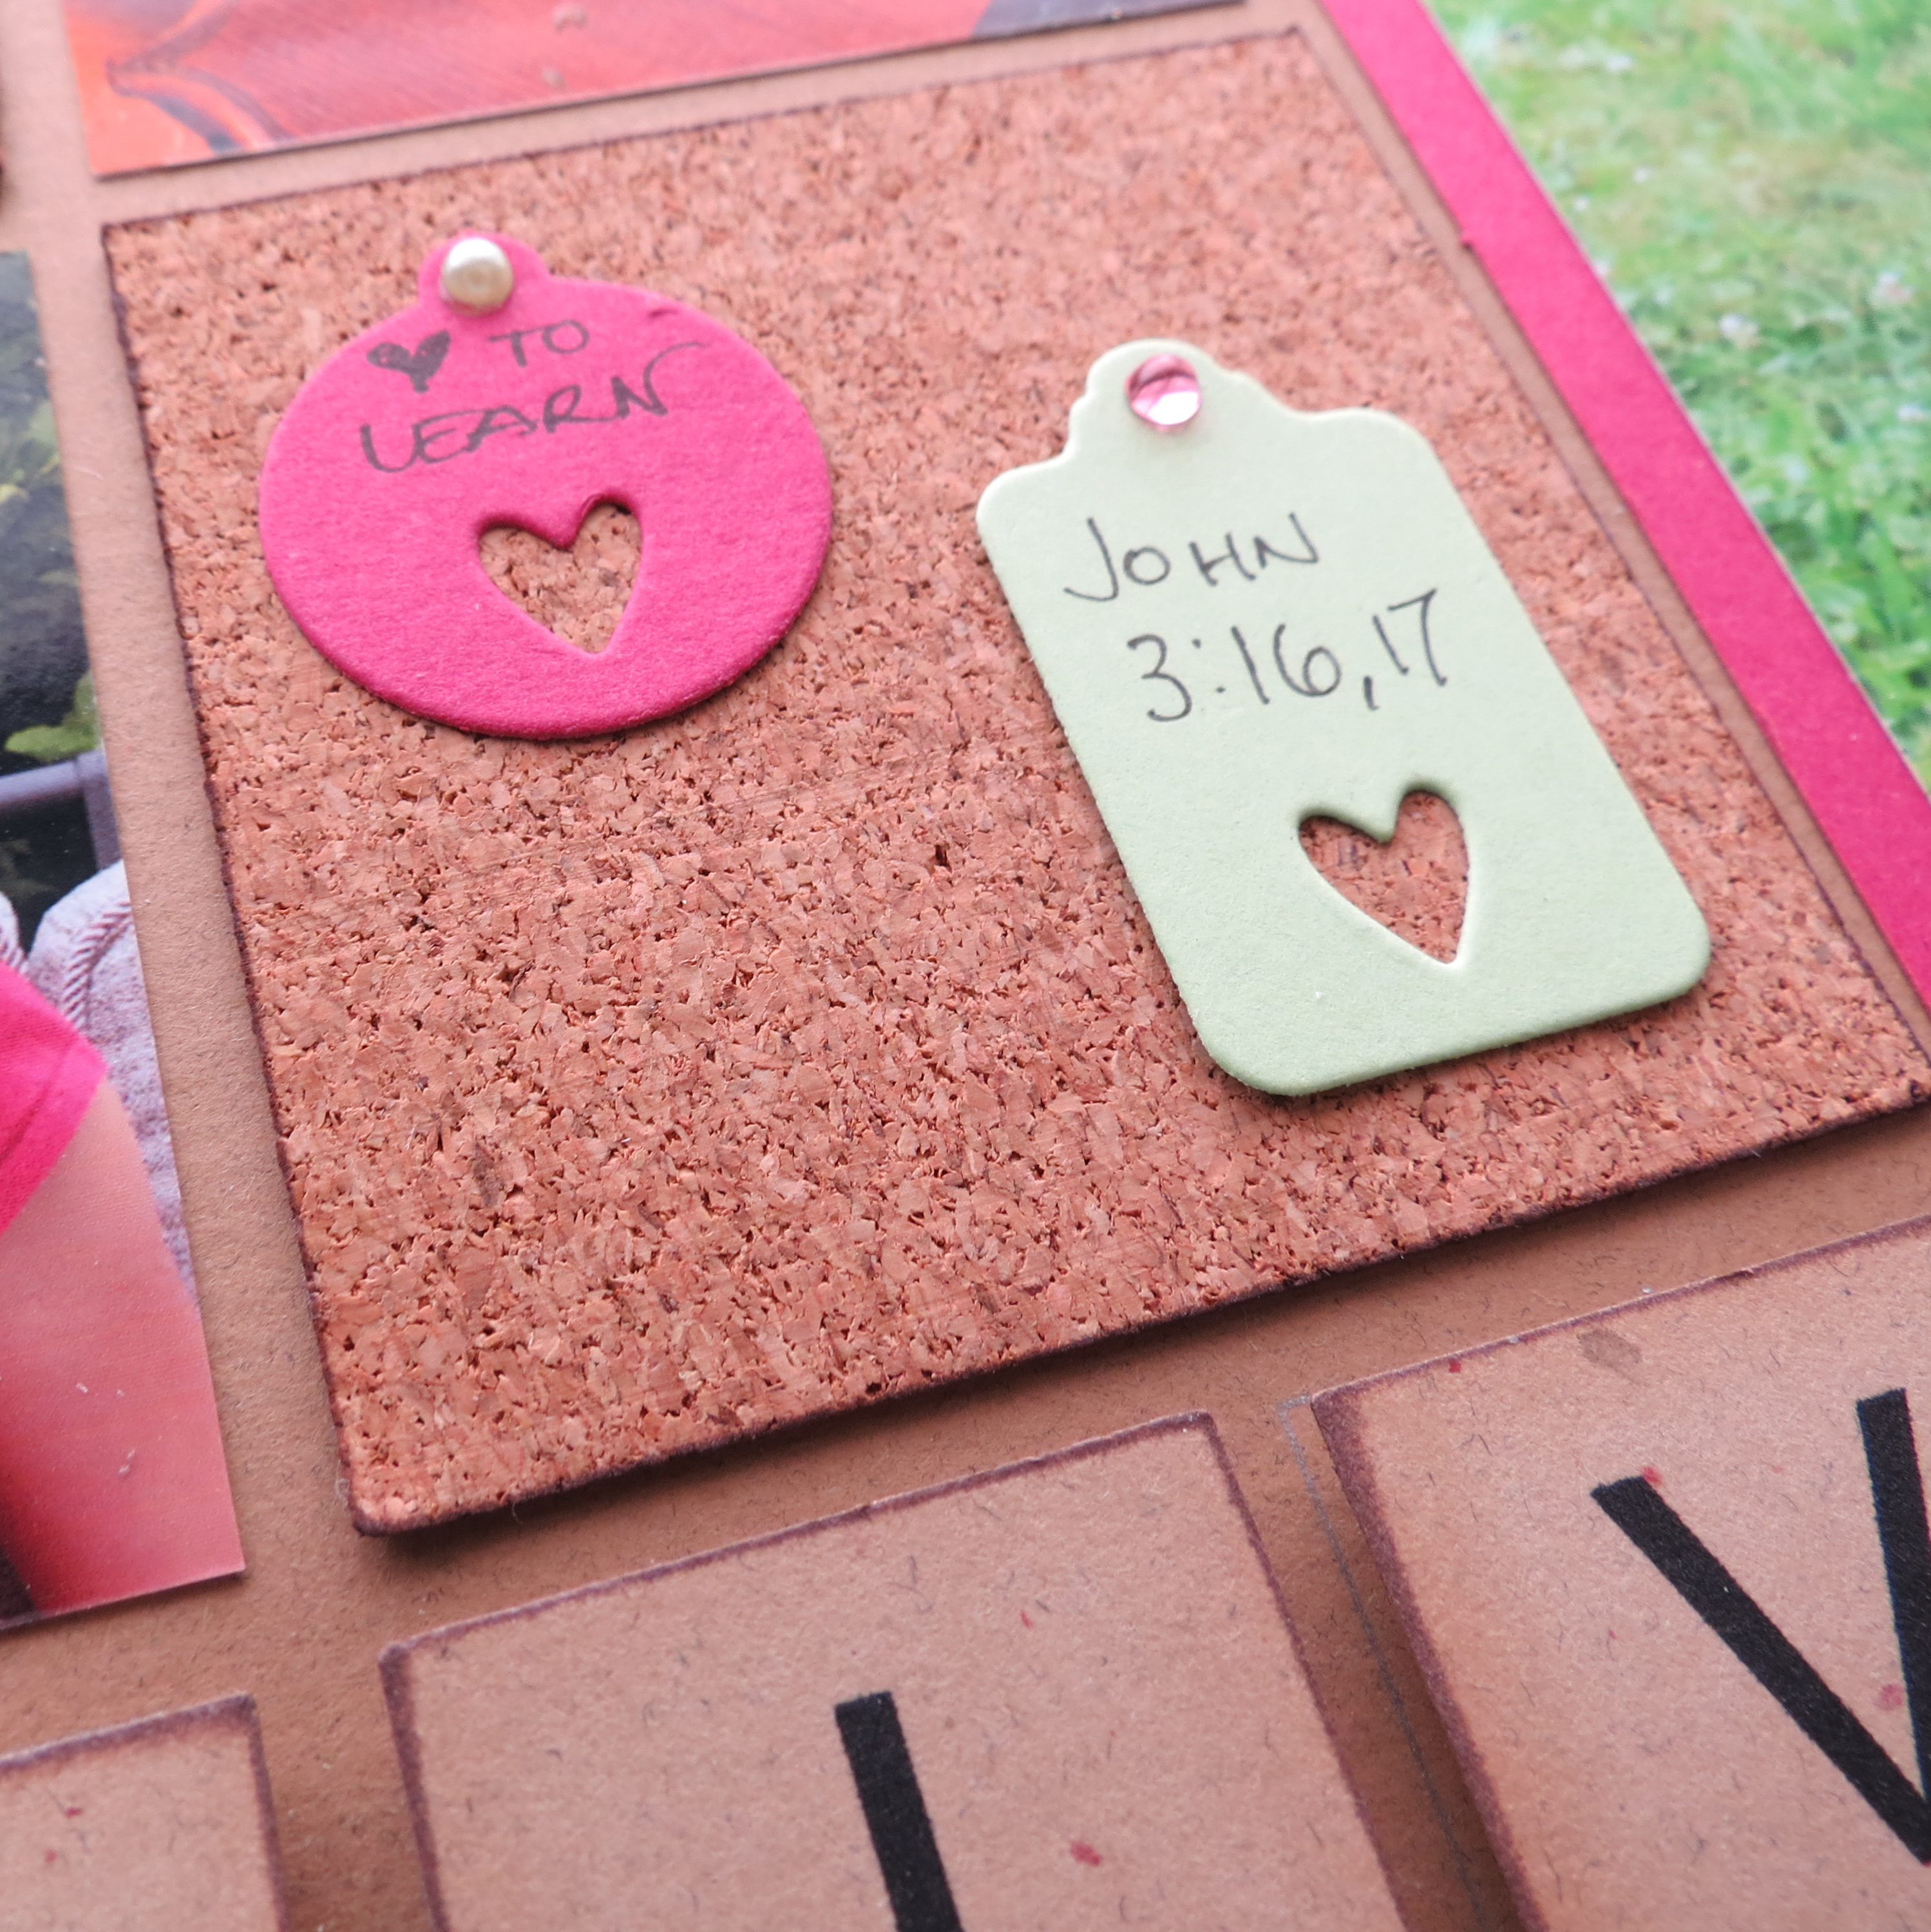
Trends: Cork
Trends: Cork and chalkboards
Adhesive Cork sheets from DCWV are thin and easy to cut to size. They work great for tacking items of interest that are smaller than our 1” tiles for a nice look. The adhesive backs are a guarantee they will stick to the page. I’ve used tags to add a few of her likes and interests and left some room for her to add more. The tags have gems and pearls to act as push pins holding things on the board. Plus, it adds a little fun color and bling! The cut edges of the cork are also chalked to add definition and separation from the grid below.
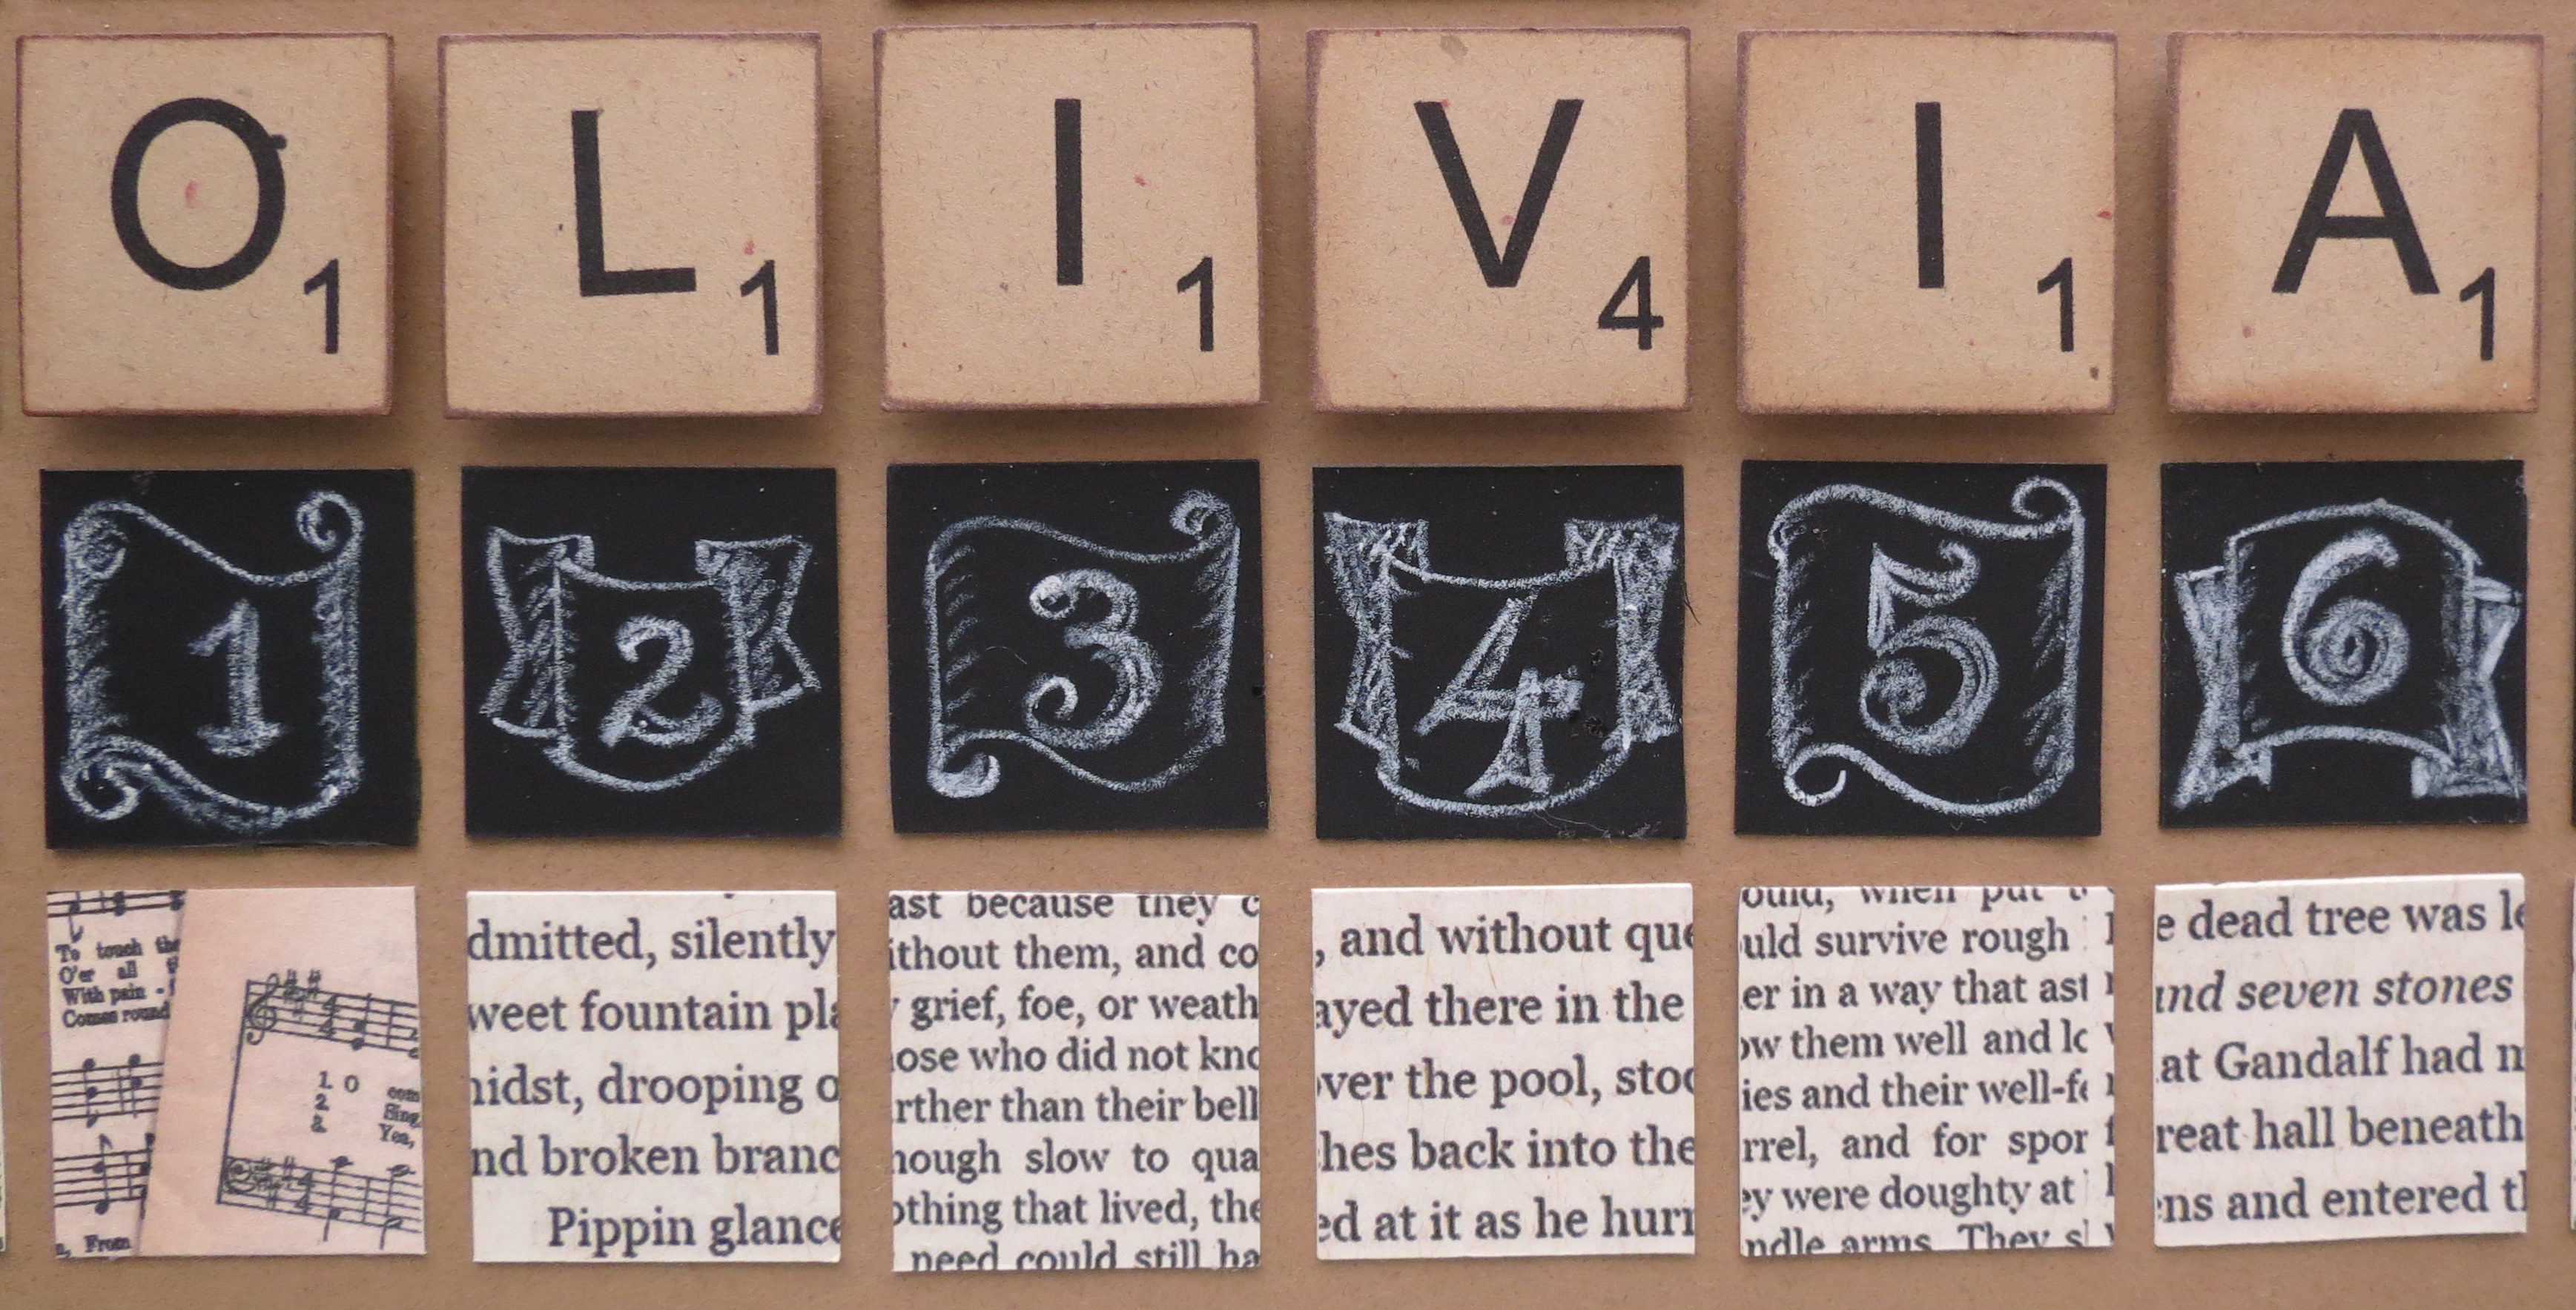
Trend Three: Scrabble Letter Tiles
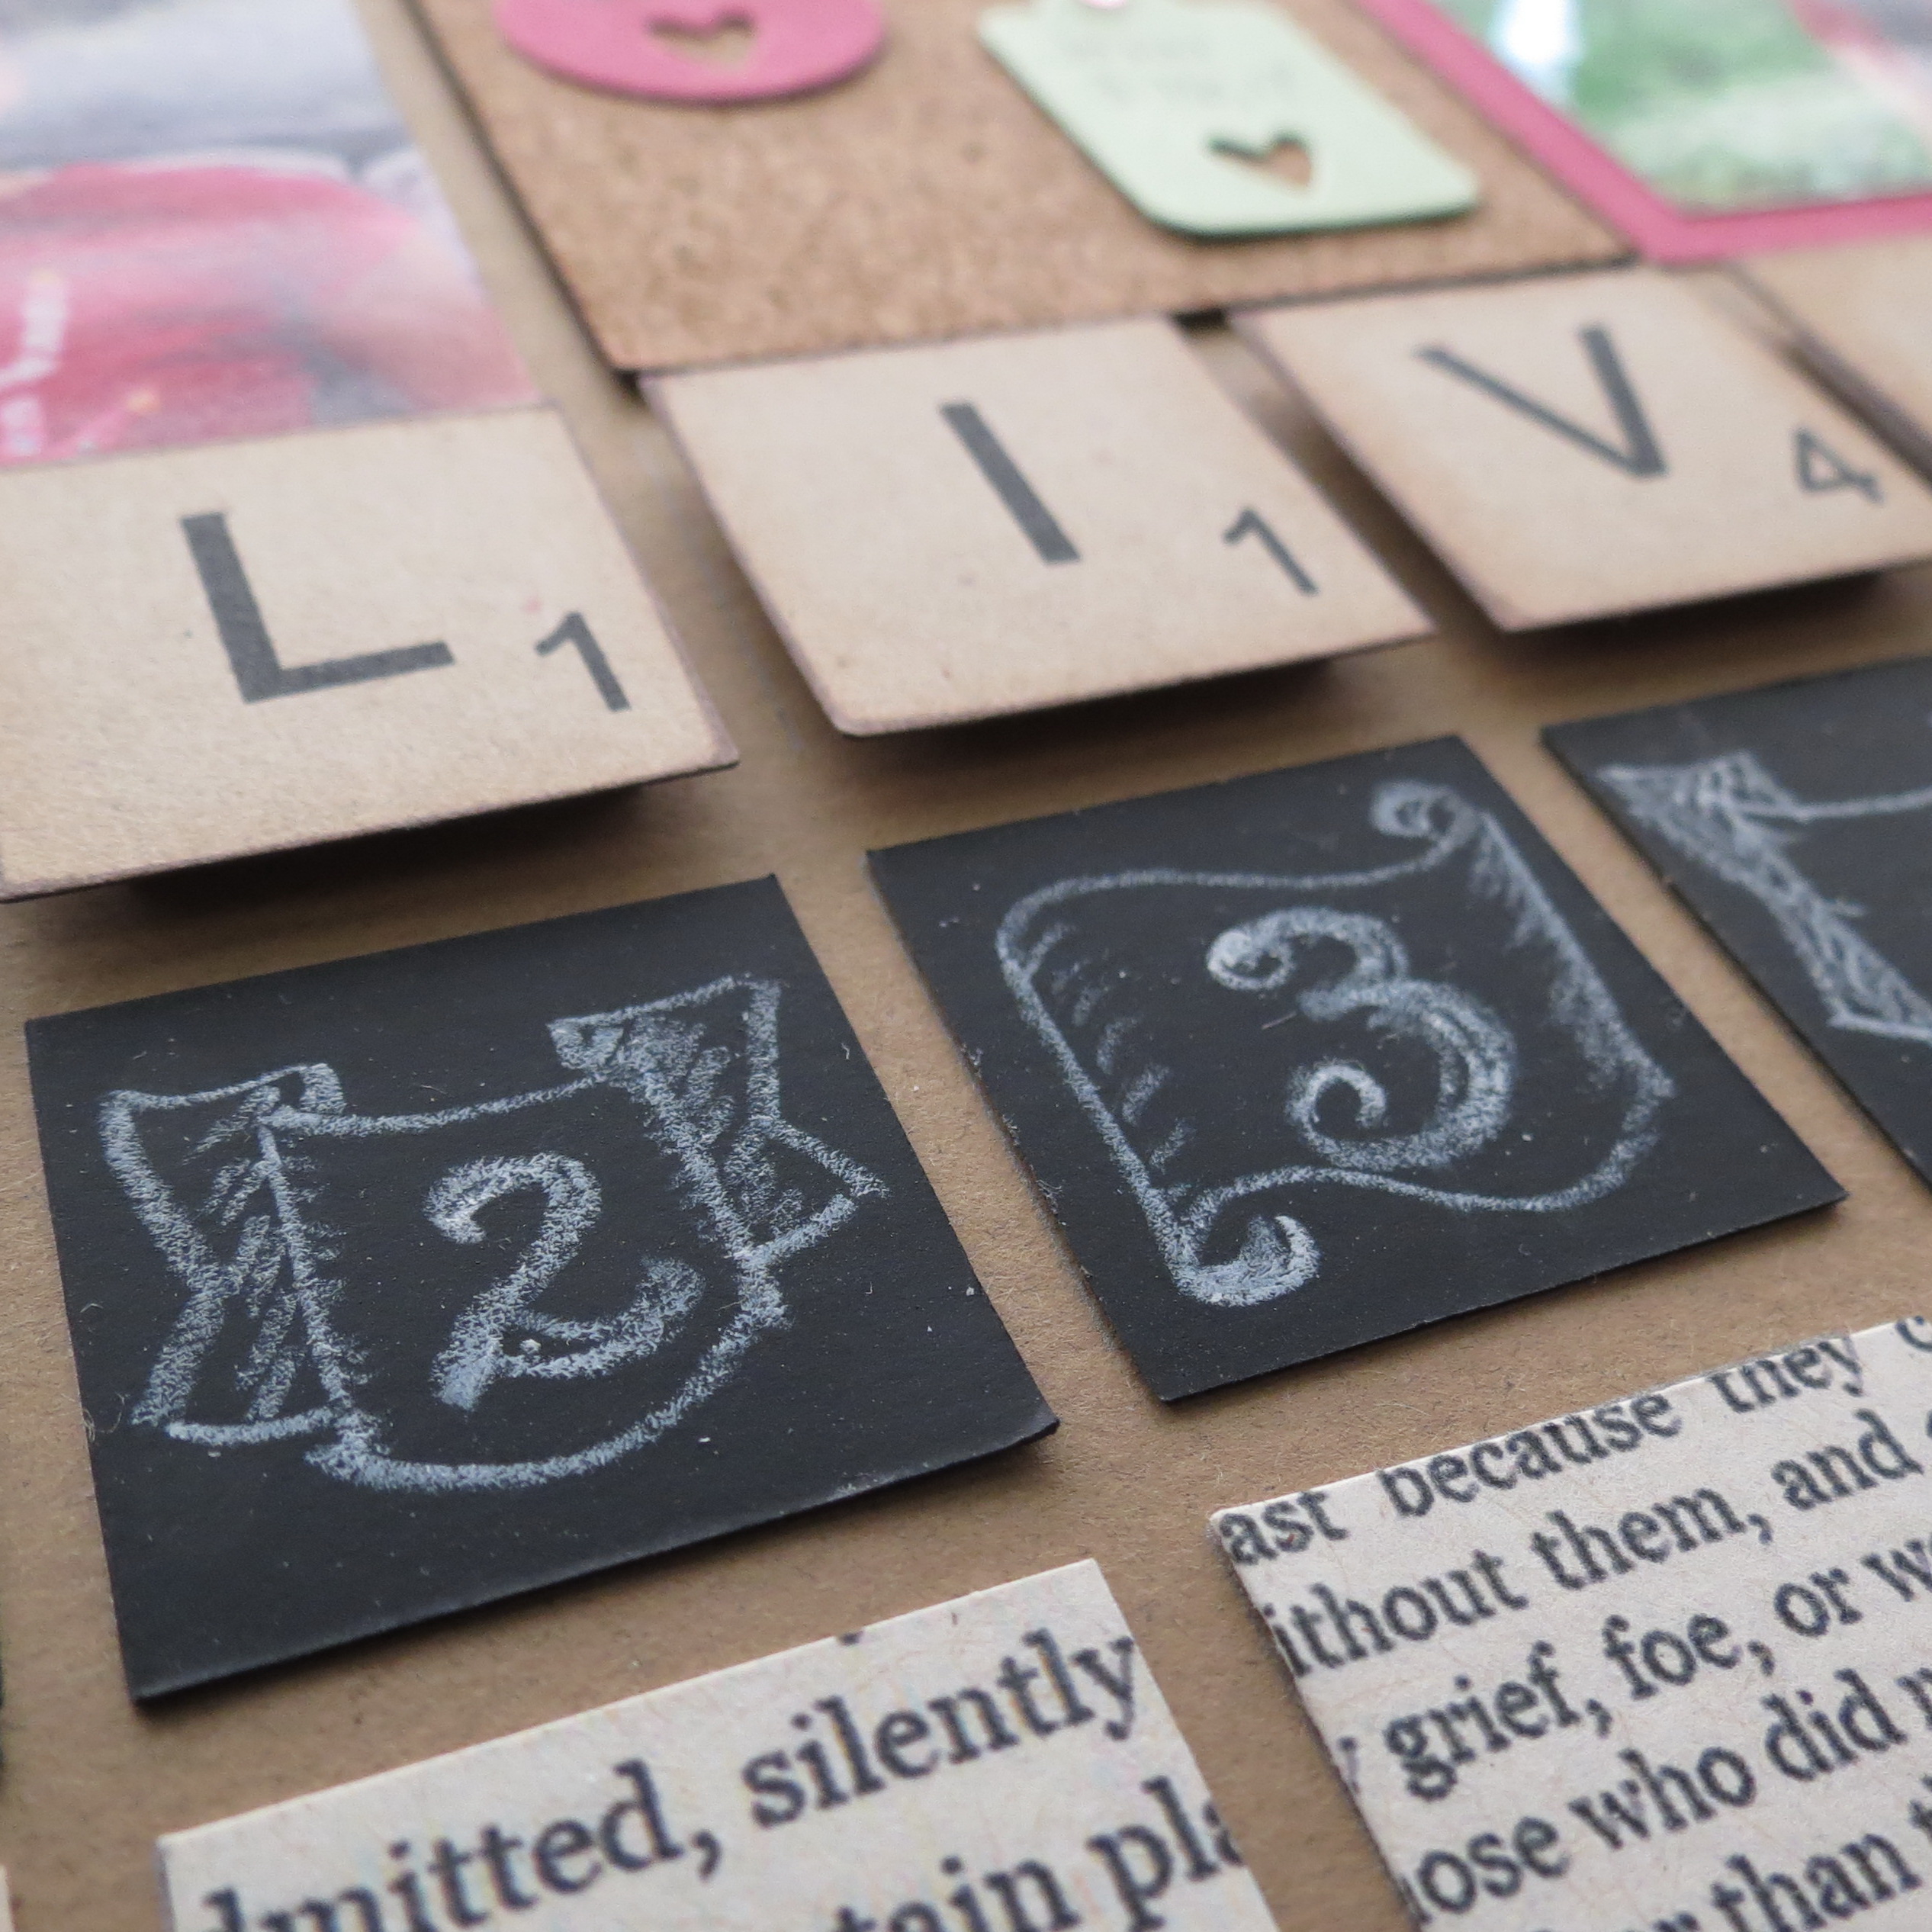
Trends: Chalkboards and Scrabble Tiles
This is one of those trends that are so perfect for our 1” tile spots. I created the tiles that I needed that resemble the Scrabble tiles using the font Arial and a grid I made in Print Shop 20…something that most people have preloaded on their computers. If I knew how to operate the other design programs I have I would have used them, one day, I’ll learn, maybe.
The tiles were used to spell out her name, the edges were chalked and smudged to give some definition. Foam mounting tape gave the tiles some dimension like a real Scrabble tile would.
Scrapbook Ideas for Back to School
Finally, enjoy. Your kids grow so quickly. Cherish the moments and preserve the memories.
Thanks for stopping in,
Andrea Fisher