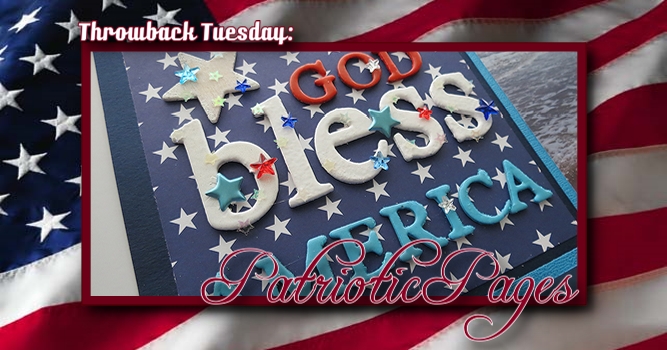
Throwback Tuesday: America the Beautiful becomes Patriotic Pages
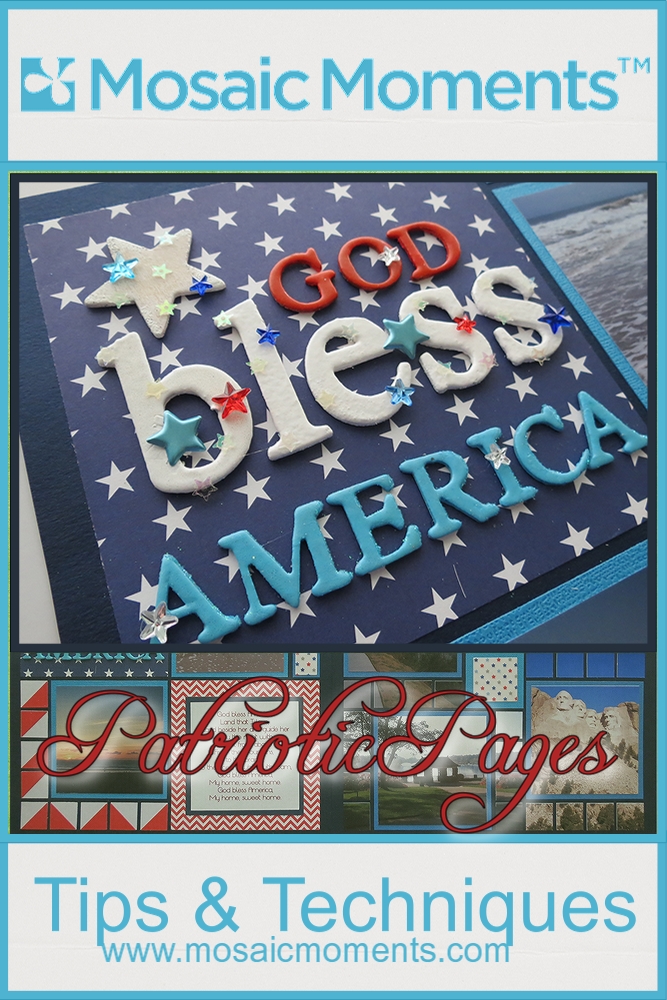
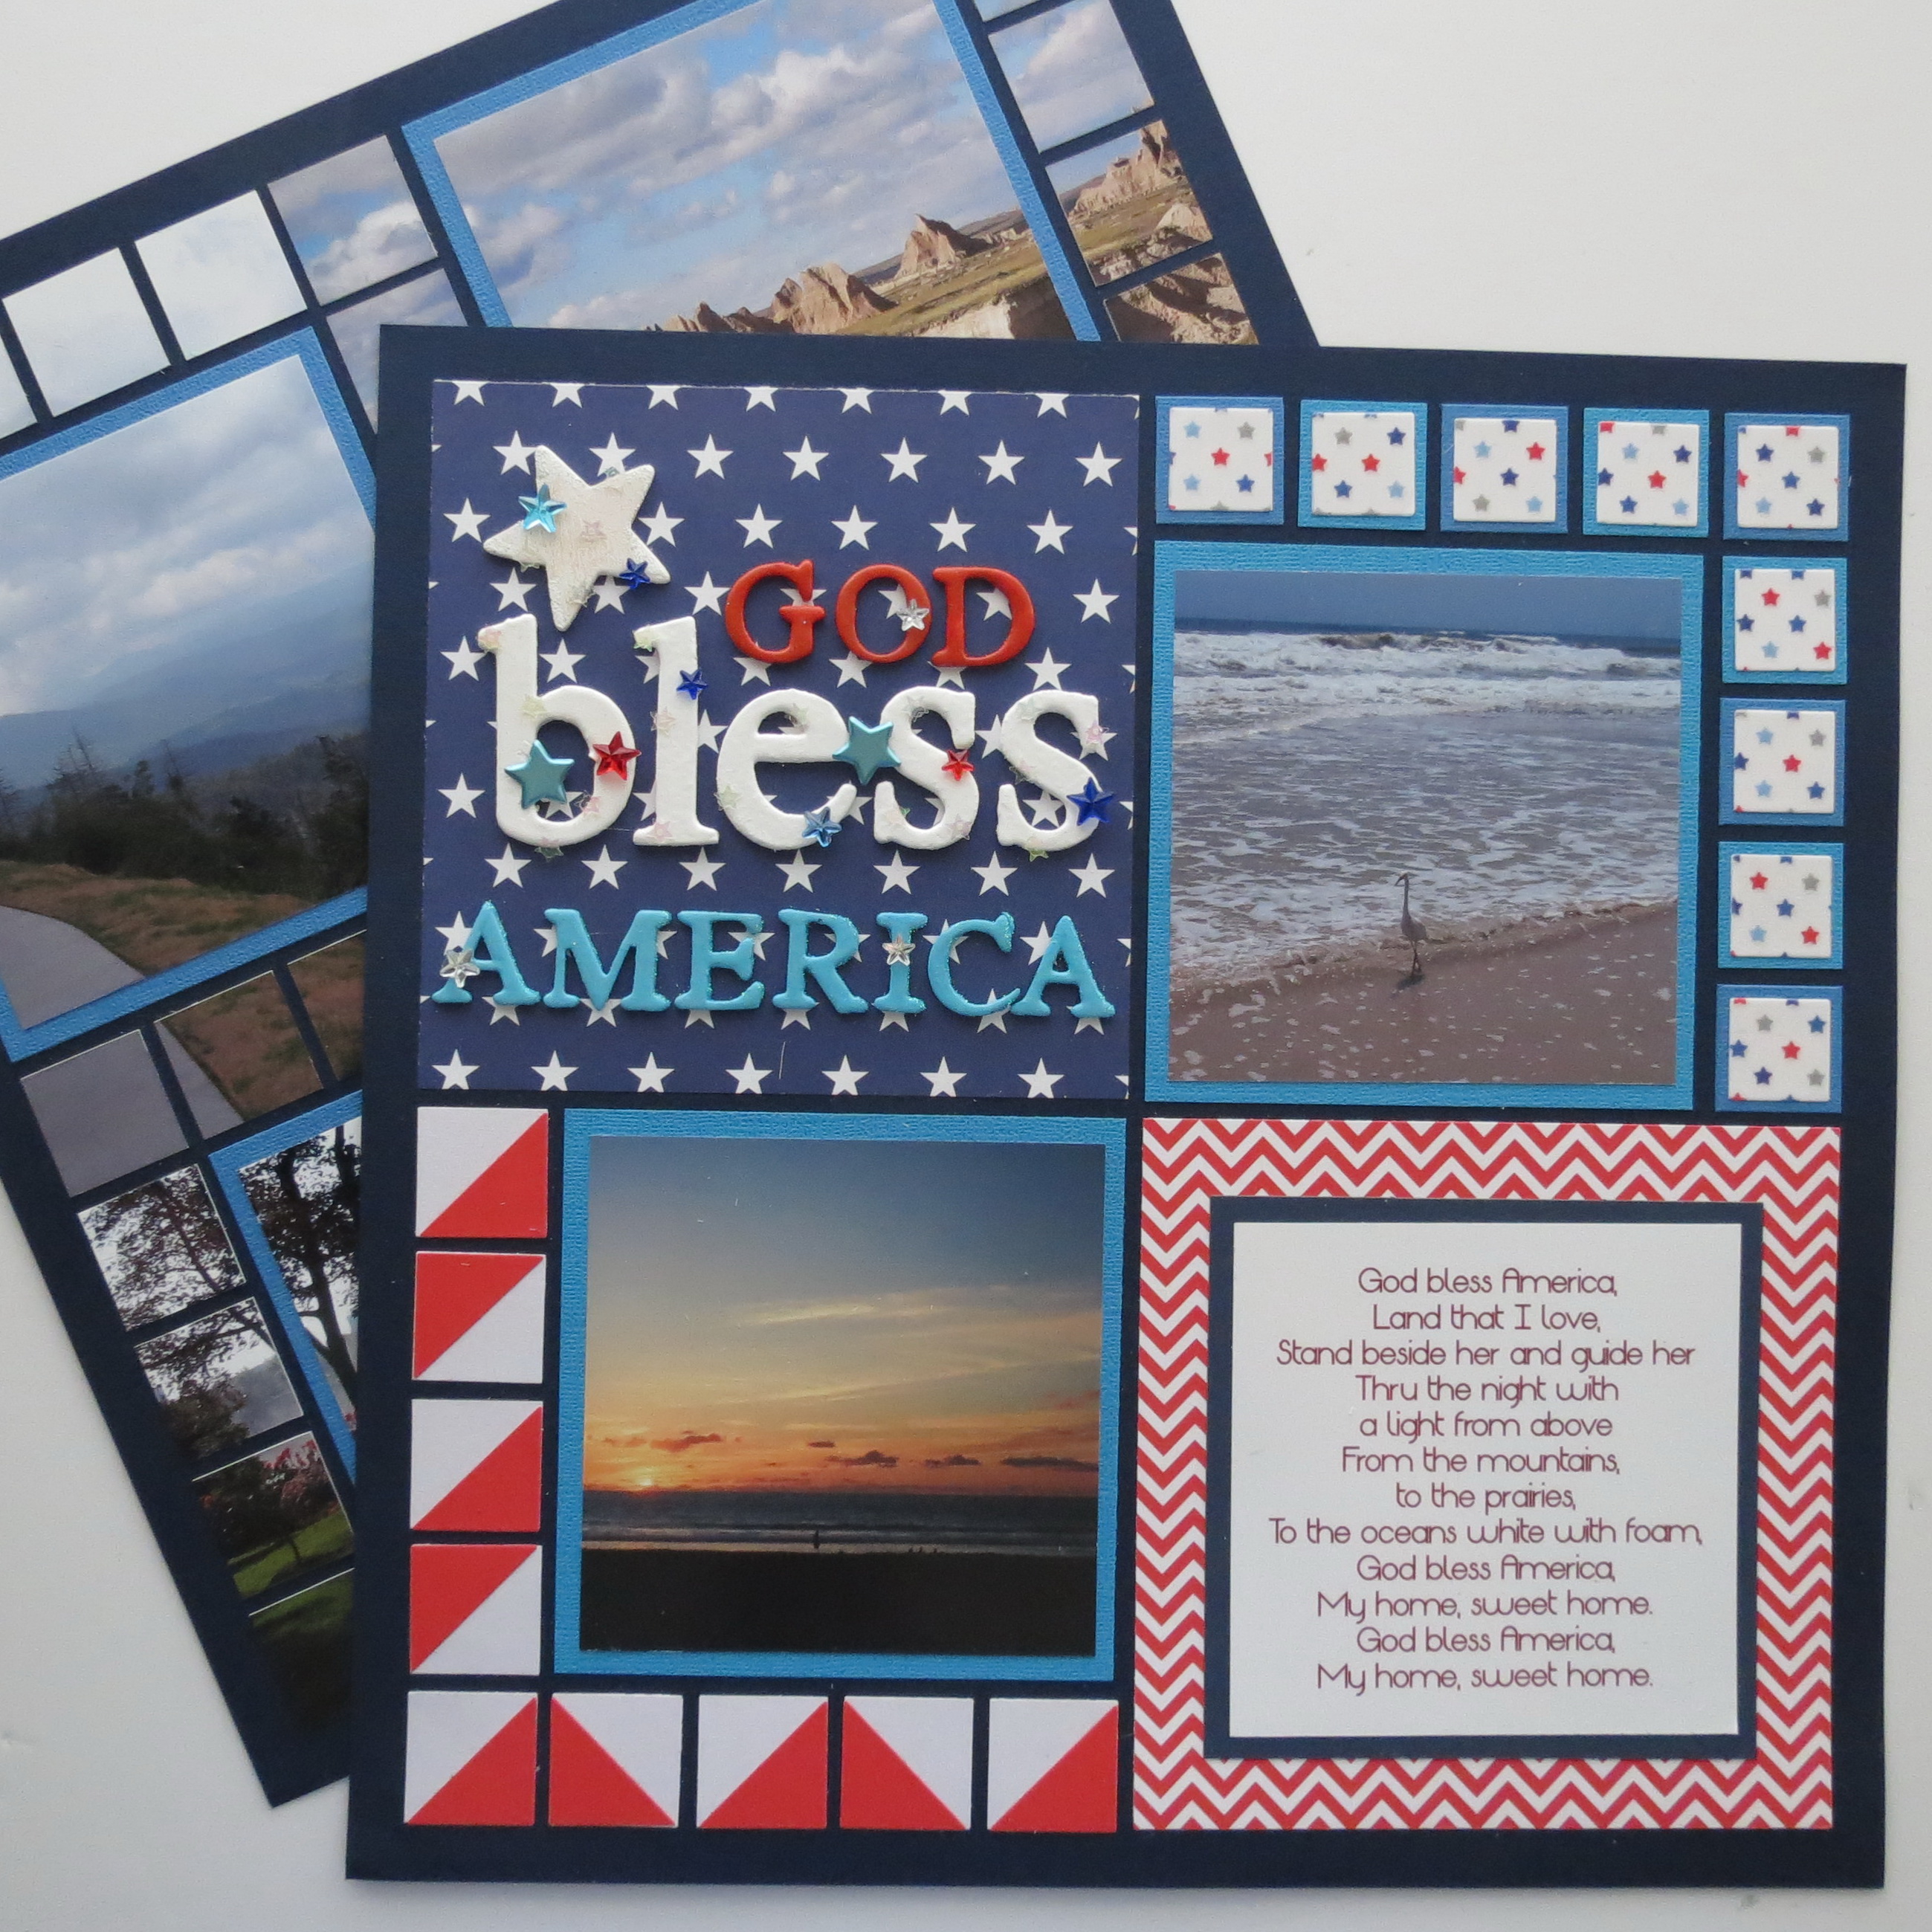
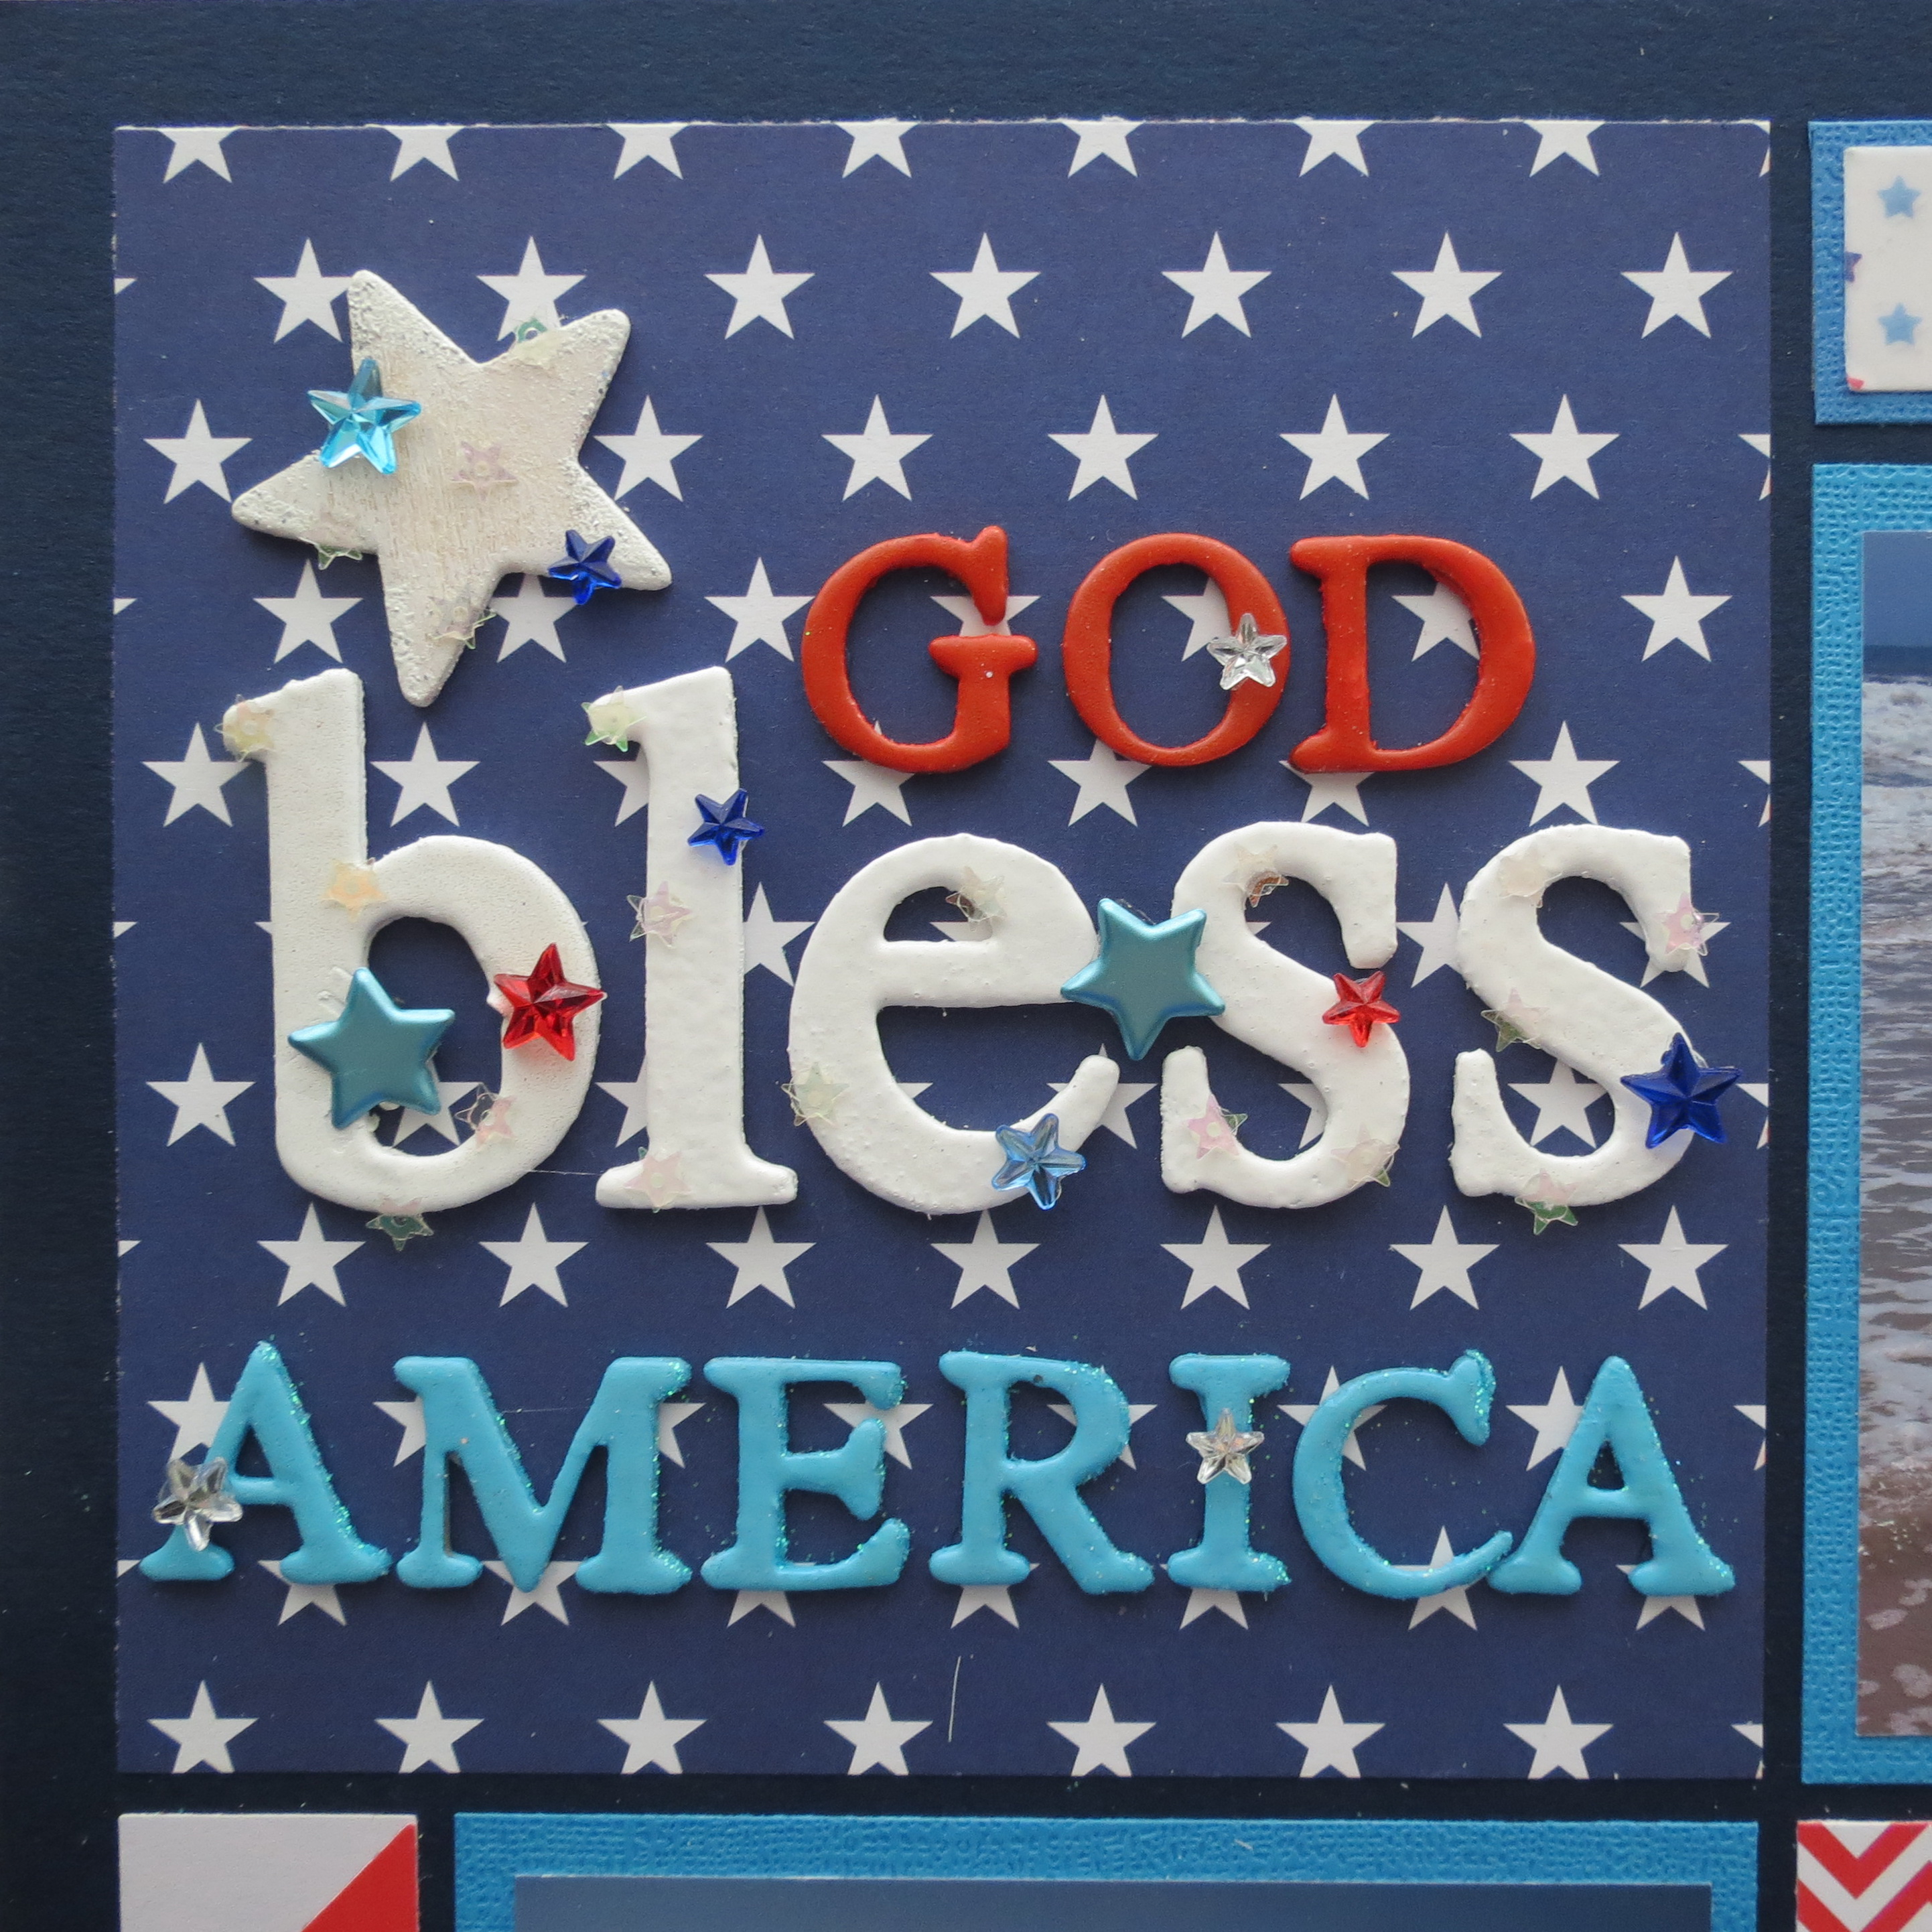
Title: God Bless America
This is Throwback Tuesday and the theme of the Design Teams Challenge was America the Beautiful. We return today with Patriotic Pages as the theme with a specific focus on a title. We hope it will inspire you for scrapping all your Independence Day Activities, travels across the country, or even a way to honor the service men and women in your life.
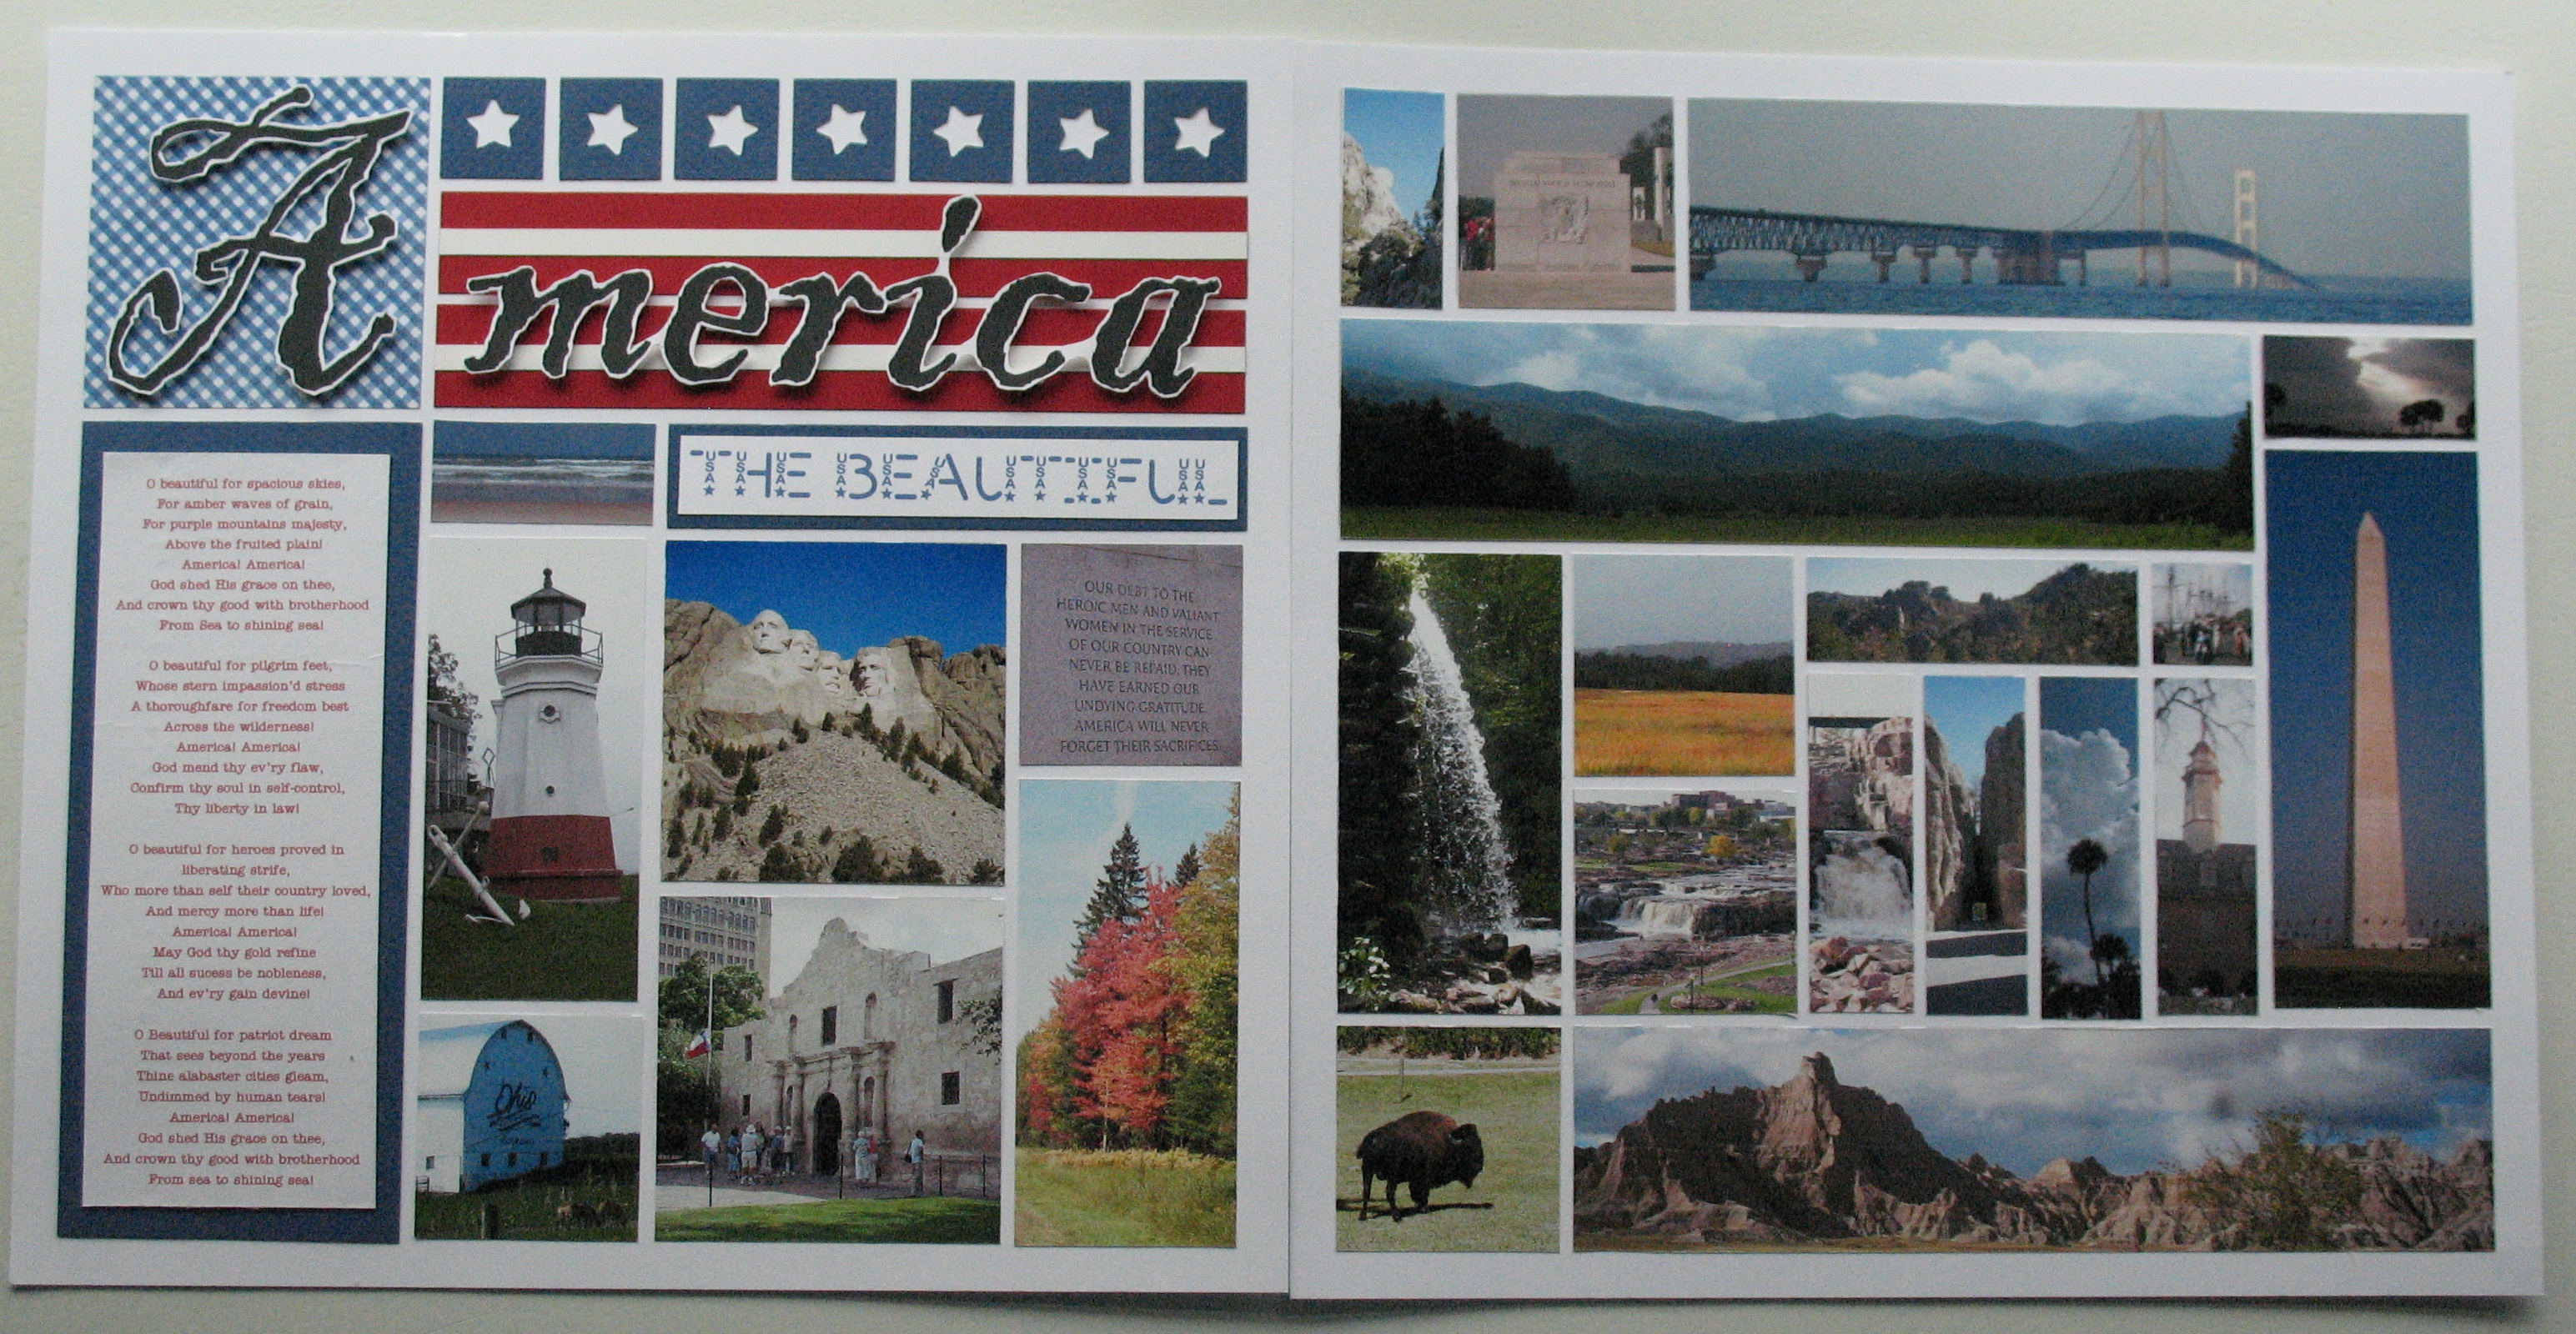
The original layout for the America the Beautiful challenge can be found on Journella with all the details on how I created the title for that layout HERE.
Patriotic Pages Design Team Challenge
The challenge was to use a patriotic song as inspiration for a page design and include some of the words on the page.
I thought I’d take on the very same challenge this time and find a new way to show it off. I began with another song, some new photos from my various trips across the USA, included the lyrics to the song, added a few new embellishment ideas, and once again, made my title the key to the theme of the layout.
My inspiration is the song God Bless America and I’ve included the lyrics, but also used the title as my page title too. I also included this month’s featured corner die in the design.
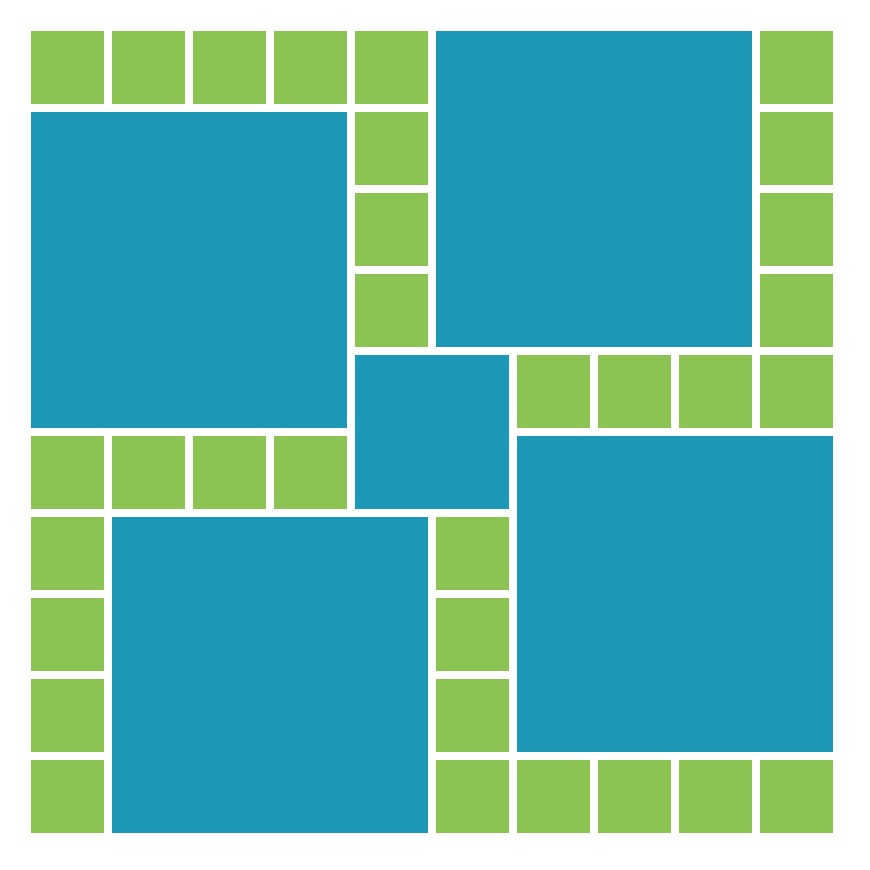
This time from the Pattern Gallery two patterns are used that are similar, yet different, squares play a significant role in both. Patterns #144 mostly squares and #233 pinwheel will showcase six photos, lyrics and a title.
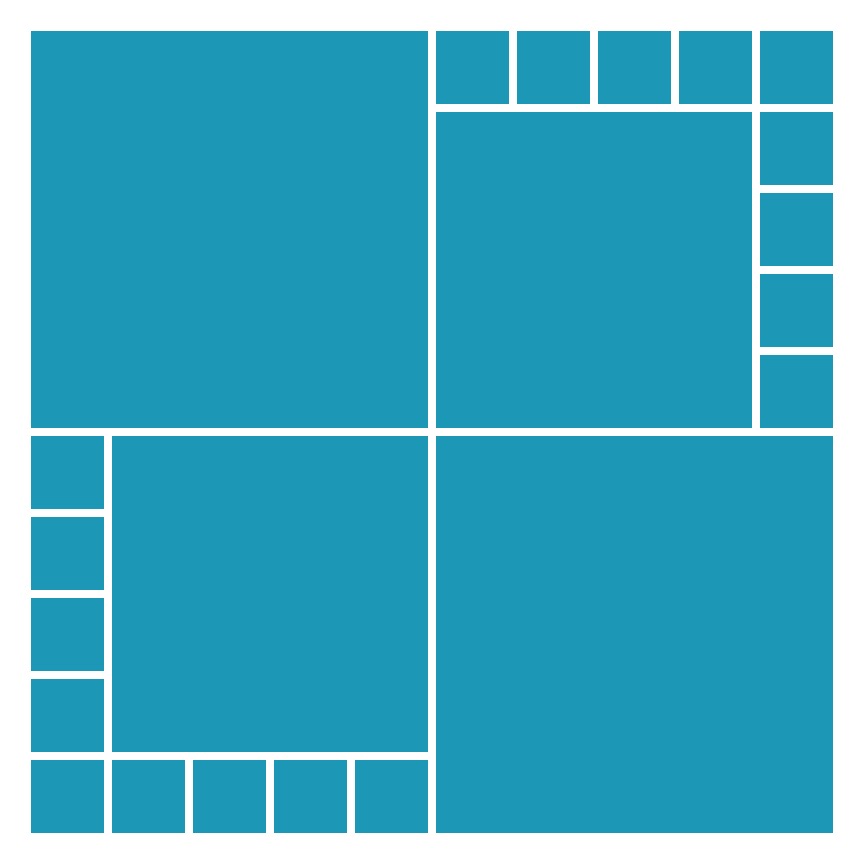
Pattern #144 squares
Pattern #233 Pinwheel
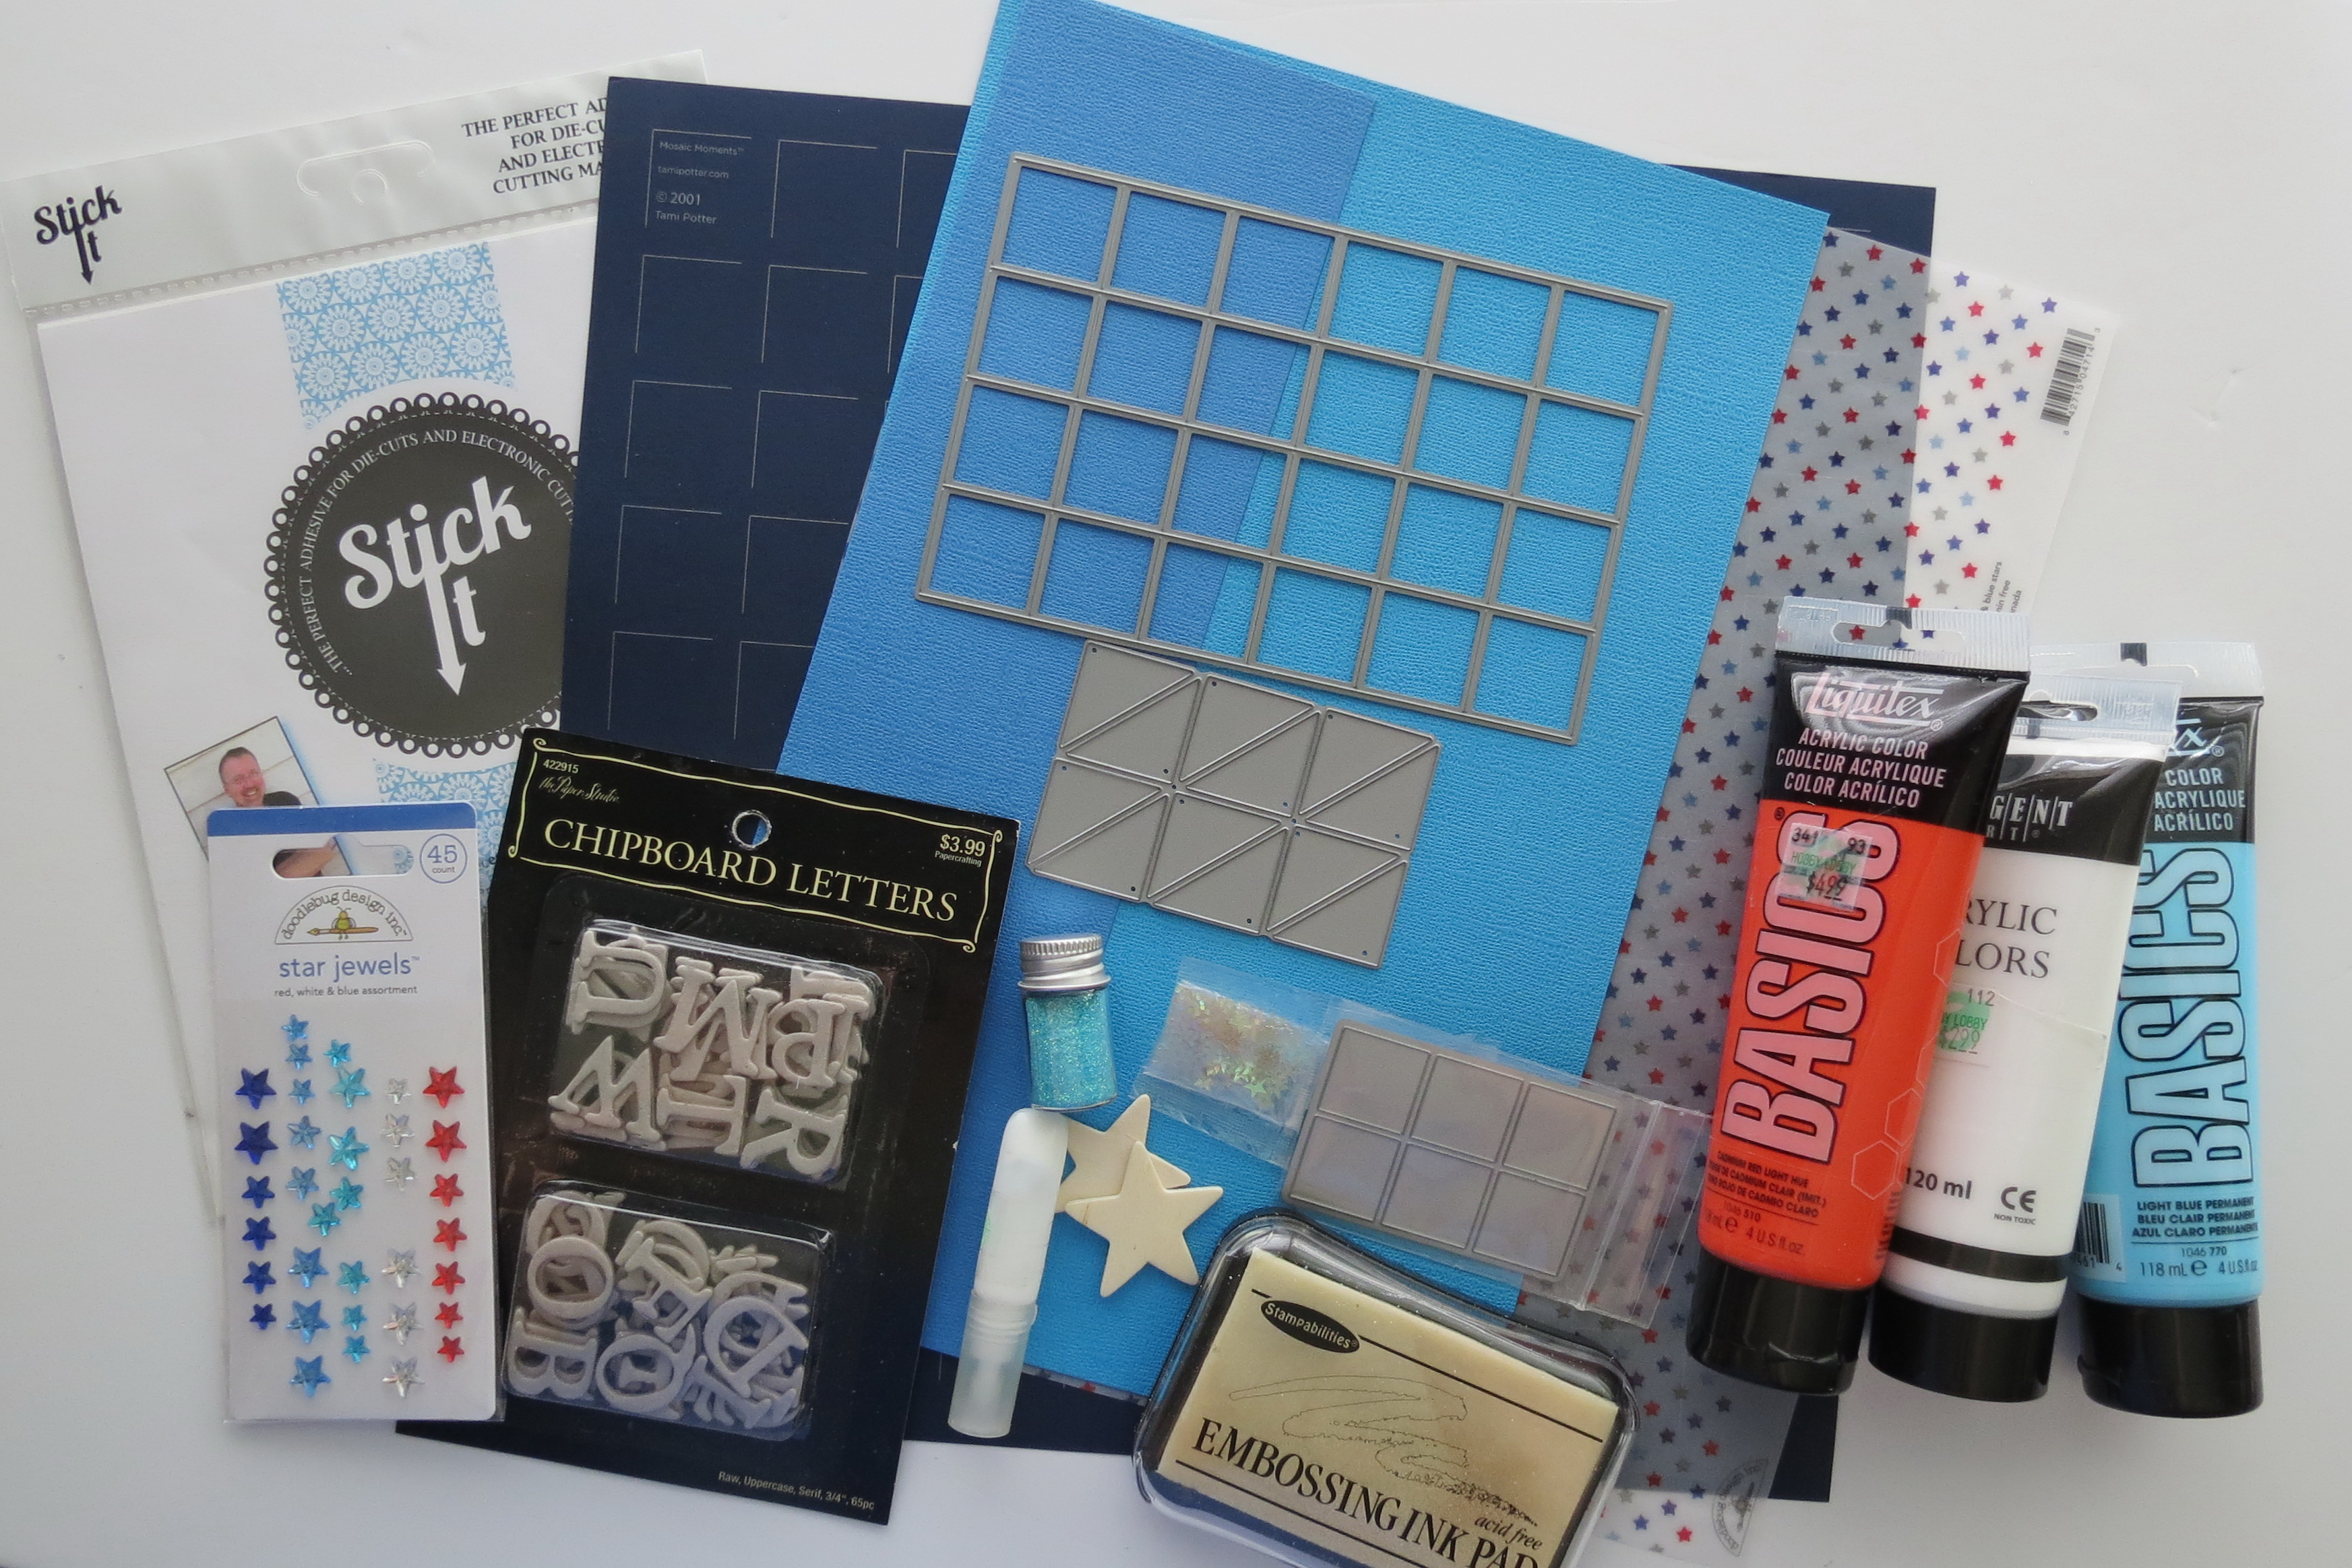
Patriotic Pages Supplies
Supplies:
• Mosaic Moments 12×12 Grid: Navy
• Mosaic Moments Die Sets: Corner Die, 4×6-1” tile die, Die Set A
• Stick It! Adhesive sheets
• Doodlebug Designs Cardstock: blue bird and blue jean
• Doodlebug Designs Vellum: 4714 red, white & blue stars
• Doodlebug Designs Kraft in Color: 4161 ladybug dot/chevron
• Doodlebug Designs Star Jewels
• Doodlebug Designs sugar coat glitter
• Reminisce pattern paper: Celebration Stars
• Cardstock: red and white
• The Paper Studio Chipboard Letters in two sizes
• Acrylic paint in red, white, blue
• Wooden star
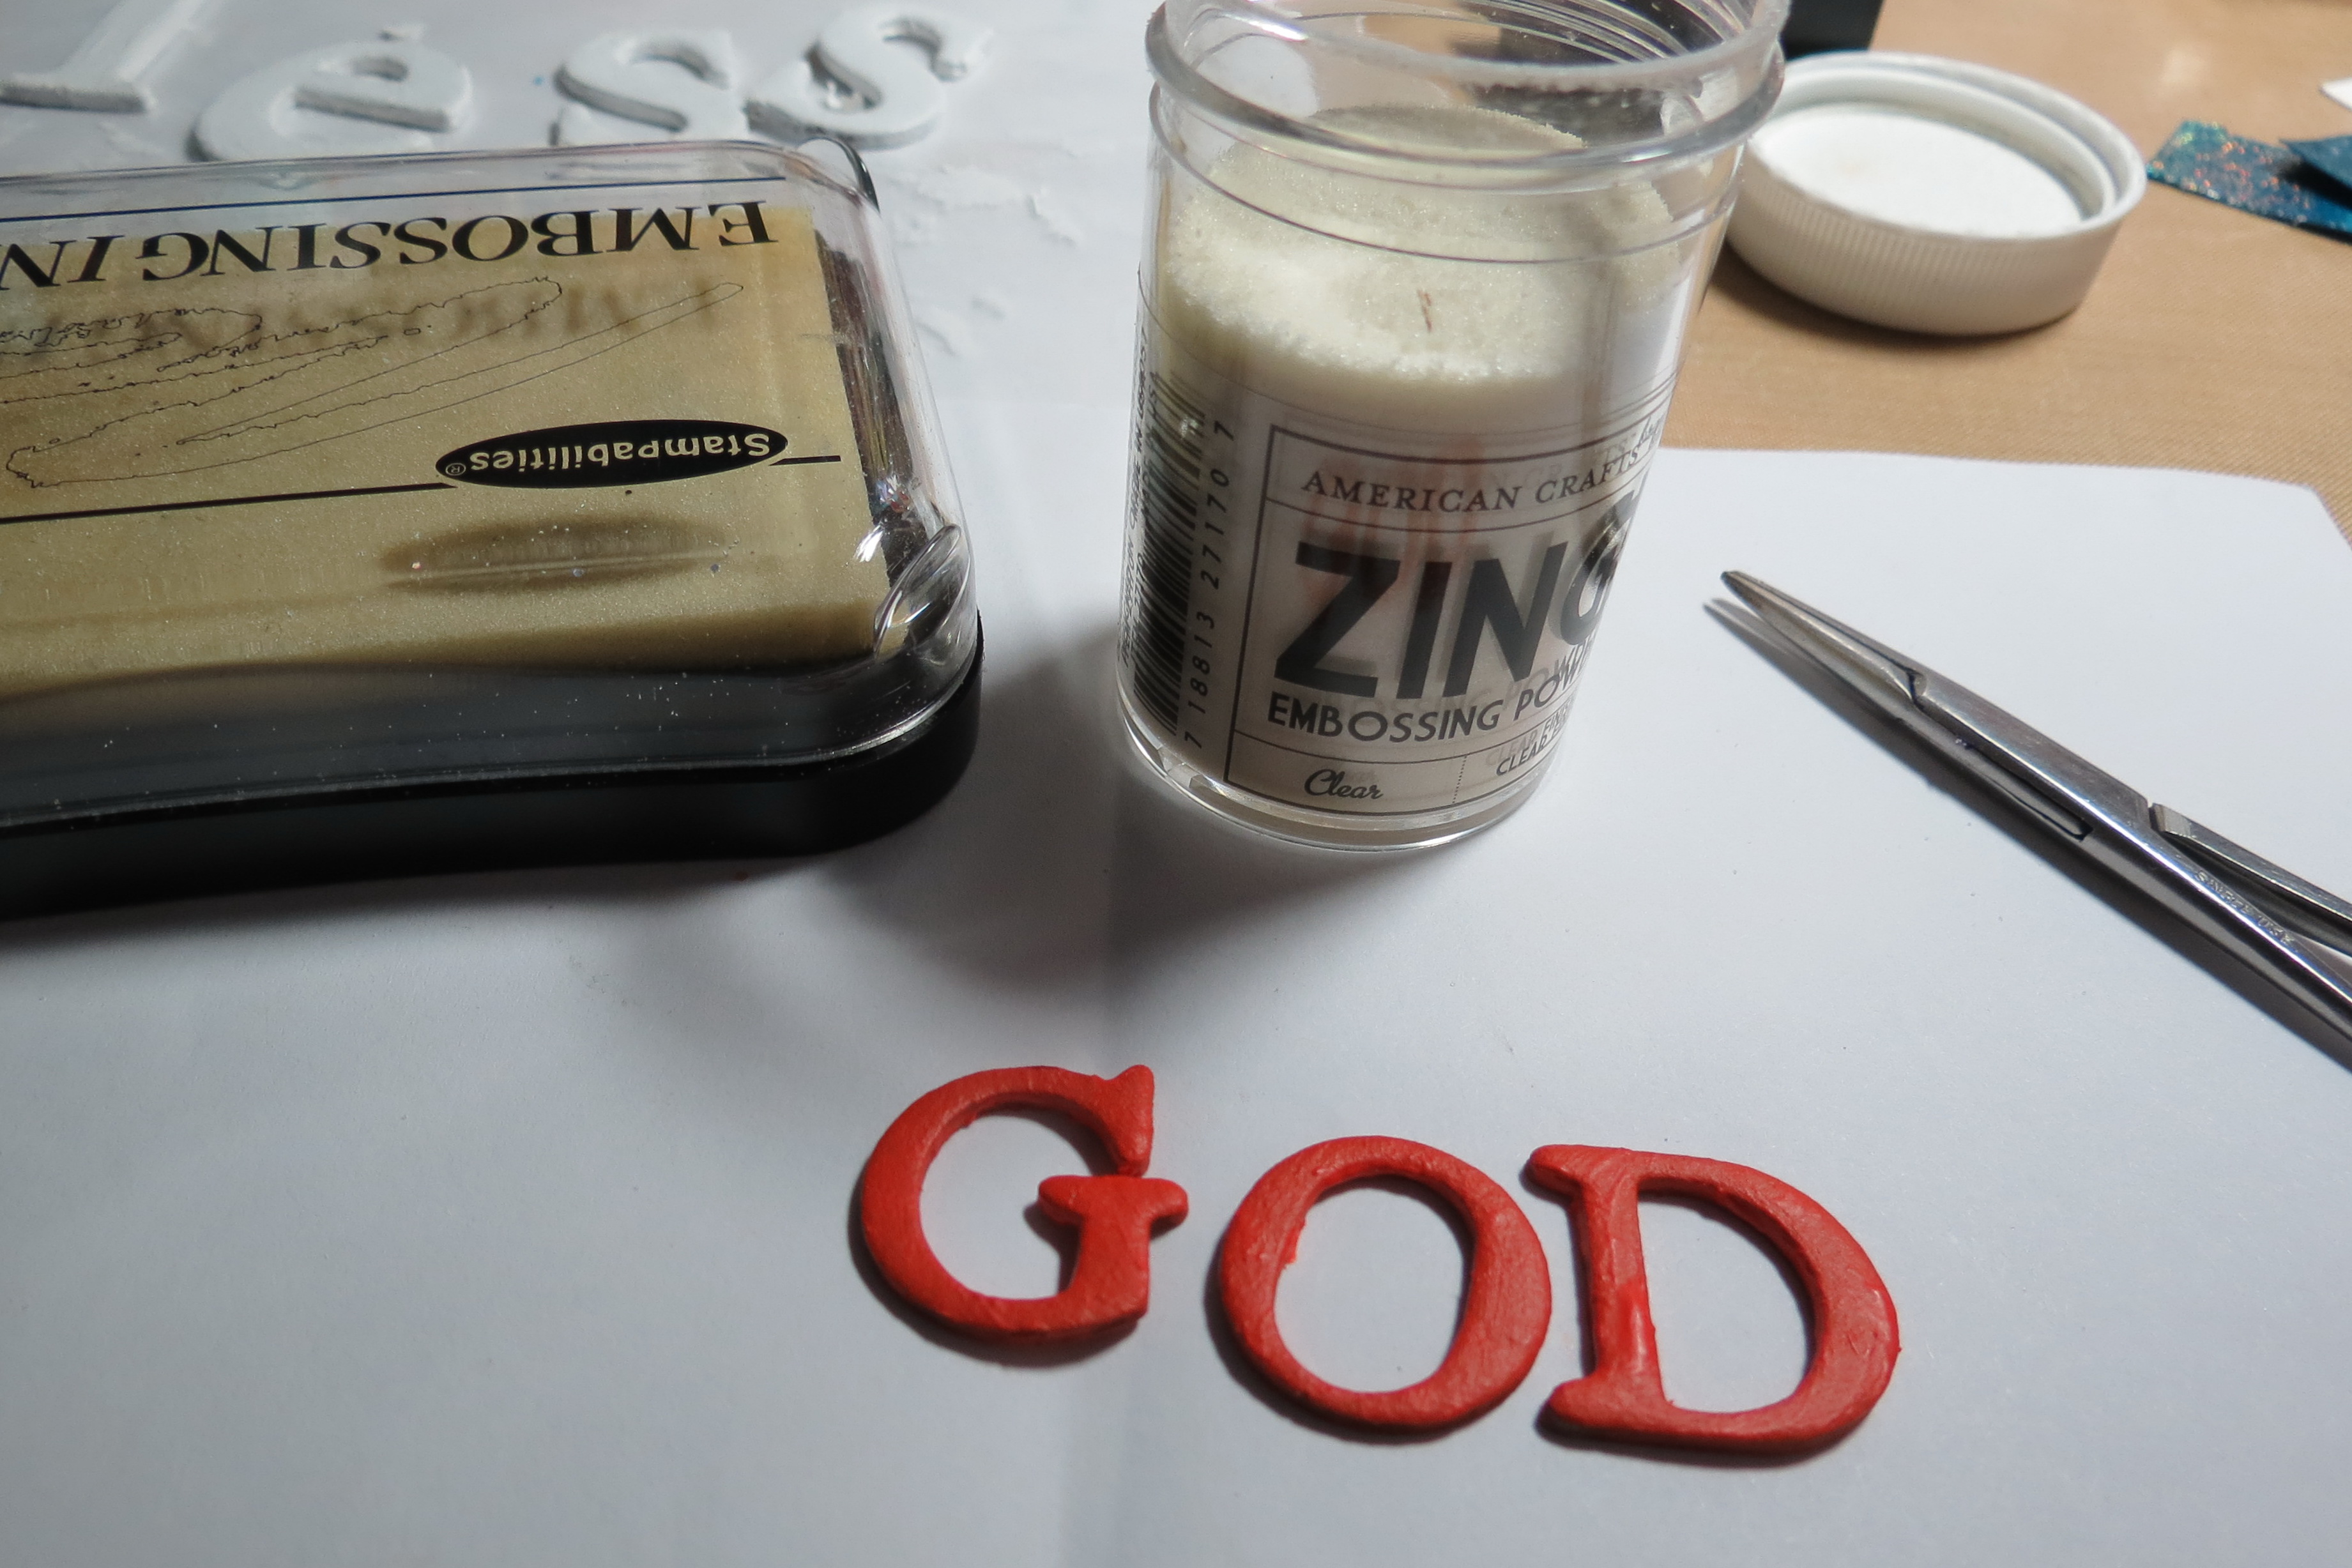
• Snowflake embossing powder with tinsel
• Iridescent stars-tiny
• Metallic Stars
• Papertrey Ink ¾” square die, cuts six
• Embossing ink, glue, glue dots
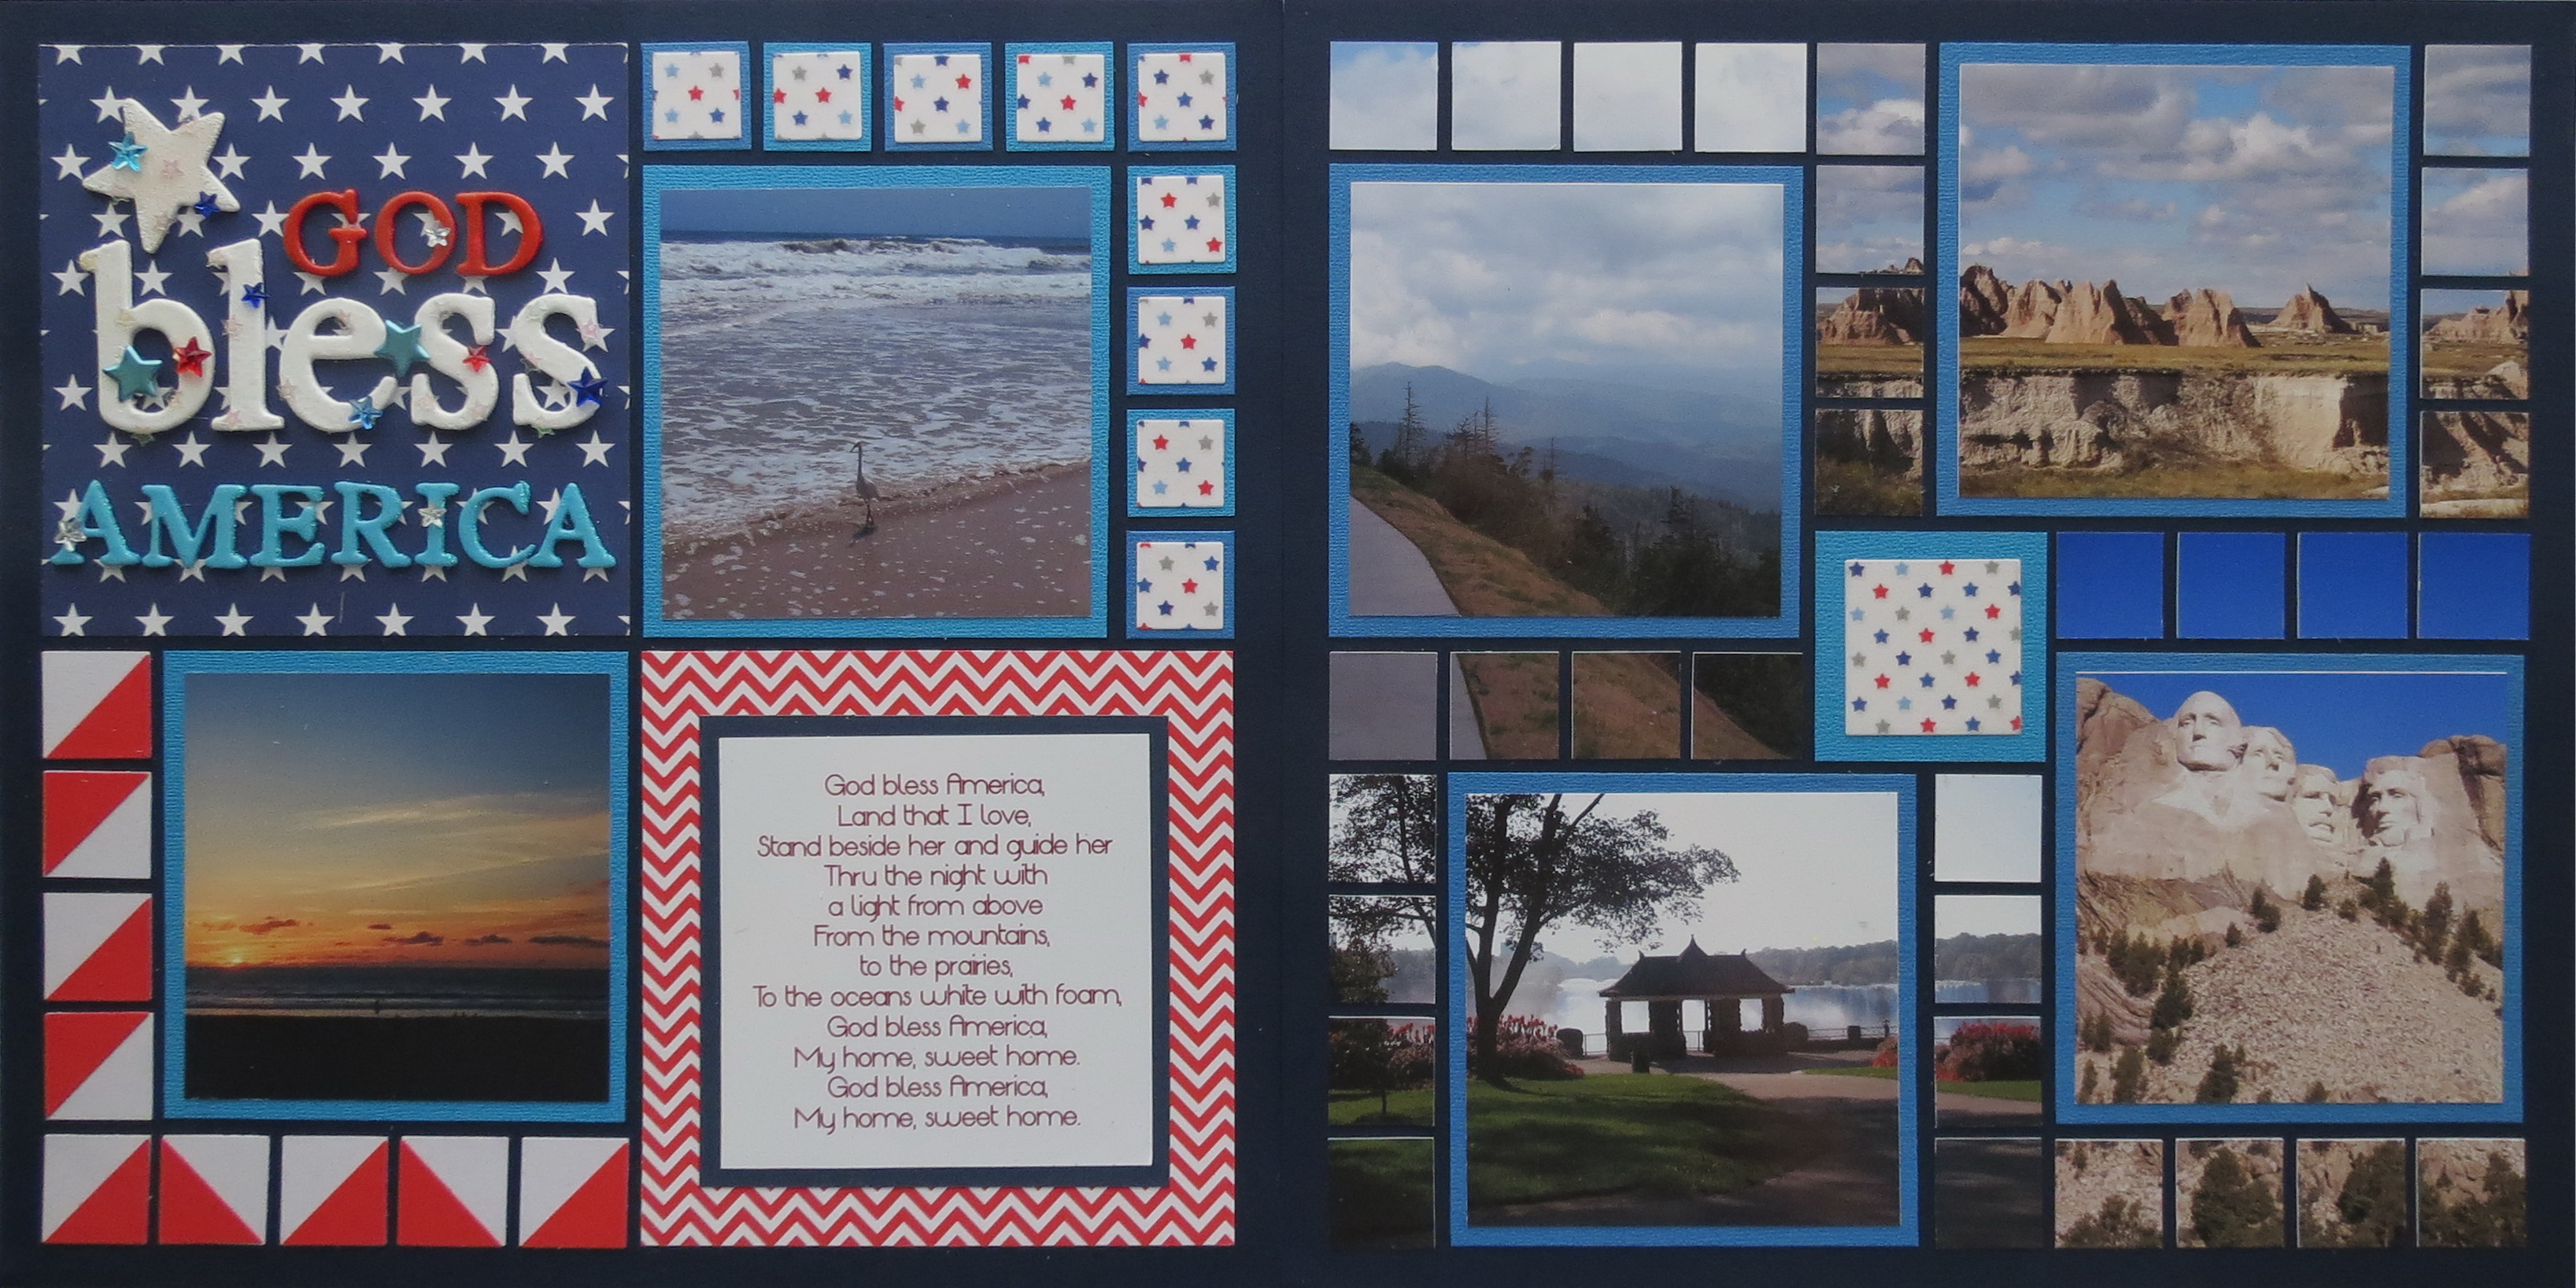
Patriotic Pages God Bless America double layout
Most of the work on this layout is straight forward and simple to complete. The title is the most detailed element on the page and I’ll highlight a few of the steps I took to get it together, but first, let’s begin with page two and pattern #233.
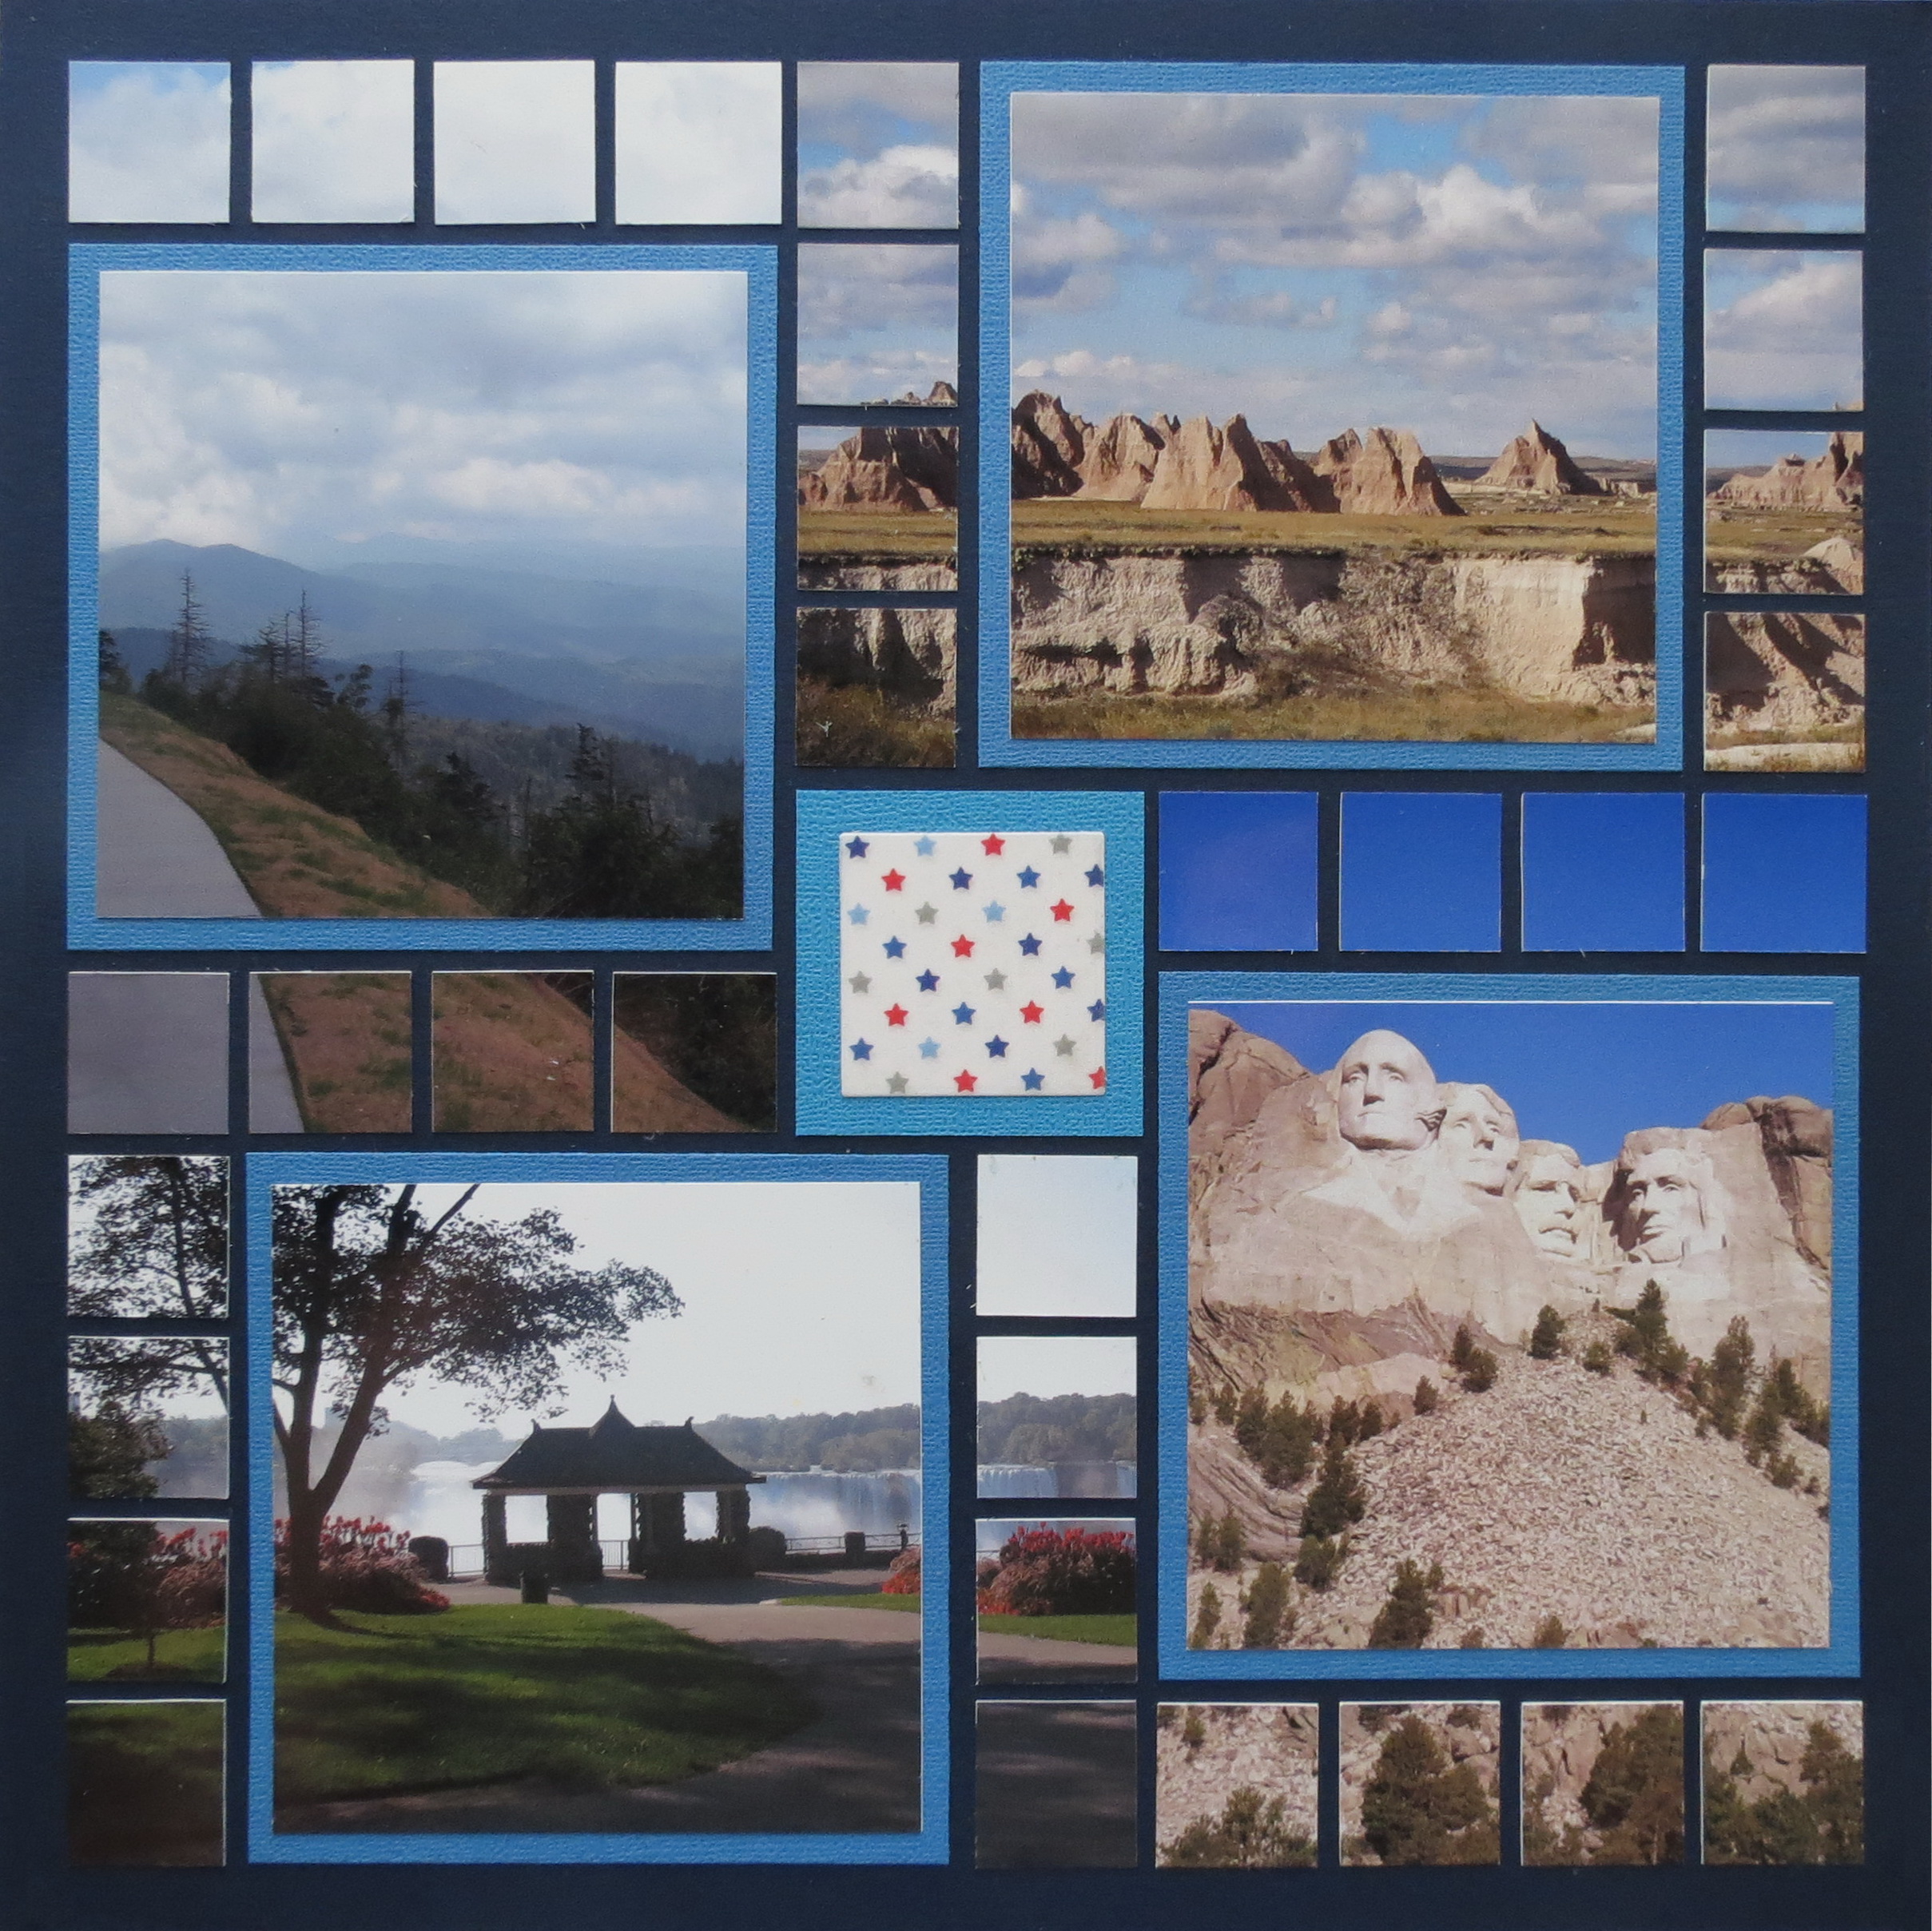
Patriotic Pages page two layout Pattern #233
I chose four photos that had a good center focal point that would stand alone once the 1” end strips were sectioned. For this process I did use my X-Acto knife and Cutting Mat to cut these. By cutting the 1” strip at each end and lifting the center 4” section away, I went back to cut the strips into 1” squares. I mounted the 4” photo squares on the blue jean cardstock.
The center 2×2 block is the blue bird cardstock. The vellum center is mounted on a white cardstock square using Stick It! and cut with Die Set A’s smallest square. The Stick It! gives a nice even coating and does not show through the vellum.
Photos on Page Two: top left, clockwise: Clingmans Dome, Great Smoky National Park, Tennessee; Badlands National Park, South Dakota; Mount Rushmore National Park, South Dakota; The American Falls as viewed from Niagara Falls, Canada.
Patriotic Pages page one Pattern #144
Page one and pattern #144 began with two patterned papers Celebration Stars and Ladybug chevrons cut to fit the 5×5 squares on the diagonal.
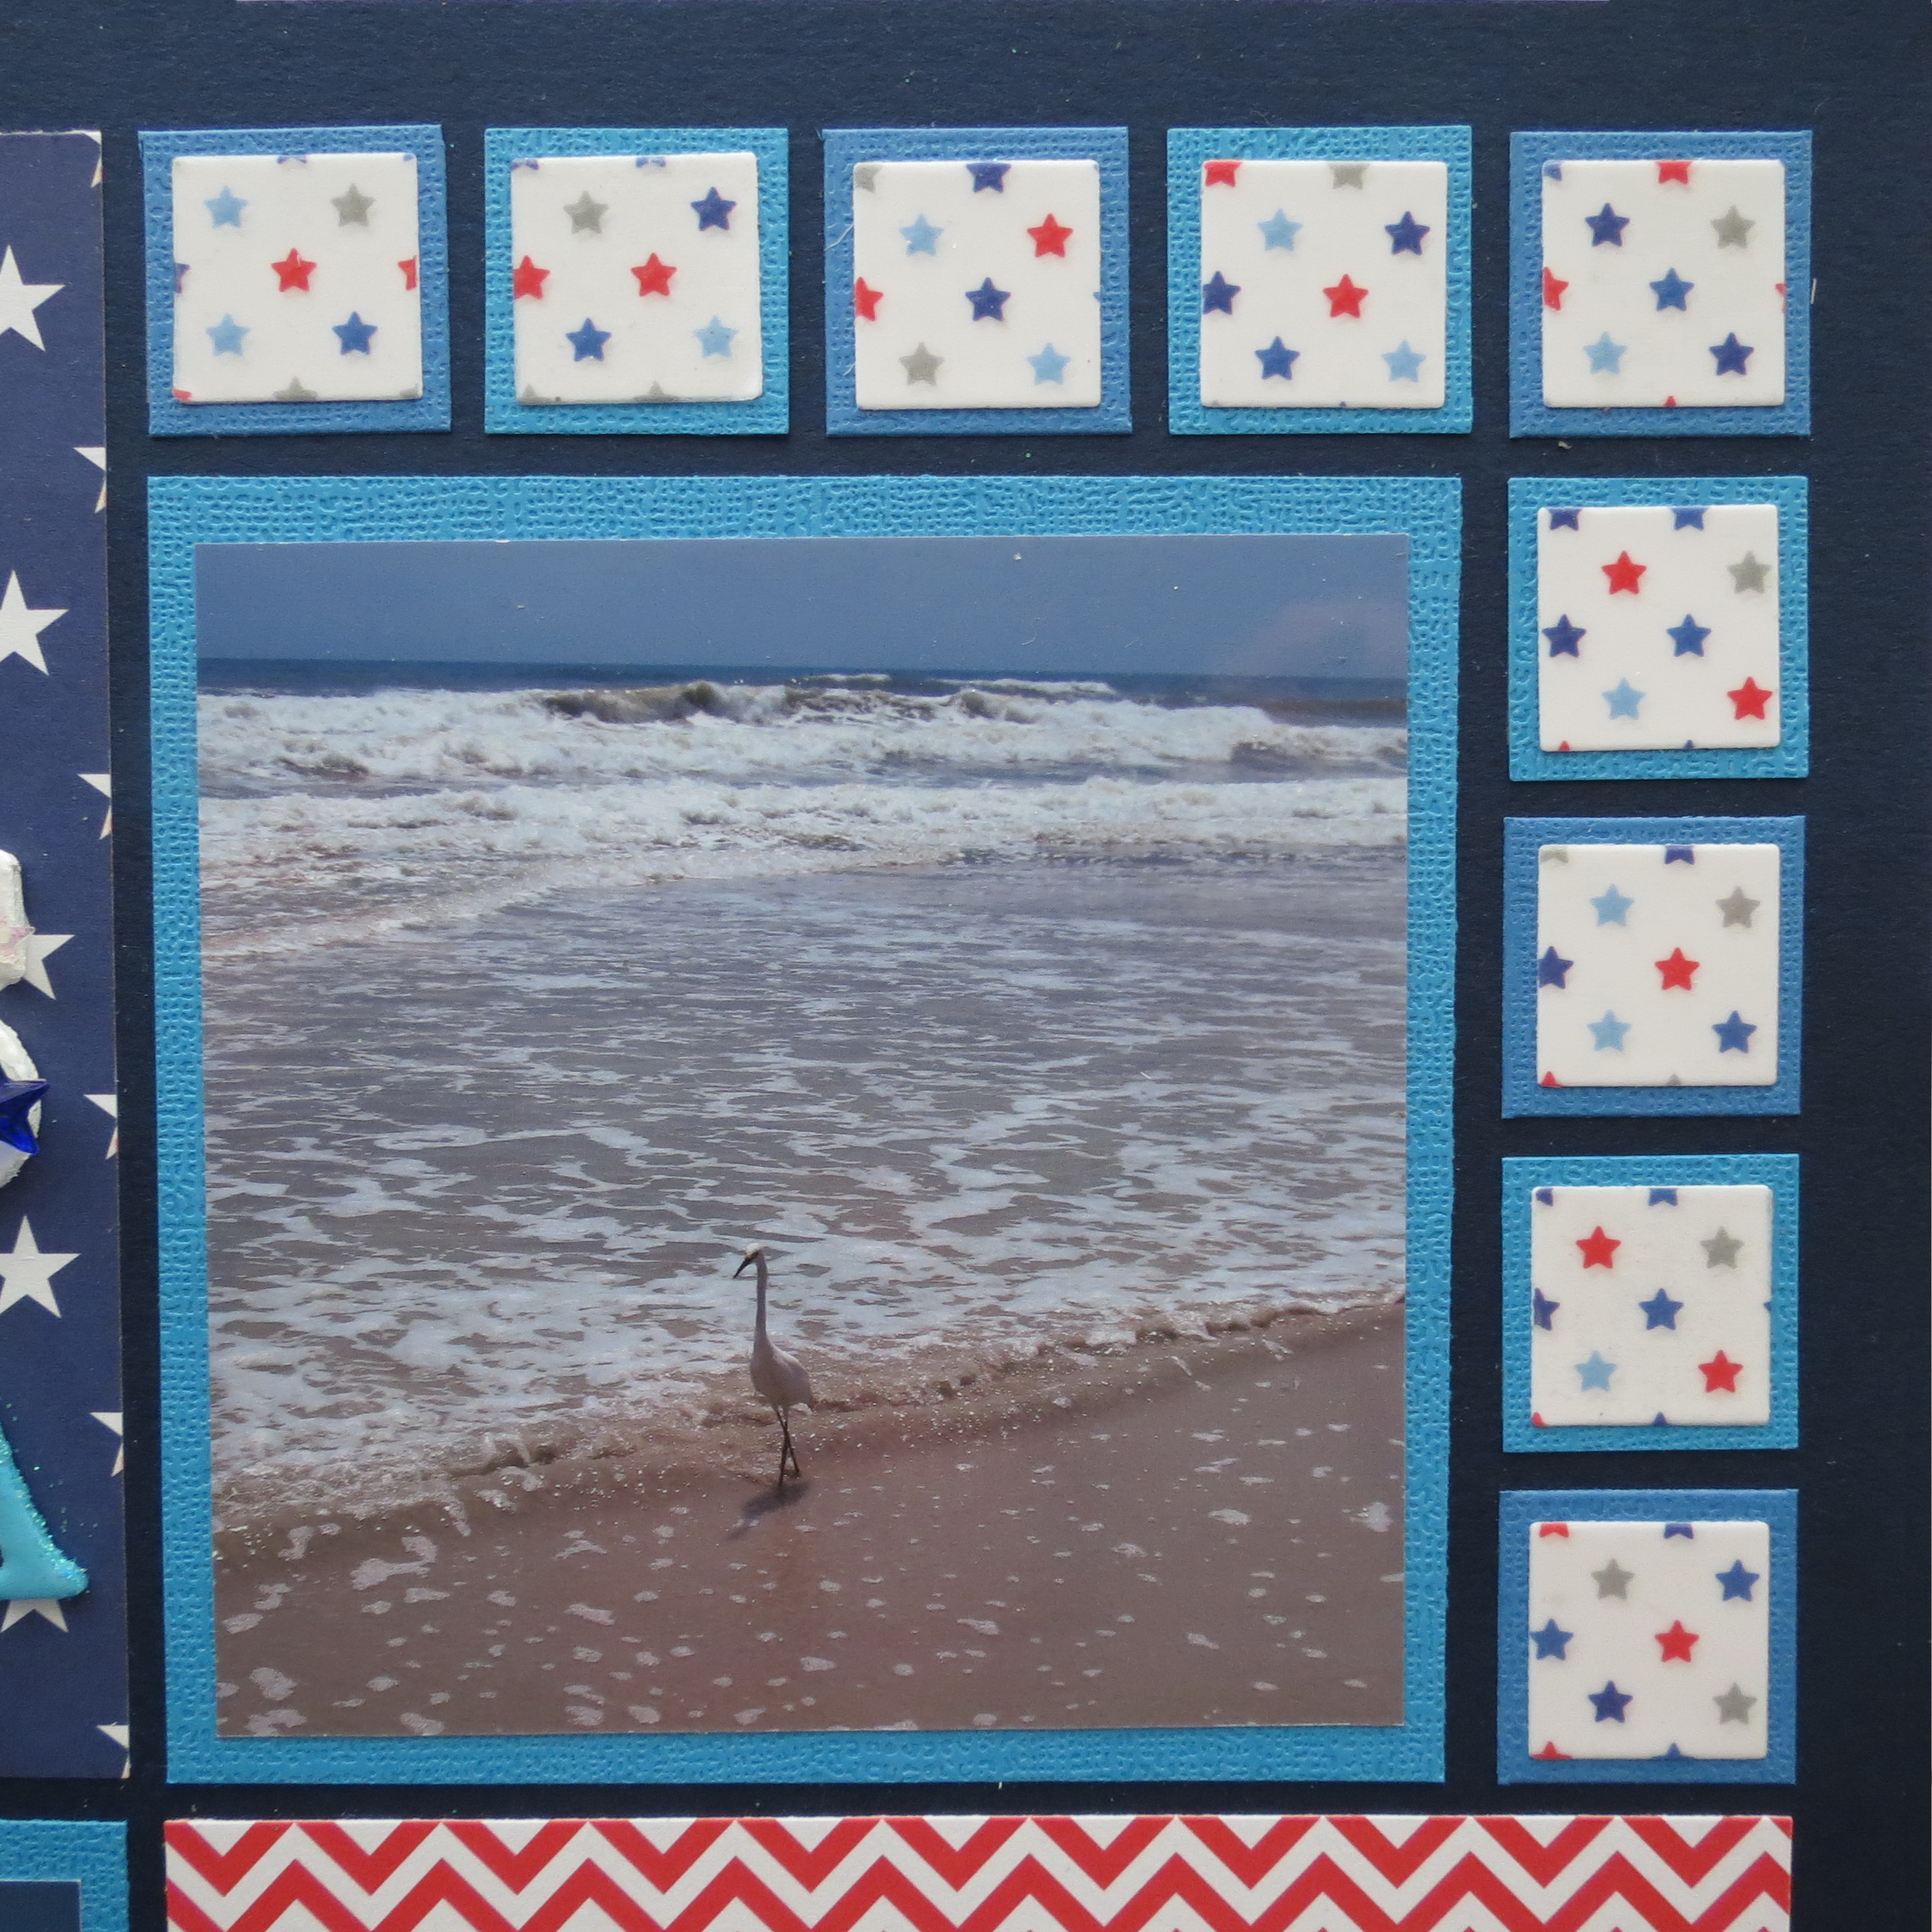
The top right corner of this page has 1” tiles alternating in blue jean and blue bird cardstock around the photo. (used the 4×6-1” square tile die) Each square is topped with white squares and vellum ¾” tiles on top. (photo: Ormond Beach, Florida)
TIP: adhere the vellum to the top of white cardstock then cut to size needed.
Patriotic Pages vellum stars and alternating tiles
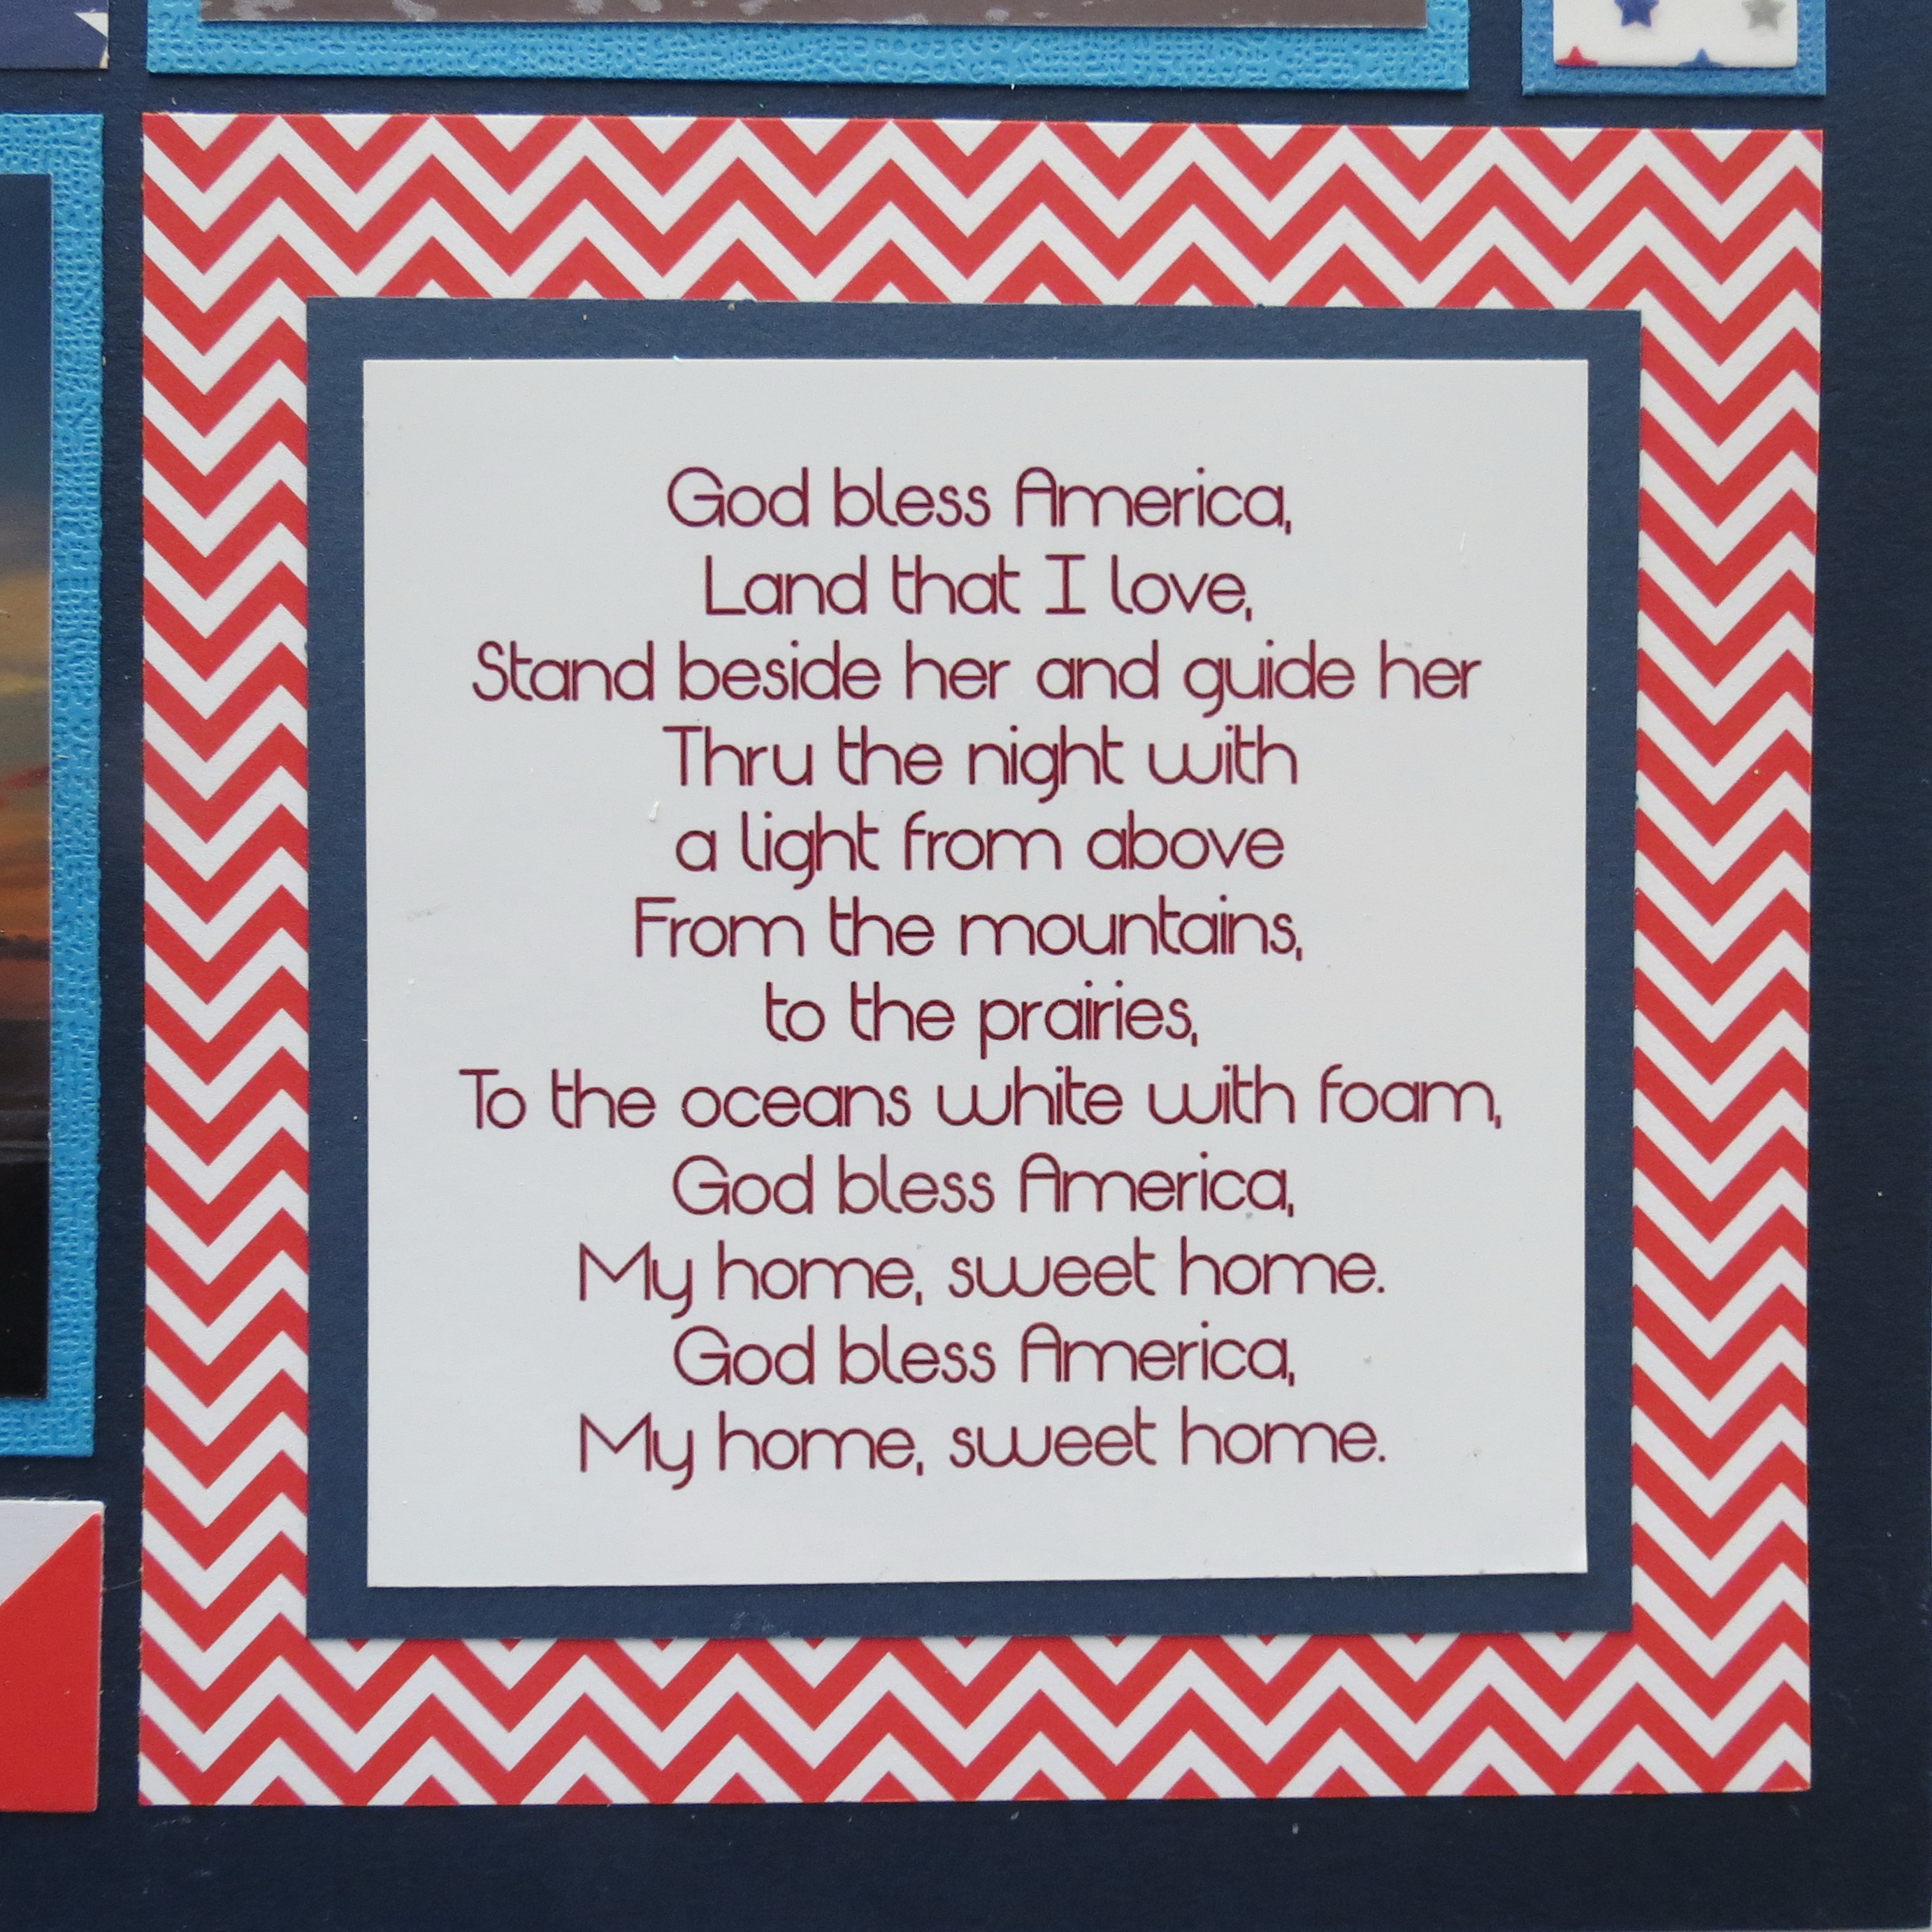
The chevron corner serves as the spot for the lyrics written in the font Origin, printed on photo paper and matted on a Mosaic Moments navy paper tile.
Patriotic Pages Font: Origin, lyrics mounted on navy on chevrons
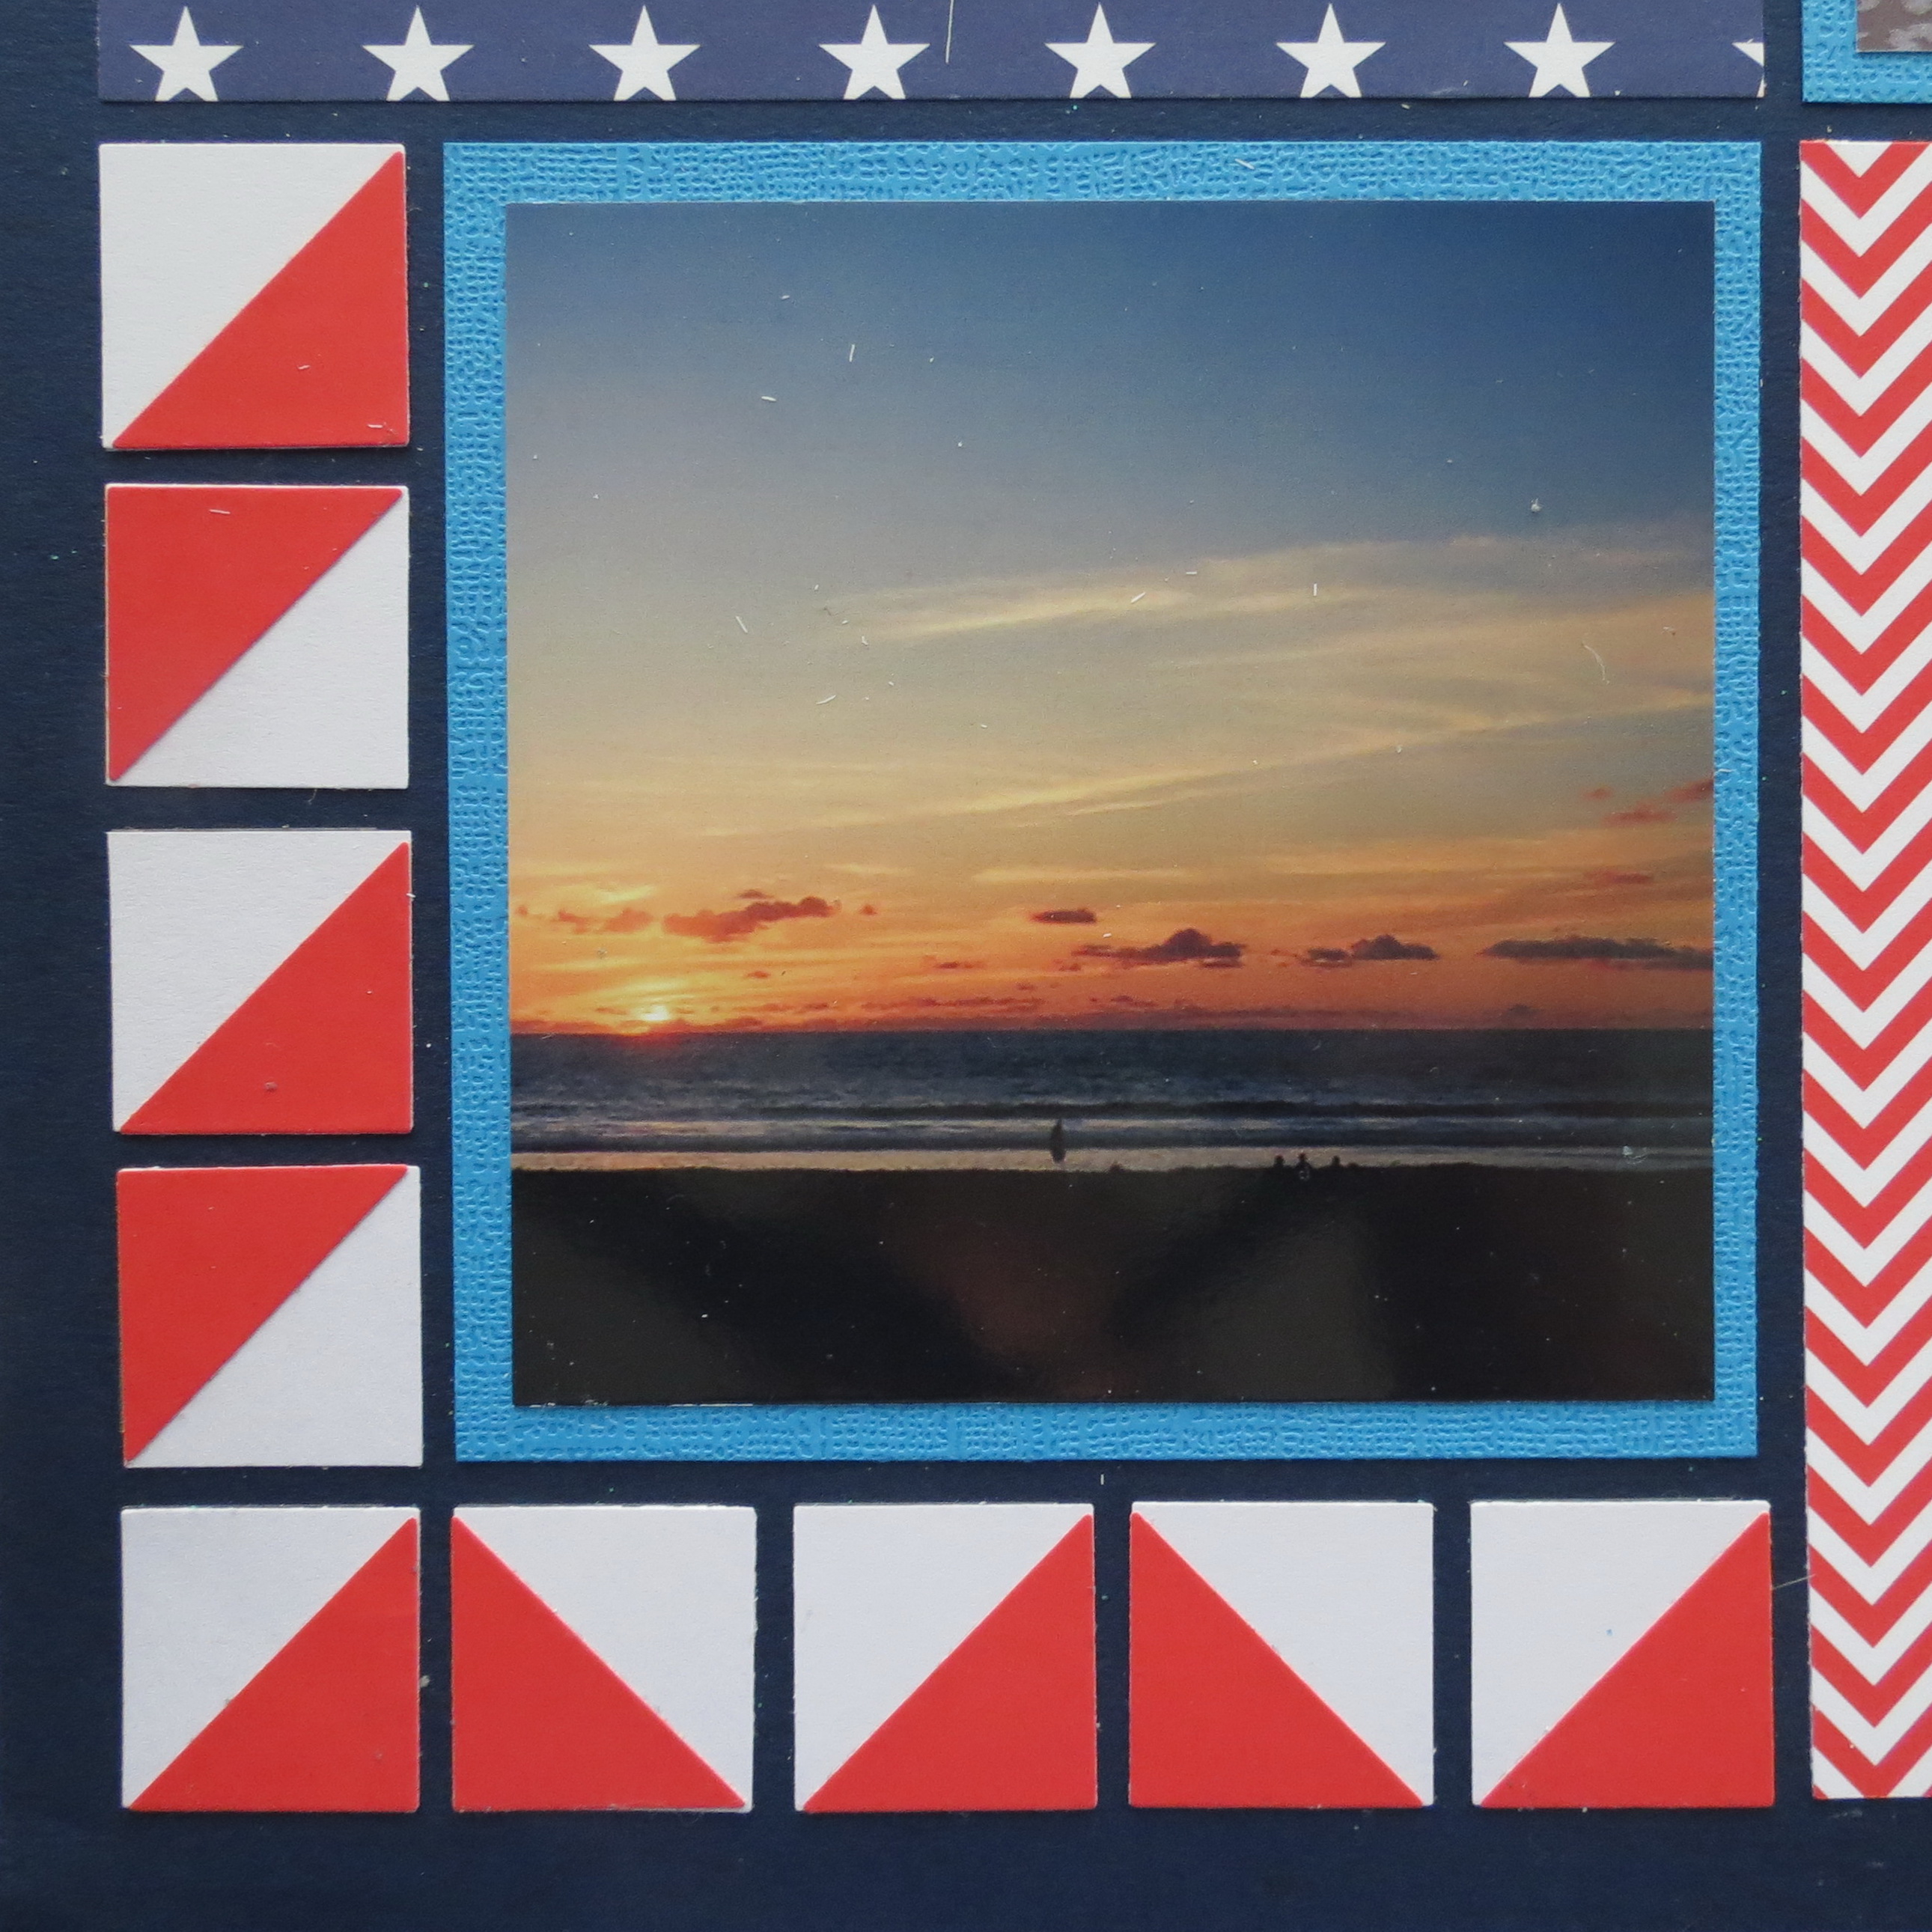
The lower left corner border tiles have a chevron pattern in red and white, using the corner tile die to cut. (photo: sunset in San Diego, California)
Patriotic Pages chevron pattern created with MM Corner Tile Die
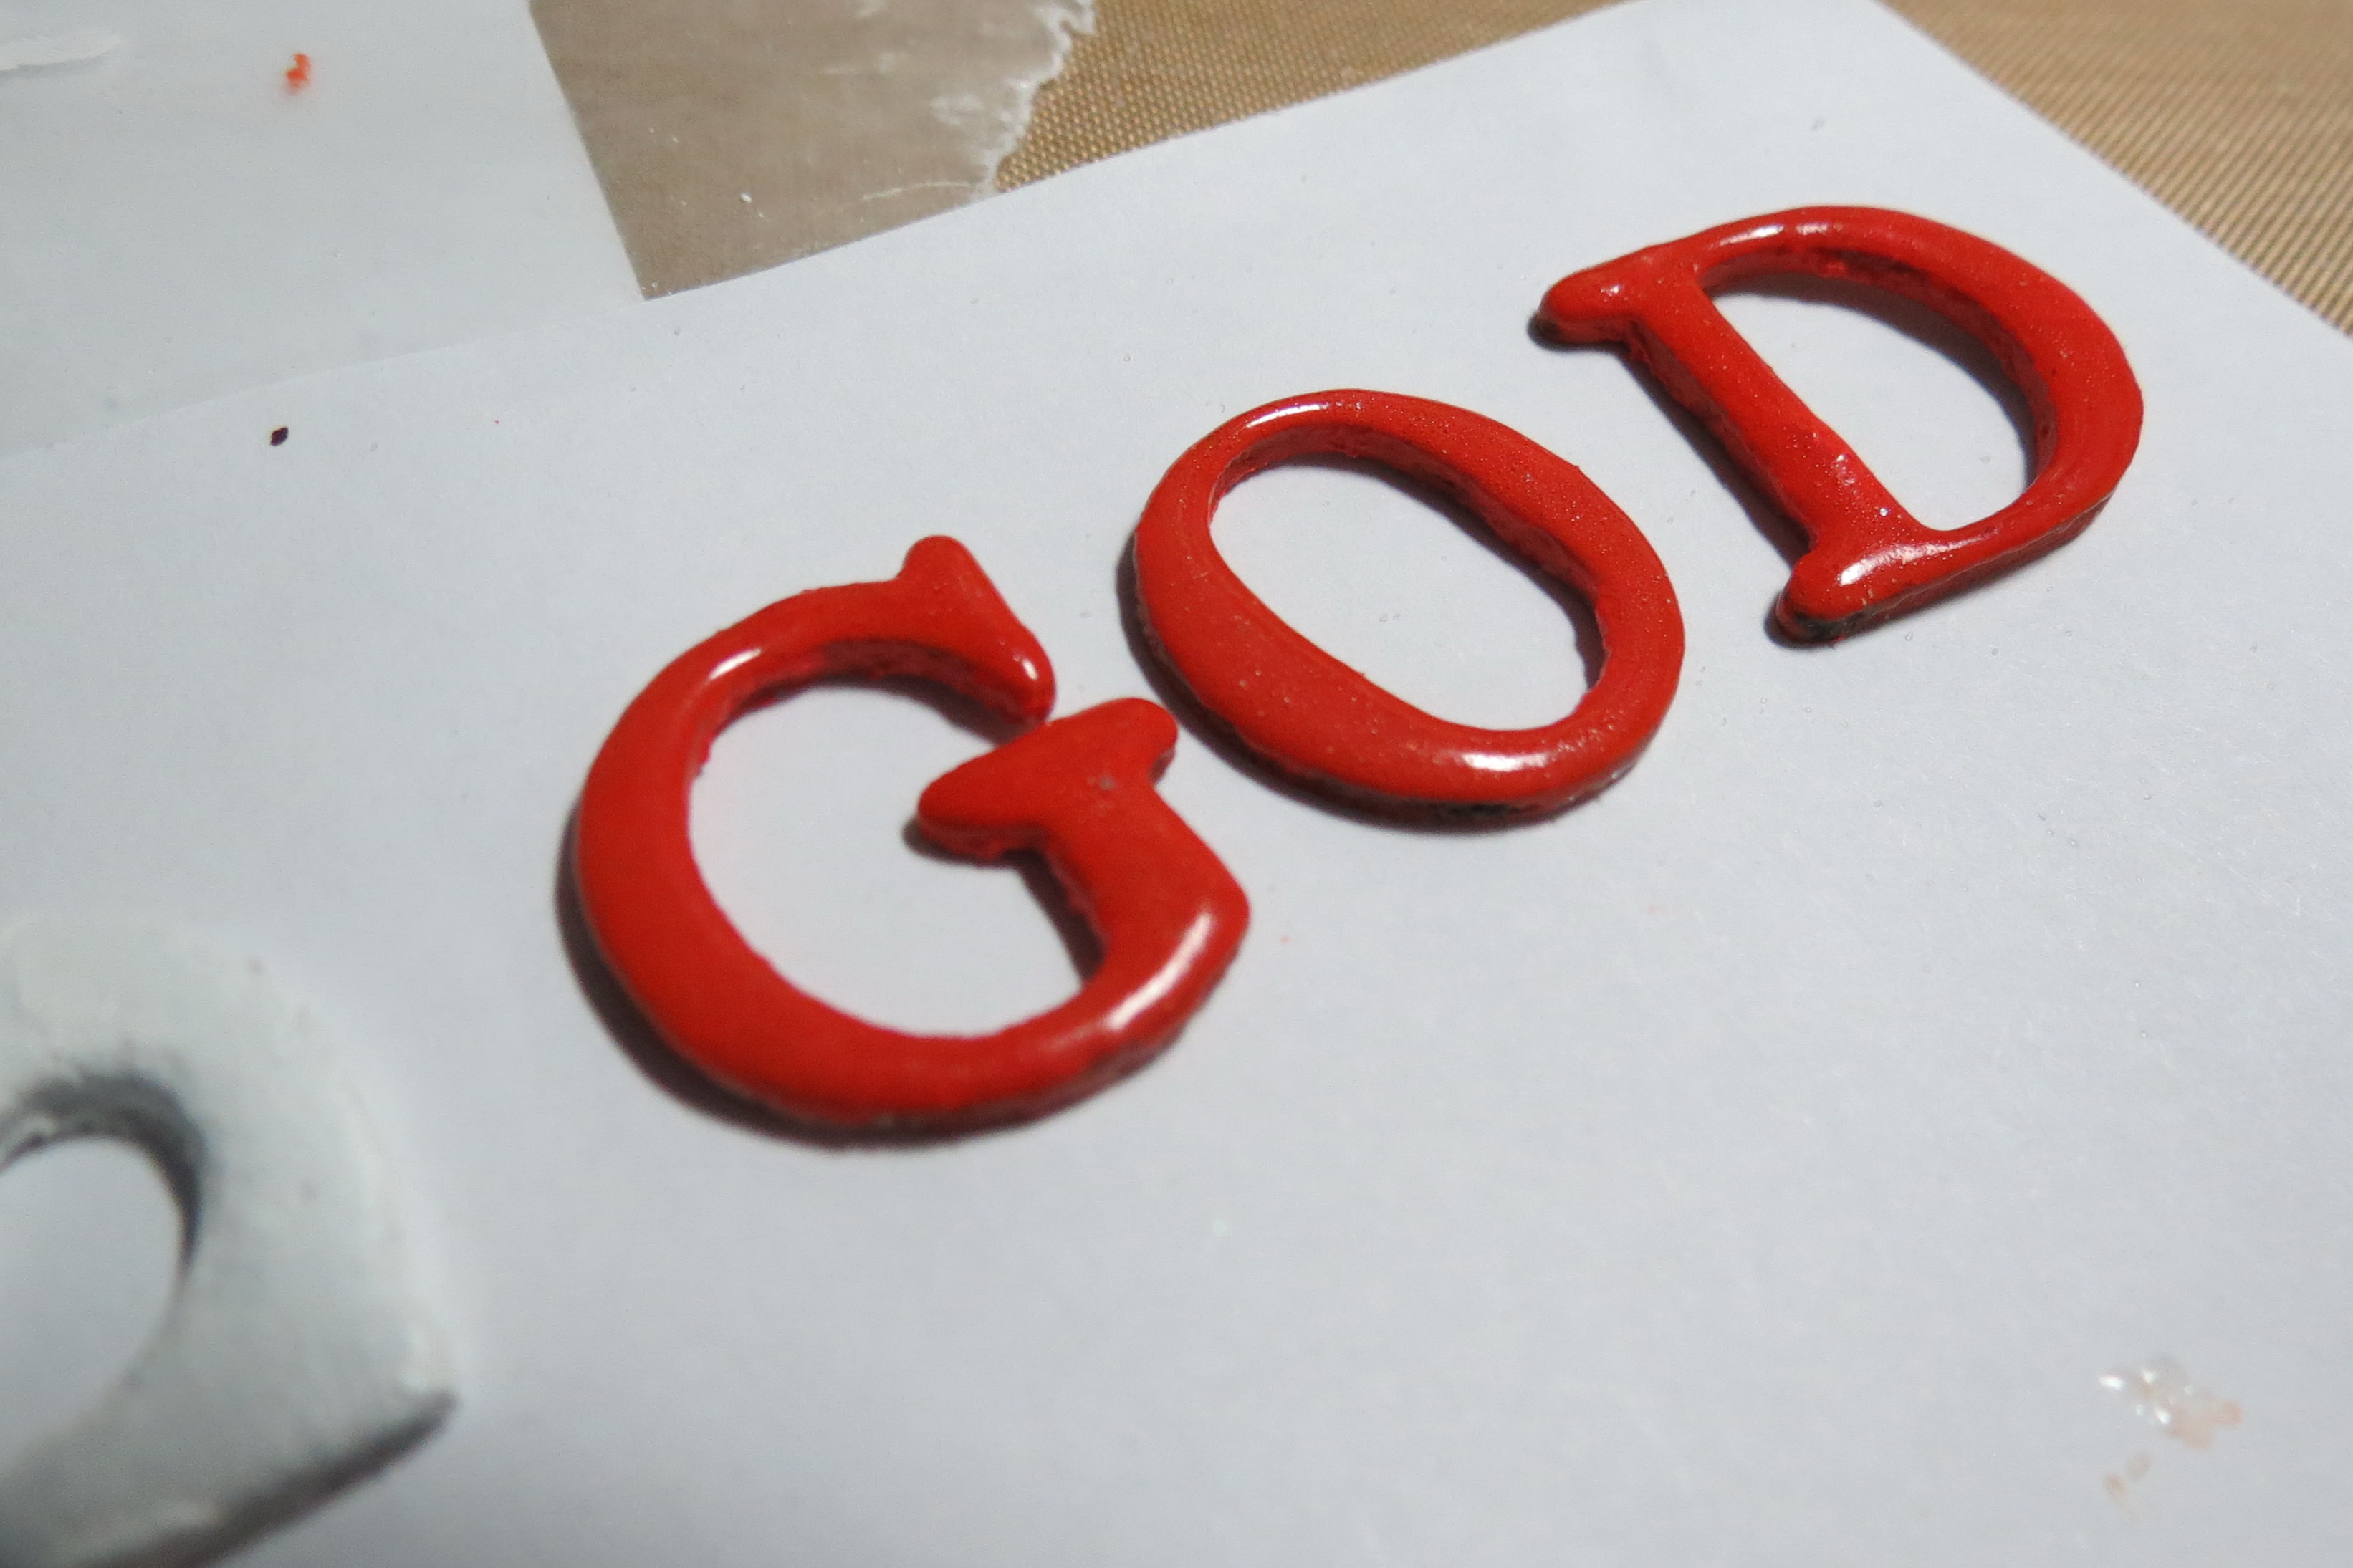
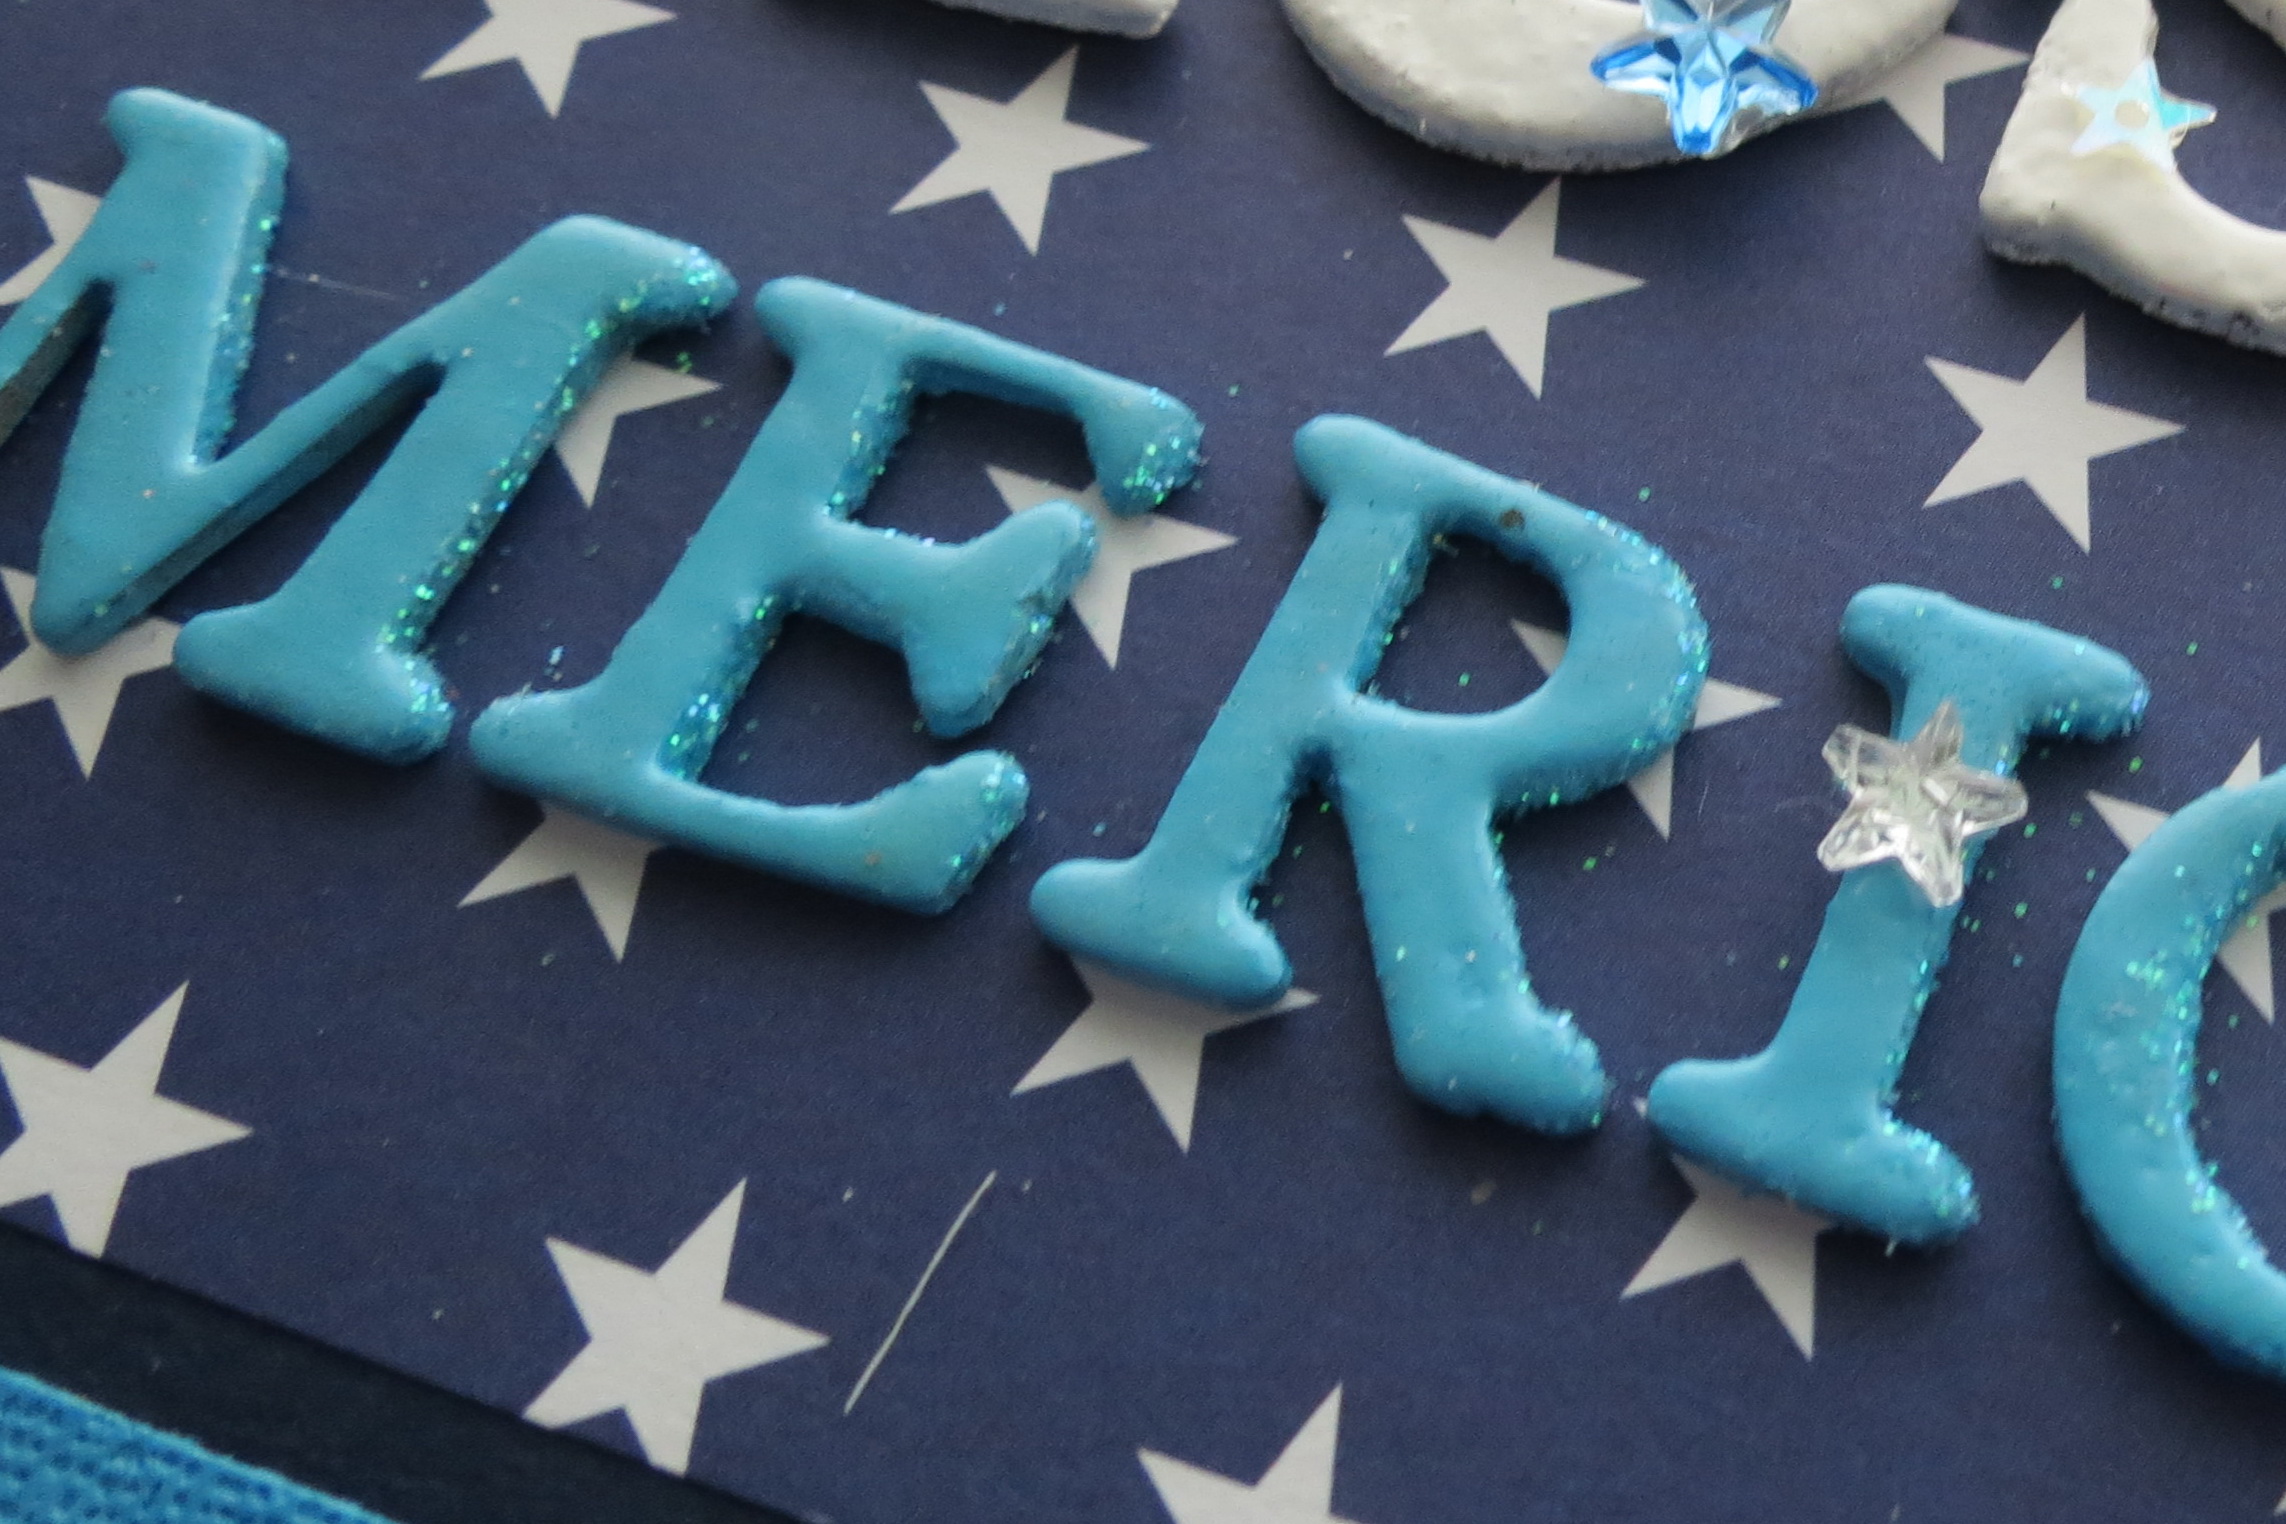
Now to the title block. Chipboard letters in two sizes are painted with acrylic paint and embossed with clear embossing powder giving them a nice shine resembling plastic. They are arranged with the larger “bless” in the center. On the aqua blue “America” letters a narrow line of glue was used along one side to adhere the glitter to match. The “bless” is randomly sprinkled with star jewels, metallic stars and iridescent stars. Although there is a sticky back on each of the star jewels they would not stick so glue dots were added.
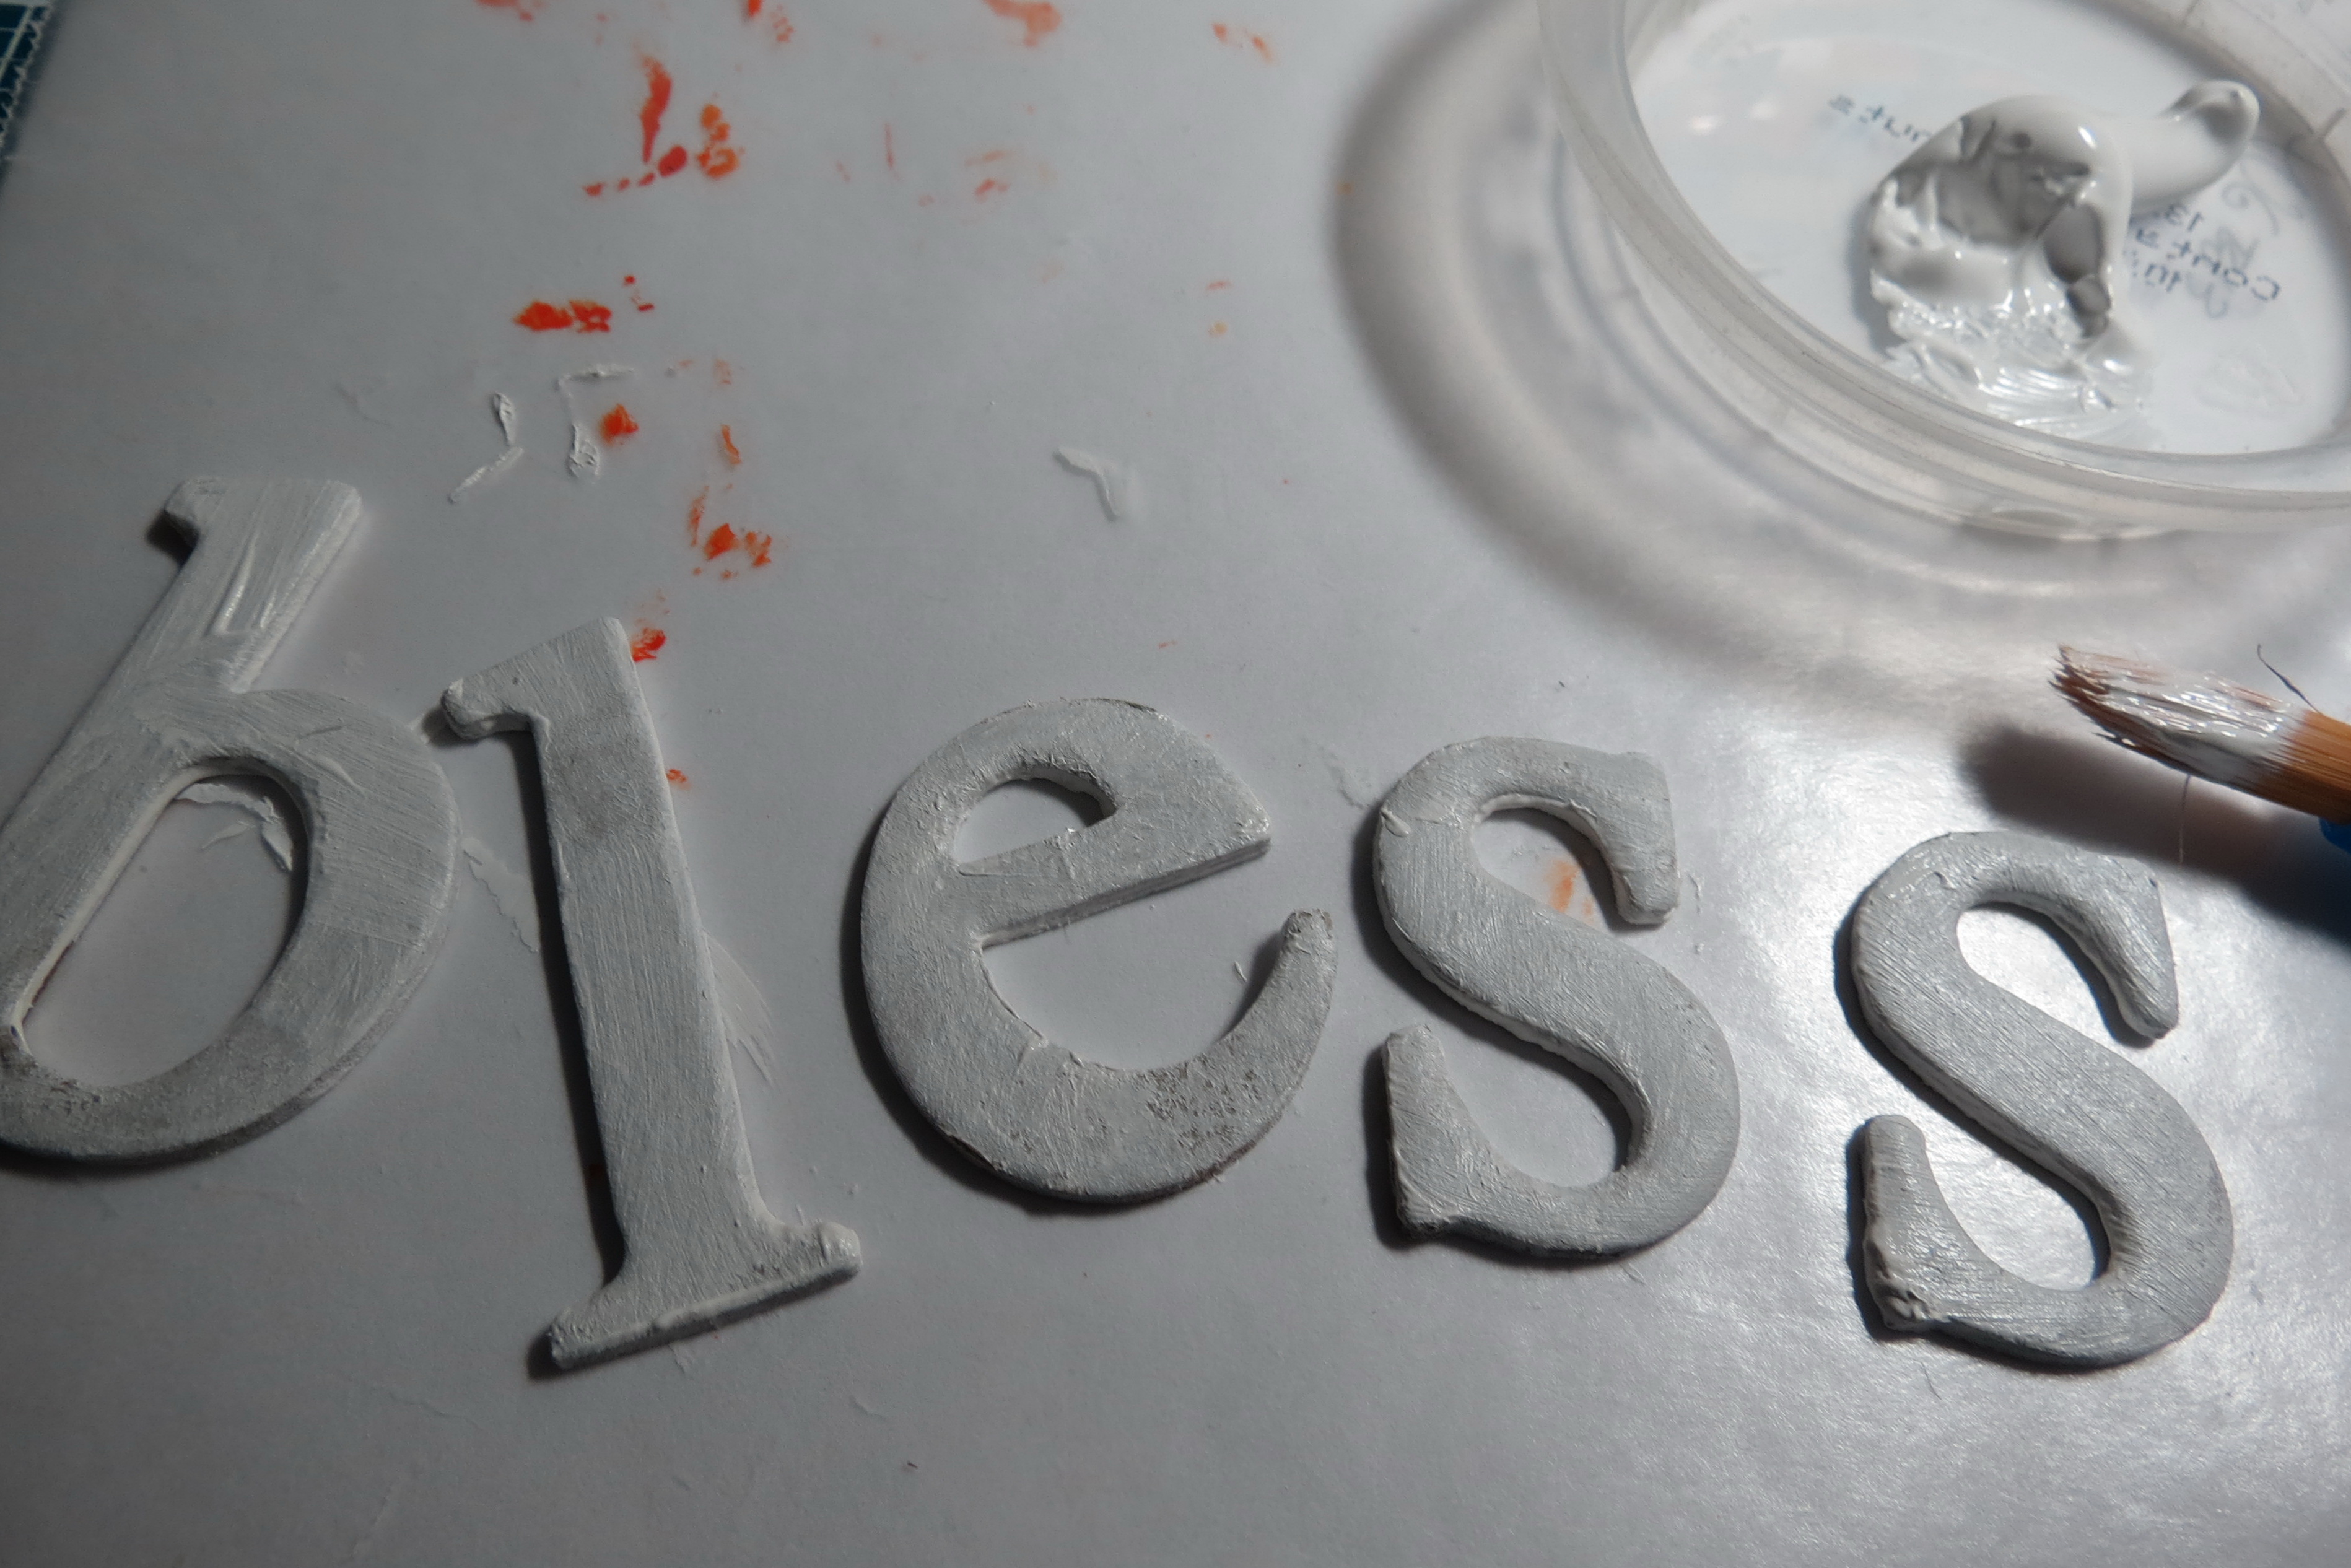
Patriotic Pages chipboard letters painted
Patriotic Pages painted chipboard letters embossed with clear embossing powder
Patriotic Pages finished letters
Patriotic pages blue letters are finished with glittered edge
Patriotic Pages chipboard letters embossed with clear embossing powder and embellished
A final touch was the wooden star. I took a dry brush of white paint and lightly touched the surface allowing the wood grain to show through. A dash of embossing powder on some of the edges with snowflake embossing powder, a combination of white embossing powder and tinsel, adds a bit of sparkle.
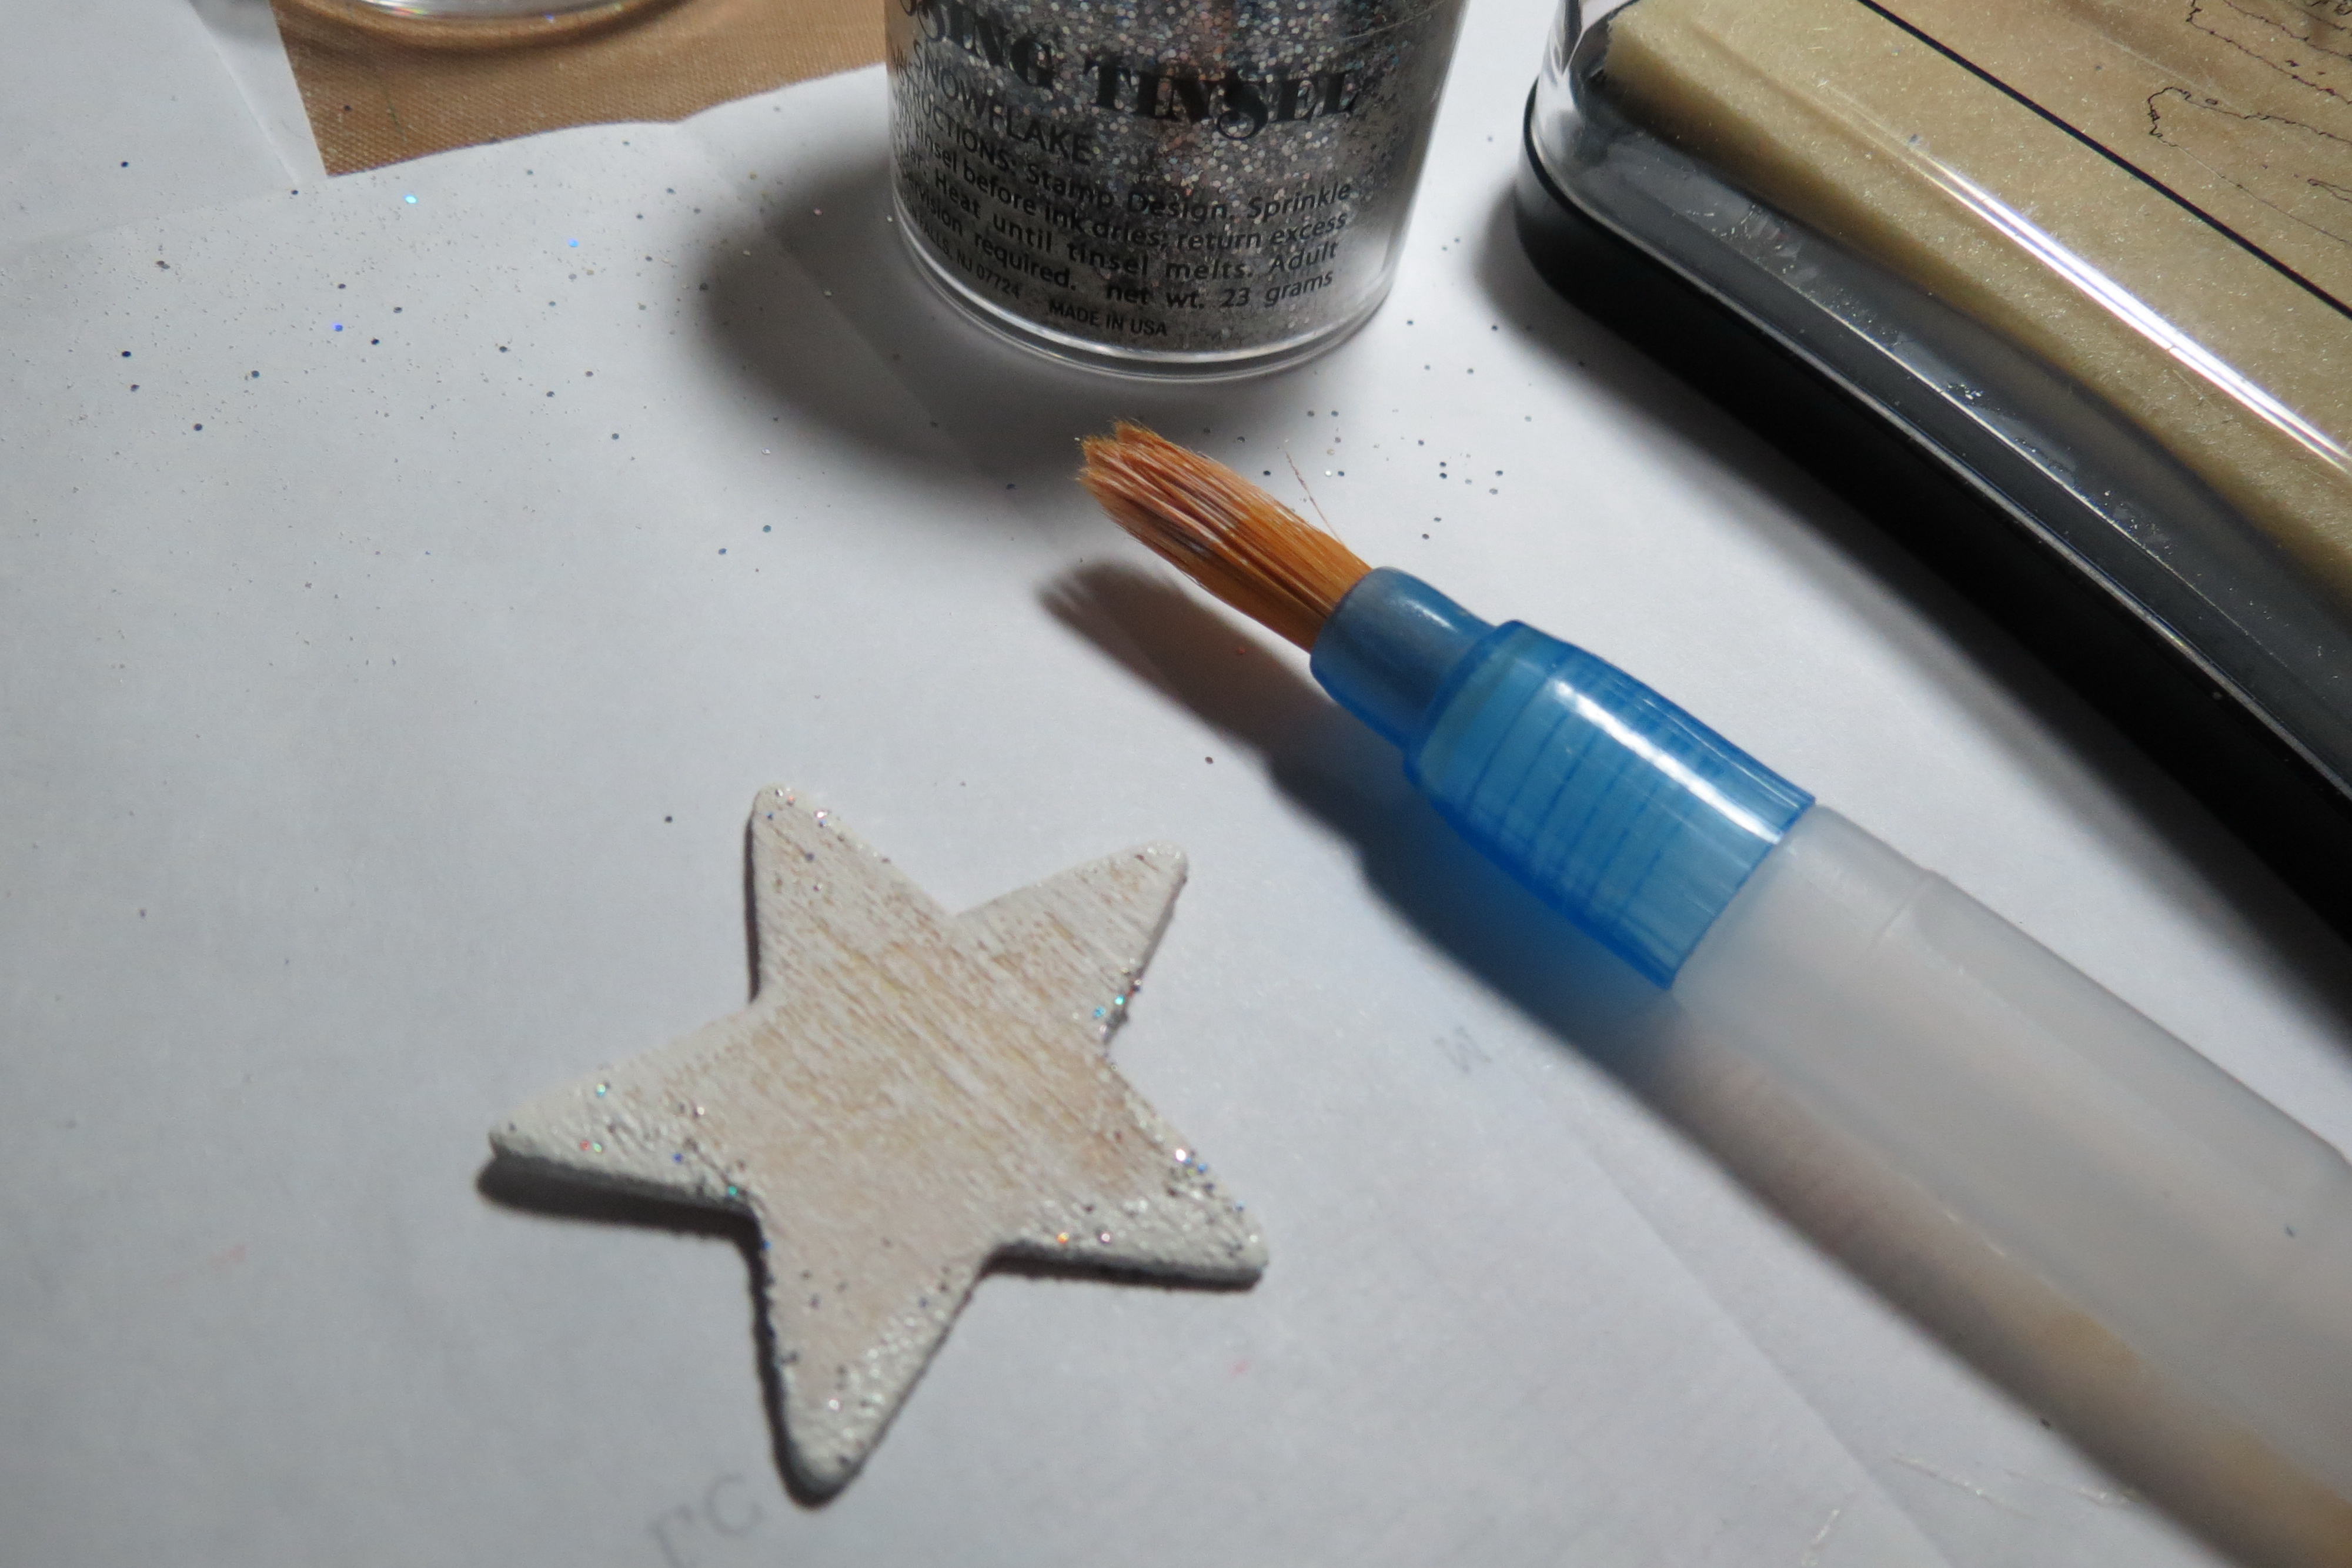
Patriotic Pages dry brushed wooden star with tinsel embossed touches
There you have it, another way to make your patriotic pages stand out in the crowd!
Andrea Fisher
Remember to stop by out Pinterest page and see all our boards, including this one with tips!