

Welcome back! This week we’ll begin Designing with Dies with the Circle Center Border as our featured die in this cozy winter layout.
We currently have 8 – 2×5 dies:
1. Filmstrip Die
2. Three Circles (2×5) Die
3. Triple Diamond Die
4. Three Diamond Rings (2×5) Die
5. Casablanca Row (2×5)
6. Pumpkin Face Die
7. Triangles 2×5 Die
8. Triple Heart Frame Die
and are adding a new one into our collection, the Circle Center Border Die.
This die will join other family members, the Circle Center Frame set and the Circle and Scallop Frames dies set. When you are purchasing your dies to work with you may want to consider family groups of dies to be able to create with a die theme in your scrapbook pages.
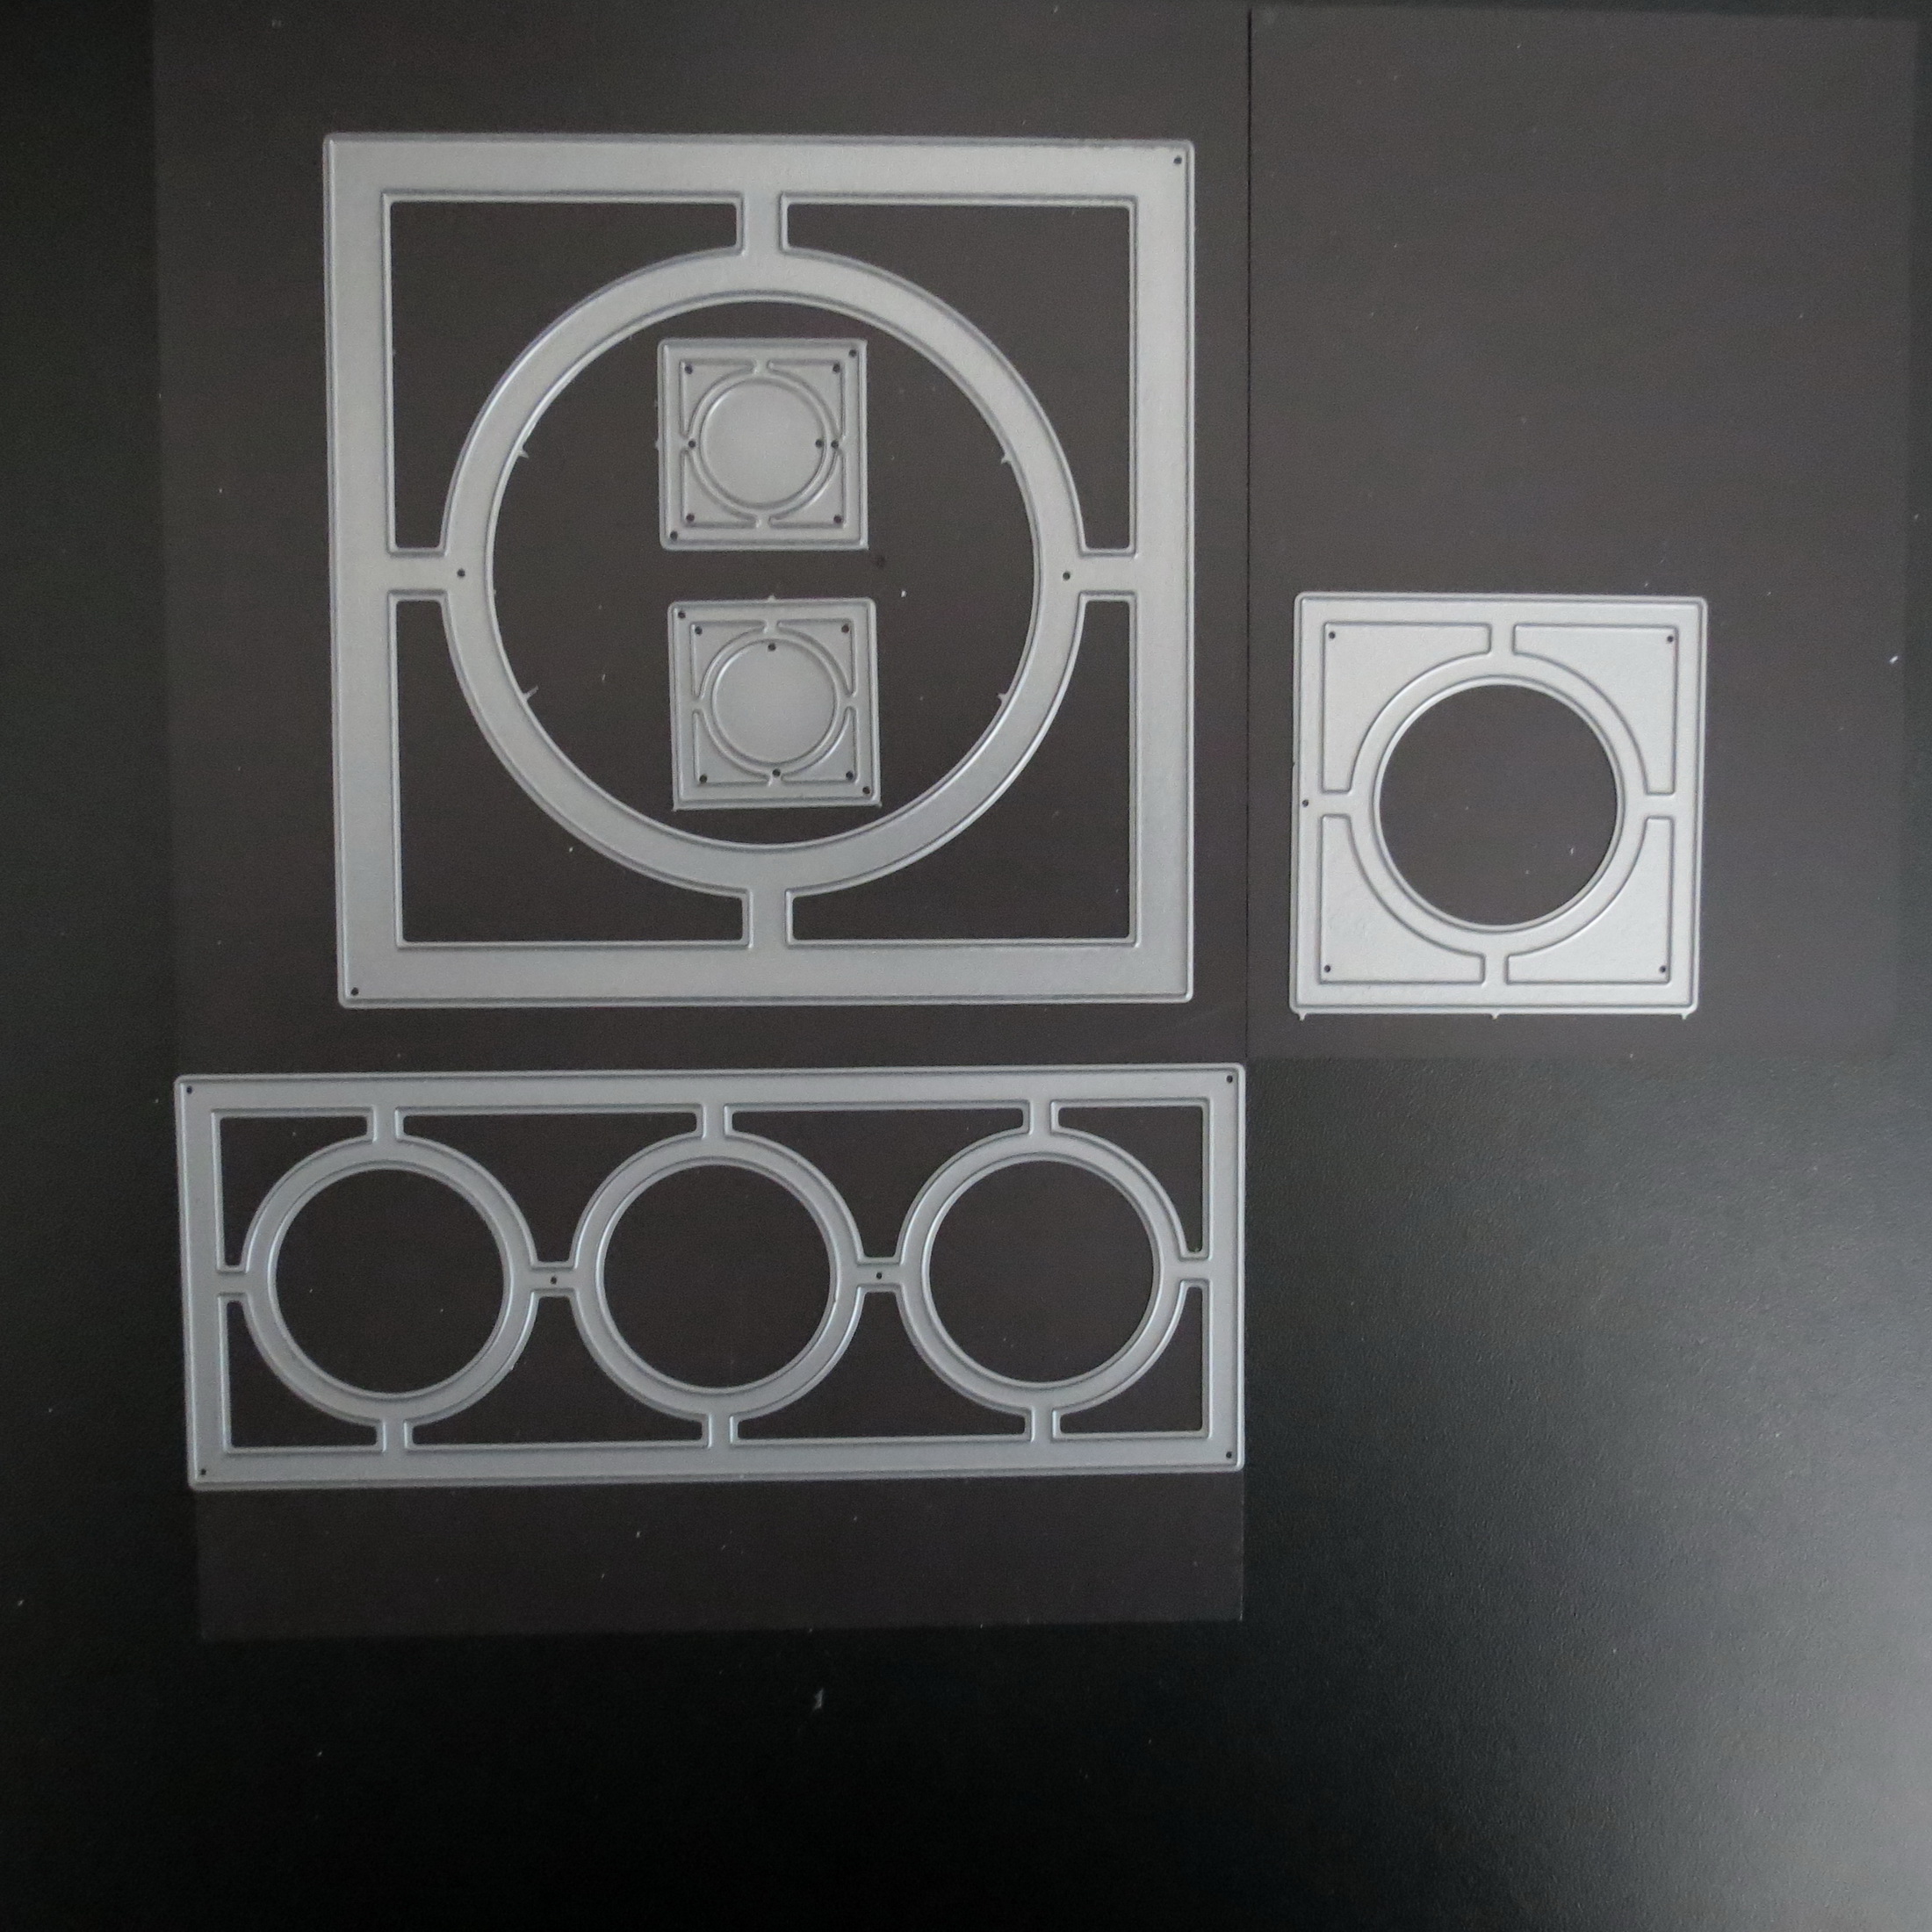
Mosaic Moments Family of Circle Center Dies
Depending on your subject matter when you are designing with dies you may want to add additional dies with which to build your layout. For this layout the Gingerbread man die, ornament border die, and scallop mats die helped to reinforce this holiday activity.
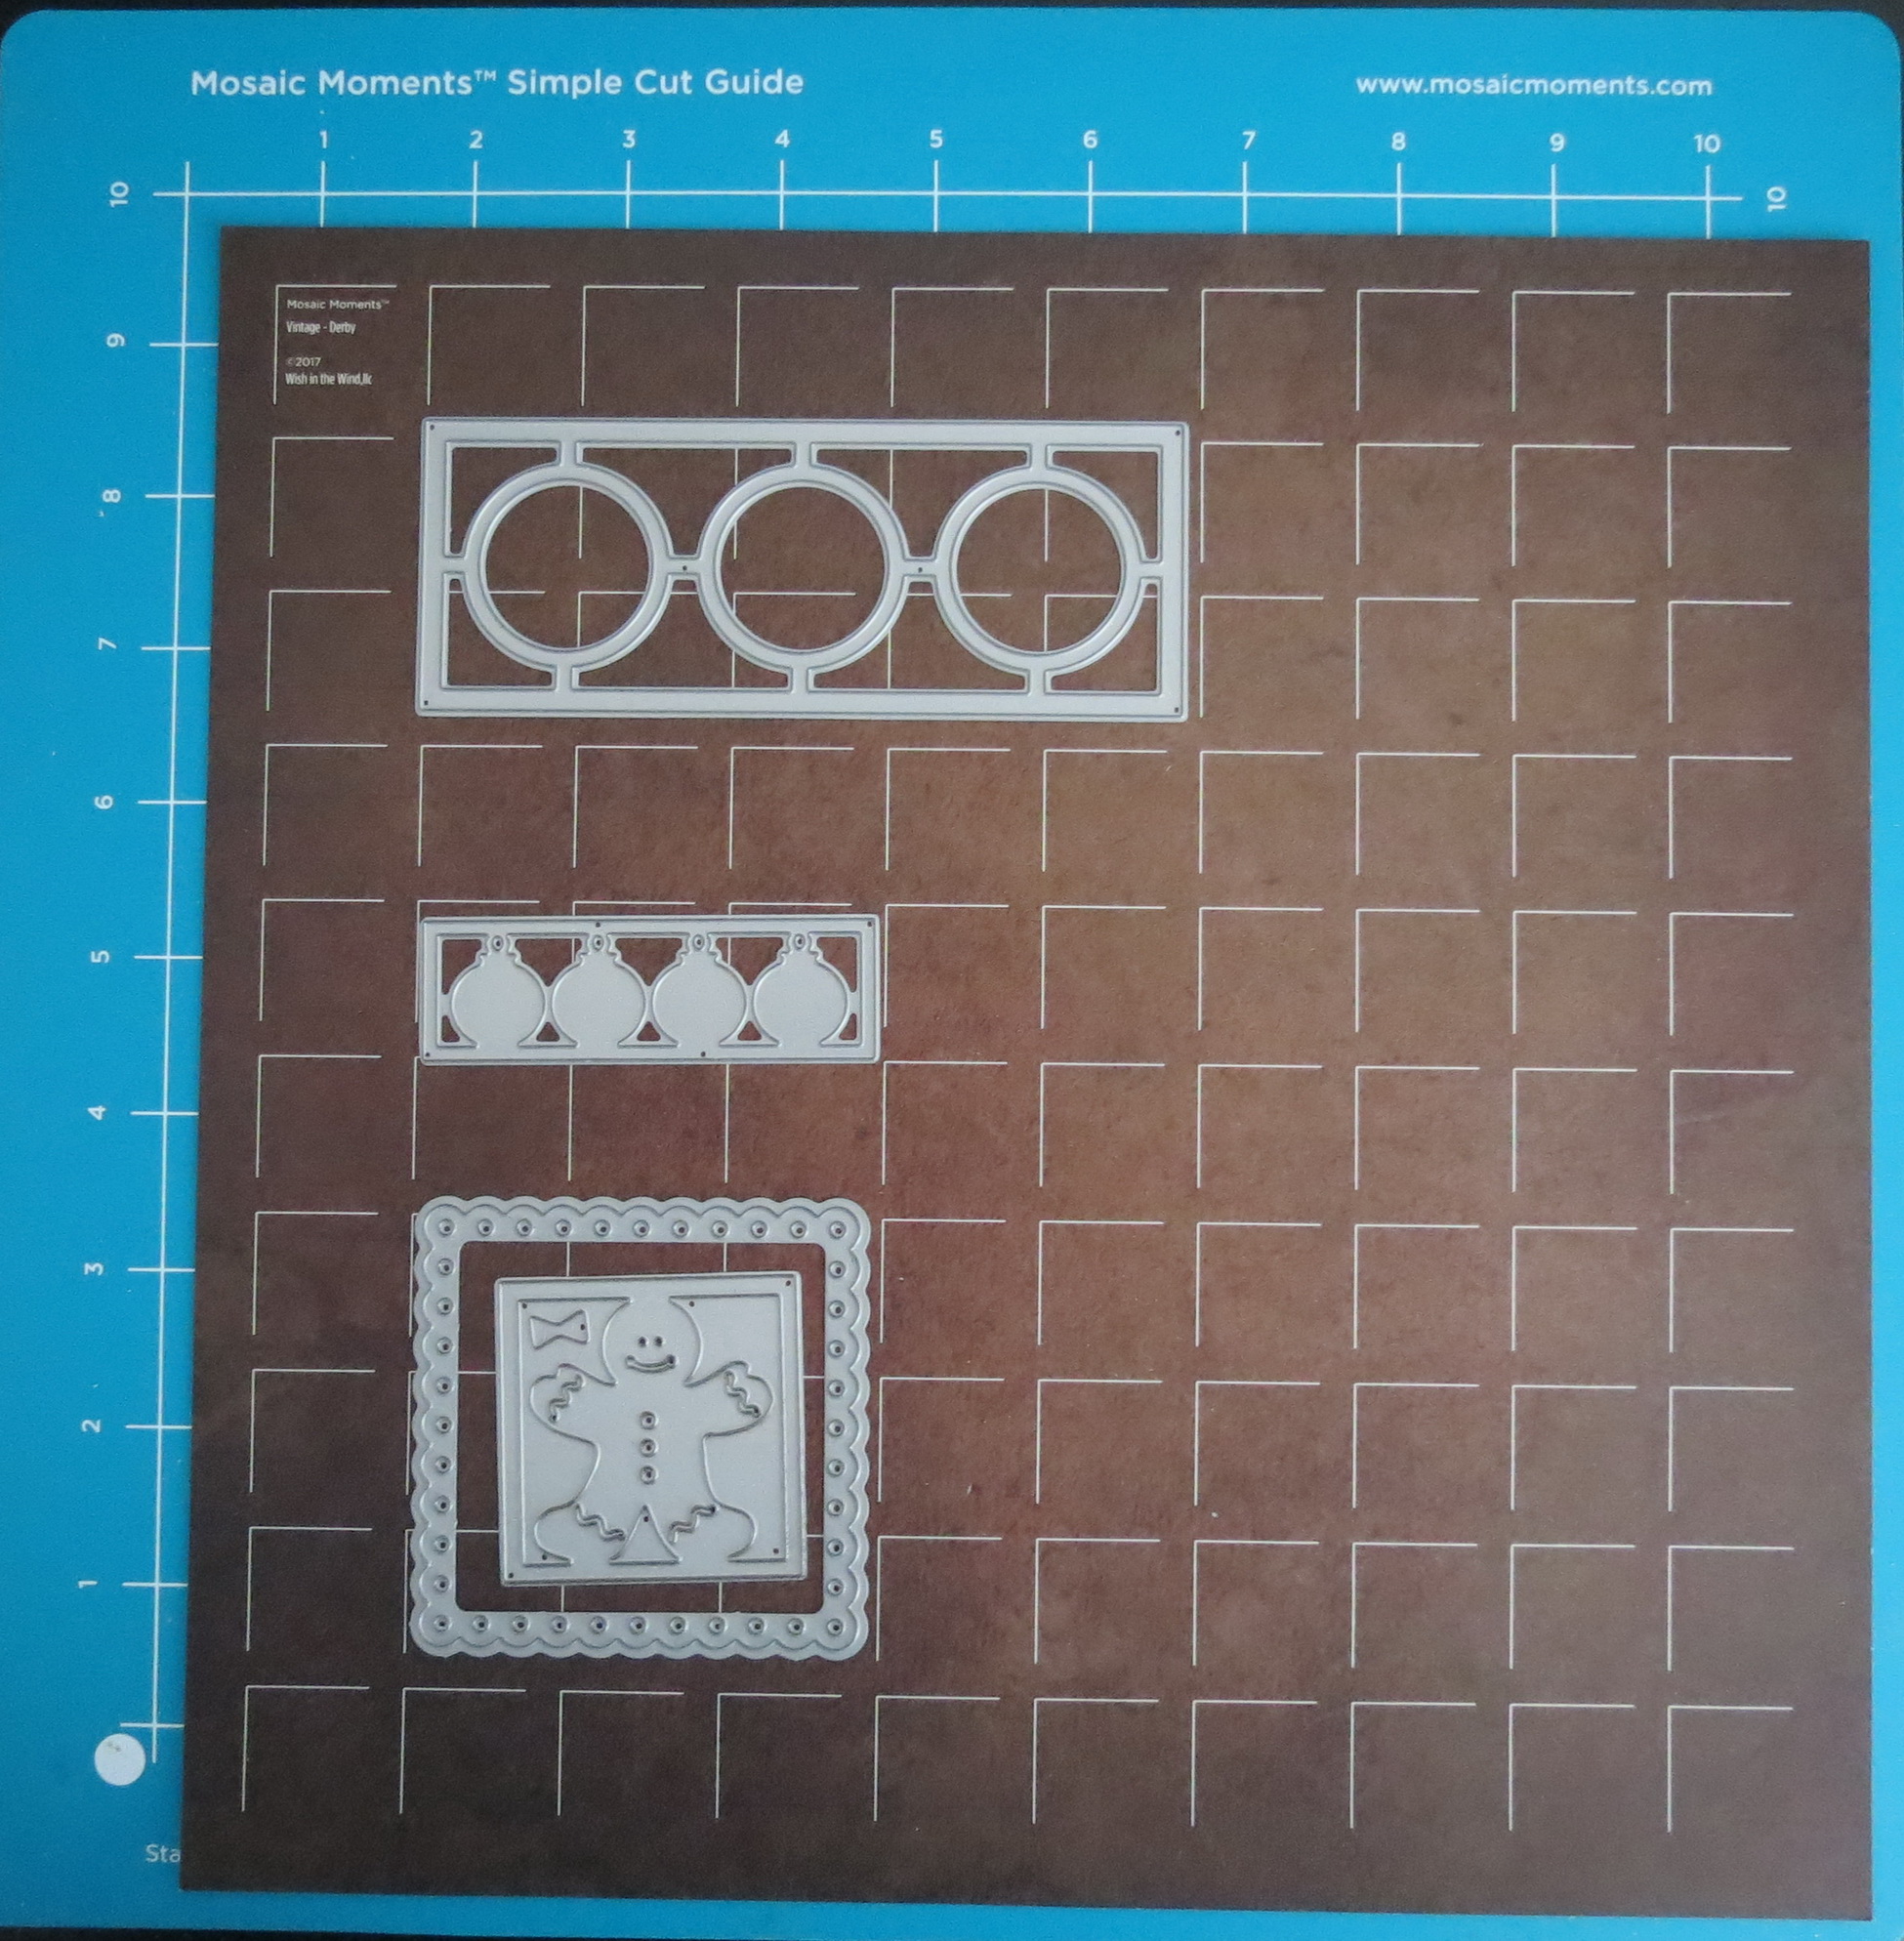
Mosaic Moments Designing with Dies featuring the Circle Center Dies
From the Renaissance Collection I’ve chosen the Vintage Derby a rich brown Grid from Mosaic Moments. I love how it looks and brings such warmth; I almost hate to cover it up! Cardstocks in medium and dark brown and a kraft brown compliment the grid and my choice of a striped pattern paper from the Tim Holtz idea-ology Collection: Christmas. The colors are a rich rustic red, a bit vintage in an appearance that blends nicely with the Vintage Derby grid.
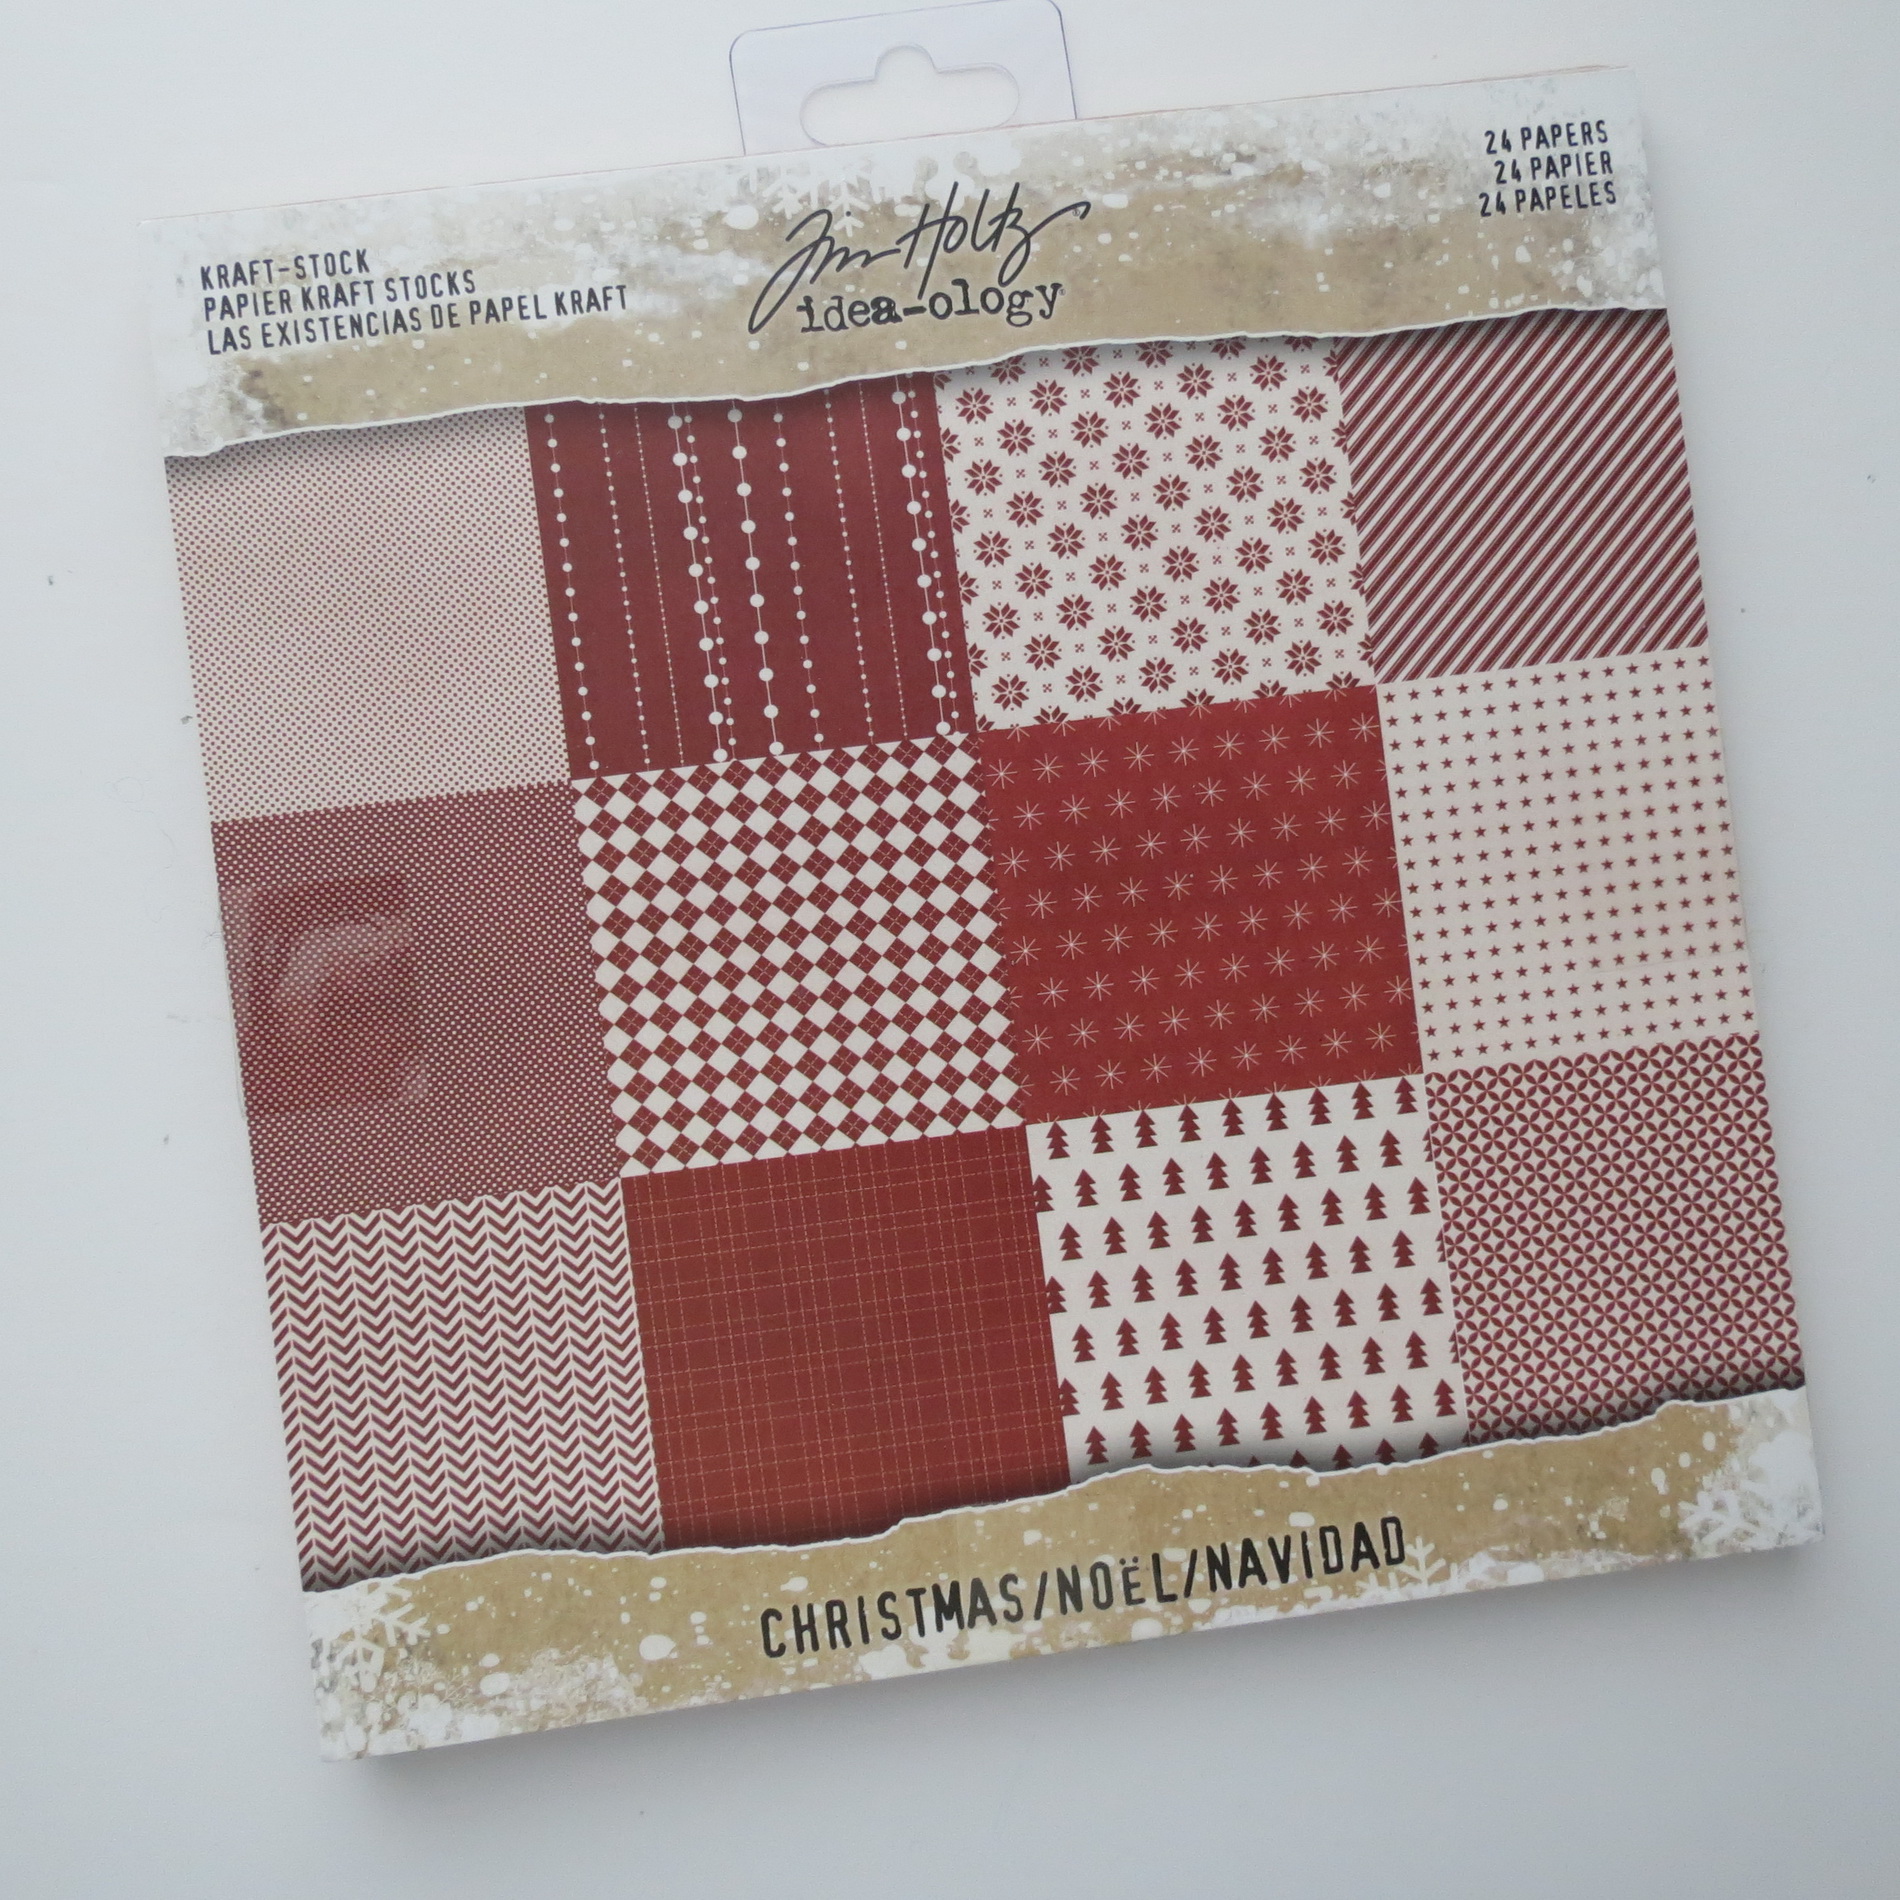
Mosaic Moments Designing with Dies featuring Tim Holtz idea-ology “Christmas”
Since I was beginning with the new Circle Center Border Die I selected all the patterns in the Pattern Gallery that use a 2×5 die. Because the pattern is color coded, this time orange for the die being used, it is easy to isolate the patterns to determine what will now suit my photos.
Tip: I have the images of the patterns downloaded into a folder in my photo storage files. I can easily copy and paste to the folder where my photos for the project are stored. REMEMBER only copy them to your folder leaving your original files in place. Once I’ve made my choice the unused patterns can be deleted.
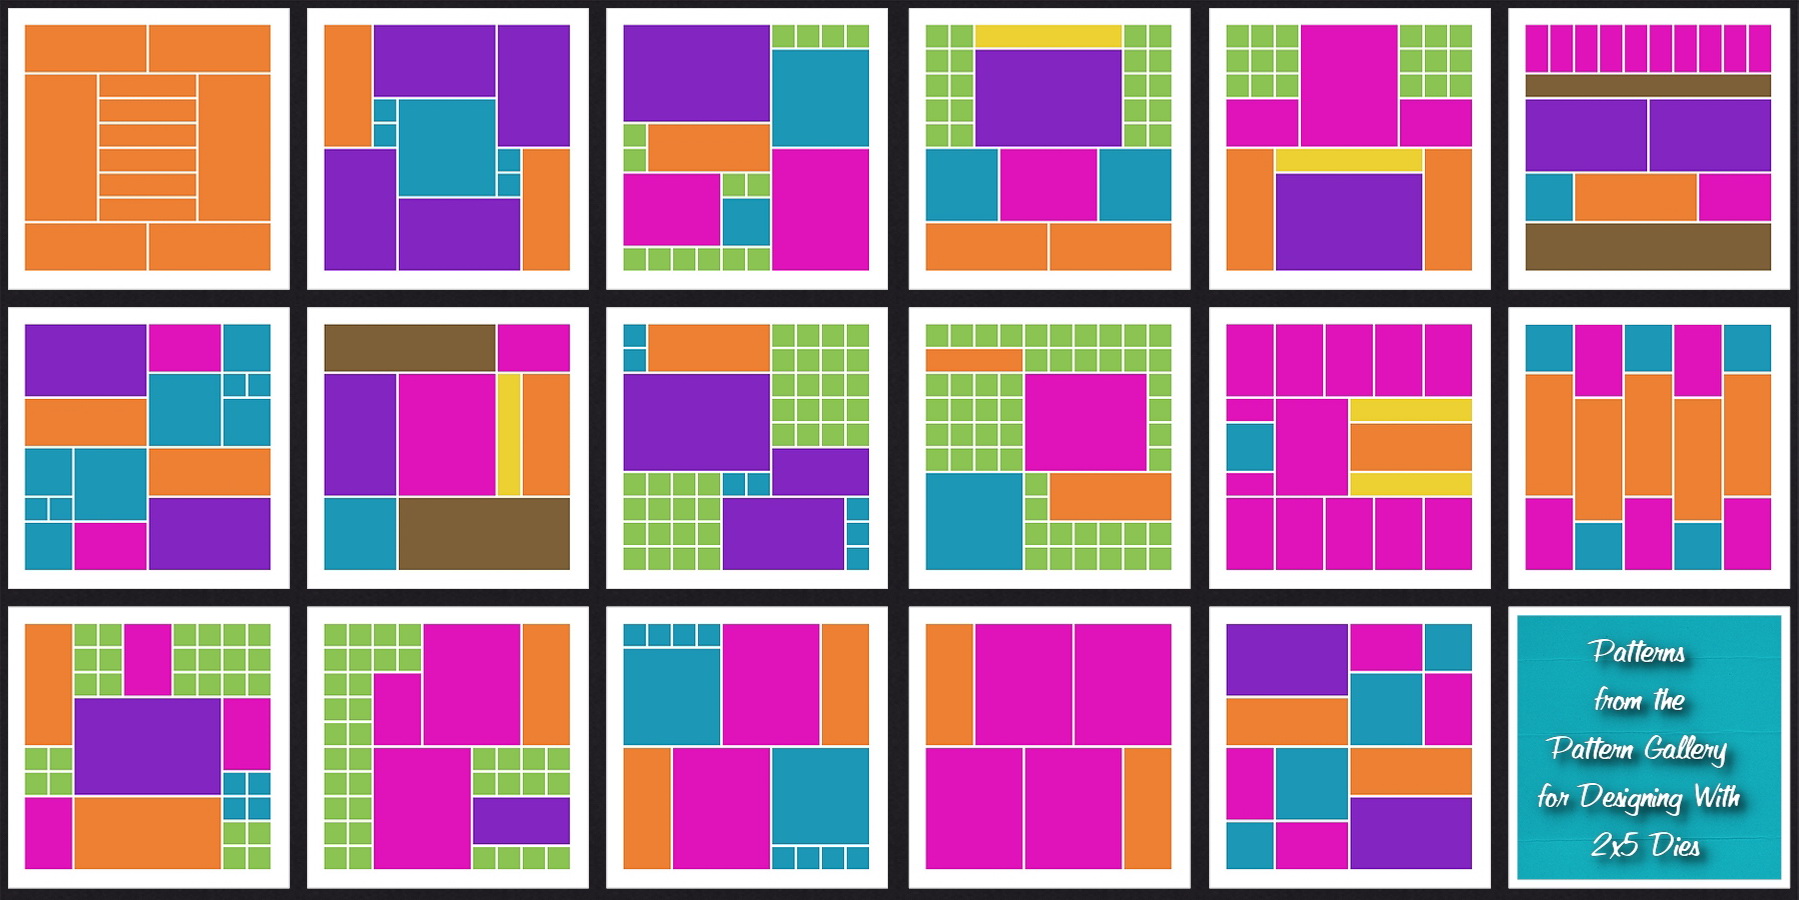
Mosaic Moments Designing with Dies Patterns for 2×5 Dies
You can see at a glance the various patterns and how the die will be used and the type of photos you will need. In the beginning I was only considering the 2×5 die…all the others I’d add in later came after I selected my pattern and was deciding how to place the photos on the grid in the best manner.
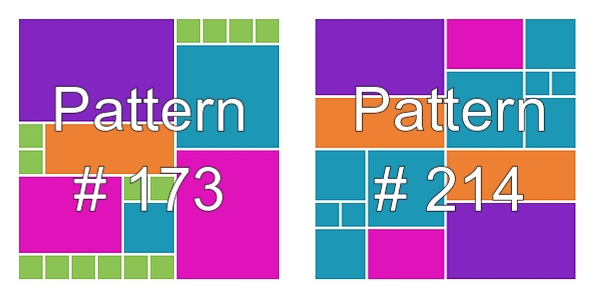
Mosaic Moments Pattern Gallery Choices Patterns #173 & #214
I had narrowed my choices to two patterns #173 and #214. Pattern #214 allowed for more photo spots and I had quite a few I wanted to use so this was my best choice but I wanted that diagonal row of squares to run from left to right so I flipped the pattern, a mirror image, for the look I wanted to achieve.
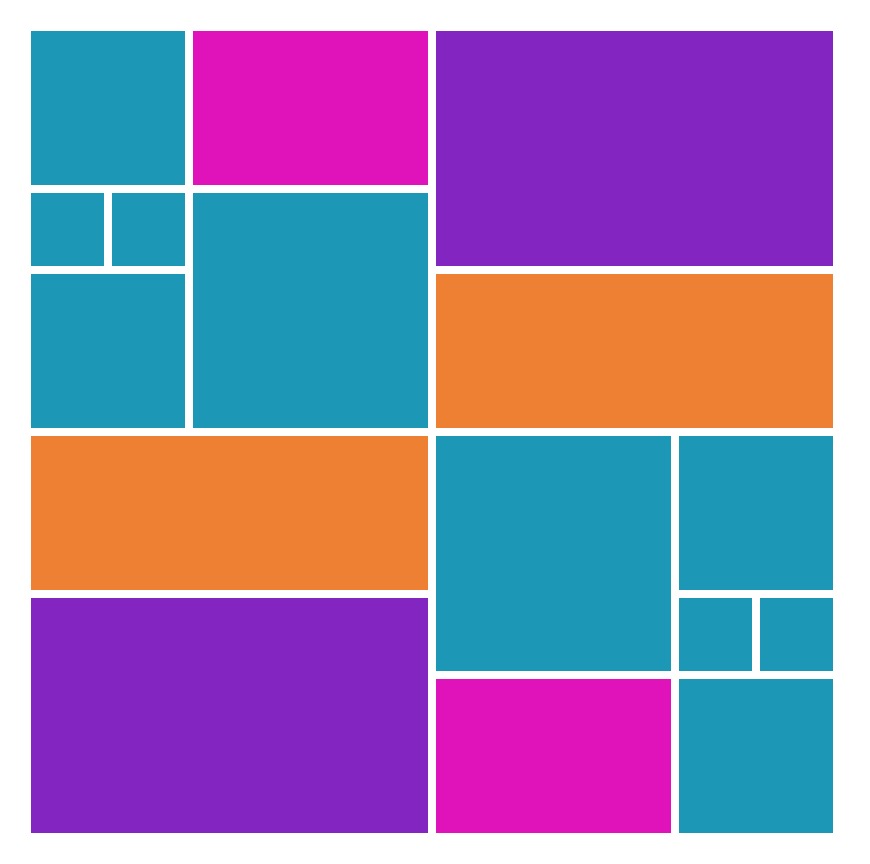
Mosaic Moments Designing with Dies Pattern #214
Mosaic Moments Designing with Dies featuring the Circle Center Dies
Remember:
As we talked about in our last post with photo tips I gave two ways for creating interest in your layout. I’ve used both tips again here.
• First: Telling the story from beginning to end and
• Second: An Overview shot, closer shot of the action and finally a detailed close-up
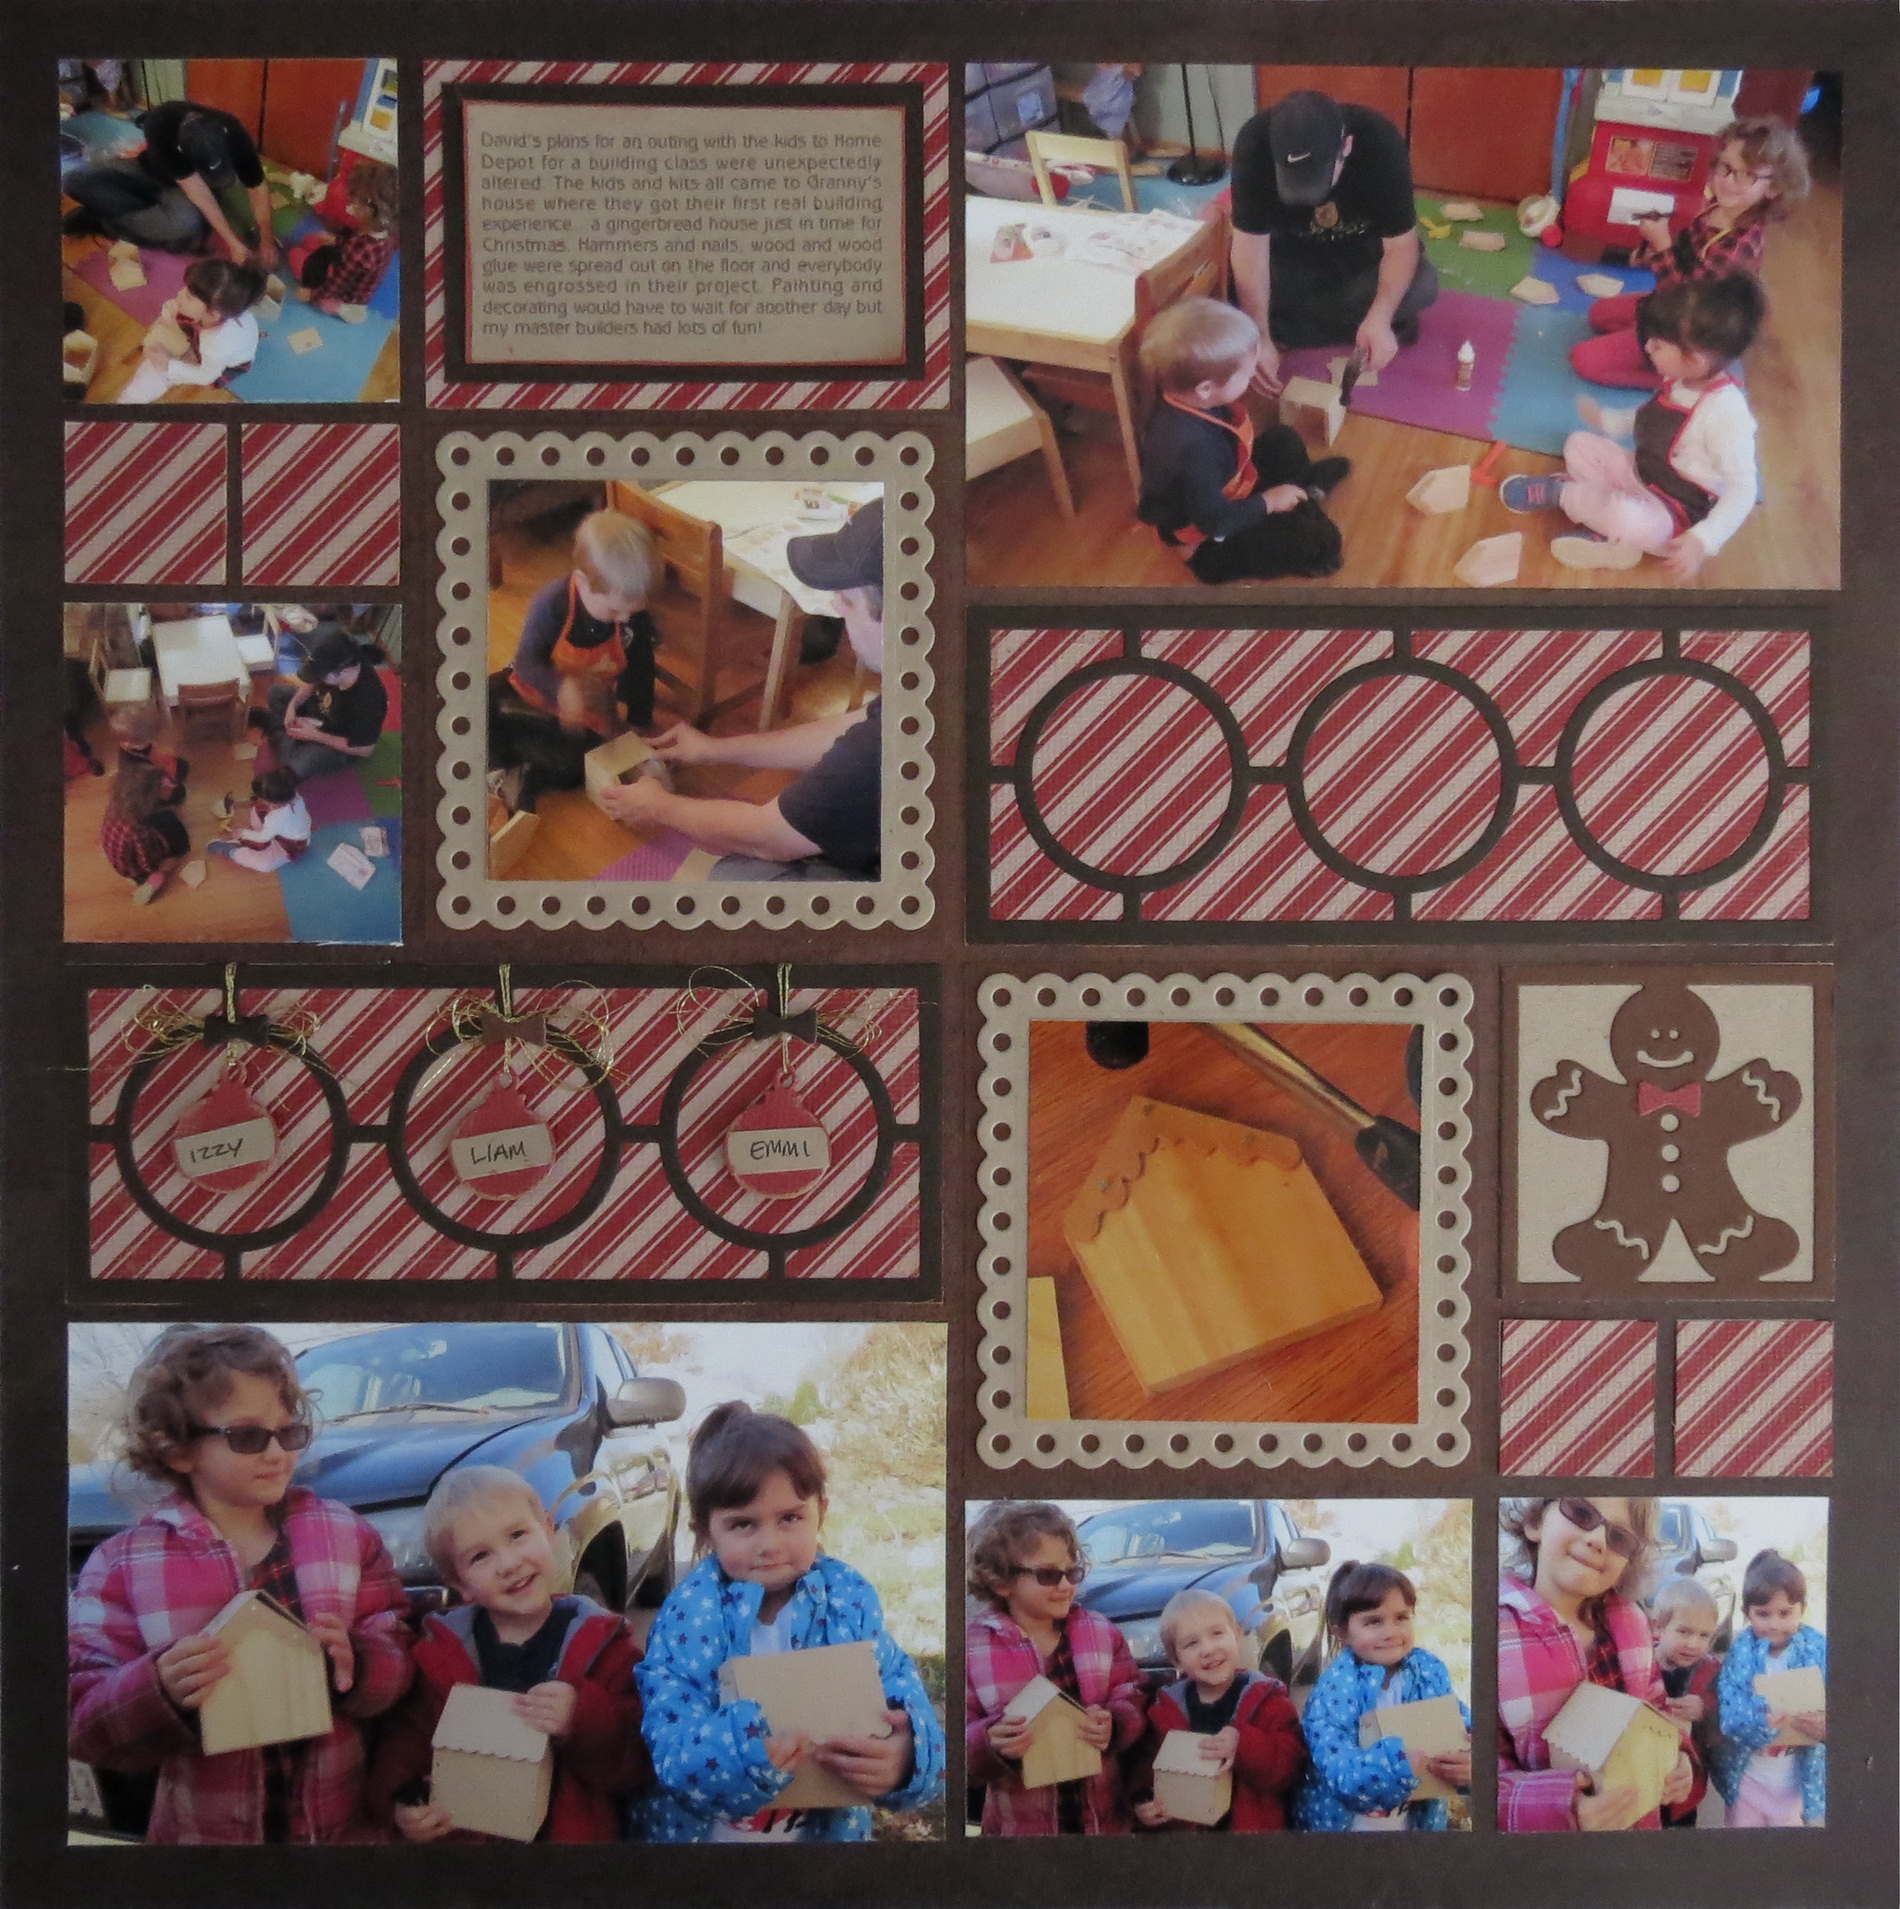
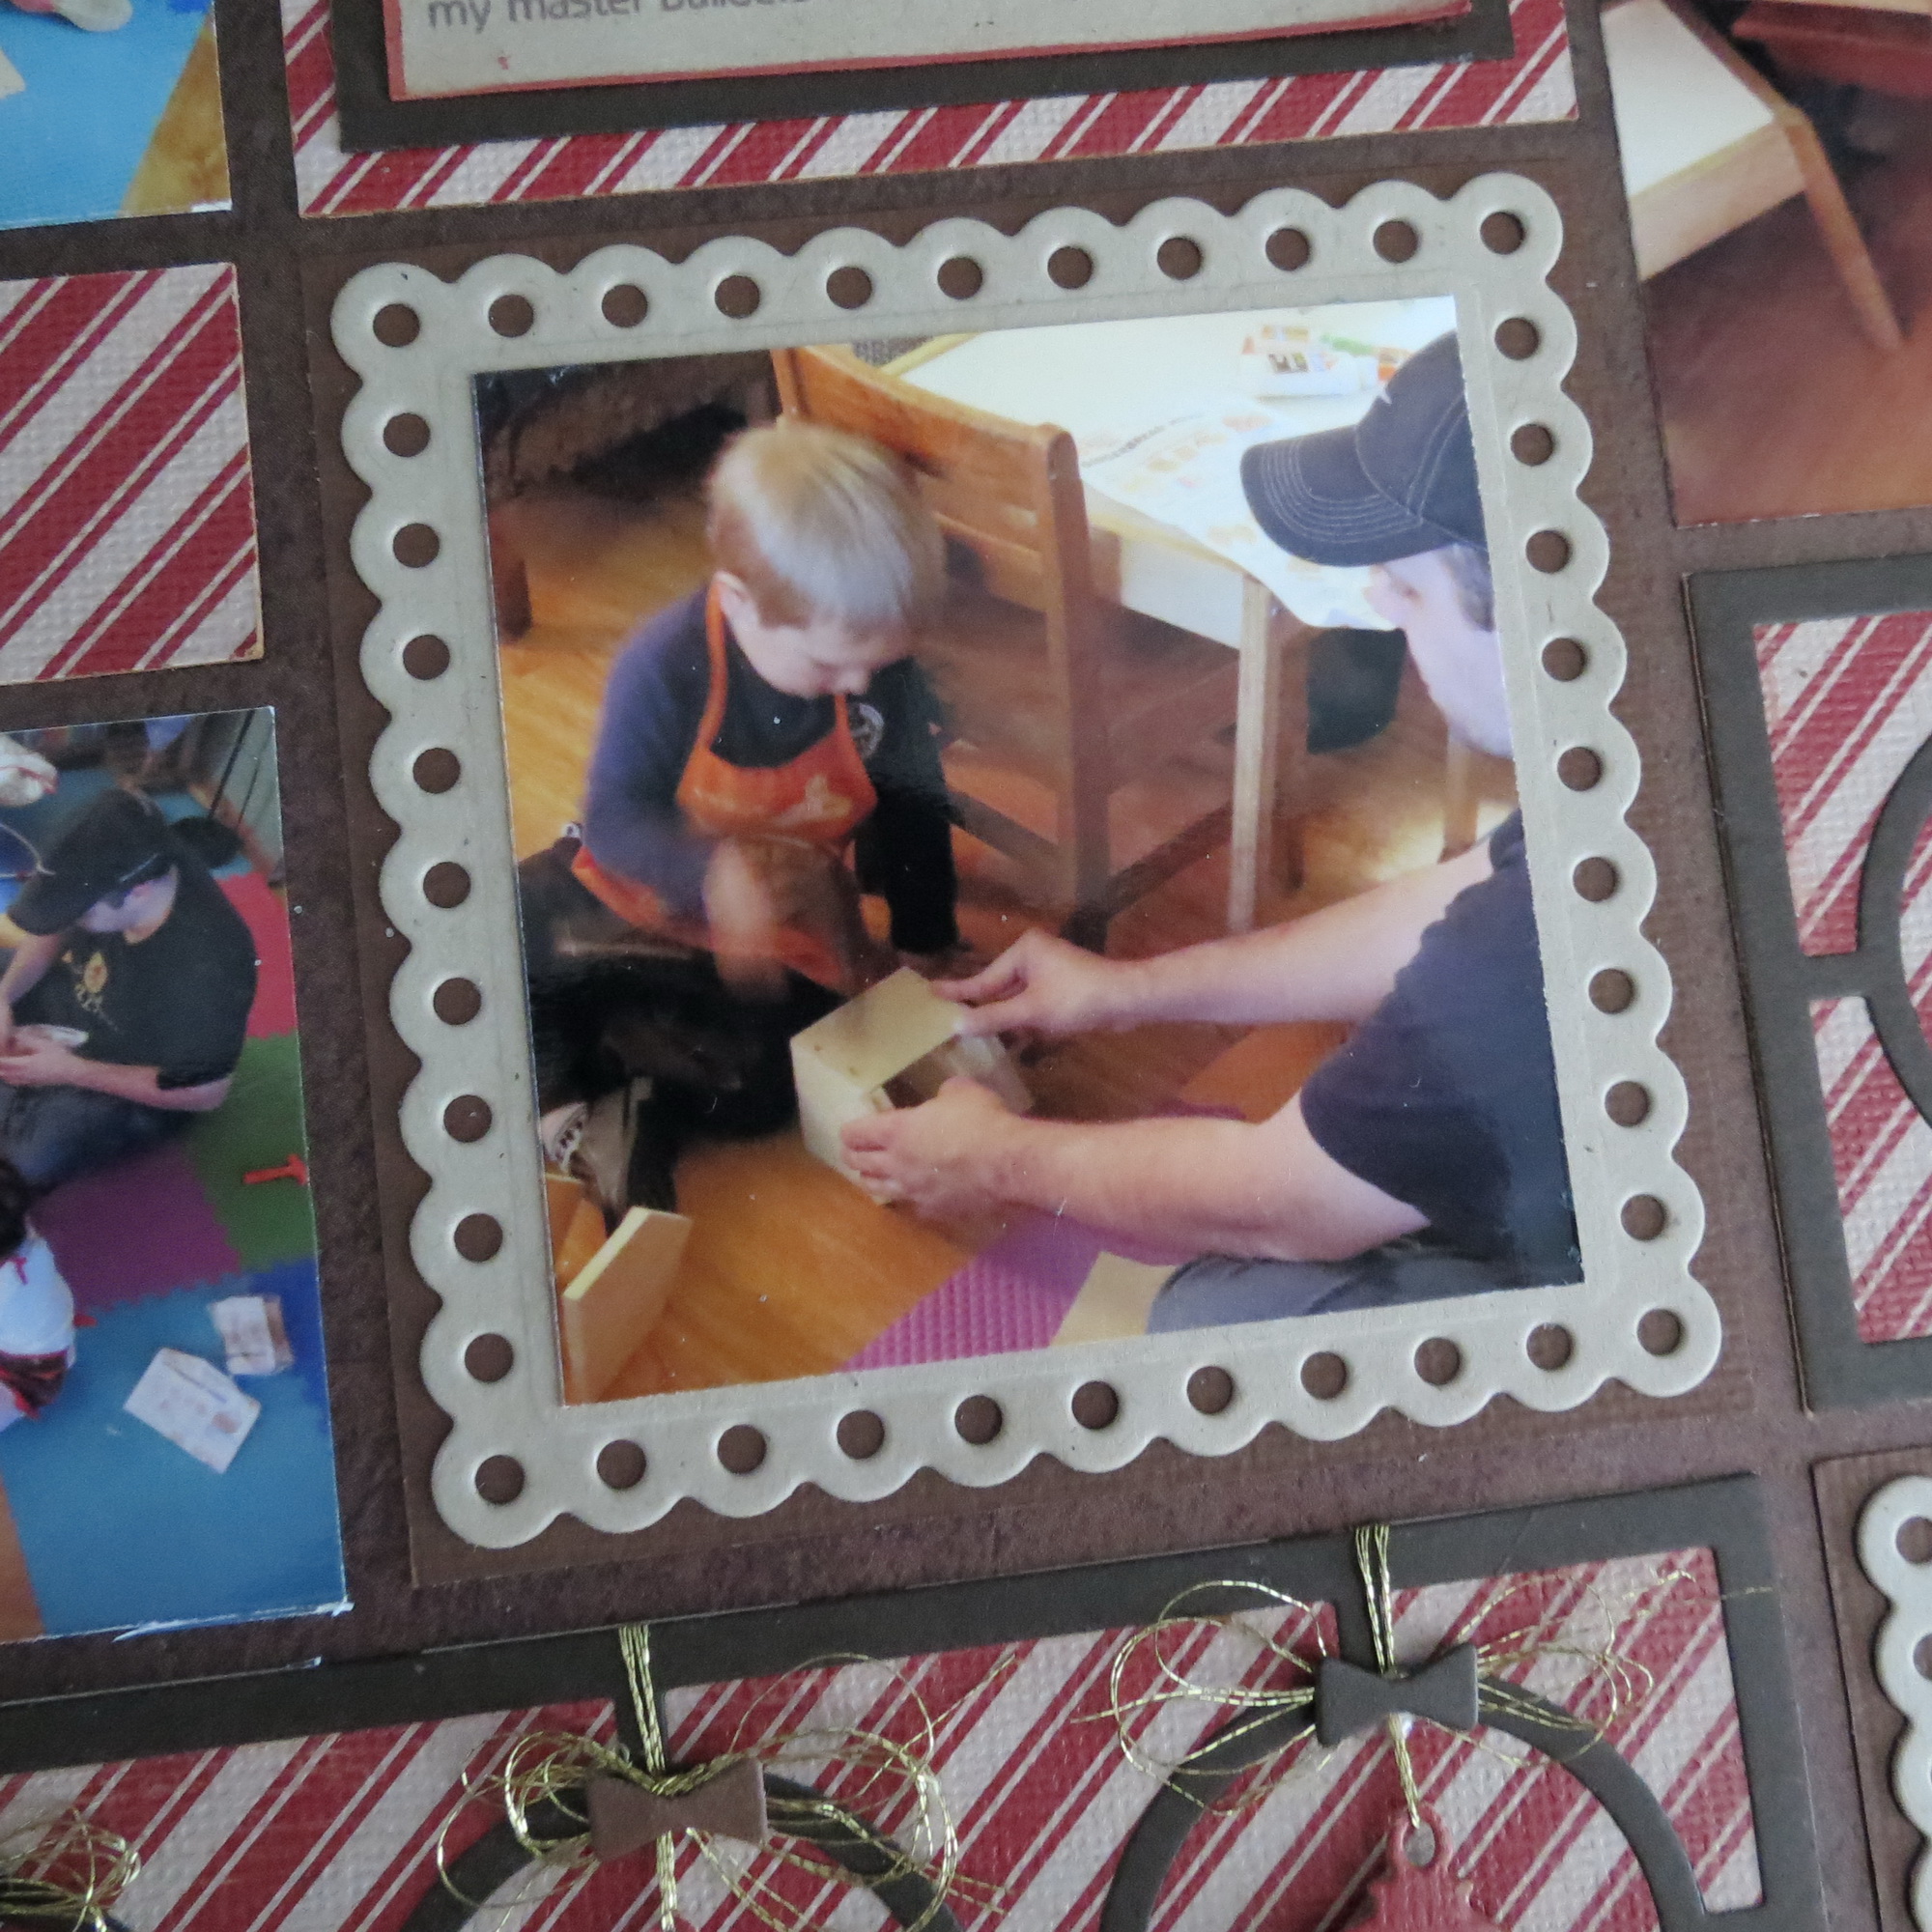
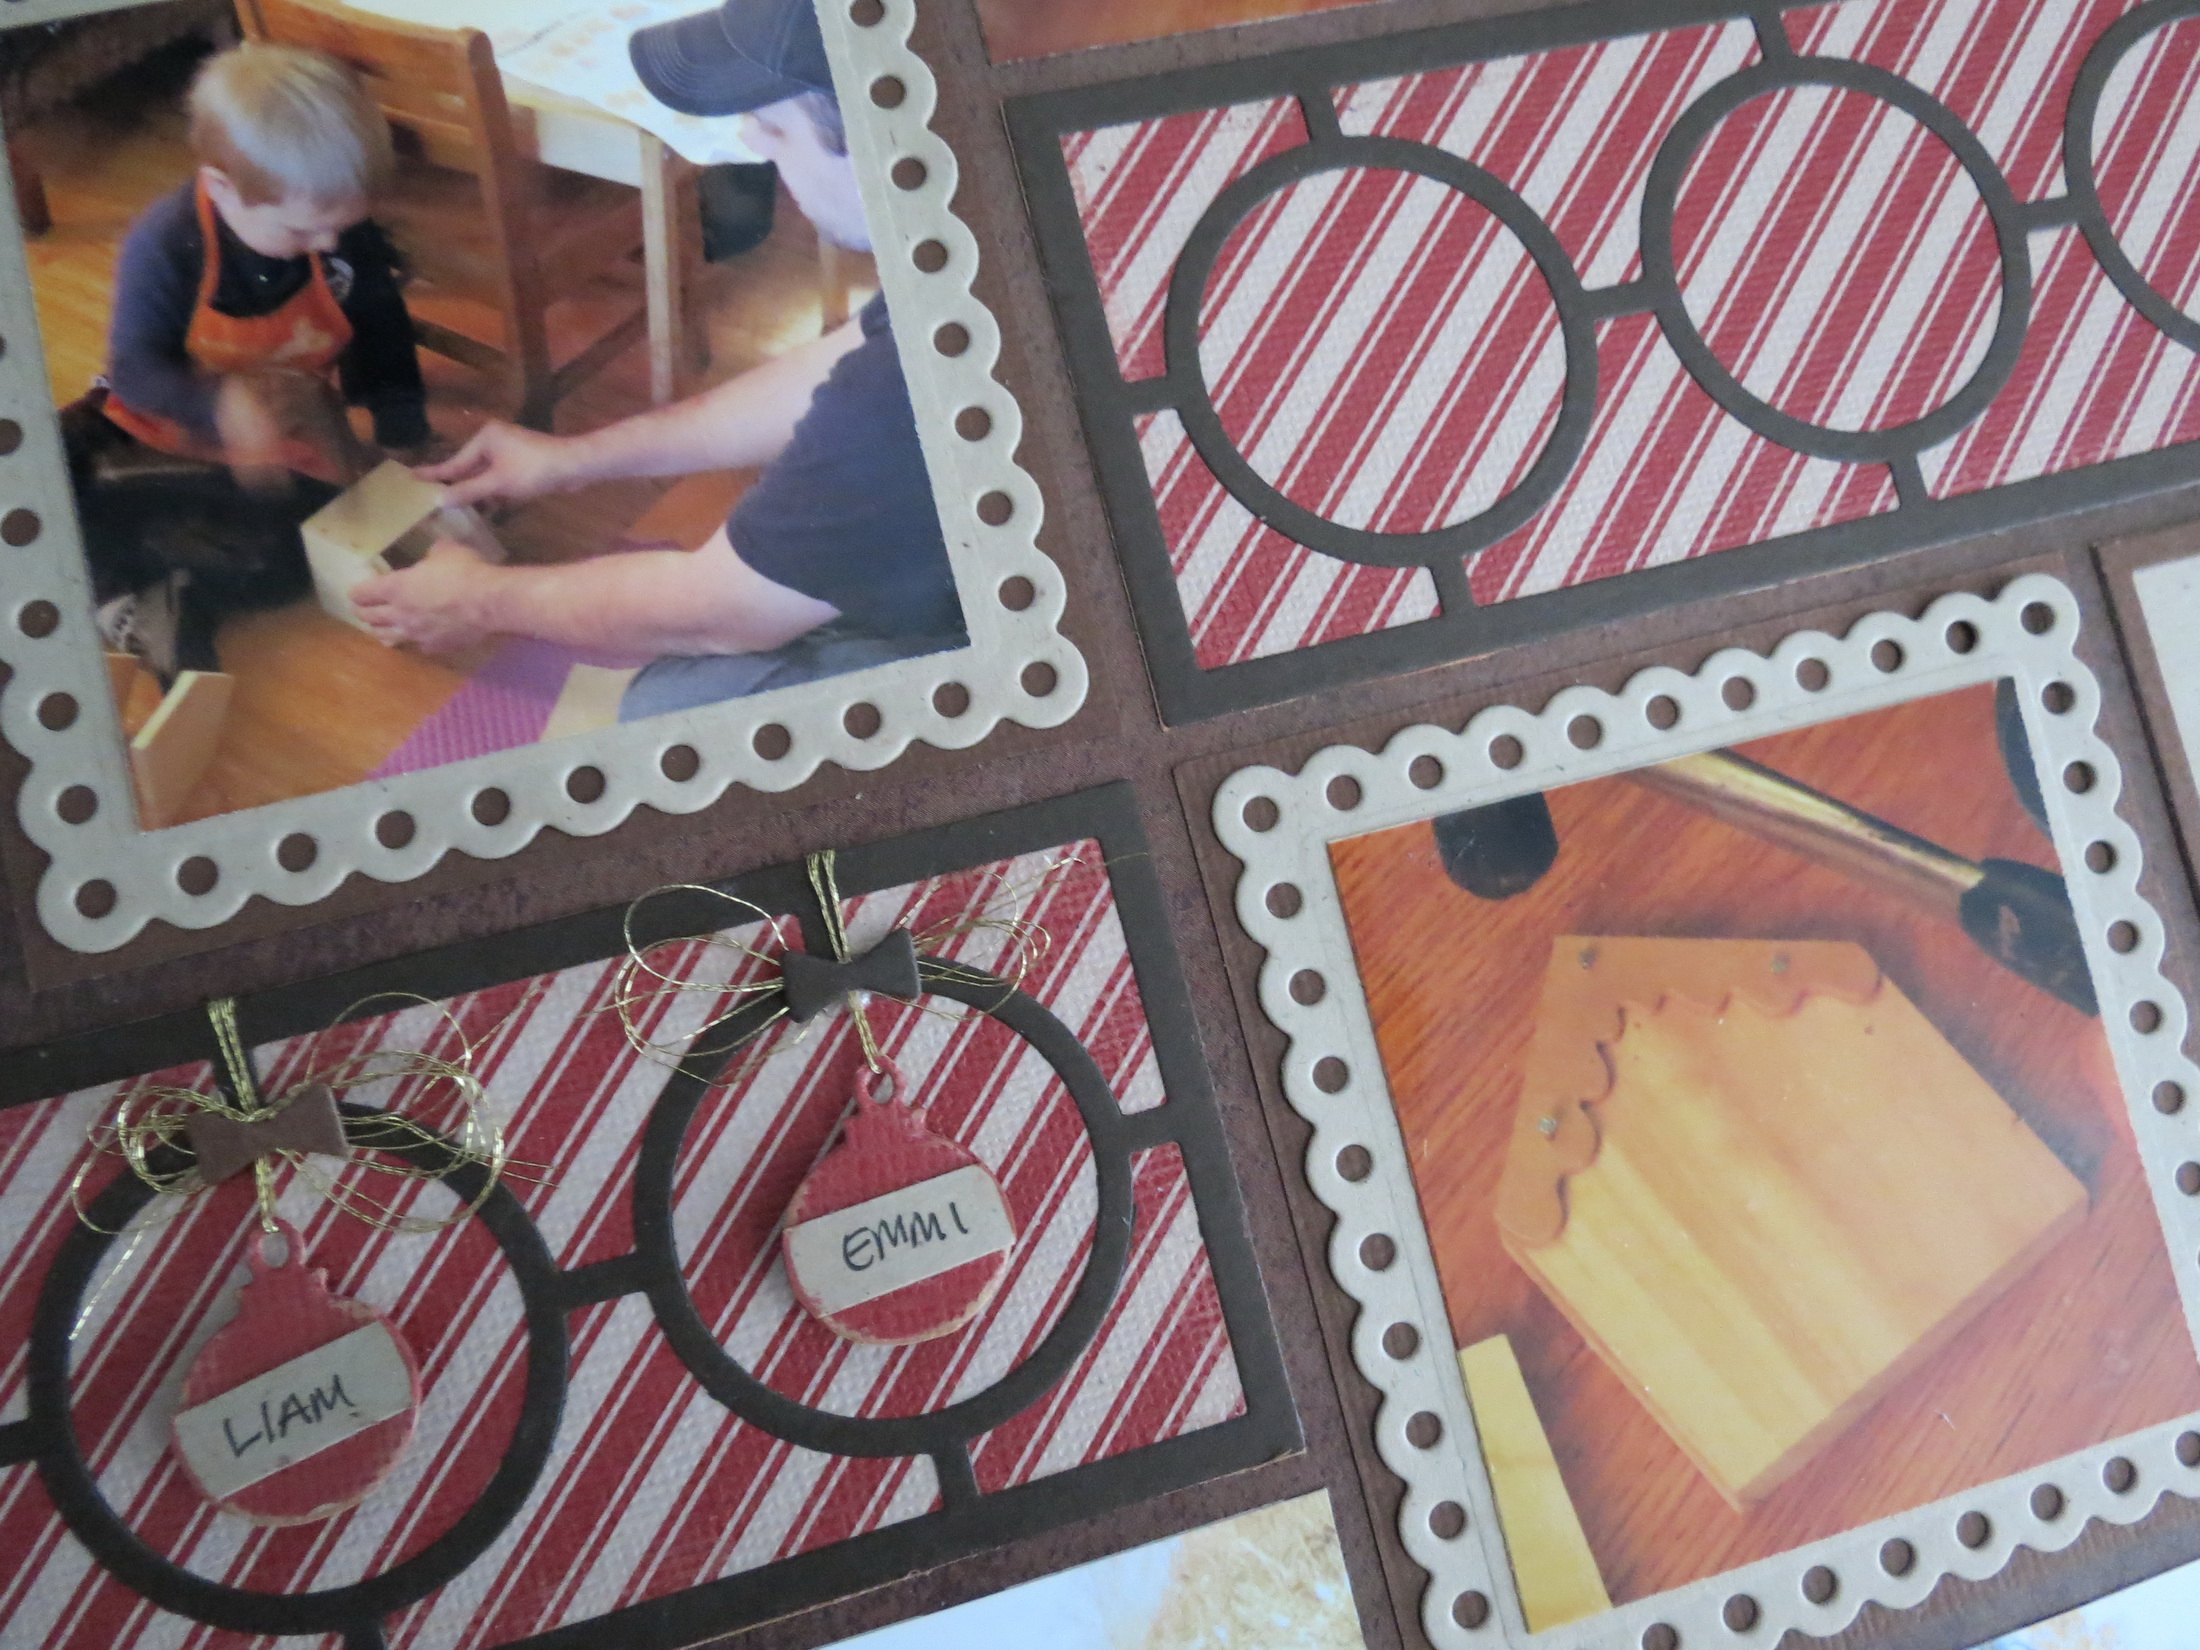
My diagonal series of squares begins with a big overview shot, moves to a closer look at my son and grandson working on their project, the third is a close up of one of the kids hammering the trim to the house and the last photo shows them all standing with their completed gingerbread houses.
Tip: Because this pattern is a column pattern it also allowed me to divide the photos into top and bottom halves. There are essentially 4 quadrants with two identical elements. In the top half all the construction action photos are placed and the bottom half becomes the place for the completed projects display.
The exception being the detail of the house being hammered…but works with the final reveal pics.
I did go with three photos of the kids together with their houses because the expressions were something else.
Let’s talk about the Circle Center Border Die and how I’ve used it here.
Mosaic Moments Designing with Dies featuring the Circle Center Dies
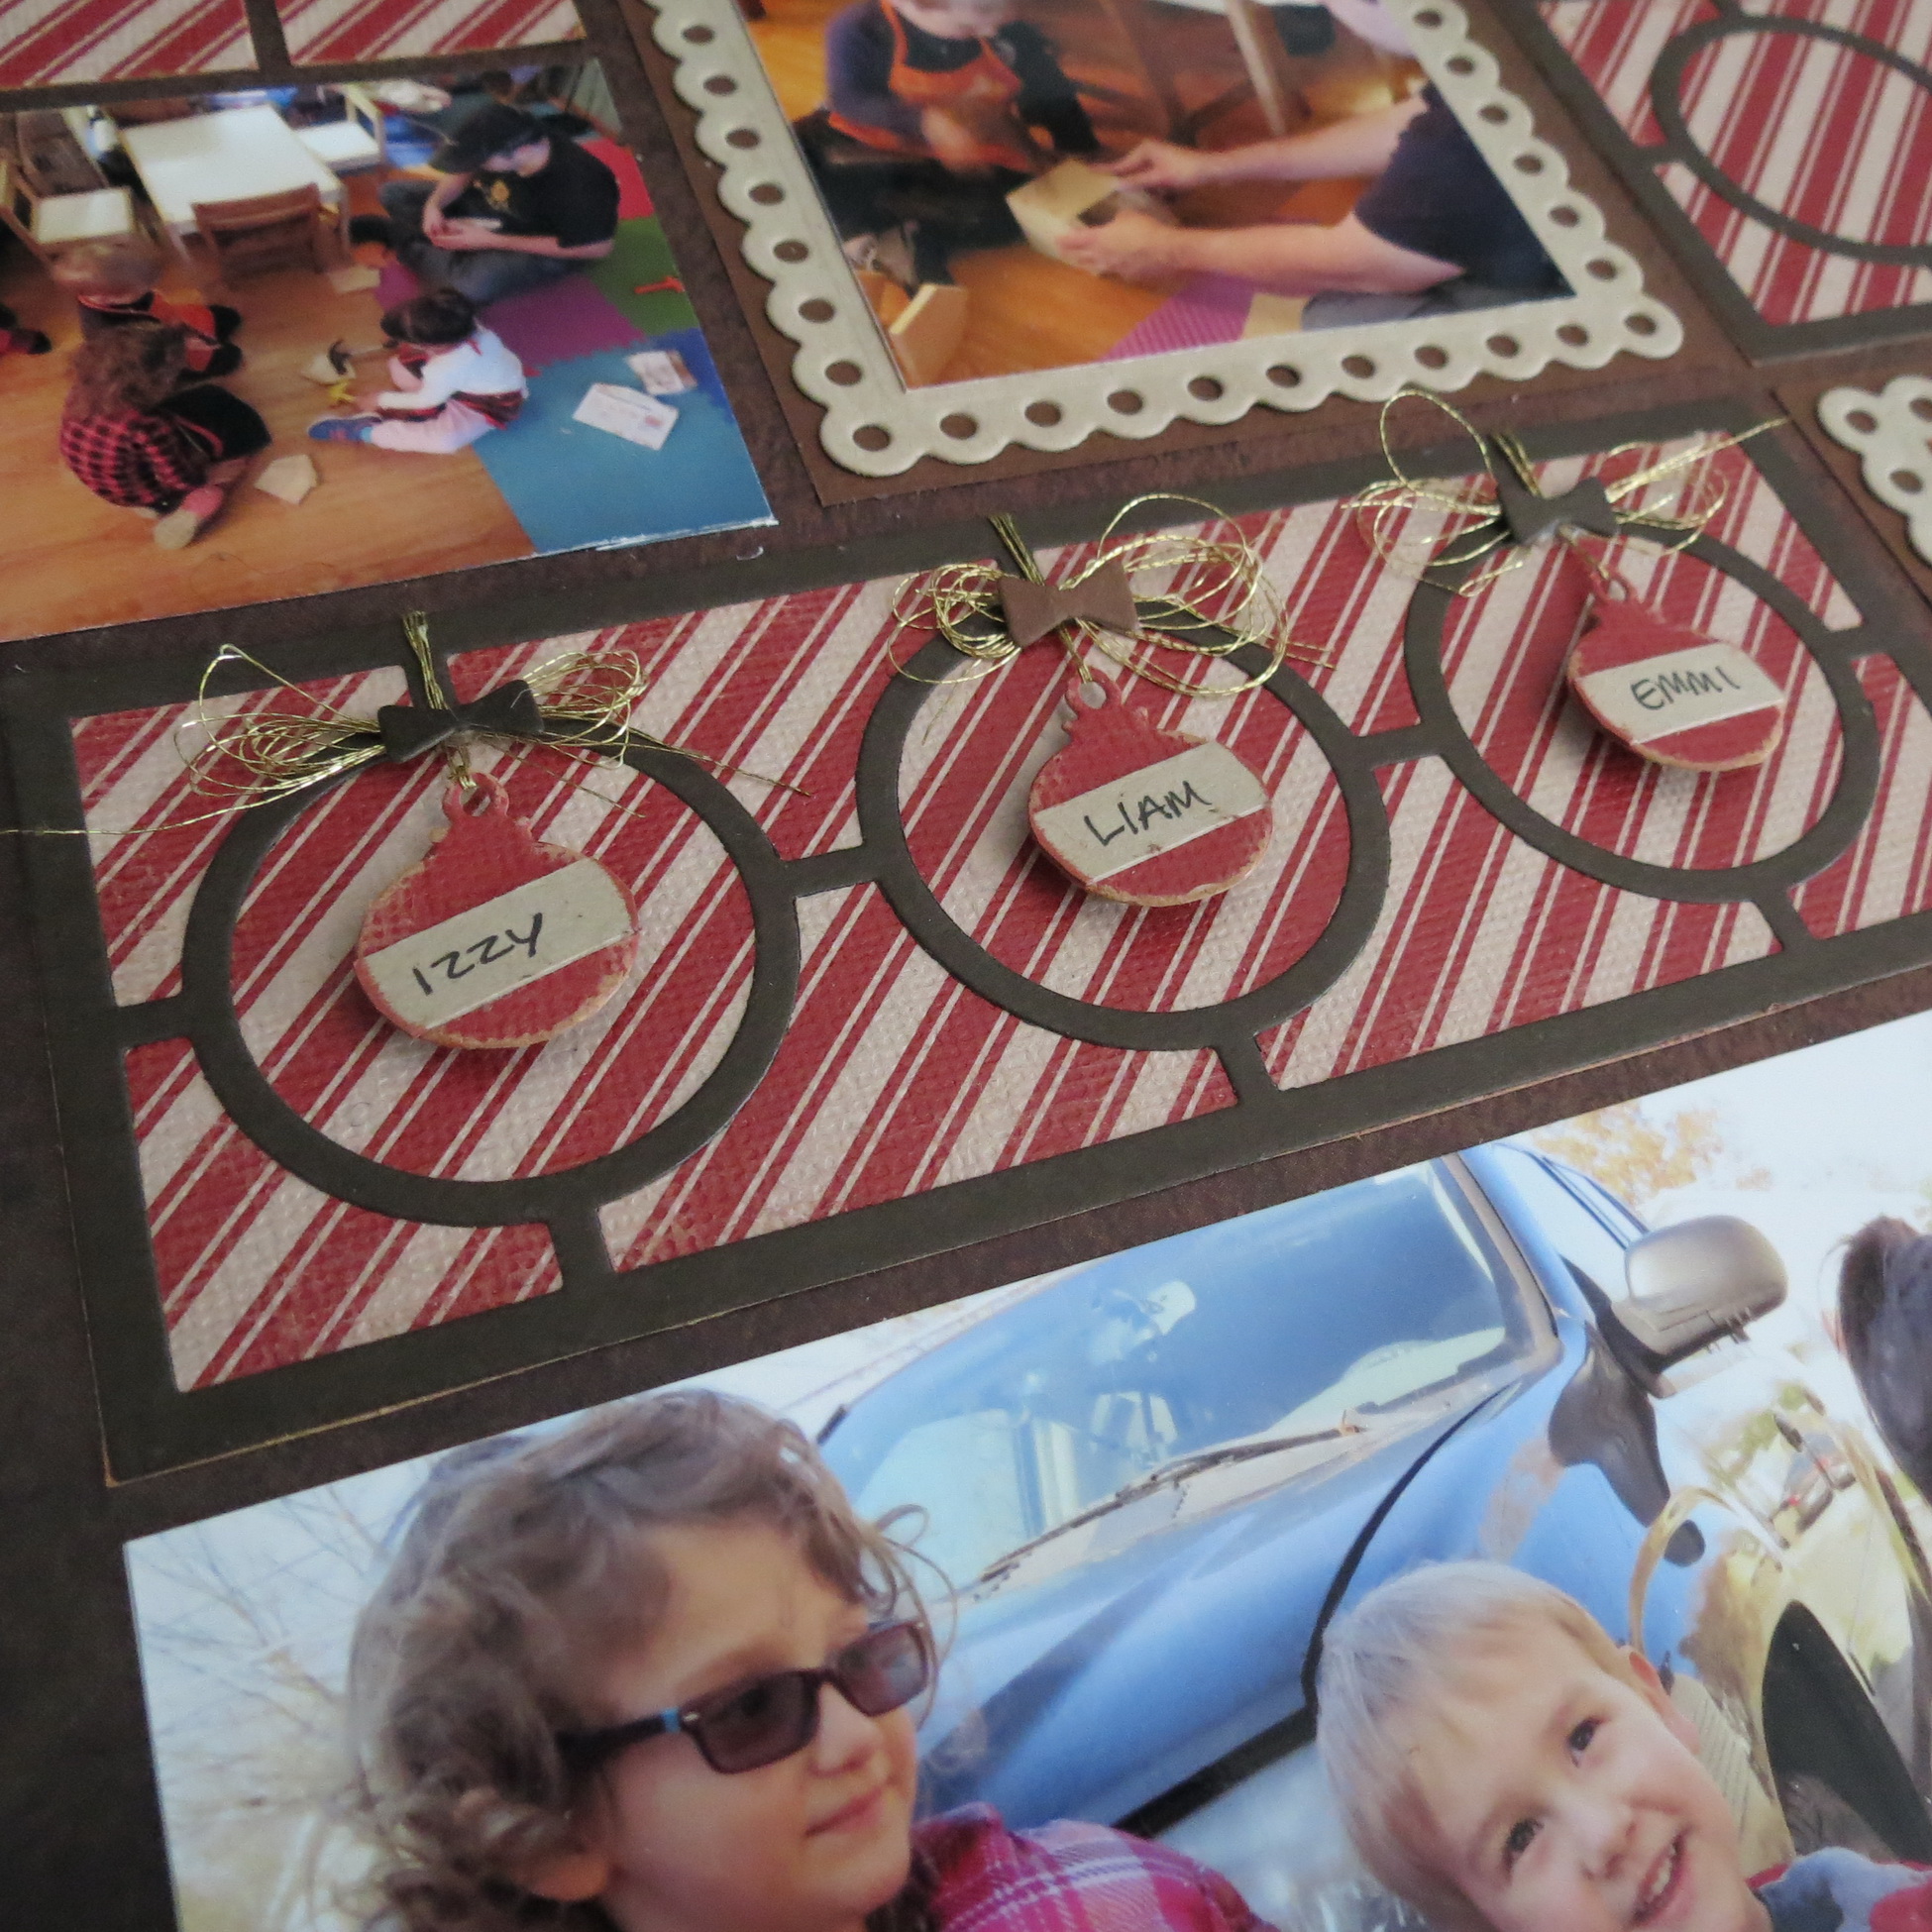
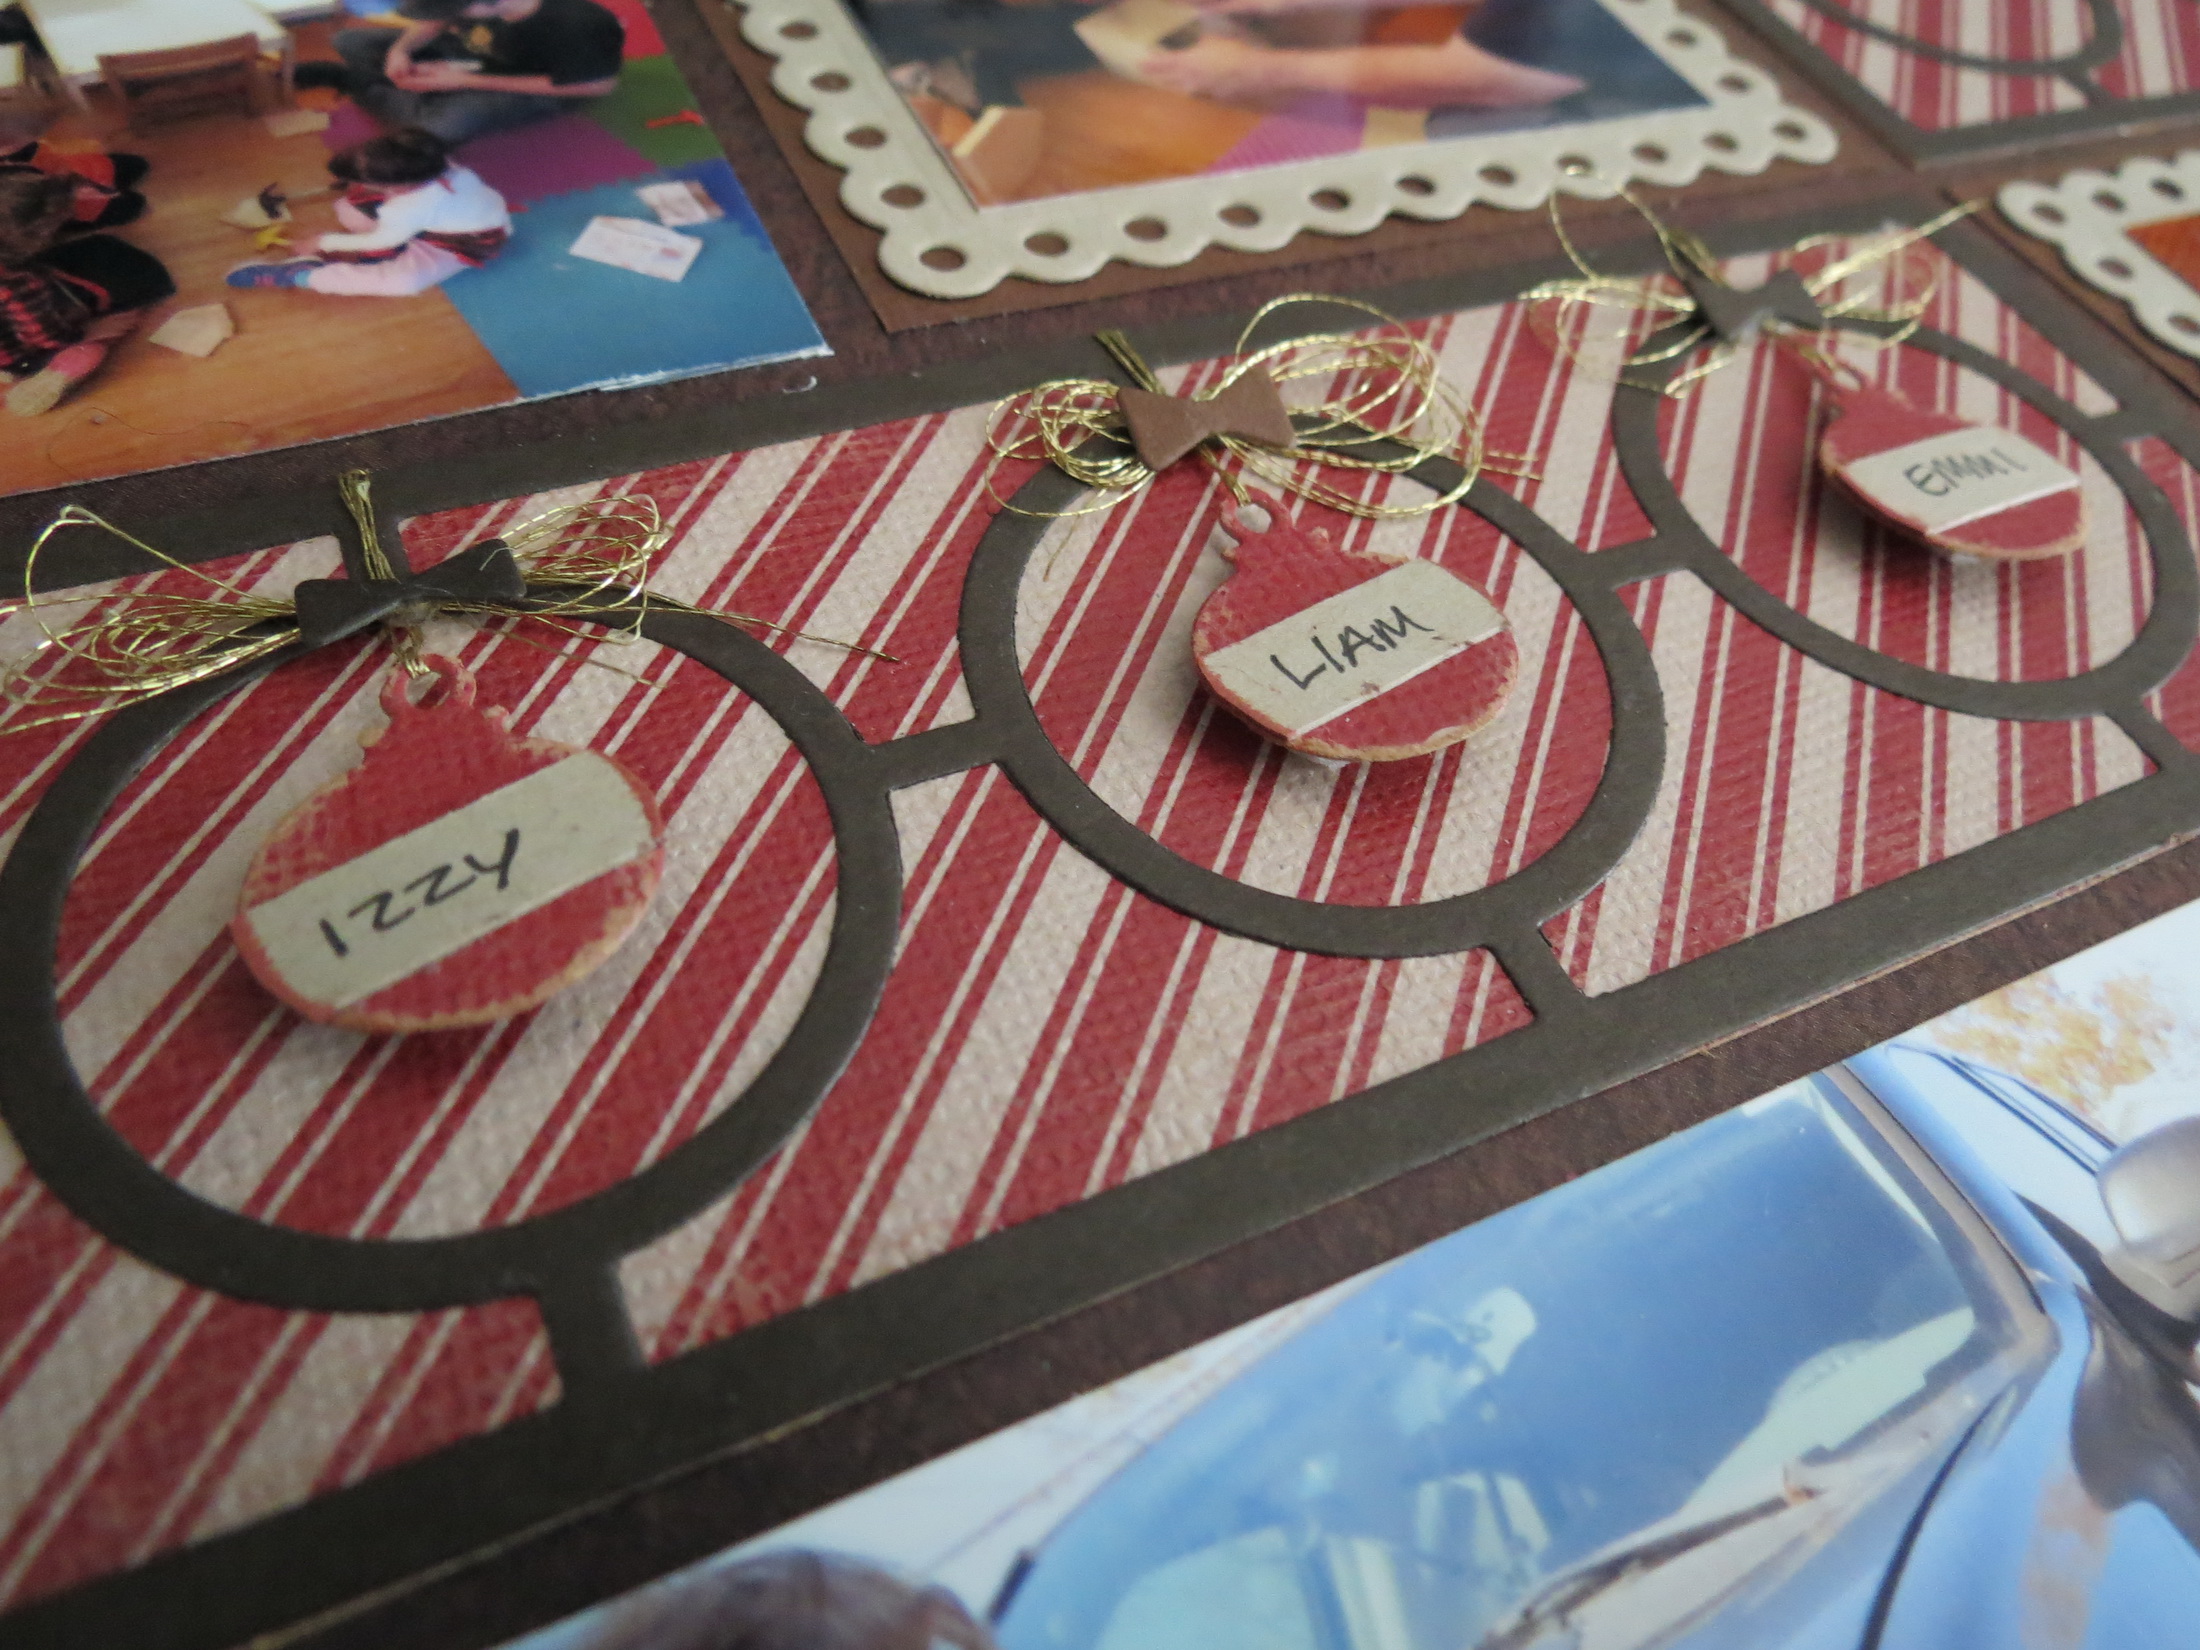
Cut in darker brown cardstock they are mounted on top of the striped paper. One has been left as is and the other I’ve added more embellishments. I may still go back and repeat the technique to include the month, day and year on three ornaments, but I haven’t really decided.
I was thinking of using smaller punched out circles to center inside each circle to write the date and names, but remembered the new ornament row die that I could detach the ornaments from the frame and hang them inside each of the larger circles of the 2×5 die.
The edge of each ornament was sanded down for an aged look. A ¼” strip of the kraft cardstock was adhered to the front at an angle and the excess trimmed away. Brick Red chalk-ink was applied to the edge of the kraft banner and the names were added with a micron pen.
Mosaic Moments Designing with Dies featuring the Circle Center Dies
Each of the ornaments has a loop to hang so I threaded some fine gold floss threads through the loop and taped to the back side of the die base. Then a foam mounting square was attached to each ornament to hold it in place and add dimension. The final touches were to gather some of the gold floss and place it in the center of a glue dot. I then rolled the dot to enclose the threads and stuck it to the top of the Die Frame above the ornament. To cover the exposed glue dot, bows from the gingerbread man die were added.

Mosaic Moments Designing with Dies featuring the Gingerbread Man Die
The Gingerbread Man Die seemed to be the logical choice of an additional element and I’ve kept it simple light brown on kraft with a solid rust red bow cut from the pattern paper.
Mosaic Moments Designing with Dies featuring the Scallop Mat Die
The final die I’ve included with this layout is the Scallop Mat Die. With the scallop edges of the gingerbread house I thought it would be a nice look. I saved it for the larger two center squares.
This die is a mat intended to be mounted on top of a larger tile block, in this case the 3×3 block in the pattern. The lighter brown cardstock is close in color to the center of the grid color and serves as the base; I liked that it sort of disappears from view. Two kraft mats are mounted on top and a hand trimmed photo finishes it off.
Mosaic Moments Designing with Dies featuring the Circle Center Dies and Scallop Mat Die
There is a small journal block at the top of the page that I’ve double mounted in darker brown and then the patterned paper. The edges of the kraft block were also chalked-inked with the brick red to define the areas and repeat the look of the 2×5 die on the page.
Mosaic Moments Designing with Dies Journaling
Journaling:
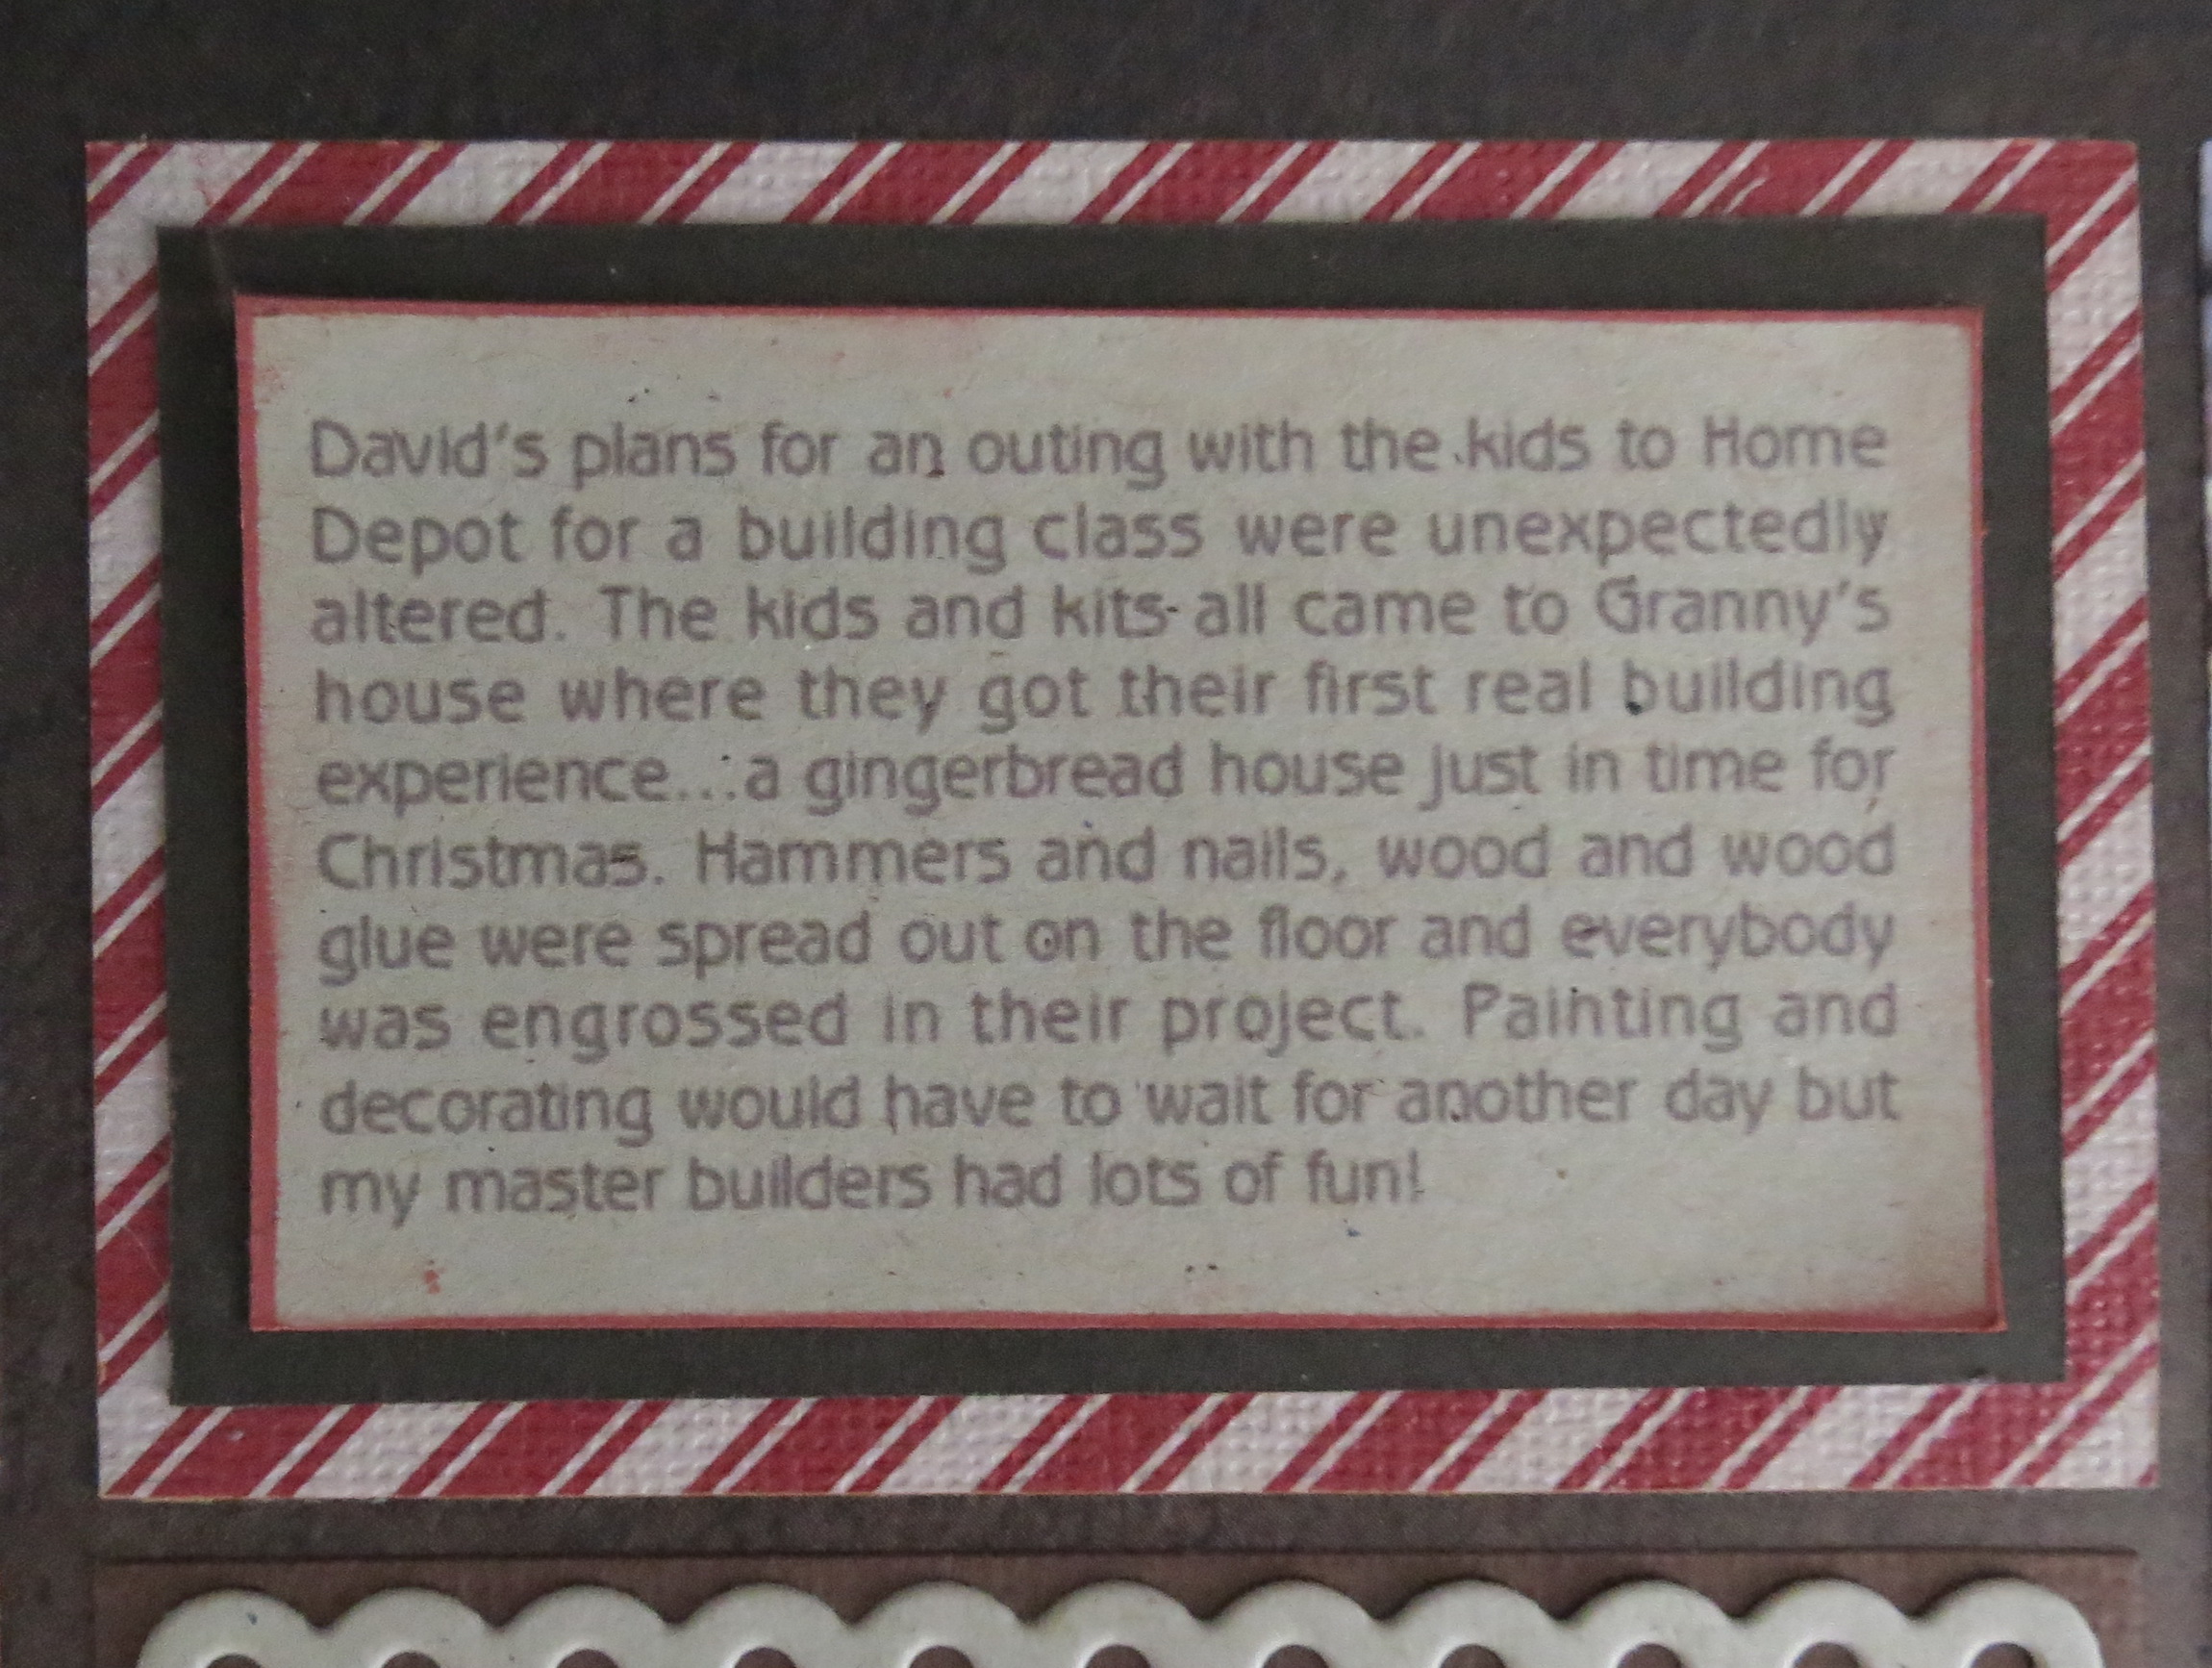
David’s plans for an outing with the kids to Home Depot for a building class were unexpectedly altered. The kids and kits all came to Granny’s house where they got their first real building experience…a gingerbread house just in time for Christmas. Hammers and nails, wood and wood glue were spread out on the floor and everybody was engrossed in their project. Painting and decorating would have to wait for another day but my master builders had lots of fun!
Perhaps you’ve got a few ideas of your own for designing with the Circle Center Border Die or gained a few tips on how to search out a pattern to work with your die. I hope so. We’d love to see what you are creating!
Andrea Fisher