
Some of you may remember a day before self-serve gas that you’d tell the gas station attendant to just “fill ’er up”. You had the expectation that your gas tank would use every cubic inch of space to hold your fuel.
On our grids, we have 100 – 1” squares to fill with our photos and stories. Depending on the patterns we choose there will be plenty of photo spots but also at times a few extra areas that we need to ‘fill’er up’. We can fill these areas with a variety of things.
- Color – cardstock or patterned papers
- Texture – embossing
- Words – stamped or die-cut words or numbers
- Journaling – the story behind the pictures
- Photos – the main focus
- Embellishments – the fancy add-ins
- Dies – many smaller dies 1×1, 1×2, 1×3, 1×4, 1×5, and 2×2’s
- Hybrid elements – using Digital scrapbook elements
I’d like to show a few of those ways with two patterns a columns pattern and a rows pattern.
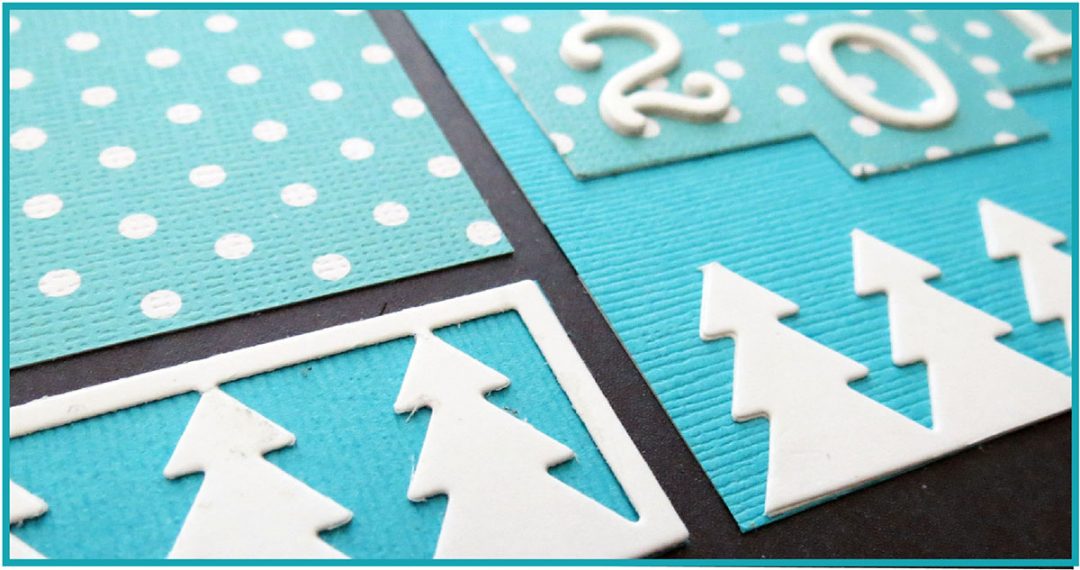
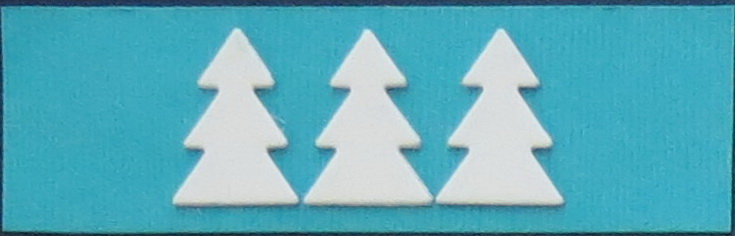
Each has several places for photos but also several 1”, 1×3 and 1×4 spaces. I’ve chosen the Forest Borders Die for both to illustrate.
Example 1 Themed Fillers
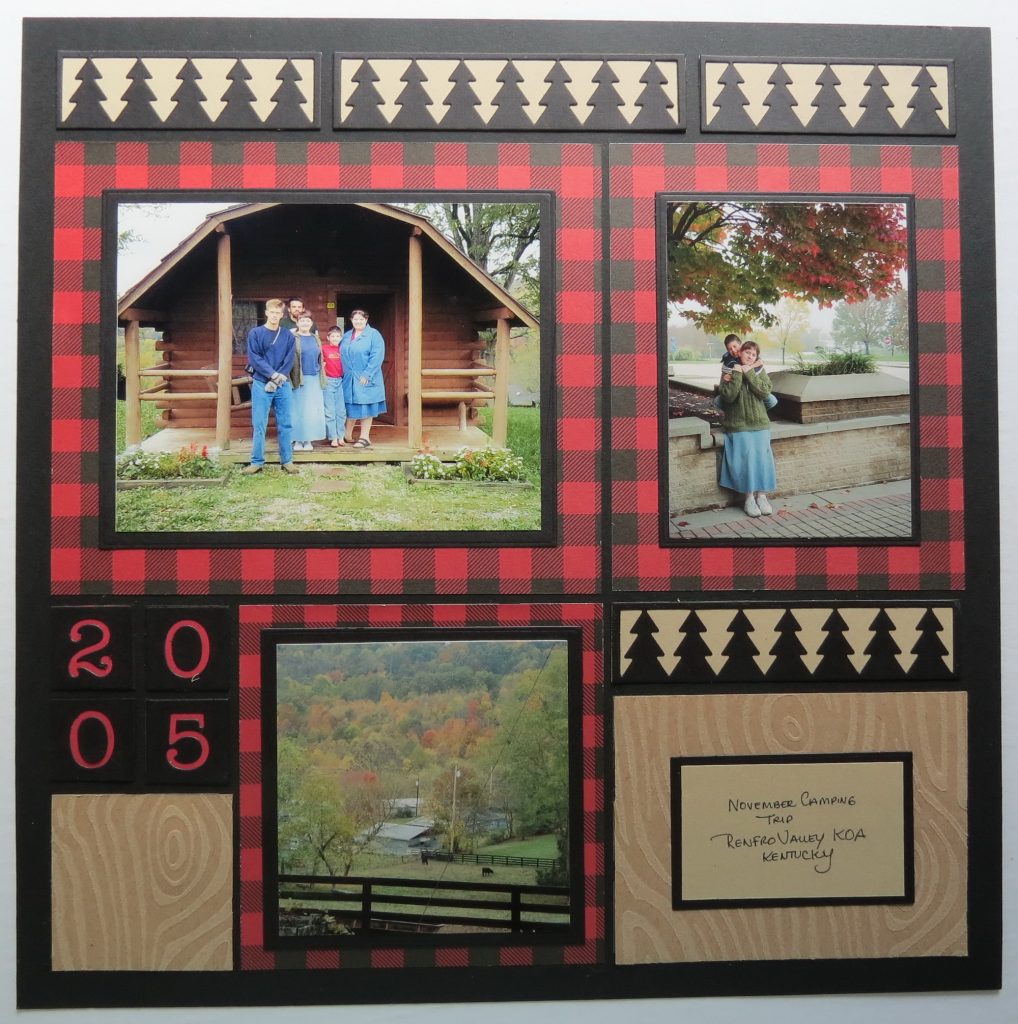
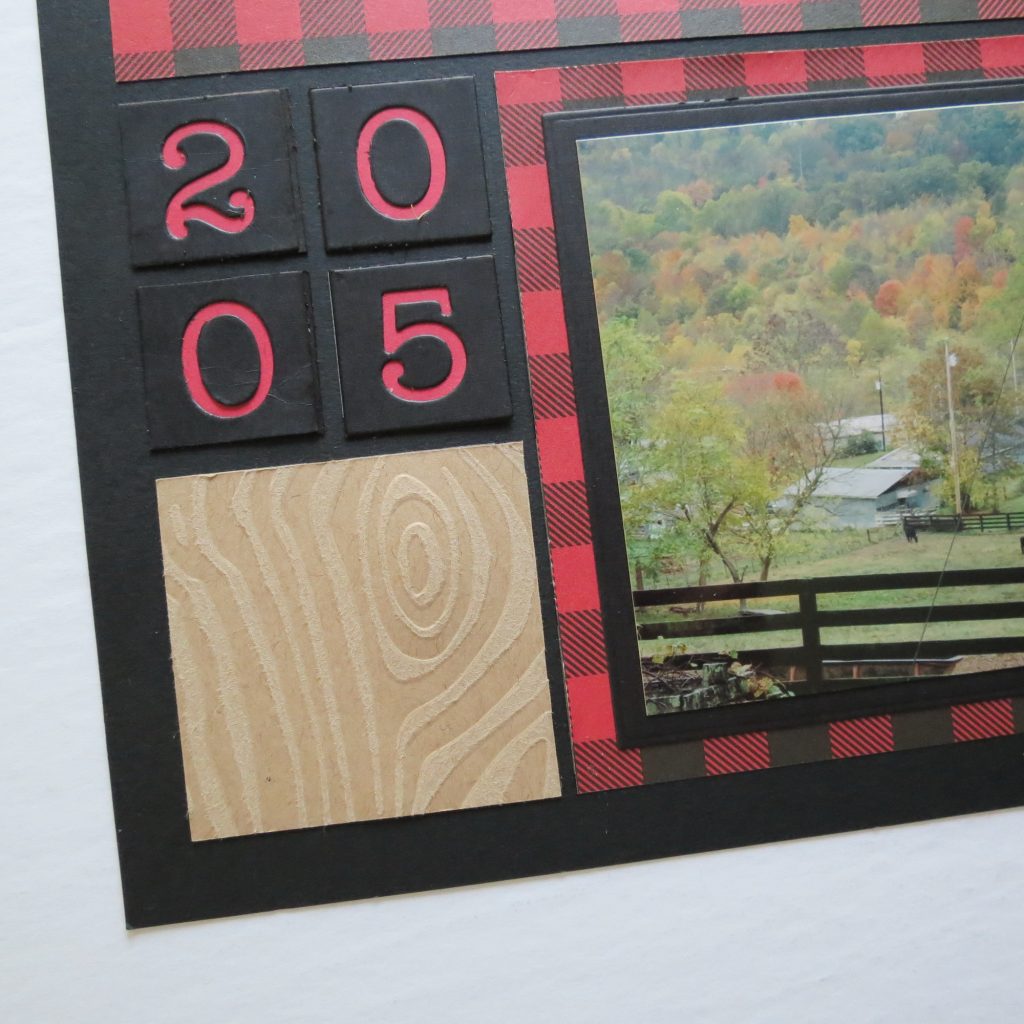
Pattern #111 is our row pattern with four good-sized spaces for photos. I’m going to use one space to include my journaling.
I’m limiting my colors to black, red, tan and kraft on a black grid. The largest three spaces are matted with patterned paper and remain visible when I add photos matted in black. Now the remaining spaces need to be filled.
The pattern calls for 2 – 1×4’s and the Forest Border die has that but it also has a 1×3 and I’m going to change those 1” squares on either side of the 1×4 in the top row into a 1×3 and fill it with the corresponding Forest Border Die section. This gives me a full border of trees
There are a cluster of 4 – 1” squares that really become the perfect place to fill with a date to add details to your page.
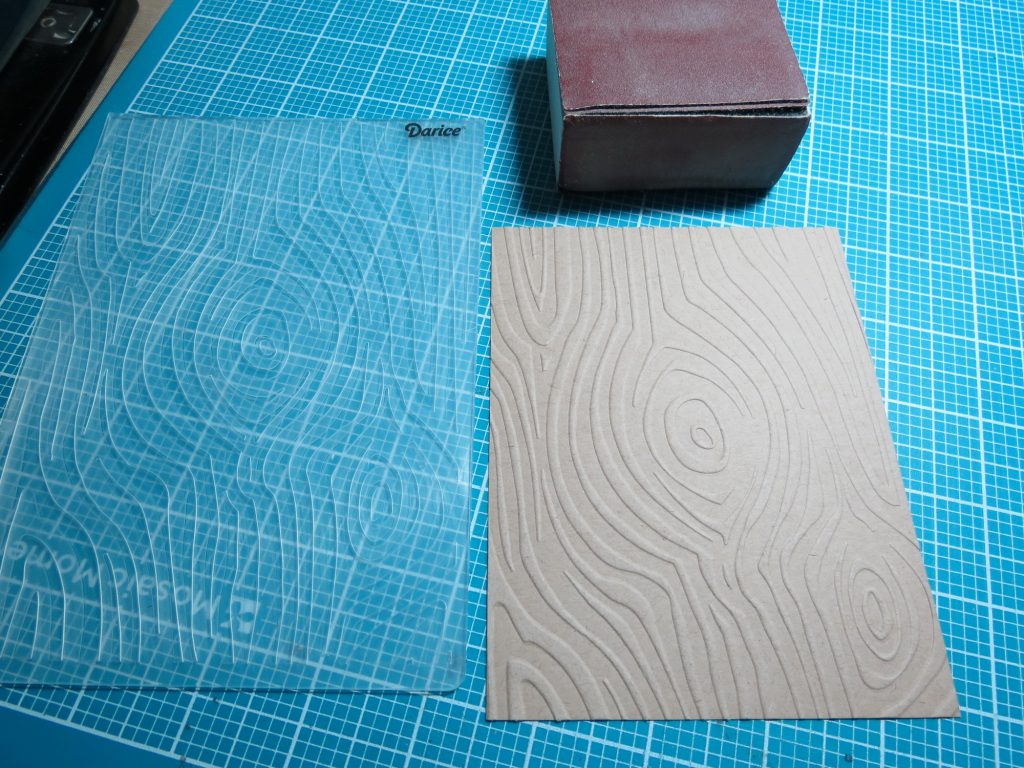
The final two spots I’m filling with texture using an embossing folder. In this layout, I took a few extra steps with my embossing. After running it through in the embossing folder I took a sanding block and gently sanded that raised section to remove a layer of the cardstock. The next thing I did may seem a bit crazy, but it really works for what I wanted to achieve. I ran that embossed/sanded cardstock back through my Evolution without the embossing folder to flatten out again. Now it’s ready to be cut into 2×2 and 3×4 tiles.
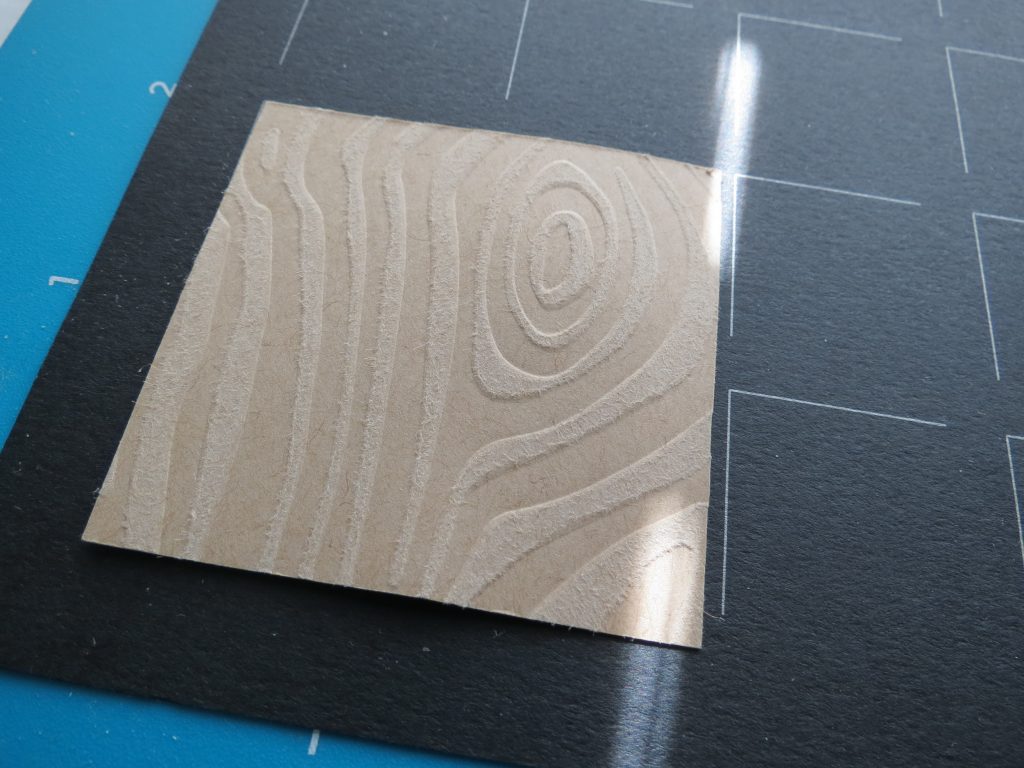
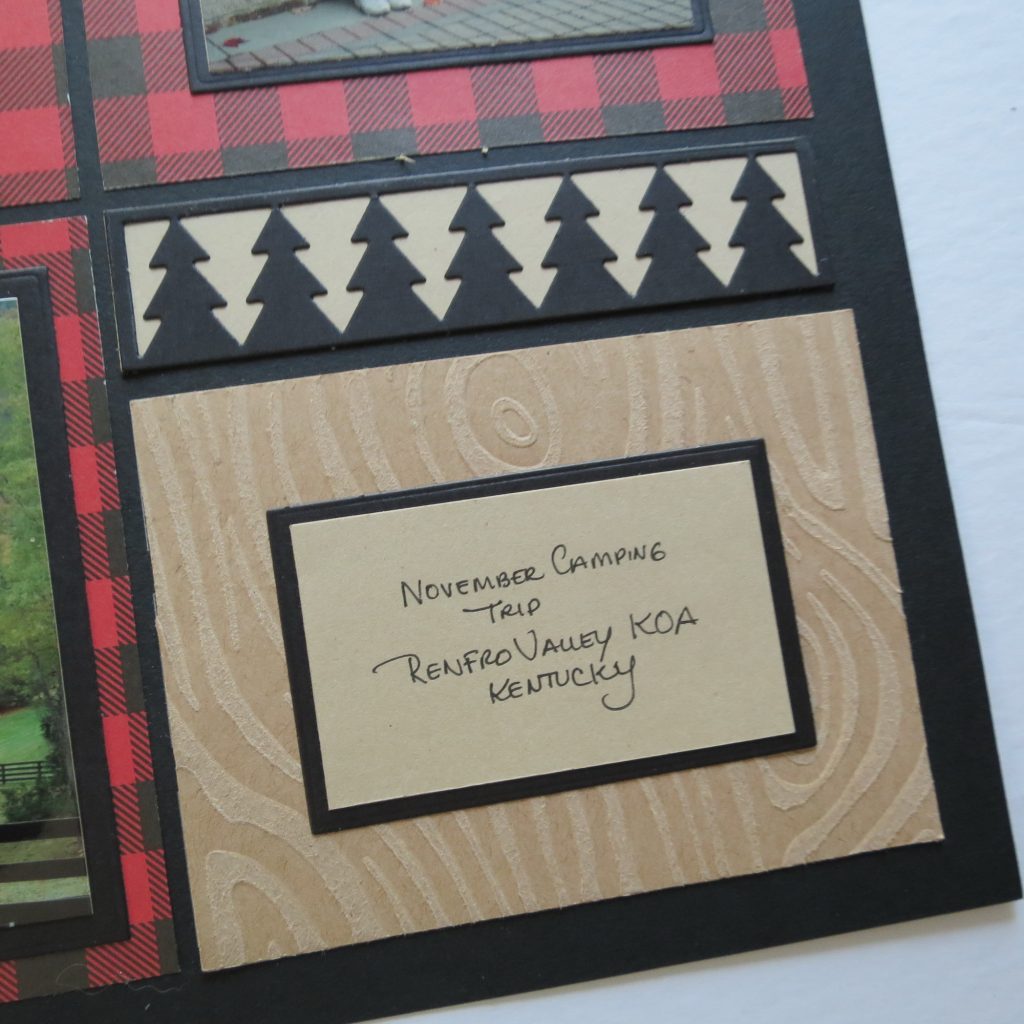
To finish off the 3×4 textured tile I’ve cut and matted a card for a little bit of journaling.
The page completed doesn’t feel crowded, but it is full. Large photos, small tiles with embellishments and medium texture give a balance to the page and keeps your eye moving around the page.

Example 2 Repetition and Variation
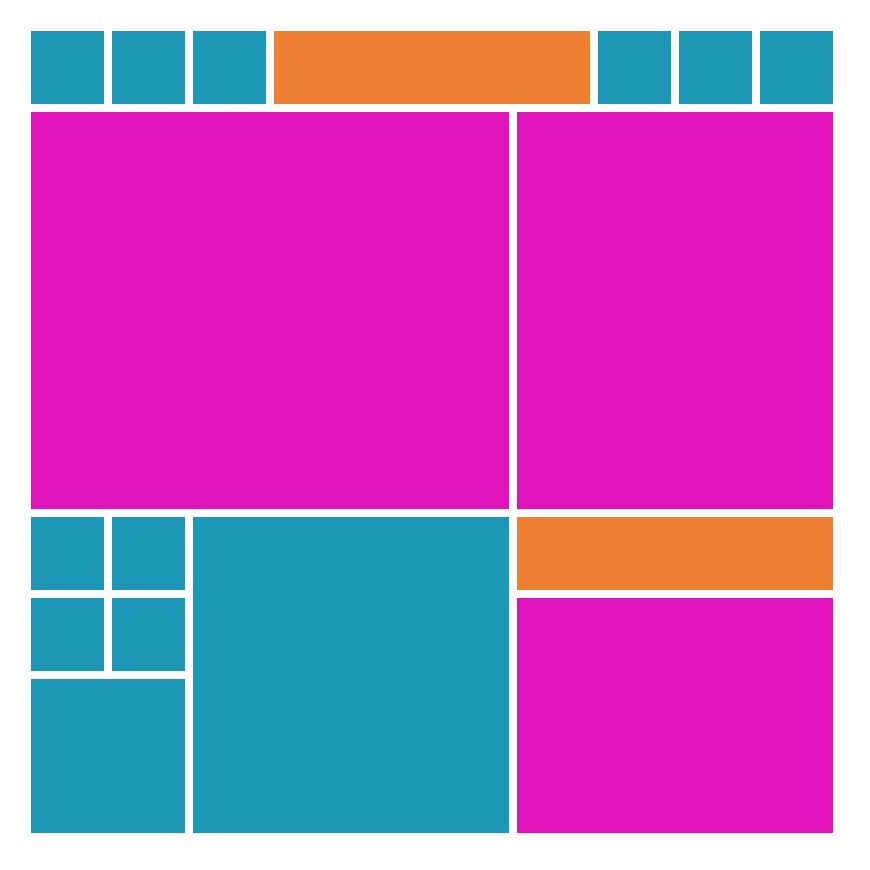
This layout with pattern #310 is a columns pattern presented on navy grid paper with both patterned and solid cardstock mat additions.

There are six 1×3 places that will be used in three different ways. The first is the center pair of 1×3’s that are left open to add in small amounts of information like date, place, occasion. Then the bottom two 1×3’s will be used to stack the 1×3 die-cut for a raised appearance. I cut two and glued them together before adding to the page.
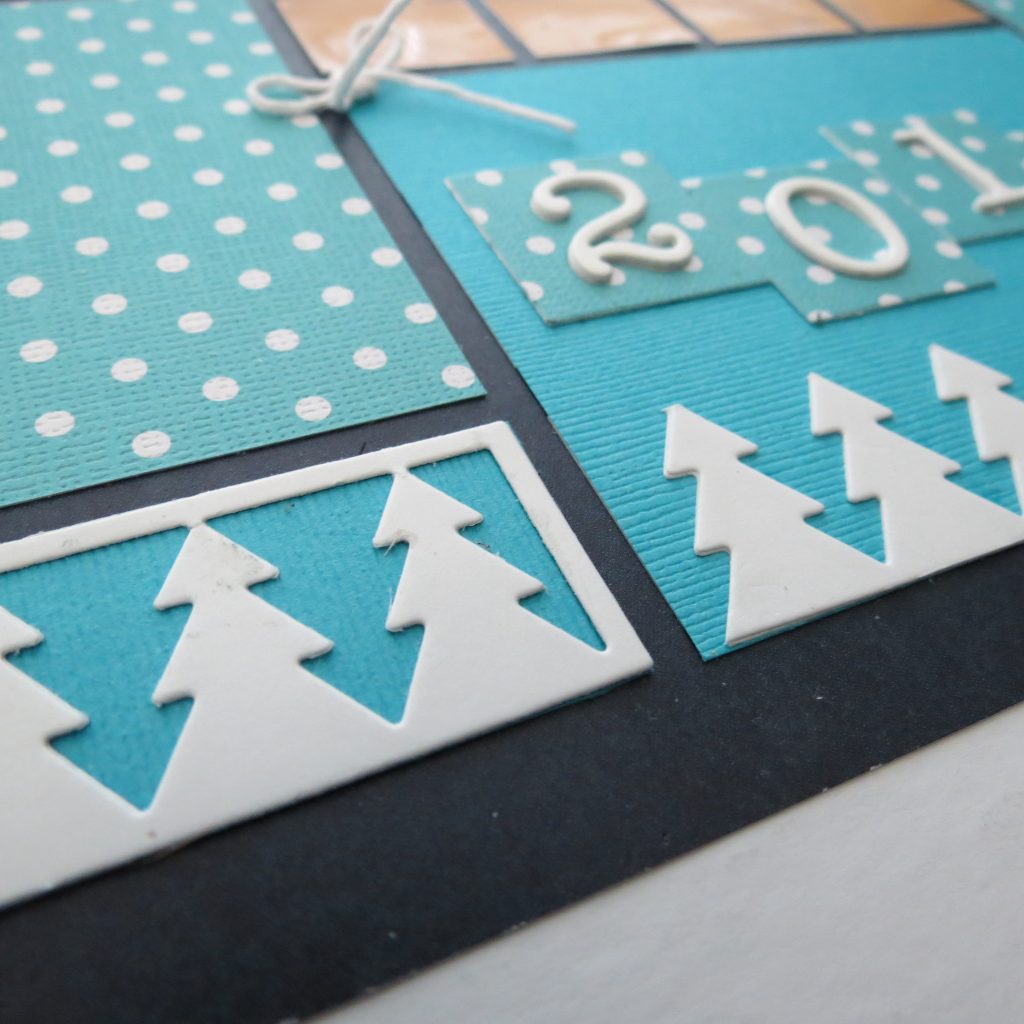
I also saved the outtakes from all of these cuts and have glued three of the trees to form one piece and made 6 sets of trees to place side-by-side on the top two 1×3 sections adding a bit more dimension to the page.
I’ll use the Forest Border die one more time as a trim piece in a larger journal block. It will also give the illusion of a full tree border along the bottom edge of my layout. However, I’ve done a bit of trimming and stacking once again. The top and two sides were cut away from this 1×4 die cut and the treetops were snipped and trimmed to a point.
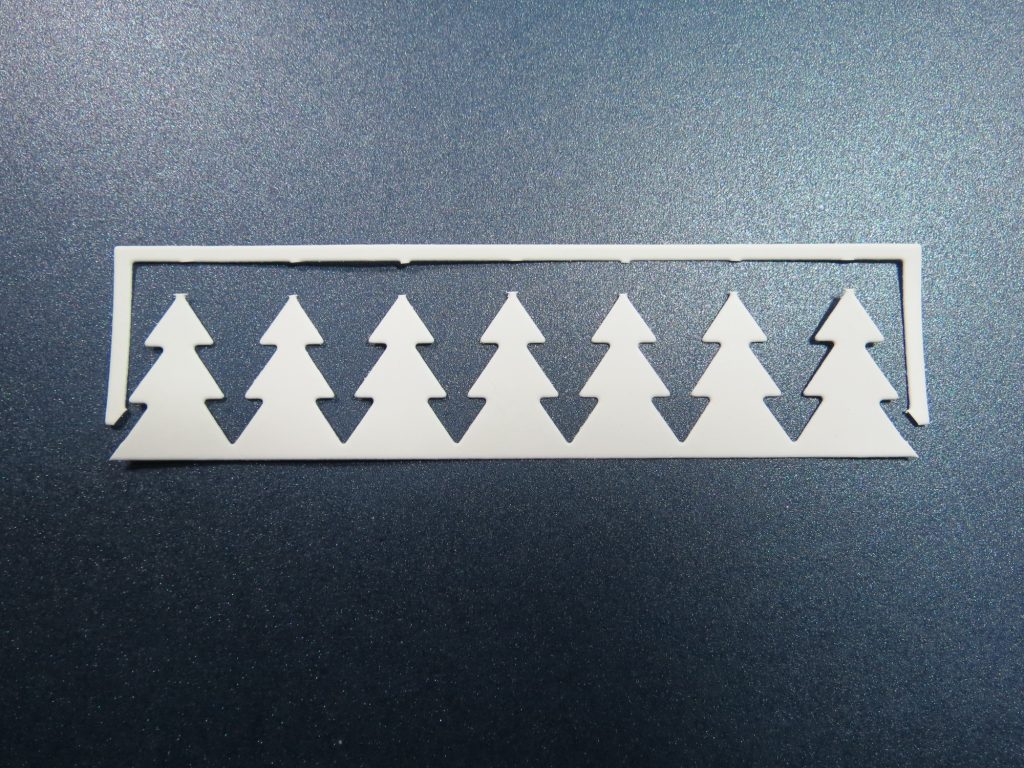
Cutting these sections allow the trees to be a part of the larger 3×4 block for that arrangement and still allowing for the illusion of being a full border across the bottom of the page.
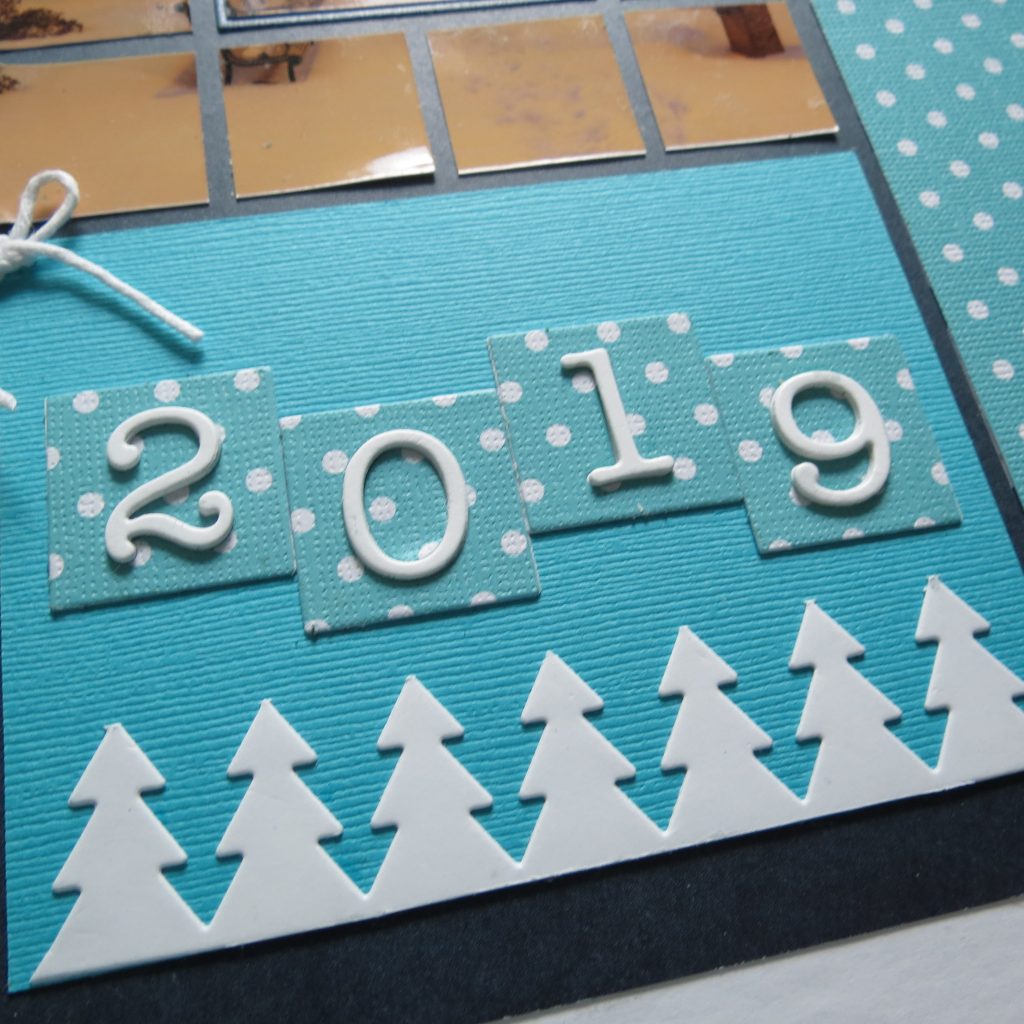
Additionally, the 3×4 block is where I wanted to do something different with the date. Each number had been cut in white five times and stacked into the 1” number blocks.
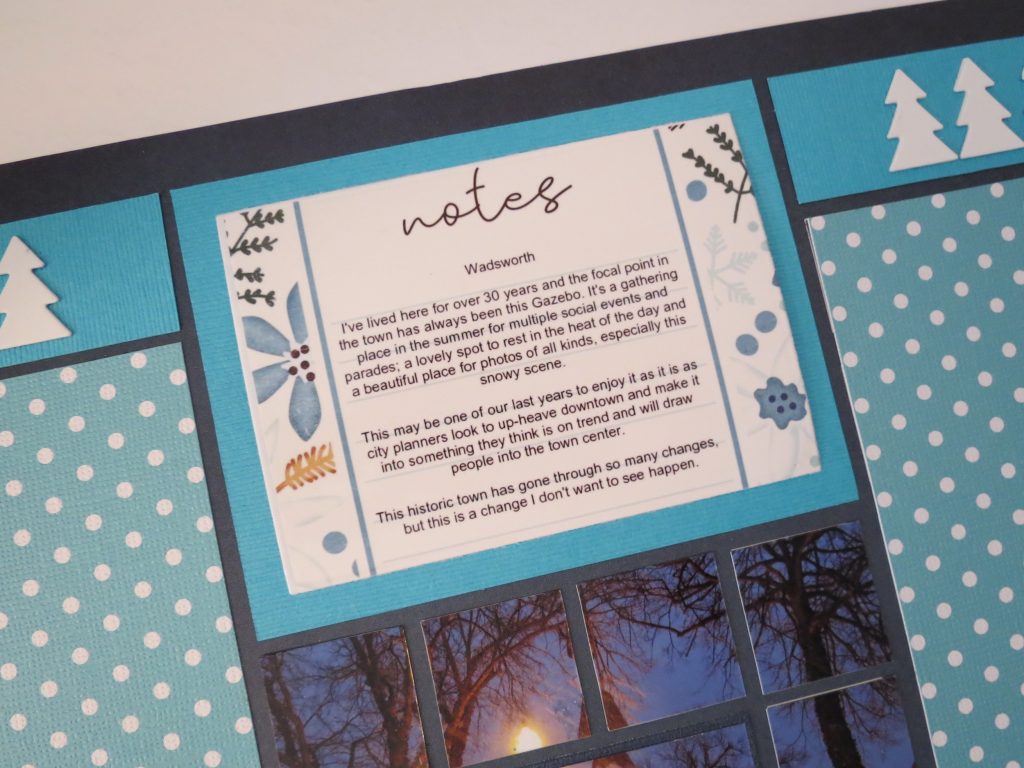
The top center 3×4 is where I planned a title or more journaling. I thought it might be nice to throw a hybrid scrapping element into the mix as these digital images often have pieces that will help to embellish our layouts. I’ve taken a digital journal card that color-wise works with my color scheme. I sized it to the area I wanted and then added my text to it, printed it as a photo and used the layering die from the Basics C set for the 3×4 to trim and then put in place.
When your pages are finished, they should be full but not crowded. I hope you’ve seen how your empty spots can be part of the design not just take up space using each of the ways we began with color, texture, words, journaling, photos, embellishments, dies, and hybrid elements.
As much as everyone loves the big design dies don’t forget the value of having a few of the smaller die sets to help when your scrapbook pages need to ‘fill’er up”.
Supplies:
- Mosaic Moments 12×12 Grid Papers in Black & Navy
- Mosaic Moments Forest Borders Die
- Mosaic Moments Number Die #4
- Papers – Core’dinations dotted aqua, Buffalo Check from Paper Studio, kraft, white, black aqua, teal cardstock
- Embossing folder – wood grain
- Digital Journal Card from the Winter Days Kit by Digital Scrapbook Ingredients
note: the center photo is a fussy cut technique I use; maybe a topic for another day.
Andrea Fisher