
Are you ready for a Diamond Mine Adventure? Here are four tips for creating quick and easy layouts with the Diamond Mine Dies.

The middle of January with cold winter temperatures and blowing wind has me happy to stay inside bundled in sweaters and blankets to stay warm. It’s a perfect time to catch up on your scrapbooking while listening to an audiobook or binging on a favorite series. For a quick layout and getting plenty of pages completed I’ve got a few quick tips for working with the Diamond Mine Dies that will have you taking on this great Adventure into our Mosaic Moments Die Collections Dies.
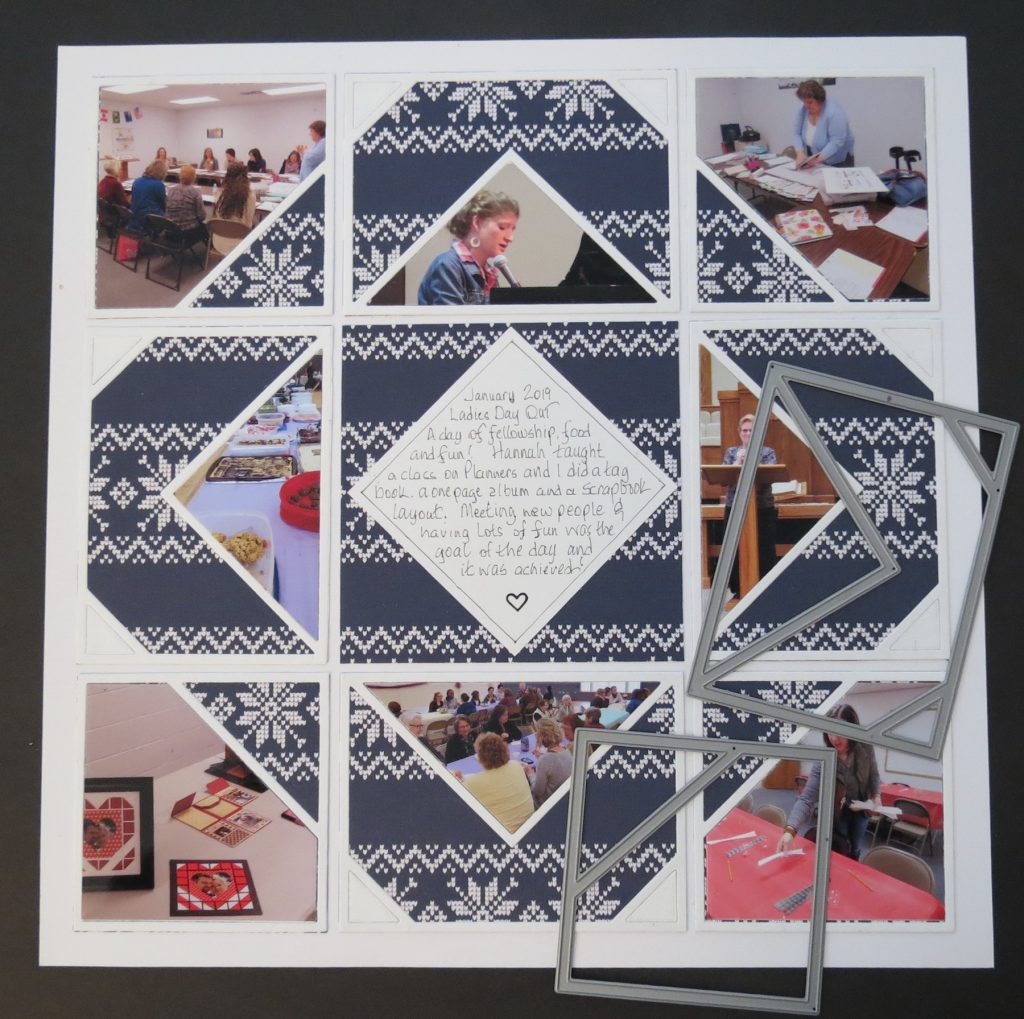
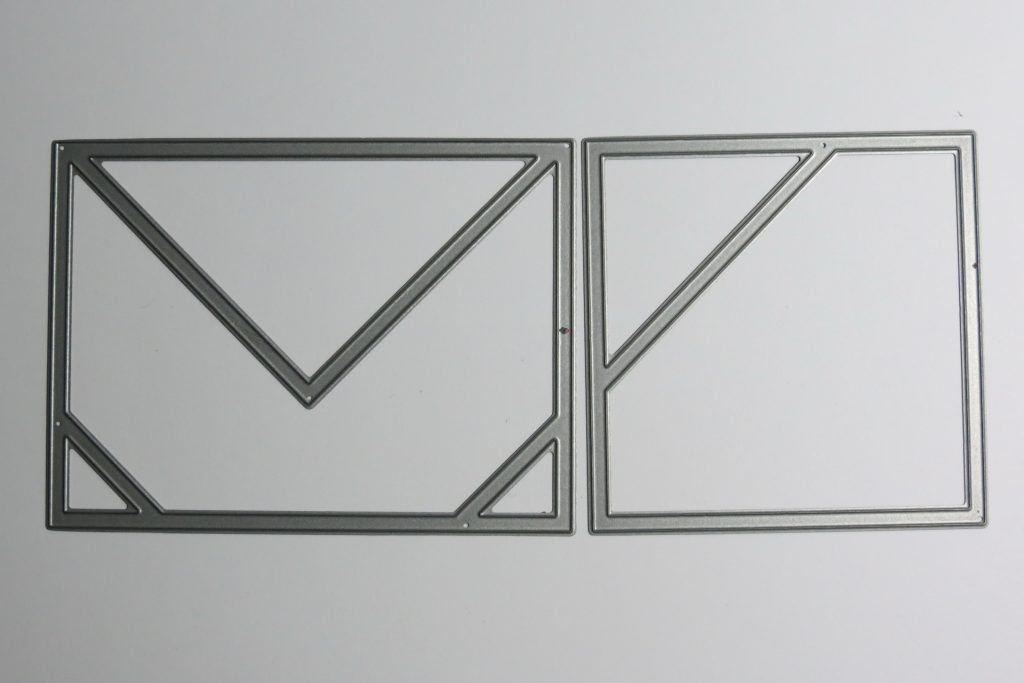
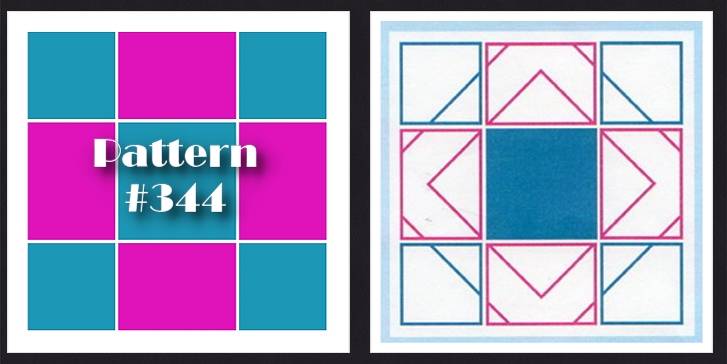
The Diamond Mine Die Collection has several dies that can be used to achieve several different looks. I’m going to use one of the patterns #344 a mostly squares pattern for this layout and two of the dies the 3×4 and the 3×3.
Diamond Mine Adventure TIP #1: Limit your colors
I’ve kept the color scheme simple in navy (the patterned paper) and white (the Mosaic Moments Grid Paper), this strong contrast will emphasize the pattern of the Diamond Mine Die. Using one sheet of paper keeps it simple and quick.
Diamond Mine Adventure TIP #2: Center your paper pattern for visual balance and a pleasing look
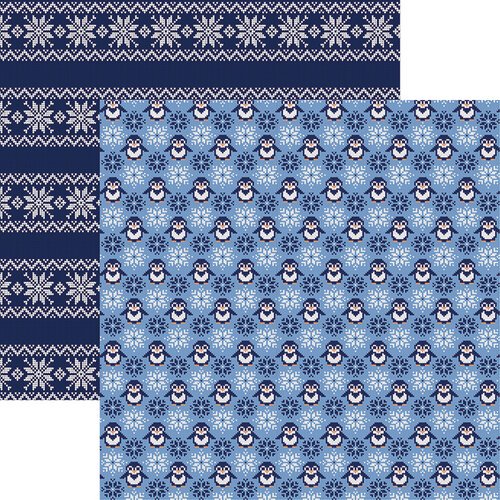
The pattern paper, Penguin Sweater, has a knitted pattern that I wanted to be centered on the page. To ensure that, I took one of the 3×4 die cut sections and lined up the point with the pattern and marked the edges and then cut a center strip from the 12×12 paper. I then cut from above and below the cut to continue the pattern with the two other portions.
Diamond Mine Adventure TIP #3: Use the full sheet to streamline assembly
Each of the strips were cut from left to right, keeping the pattern intact, to fit the pieces needed for the pattern. These will all serve as the bases for the die-cut sections. We often recommend cutting a base tile to attach the die-cut and add stability to the die section; this allows the pattern paper to serve a dual purpose.
While I could have fussy cut these tiles to fit into the die-cut, I’m looking to make this quick and easy. Attach each section to the grid. TIP: For those of you who love your patterned papers this is one way to show them off.
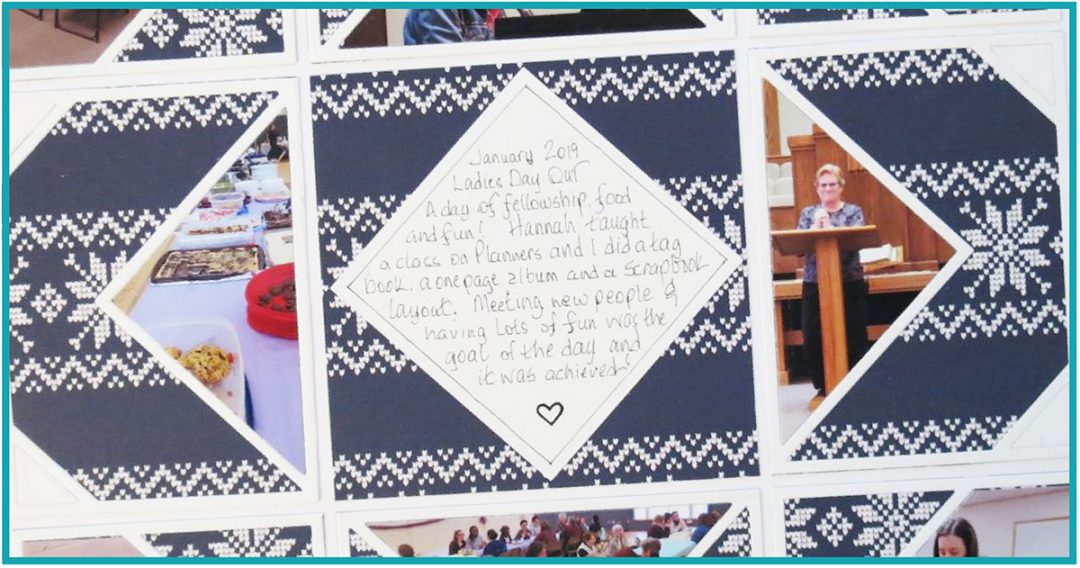
Choose your photos and cut to fit them into the spaces that they belong. I chose not to add a photo in the center block but to reserve this for the journaling info I wanted to add. I thought it would add to the design by adding this 3” square block on point to continue the Diamond pattern. It also allows the pattern of the paper to show nicely.
Diamond Mine Adventure Tip #4: Tone on tone accentuates the design of the dies
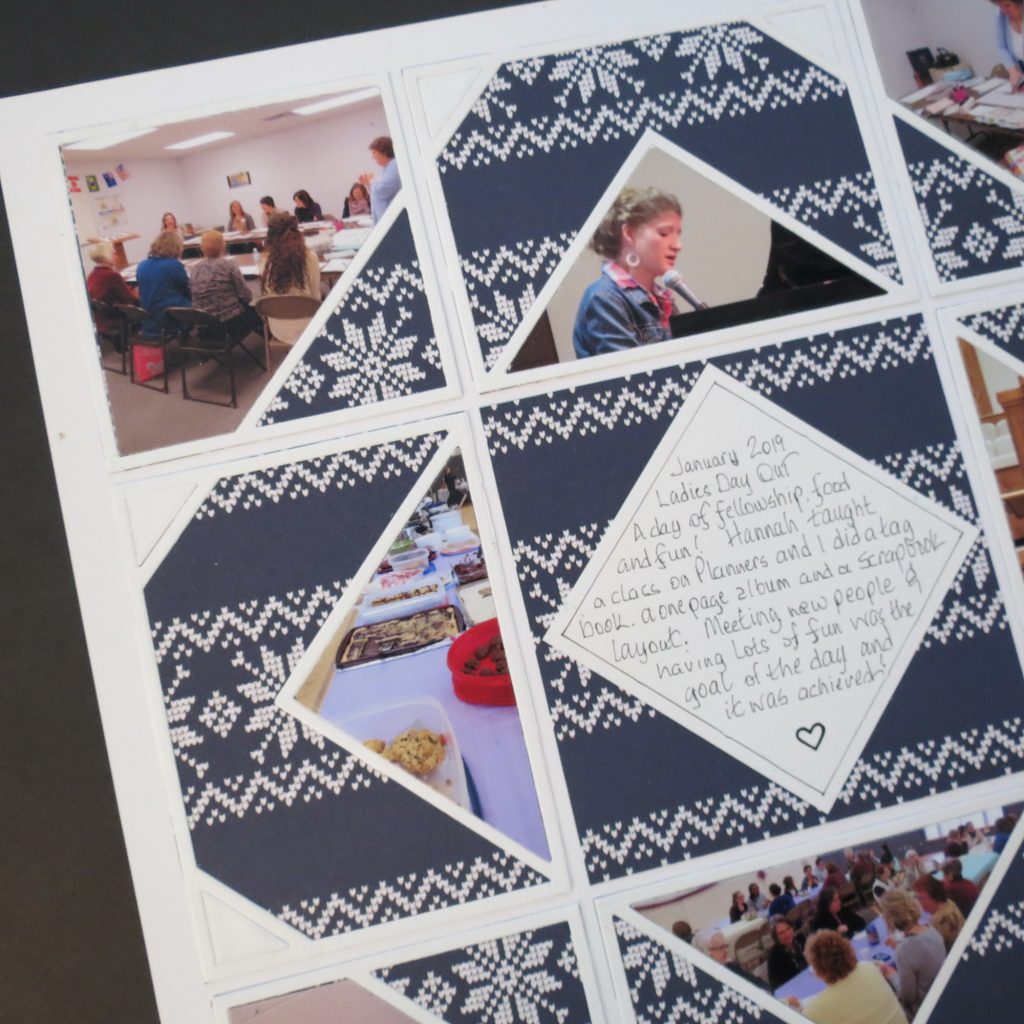
For the corners on each of the 3×4 sections, I replaced the small white corners so that the Diamond pattern is emphasized even more. The corners, along with the die-cut sections, blend into the grid paper allowing the design to stand out.
I know that several of our Collection Dies can look intimidating but I hope this layout with a few of the short cuts I’ve shared you will see this is a new adventure for you to undertake in the new year!
Supplies:
- Mosaic Moments Grid Paper – White
- Mosaic Moments Diamond Mine Die Sets – 3×4 and 3×3
- Patterned paper – Reminisce – Santa’s Sweater Collection – Penguin Sweater (available from scrapbook-dot-com)
- White cardstock
Andrea Fisher