
 Simple Steps 101.07: The Basics: Layering with the Basic Dies
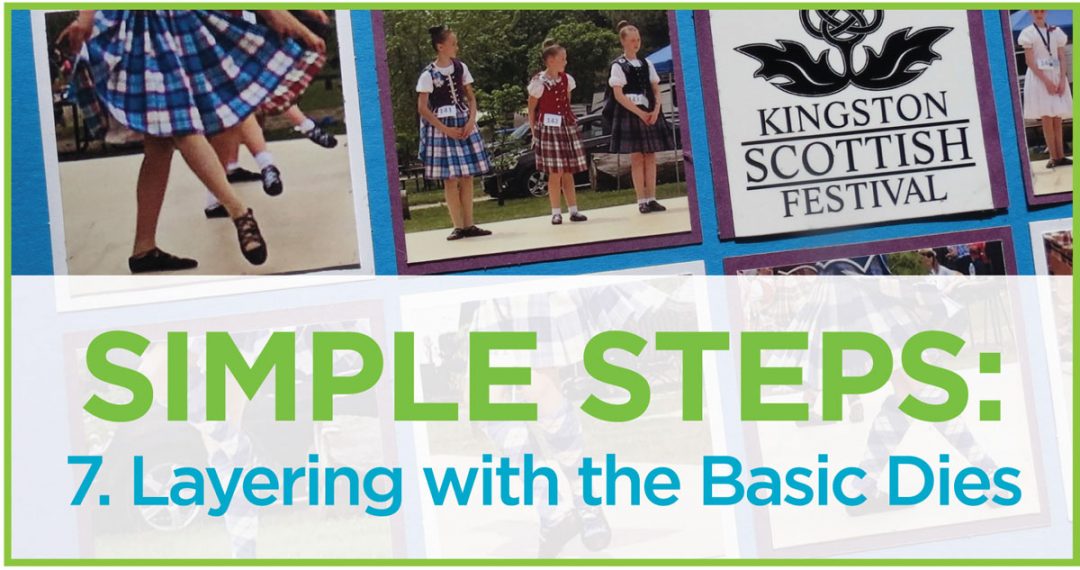
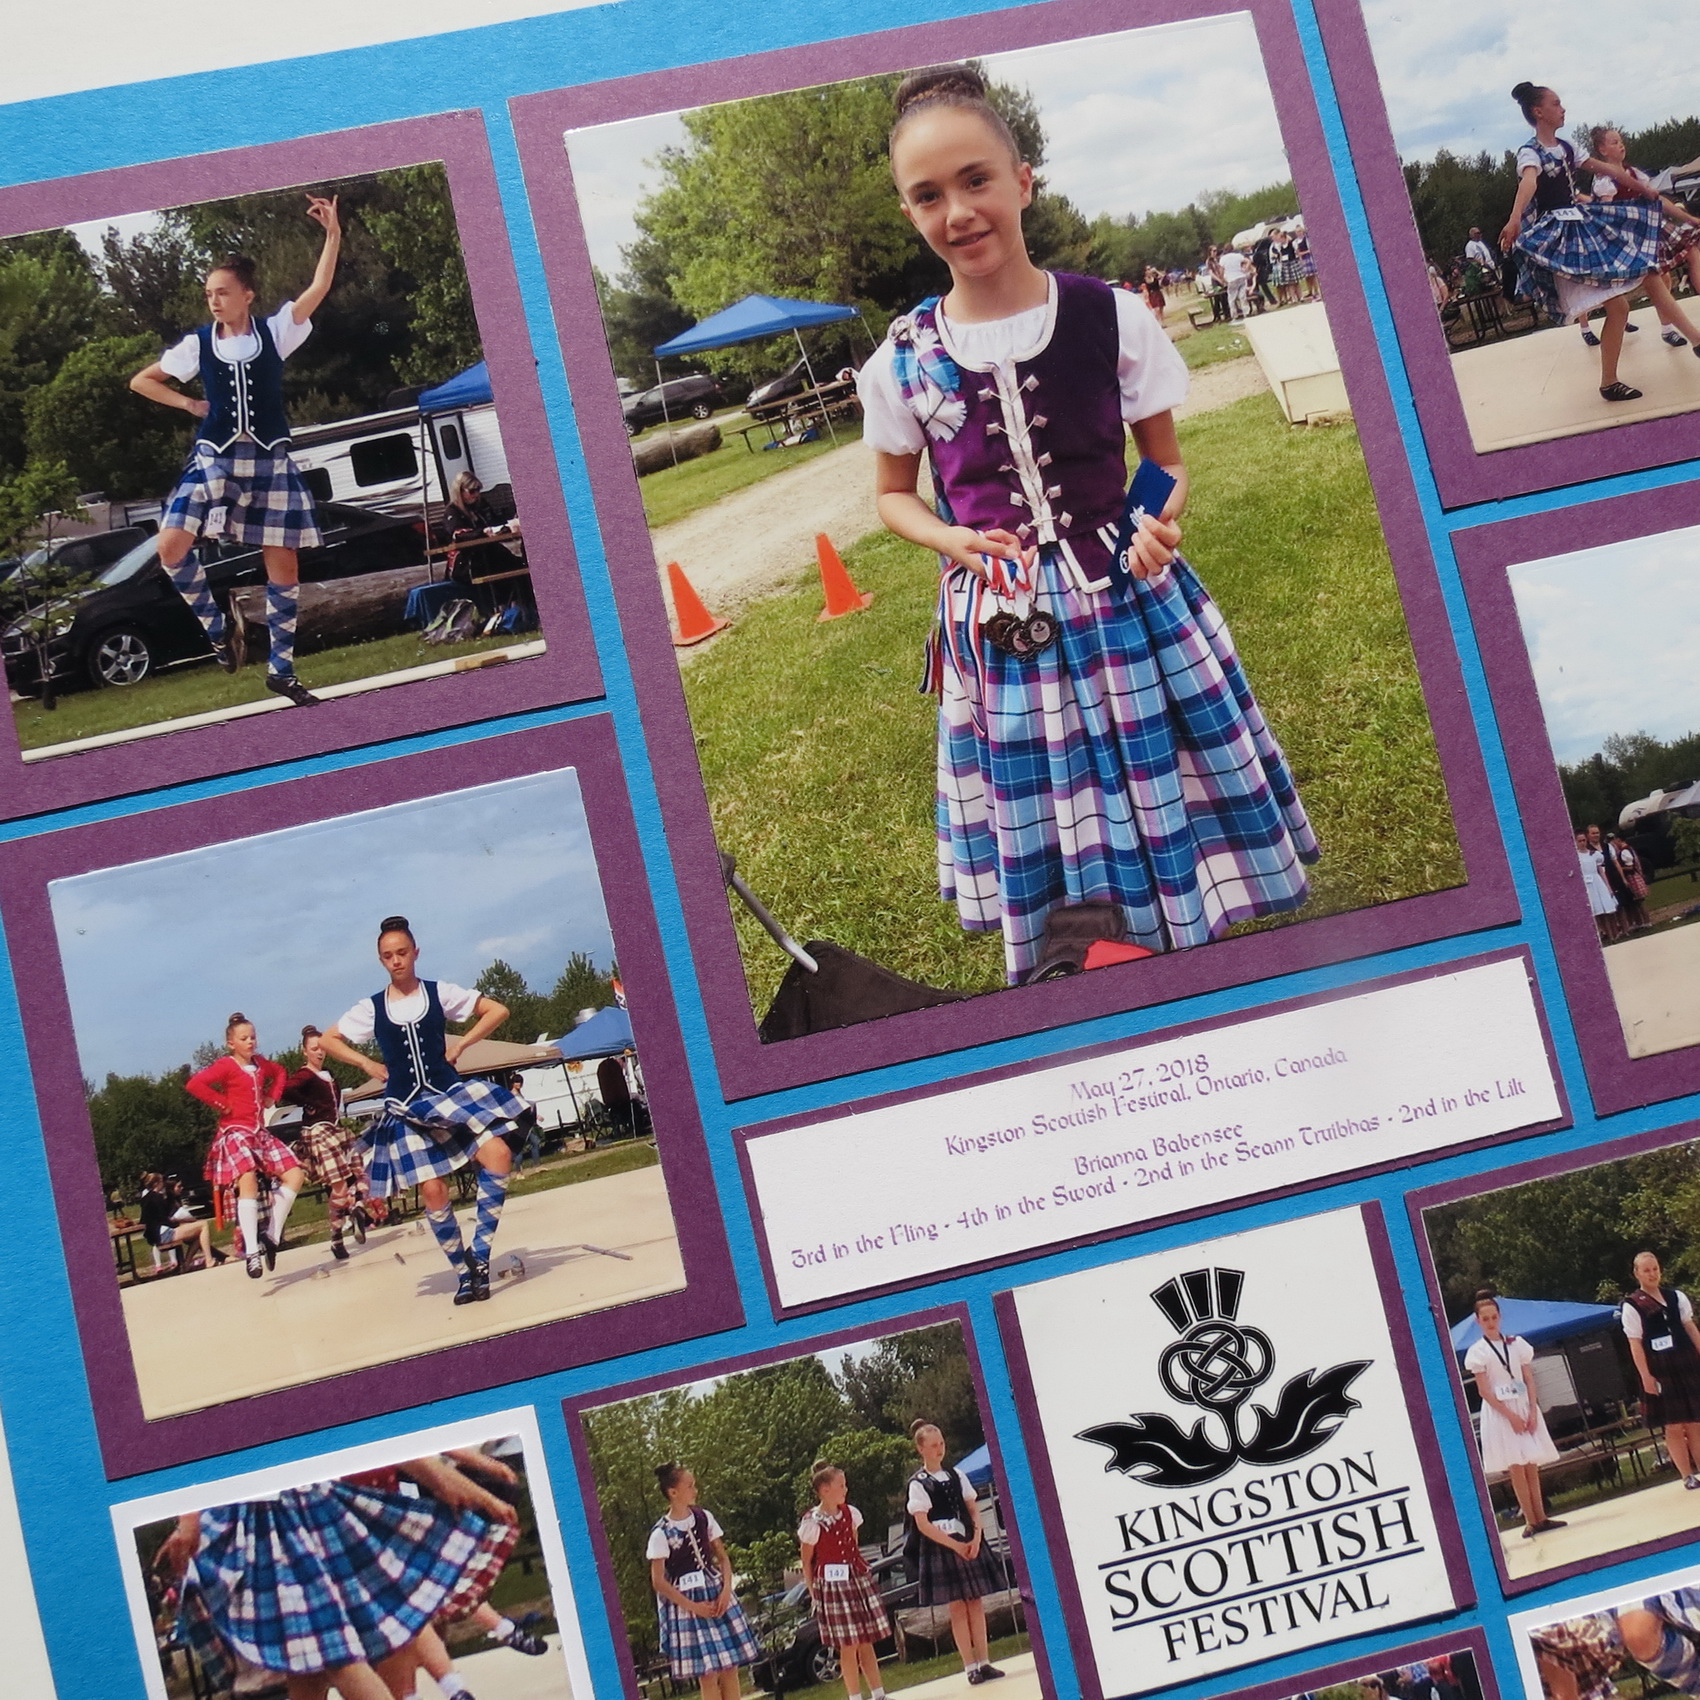
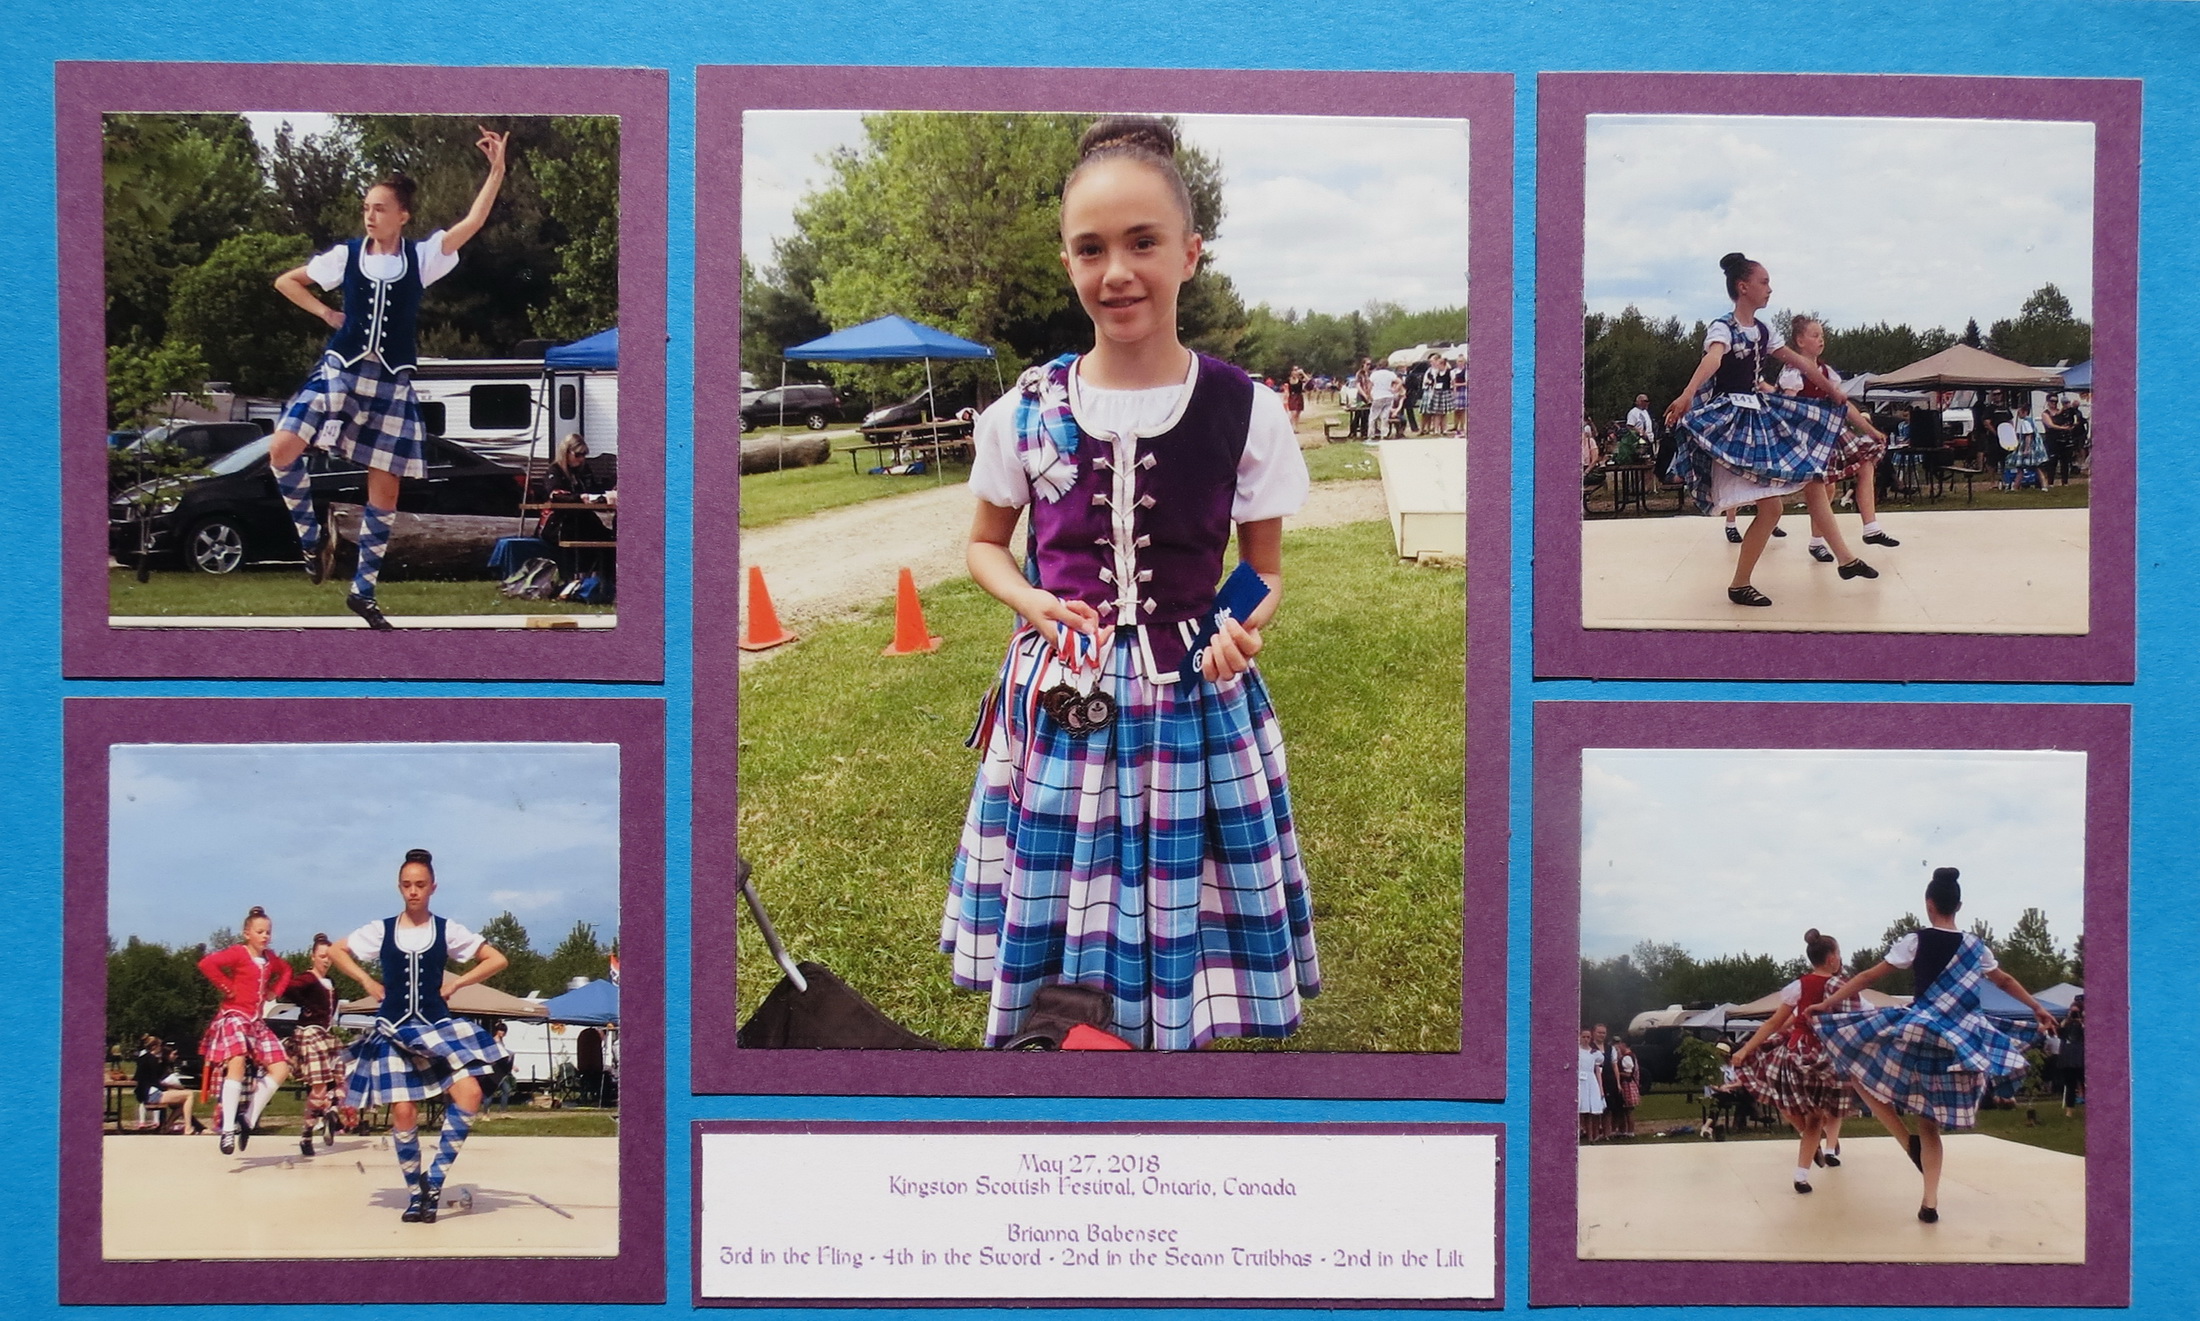
Brianna, Highland Dancer.
Layering photos is something you may or may not choose do in your layouts, but today I’m going to show you how a mat and the layered look can draw out the colors in your photos and pull a page together.
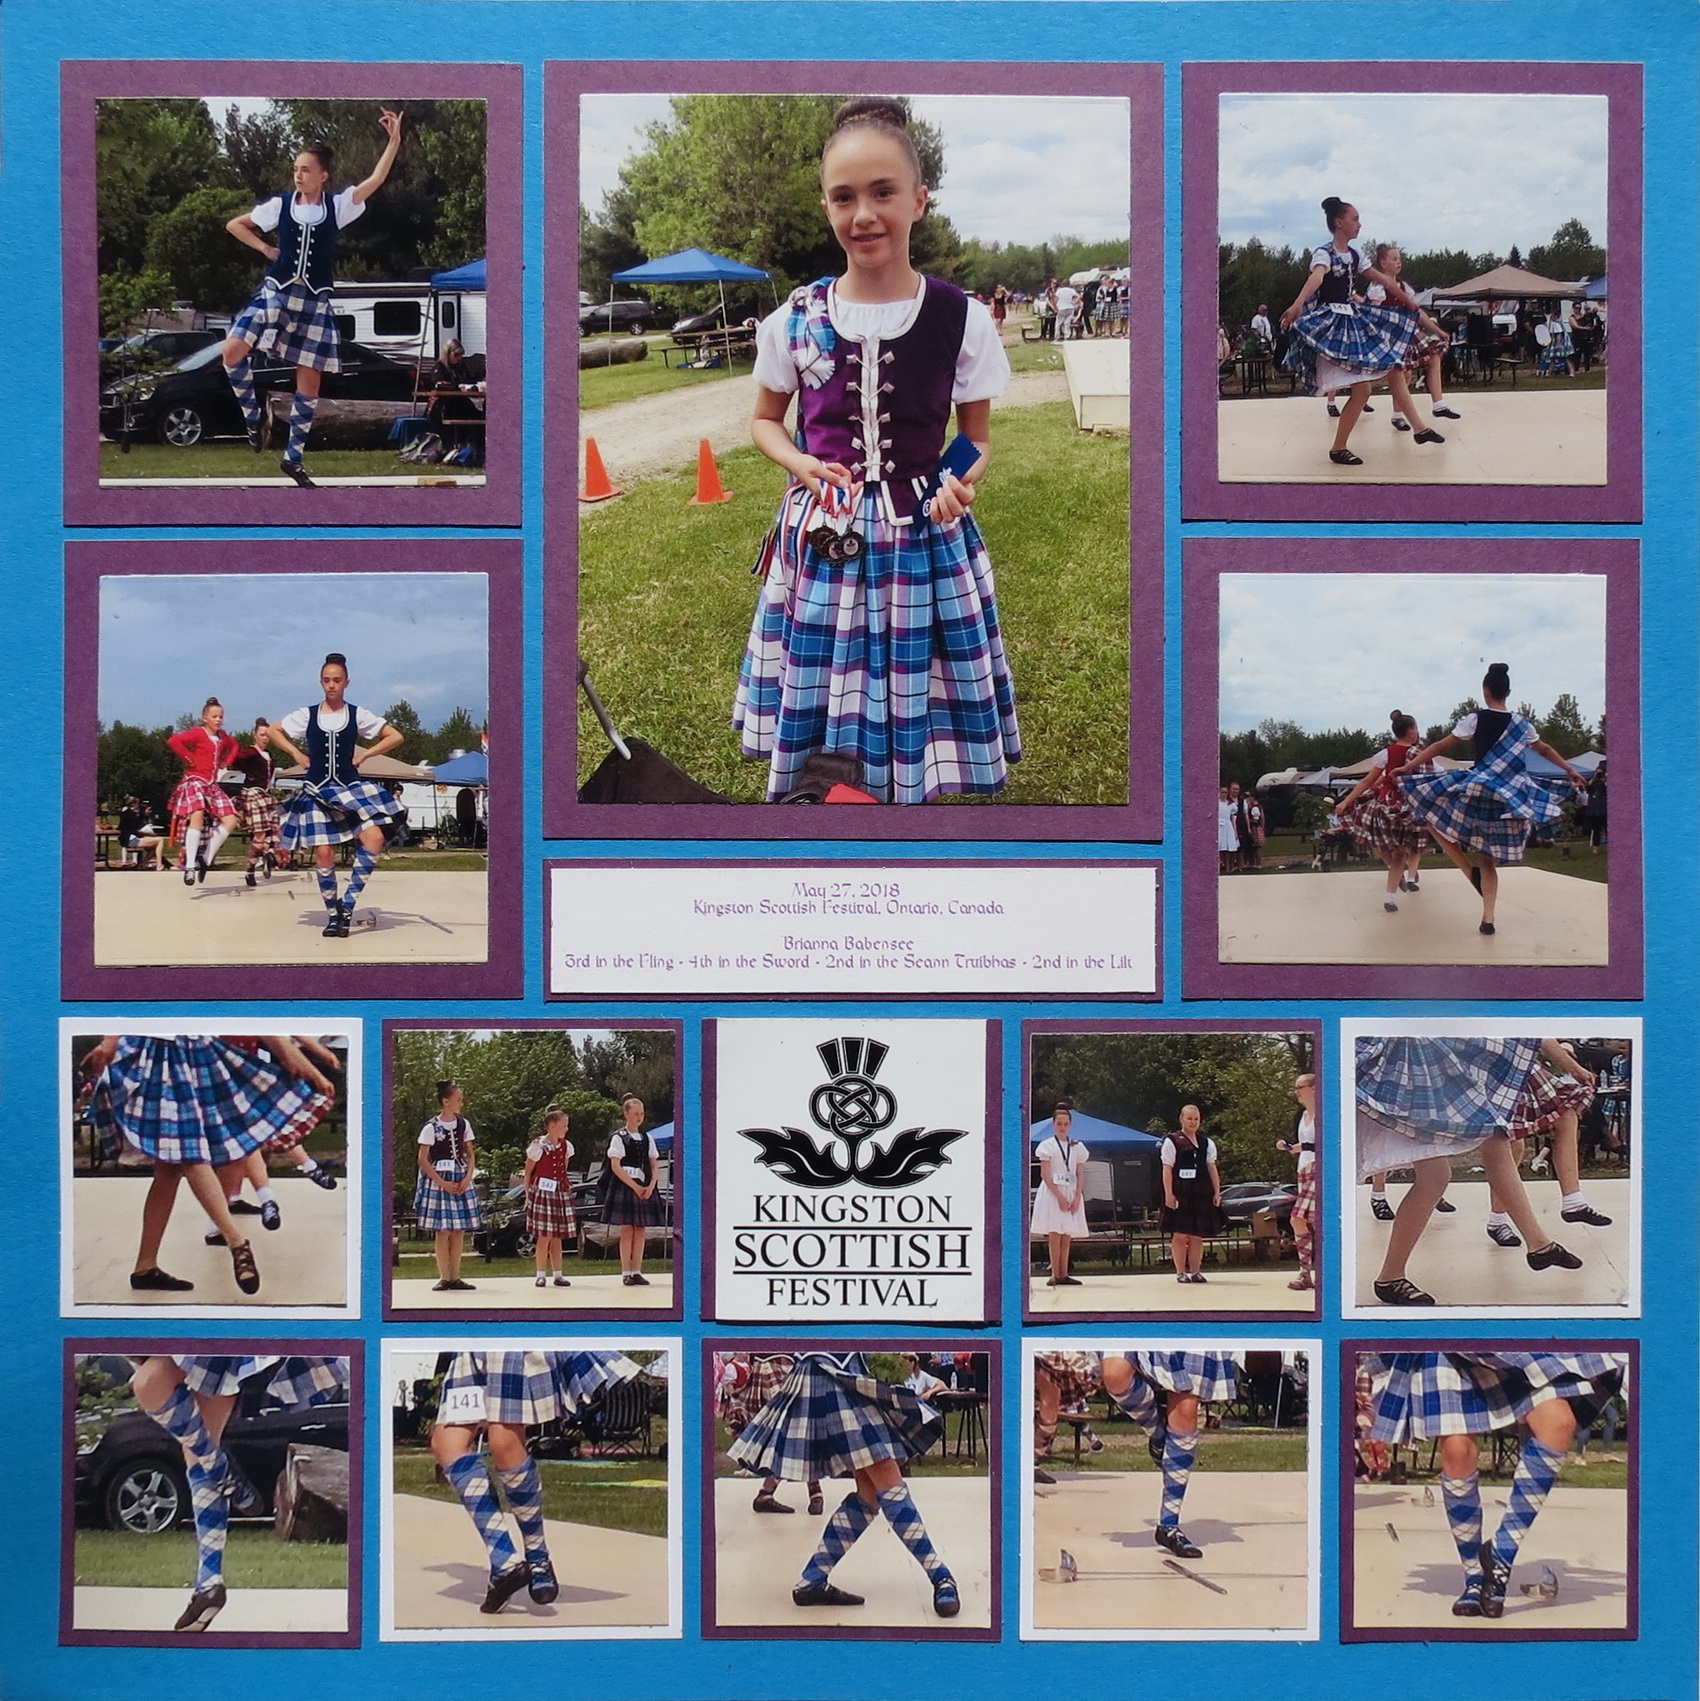
Mosaic Moments Simple Steps 101.07 Layering Basics
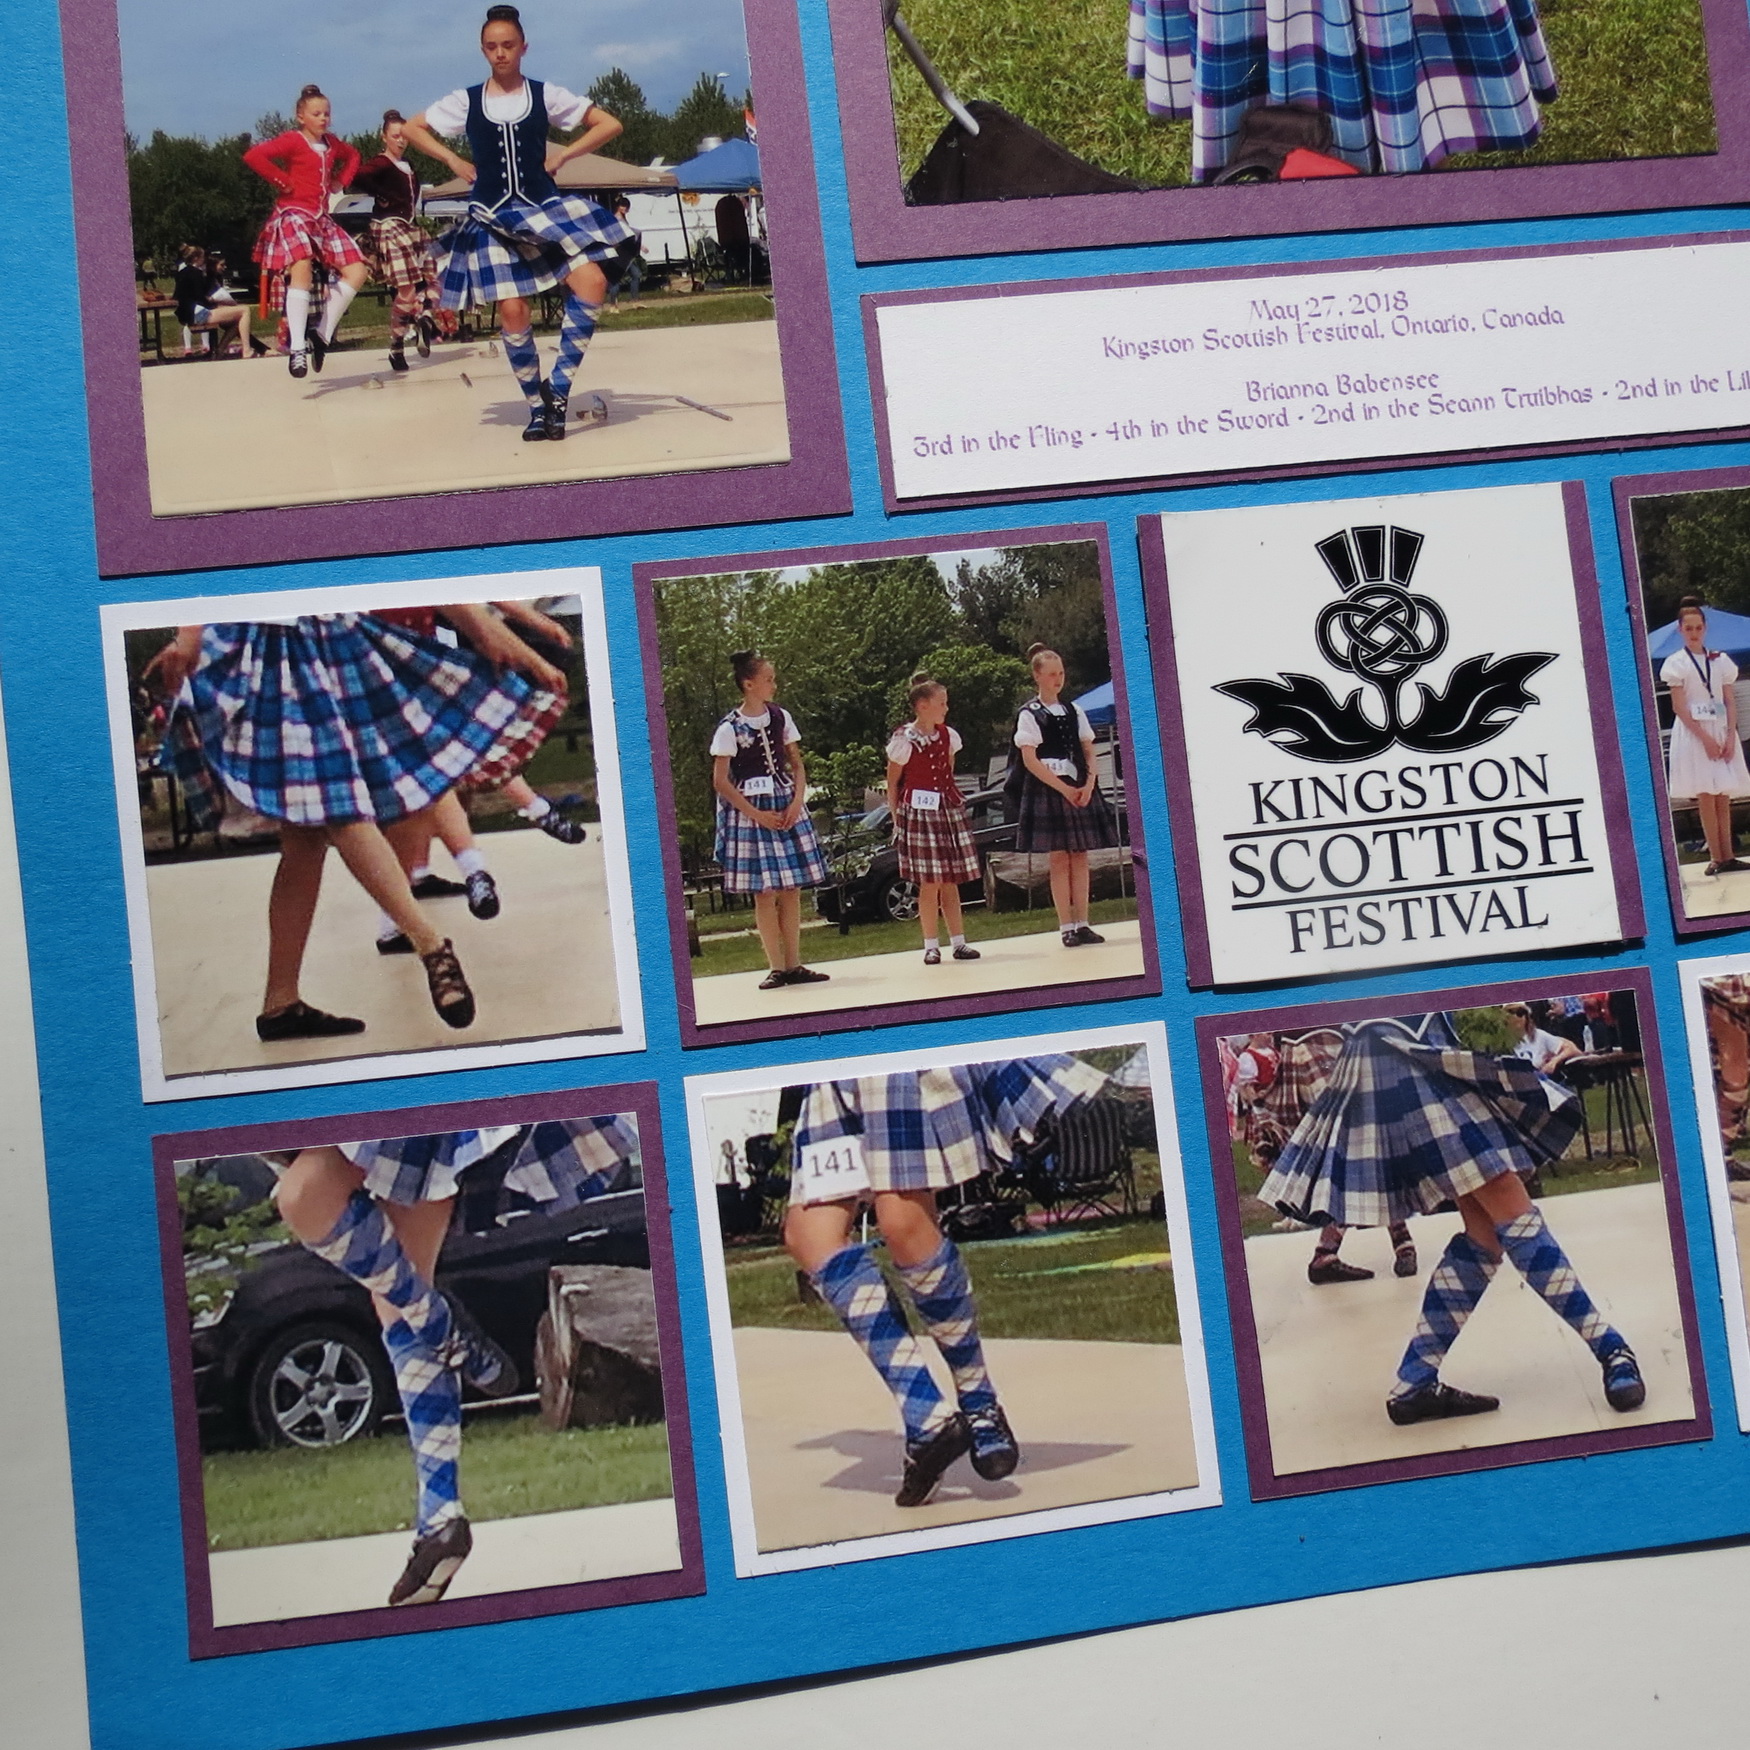
For the photos in the top half of the page, I’ve used Die Sets A & C and the layering dies for each of the photos. While in the lower half I used mats, but a narrower, hand-cut 1/8” border around each of the photos. White and Boysenberry mats have been used on the 12×12 Bahama Blue Mosaic Moments Grid Paper. Amazingly, the colors are perfect for Brianna’s outfit and balance out the bold blue grid.
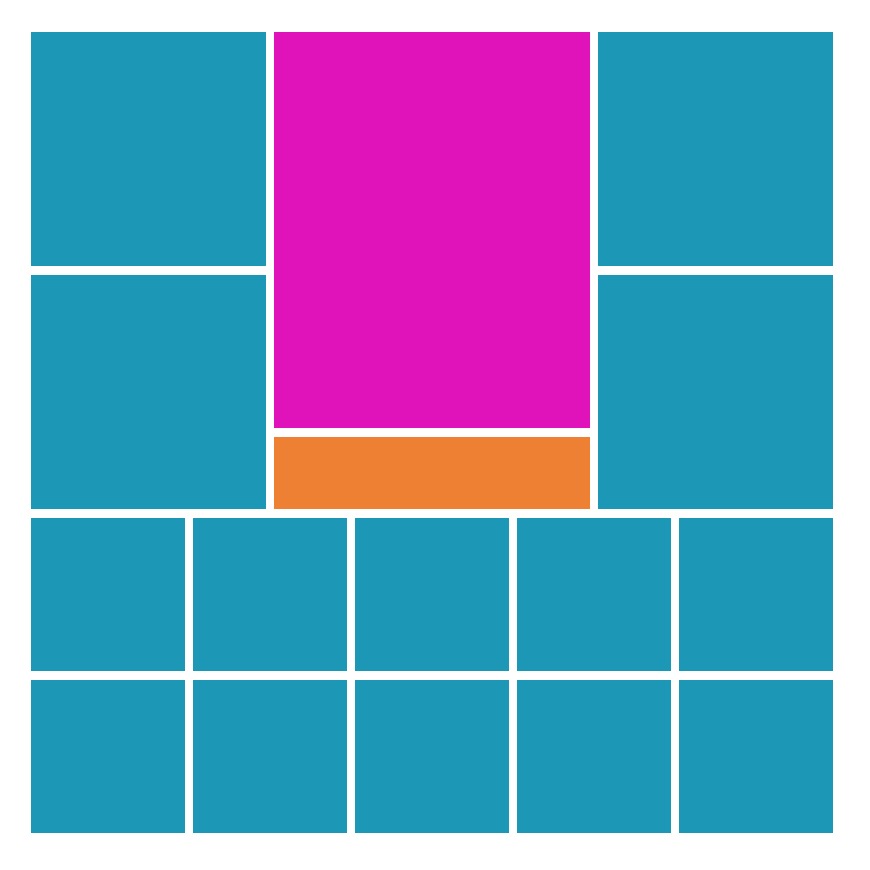
Pattern #391
I’ve used a symmetrical pattern, #391, and the 2×2 series of squares at the bottom of the pattern was a perfect area to feature some of the details of the various dance steps. I also added a modified logo from the Kingston games by squaring it off with a paper tile.

Mosaic Moments Simple Steps 101.07 Layering Basics narrow 1/8″ border and checkerboard pattern
I had one additional photo that was important to include on the page but really didn’t fit the pattern. I decided it could work if I could divide it in half, but, again, it was not going to fit the pattern. So I tried something a bit unconventional and placed the logo in the center of the top row of 2×2’s and each half of the photo on either side of the logo. It actually helps for a change of perspective from the close-up shots surrounding it.
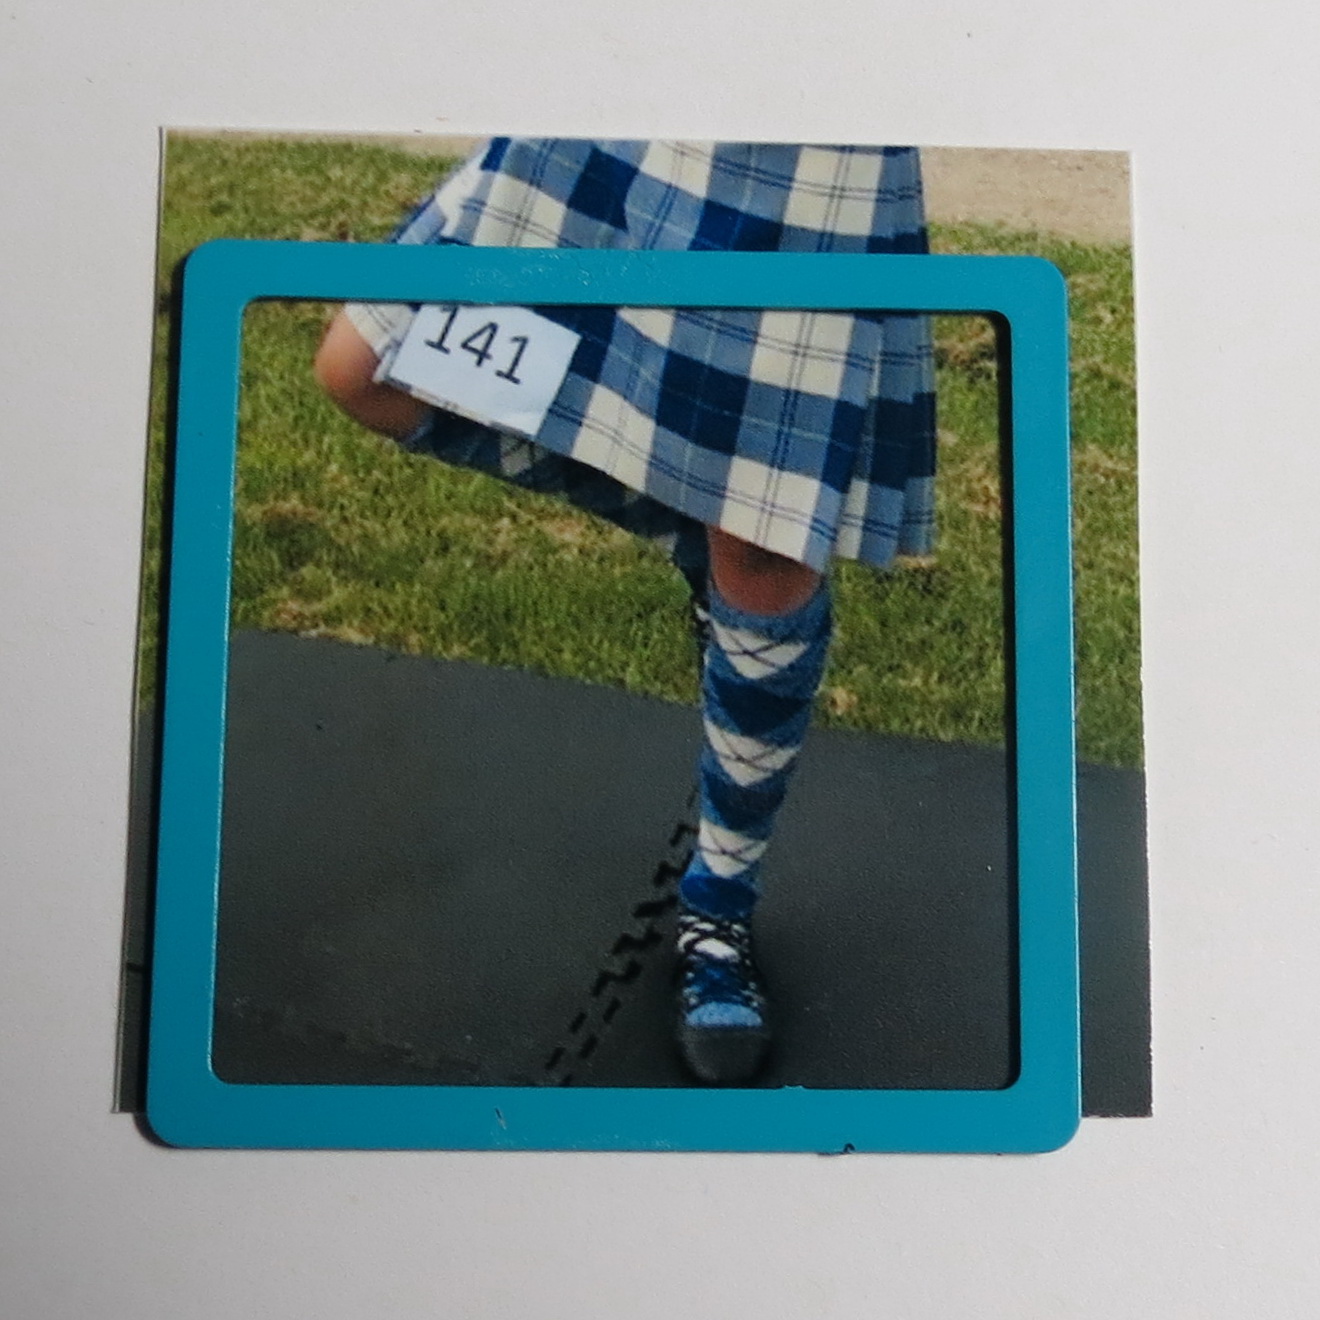
Mosaic Moments Simple Steps 101.07 Layering Basics too much image is lost using the layering die for this series of photos
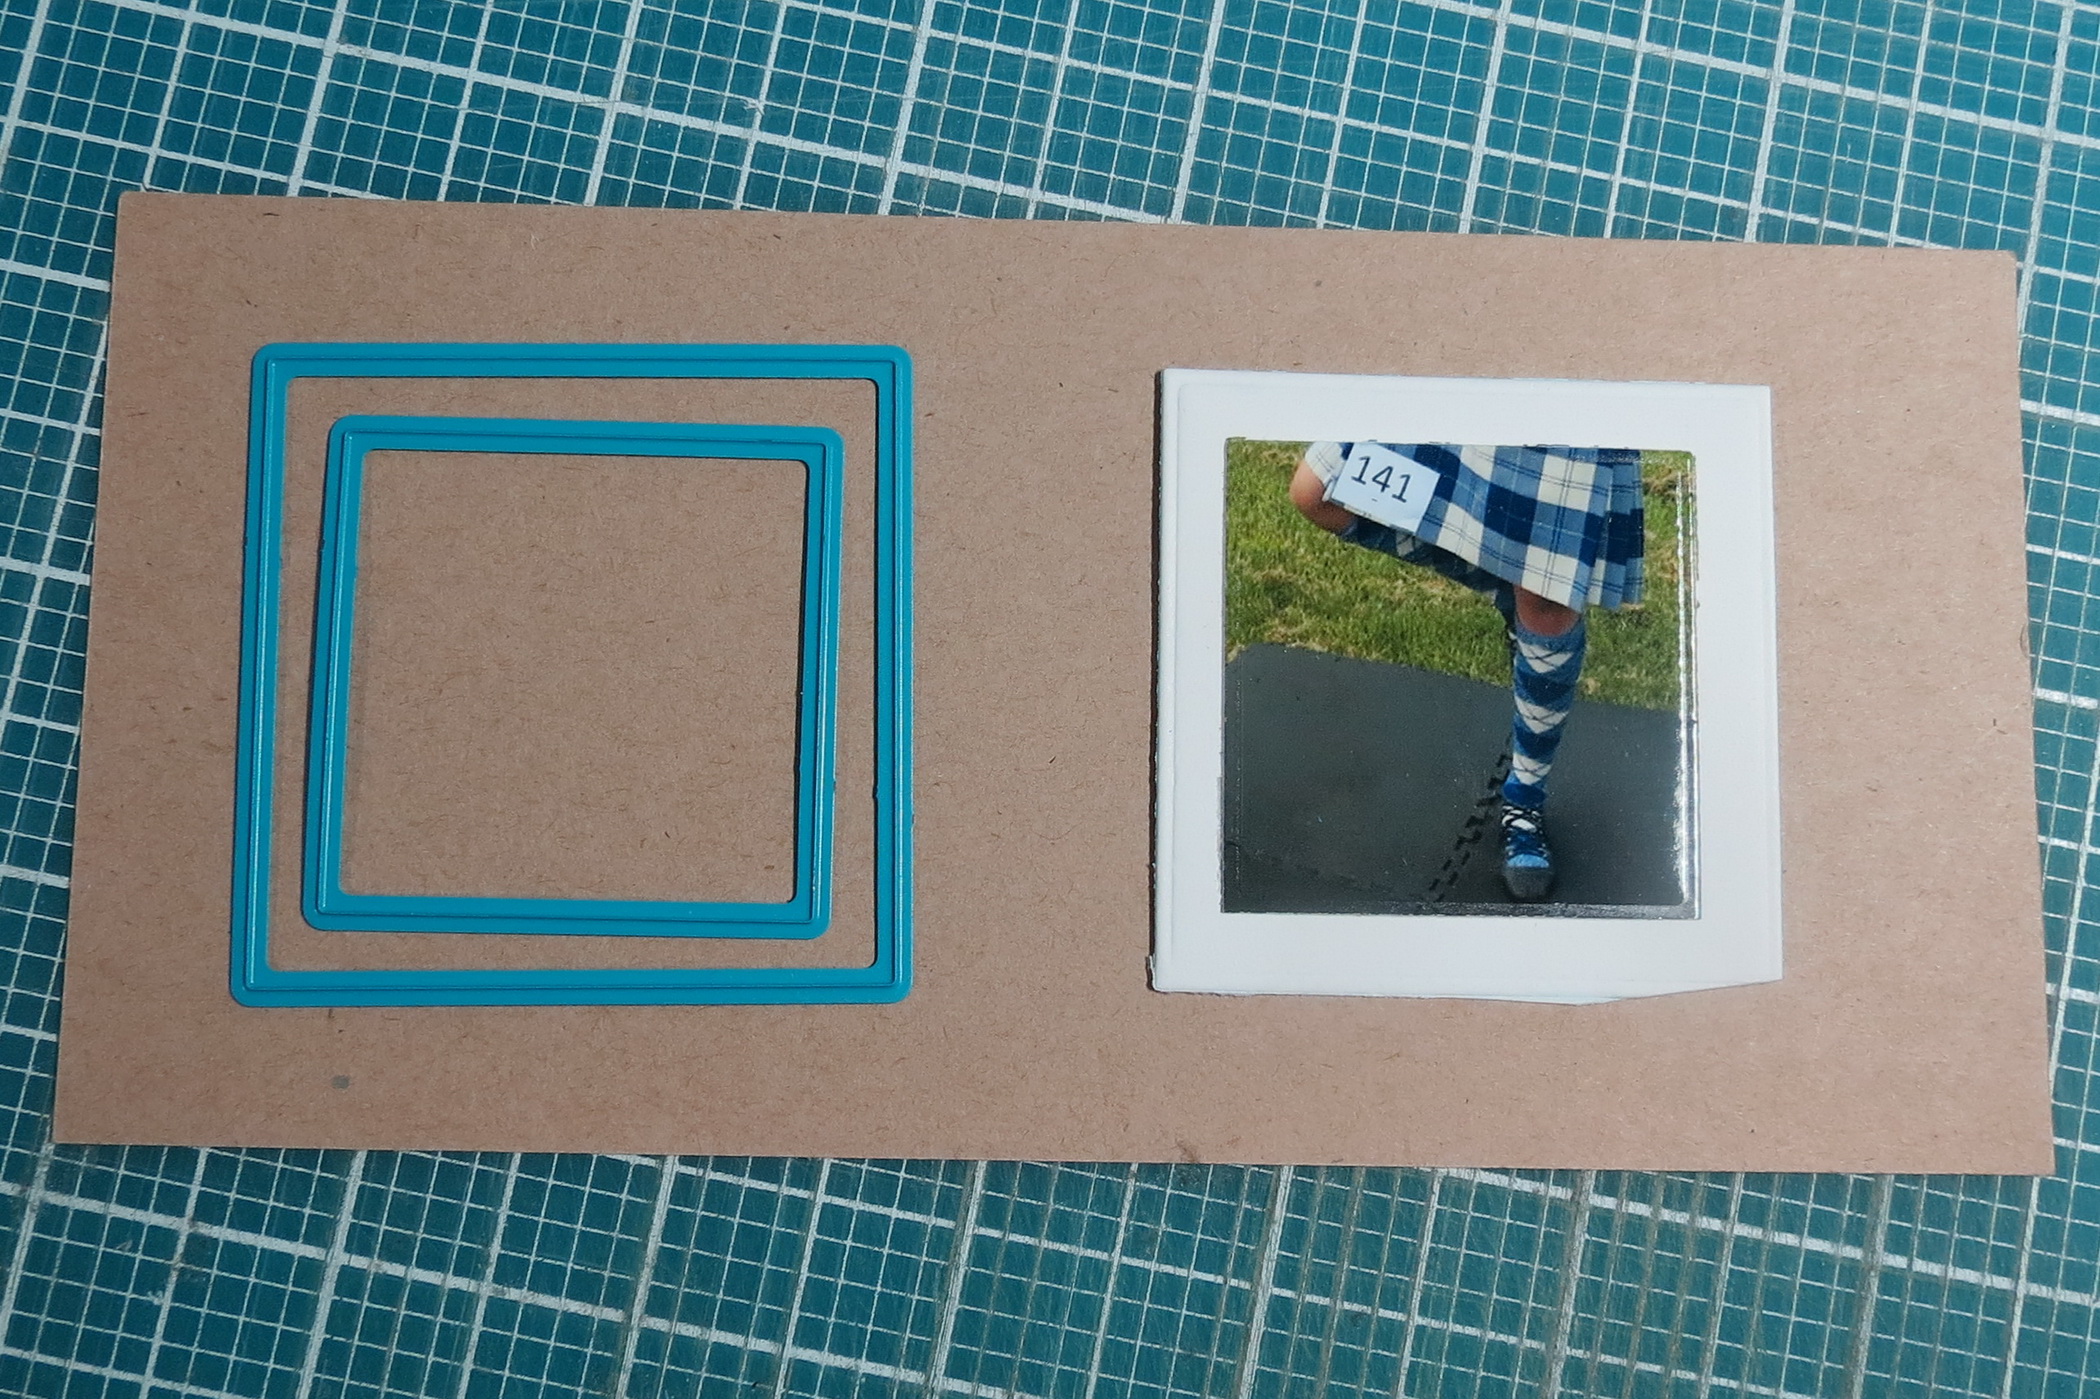
Mosaic Moments Simple Steps 101.07 Layering Basics 2×2 and layer dies
I chose to use a narrow border on the 2×2’s, cutting away a ¼” from the die cut 2.125”photo, because using the layering die for this size was cutting away too much of the details in the “swirl of the kilt and the fancy footwork” I wanted to capture. Using a combination of colors for the mats keeps it interesting and your eye moving from photo to photo as I’ve used an alternating pattern or checkerboard border.
Mosaic Moments Simple Steps 101.07 Layering Basics journaling block with a narrow border
The 1×4 tile became my journal spot to list the event, name, and accomplishments on white and mounted on a Boysenberry tile.
Mosaic Moments Simple Steps 101.07 Layering Basics journaling block with a narrow border
It was Brianna’s first competition and she did very well! The large central photo of Brianna shows her with her medals and ribbons. It’s a great focal point photo surrounded by snaps of her dancing and close-ups of her dance steps, everything that led to her results.
Mosaic Moments Simple Steps 101.07 Layering Basics alternating color mats for a checkerboard effect
This pattern really lends itself to a series of photos and includes three different sizes of photos for variety. By varying the borders by either hand-cutting or using the layering dies additional interest with two areas are defined within the pattern. You will find this to be a versatile pattern for using the basic die sets with the layering dies or fitting to the grid, with a few Simple Steps you’ll be creating Mosaic Moments Masterpieces in no time!
Special thanks to Sonya Babensee for the photos used in this layout.
Andrea Fisher