
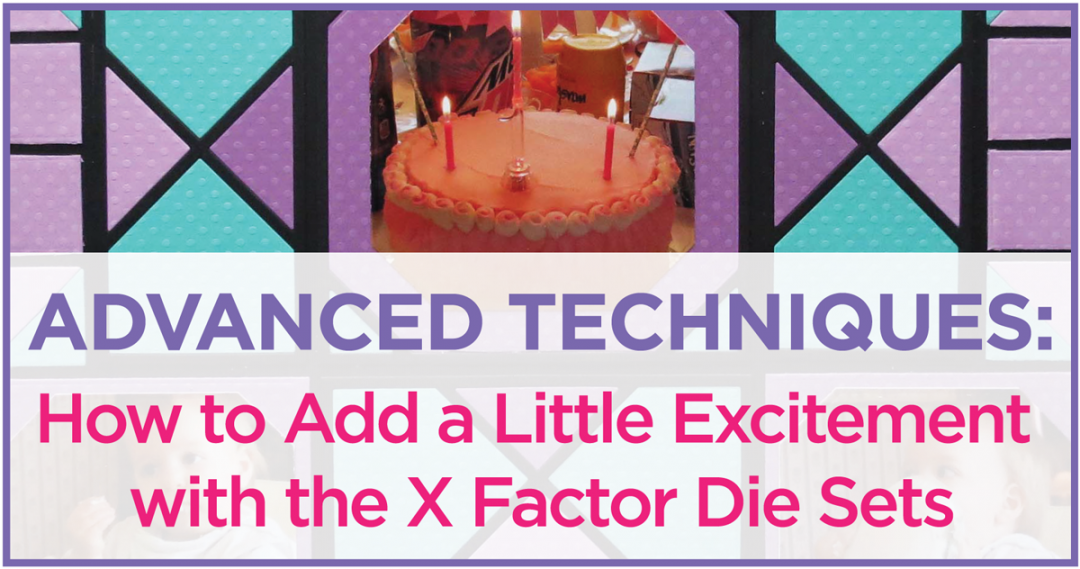
Featuring the new X Factor Die sets
Birthday Girl
Today I’m using the new X Factor Die sets to show how you can bring your layouts to a new level of interest with a little planning and a little color.

Mosaic Moments X Factor Die Sets
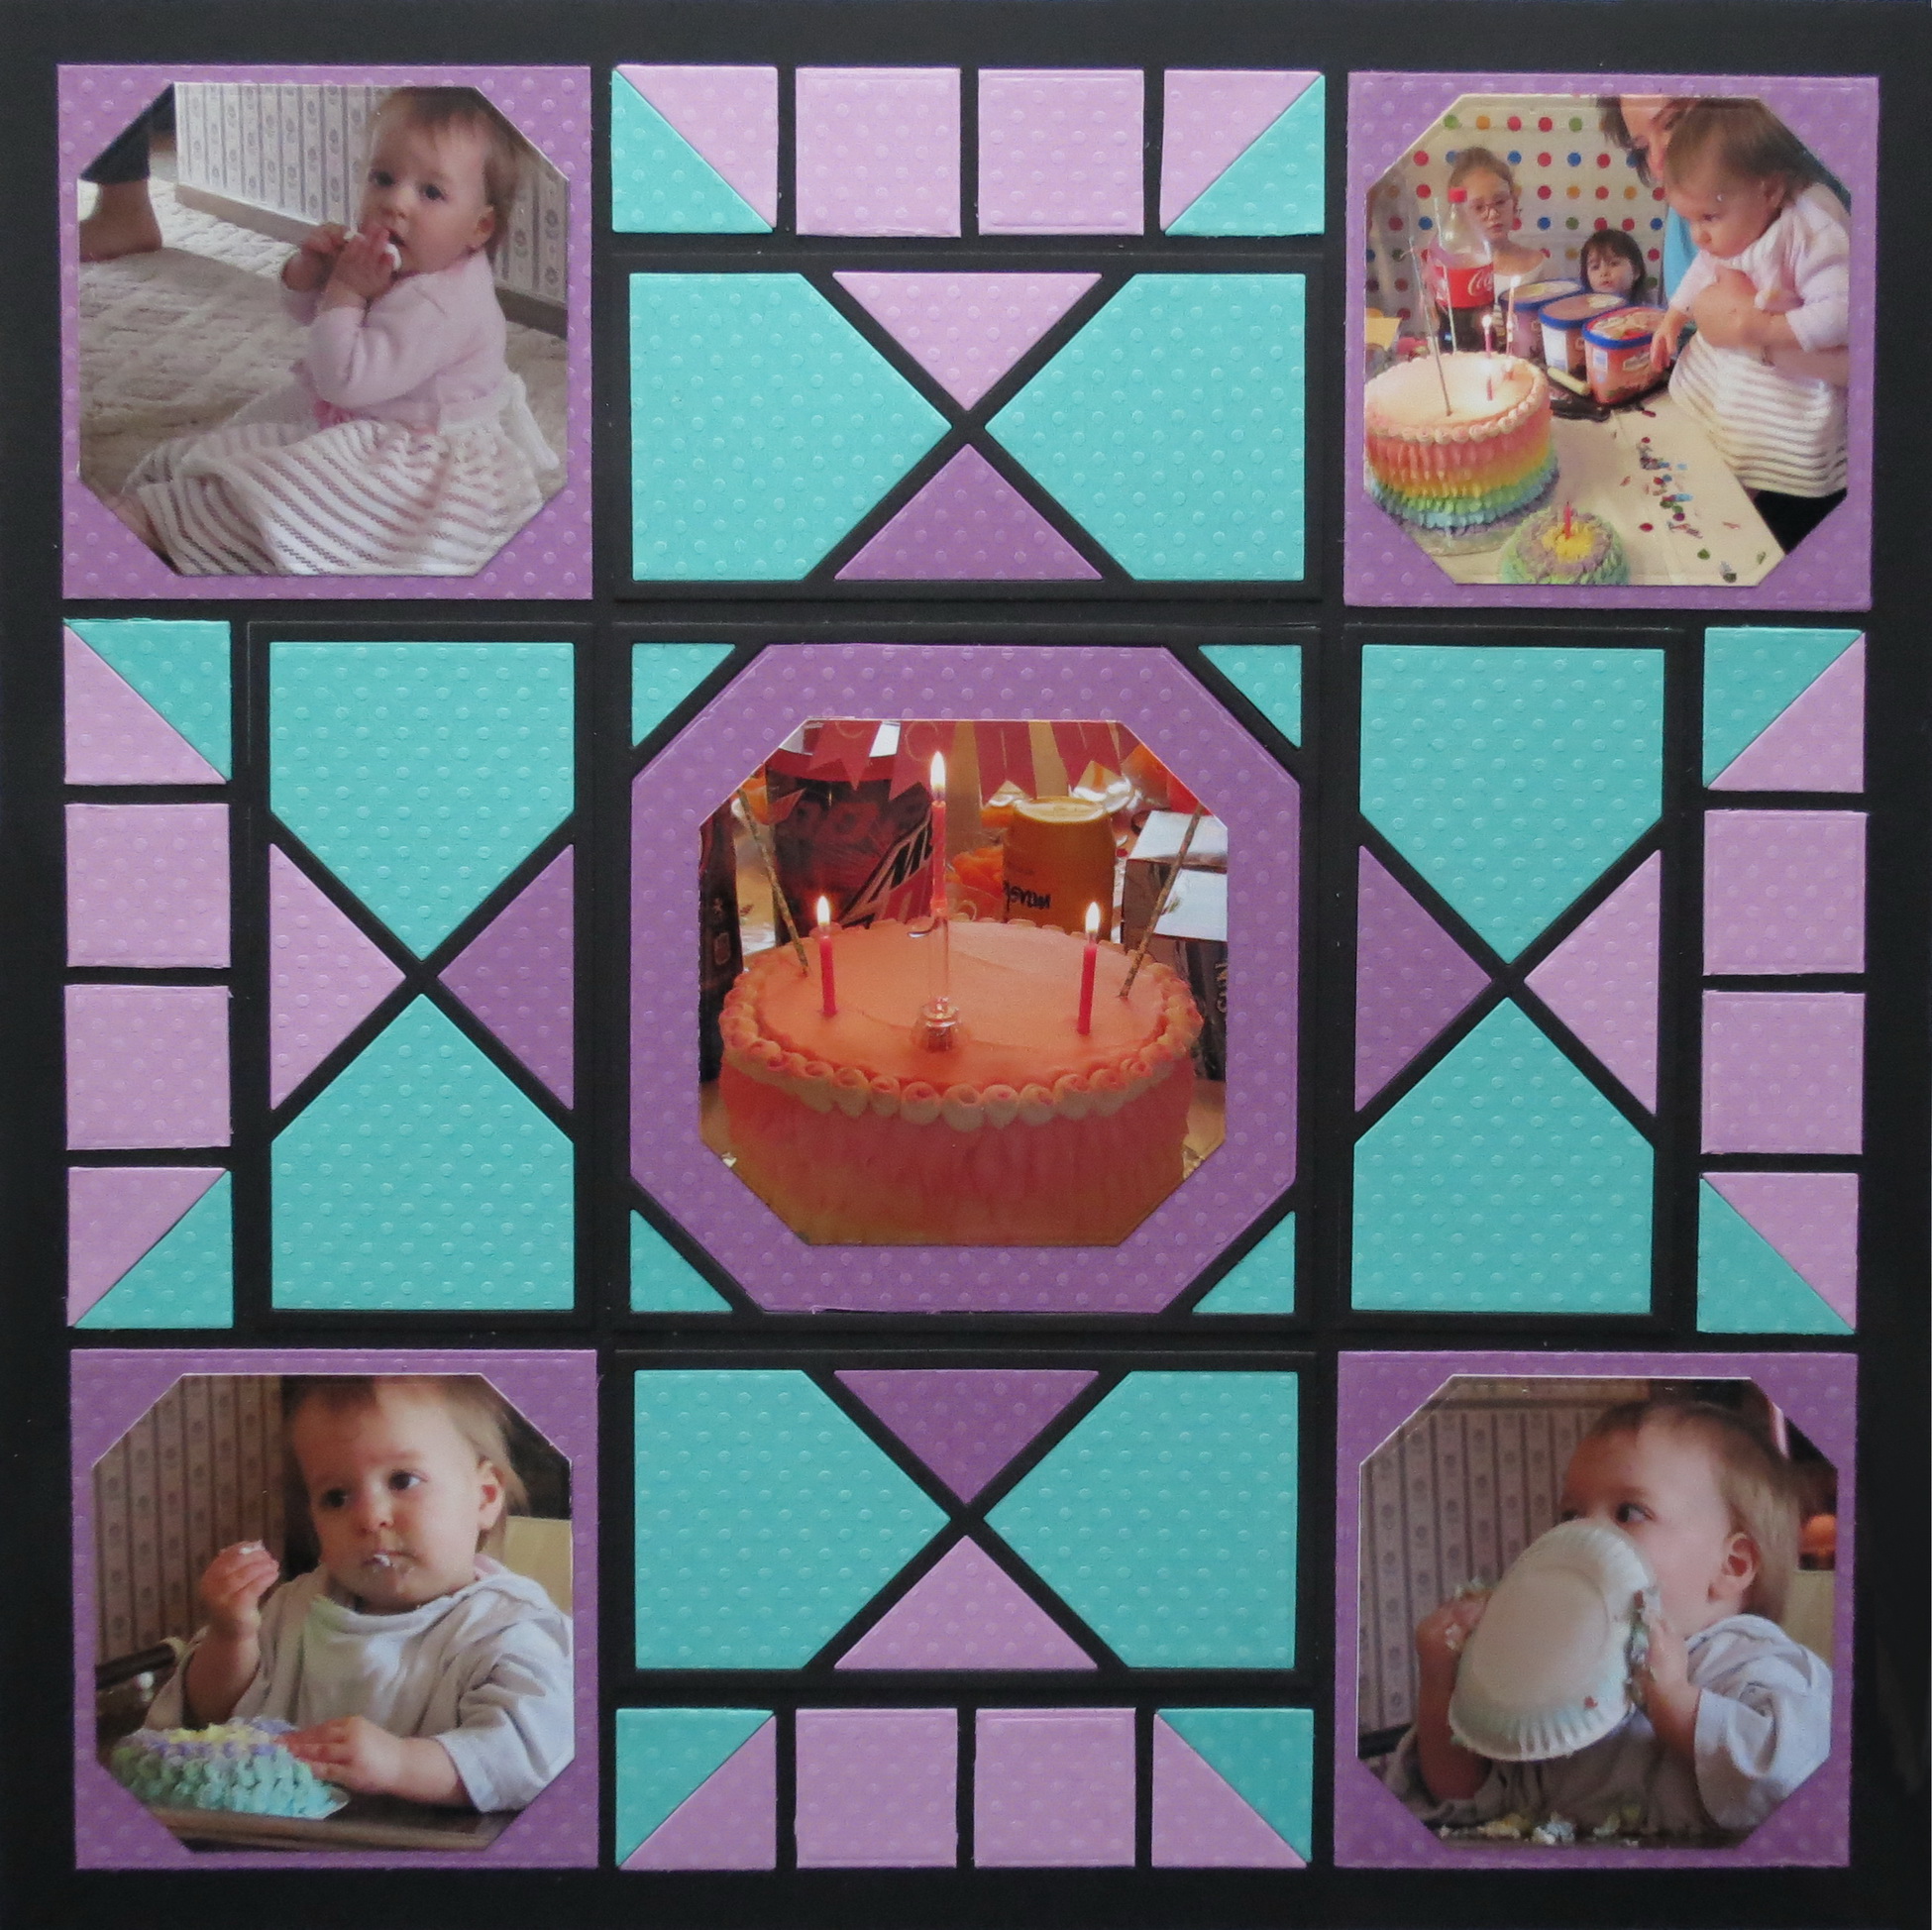
The pattern I’ve chosen for this week is Pattern # 360, a mostly squares pattern. It is one of the few designed patterns in the Pattern Gallery that can be used with these dies. I’m sure there are more to come in the near future.
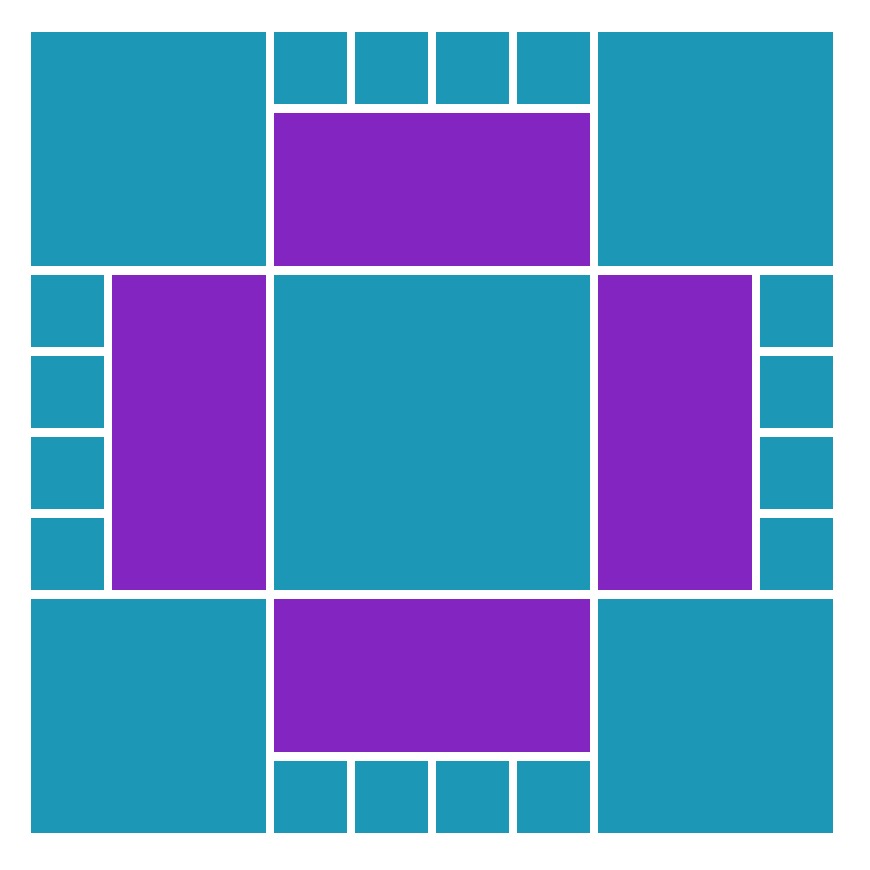
Mosaic Moments Pattern #360
I began with the die set and created my page, it was only after I was finished that I thought it might be interesting to compare the usual way I might approach this pattern without using the new dies. I’d call this the “ordinary way” in this case.
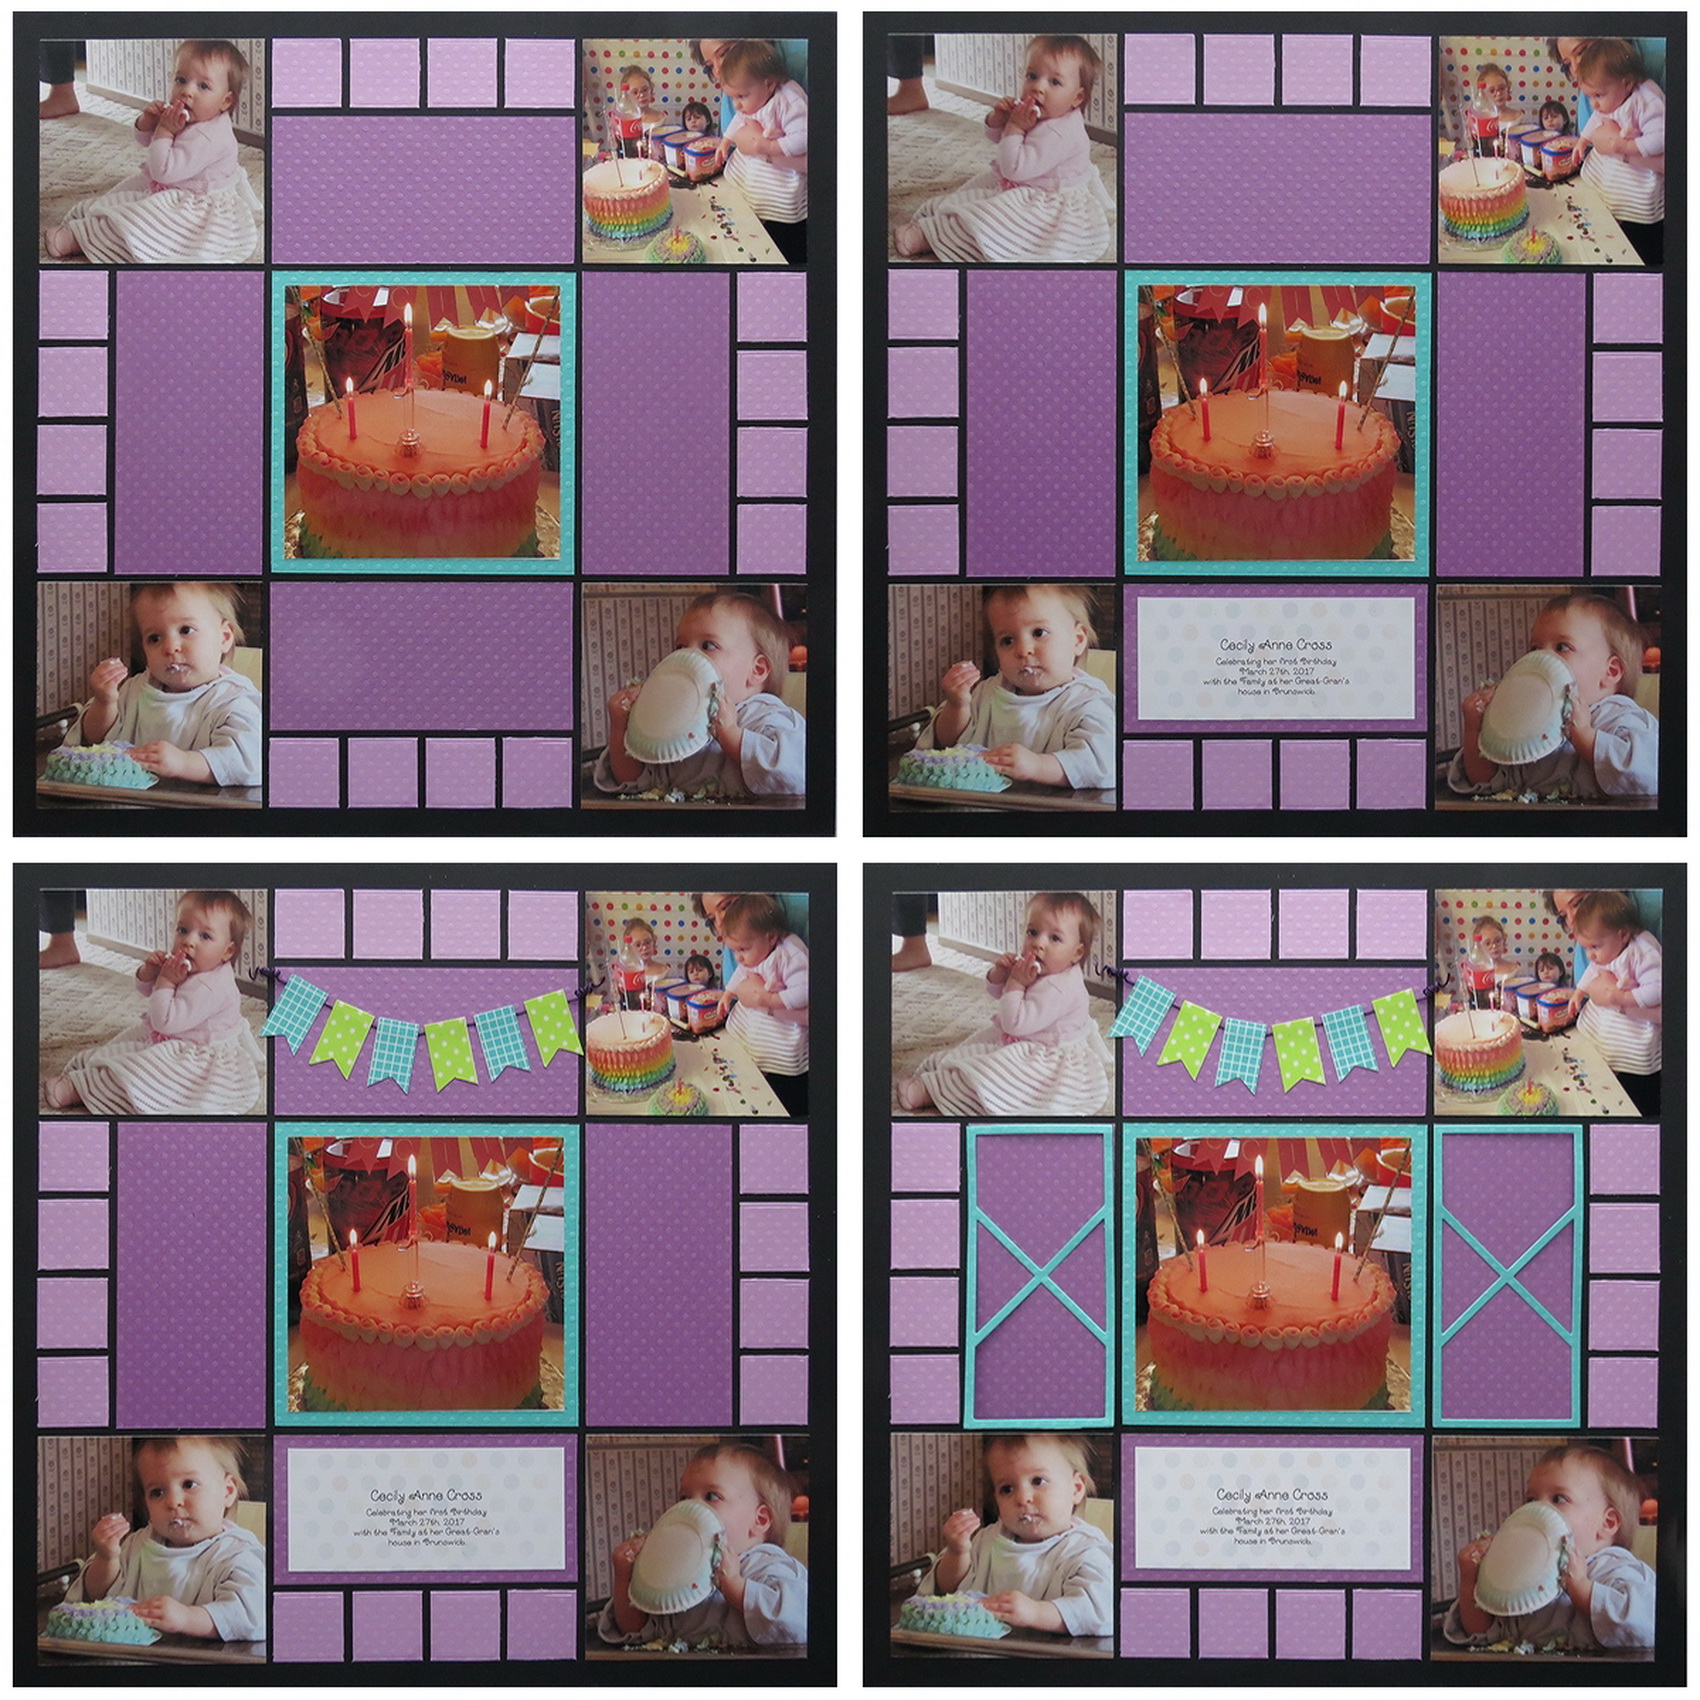
Mosaic Moments Advanced Techniques The Basic approach to the Pattern
From the photos you can see how using the same photos and colors in the pattern I have a fairly nice, simple, quick, clean mosaic layout. I have spaces in the four 4×2 spots I could add photos; I could add journaling or a title or even add embellishments.
I started with a journal spot below the central photo. Then I added a washi tape banner above the central photo. Then just to throw caution to the wind I placed two of the 2×4 die cut sections on each of the side spots. I have kept the layout at the third stage and discarded the X Factor die sections.
In this layout all the lines follow the normal Mosaic Grid patterns. The colors pop against the black background. But let’s switch to the new X Factor Die sets and change up our lines and see how that looks.
The X Factor Die Sets in Action
Mosaic Moments Advanced Techniques with the X Factor Die Sets
The first thing I have done is to cut all the die pieces in black cardstock. This will help to change the direction of the grid visually as I work on a black grid. I’ve got my mind thinking in quilt patterns at this point and playing with the light, medium and dark colors of Bazzill Swiss dot cardstock. I want to find the triangles and emphasize them.
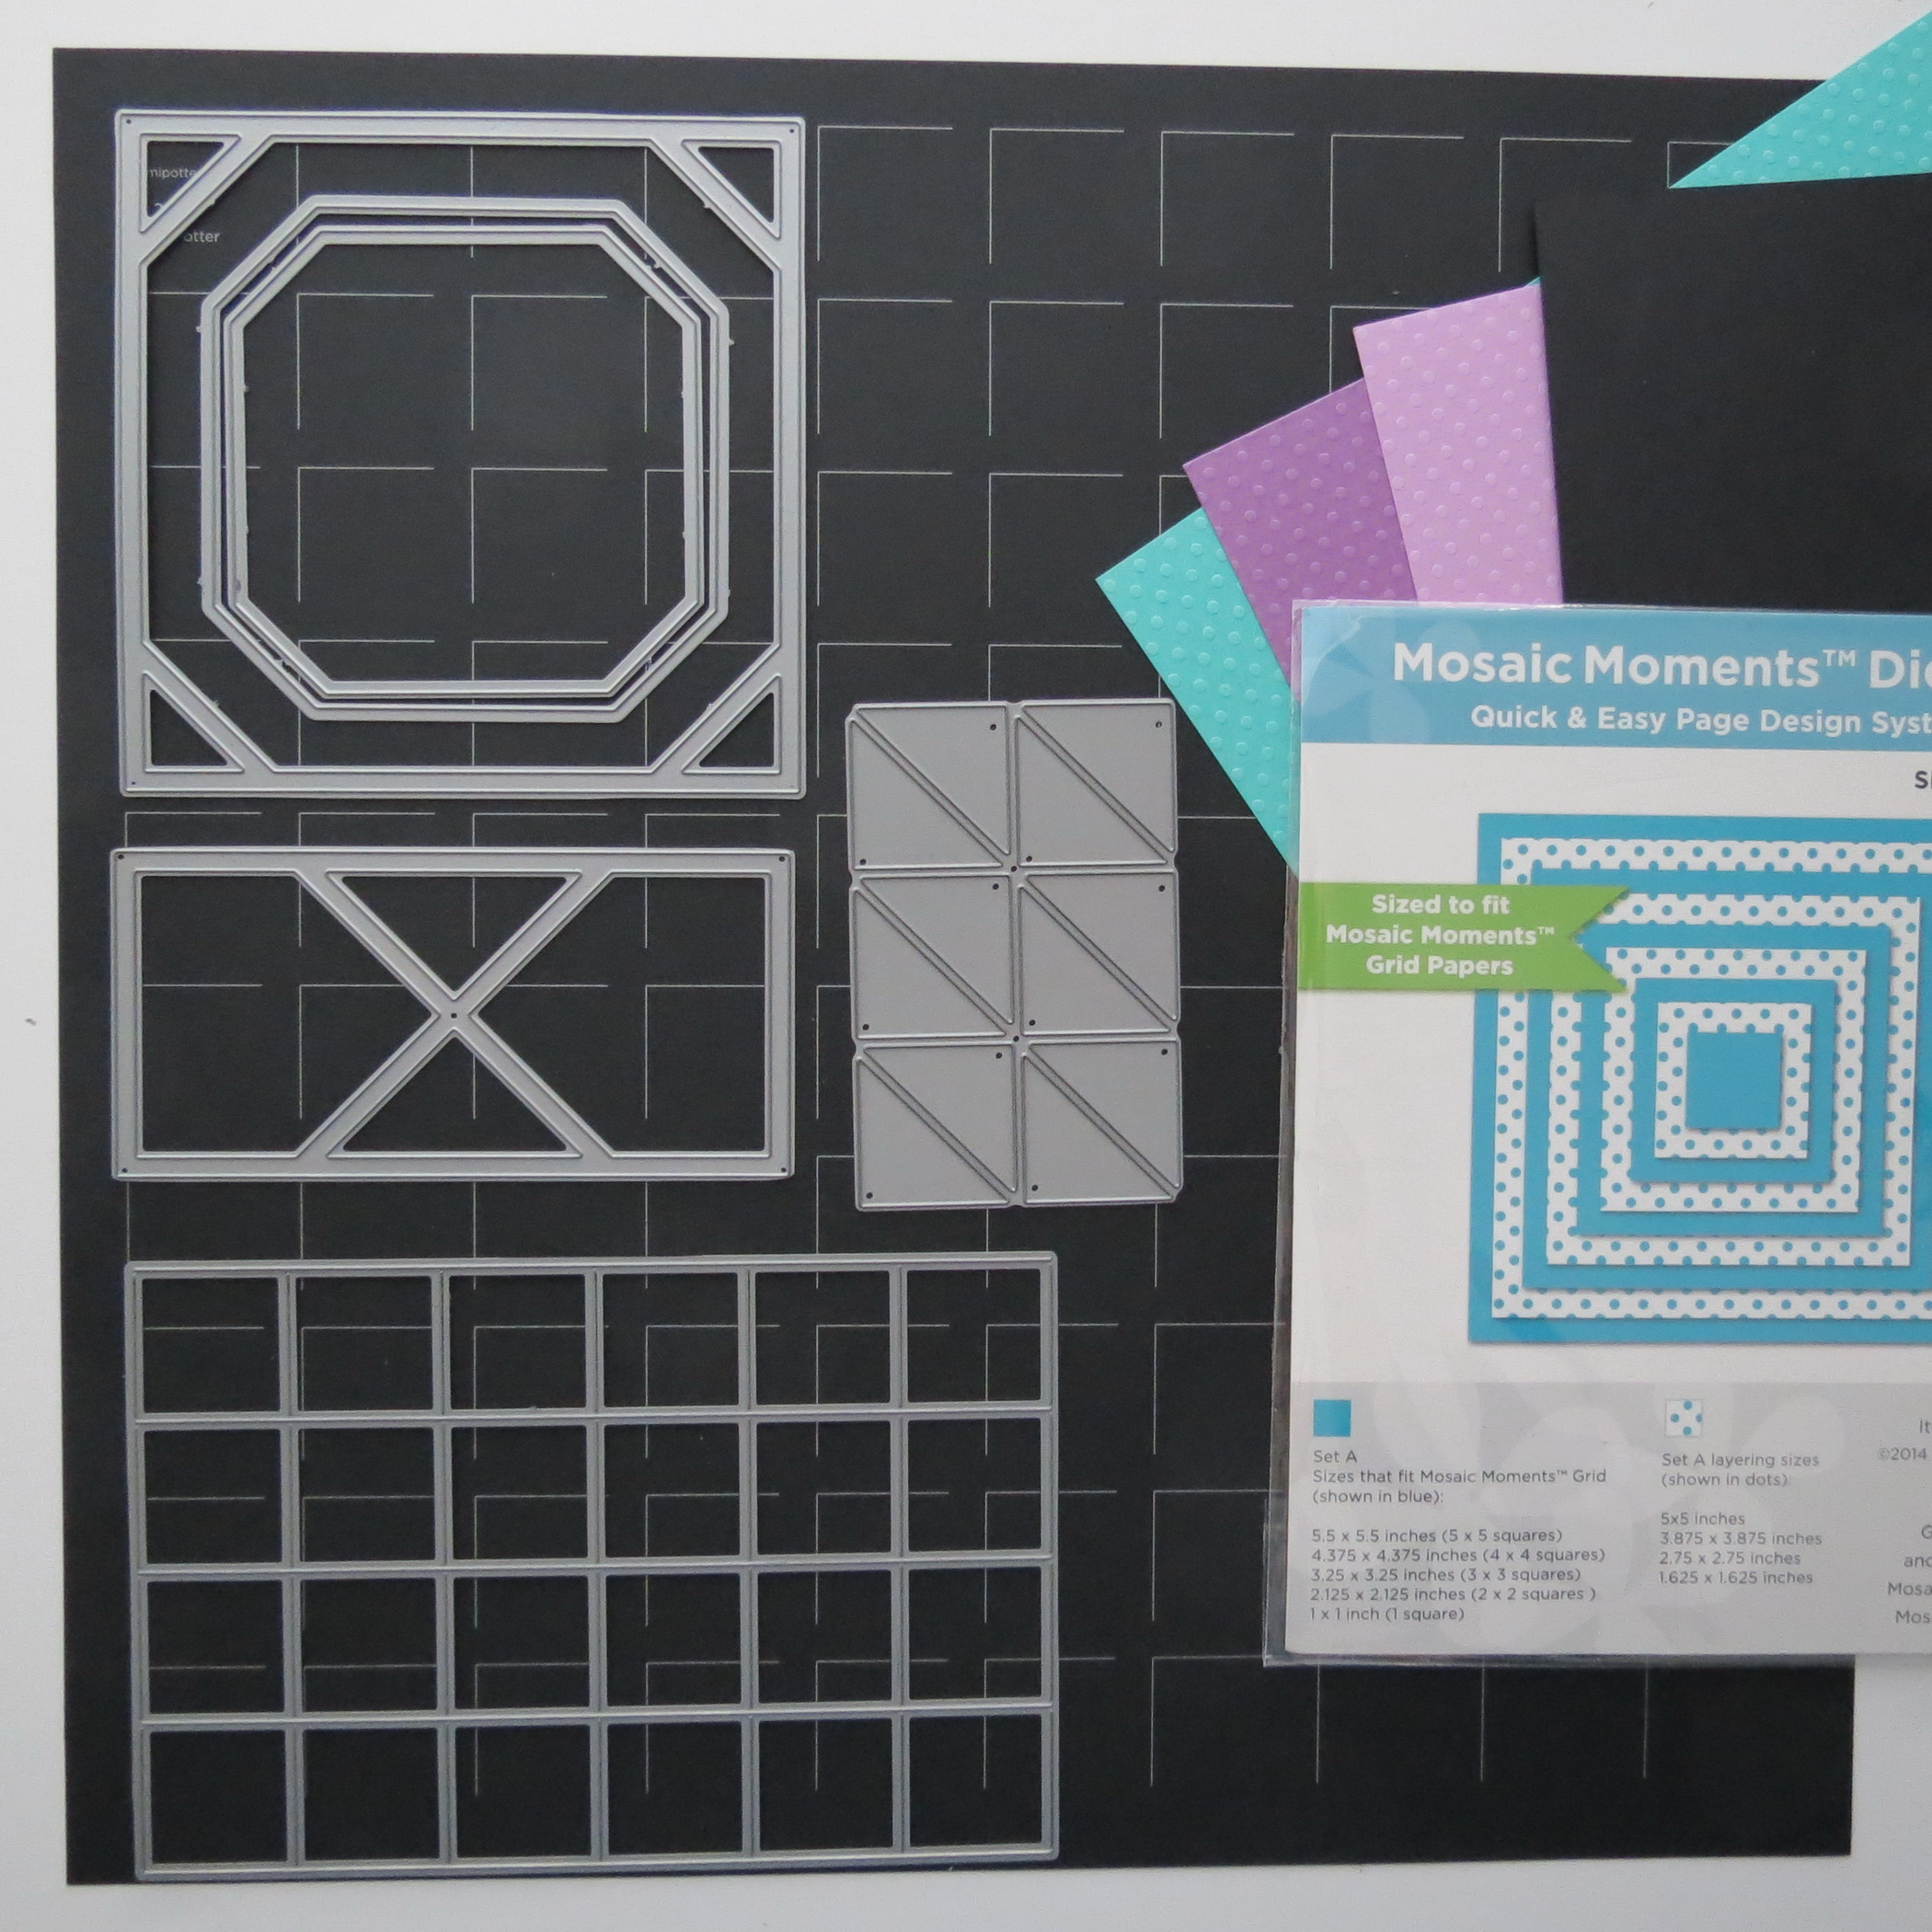
Mosaic Moments Advanced Techniques with the X Factor Die Sets, Corner Tile set, Die Set A and 4×6 1″ grid tile
To get the full triangle for my pattern I will also use the Corner Tiles Die to turn some of the 1” squares into a portion of another triangle.
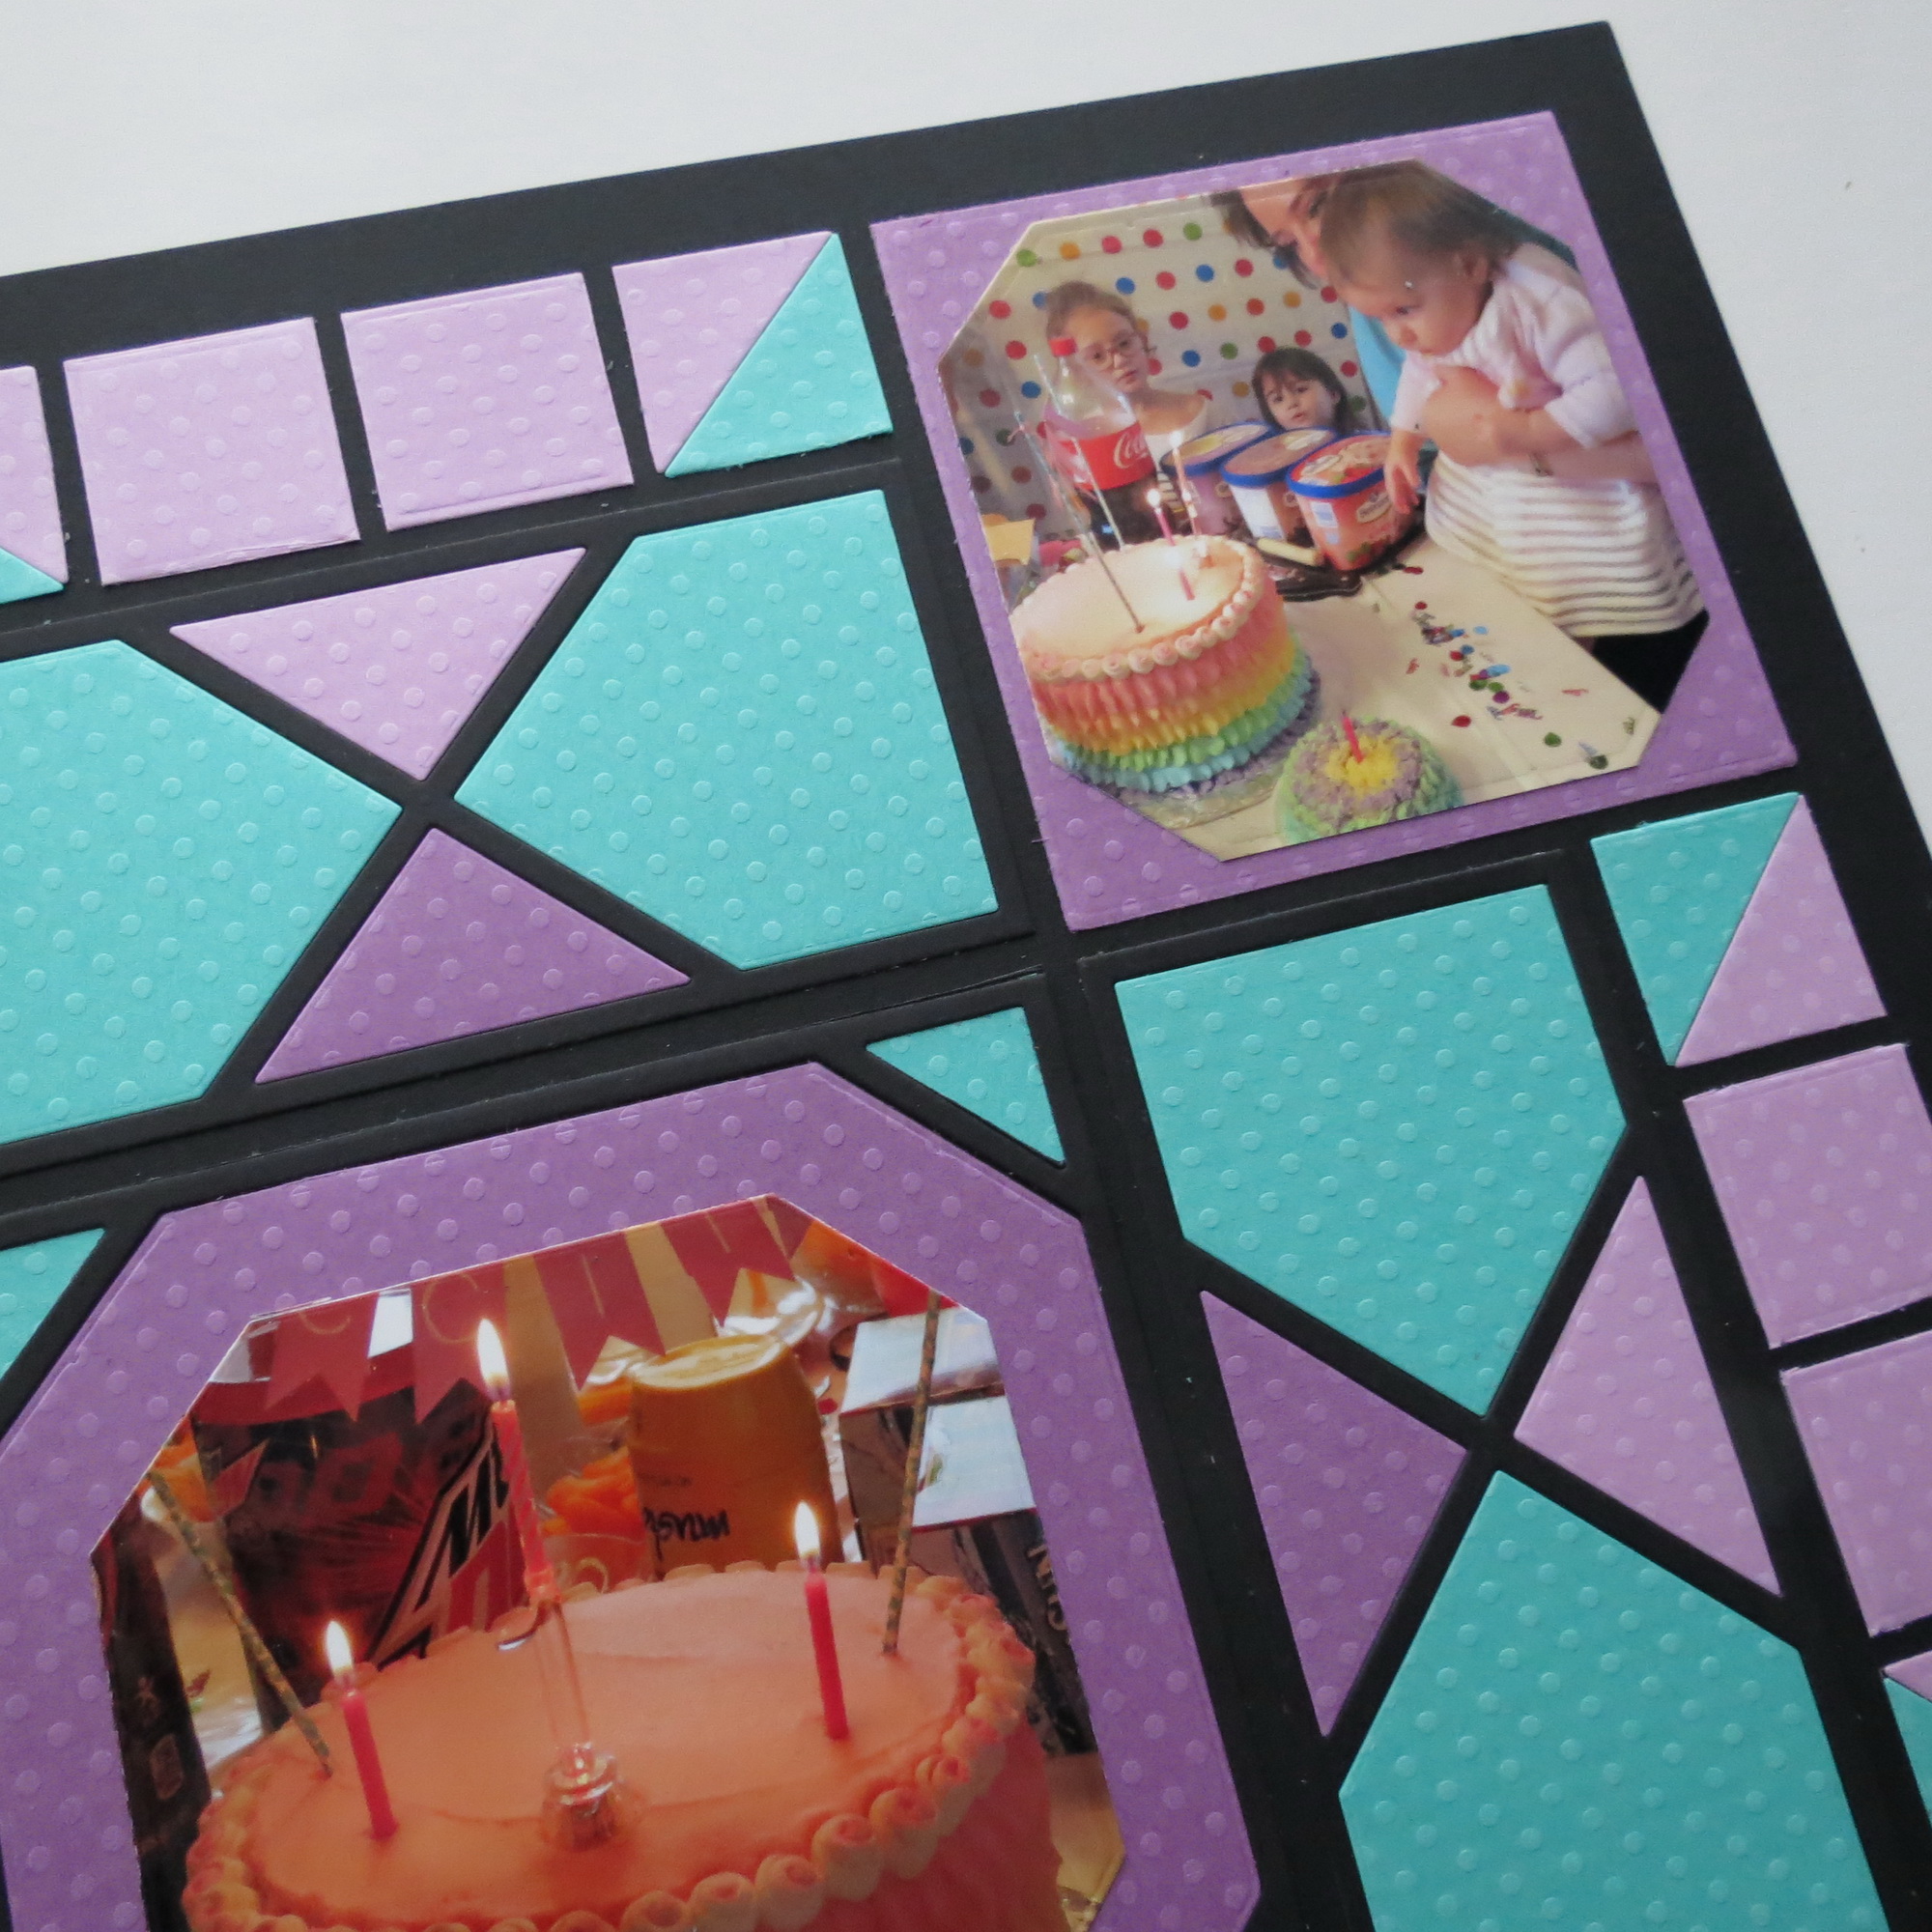
Mosaic Moments Advanced Techniques with the X Factor Die Sets
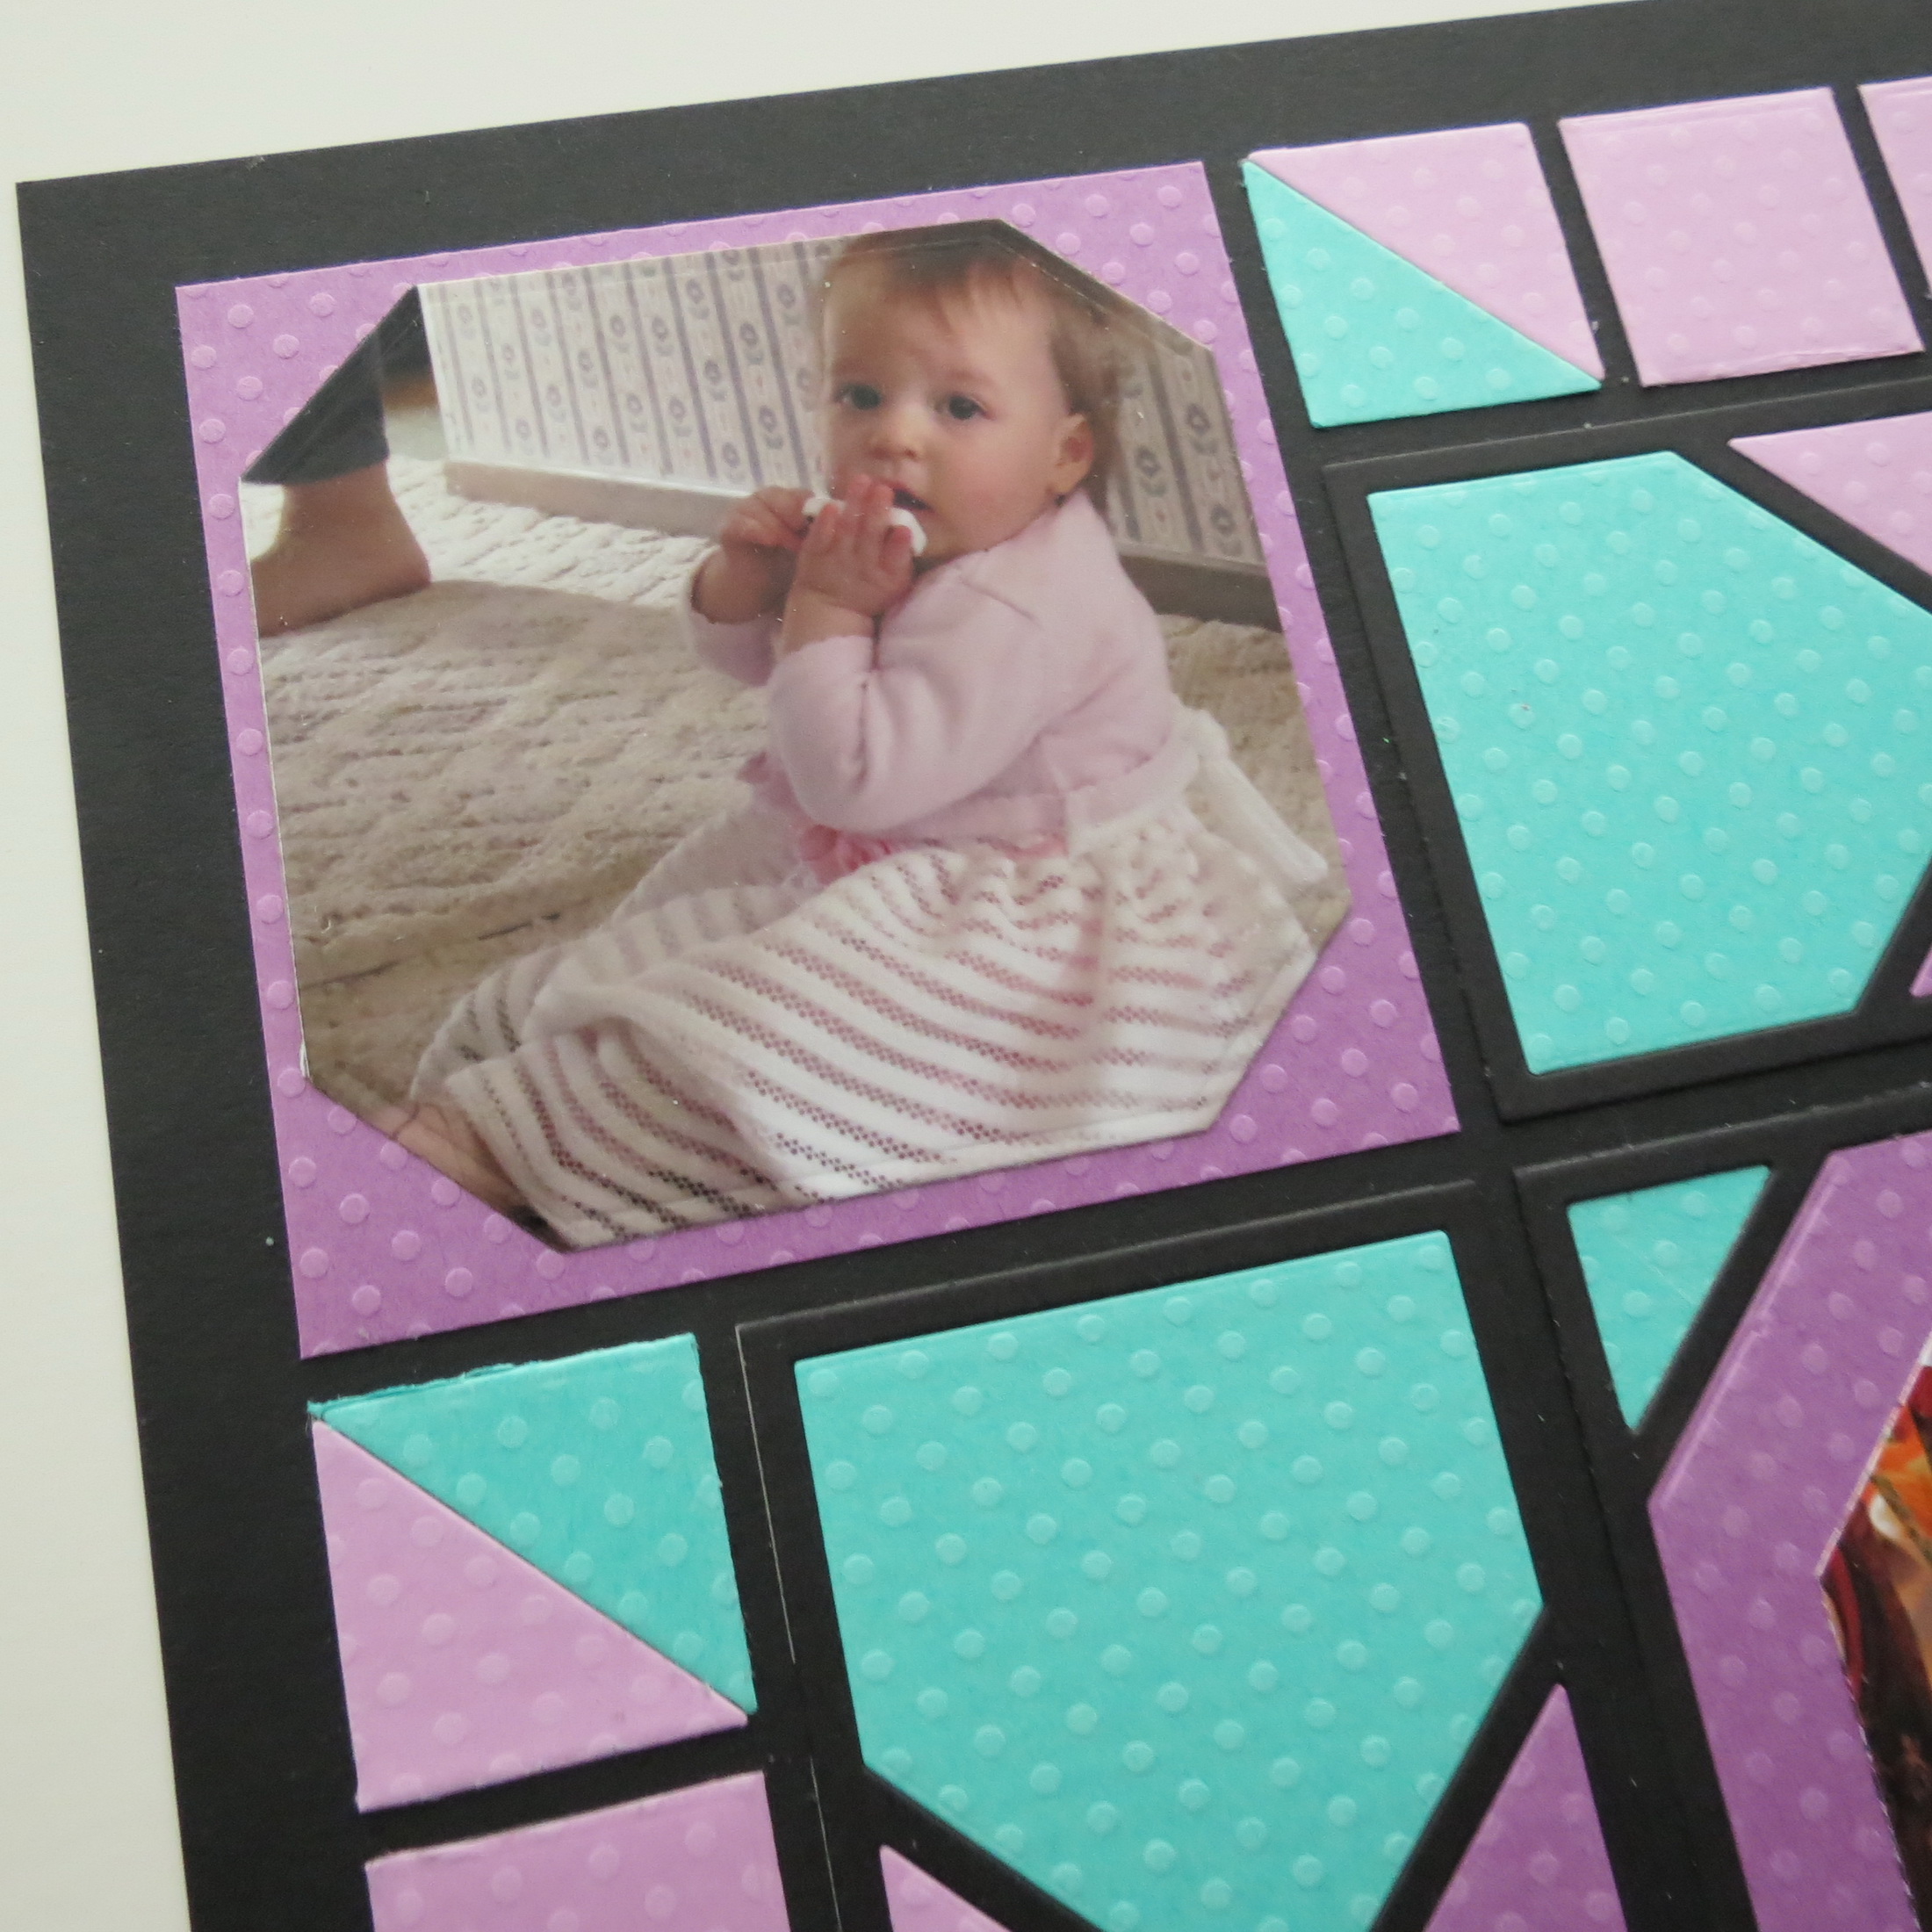
Each of the corner photos are mounted on a 3×3 square cut with Die Set A. The photos were cut with a die from the X Factor 4×4 Plus Nested Die Set and mounted on top of the cardstock base. The base could also have been cut with the die and the photo embedded. I chose to leave it mounted.
Mosaic Moments Advanced Techniques with the X Factor Die Sets
For the center photo I chose to leave a wide mat around the photo allowing the center square to show on point with the matching colors from the neighboring spots.
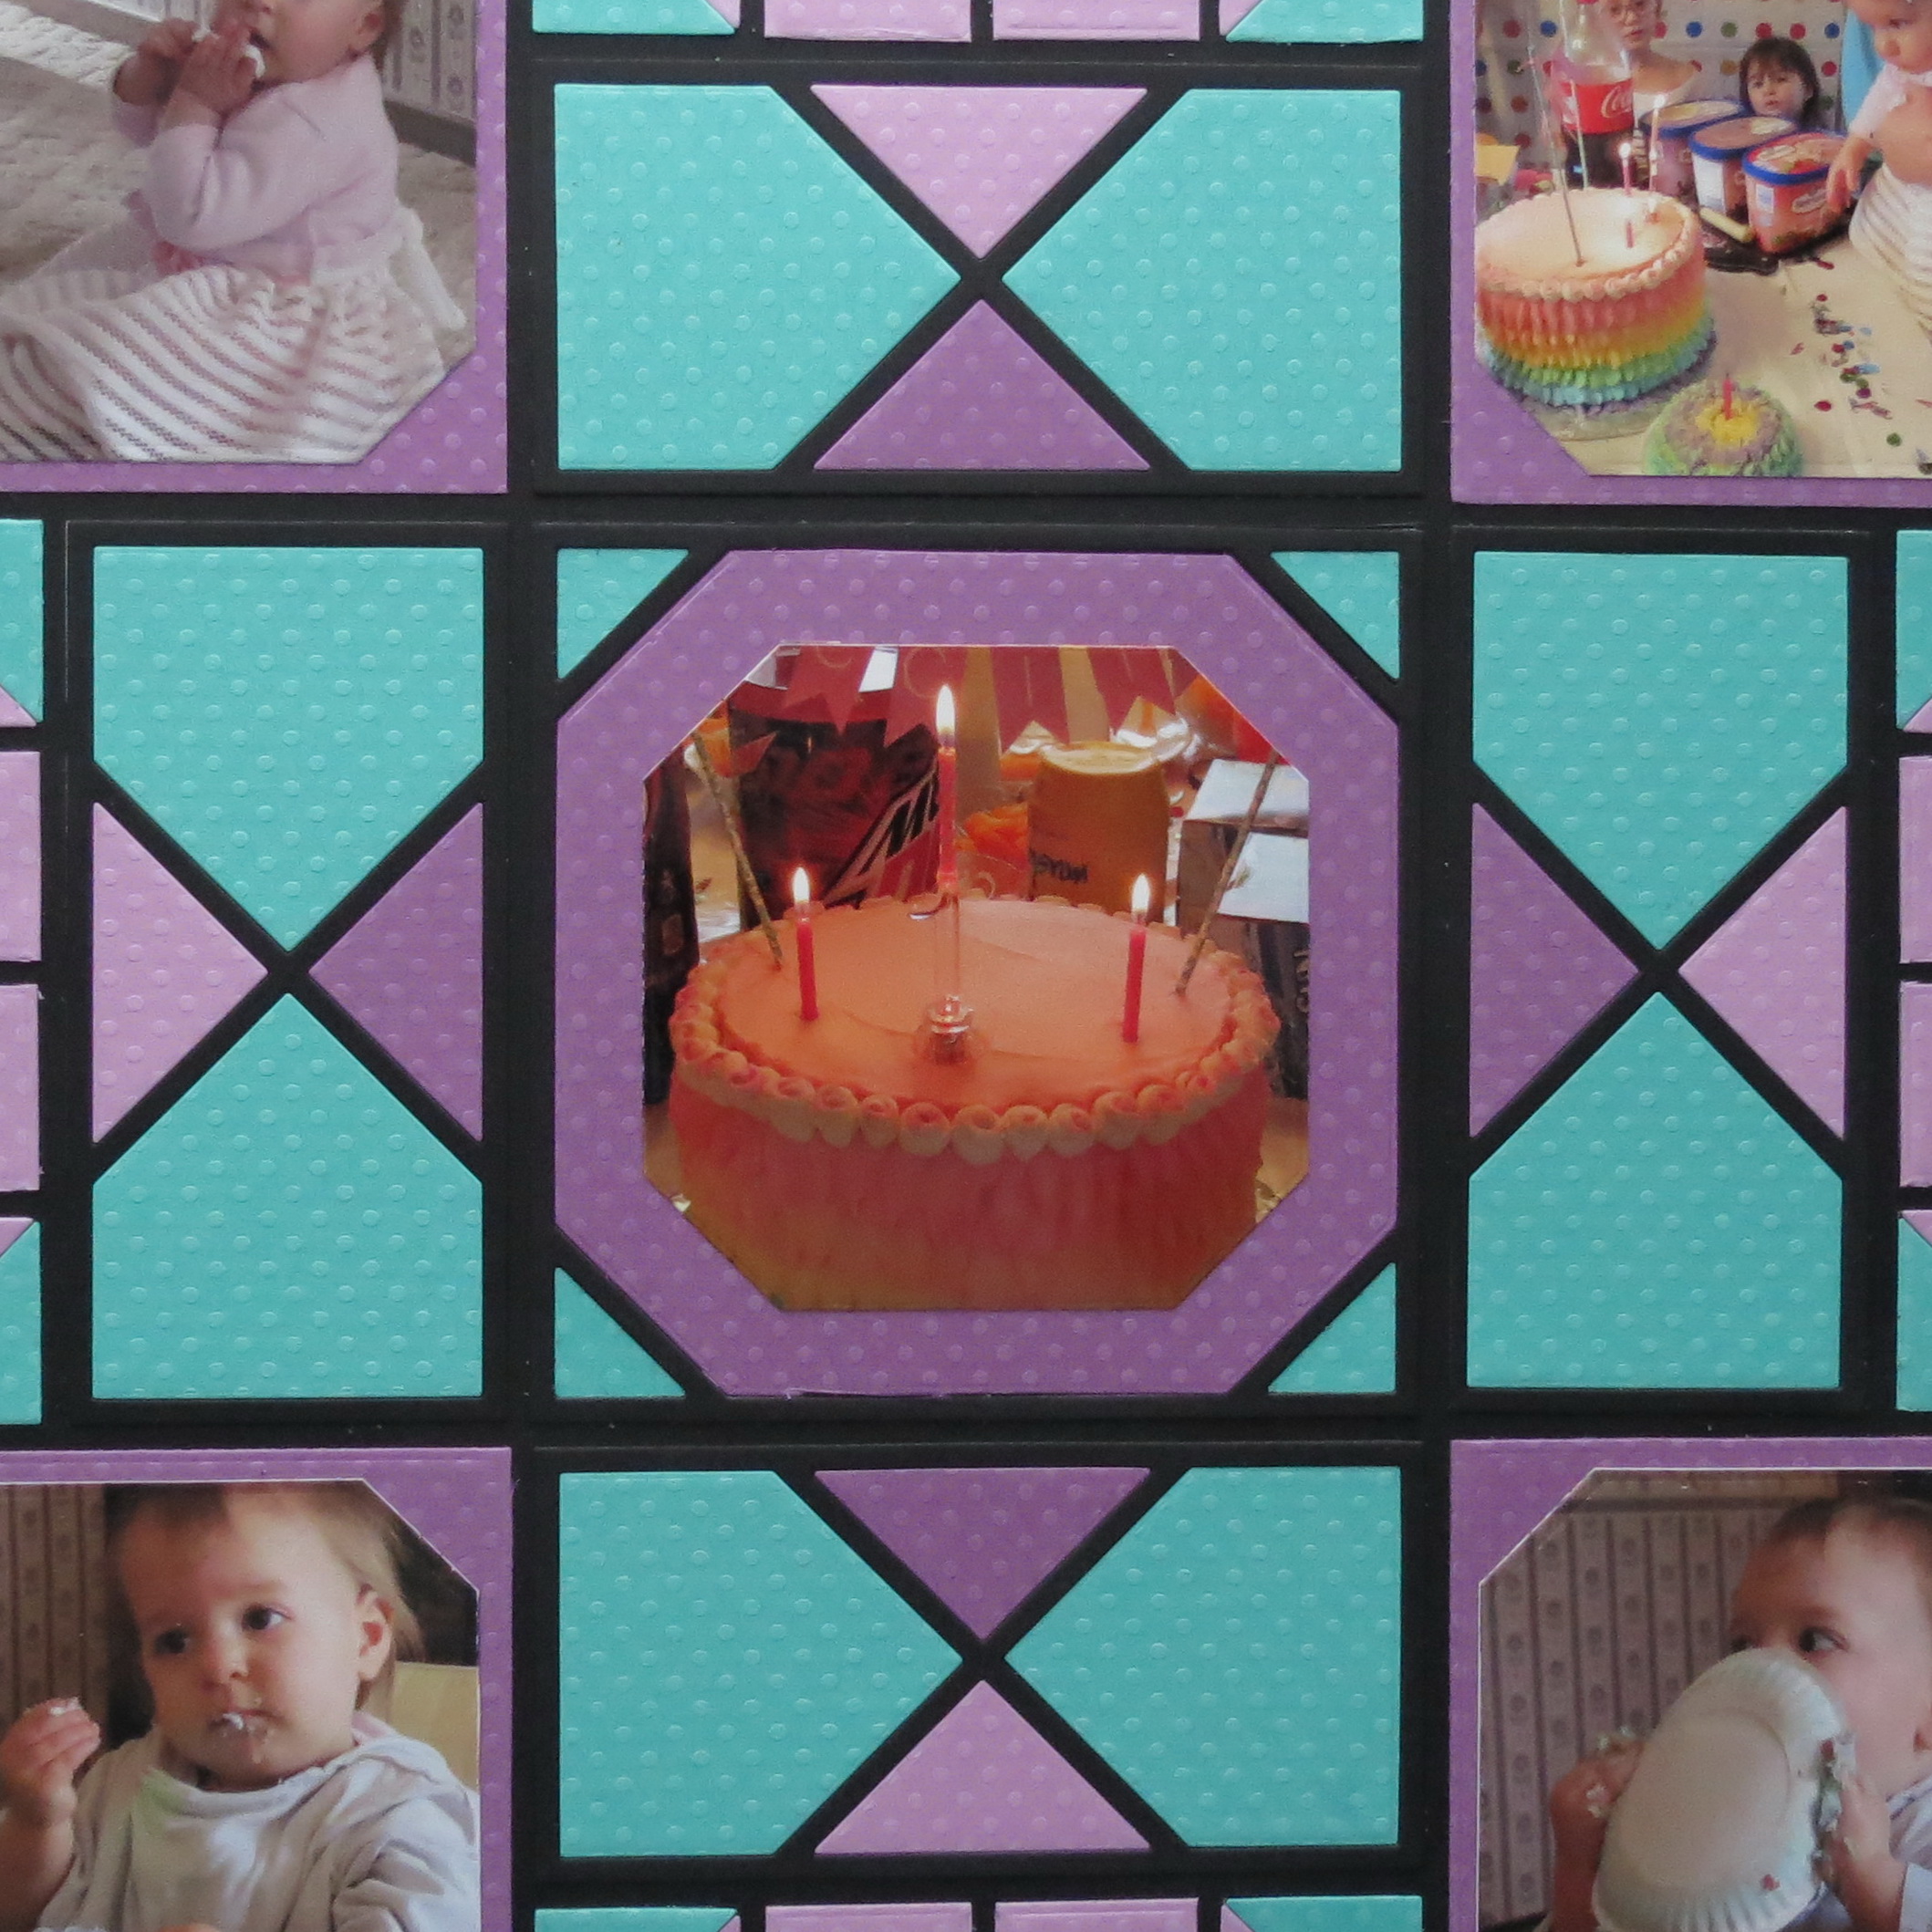
Mosaic Moments Advanced Techniques with the X Factor Die Sets Center detail of dies
Because the black die sections blend in with the black background the center of the layout it appears prominently on the page. Then the diagonal lines show the new pattern created using the die sets and black cardstock. All of a sudden you are no longer anchored to the 100 – 1” square grid. You’ve taken your page up a notch with a few advanced techniques and turned the grid on its side. All it took was a little planning and a little bit of color!
I know that when you first look at the X Factor Die Sets online it can be a bit intimidating. It can be difficult to visualize what your layouts might be using this die. Hopefully you’ve been inspired by the ideas we’ve been sharing. I think you just might enjoy playing around with these new sets. Now go try out a few ideas on your pages!
Andrea Fisher