
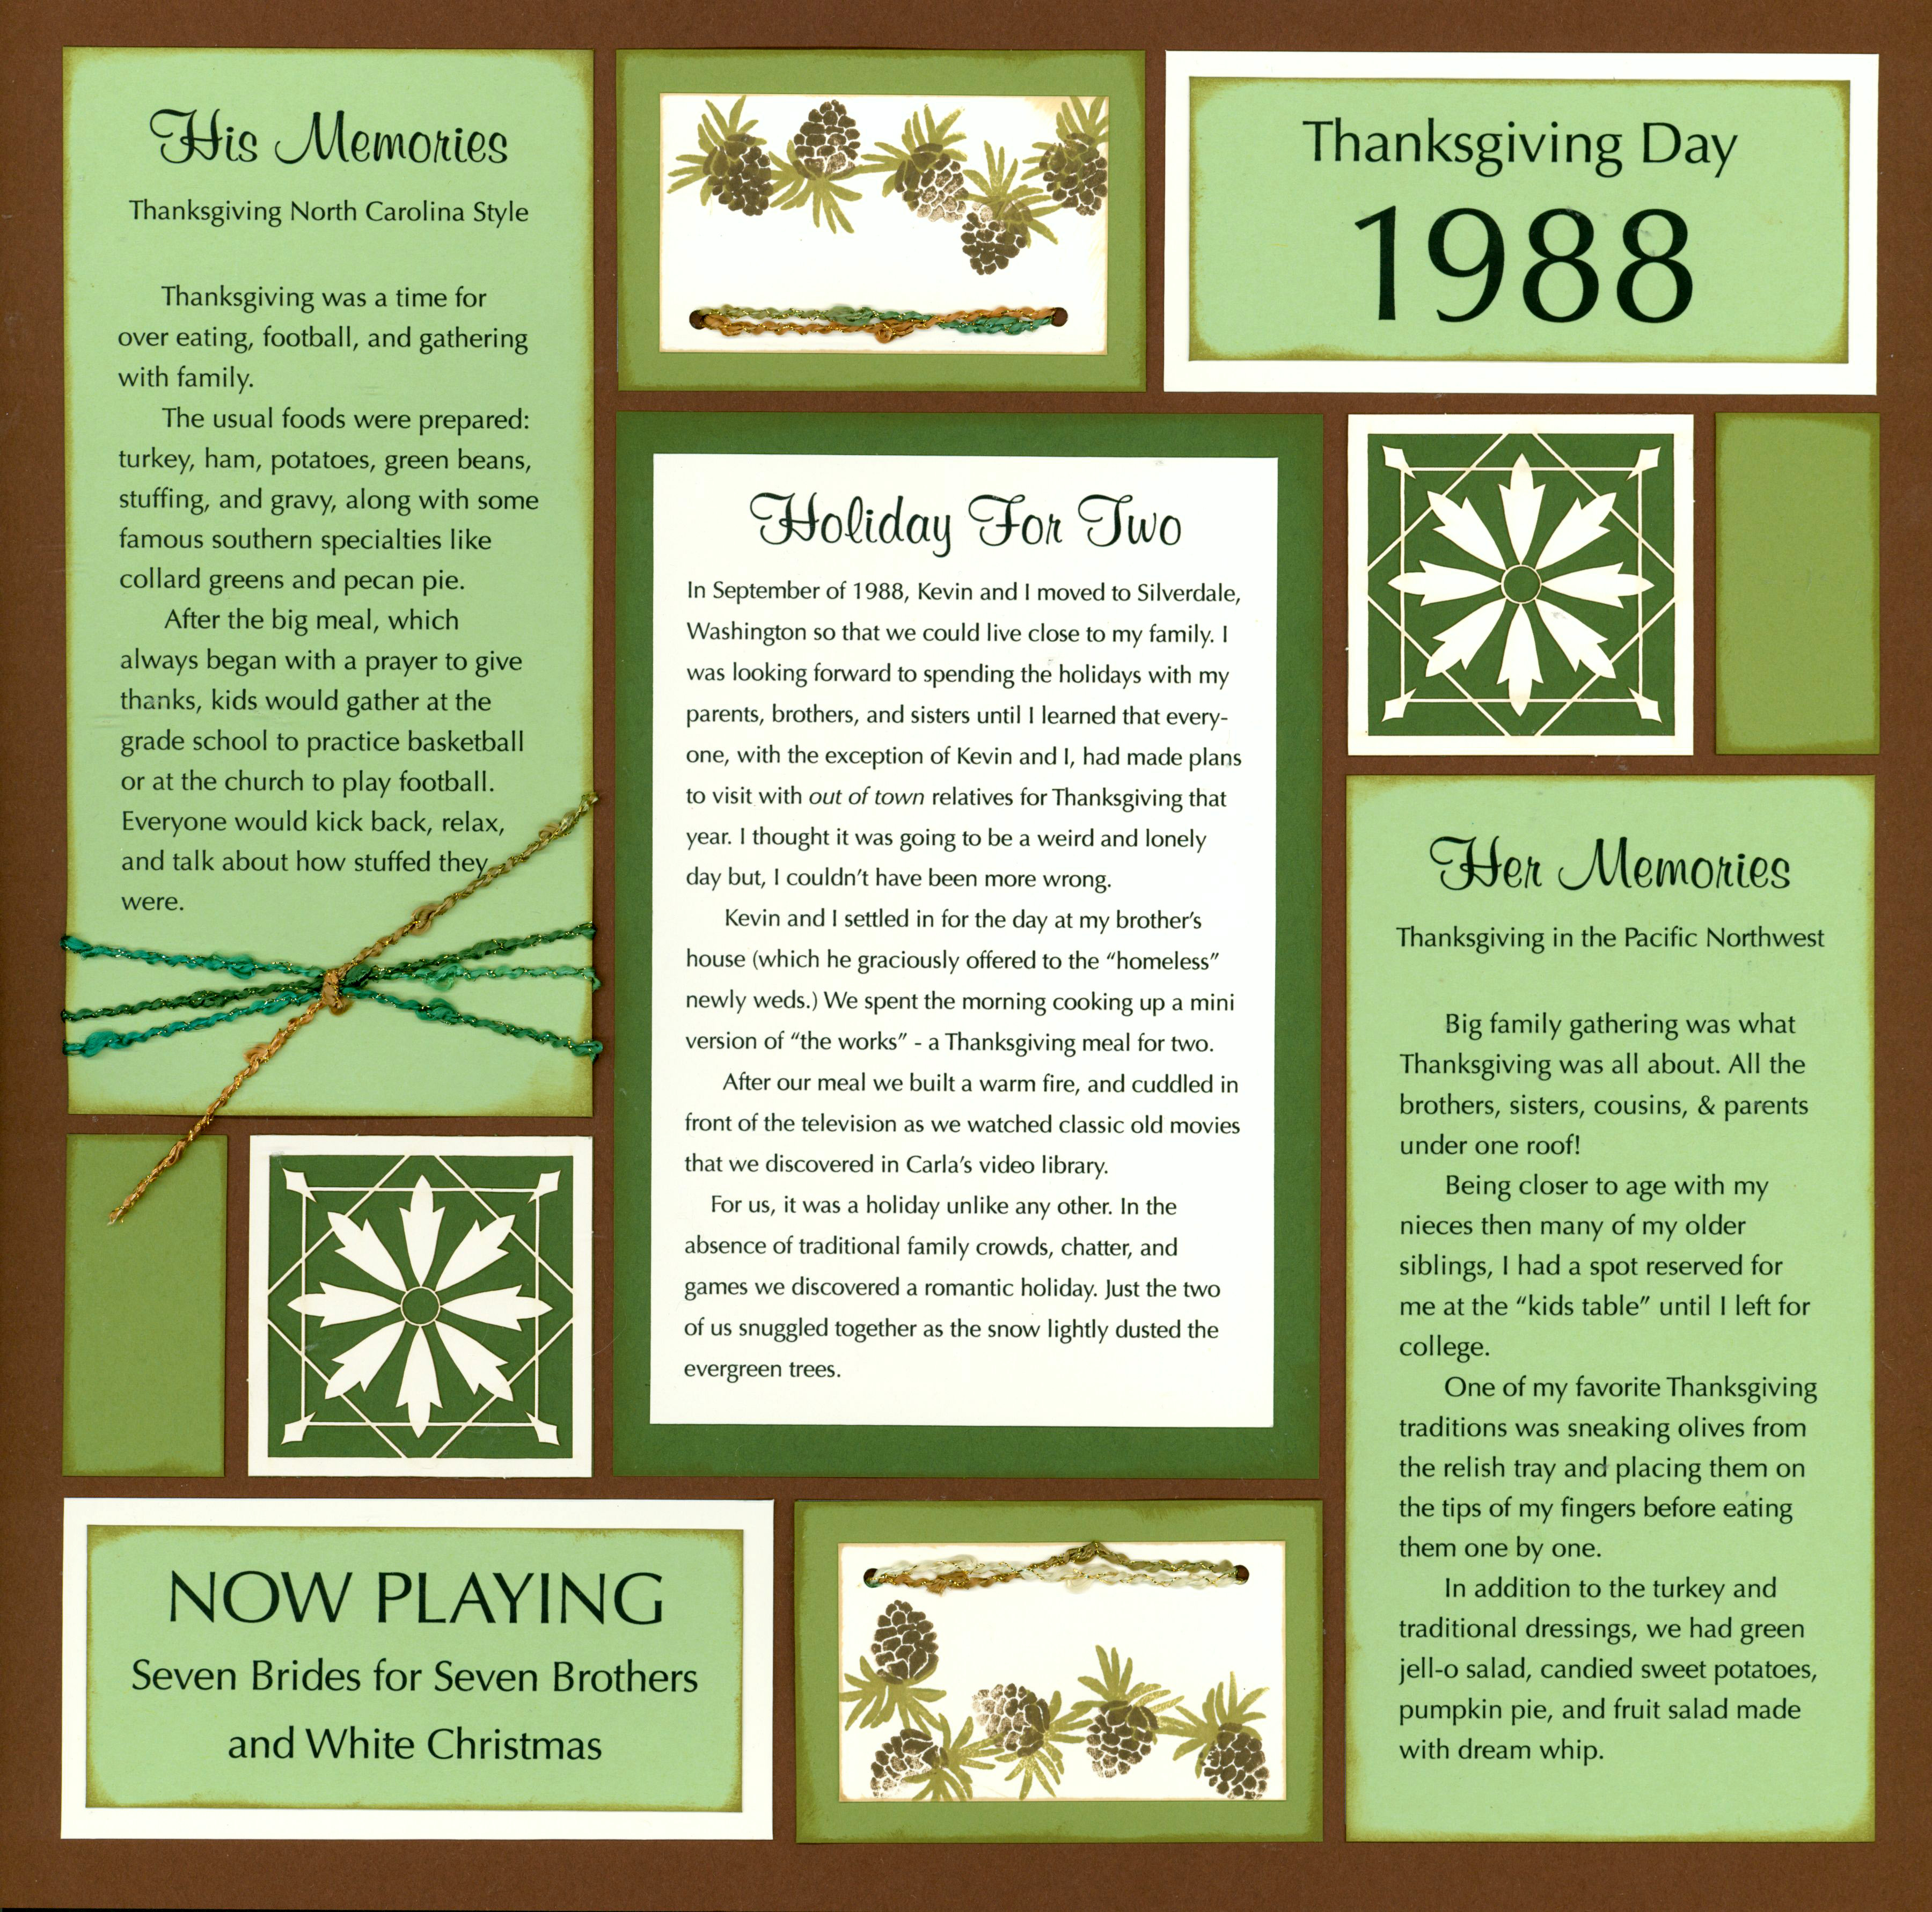
One of my favorite “perfect moment” memories.
It was a Thanksgiving many years ago. Kevin and I were newly married. Everyone else in the family had gone out of town visiting relatives. I thought it would be weird and lonely without a crowd around (both of us grew up in big families so this would be a Thanksgiving like no other.)
When the holiday arrived, Kevin and I cooked up a Thanksgiving meal for two. We enjoyed a quiet afternoon watching old movies like Seven Brides for Seven Brothers and White Christmas. We had a cozy fire going and it even snowed for a little while. It could not have been more perfect. Just the two of us alone for Thanksgiving. It had never happened before and it may never happen again.
It was a glorious day and there is not one photograph of it. So, how can I hold onto that memory and share it with my loved ones? In college the first phase of any assignment given was to do research. Taking my cue from there, my creative process began
Step #1 – Make a list (doodles optional).

My list included:
- the date
- location
- details to note
- movies we watched
- the menu
Additional things you may want to consider on your list:
- colors you remember
- music
- things that relate to the time or season
- things that relate to the year or decade
- If it is a childhood memory be sure to include ages of those involved
- a list of relevant pop culture to add to your page
- a time line that includes important events that came before and after the memory you are sharing.
After writing my list I let it sit for a few days. I wasn’t sure where I wanted to go from there. I asked myself “what made the memory stand out” and I realized it was because it was so different from the Thanksgiving Holidays that Kevin and I enjoyed growing up (always surrounded by our big families). That lead me to the idea to do a “he said/she said” of childhood Thanksgiving memories.
Step #2 – Ask Questions
In addition to the questions I asked myself, I asked Kevin to tell me what he remembered about his Thanksgivings as a child.
Step #3 -Layout
Once I decided which memories I wanted to include I began making page layout decisions. First I had to know how much space the individual journaling areas would take.
Make text boxes sized to fit gird paper. I made 2 boxes -(3.25×6.625) for the His and Her Memories, 1 box for the feature story (4.375×6.625), and 2 boxes for support detail (2.125×4.375).
I printed my journaling onto regular white copy paper, cut it out, and laid it on my grid paper to see how I could fit it all together.

Phase 1 – Layout the largest elements first, in this case, 3 journaling blocks.
Phase 2 – Consider the remaining space available. How do you want to use it? I decided to add two title/support journaling blocks.
Phase 3 – Remaining “creative” space. This is the space I used to add embellishments to my page.
I liked how it all fit together, so it was time to choose colors. I decided to use colors that reminded me of the evergreen trees that surrounded us on that Thanksgiving Day (three shades of green on cocoa grid paper.)
I decided to use ivory paper matted with the darkest green in the center. That meant resizing the journal block to allow for matting. I also decided to mat the smaller two journal blocks. The main journaling block now became (3.75×6) smaller blocks were resized to (4×1.75) to fit on mats.
Once the journaling blocks and mats were cut to size it was time to add the finishing touches.

Materials used:
- Mosaic Moments Cocoa Grid Paper
- World Win Cardstock – three shades of green cut to fit the grid with a craft knife, metal ruler, and Mosaic Moments mat.
- Chalk ink (moss) by Color Box to shade edges of mats.
- CornerStones™
- Pine cone – clear rubber stamps by Impression Obsession.
- a touch of fiber