
1. Make Strips of Journaling
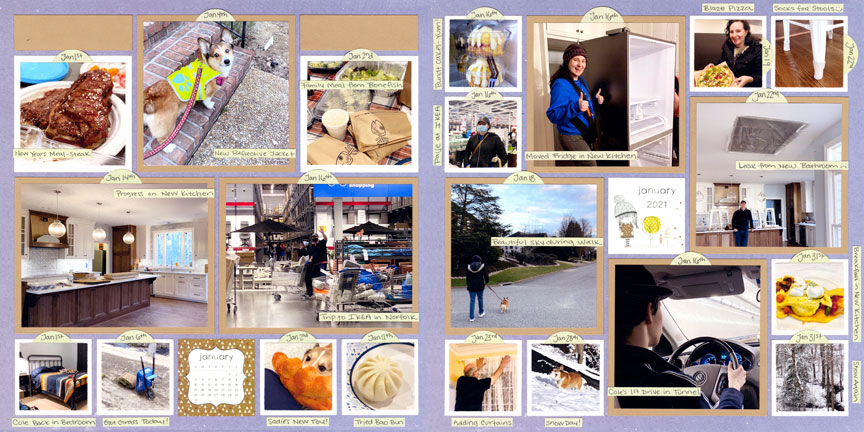
Keep your journaling short and sweet with little paper strips.
The strips can be hand written or typed on the computer. All of mine are a quarter of an inch thick, but you could cut them wider if needed.
Pros: The strips don't take up a lot of space on your page, especially if you stick them over your photos. This method is great if you just need short descriptions.
Cons: You will need to hand-cut all of the little strips, which may take more time than usual. The layout can also look very busy if you place a strip on every photo.
This Layout Features: 12x12 Plum Grid Paper from Fresh N Fruity Collection, the Layering Die Bundle, and the Basic Die Bundle.
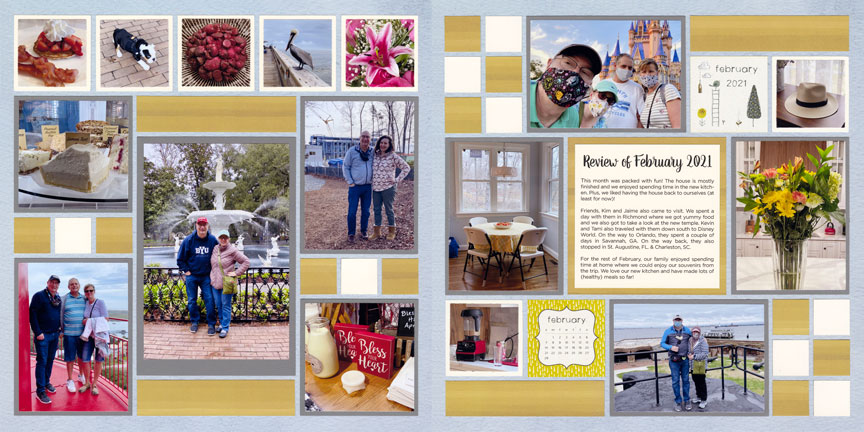
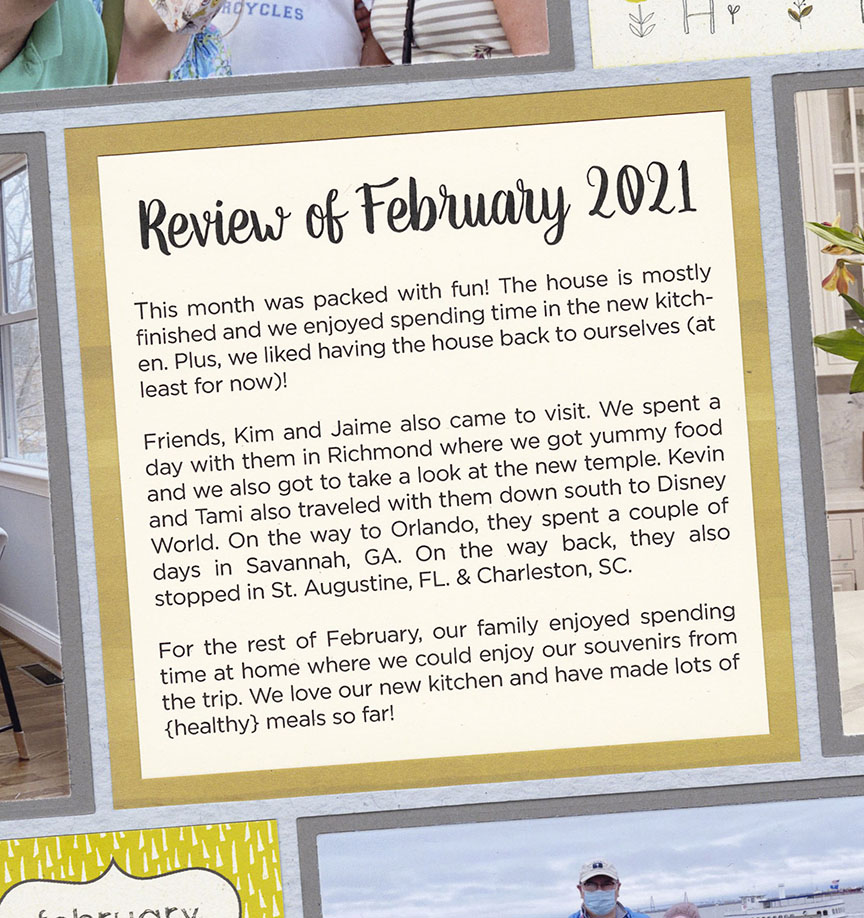
One of the most common ways I add journaling is by filling up an entire design spot with it!
Generally, I like to type my journaling when I use this method for a crisp, clean look. Use a program, such as Microsoft® Word and set up a text box sized the same as the die you will use for your journaling space.
Pros: The layout doesn't feel as busy when you fill your journaling in one design spot. It's also great if you want to write in a longer form, and want to give an overall summary of the story shown on your page.
Cons: Depending on your design spot size, you may not be able to fit as much of the specific details as you would like.
This Layout Features: 12x12 Right as Rain Grid Paper from In the Garden Collection, the Layering Die Bundle, and the Basic Die Bundle. Patterned paper from One Canoe Two™.
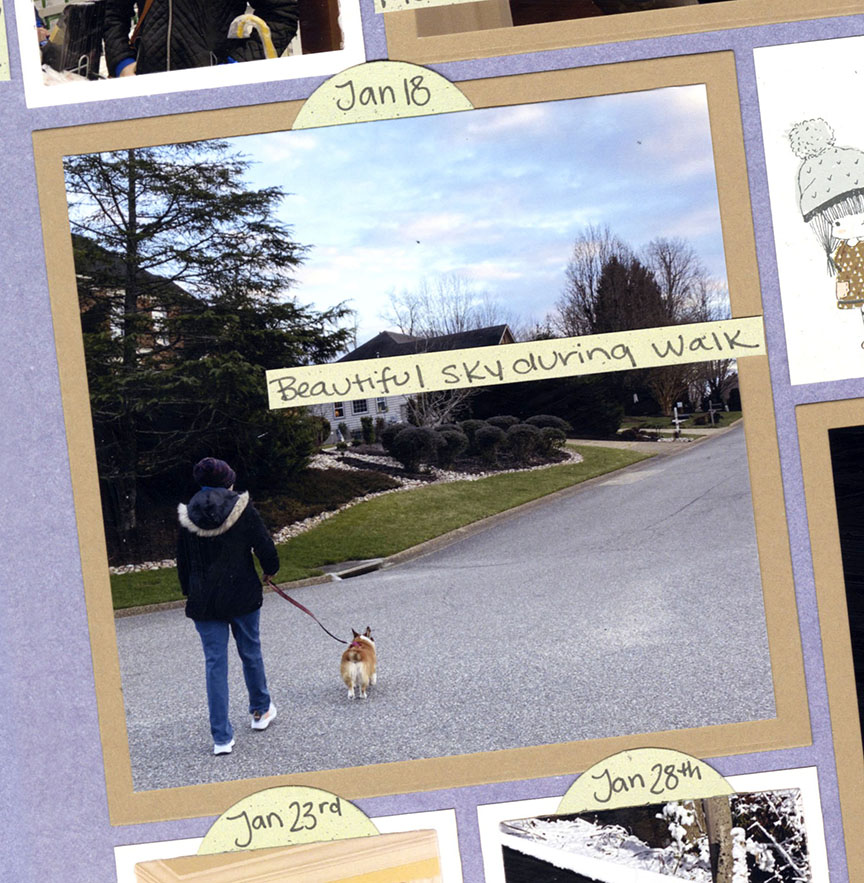
This is one of my favorite methods for journaling since it doesn't take up extra space on your page!
I crop each photo with my layering dies, and then cut them 1/8th or 1/4 in. shorter with my cutting mat and craft knife. It's also quick and easy to handwrite with a pen!
Pros: This method doesn't take up extra space on your page and doesn't feel too busy. I was able to write larger than with the strips.
Cons: It will take you extra time to cut your photos shorter. Writing also has to be brief and to the point since there is not a lot of room.
This Layout Features: 12x12 Kindness Grid Paper from Happiness Collection, and the Basic Die Bundle.
Have you ever tried bullet point journaling on your scrapbook pages?
It's so simple! You can draw your bullet point with your pen or use dot stickers. I hand wrote my journaling, but you could also type it.
Pros: Very easy to write your journaling since it's short and to the point. It also doesn't have to take up a lot of room on your layout.
Cons: It took extra time to line up each bullet point section evenly, and to figure how many would fit in each space.
This Layout Features: 12x12 Pineapple Crush Grid Paper from Cool Drinks Collection, the Layering Die Bundle, and the Basic Die Bundle. Pattern paper from Heidi Swapp™.

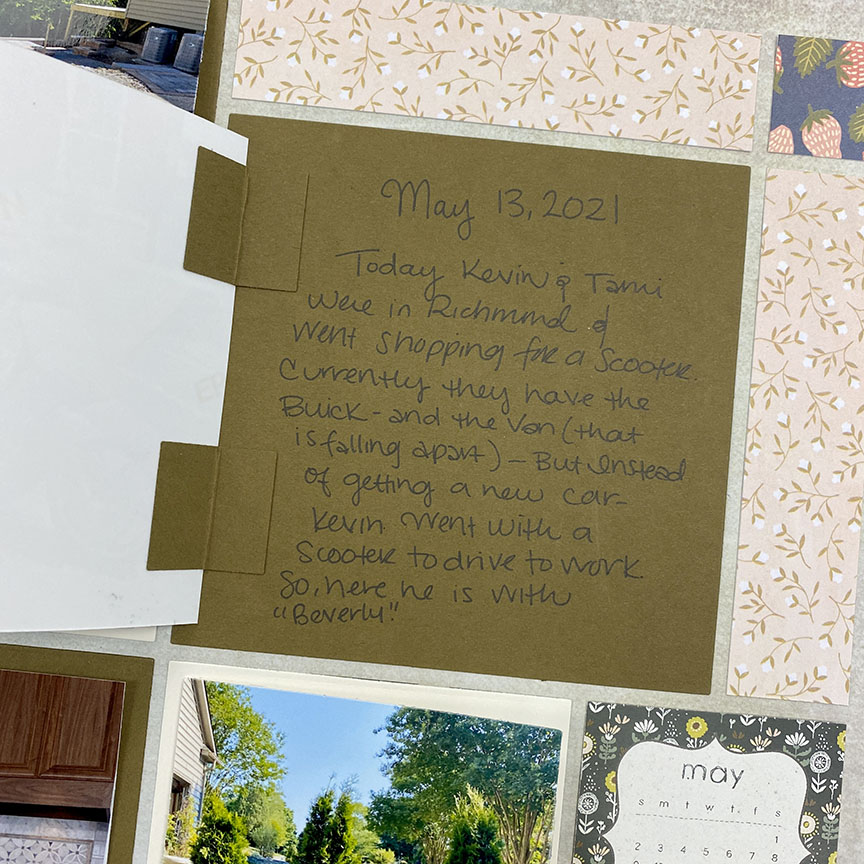
At the first glance, this page doesn't appear to have any journaling, but open the flaps and there it is!
The flaps are so easy to make! I just cut little 1" squares with a punch and folded them in half with a scoring tool. Then you stick one side on the back of your photo and the other side on your mat.
Pros: This method allowed me to add the most journaling. Every single photo has a flap with a paragraph description, so I could give more details.
Cons: These pages need to be in page protectors that are easy to take the layouts out. It's not obvious there are journaling spots.
This Layout Features: 12x12 Rain Grid Paper from Lazy Days Collection, the Layering Die Bundle, and the Basic Die Bundle. Pattern Paper from One Canoe Two™.

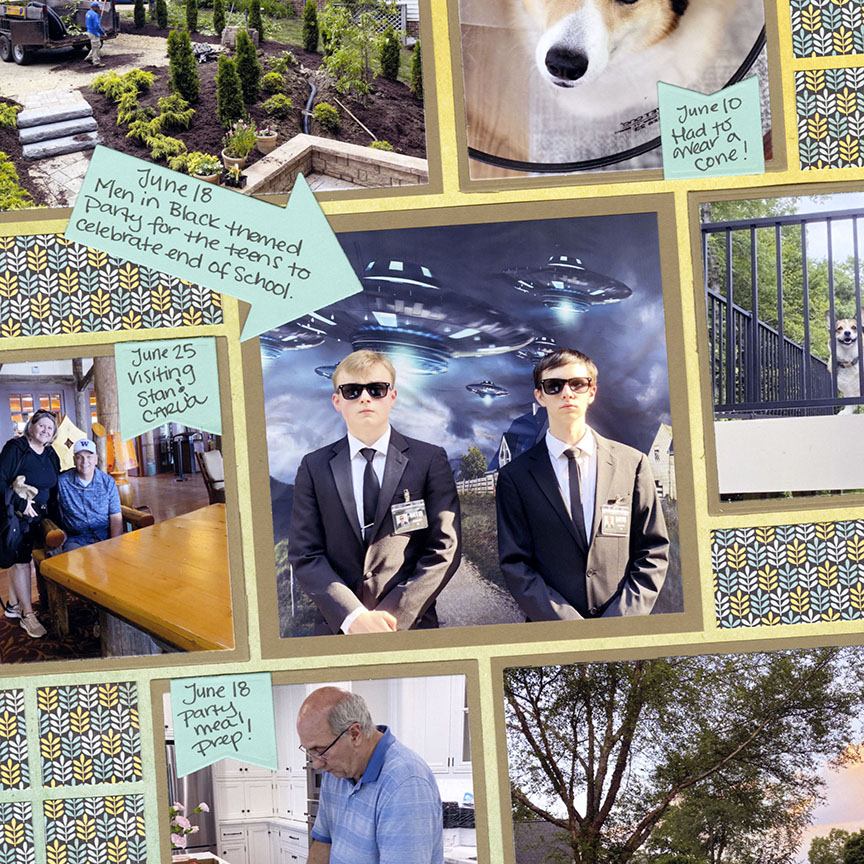
This is the funnest way to add your journaling!
If you love to add embellishments and play with die cuts - this is a great method! I cut out little banners and arrows to write my journaling on.
Pros: Adds a lot of interest to your layouts, and it's super easy to handwrite on each one.
Cons: You need to make sure you have enough space for each embellishment or die cut on your layout.
This Layout Features: 12x12 Daytime Grid Paper from Ombré Collection, the Arrow die, Mini Banner die, the Layering Die Bundle, and the Basic Die Bundle. Pattern paper from BasicGrey™.
Type your journaling right on your photos to save on space!
I love this method because it doesn't look too busy and typing your journaling always looks more clean than handwriting. I used the Photos app provided on Mac computers to add my journaling.
Pros: You can just add journaling to your photos and print - no extra cutting or glueing!
Cons: Takes up space on your photos and may seem distracting for some. You need a photo program that has this feature.
This Layout Features: 12x12 Robin's Egg Grid Paper from Dockside Collection, Bloom Die Set, the Layering Die Bundle, and the Basic Die Bundle. Pattern paper from Jen Hadfield™.
8. Create Titles with Alphabet Dies or Stickers

"August 2021" by Paije Potter

Create larger journaling and titles on your pages with Alphabet dies or stickers.
I placed the titles on strips of paper throughout the whole page. I recommend using lowercase letters to fit in tighter spaces. If you need more information, you can add it with a pen.
Pros: Alphabet dies and stickers make great embellishments for your layout and add interest.
Cons: The letters may take up more space than other journaling methods. You will need to find page designs with spots large enough for your titles.
This Layout Features: 12x12 Twine Grid Paper from Nantucket Collection, Alphabet 3 upper and lowercase die sets, Craftsman die set, and the Basic Die Bundle.
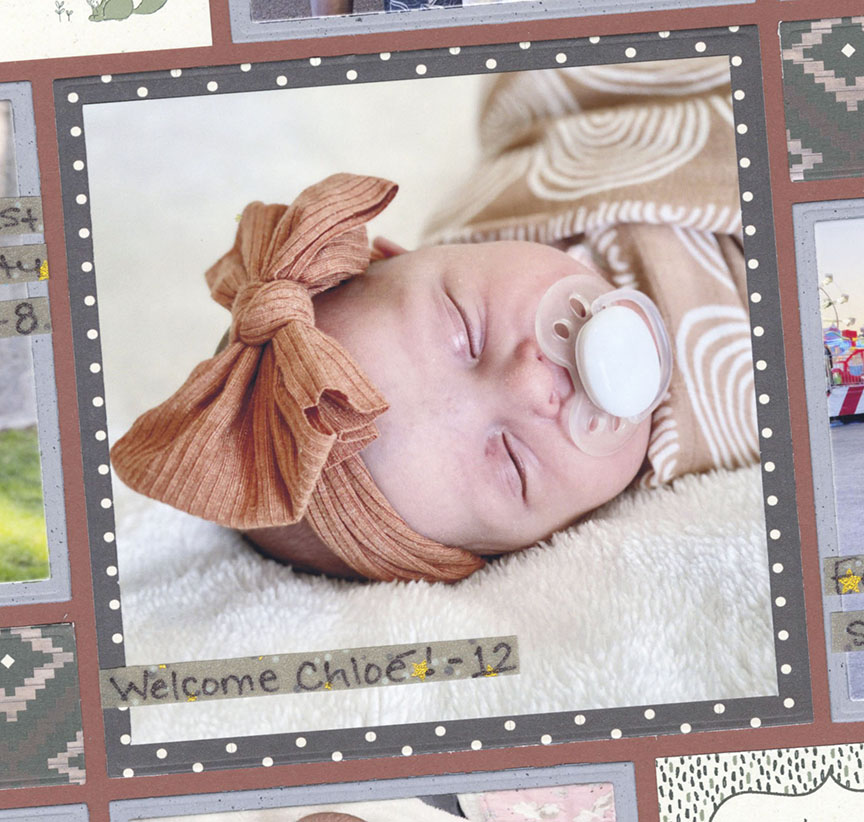
9. Write on Washi Tape
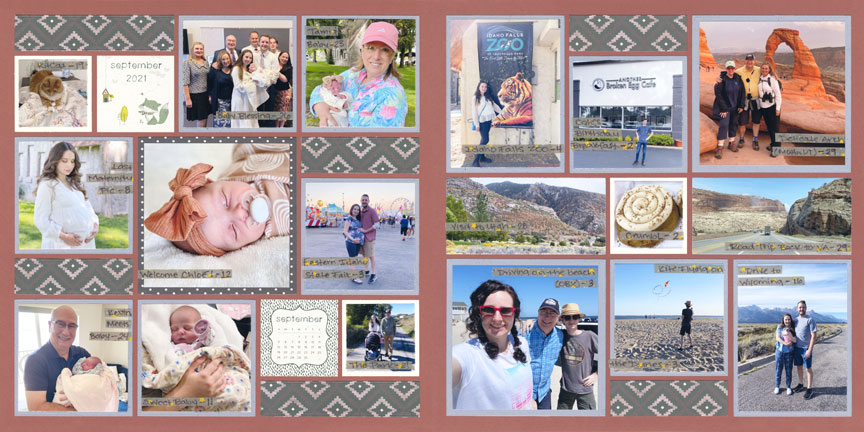
"September 2021" by Paije Potter
If you are a washi tape fan, this is a fun way to journal!
After making my layout, I got out some matching Washi tape and wrote the journaling on it! If the strips are too long, you can break up the sentences into multiple strips.
Pros: Creates a fun and colorful embellishment on your layout. It's easy to write the journaling on the tape.
Cons: Washi tape is usually transparent - you need to make sure your washi tape will show over your photos. You need to use a marker with a fine tip that will show on the tape.
This Layout Features: 12x12 Cayenne Pepper Grid Paper, Layering Die Bundle, and the Basic Die Bundle. Patterned paper from Heidi Swapp™.
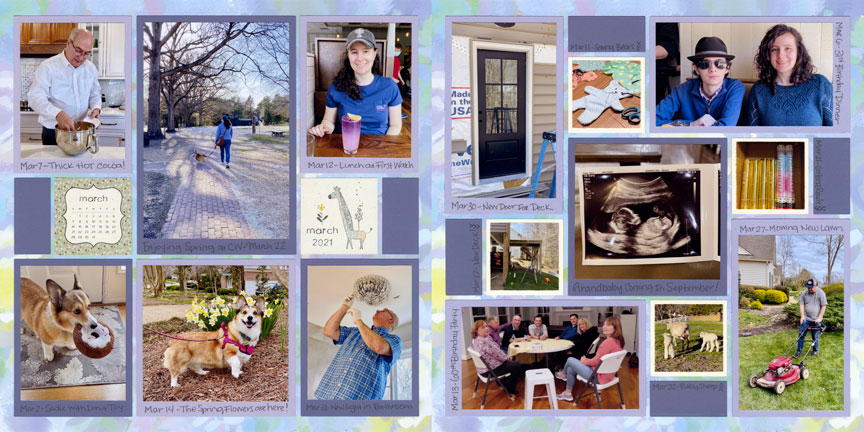
10. Create a Journaling Calendar
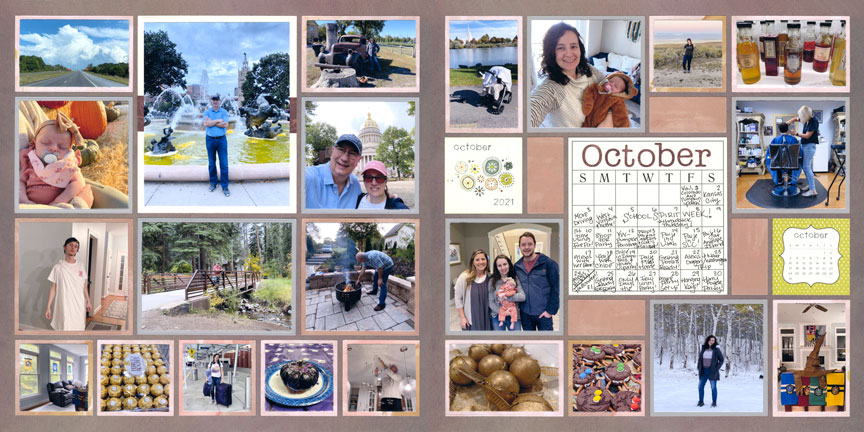
"October 2021" by Paije Potter
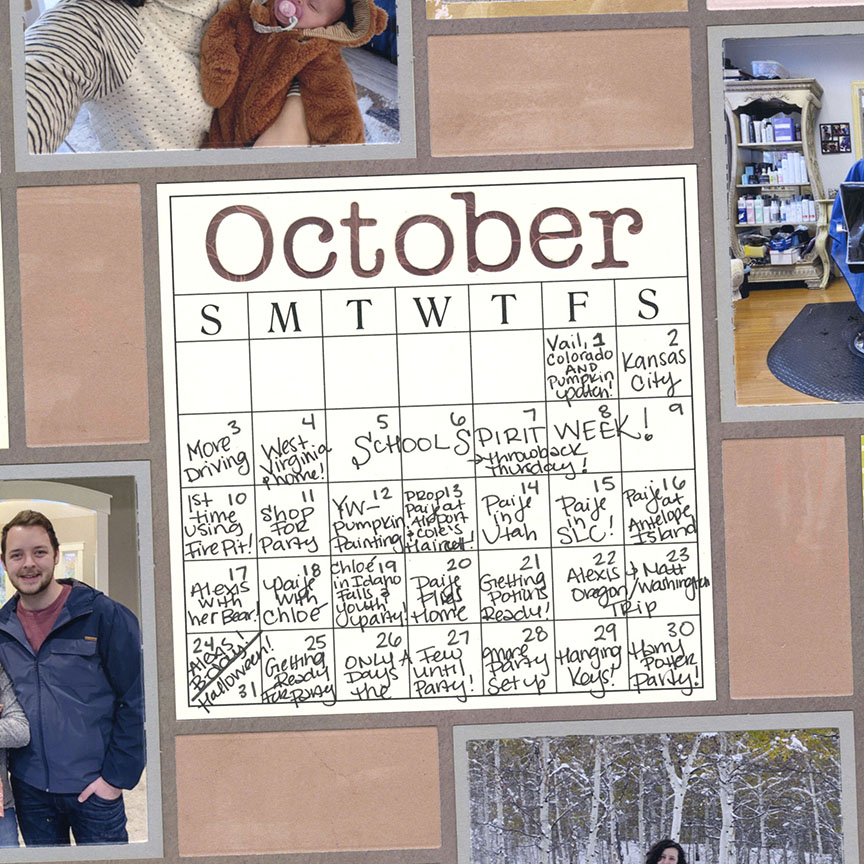
Place all of your journaling inside a calendar!
This calendar is a free download you can get on snapncrop.com here. Just print it on the color you would like, and add the month with the alphabet dies. I wrote my journaling with a black pen.
Pros: Your Journaling is more organized, plus it's all in one spot, so it won't take up too much room on your layout.
Cons: You will need to write very small to fit in the dates and information.
This Layout Features: 12x12 Walking Path Grid Paper from Renaissance Revival Collection, Layering Die Bundle, and the Basic Die Bundle. Patterned paper from Heidi Swapp™.
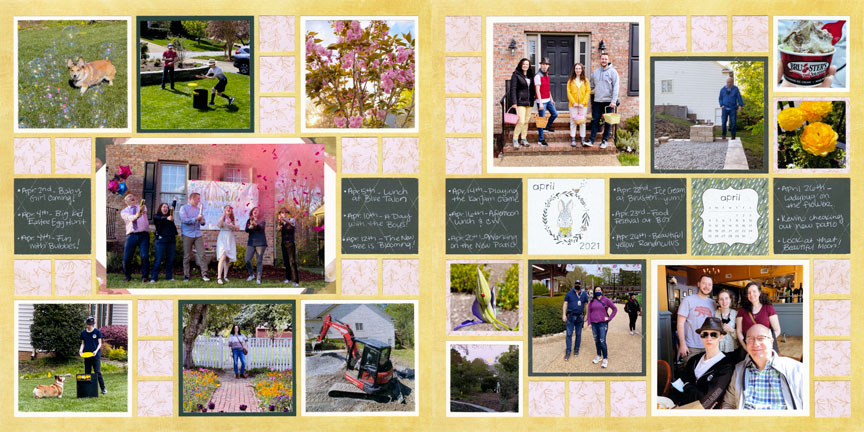
11. Journal on Paper Blocks
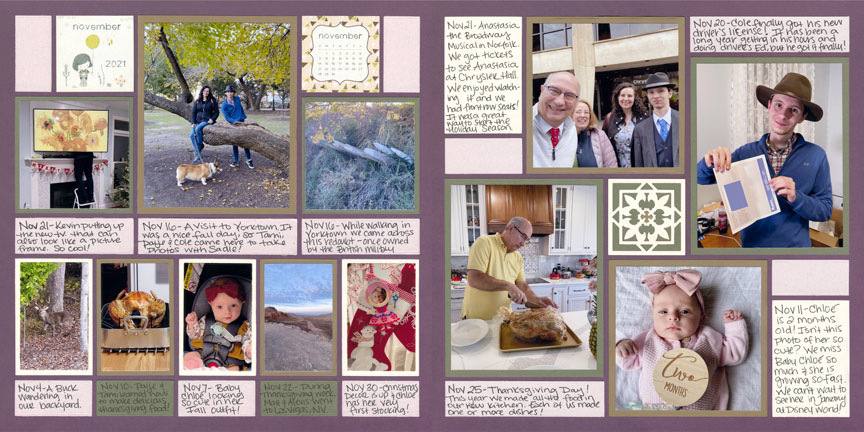
"November 2021" by Paije Potter
Type or handwrite your journaling on multiple paper blocks through out your layout!
This is one of my favorite methods because I was able to fit in more details about every photo on my layout. Plus, family members love to see your handwriting. I recommend using a pencil first, and then write over it with a pen to carefully finalize your writing.
Pros: You can fit in a lot more journaling than other methods.
Cons: You need to find a page design that allows enough room for all of your journaling. The Journaling takes up a lot of space and may mean using less photos.
This Layout Features: 12x12 Eggplant grid paper from Harvest Collection, Fleur De Lis die, Layering Die Bundle, and the Basic Die Bundle.

12. Create a Journaling Timeline
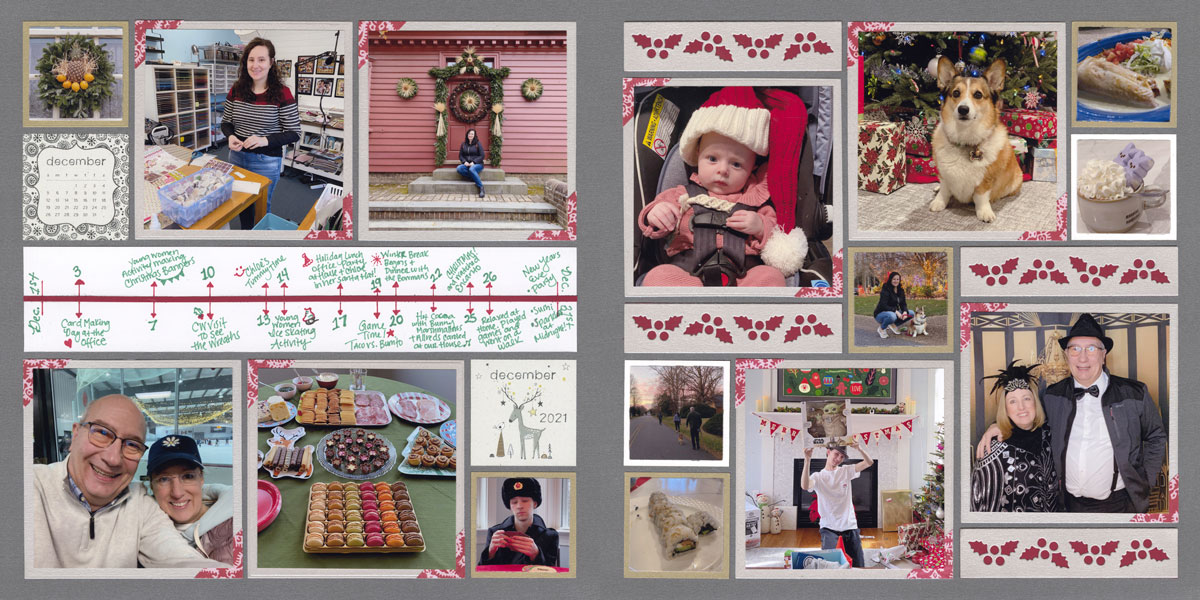
"December 2021" by Paije Potter
For something a little different, you can write a timeline of events throughout a year or month.
Timelines can be so fun and colorful or you can keep them basic. If you enjoy creating your own embellishments and scrapbook elements, this may be a great project for you! I also love seeing all the events in order. I like being able to see when things took place in one spot on the page.
Pros: There is a lot more room to add little embellishments and use fun pen colors! You can write a lot of events.
Cons: You will need to handcut the timeline size (2.125x11.125 in.) and take the time to write out each day or event. Plus, the journaling will be small.