
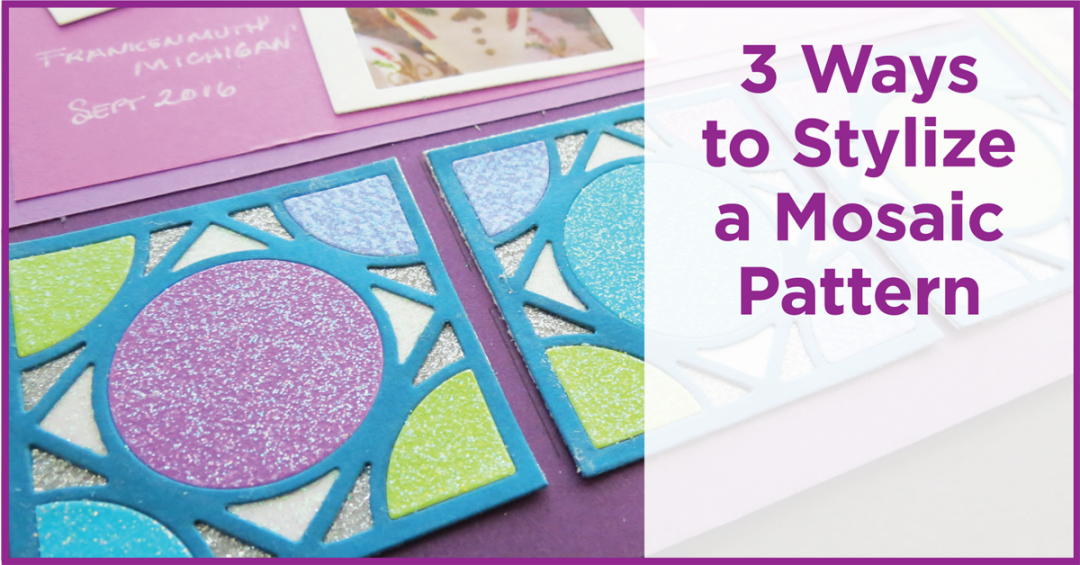
featuring Pattern #299 a mosaic style pattern
Michigan in the Fall… Mosaic Style!
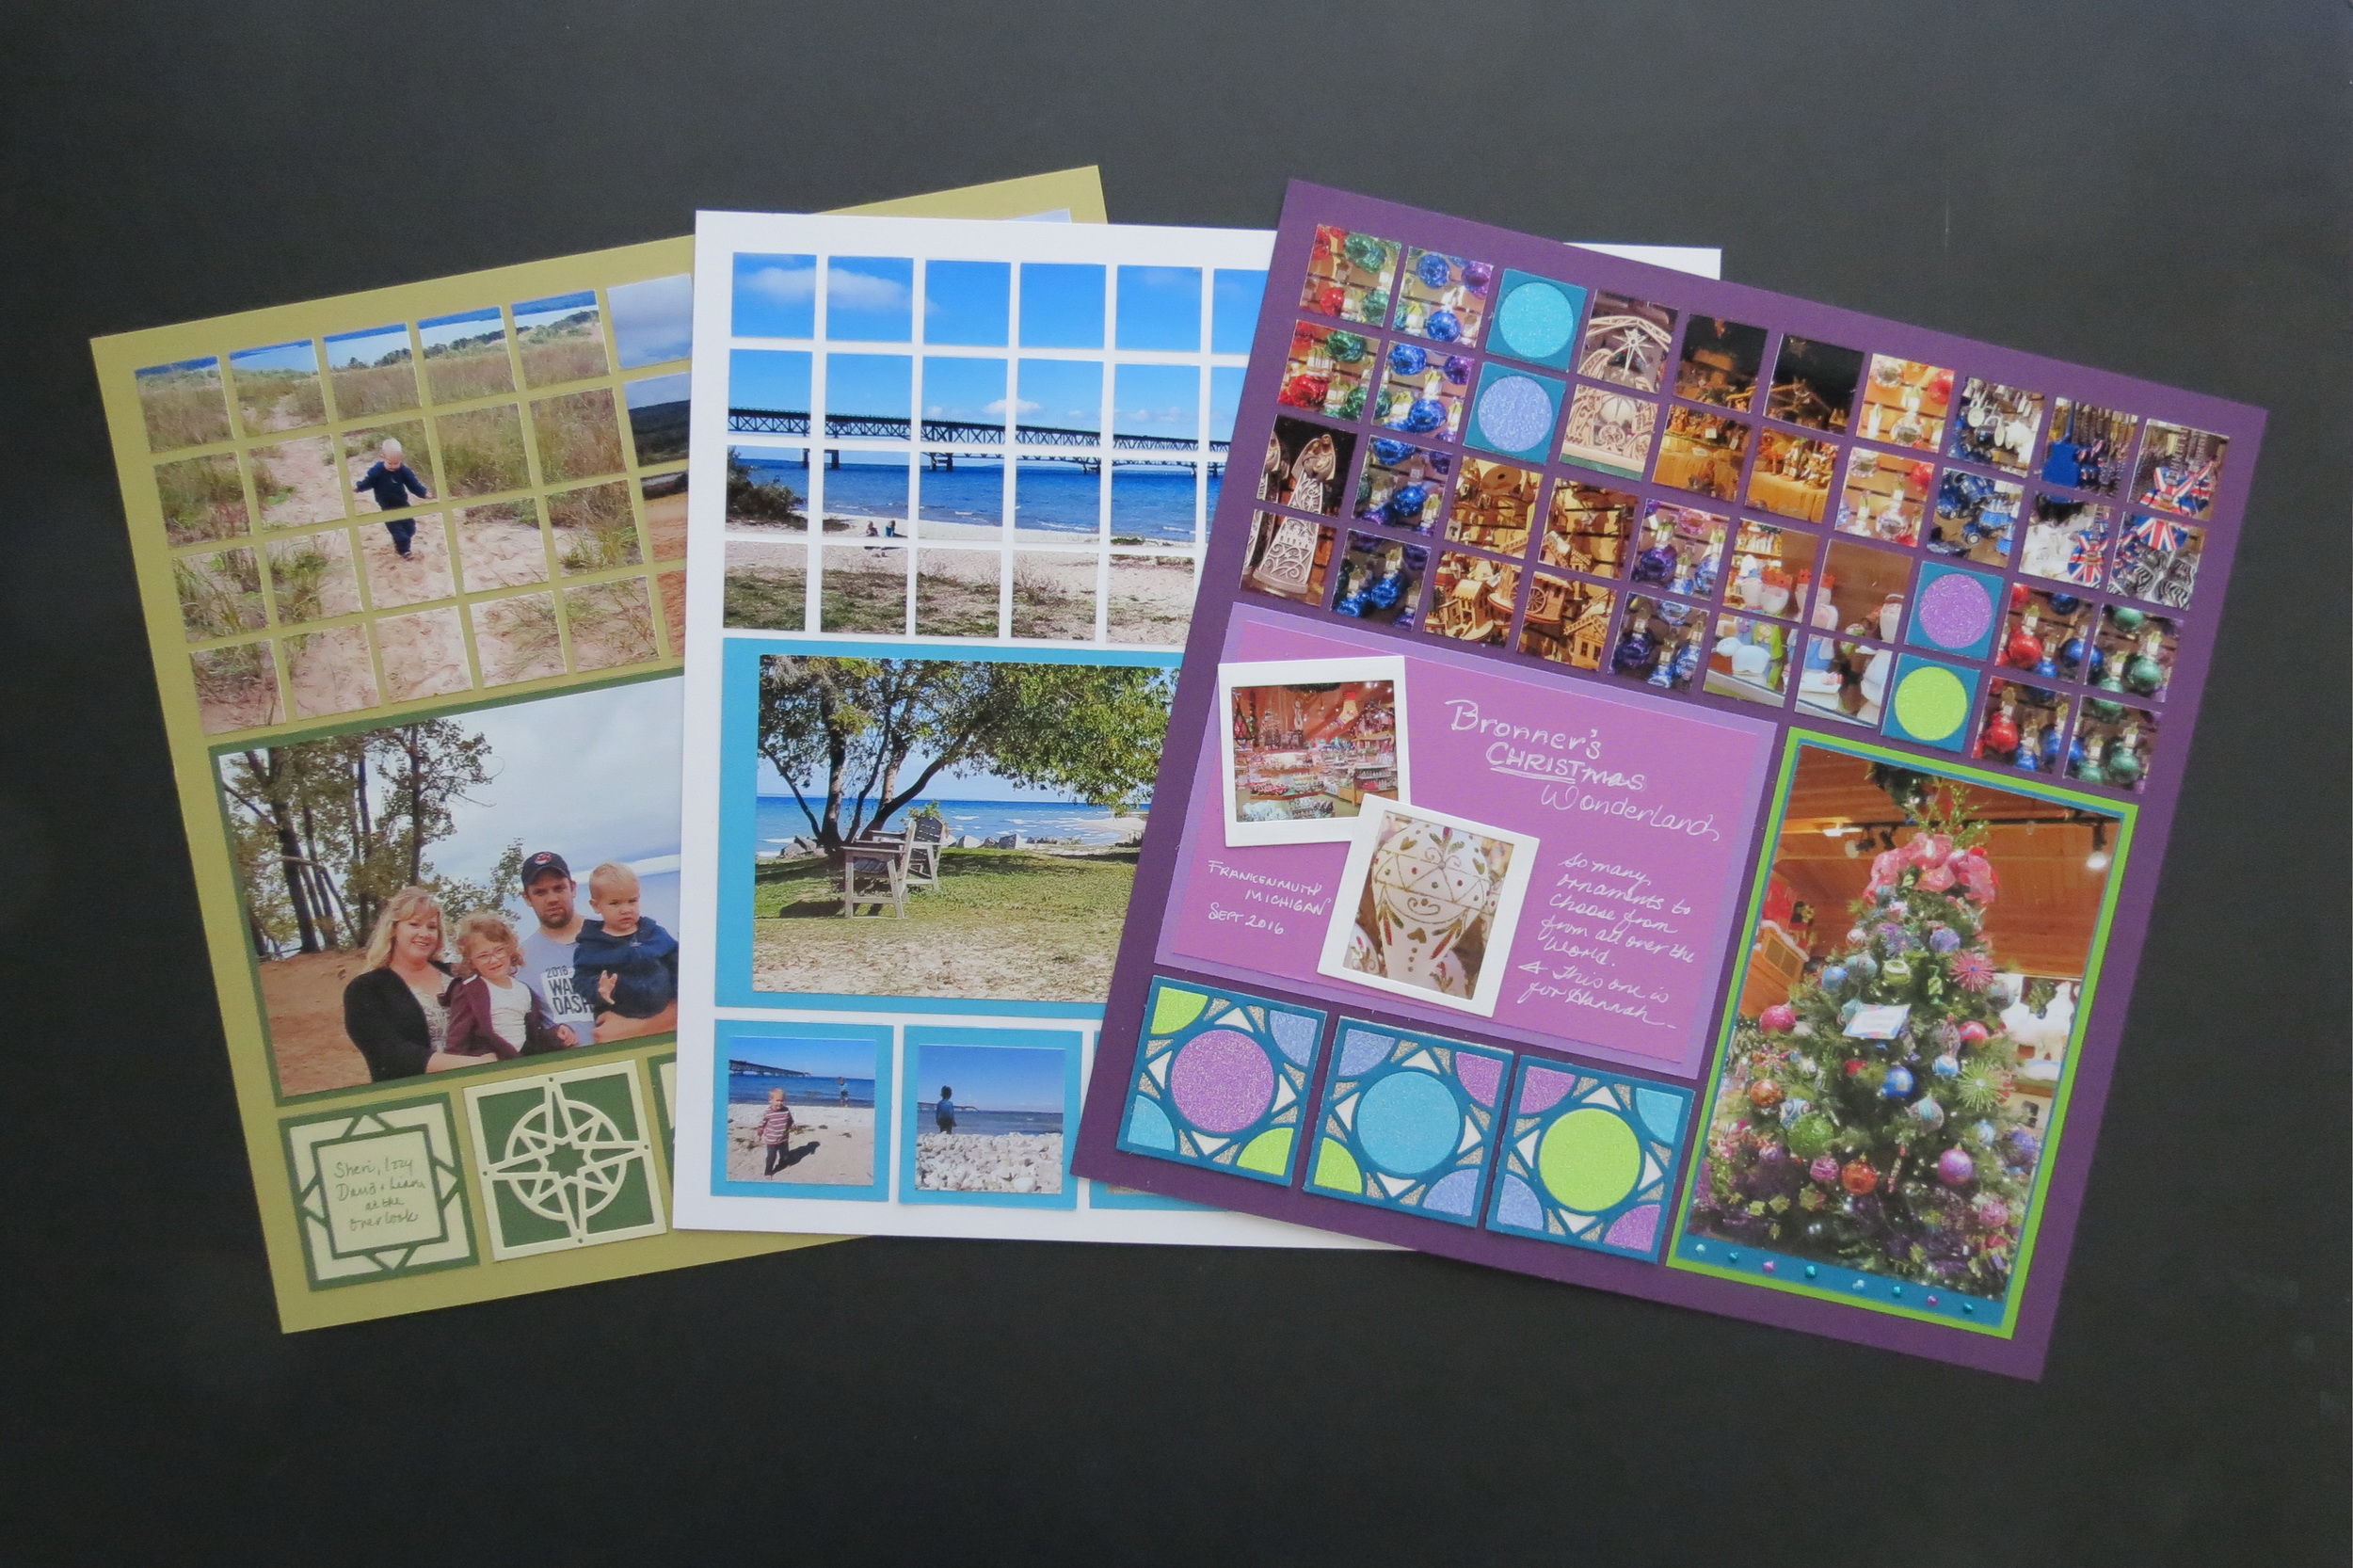
This week’s three with one pattern is a mosaic pattern, Pattern #299 and each layout will showcase photos from Michigan this fall. As things worked out my son and his family were taking a long weekend to our neighboring state at the same time I was there with a cousin visiting from Scotland. While David’s family was roughing it and enjoying the great outdoors of the top of the mitten, we were nearer the crook of the thumb shopping in the quaint village shops of Frankenmuth, including Bronner’s CHRISTmas Wonderland. Come, Explore Pure Michigan with me!
Layout One

MM 1-3 Ways Michigan Mosaics
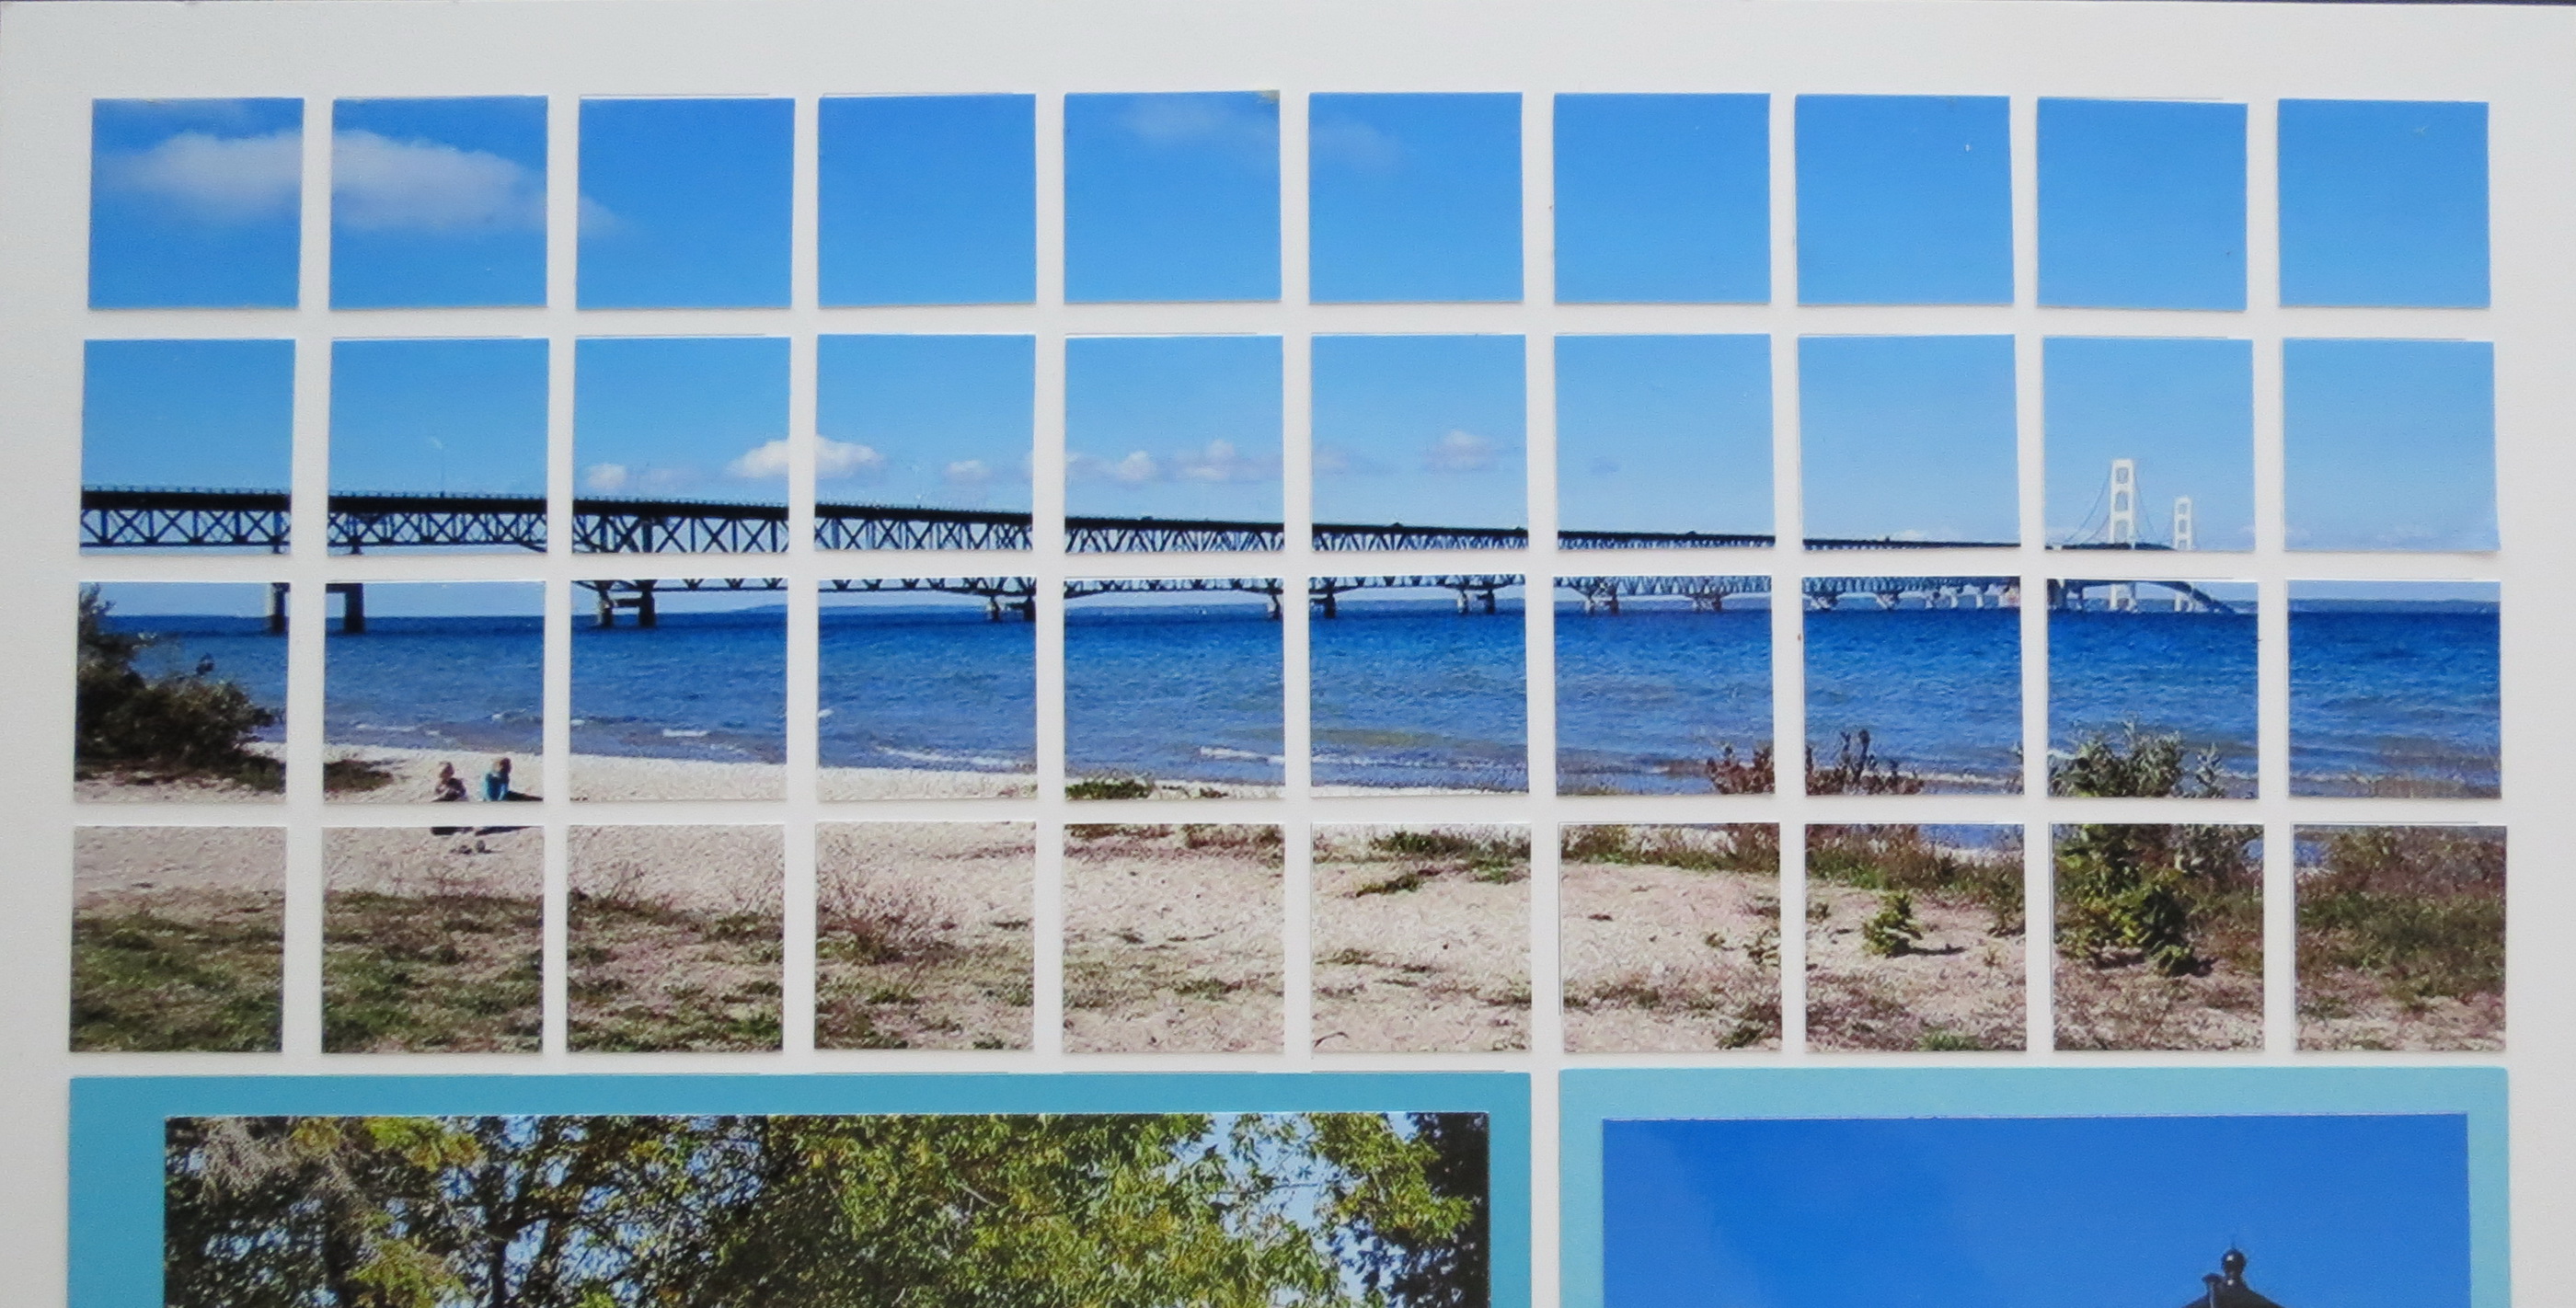
Mackinac Bridge and the Mackinac Point Lighthouse
A cropped photo printed on 8.5×11” photo paper and then cut into 1” mosaic tiles fills the top mosaic section of this layout on a white MM 12×12 Grid. Two 4×6 photos are mounted on MM Paper Tiles with a small border to write in the locations (which I forgot to do.) The three 2.125 paper tile mats hold 1 7/8” squares of additional views of the kids and the view.
MM 1-3 Ways Michigan Mosaics
MM 1-3 Ways Michigan Mosaics
Layout Two
MM 1-3 Ways Michigan Mosaics
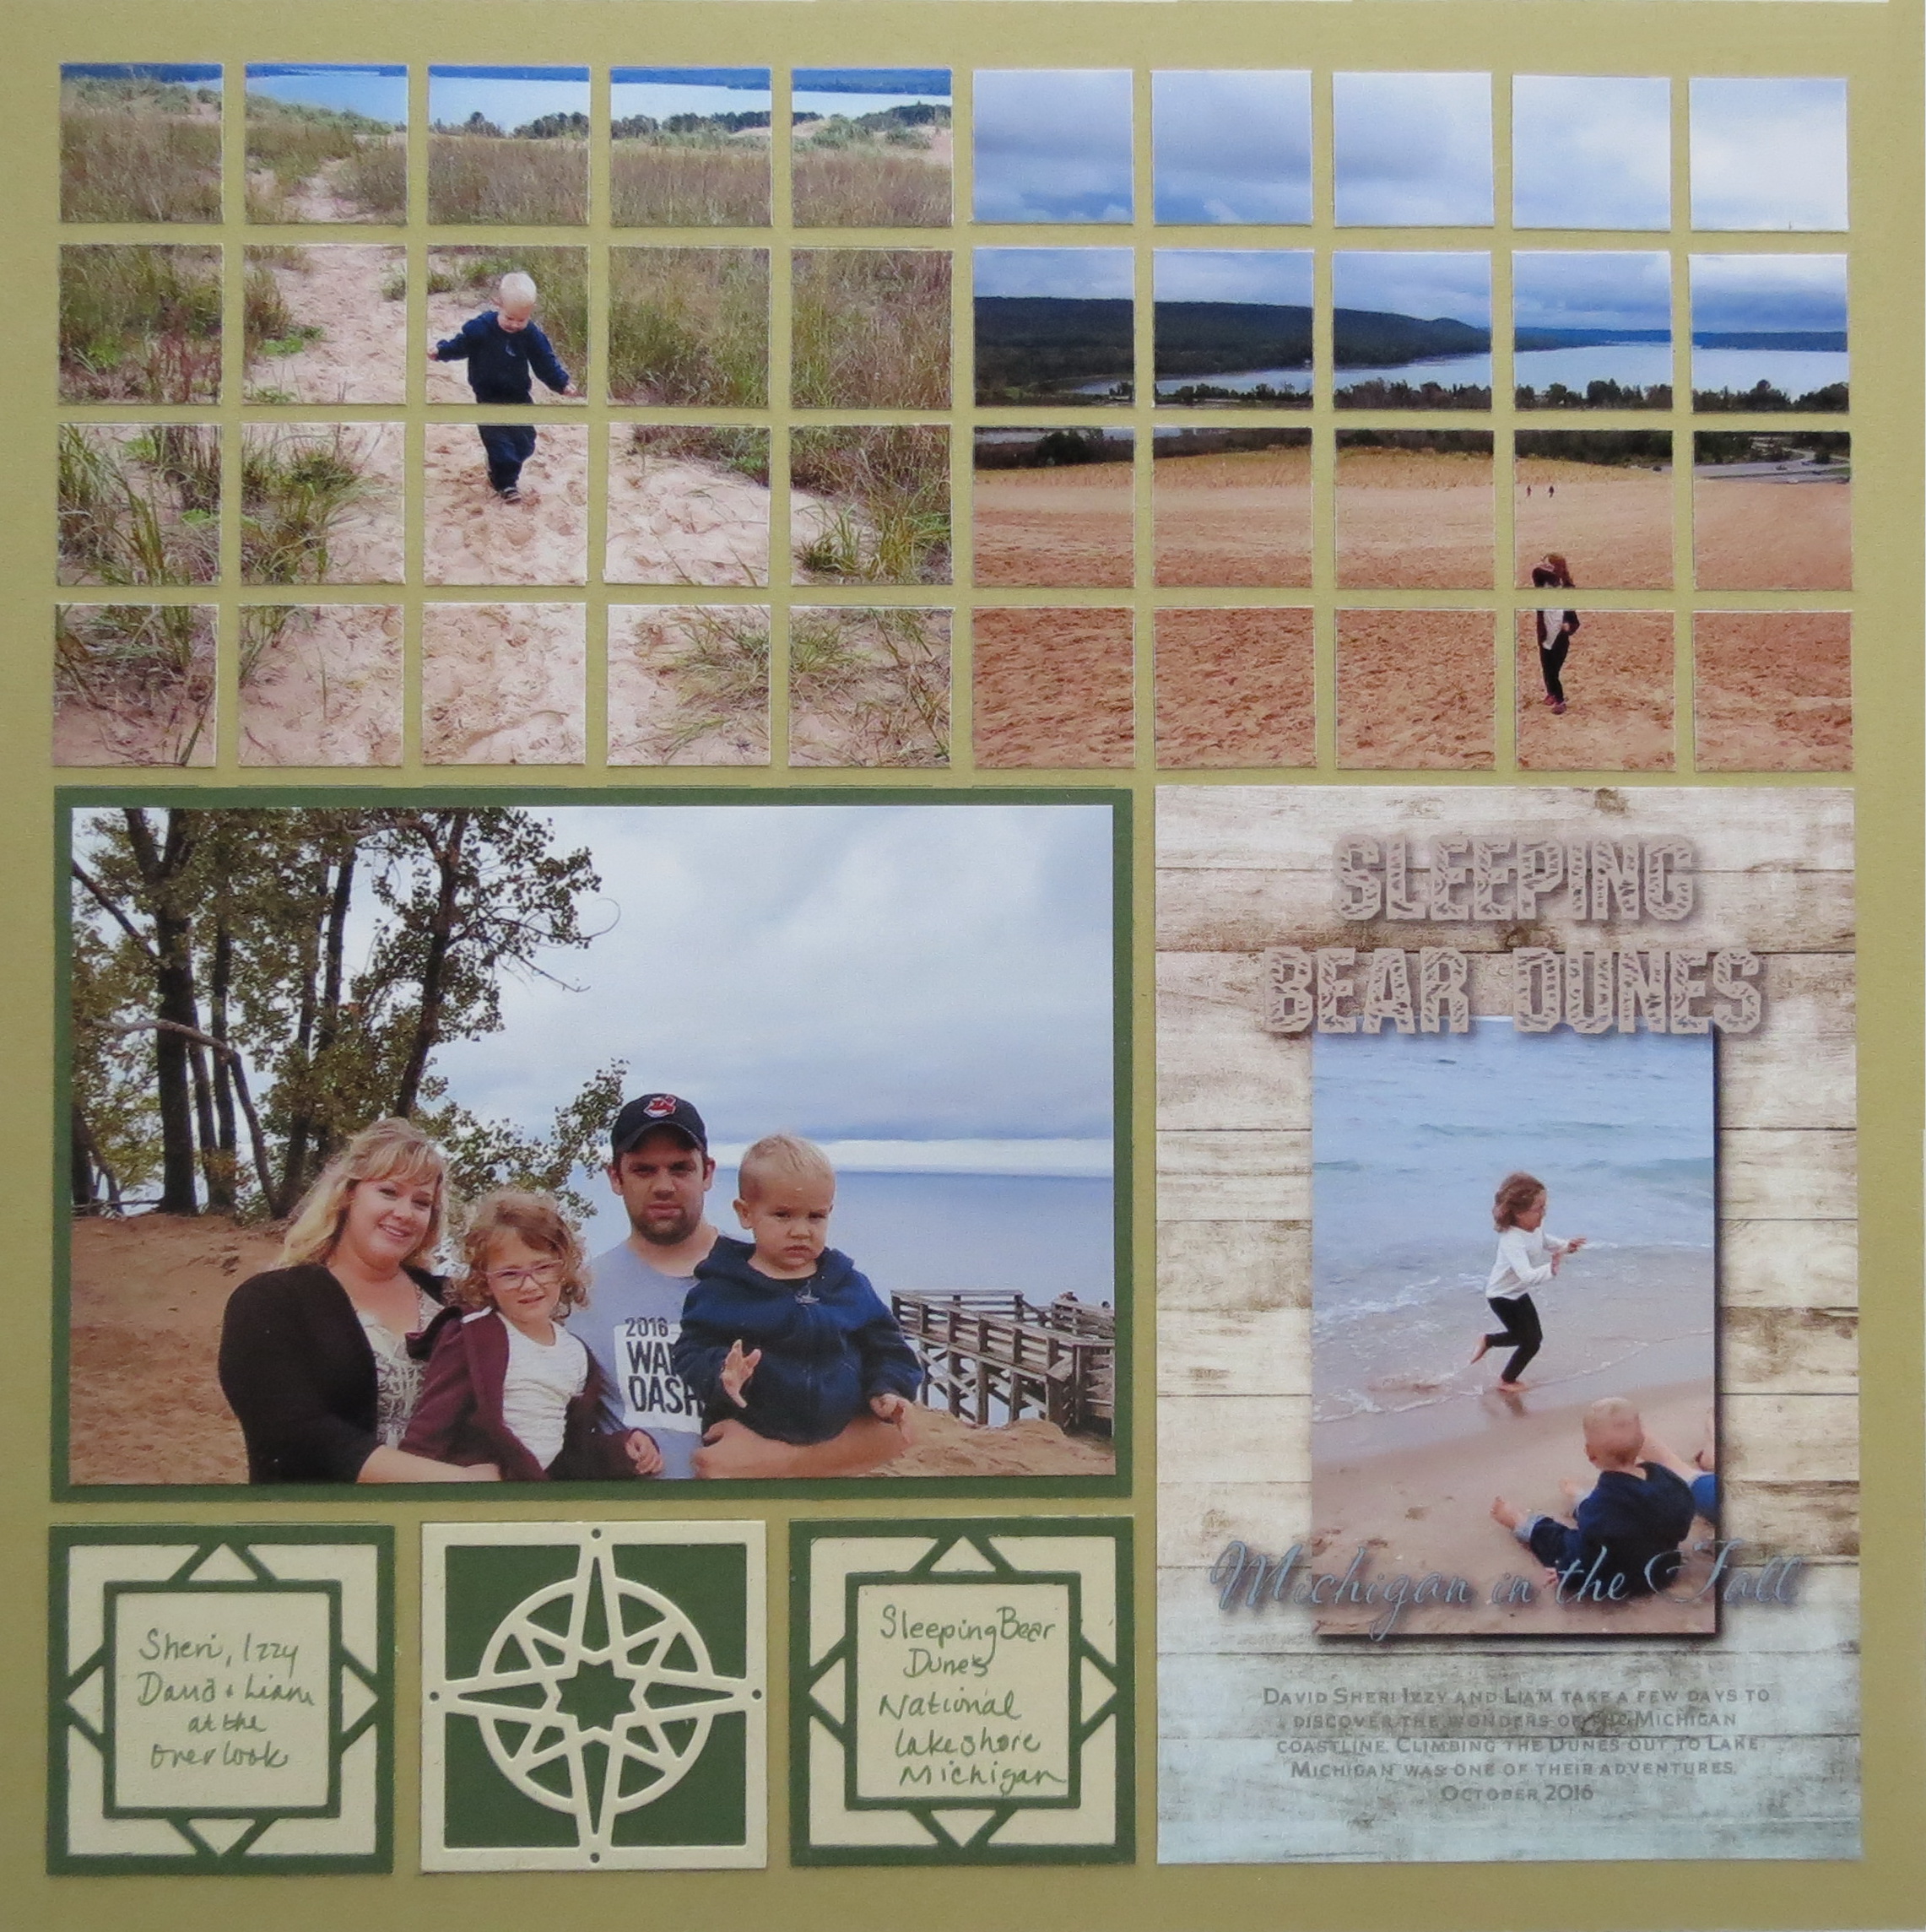
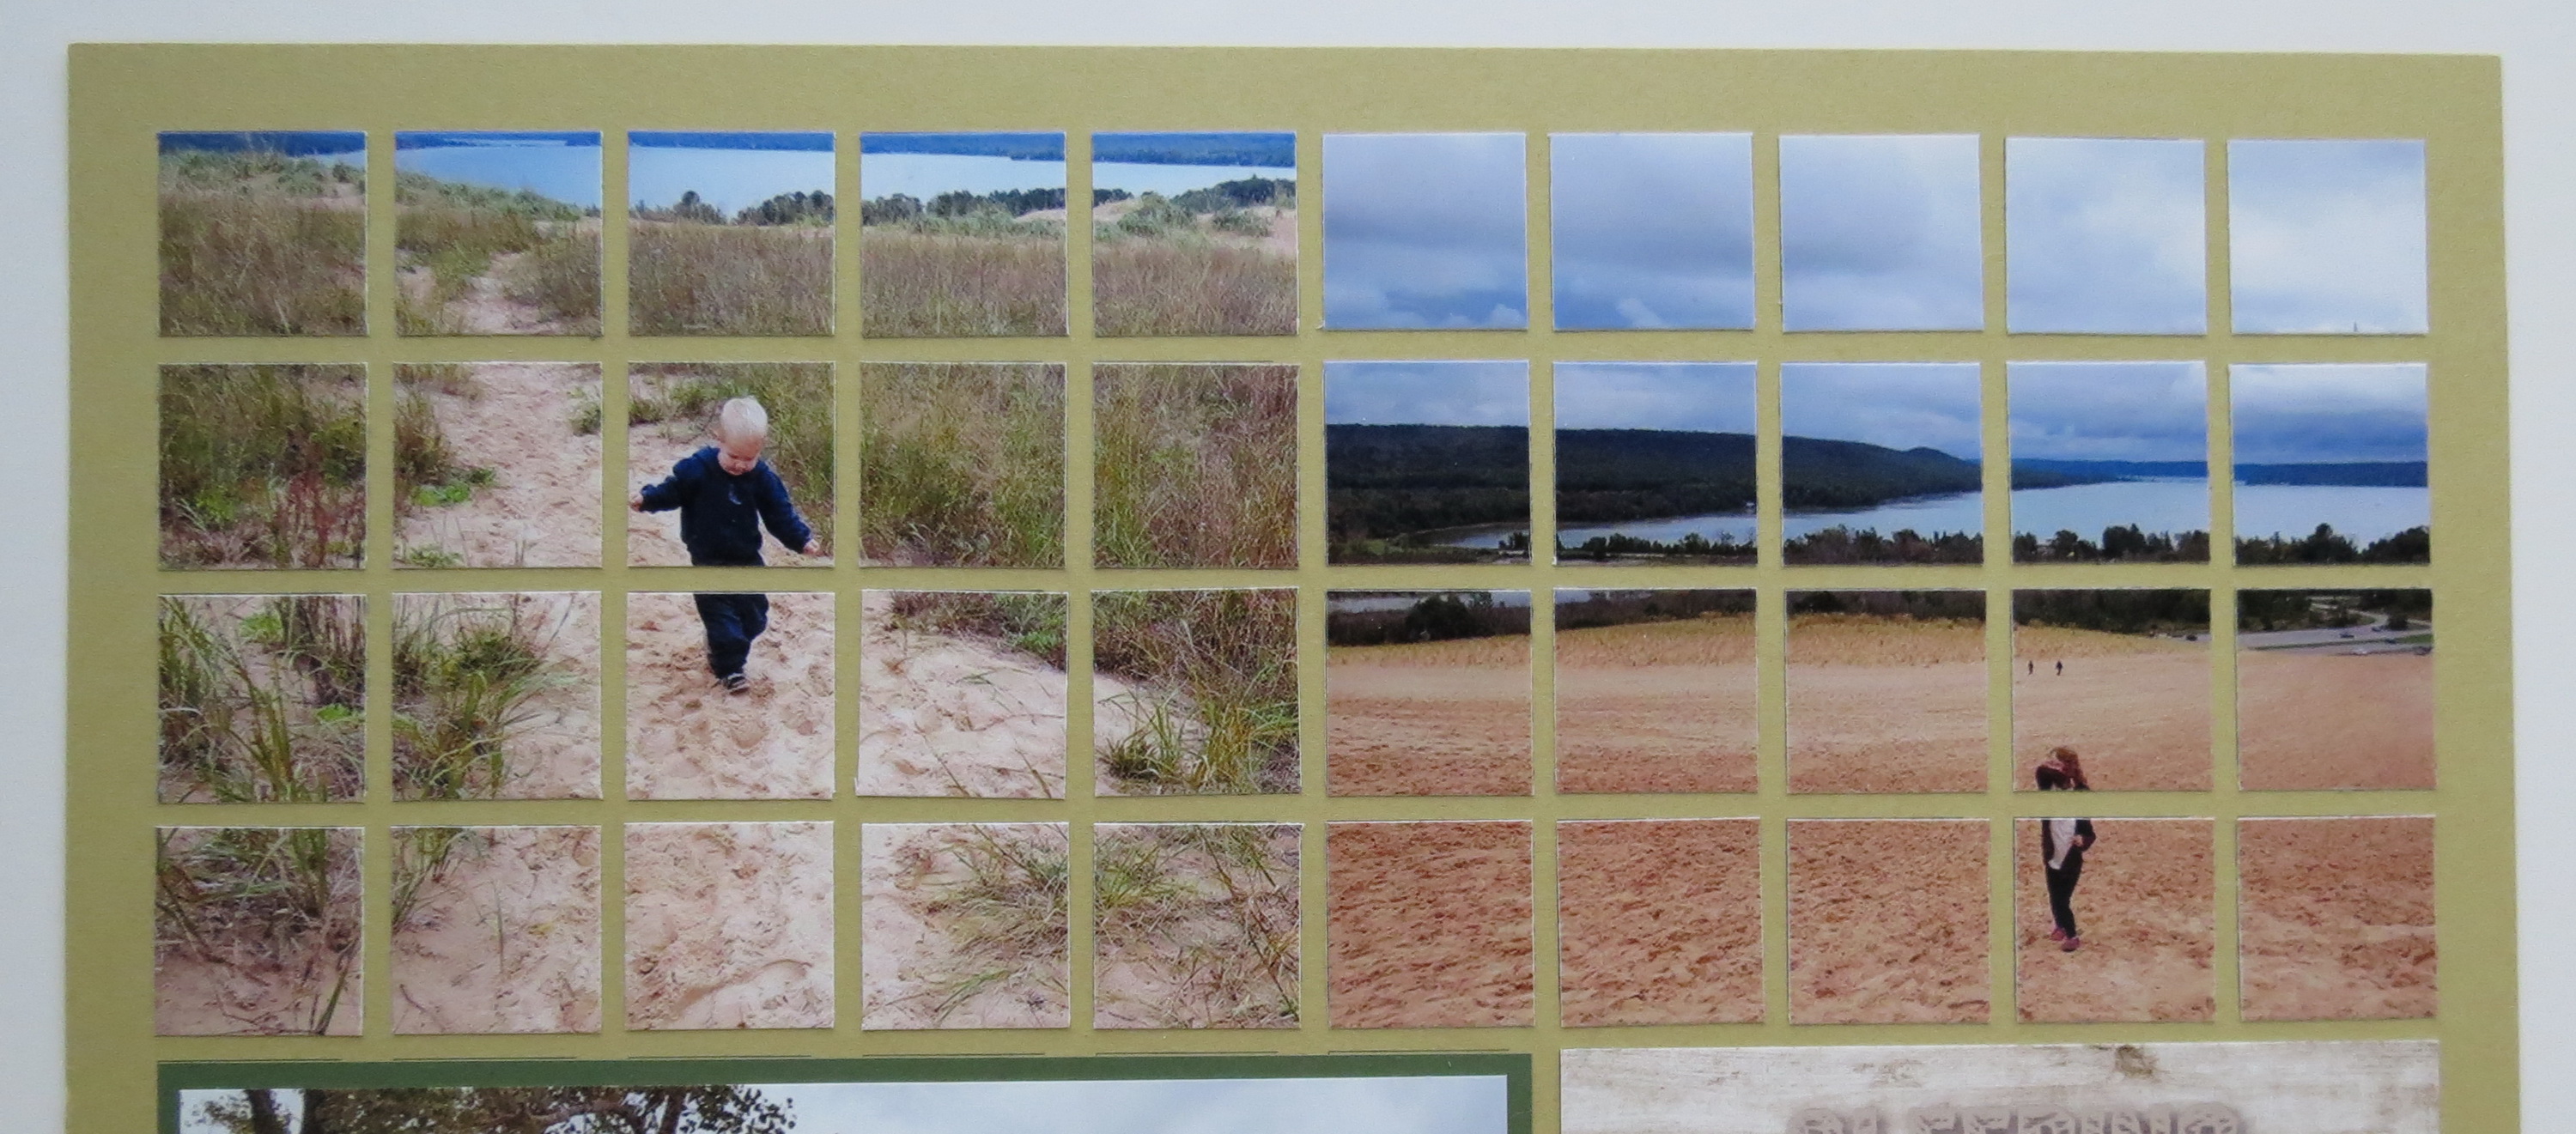
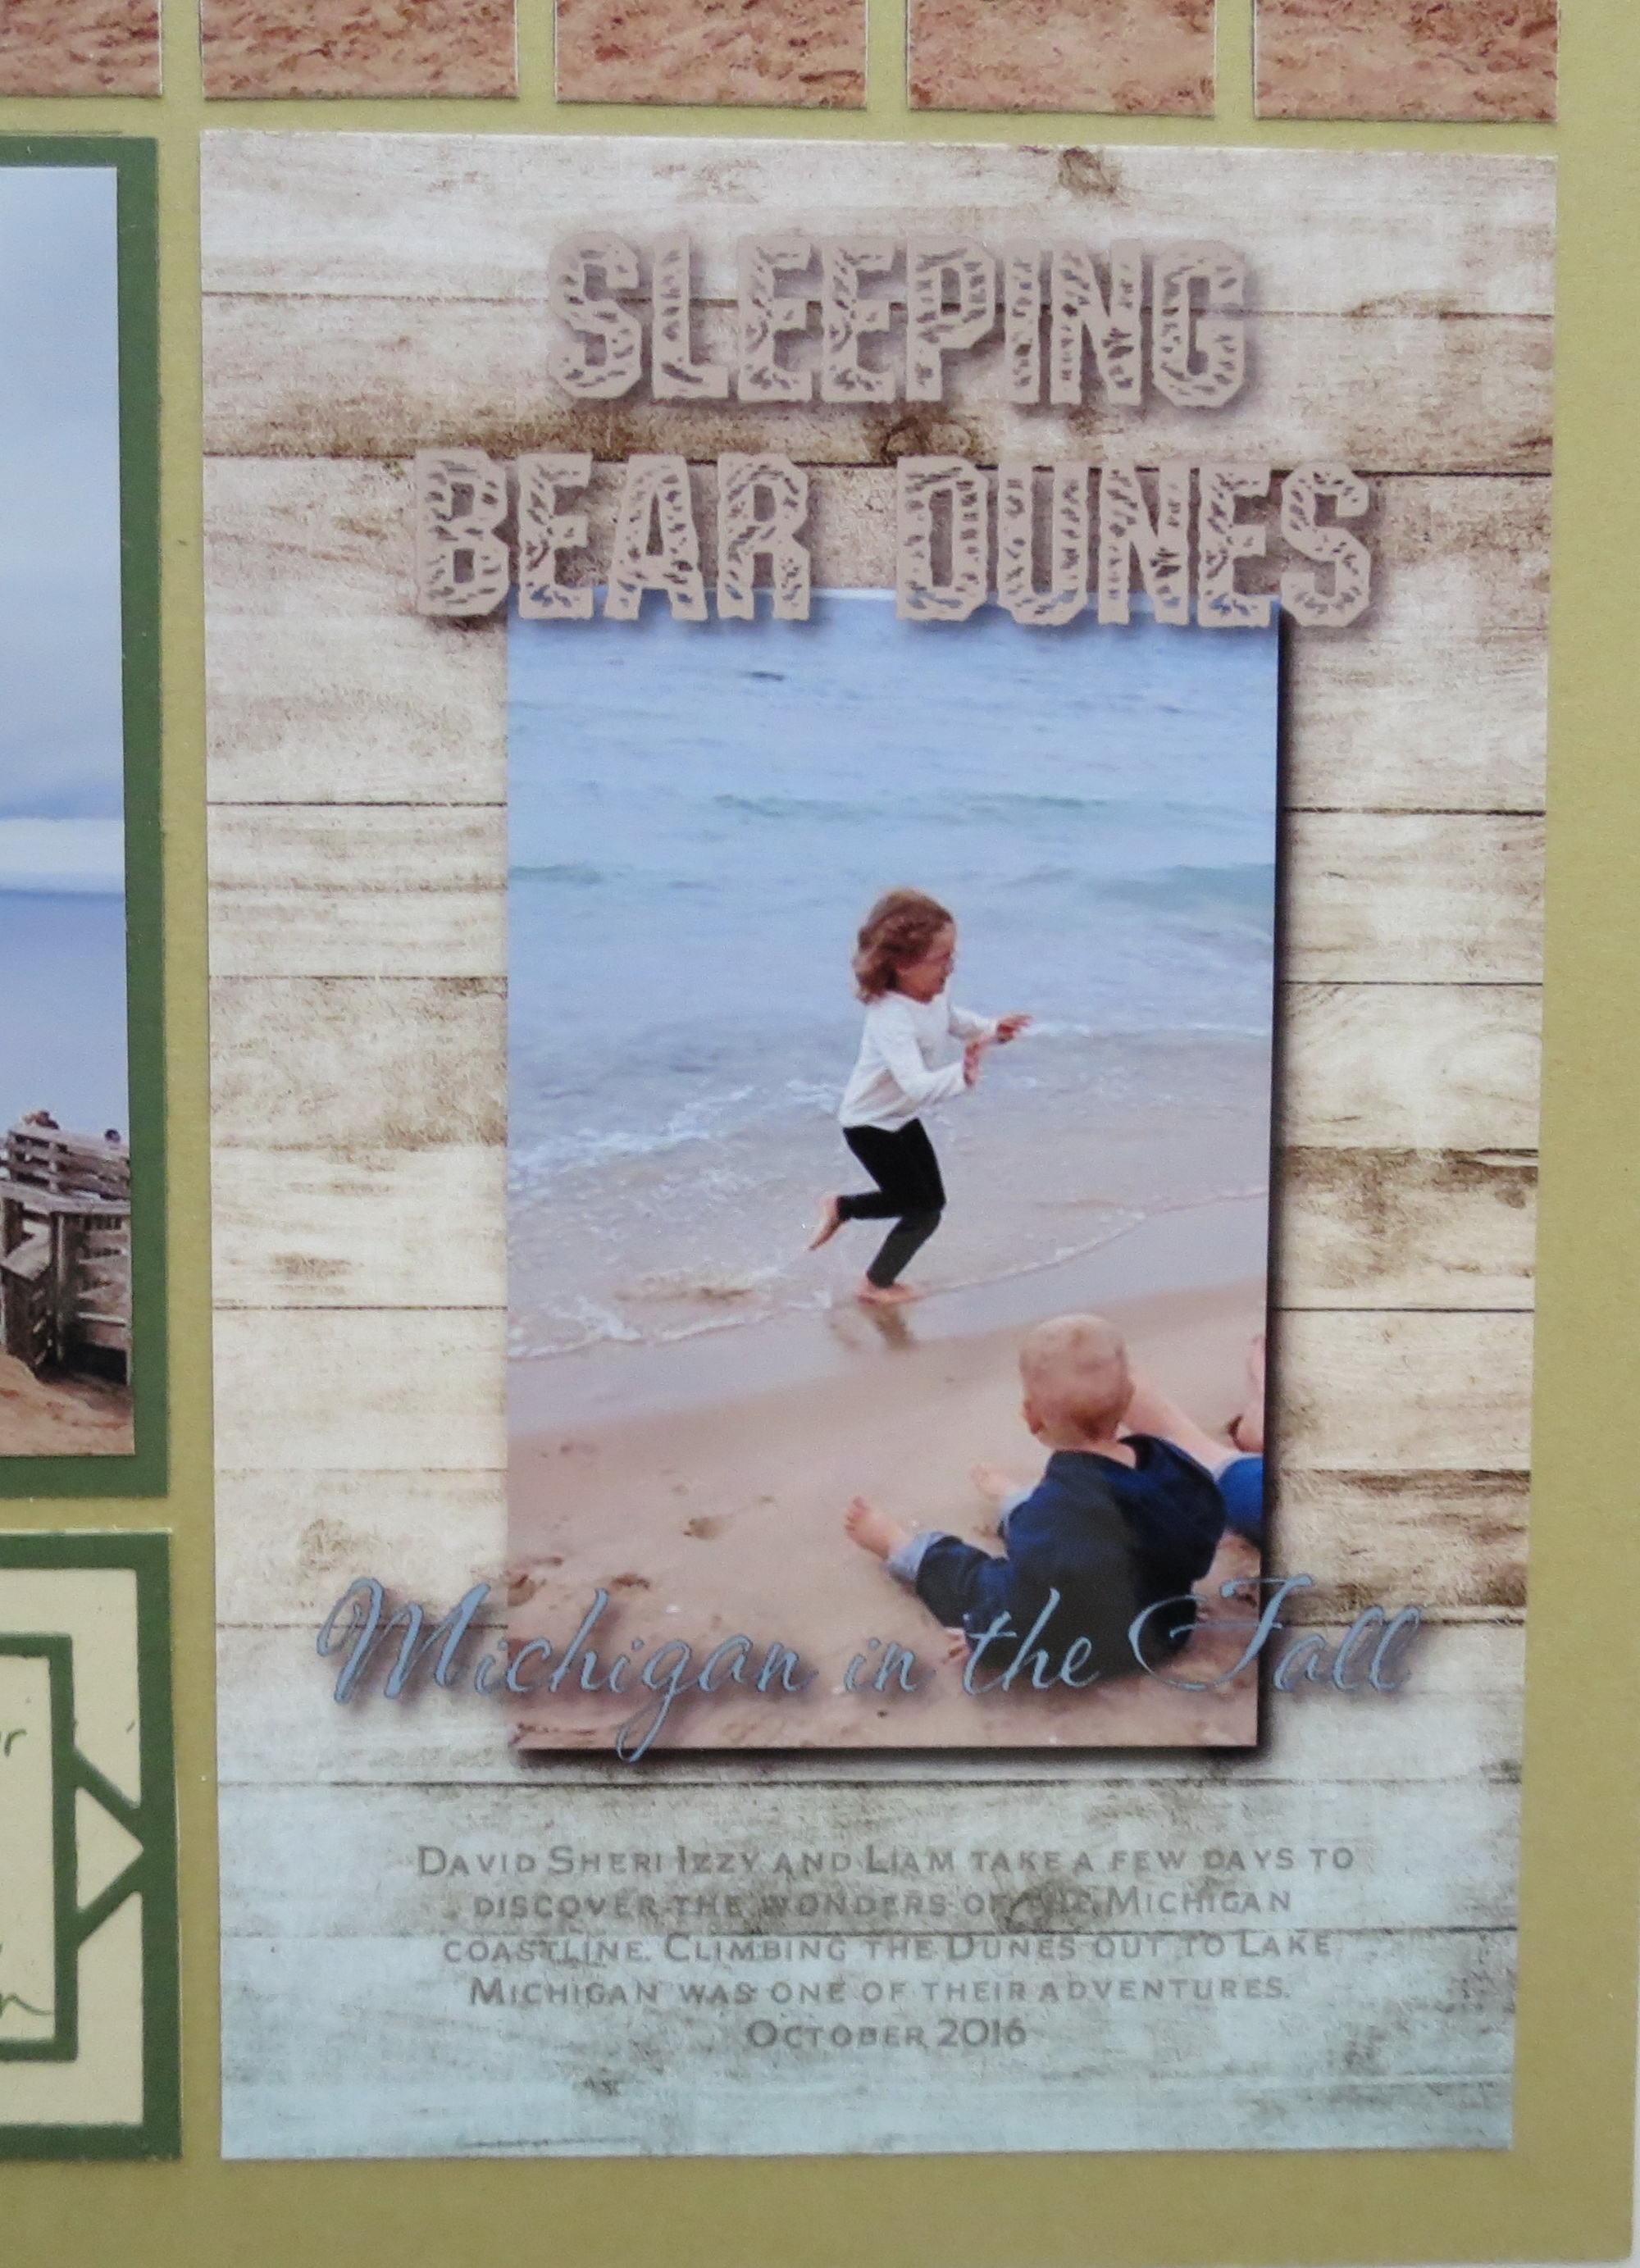
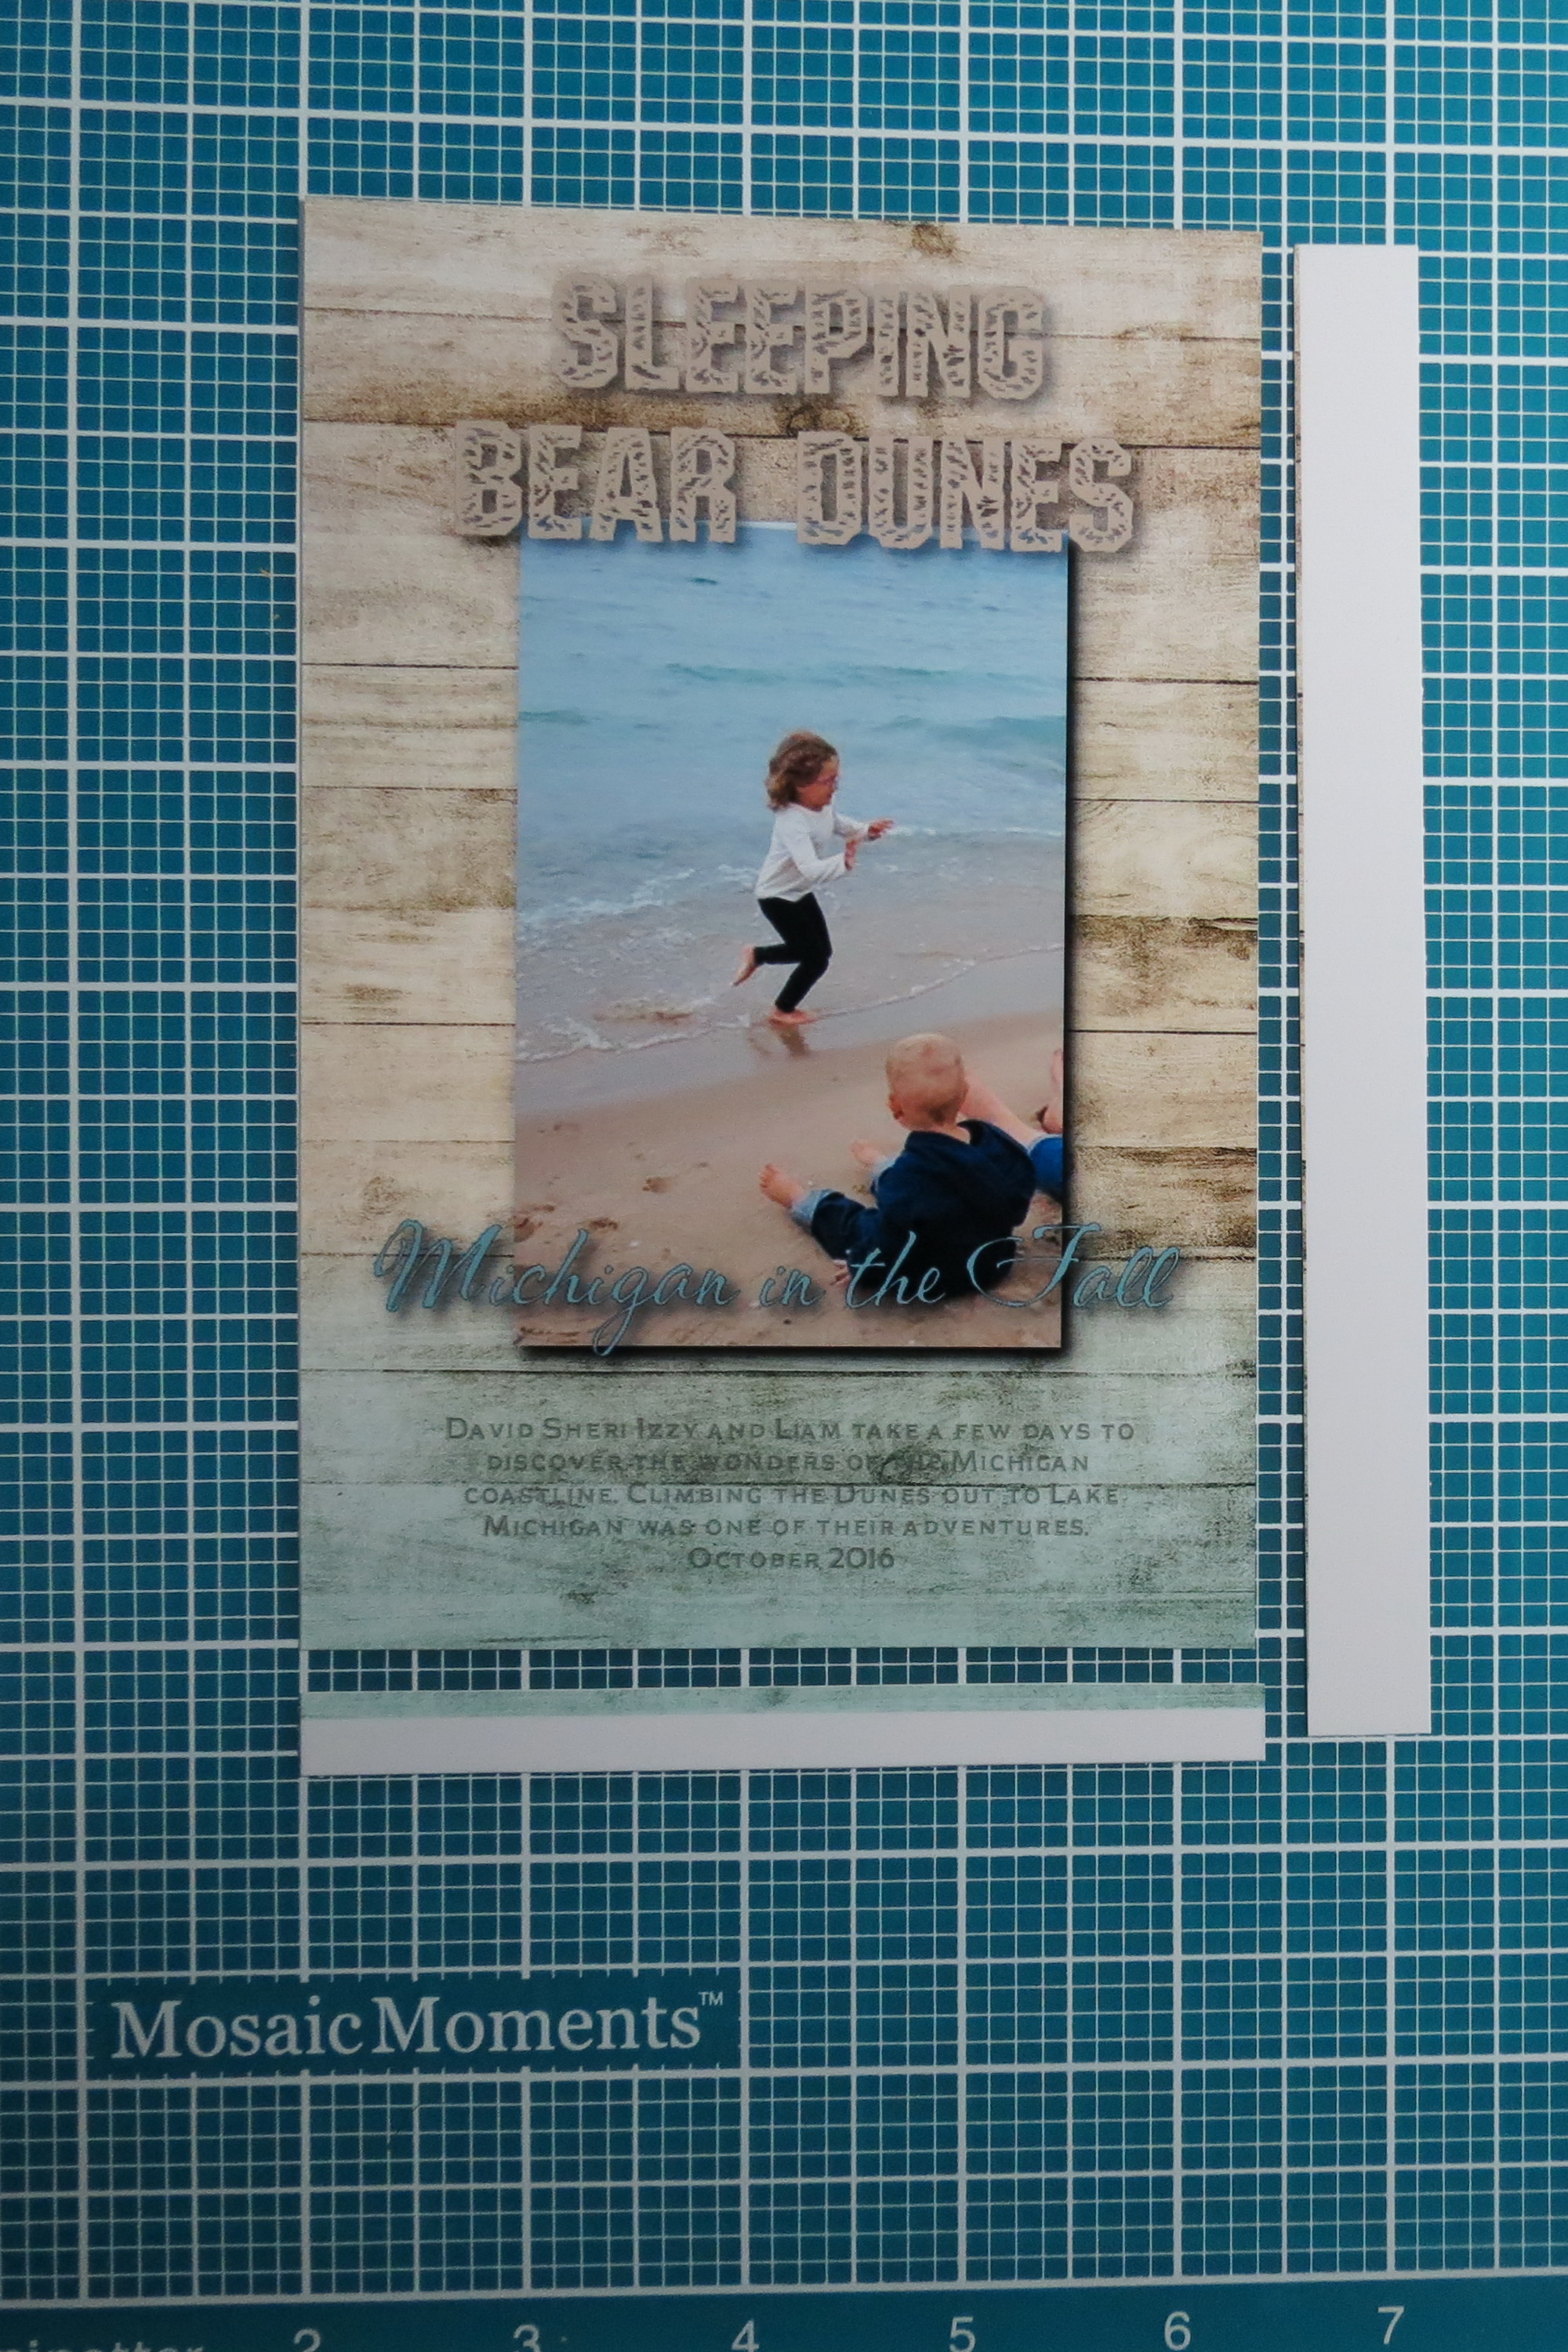
Sleeping Bear Dunes National Lakeshore
A Barley Grass MM Grid was the perfect color match for these sand and surf photos. I was amazed to hear that the 2 and 4 year olds climbed the dunes and hiked all the way over to Lake Michigan. That is one long walk! These photos capture the vastness of the dunes and seeing the little ones climbing it with almost no one around is a great visual. The two photos were printed to true digital size 4×5 and the 1” grid die helped to cut them to fit the top mosaic section to the pattern.
MM 4×6 1″ grid die
MM 1-3 Ways Michigan Mosaics
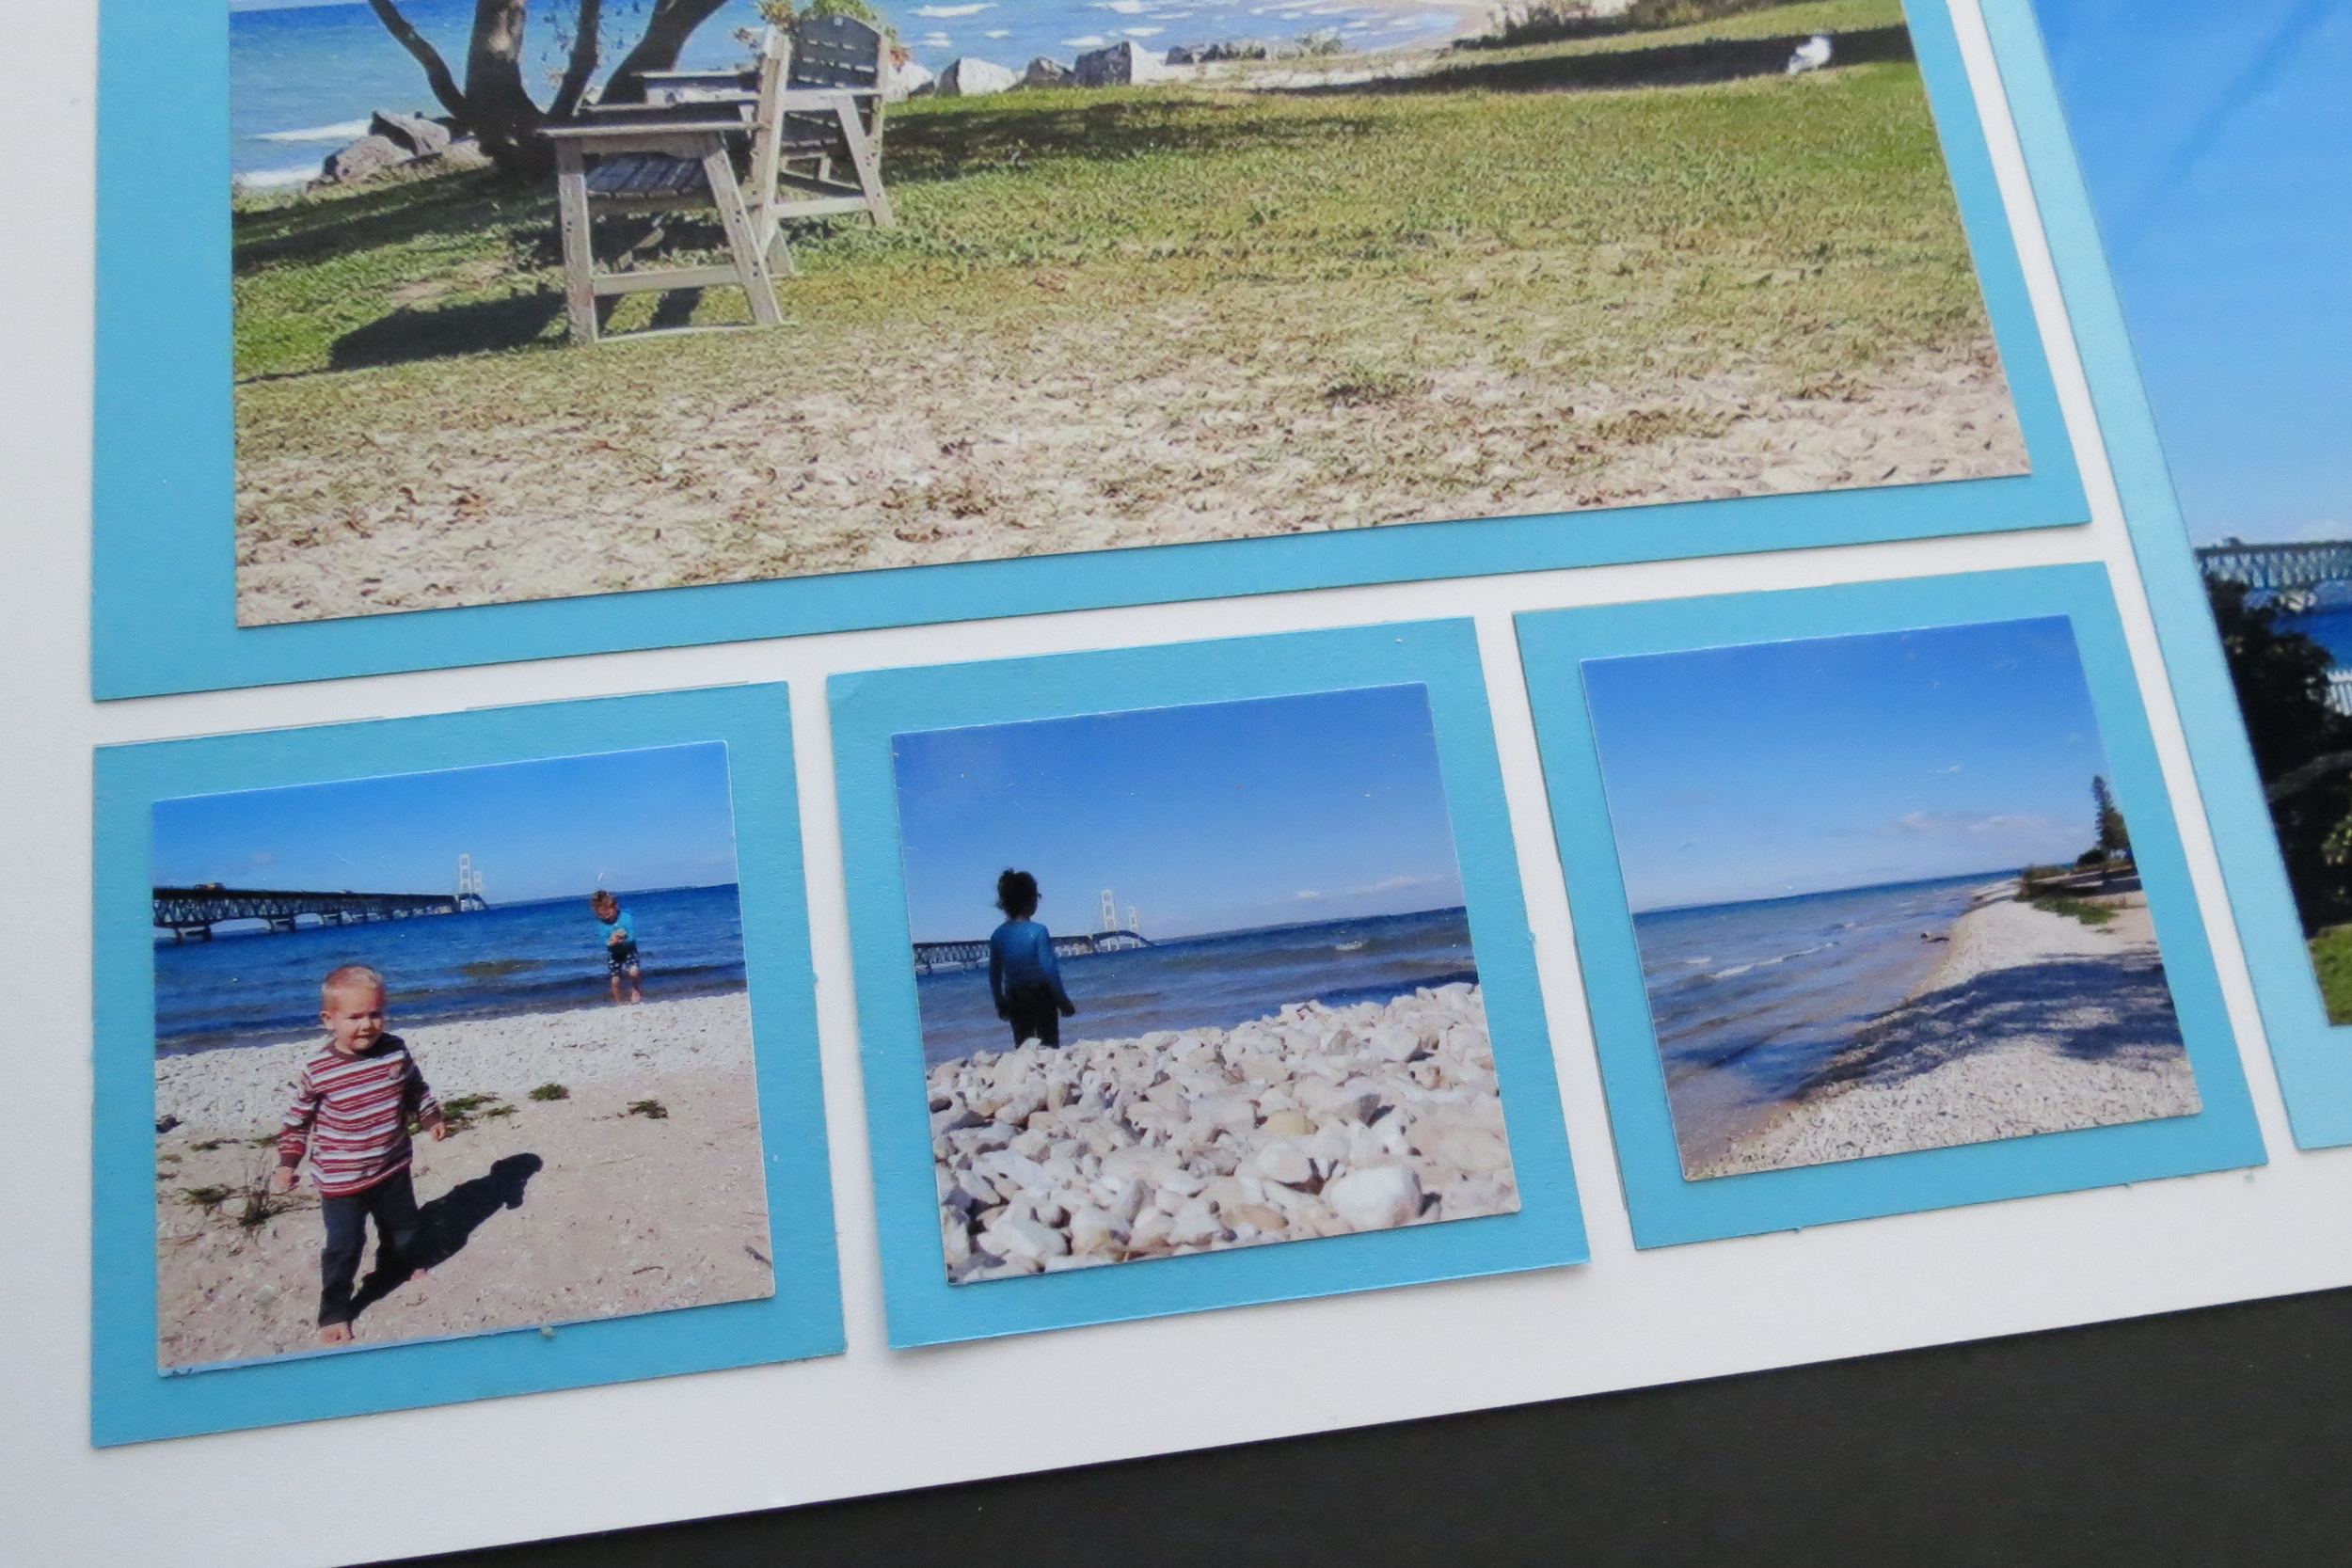
I printed the family photo on 5×7 photo paper using margins to print to size intending to fill the full 4×6 block, but forgot to print borderless leaving me with less photo than I planned, making a mat necessary.

MM 1-3 Ways Michigan Mosaics Cruise-Compass-Travel Die Set

MM 1-3 Ways Michigan Mosaics Square Diamond Frame Die Set
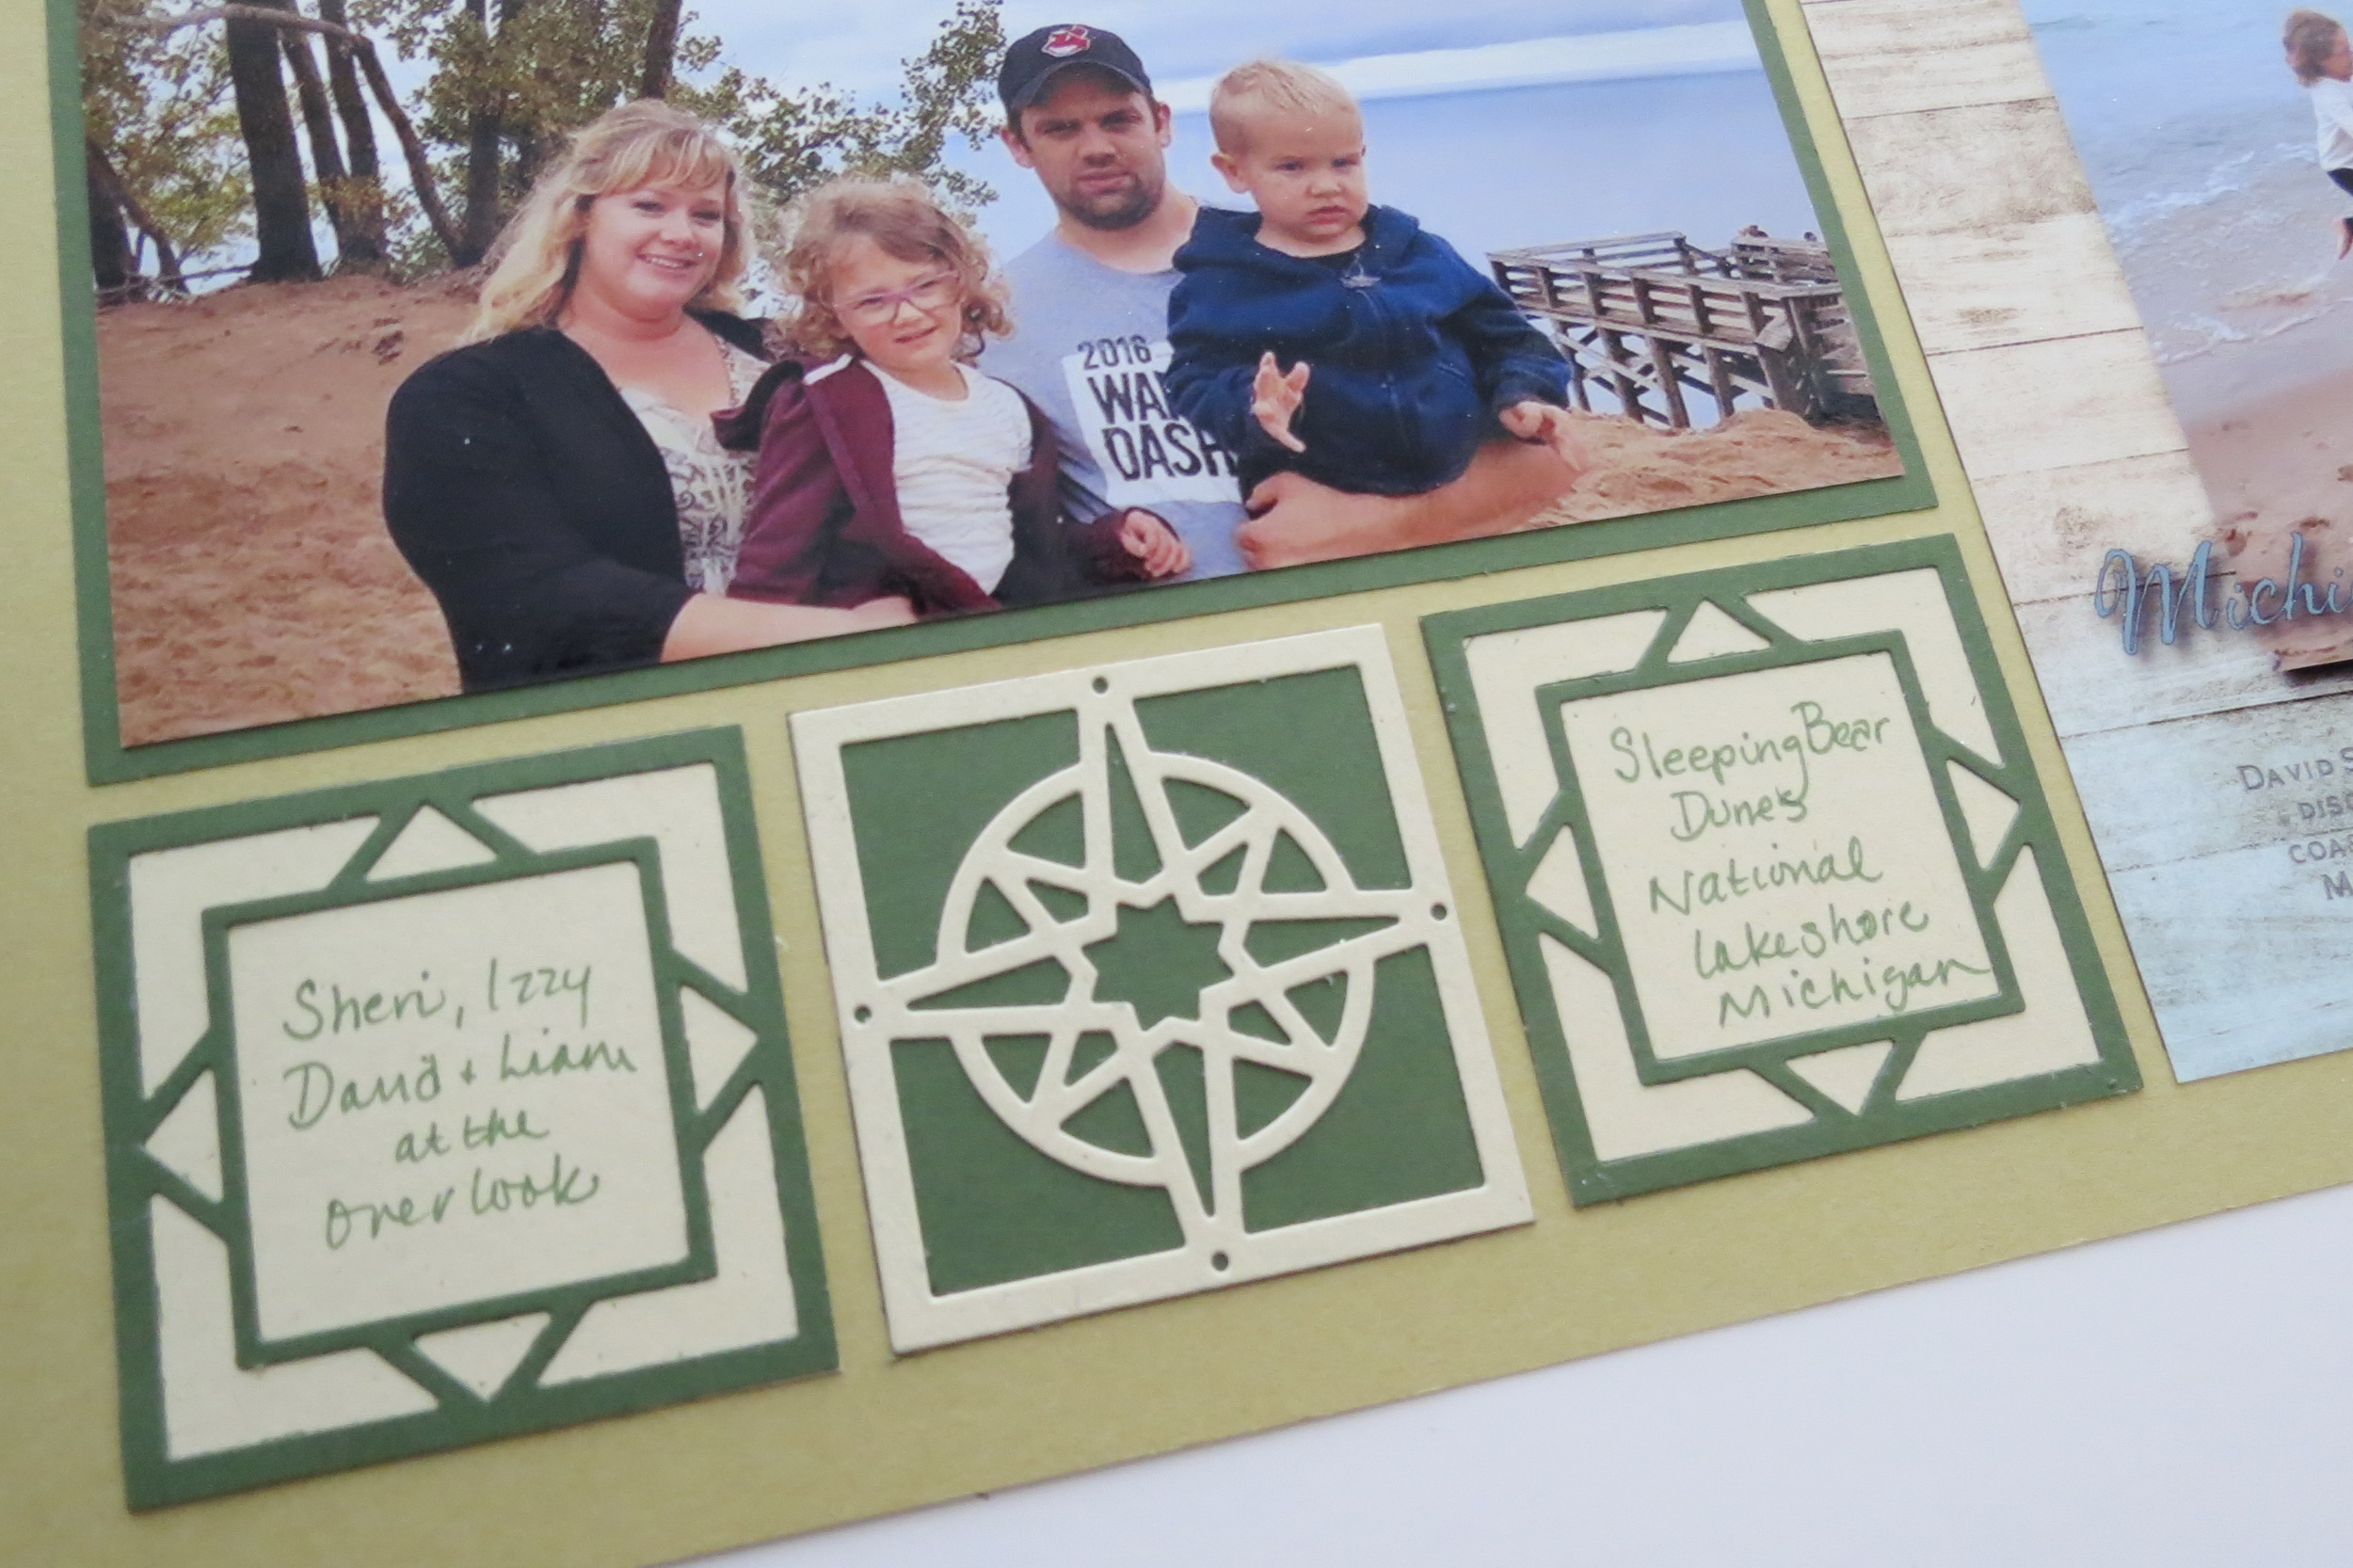
MM 1-3 Ways Michigan Mosaics Cornerstone Tile Dies
The Compass Point cornerstone die and the smaller Square Diamond die fill the 2.125” squares allow spots to add a few page details.
MM 1-3 Ways Michigan Mosaics
My big surprise on this page was adding a hybrid digital element. I created a mini digital page that includes titles, journaling and a photo using a digital scrapbook kit “Shoreline” by Kimeric Kreations for a pattern paper for the backdrop. This allowed me to fit the journaling I wanted, add a title (or two) and include a photo that was too grainy to use at the larger dimensions. This gives a fresh look to your page and allows multiple items to be arranged in a defined space.
MM 1-3 Ways Michigan Mosaics
When printing on a 5×7 I adjusted my margins to print to block photo size, but I needed to trim a little more away which is better than not having enough!
Layout Three
MM 1-3 Ways Michigan Mosaics
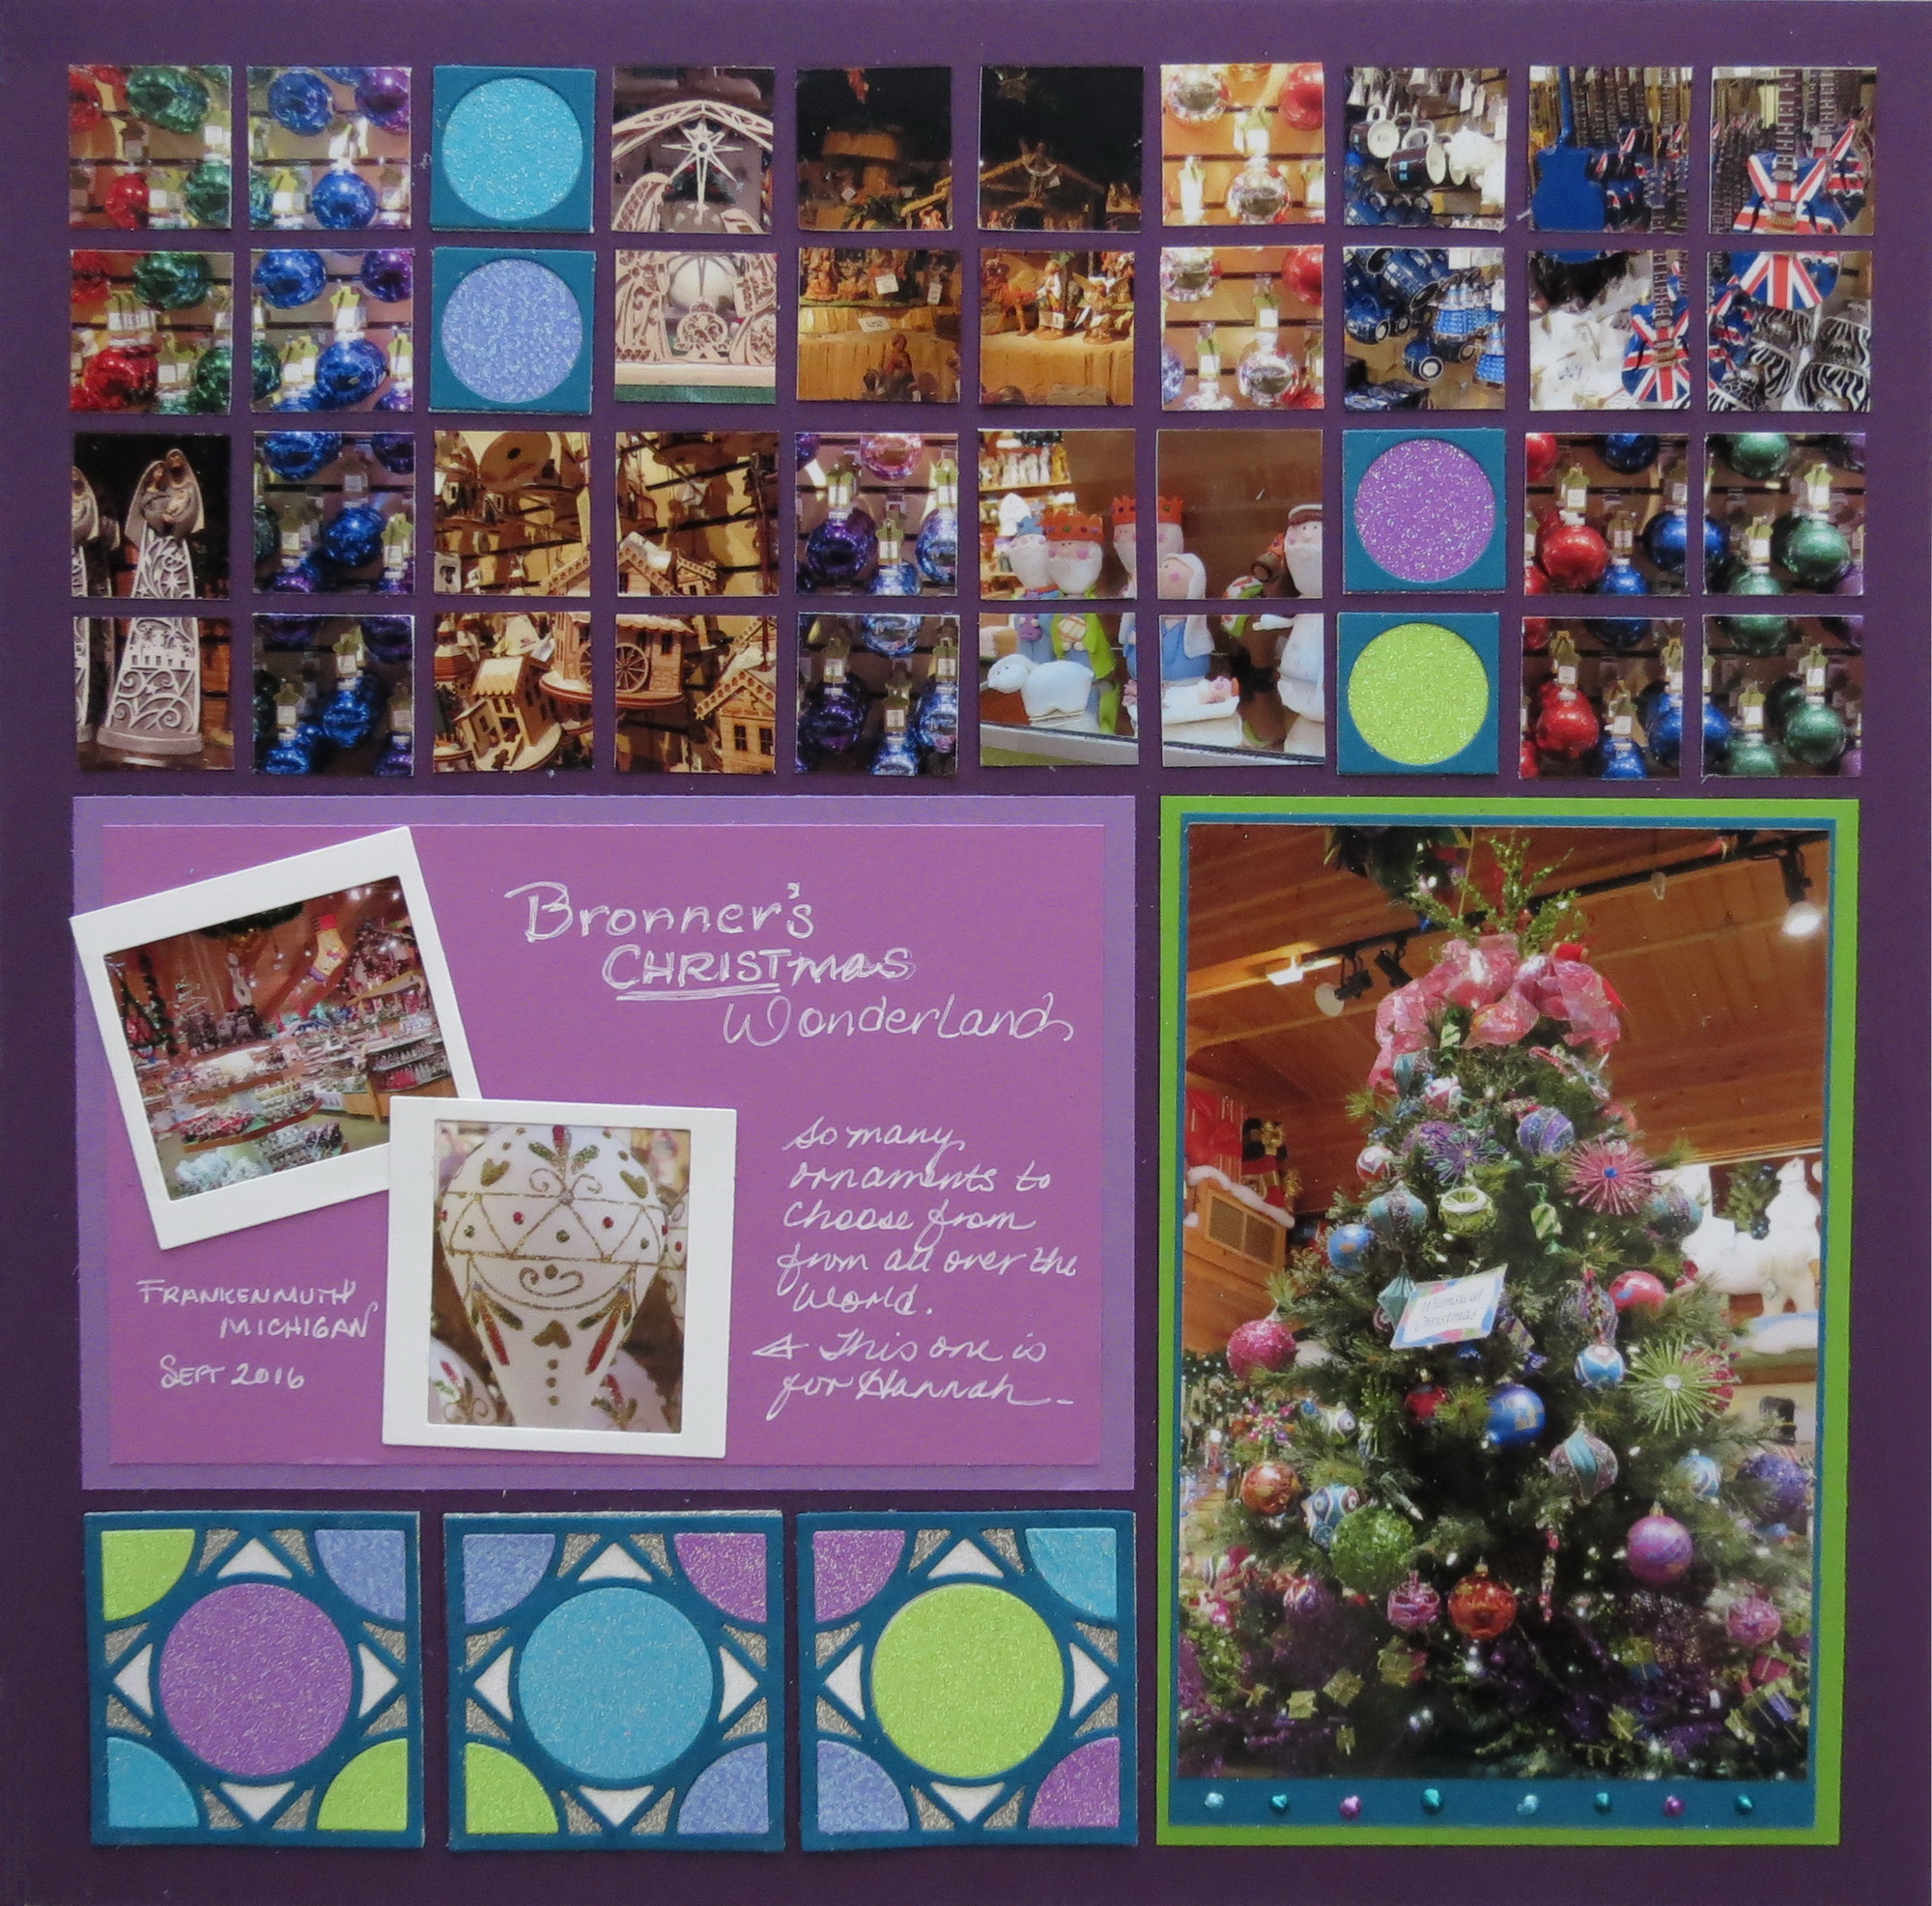
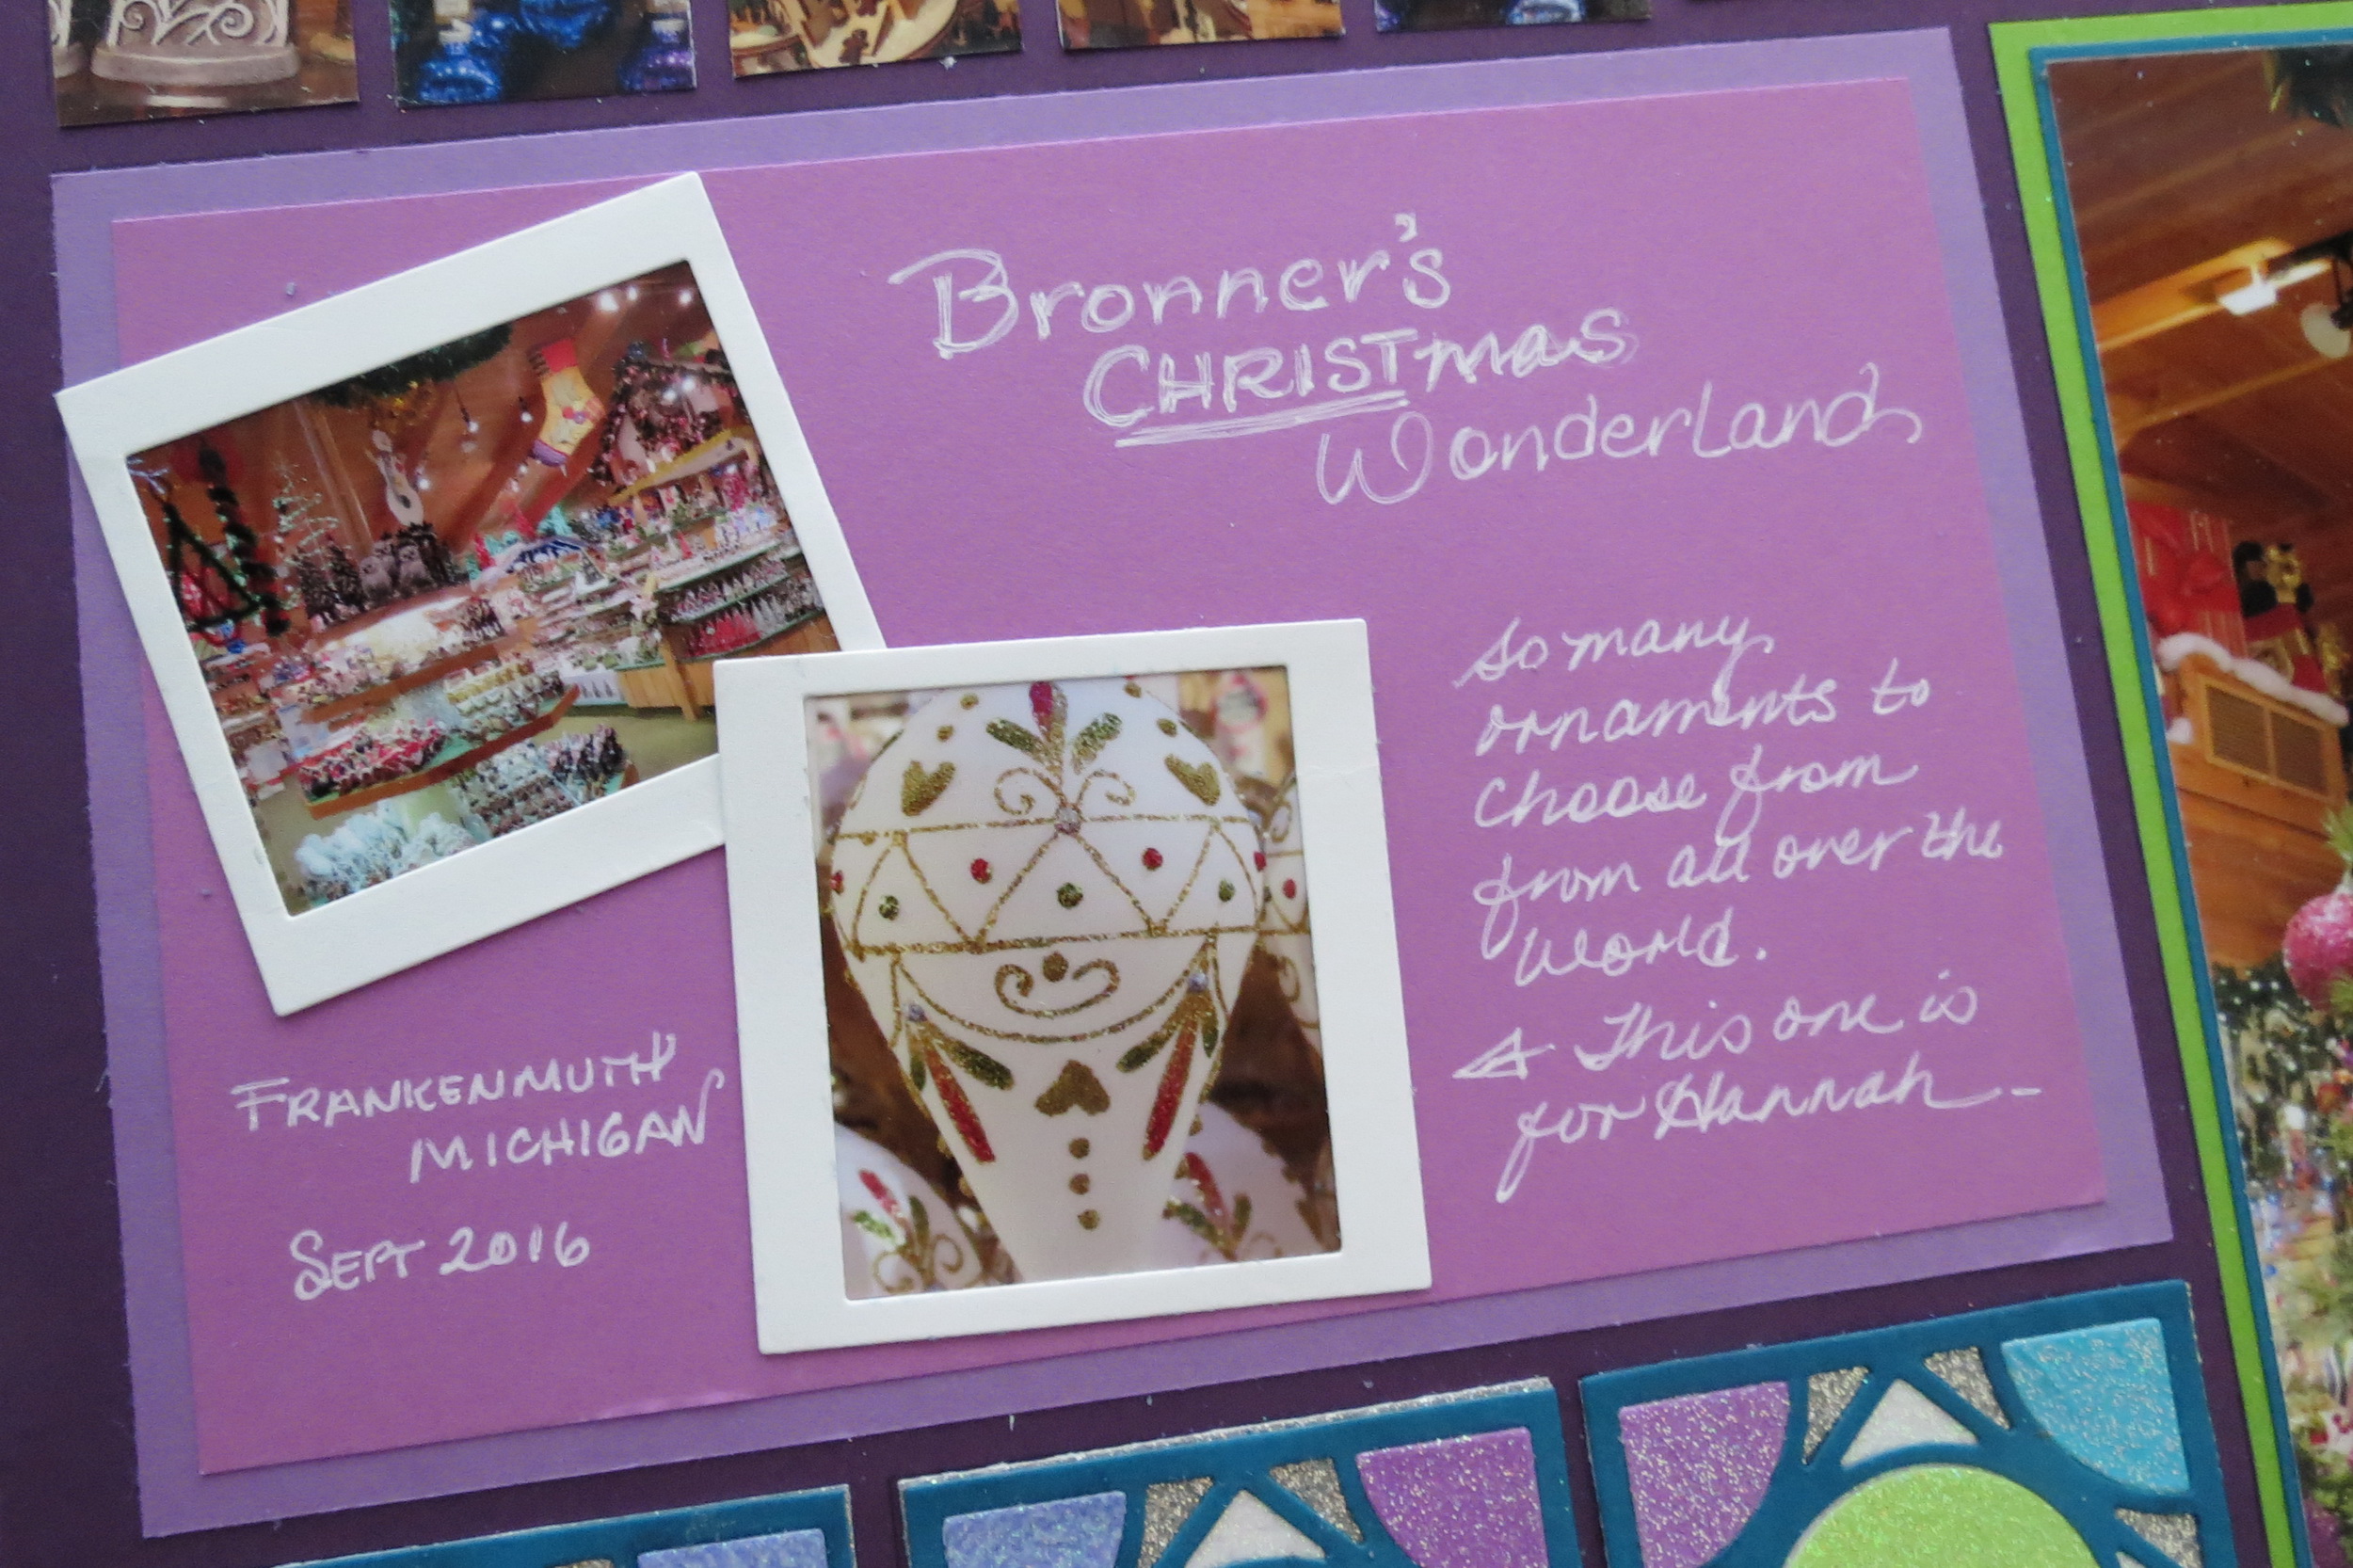
Bronner’s CHRISTmas Wonderland, Frankenmuth, Michigan
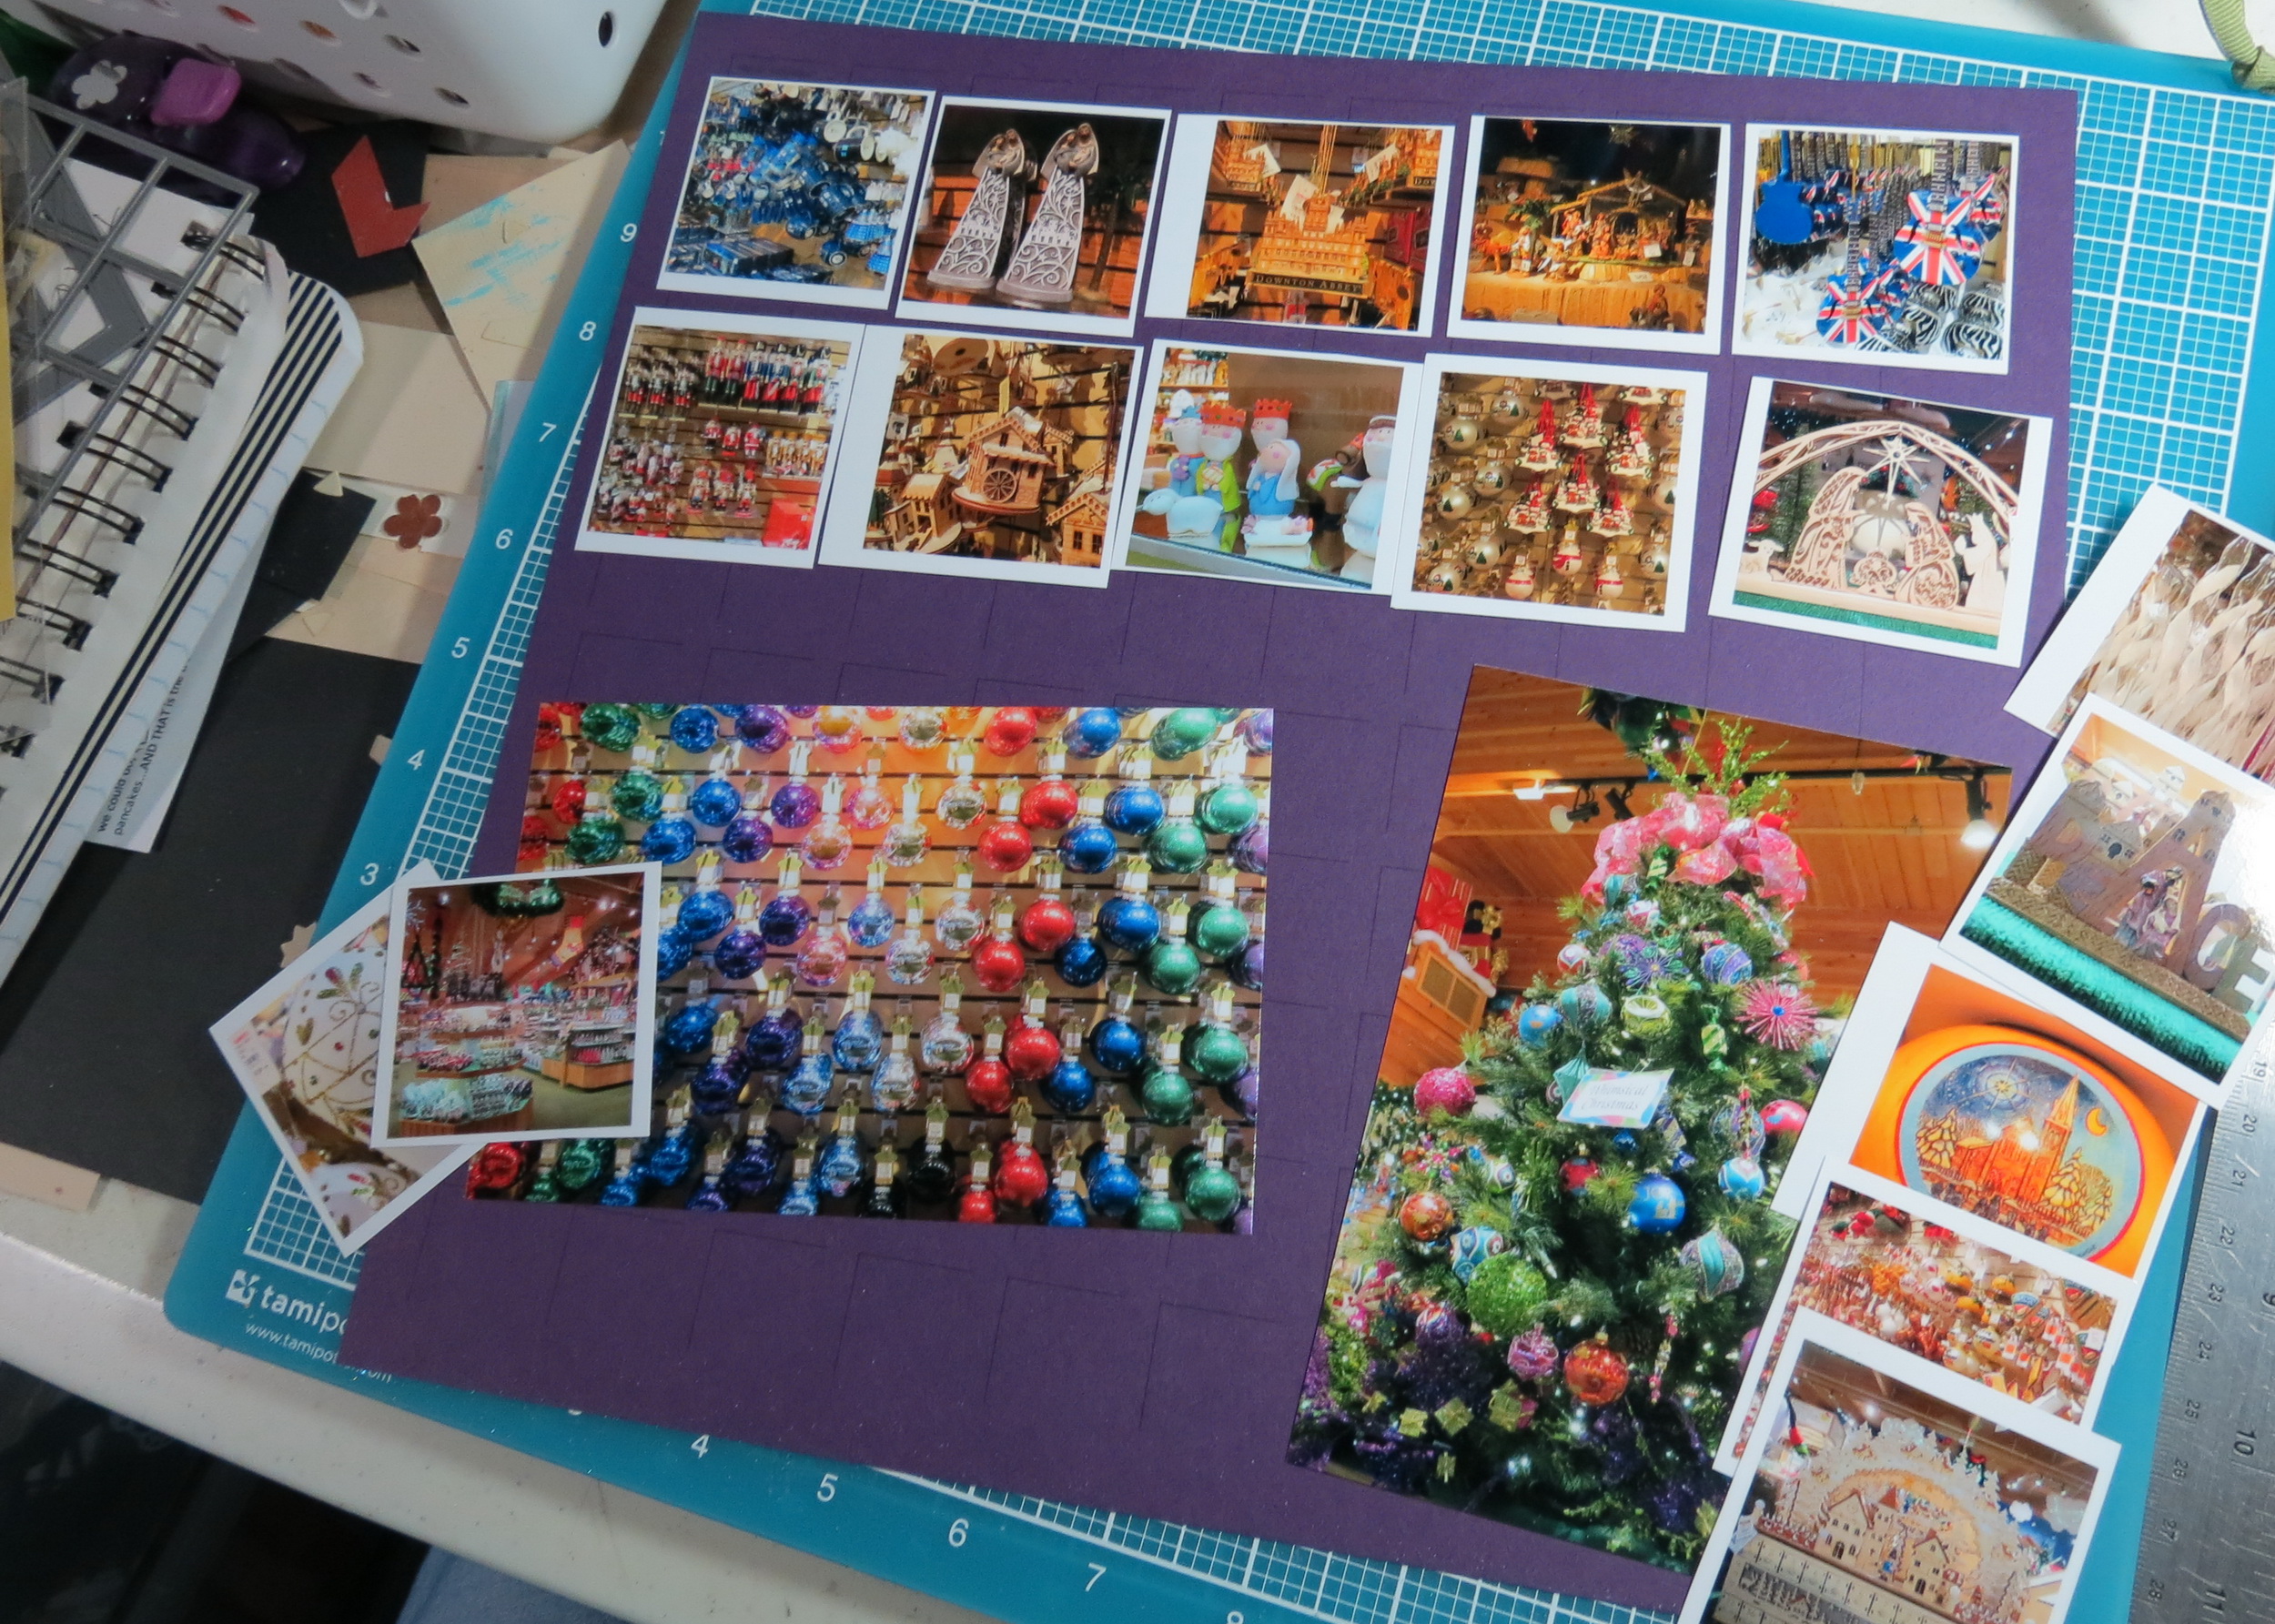
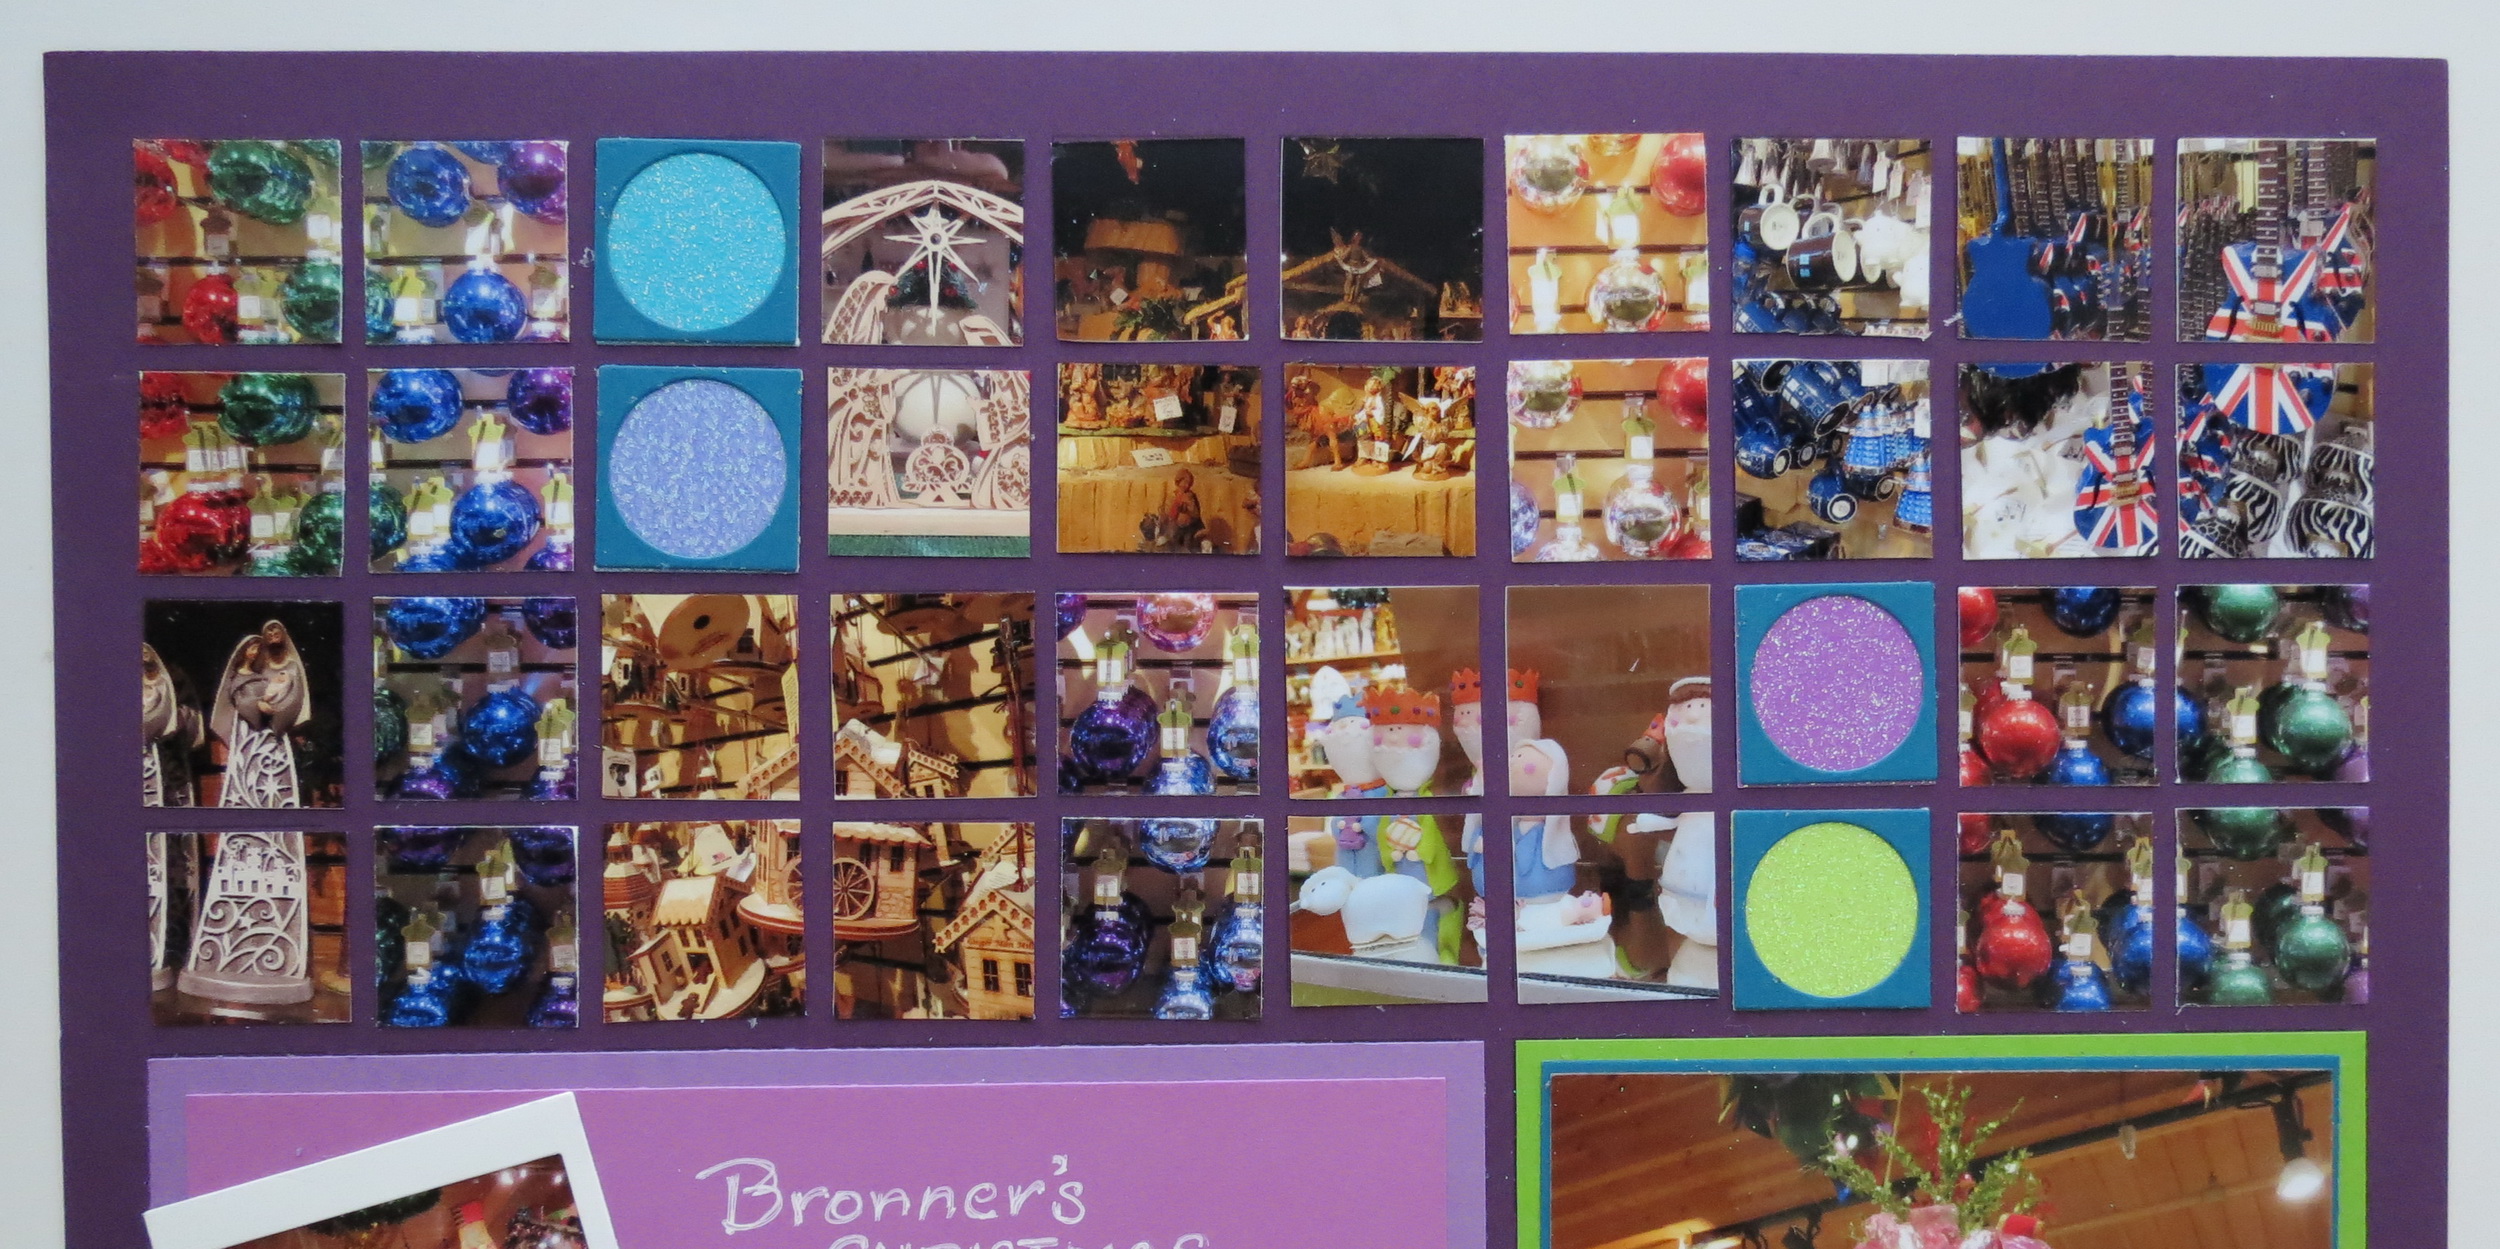
This time a 12×12 Royal Purple Grid will show off these festive Christmas photos from the many, many ornaments and decorations from the biggest Christmas store around. Following a tip from Tami about taking photos from many different distances close-ups to distance shots for interest they became the perfect filler for the top mosaic section in this layout.
MM 1-3 Ways Michigan Mosaics
I printed several photos that I had cropped to about 2×2 size and one 4×6 of a wall of colorful ornaments to fill this area. Some sections from the 4×6 span the area with 1×2 and 2×2’s cut into 1” squares. I even popped in a few 1” circle tiles to carry the colors from the bottom border piece.
MM 1-3 Ways Michigan Mosaics
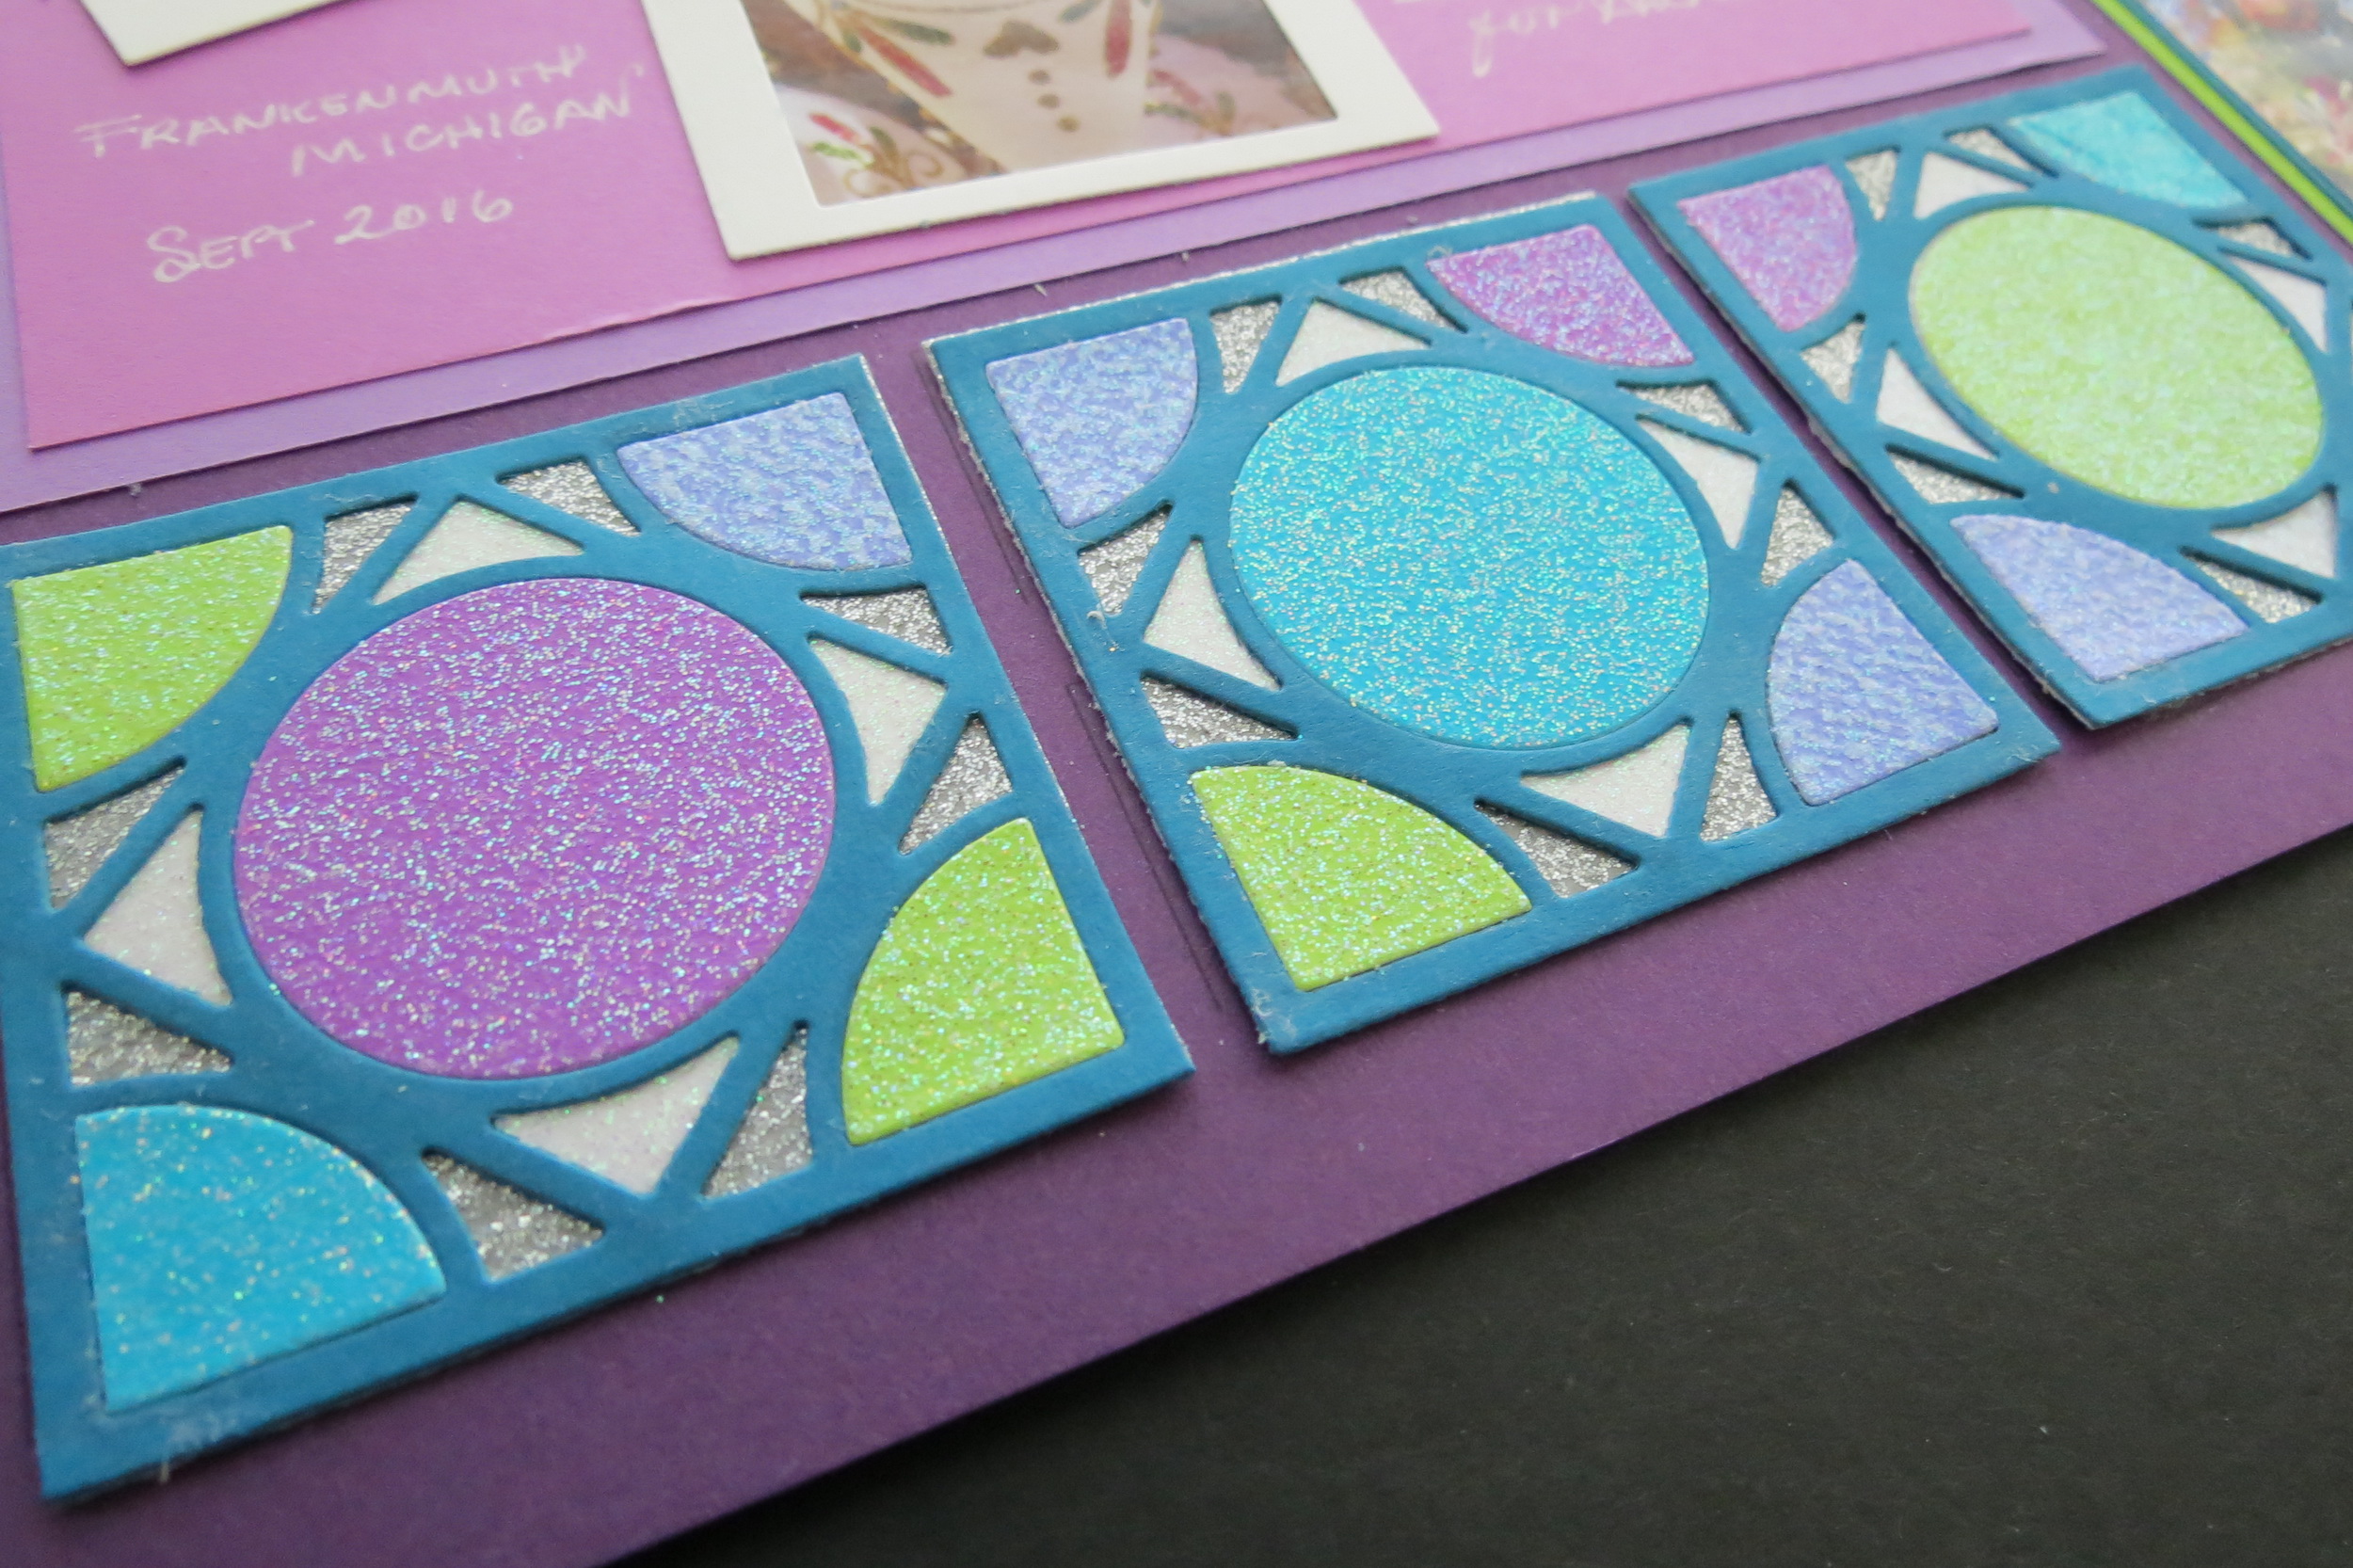
The Encircle die provides all the bling on this page. Using several colors of glitter cardstock to match the colors in the featured photo I cut several of the encircle cornerstones and three in a teal cardstock to frame the glitter pieces. The base is a silver glitter square and a smaller white glitter square to back the square in the tile. The center and corners are filled with the color pieces in a pattern that suited me.

MM Circle Tile Die set

MM Encircle Die
MM 1-3 Ways Michigan Mosaics
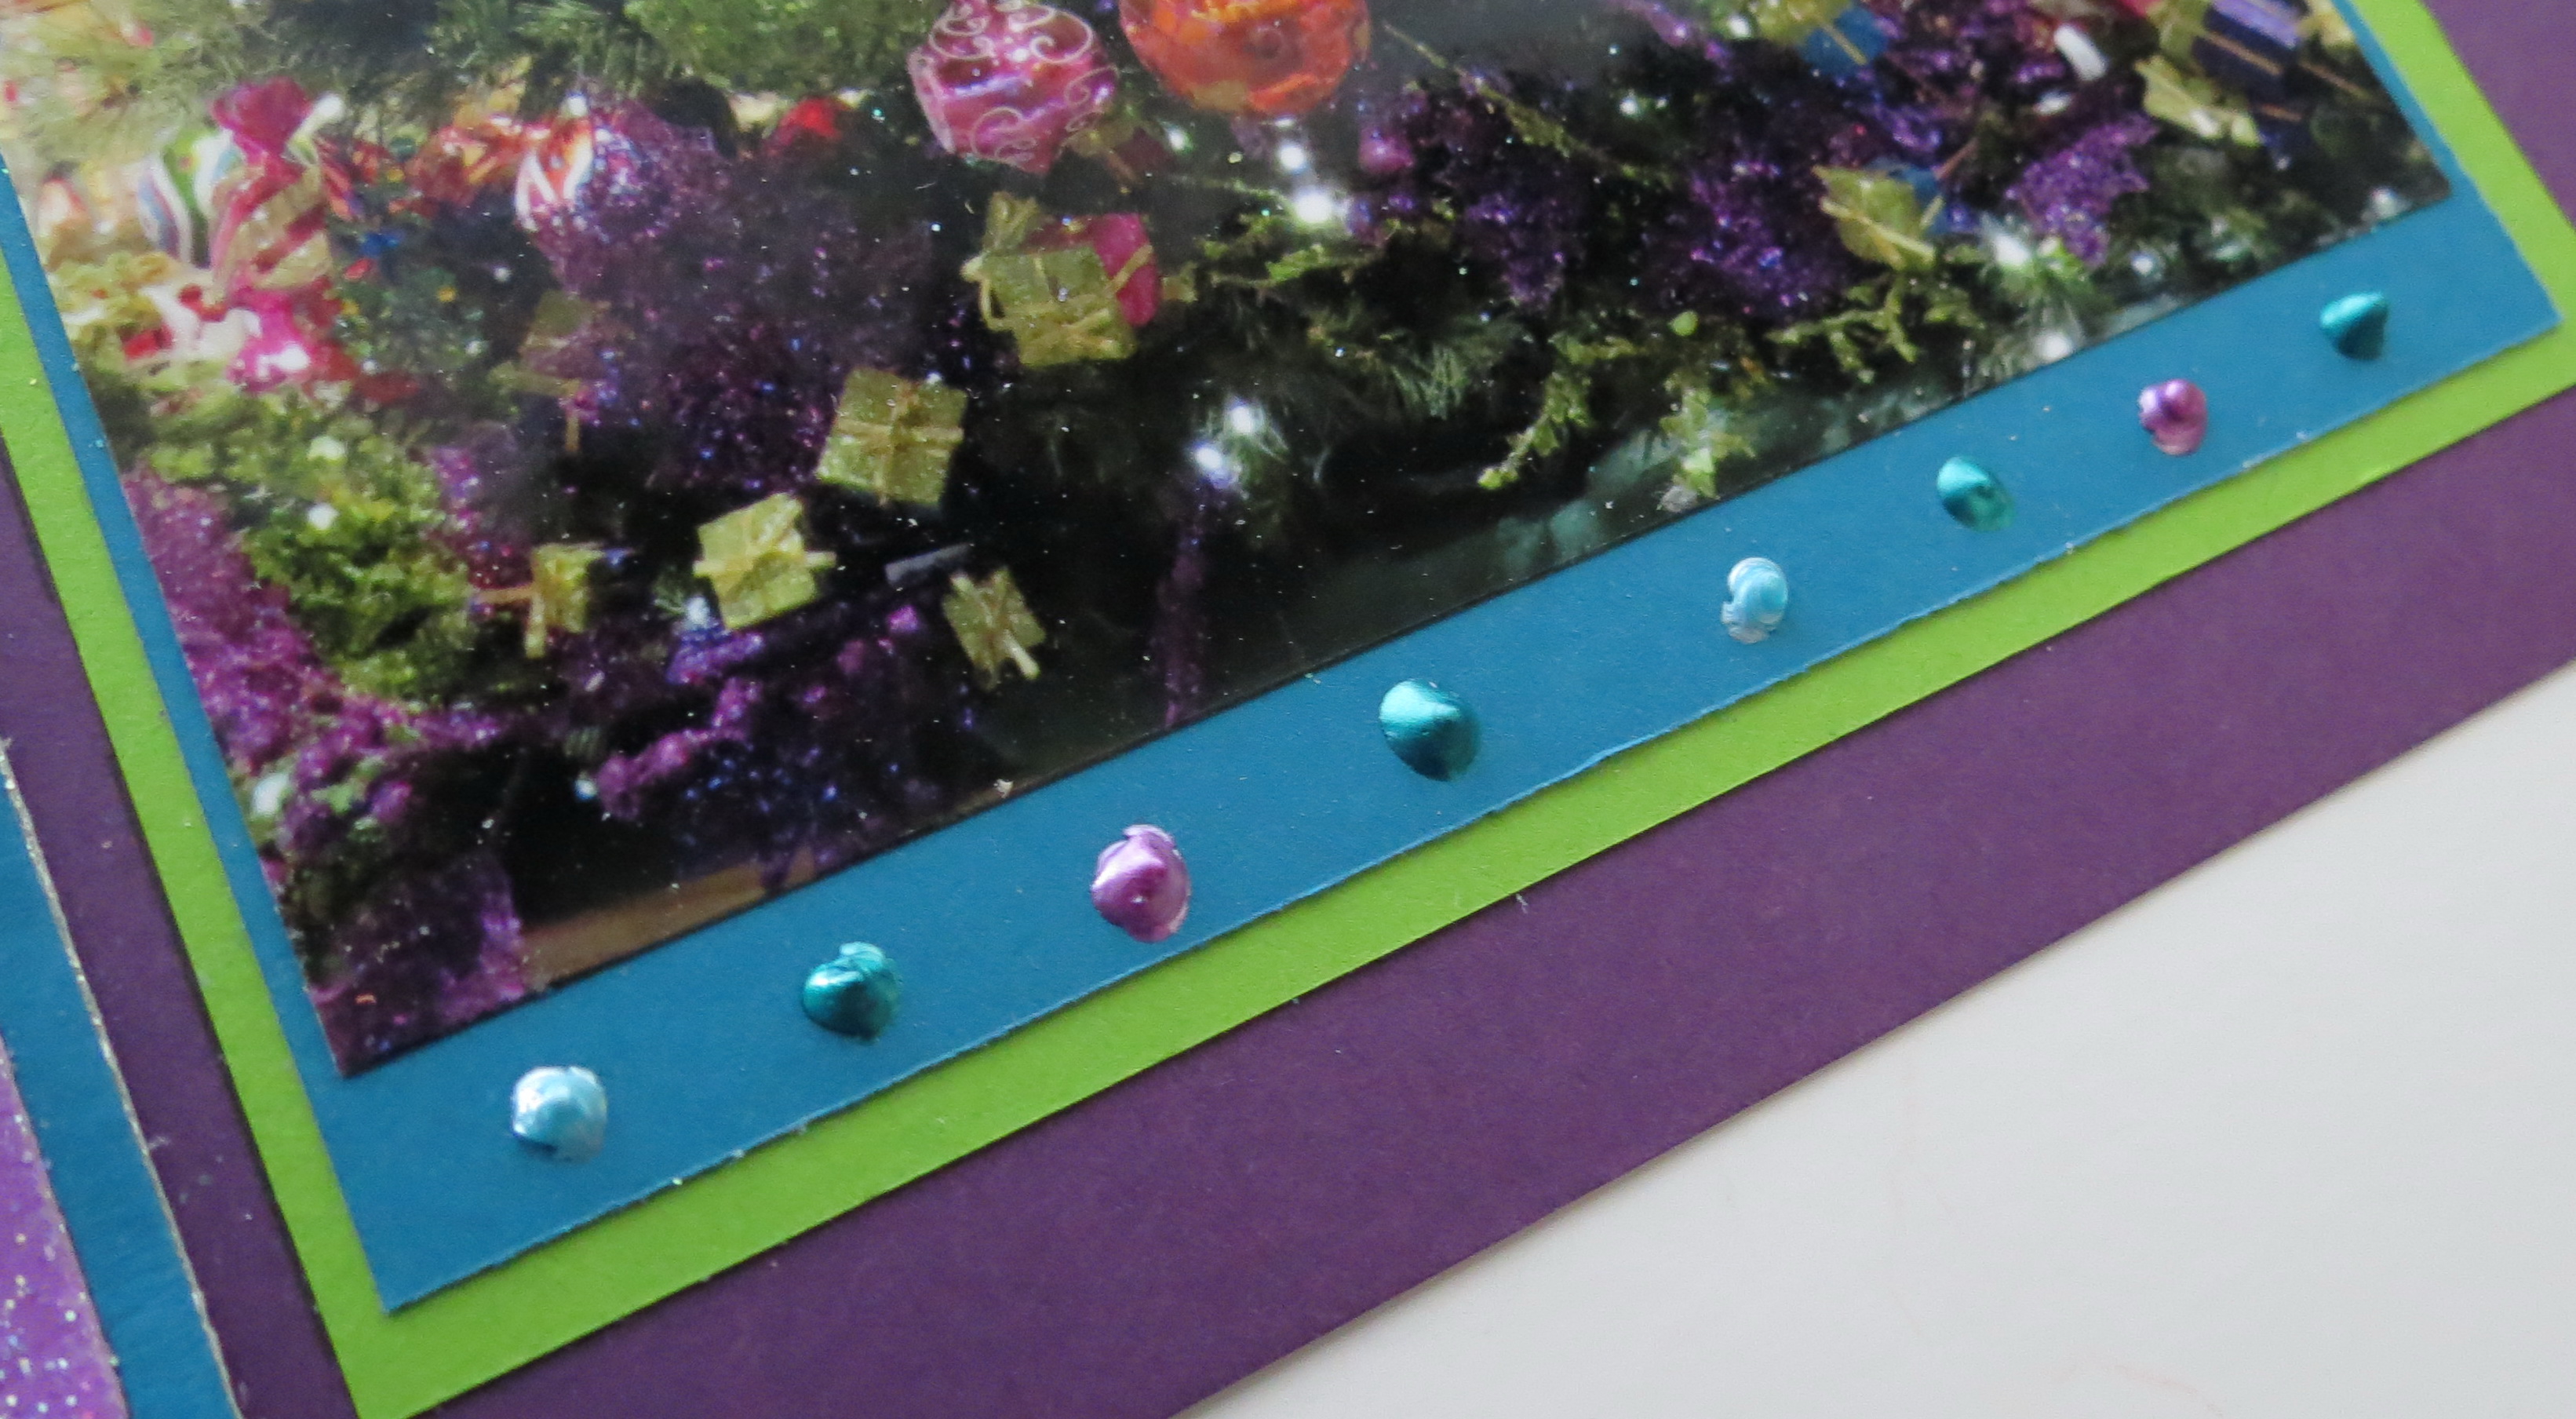
The feature photo is double matted with a row of liquid pearl dots to add a finishing touch.
MM 1-3 Ways Michigan Mosaics
The large horizontal block is double matted and a handwritten title and a bit of journaling is added with a white gel pen. I had two additional photos I wanted to feature one is a general photo of the inside of the store and the other a close up of the ornament I bought. I used a slide mat from a die that cuts slides and Polaroid mats for both photos. This let me arrange them on the mat in random fashion breaking from the mosaic format, varying the pattern yet another way.
MM 1-3 Ways Michigan Mosaics
Because each layout is a little bit different I thought I’d create a quick glance visual to highlight each of the differences.
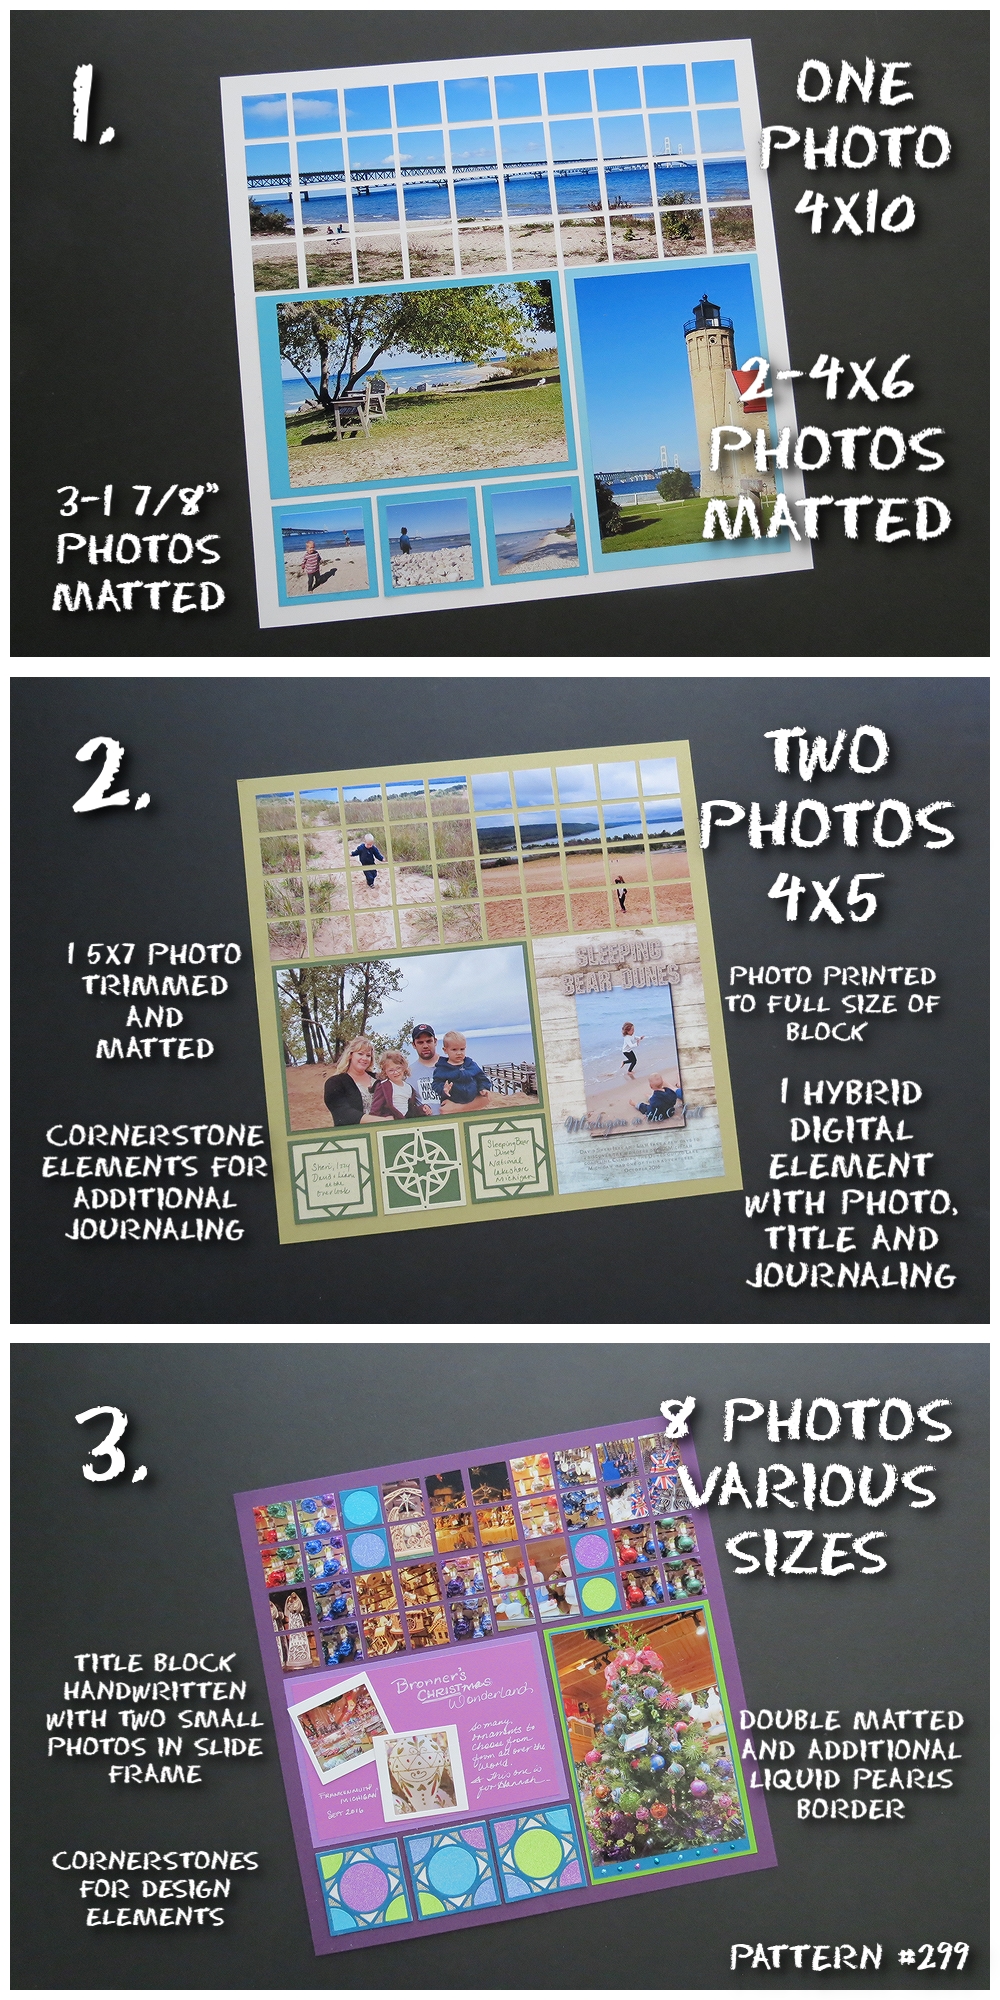
MM 1 pattern 3 ways overview
Have fun with the mosaic patterns you find in our Pattern Gallery, there are so many ways to showcase your photos!
MM 1-3 Ways Michigan Mosaics
Andrea Fisher
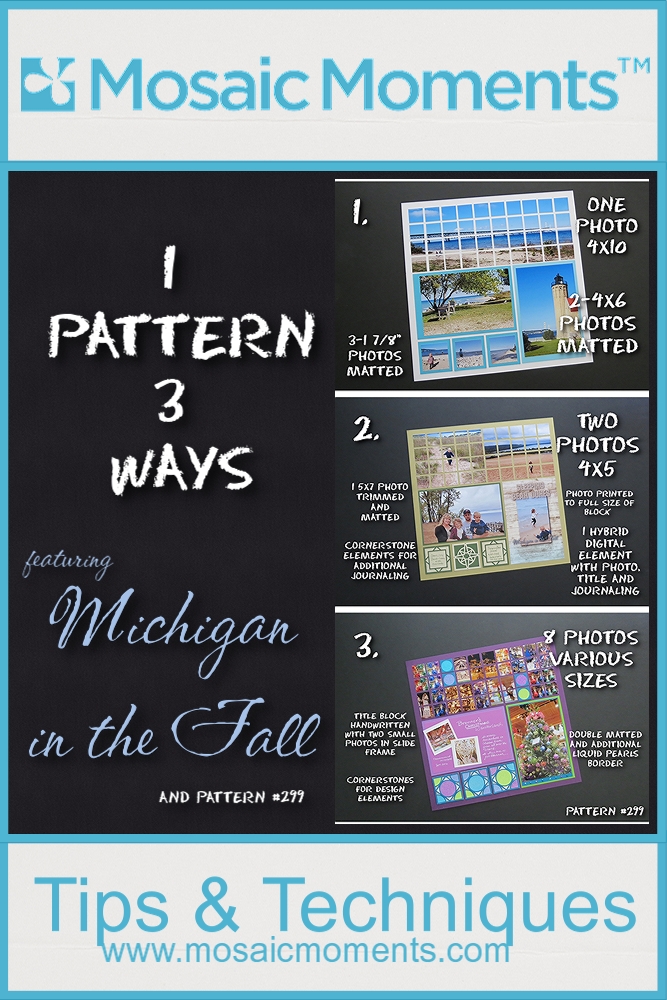
MM One Pattern Three Ways with a mosaic style pattern #299