

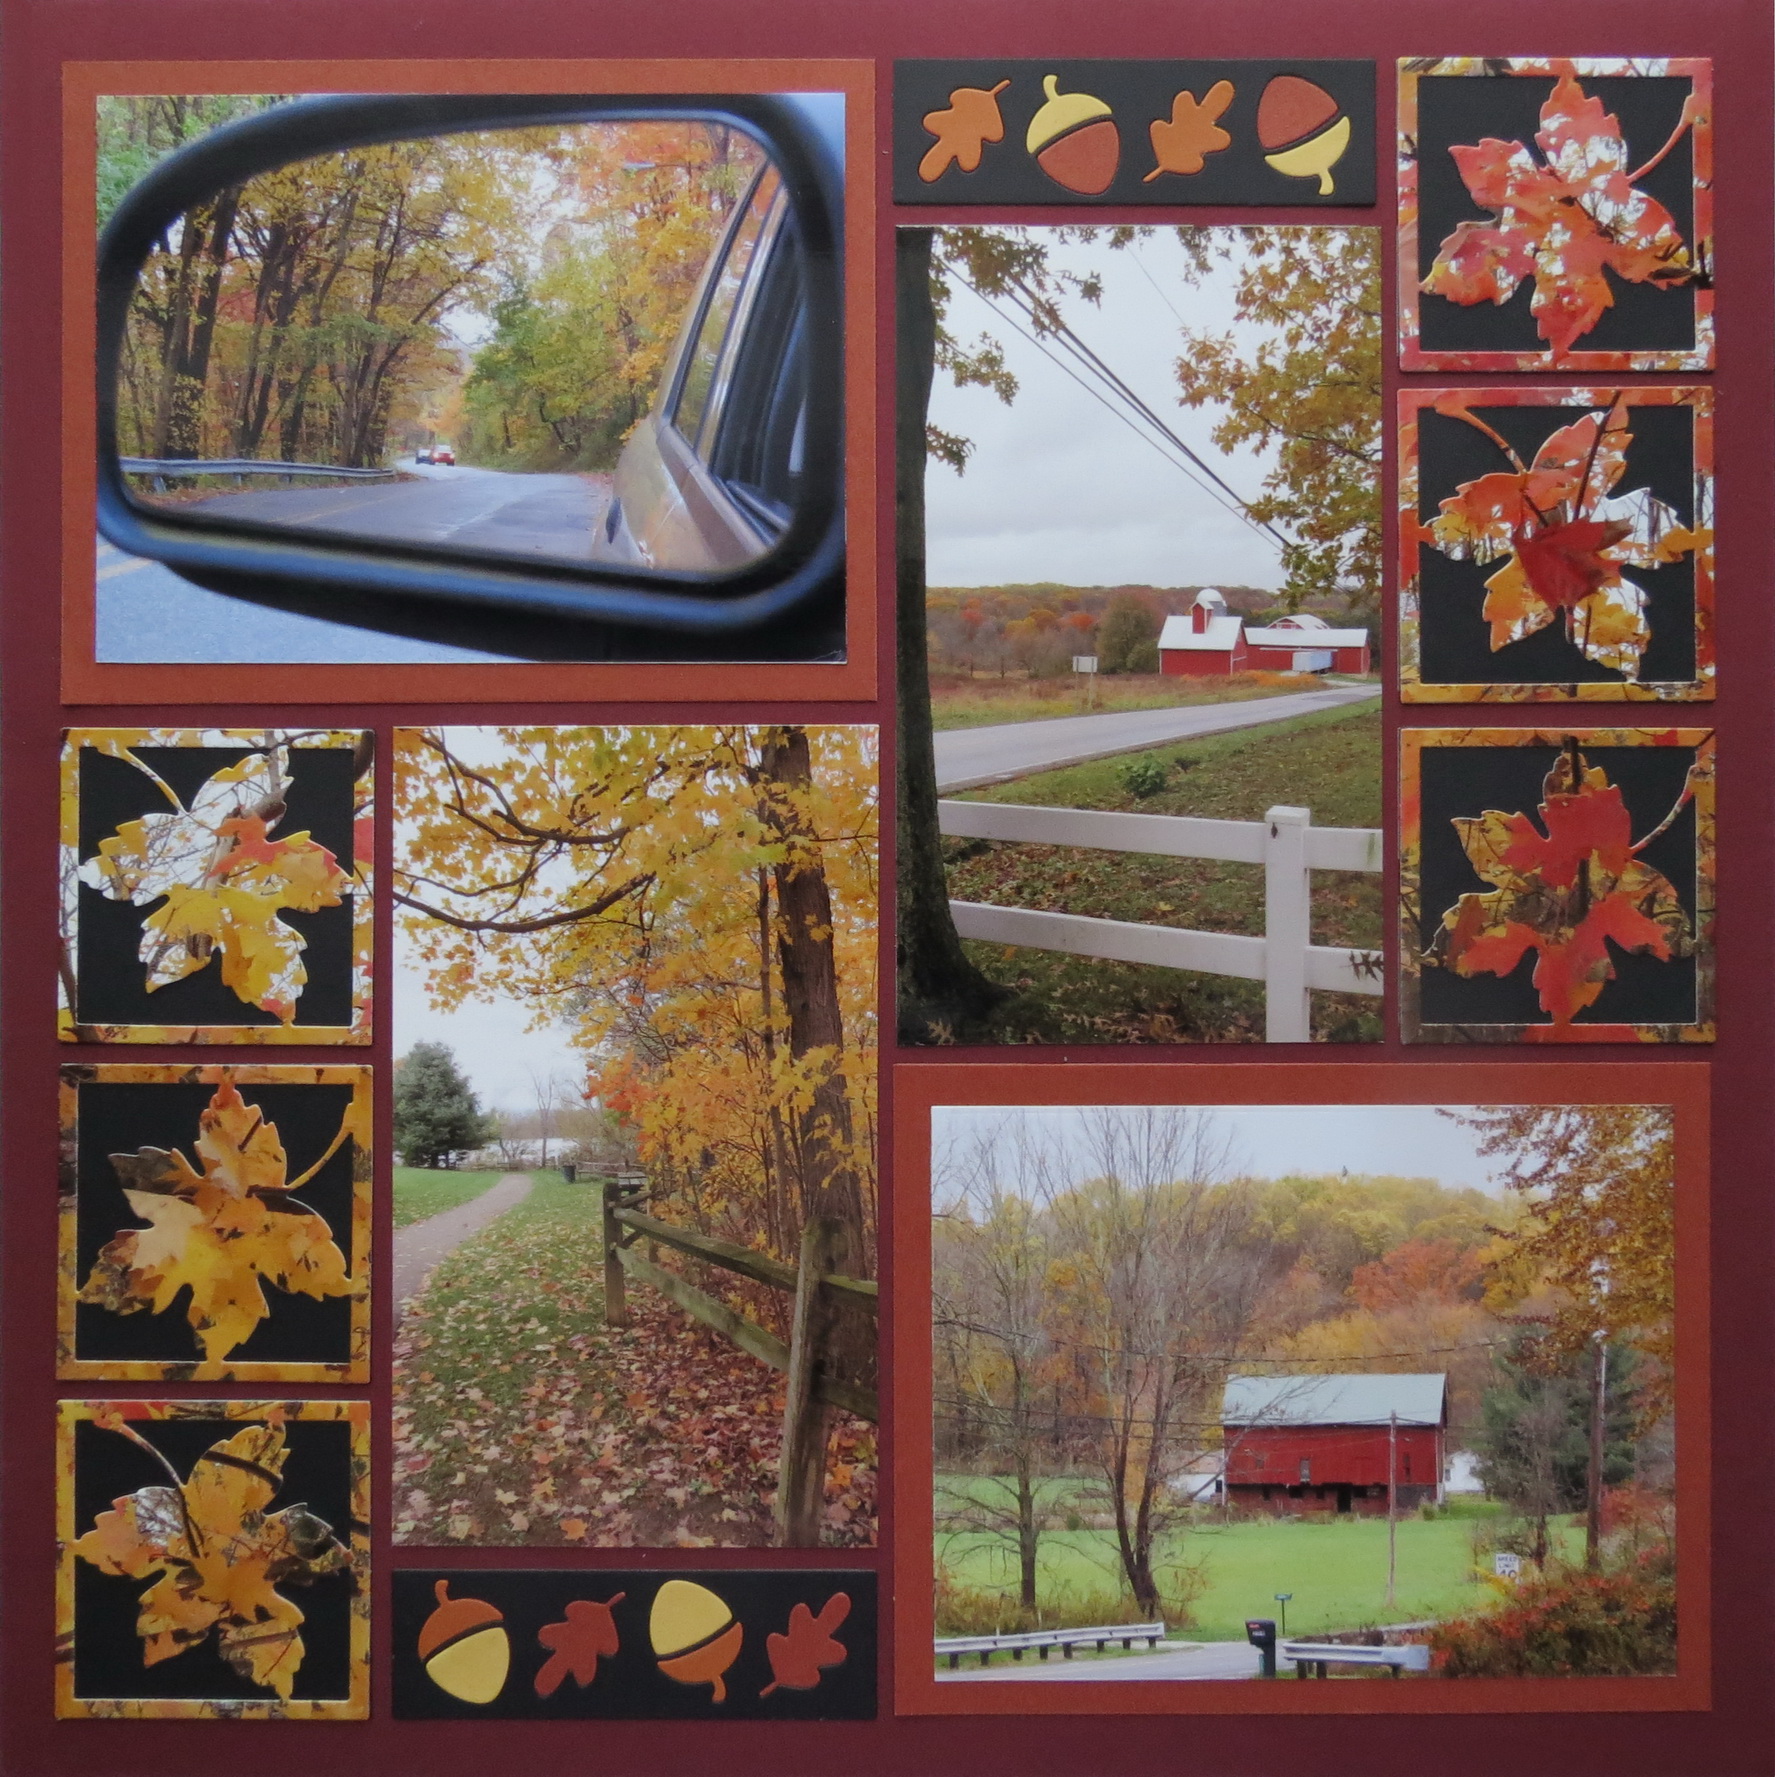
 Featuring the 2×2 Leaf Die and Acorn Borders Die Set
Four Tips for Composing Photos
Now, I’m not an expert at composing photos, but I do have a few tips I’ve used that you might find helpful.
Cropping a photo to fit the grid often changes the photo view we first captured. So how do we change that? What can we do to preserve the same view or feel or maybe even improve it? These tips may help.
Mosaic Moments Four Tips for Composing Photos
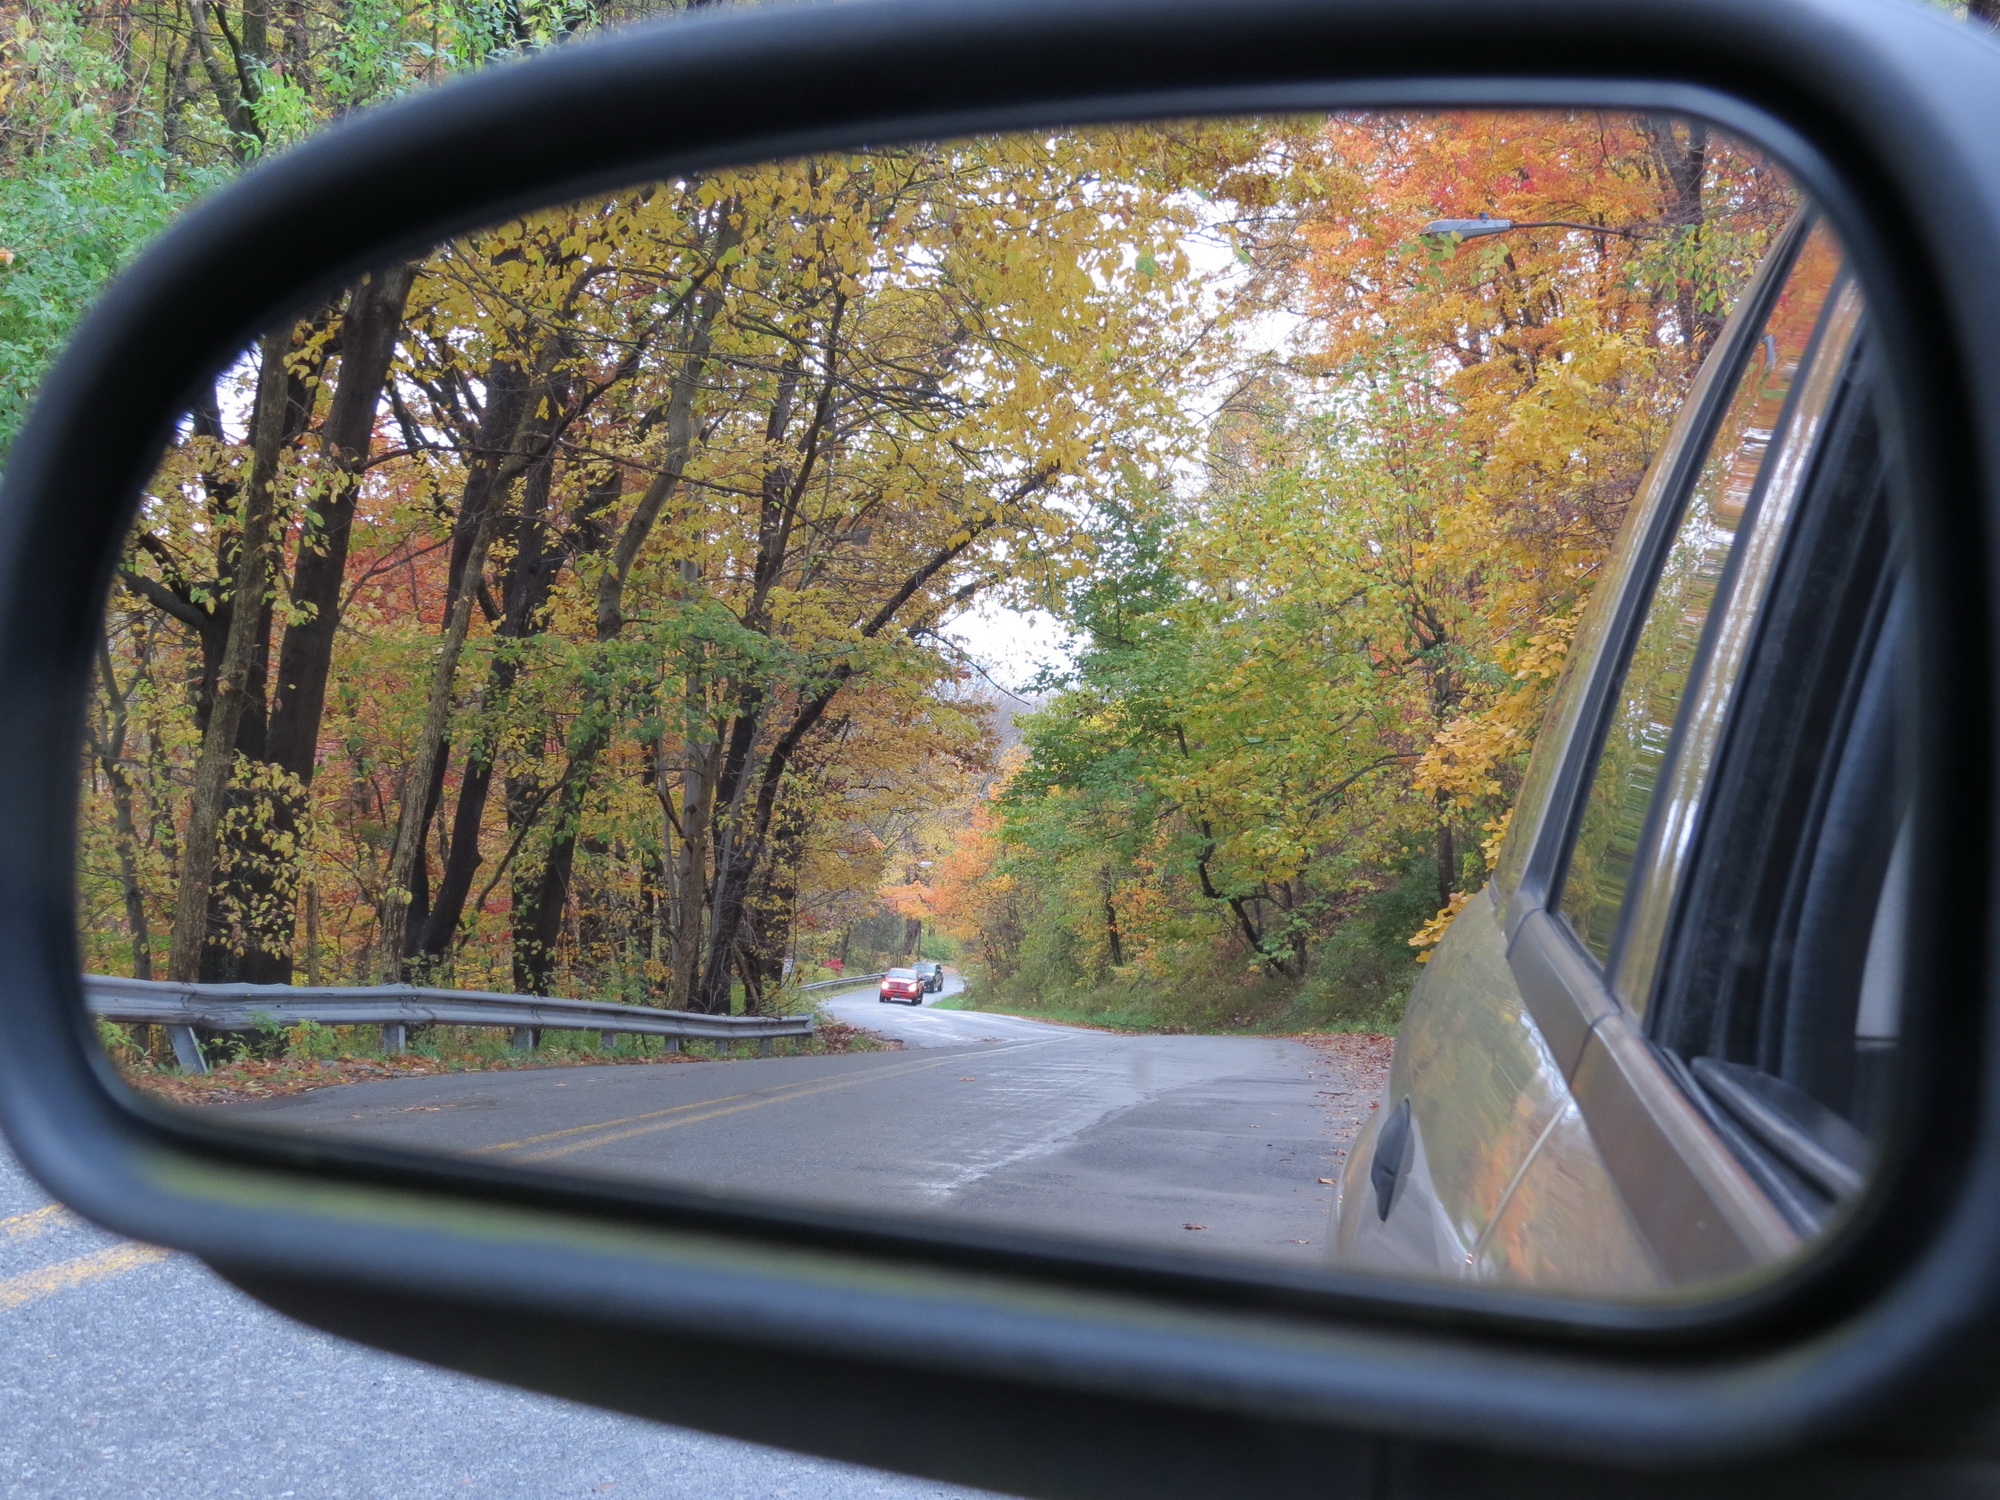
1. Take a Look Behind
On occasion I have been known to pull to the side of a backroad to get a picture, and I often find myself opening passenger windows and using my zoom. But, if the road isn’t busy, and I’m not creating a hazard I do get out and take pictures. On my last fall outing as I was waiting to get out, using my side mirror to check traffic I found I liked that view in the mirror. The mirror itself created a frame for the shot. I chose a pattern that would allow me to use most of that picture as it was, in this case, a layered size for a 4×5 spot. This reflection photo of the scene in reverse may be something you’d like to try, but remember, wherever you stop to take photos on your journeys you have to be safe and use common sense and be alert to your surroundings!
Mosaic Moments Photo Tips 1. Look Behind
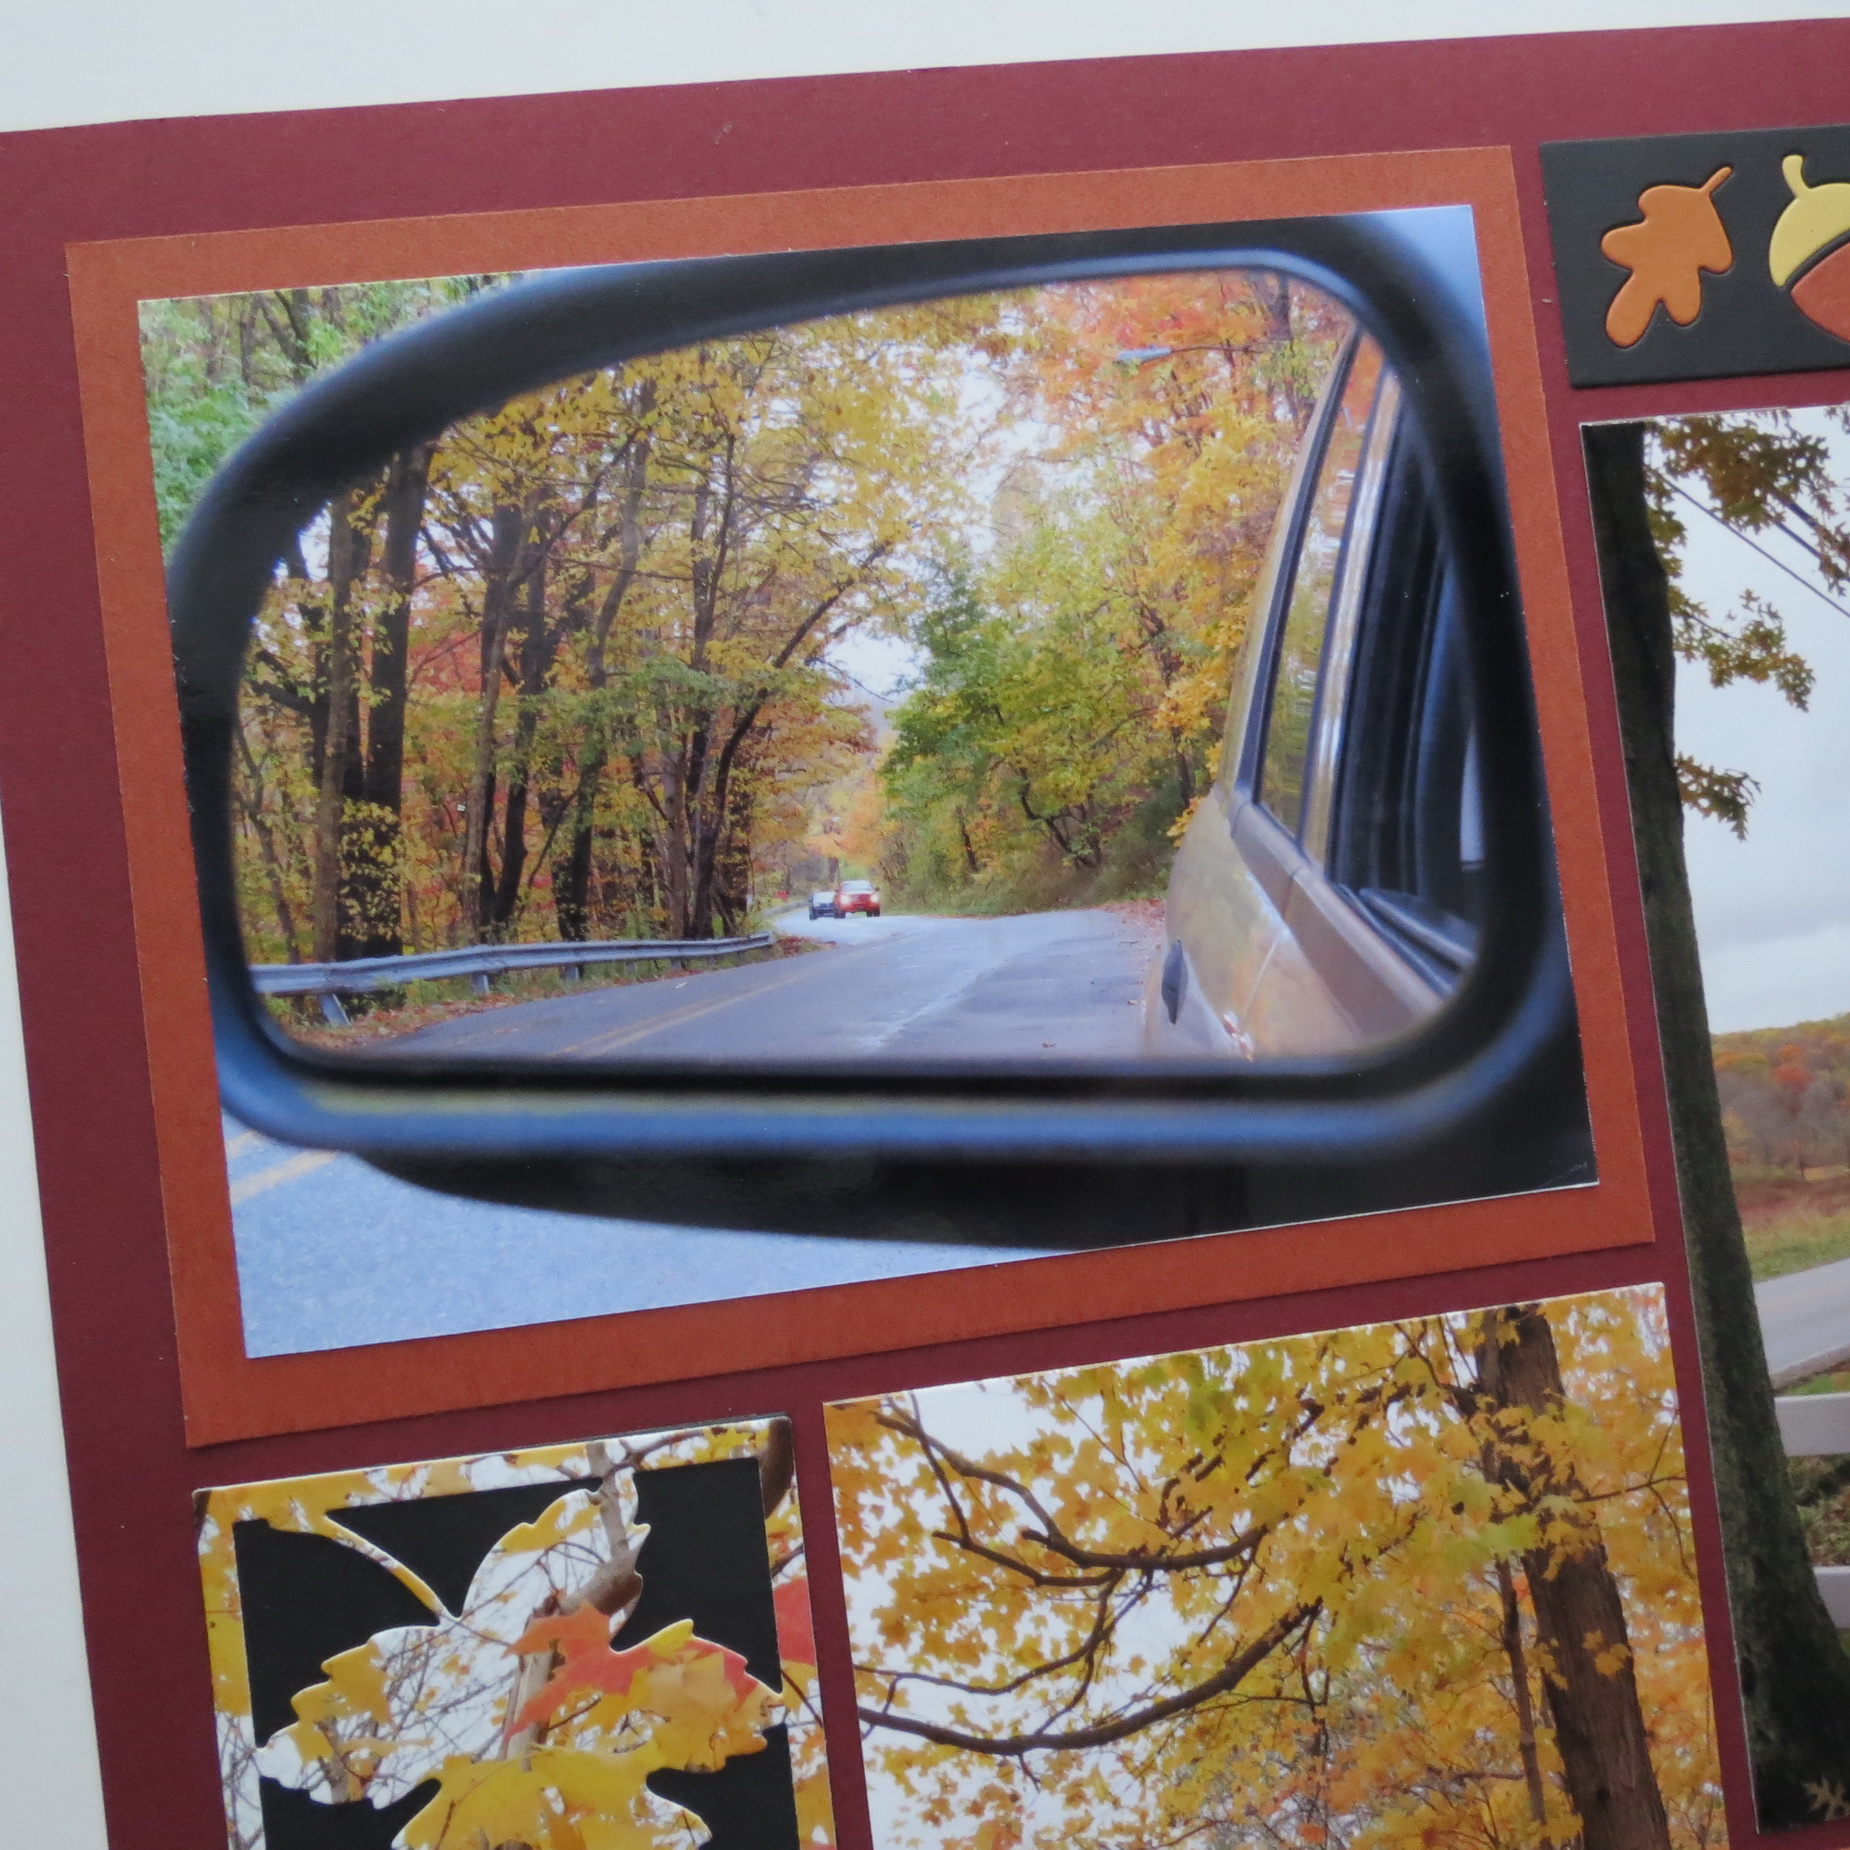
Mosaic Moments Photo Tips 1. Look Behind
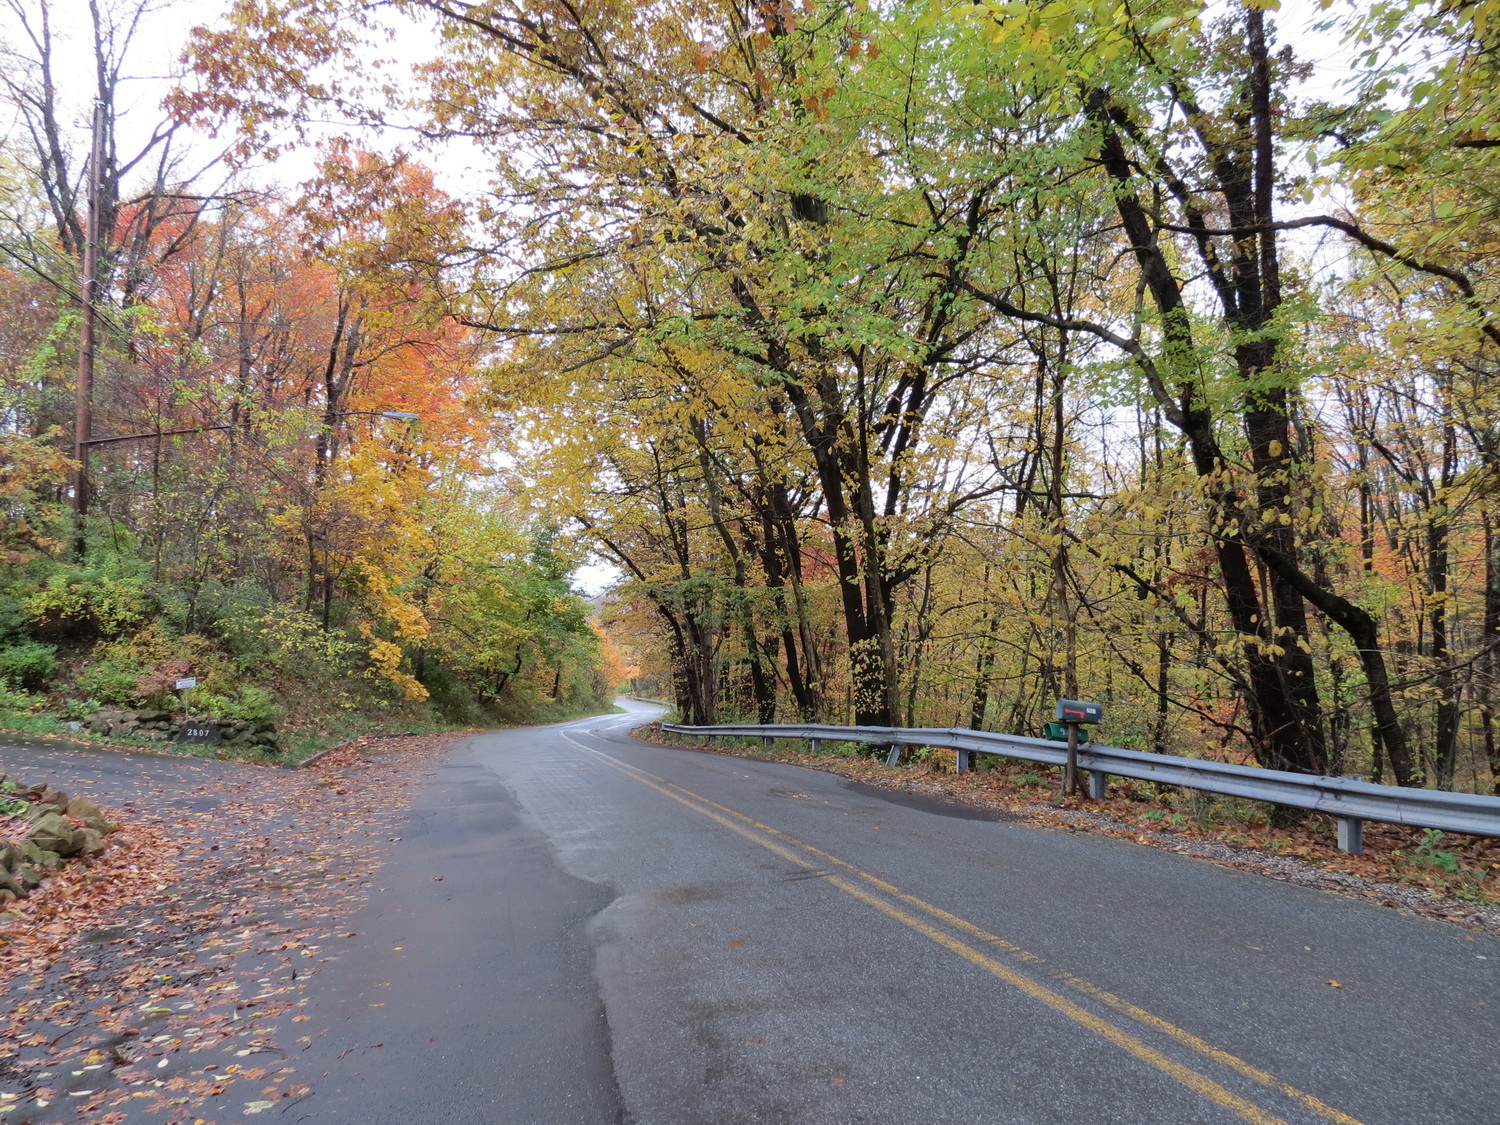
Mosaic Moments Four Tips for Composing Photos 1. Look Behind This is the original view
2. Framing Your Photo: The Set-Up
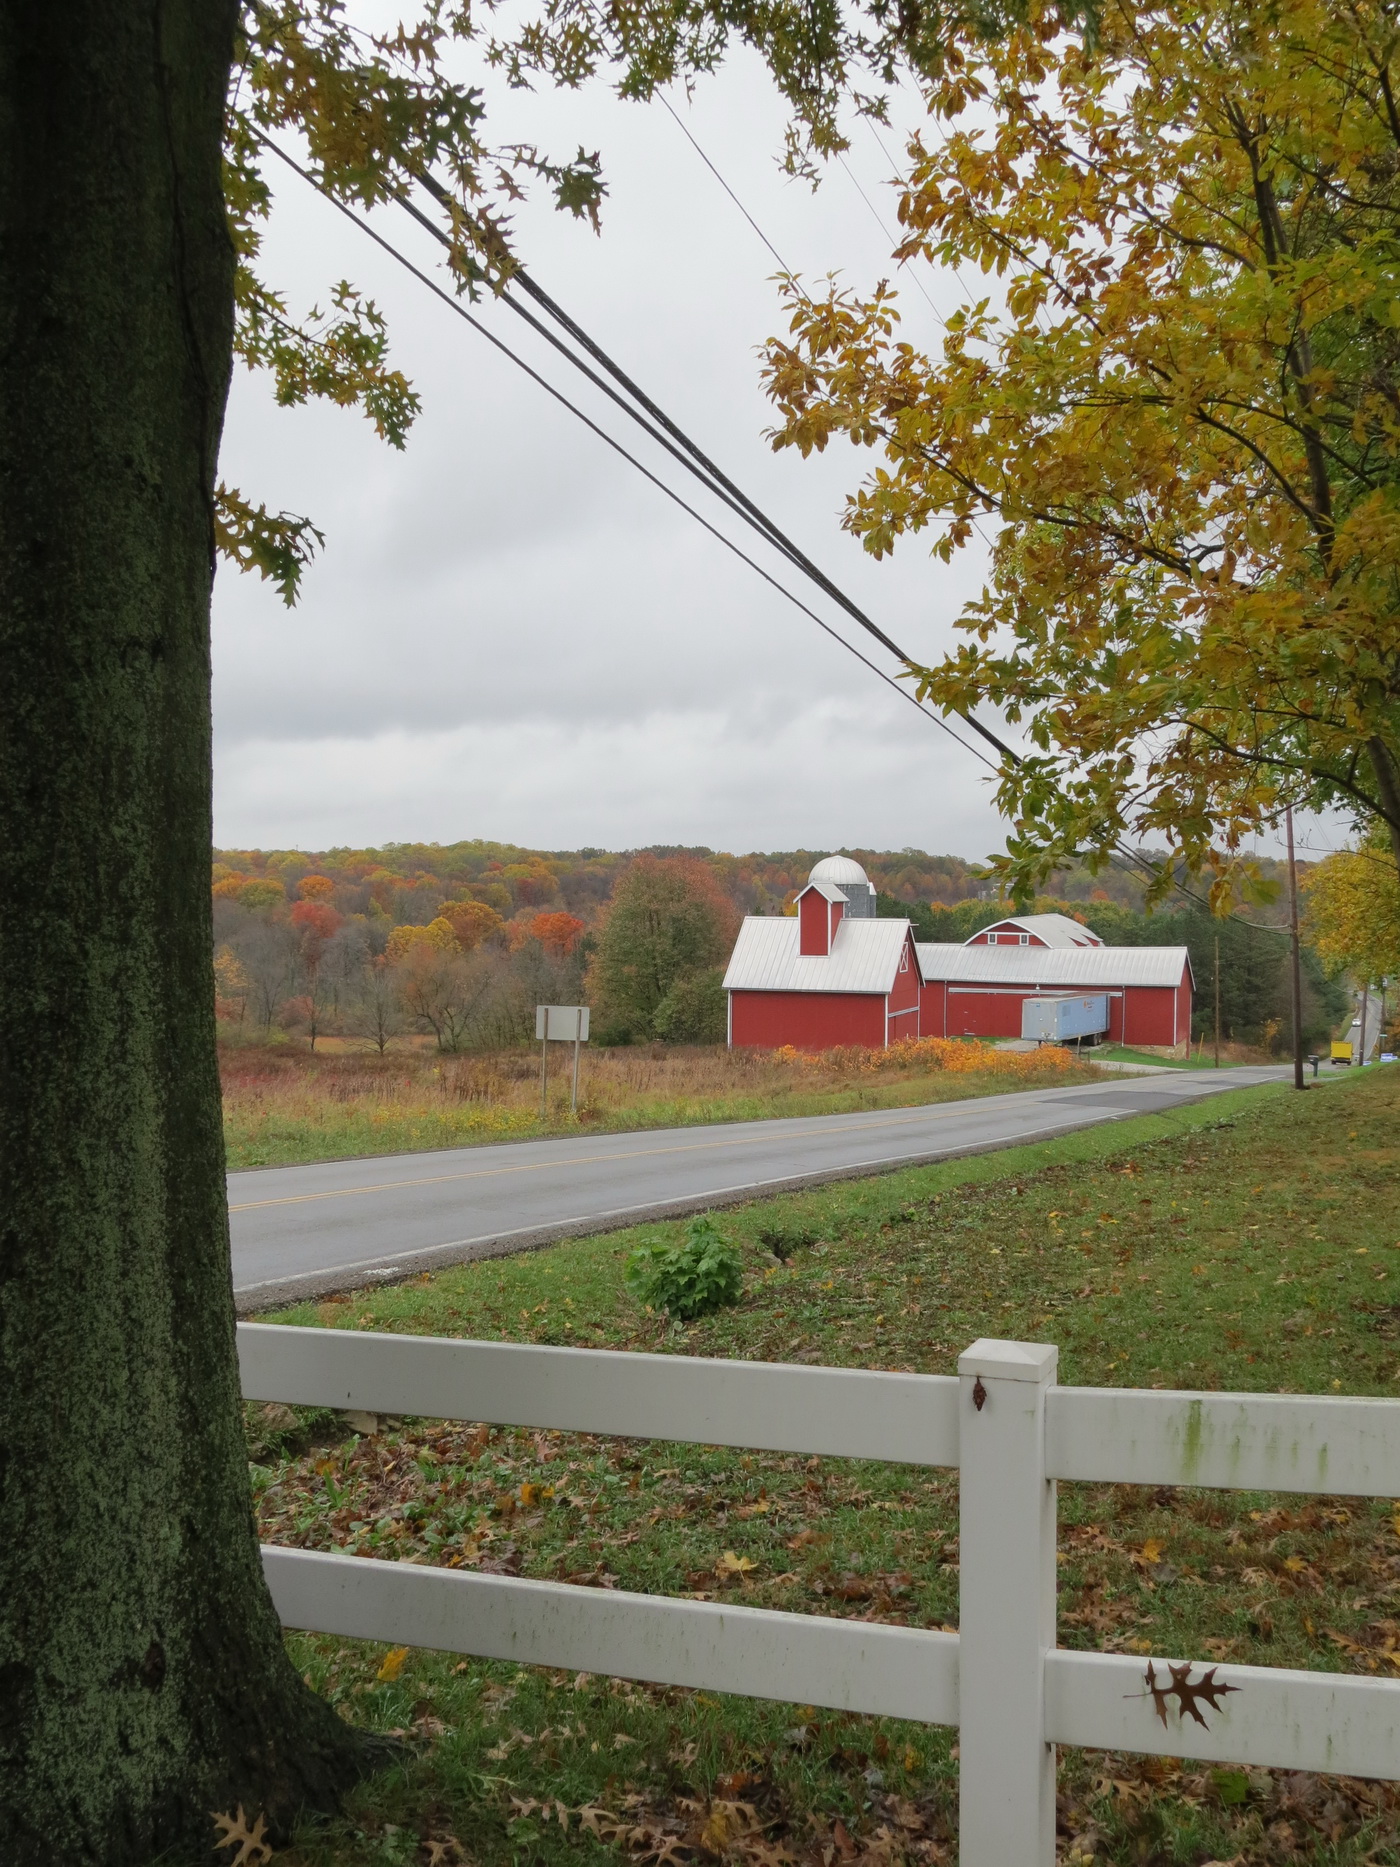
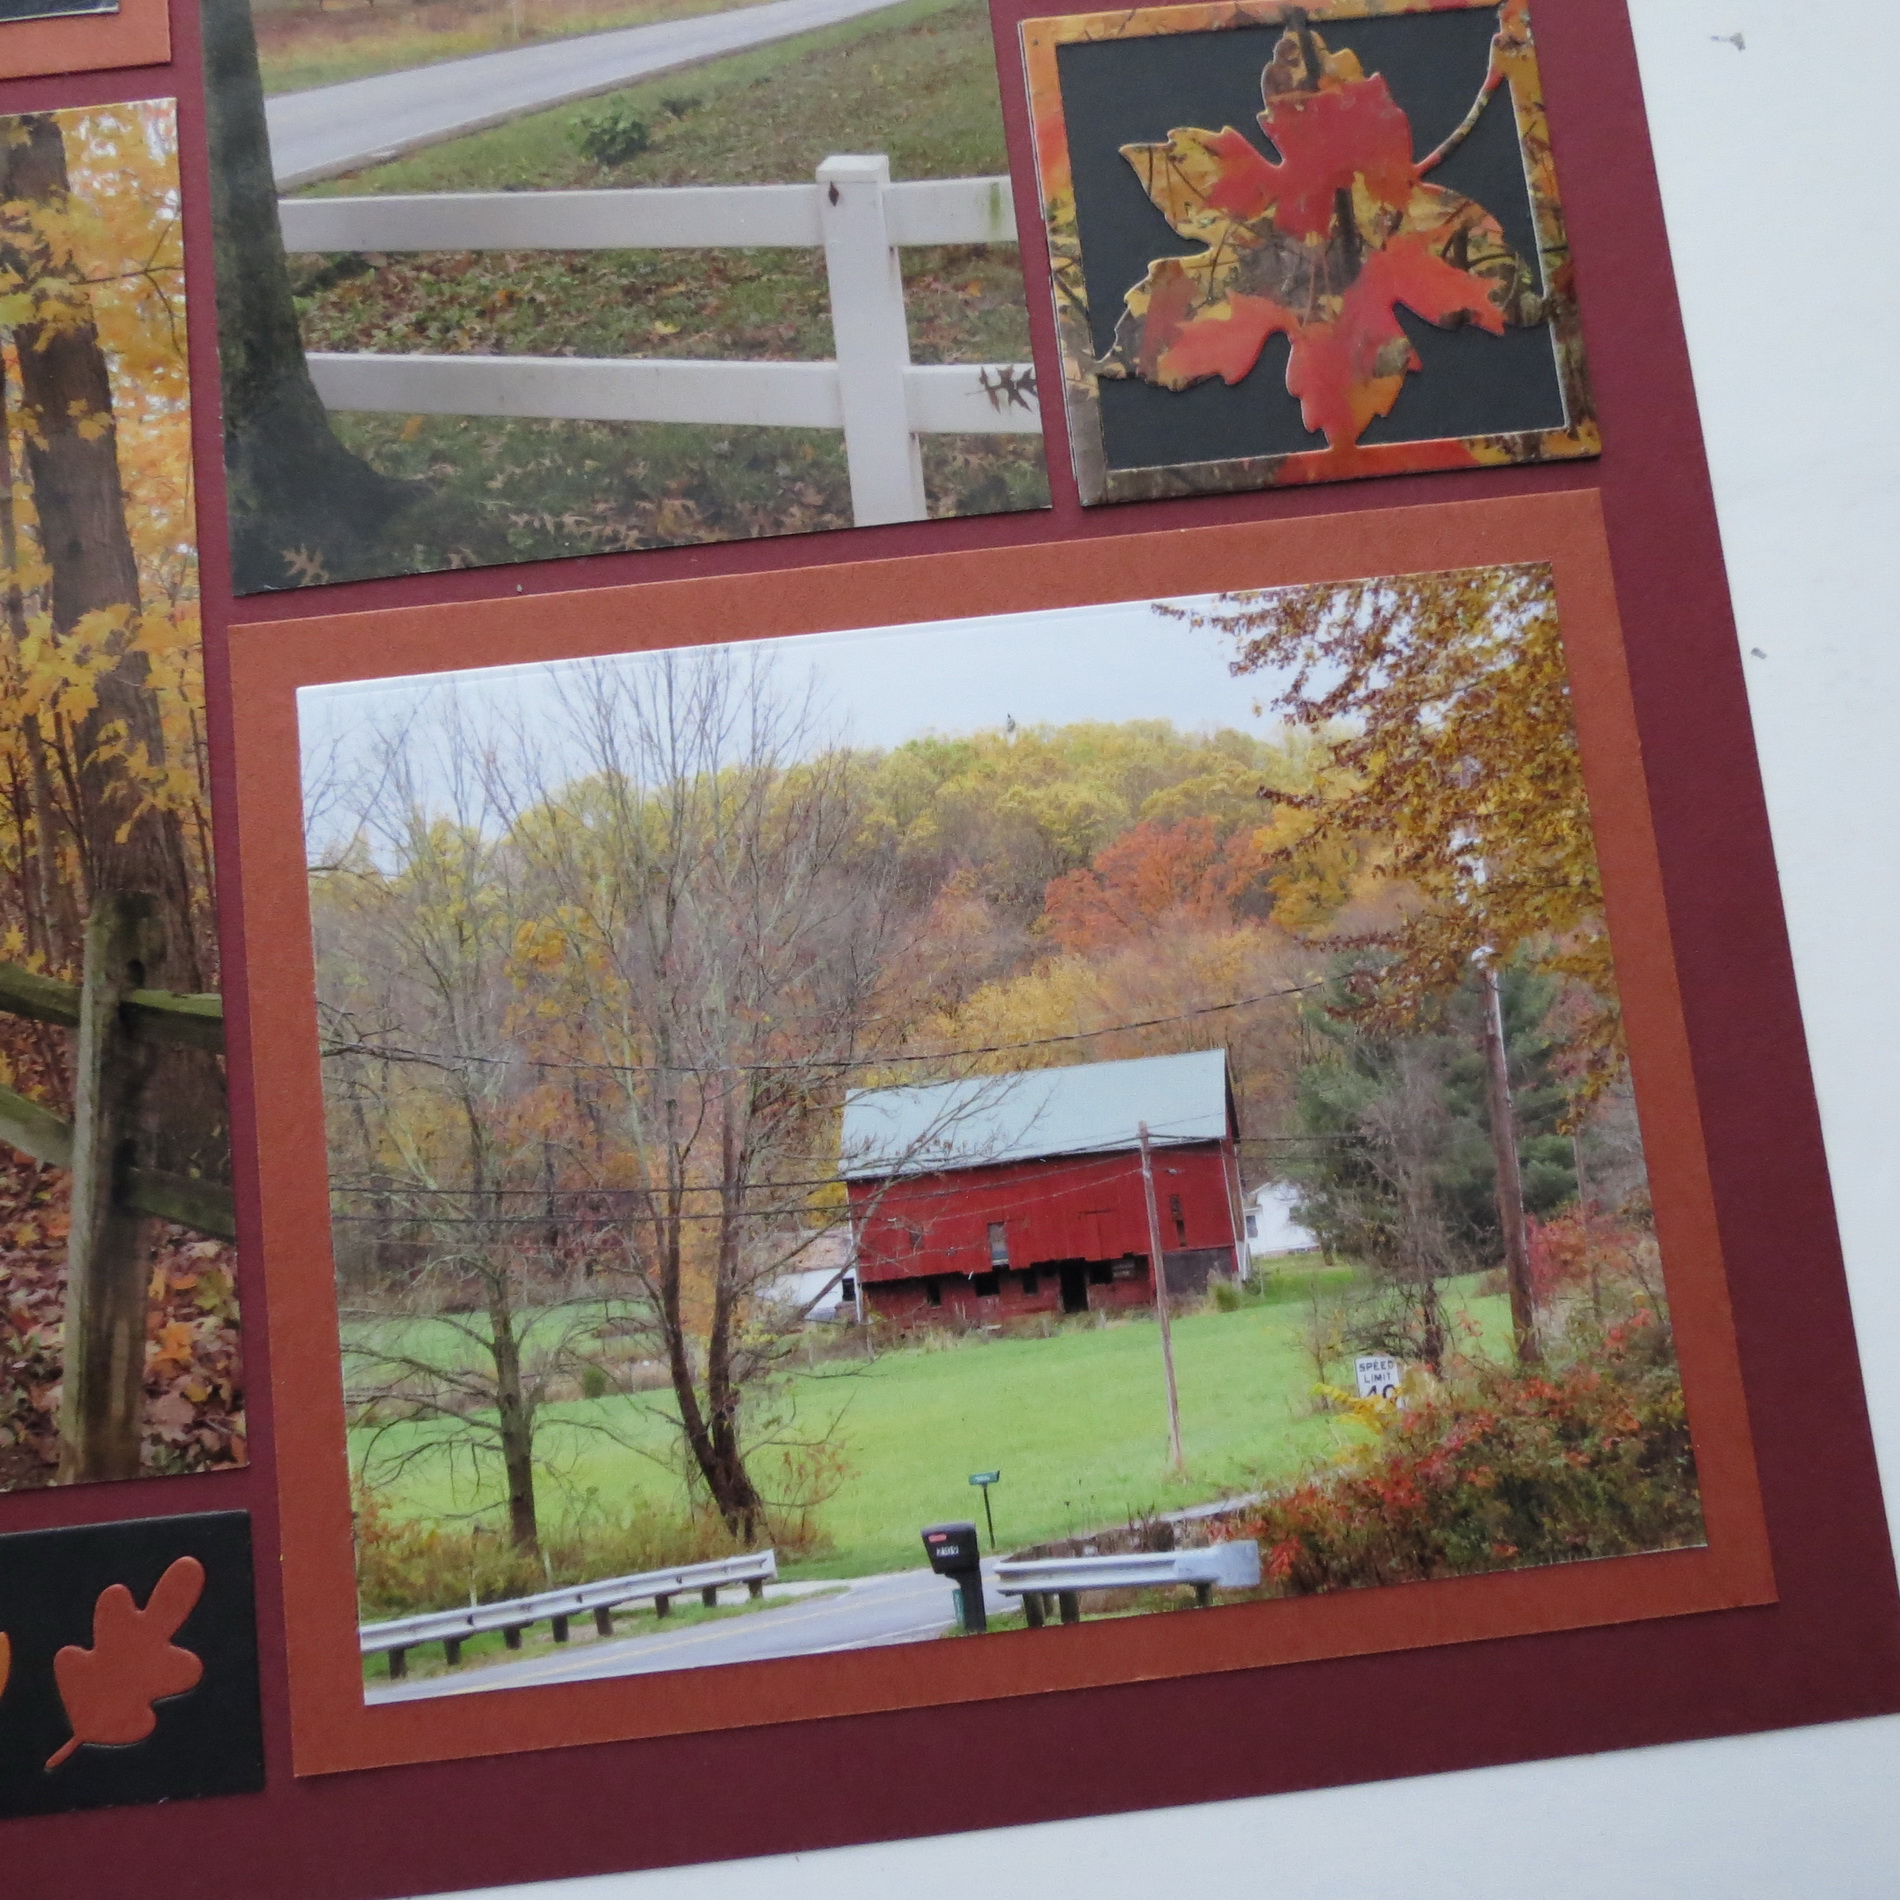
This set of photos shows two versions of the same focal point, a red barn with rolling hills and trees with changing colors in the scene. One is a vertical picture while the other is horizontal. It’s always a good idea to take several of your subjects in each position. The horizontal photo was taken at the roadside edge (safely from the driveway and not in the road) where the road also serves as a lead in to the picture, while the second, vertical picture includes a tree, a tree trunk and a white fence.

Mosaic Moments Four Tips for Composing Photos Photo Tips 2. Framing Your Photo: the Set-up
The horizontal gives you a sense of wideness to the whole view before you and the road takes you in and out and on to the hills beyond.
Mosaic Moments Four Tips for Composing Photos 2. The Set-up
The vertical has a cozy framed view with the tree trunk, fence and overhead branches with leaves. The road and even the powerlines above move your eye from the left edge to the focal point red barn.
When using this vertical photo I needed to trim some but was able to retain a portion of the tree to maintain that natural frame.
Mosaic Moments Four Tips for Composing Photos Photo TIp 2.
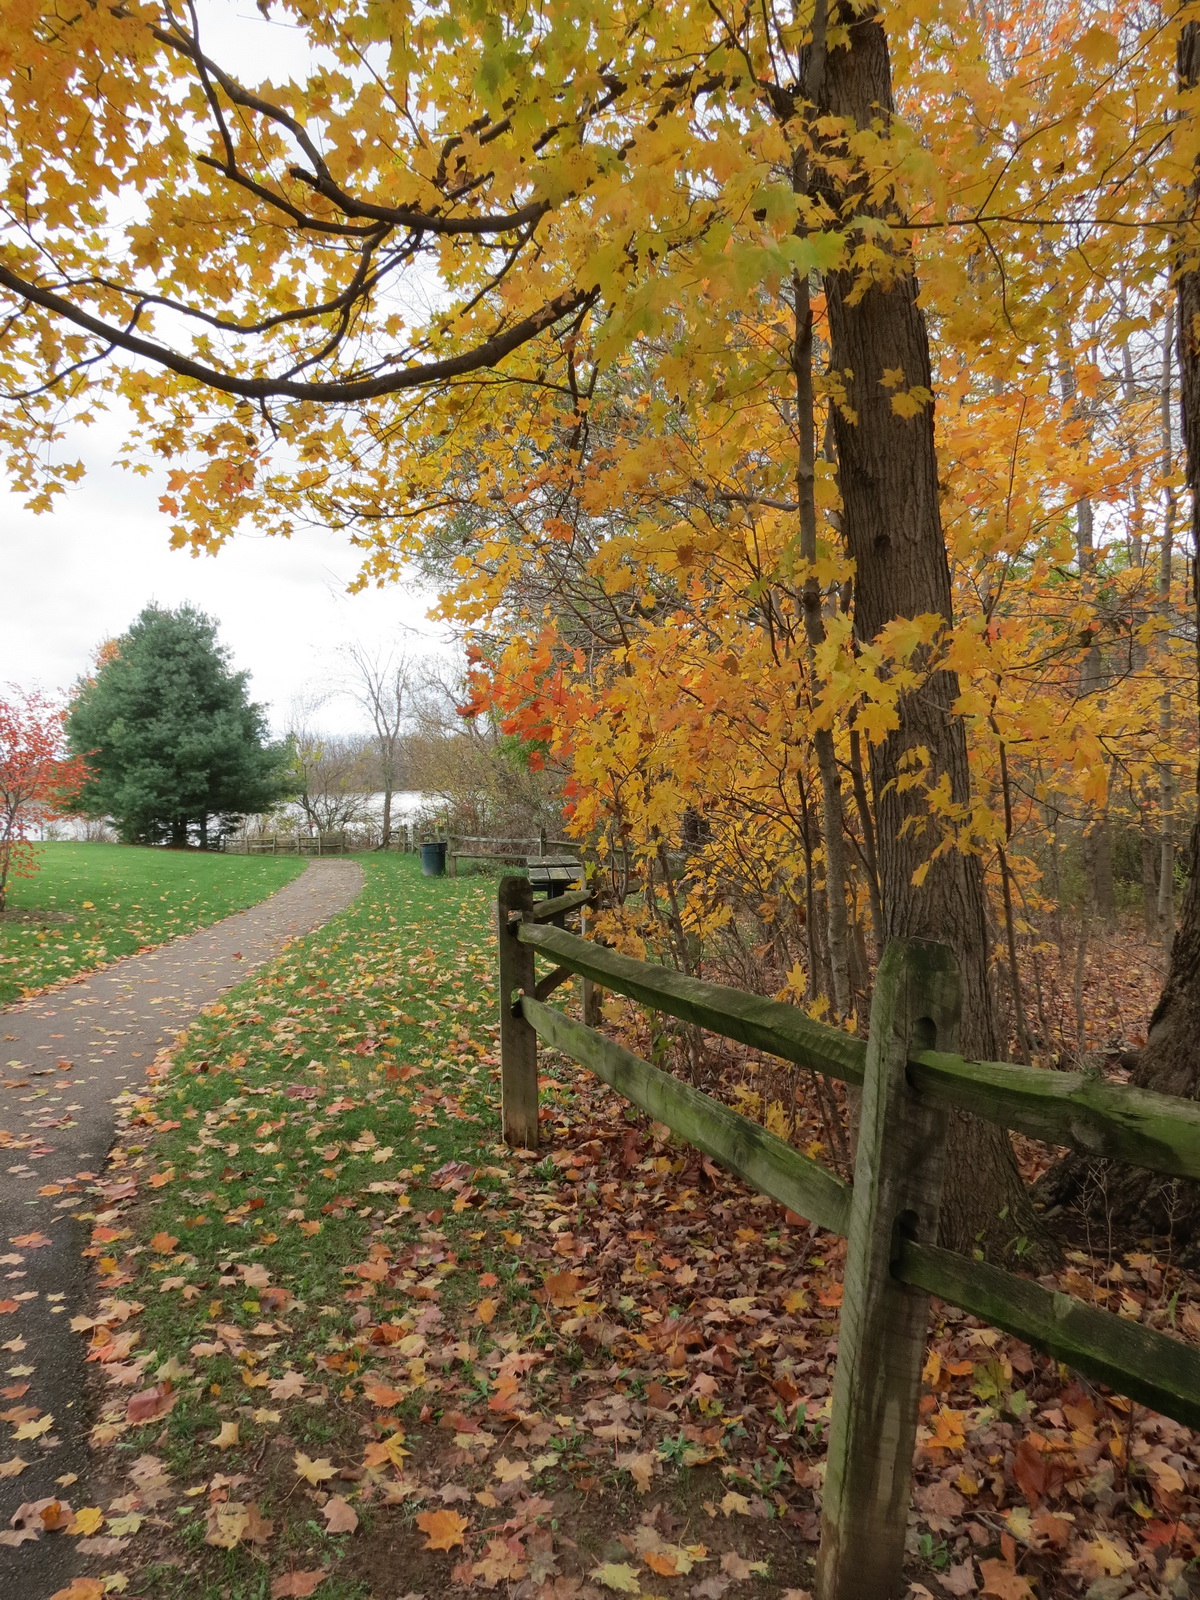
3. Using a Lead In
This photo actually has a double lead in, along the path on the left and a portion of the fence rail on the right. My focus in this one is the color of the fall foliage, but your eye is carried further to the lake beyond. This photo probably had the most cut from it to fit to the grid. In taking a centering approach to cropping this photo it allowed me to keep a good portion of the evergreen in the long view and only a small portion of the colorful forest to be lost. In the cropping process, the tree on the right now becomes an element to frame my view.
Mosaic Moments Four Tips for Composing Photos 3. Using Lead-Ins
Mosaic Moments Four Tips for Composing Photos 3. Lead Ins
Mosaic Moments Four Tips for Composing Photos 3. Using Lead-Ins
4. The Natural Frame
…letting the scene before you frame your focal point
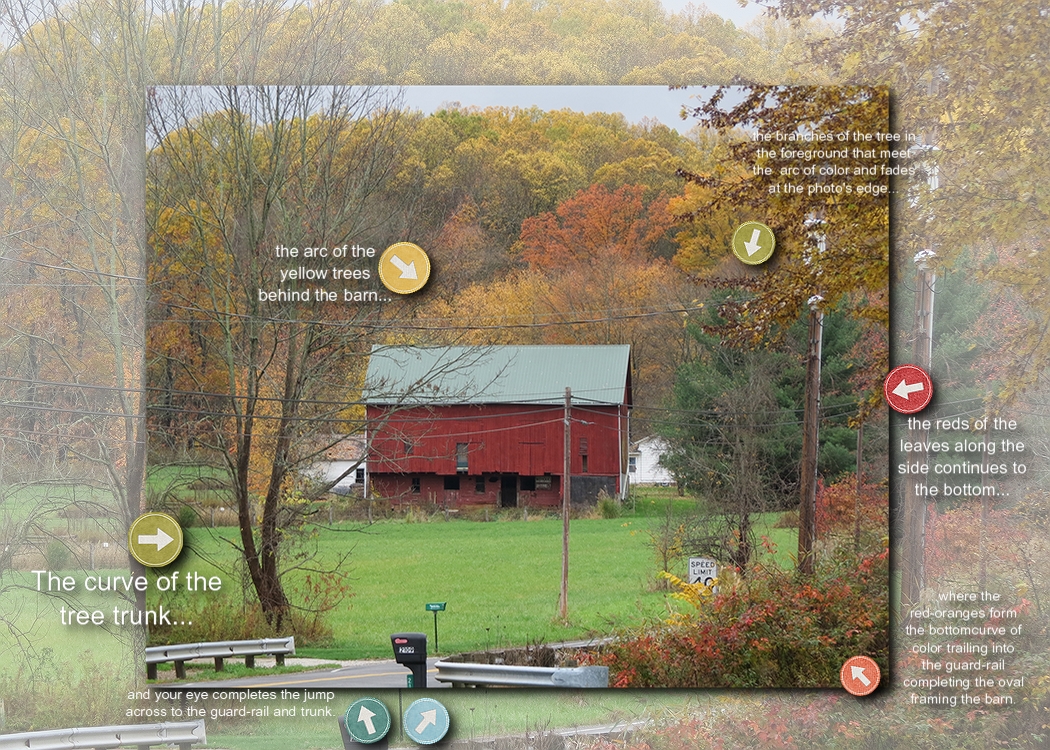
This final composing tip is taking a significant portion of the photo away to fit the grid. As I looked at it deciding what I wanted to keep I noticed a natural oval that seemed to highlight my focal barn. Each of the elements that moved my eye around the view I wanted to keep. I’ve made a graphic to point out each of these elements to make it a bit easier to see what I saw, although if you look at the original first, I think you’ll see them too.

Mosaic Moments Four Tips for Composing Photos 4. The Natural Frame
Beginning with the curved tree trunk on the left, to the semi-circle of yellow trees behind the barn beginning at the roof edge, next, the darker branches of the tree in the forefront along the side with the red leaves and brush along the bottom and the guard rails on either side of the street, I see a natural frame occur. I made sure that as I trimmed from the left and the bottom those elements remained, I sacrificed some of the sky to keep those guard rails a part of the picture. You may think of guard rails as unsightly, but in this photo, they serve their purpose well.
Mosaic Moments Four Tips for Composing Photos 4. The Natural Frame
Mosaic Moments Four Tips for Composing Photos 4. The Natural Frame
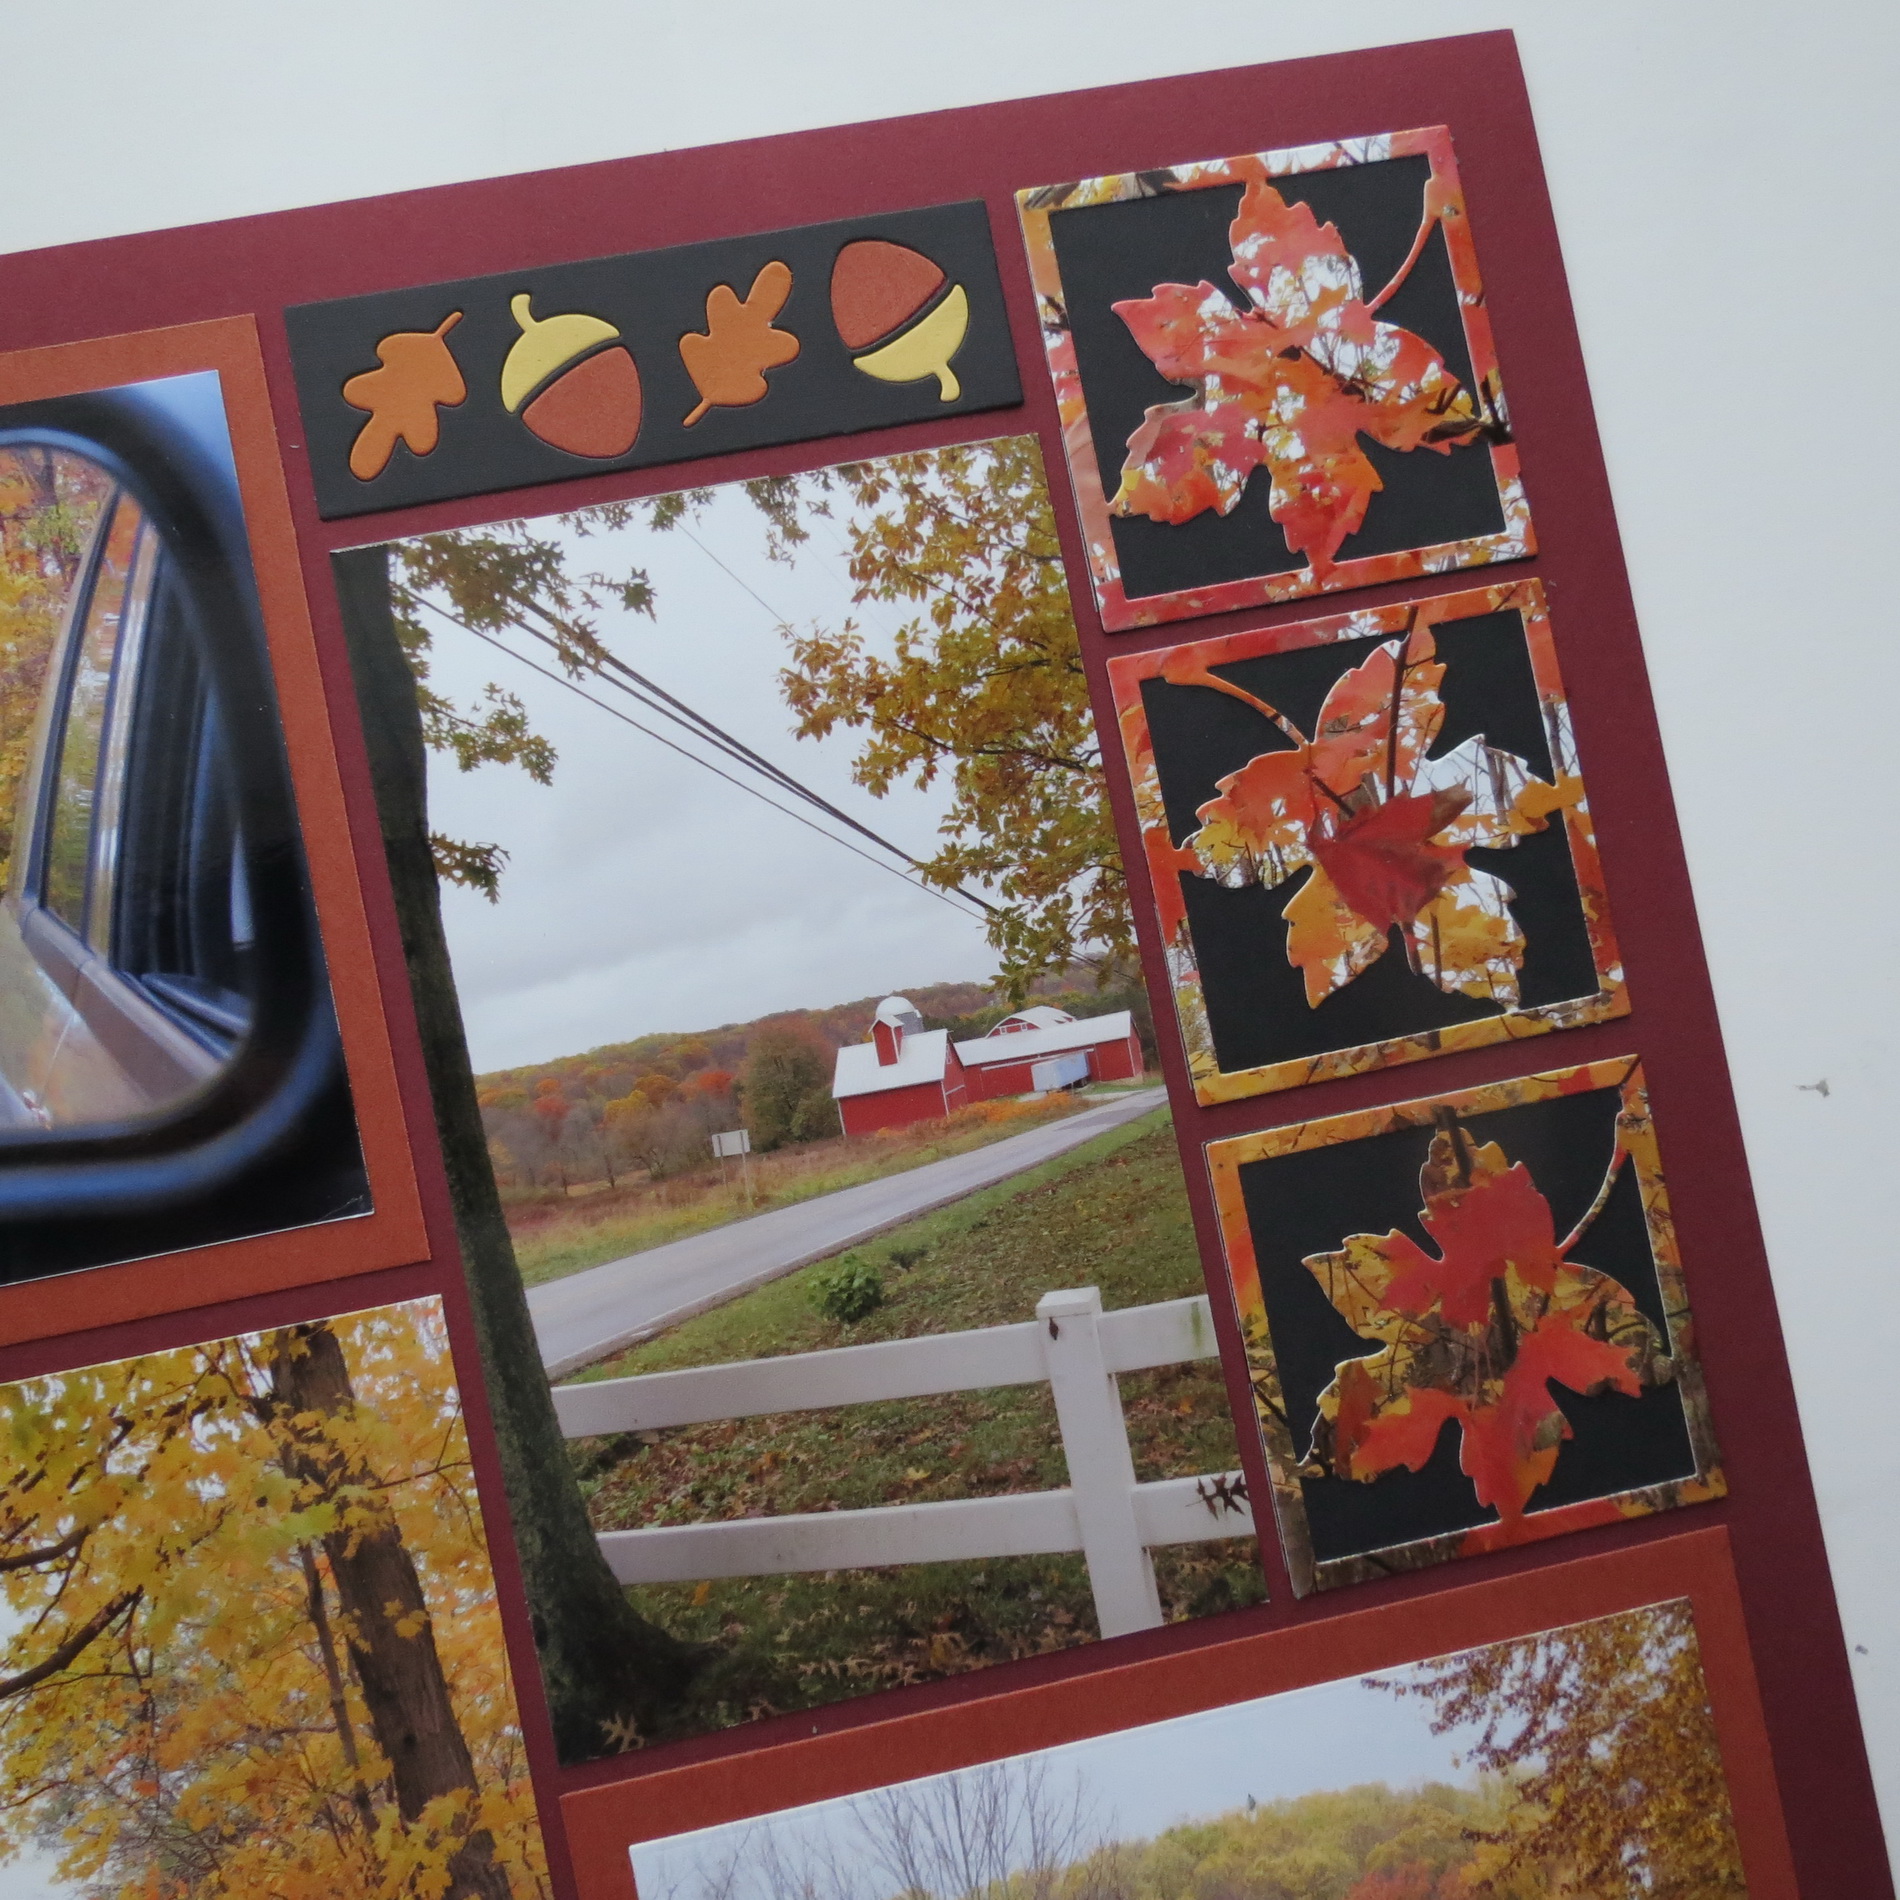
Adding Design with Dies
The Pattern for this layout is #318 a columns pattern and is presented on our 12×12 Mosaic Moments Maroon Grid Paper. Additional colors of cardstock to complement the fall theme are also used.

Mosaic Moments Pattern #318
Mosaic Moments Maroon Grid and Sunflower Die Sets
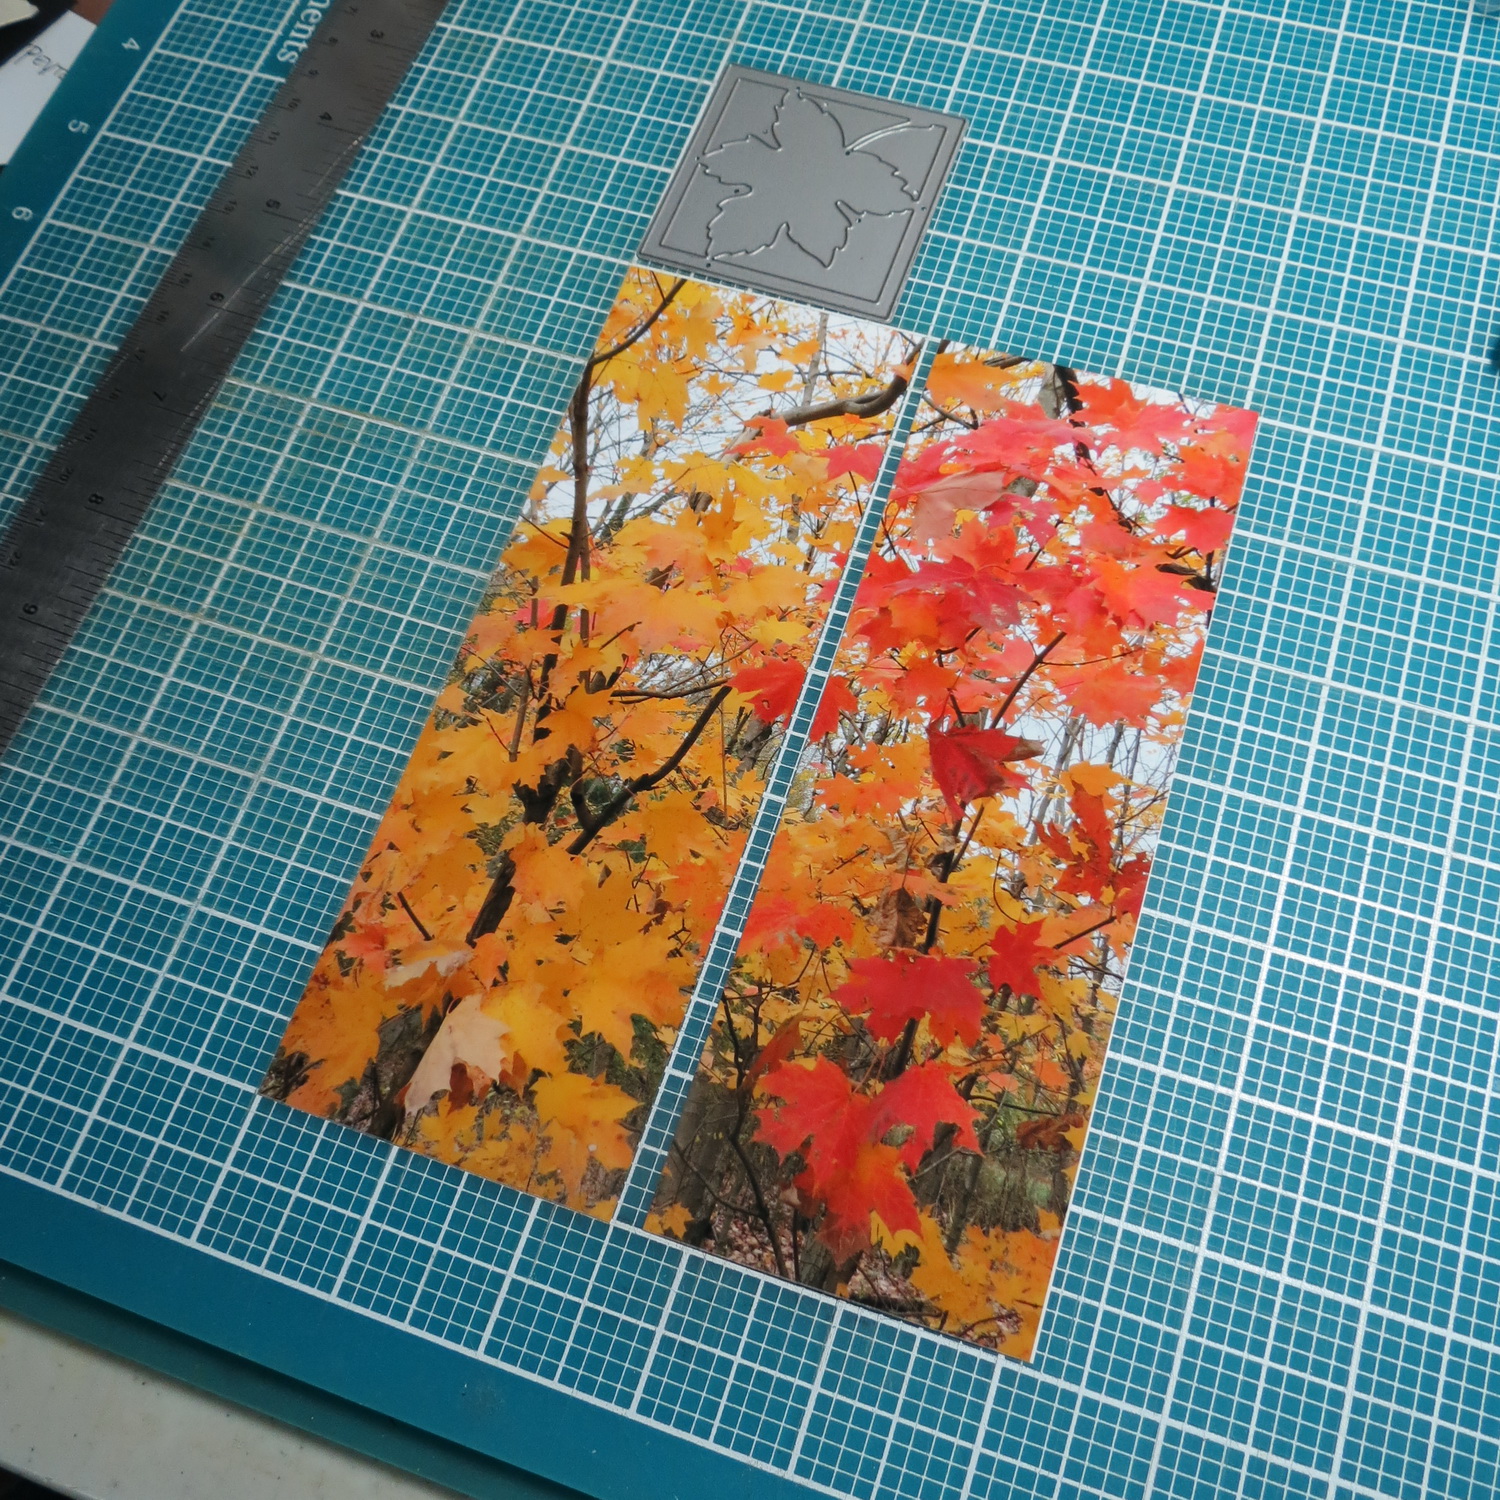
Featuring the 2×2 Leaf Die
There are many ways that this leaf die can be used. In a past post I showed you multiple possibilities for a fall themed use and you can read more about those ideas here: “A Twelve Step Program for Fall Fun…with the Mosaic Moments Leaf Die” I’m trying another way that may or may not appeal to you, but it does add color and a unique look to the page.

“A Twelve Step Program for Fall Fun…with the Mosaic Moments Leaf Die”
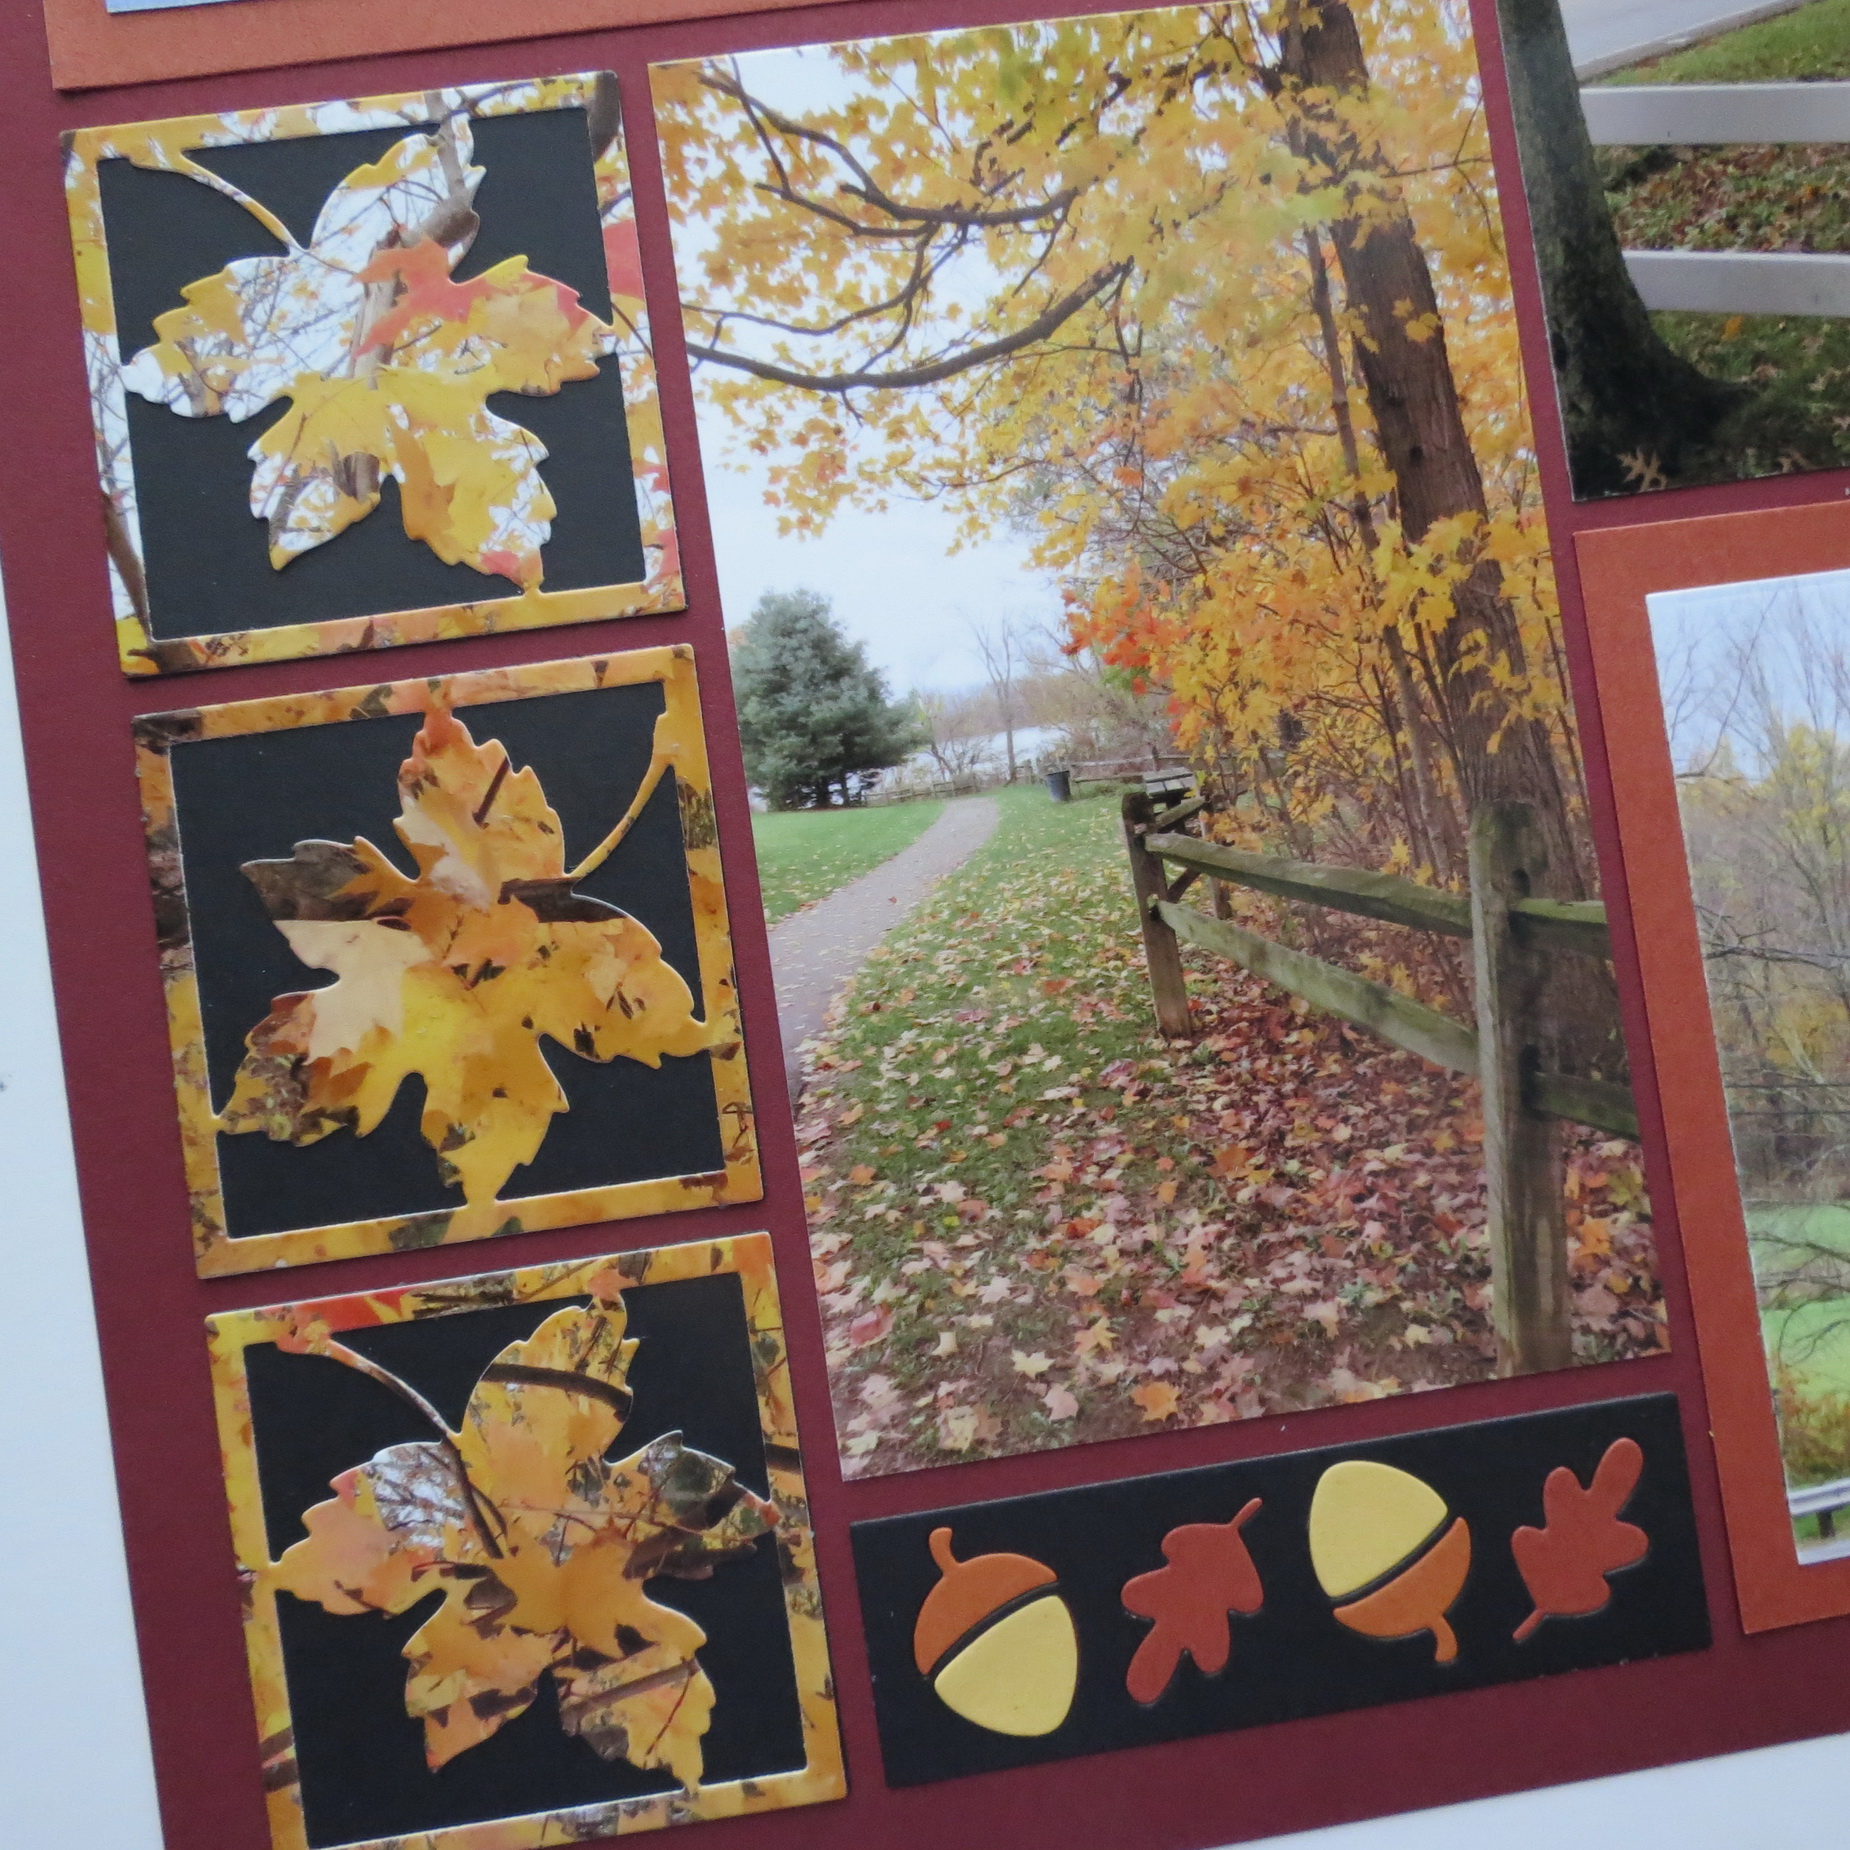
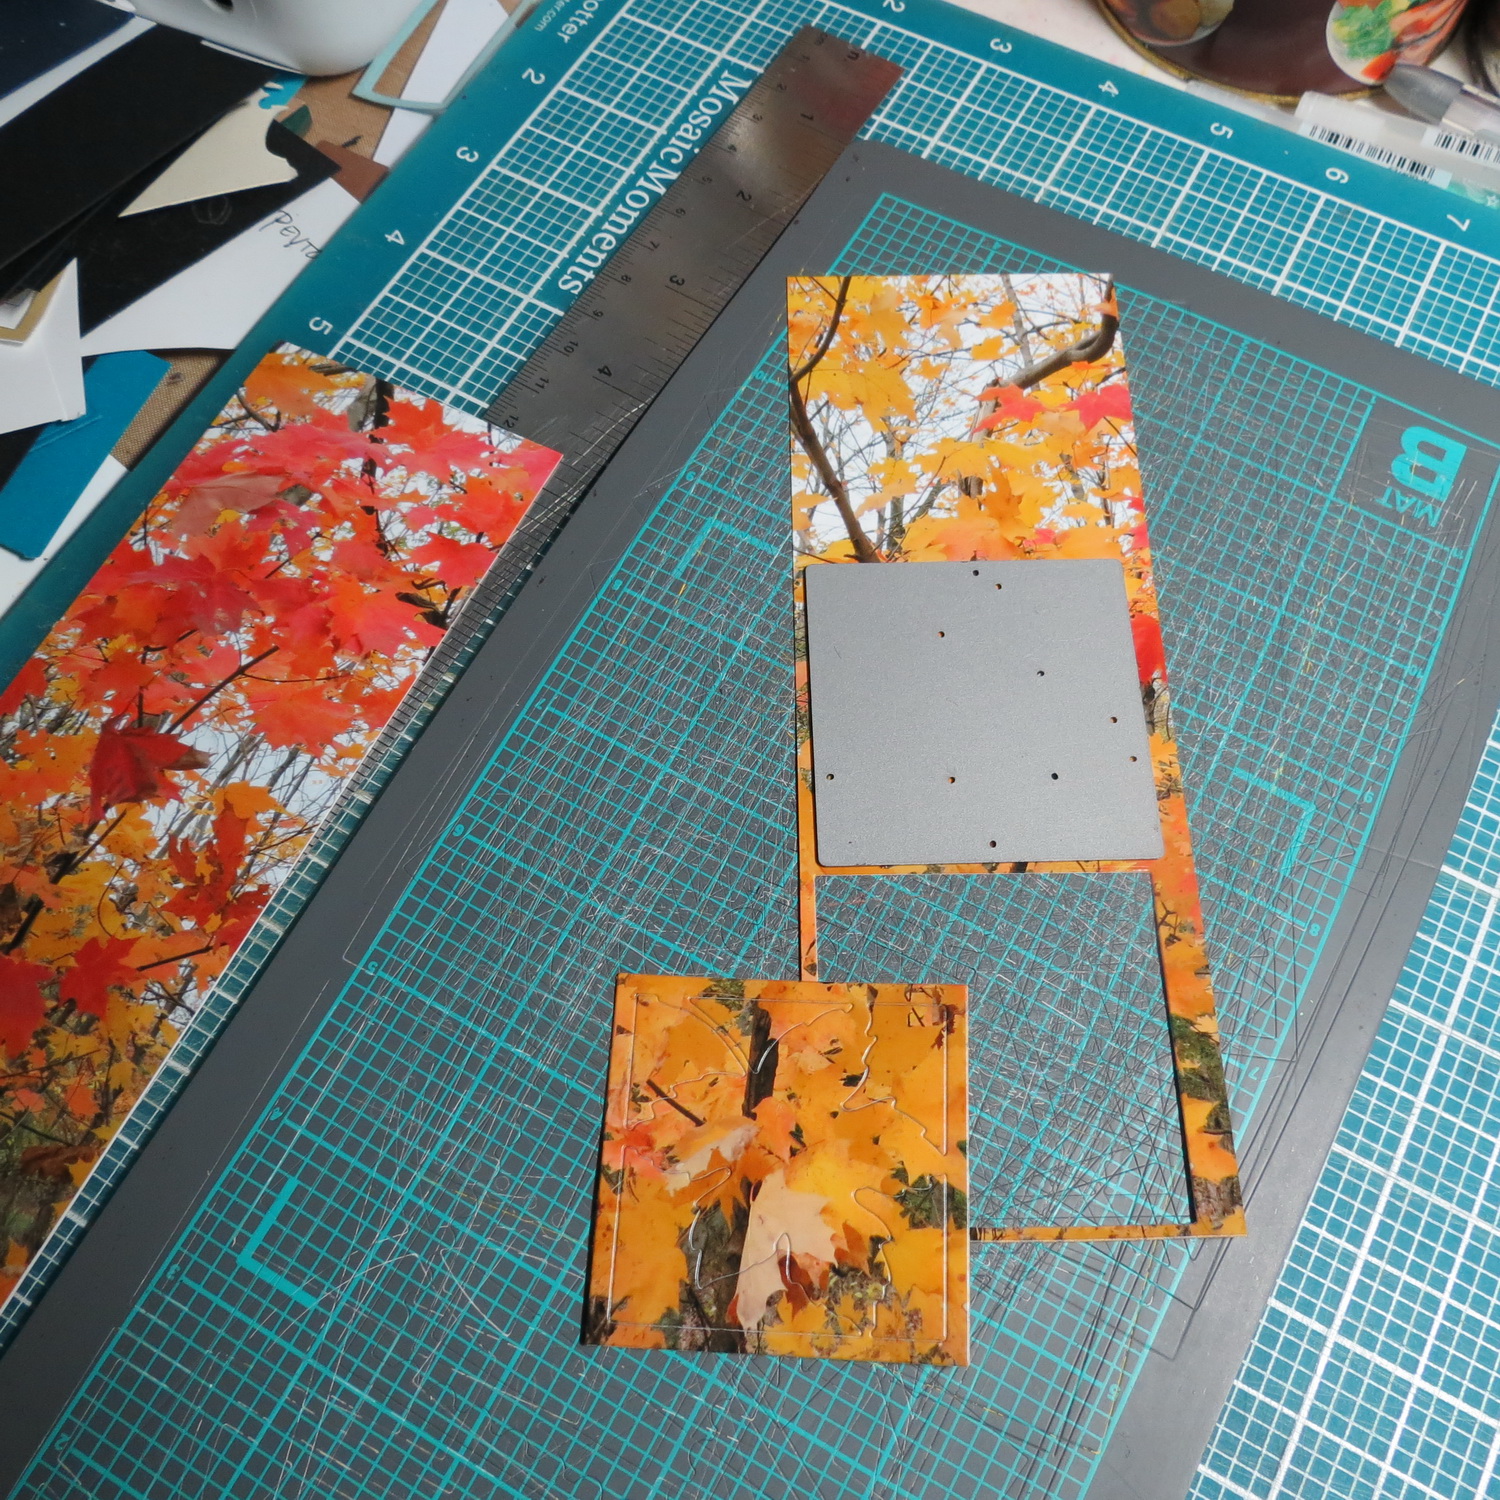
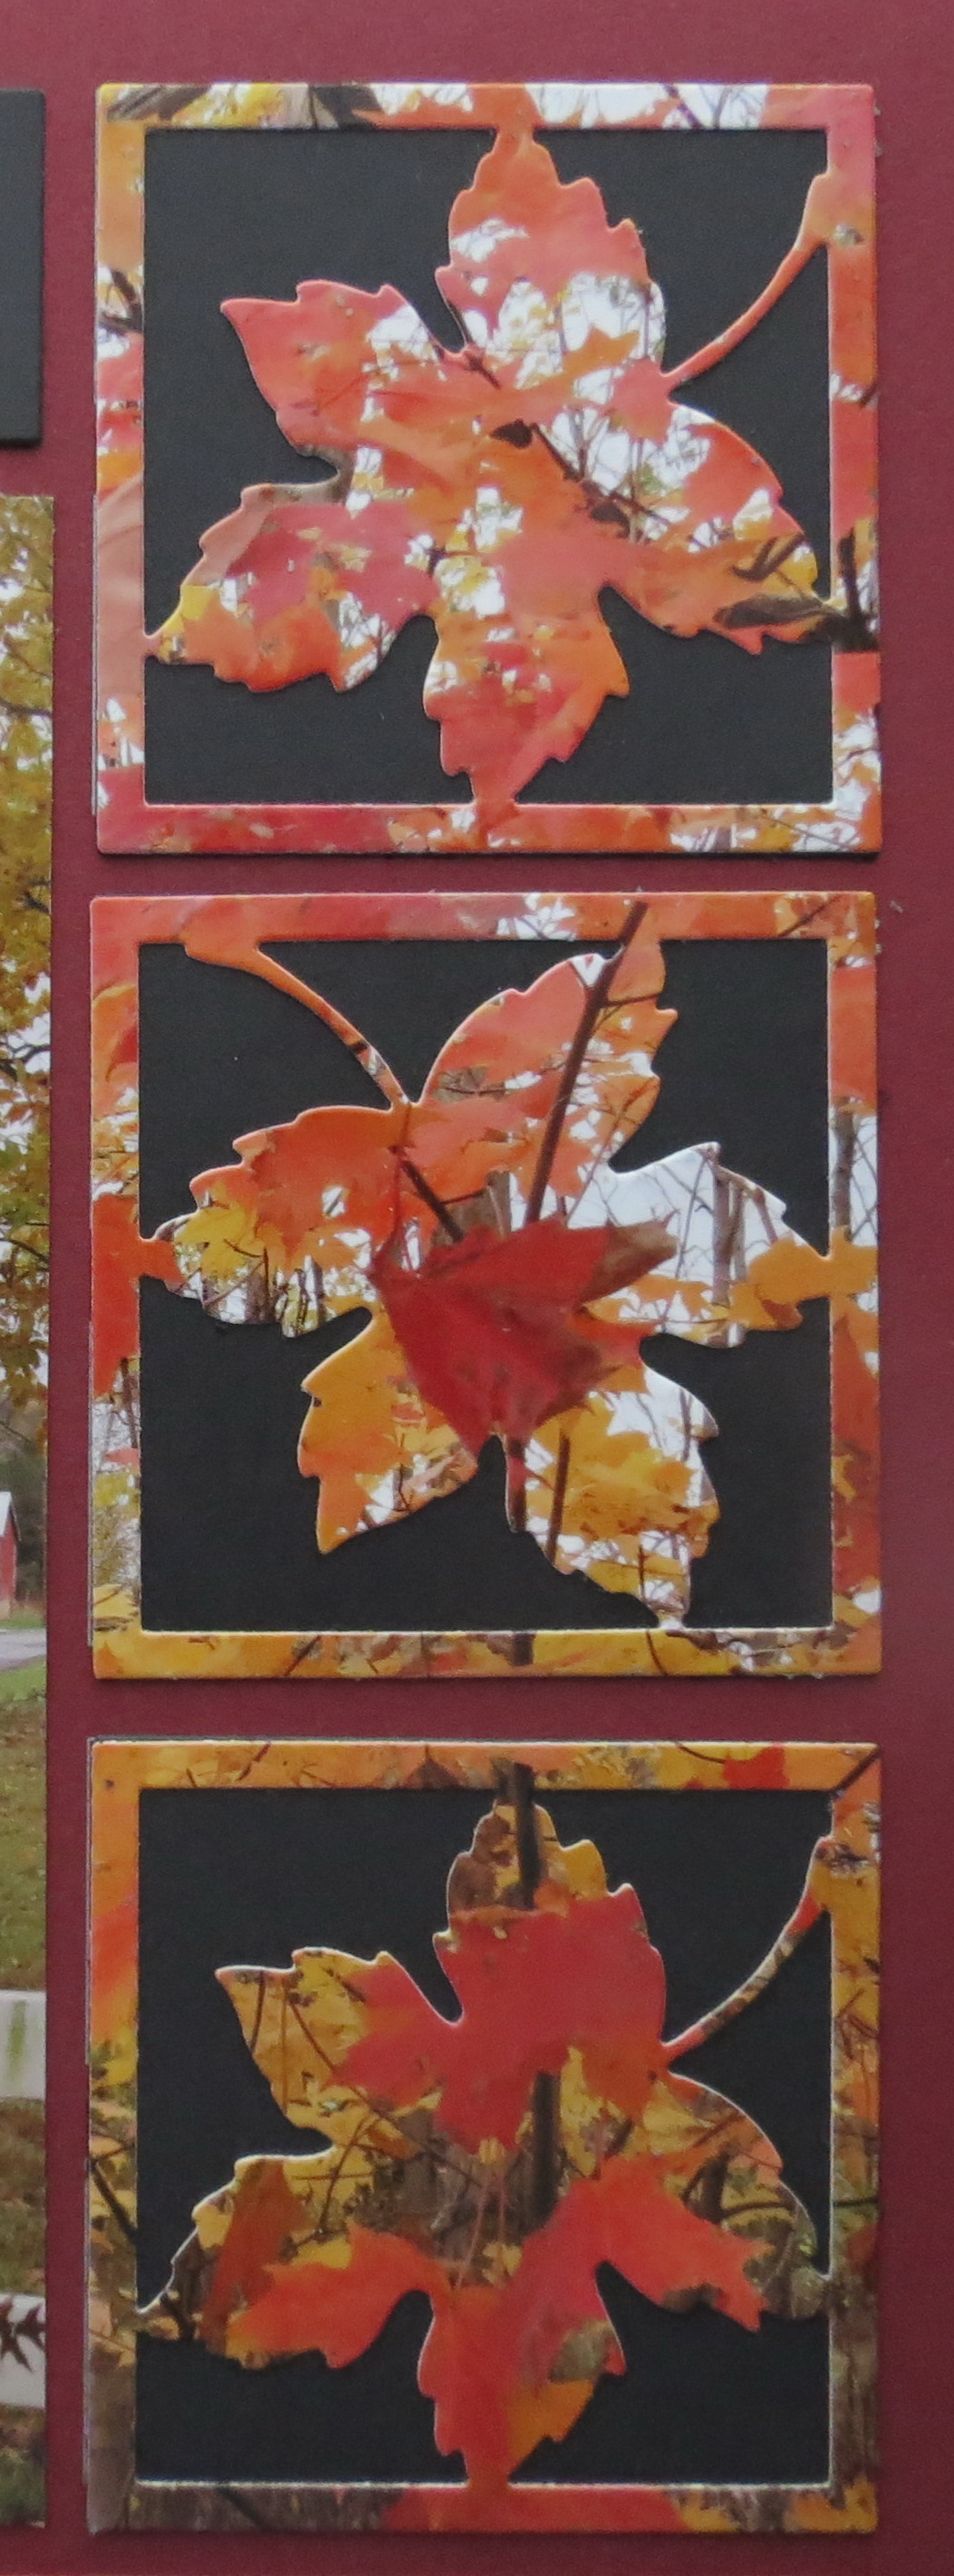
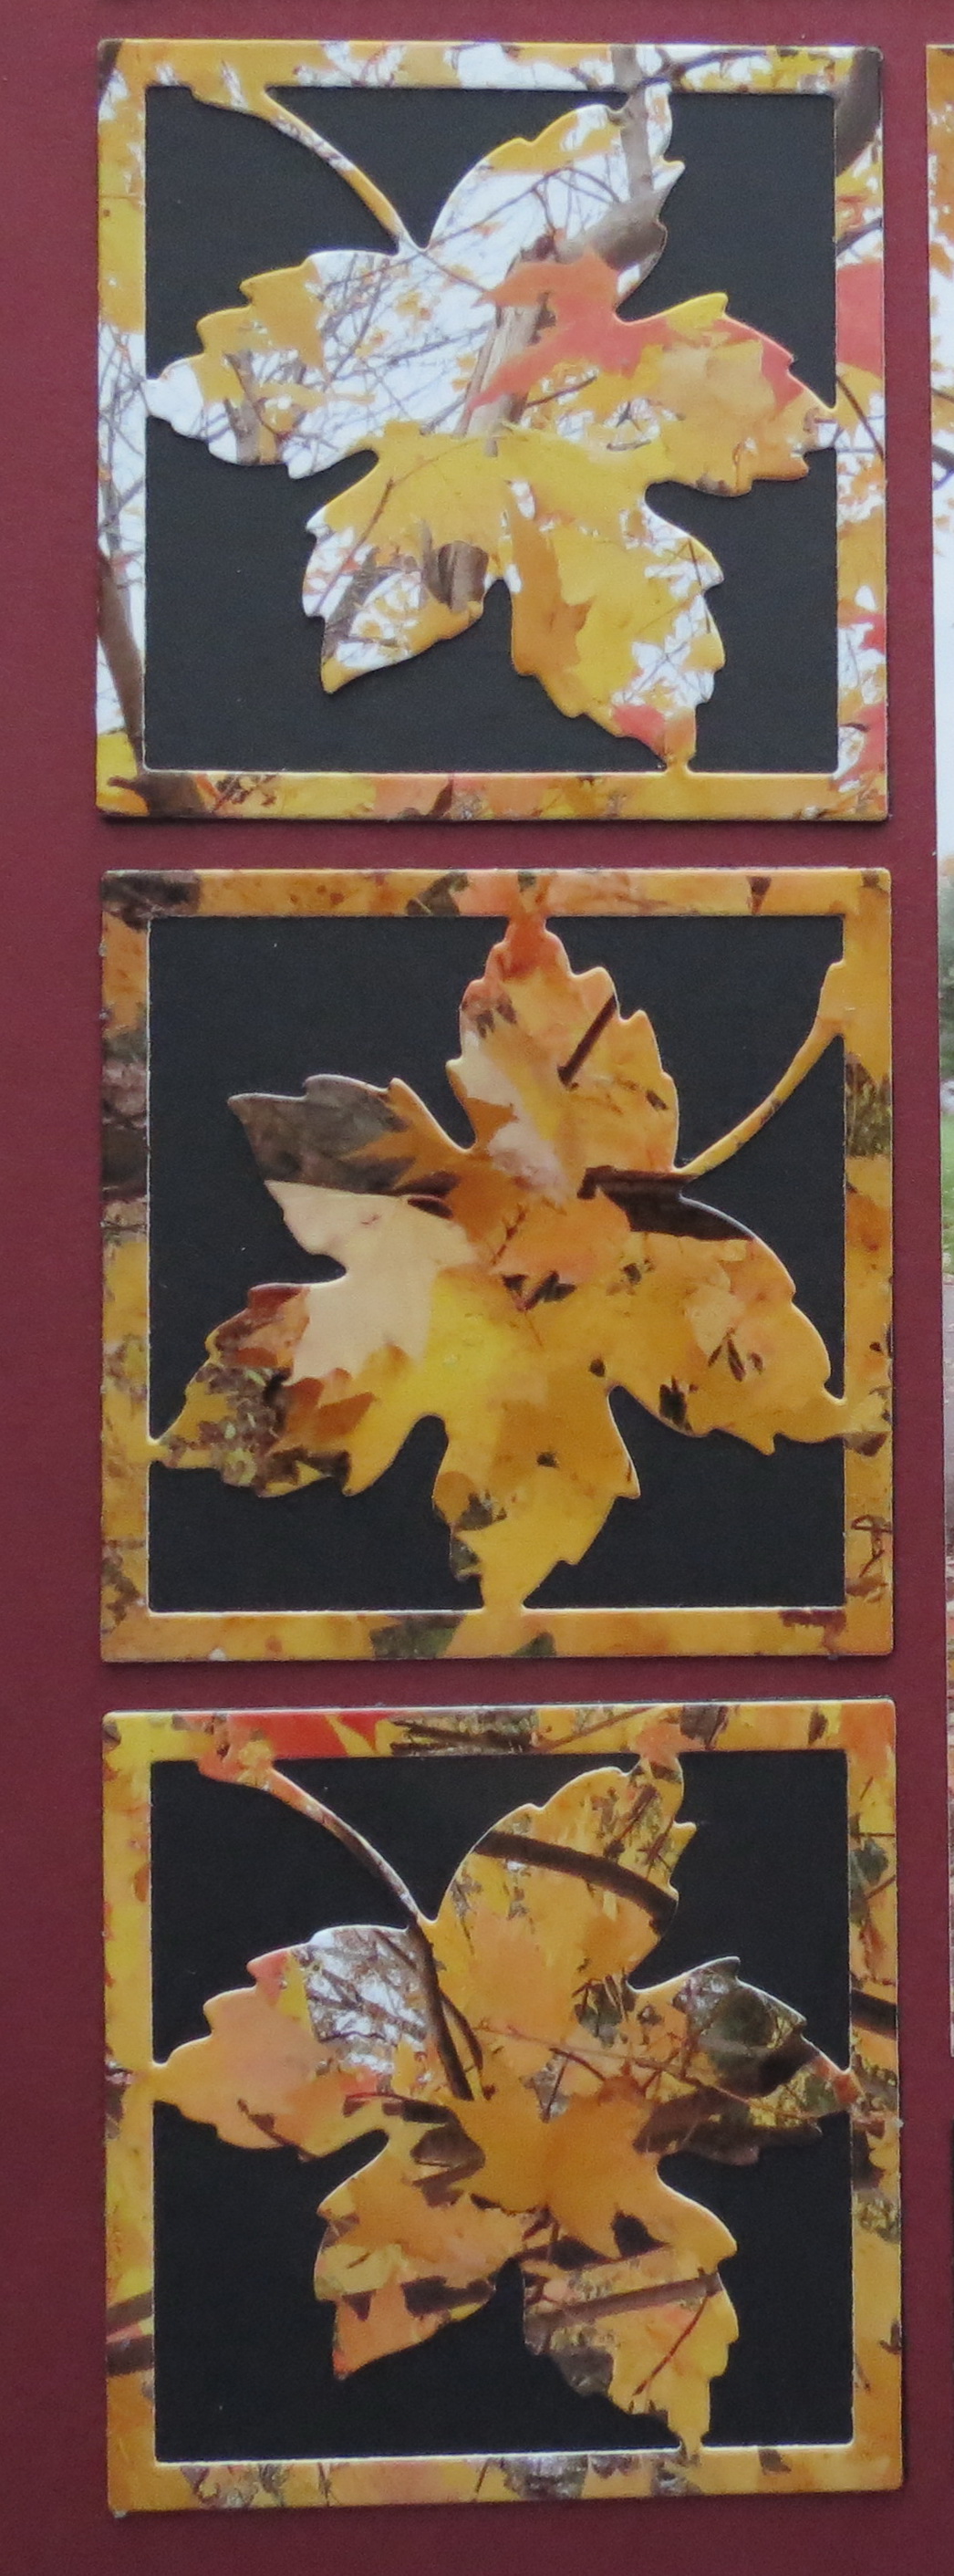
I began with a 5” x 7” photo of foliage on a tree that has lots of colors. I cut the photo in half and from each half used the die cut to cut three leaf squares. I switched the direction of each of the leaves before I cut them so that the strip of squares preserves the photo. A black cardstock 2×2 square background lets the image and colors pop off the page.
Mosaic Moments Four Tips for Composing Photos 2×2 Leaf Die technique
Mosaic Moments Four Tips for Composing Photos 2×2 Leaf Die Techniques
Mosaic Moments Four Tips for Composing Photos 2×2 Leaf Die Techniques
Mosaic Moments Four Tips for Composing Photos 2×2 Leaf Die Techniques
I’ve used black cardstock once again to cut the acorn & leaf die strip so that I carry the black color through the page. Cutting the die again in yellow, orange and rust lets me piece the parts together for a little variety.
One additional Tip for Fall Photo Layouts: The day I took these photos was in November and a lot of the trees were already bare, it had been very wet fall and there weren’t a lot of vivid colors, everything was a bit muted and moody. We always love to have a bright sunny day with tons of vibrant fall colors to capture for our pages, but the overcast and even damp day brought a different feel to the photos I was shooting. Because the tree trunks were wet, they were also very dark and the leaf color on them really popped! So don’t think twice about taking a drive and shooting photos on an overcast of damp day, you just might like what you capture!
Andrea Fisher