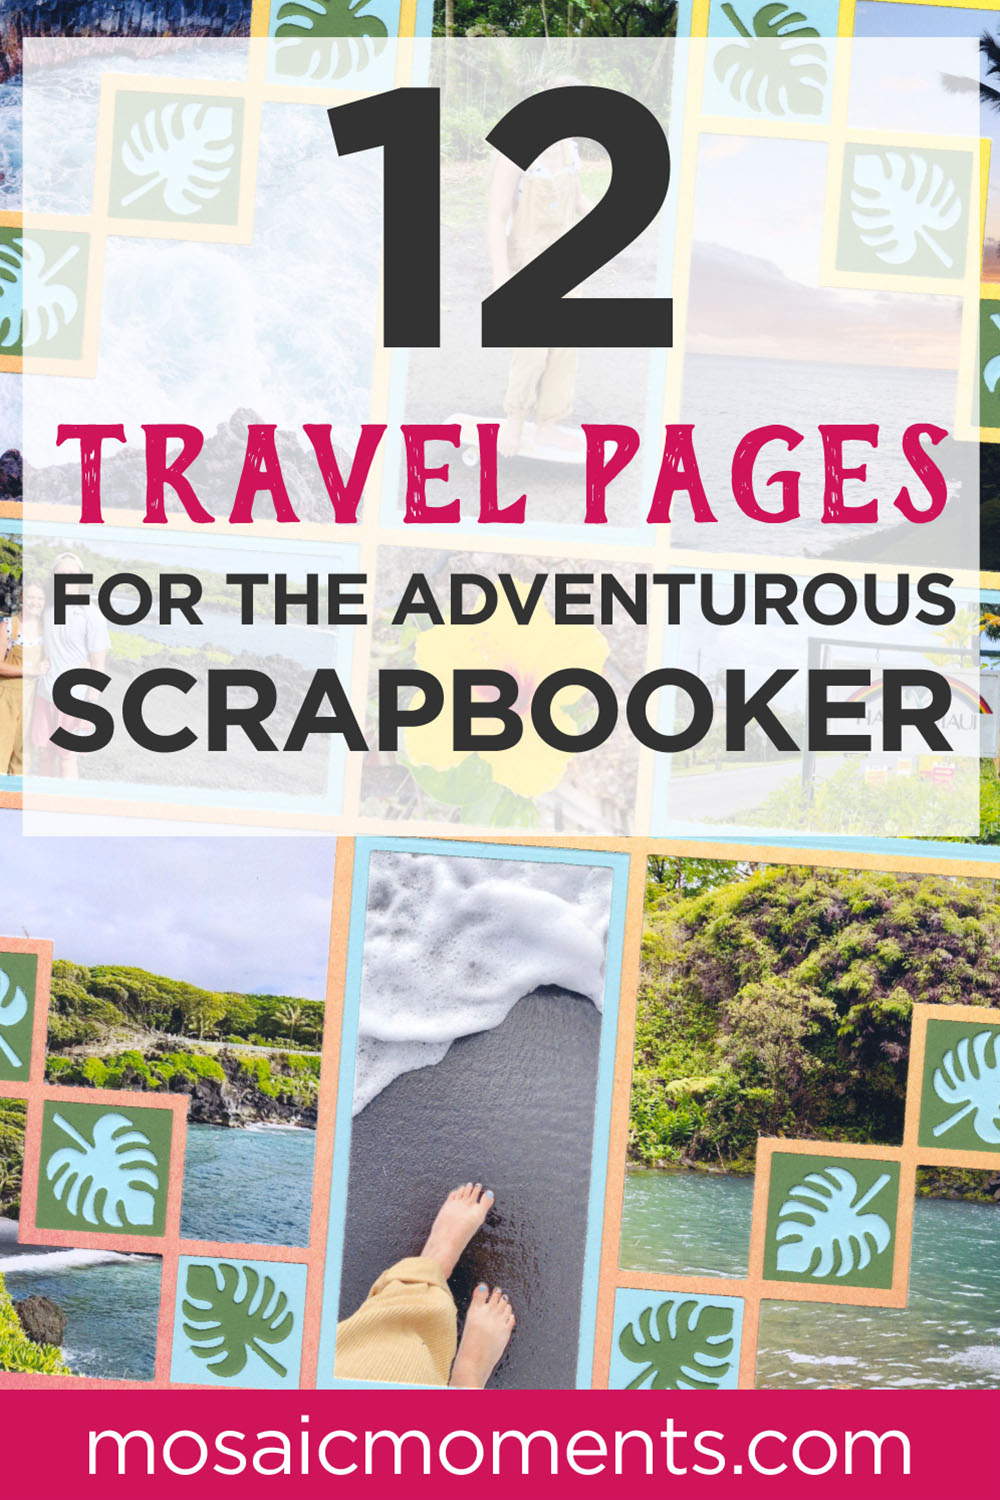
Maybe you're like us and want to make the most stunning layouts with your travel photos.
For beautiful travel pages, we love to use the discover and adventure level dies. Plus with the Mosaic Moments® system, you can show multiple photos from your trip on a single layout! We gathered 12 layout ideas and shared our tips for getting the best travel scrapbook pages.
Scroll down to see all of these incredible examples.
1. Photograph the Journey
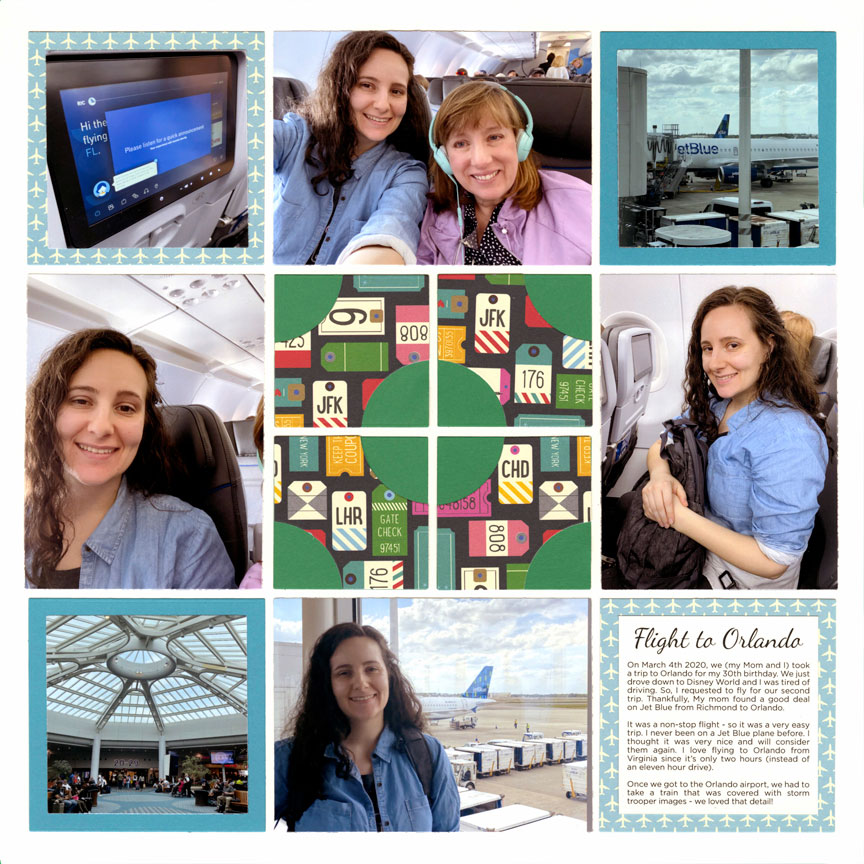
"Fight to Orlando" by Paije Potter - Pattern #438
Take pictures of how you got to your destination.
Sometimes just getting to a place is an adventure. We all have those airport stories. Here Tami and Paije catalogued the details of their flight to Orlando. They even took a detail shot of their movie screen.
And Paije even had room to journal their travel story!
This Layout Features: White 12x12 Grid Paper and Perfect Spot Die Set.
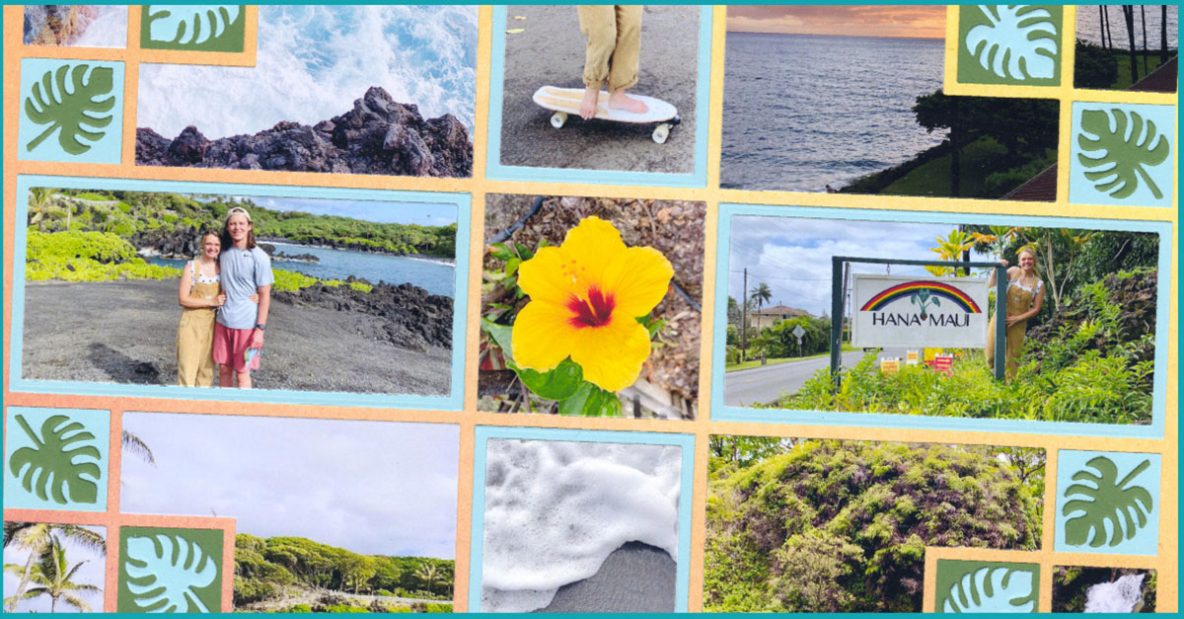
2. Use your Scenic Photographs as Art
Turn your scenic pics into a work of art!
Scenic photos are often left in a box for years - with Mosaic Moments there is room to add them! Here Jodi put her Maui landscapes in each corner of her layout and cut them in half with the Steps Die and a chain of 1x1s topped with a Tropical leaf.
Isn't Mosaic Moments the best way to turn your scrapbooking layouts into art?
This Layout Features: Sunset 12x12 Grid Paper from the Ombré Collection, Steps Die, and Tropical Leaf Border Die Set.
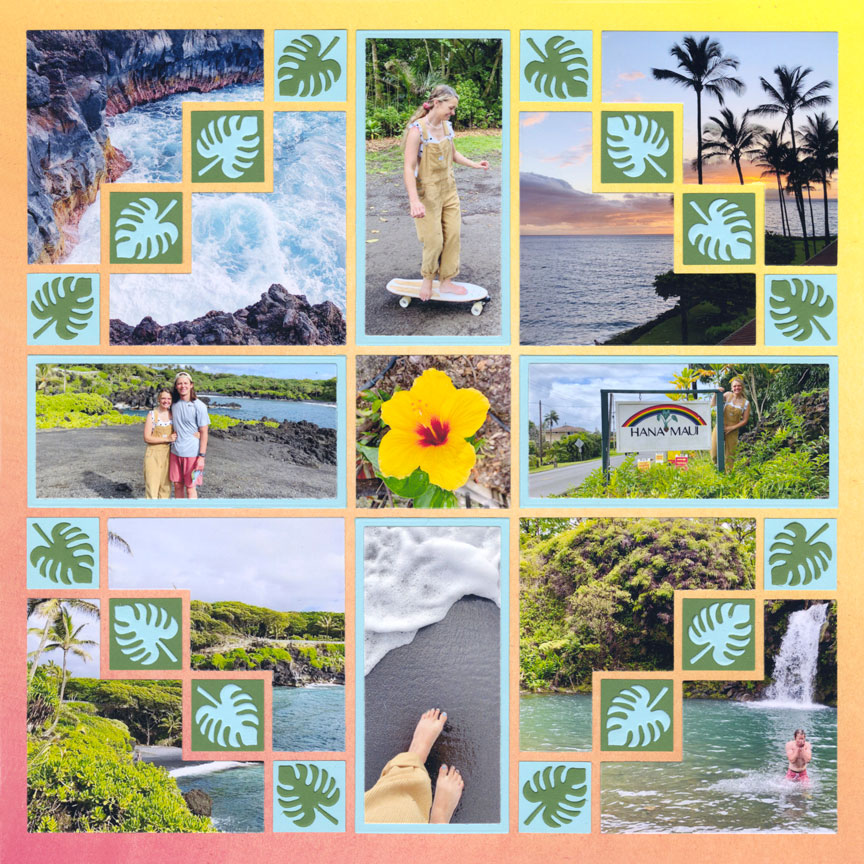
"Hana Maui" by Jodi Benson - Based on Pattern #368
3. Journal Inside Discover Dies
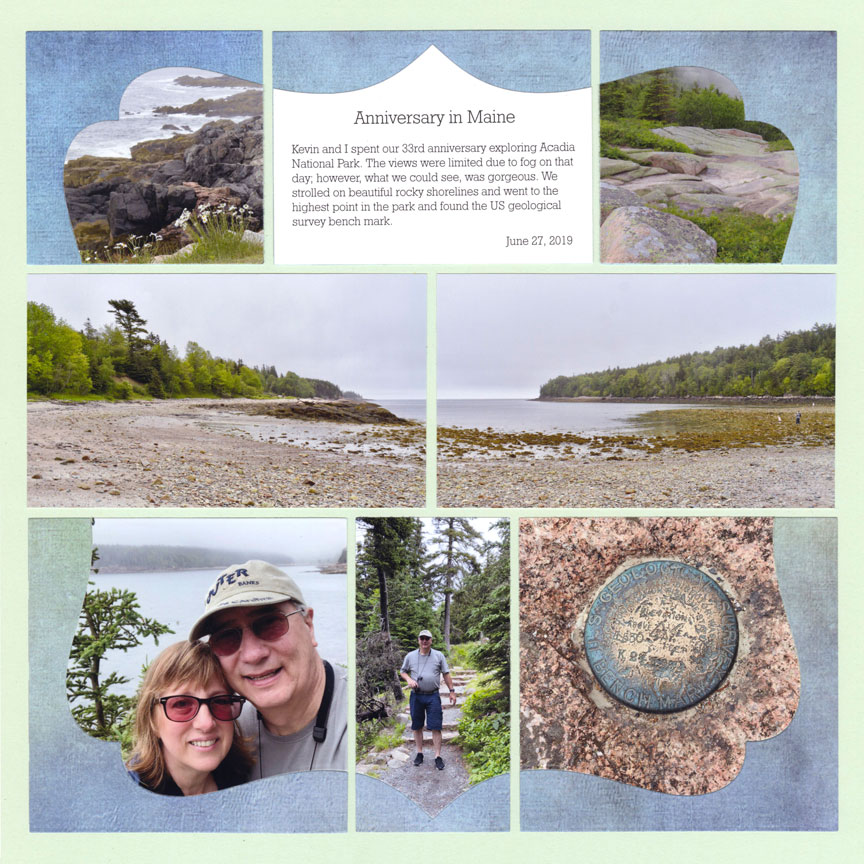
"Maine Anniversary" by Tami Potter
Add that journaling in!
Where were you? Who was there? Why did you go to this destination?
Answer the questions you can't answer with photos alone. And, yes, you can fit in journaling with a discover or adventure level die!
Find out more about journaling with different shaped dies here.
This Layout Features: Lotus 12x12 Grid Paper, Whimsy 4x4 & 2x4 Die, and Whimsy 3x3 & 3x4 Die.
4. Make Phenomenal Panoramas
Get those panoramic shots!
It gives more of an impression to make a panorama rather than using a single 4x6 photo. Here, Paije made panoramas with two different length strip dies and laid them on the top and bottom of her page. She used long distance landscape shots that usually get left on your phone.
With Mosaic Moments these photos become the art on your layouts.
This Layout Features: Eggplant 12x12 Grid Paper from the Harvest Collection, Strips 1 x 2.125 Inch Die, and Strips 1x 3.25 Die.
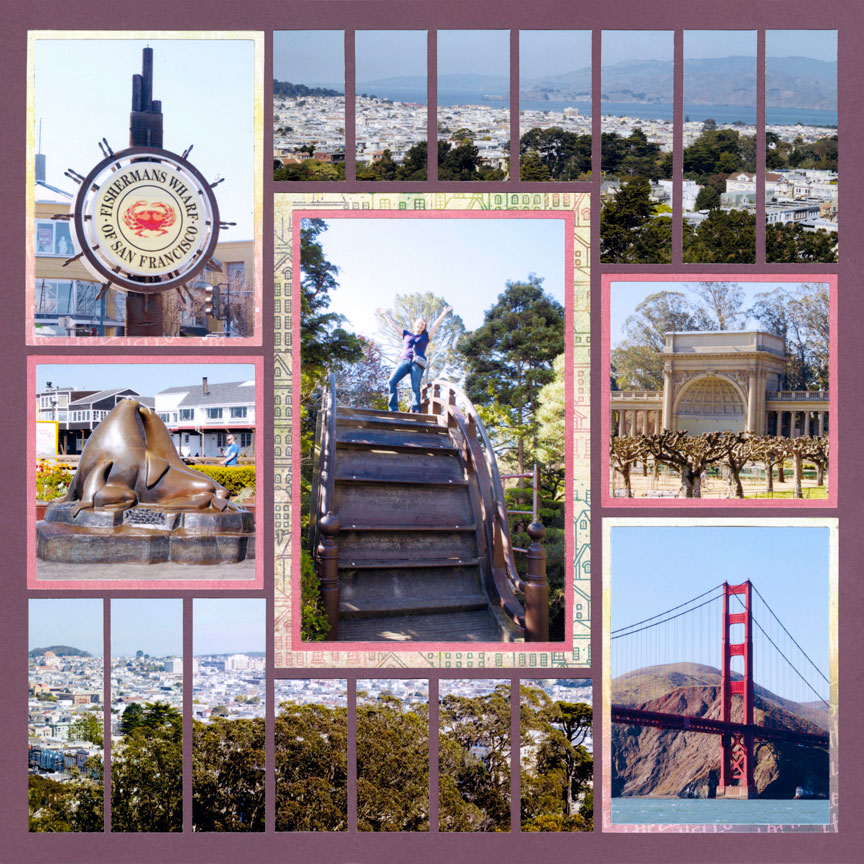
"San Francisco Trip" by Paije Potter - Pattern #582
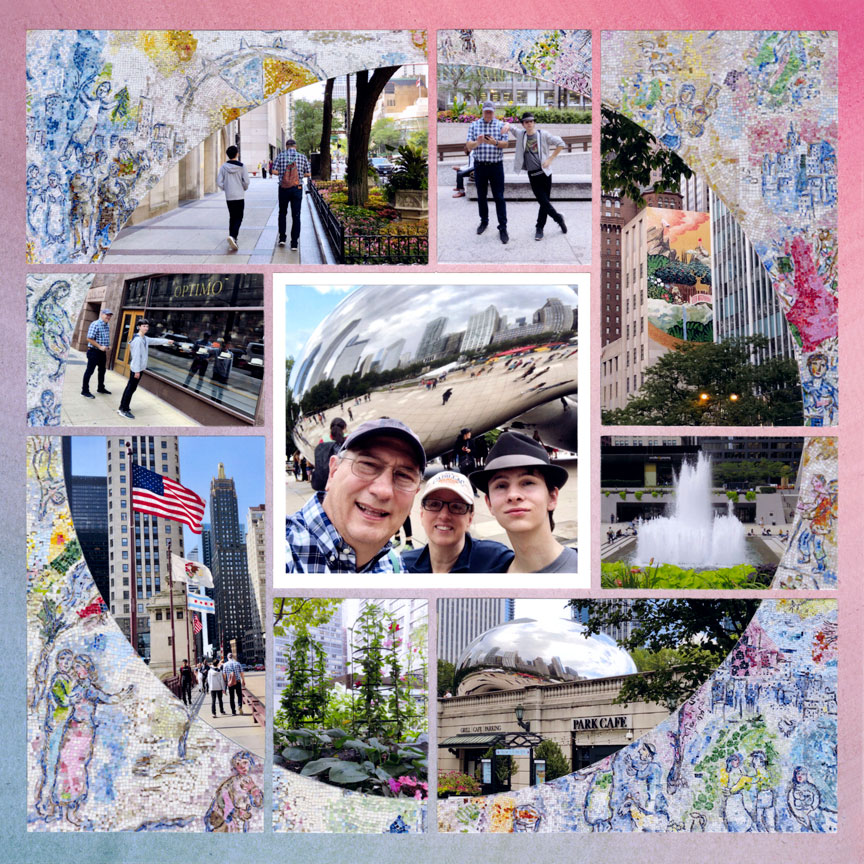
5. Make Mosaics

"Millennium Park" by Paije Potter - Pattern #171 (adjusted)
Make your layout standout with a mosaic!
Be sure to avoid cutting into people's faces - use mosaic friendly photos. If there are people or buildings like in this example that you do not want to cut up, do like Paije did -- and keep a larger uncut space in your mosaic.
This page has room for lots of photos and looks amazing because of mosaic magic!
This Layout Features: Eggplant from the Harvest Collection, and the Basic Die Bundle.
6. Take Those Detailed Shots
Take photos of everything around you.
These photos help tell the story and give a sense of what your experience was like. Tami took photos of the shops they visited, buildings, gardens, and fountains as well as her close-up focal photo. It'd be a great page with just her focal photo but all the other detail shots make her layout rich with extra detail and information about her trip.
Her photos are her journaling -- they tell the story.
This Layout Features: Twilight from the Ombre Collection, Horizon Dies, and Basic Die Bundle.
"Chicago Trip" by Tami Potter - Pattern #103
7. Use the Pattern Gallery to Fit in All of Your Photos
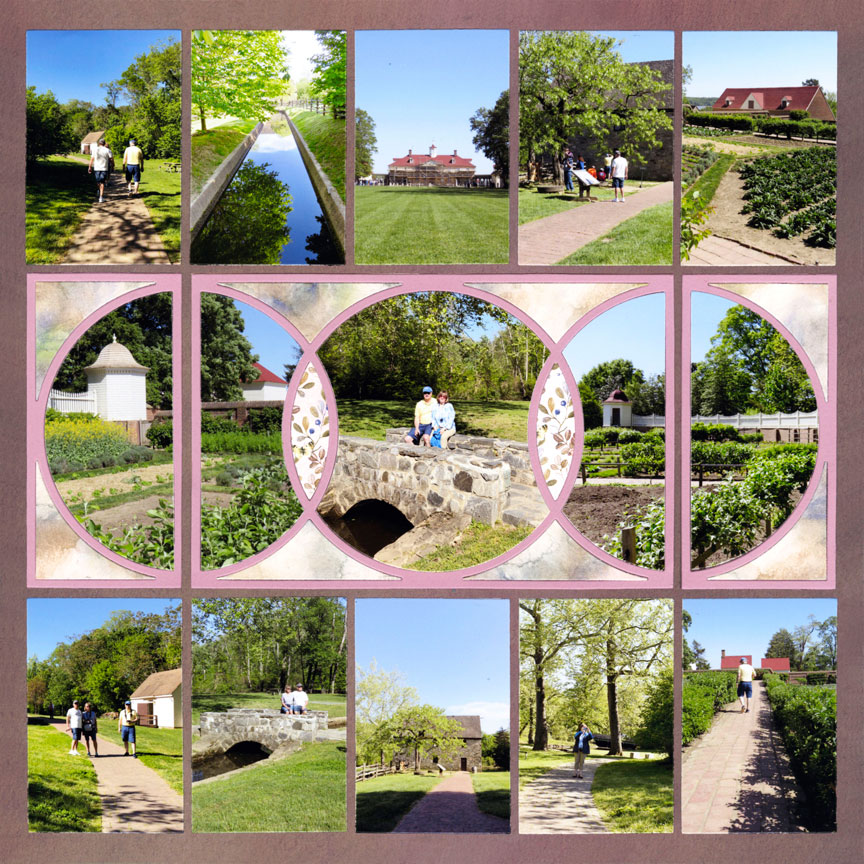
"Washington's Home" by Paije Potter - Pattern #475
Fit in lots of photos with the right page pattern!
The Pattern Gallery has many options for your layouts, and with the right one you can get more photos on your page than you thought possible. Here, Paije chose Pattern #475 -- look at the two rows of photos she was able to include and the photos she put in her Charmed Die.
A total of 13 photos are on this page - wow!
This Layout Features: Plum Pudding from the Renaissance Revival Collection, Charmed Die, and Basic Die Bundle.
8. Match your Patterned Paper to Your Theme
Use a patterned paper that matches with the theme and overall feel of the location.
Patterned paper can enhance your layout. Tami chose a weathered wood paper which brings out the "aged" feel on her page. This helps tell the story of her visit to the historic site, Fort Sumter.
This paper fits in perfectly!
This Layout Features: Right As Rain from the In the Garden Collection, and 30 Degrees Die.
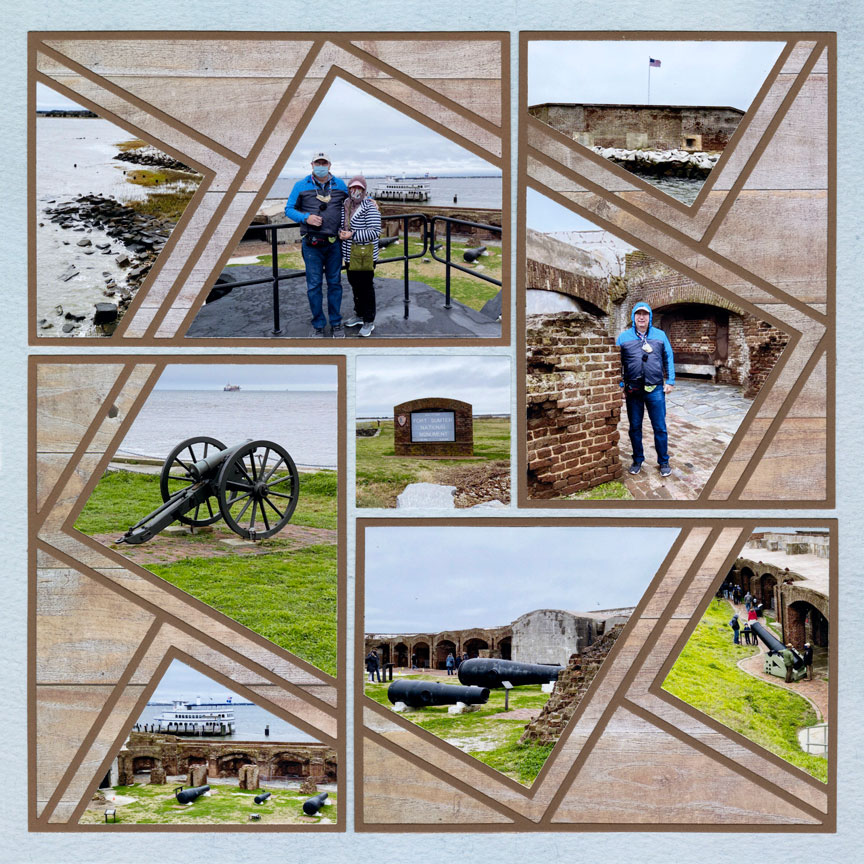
"Fort Sumter" by Tami Potter - Pattern #228
9. Take Vertical and Horizontal Photos
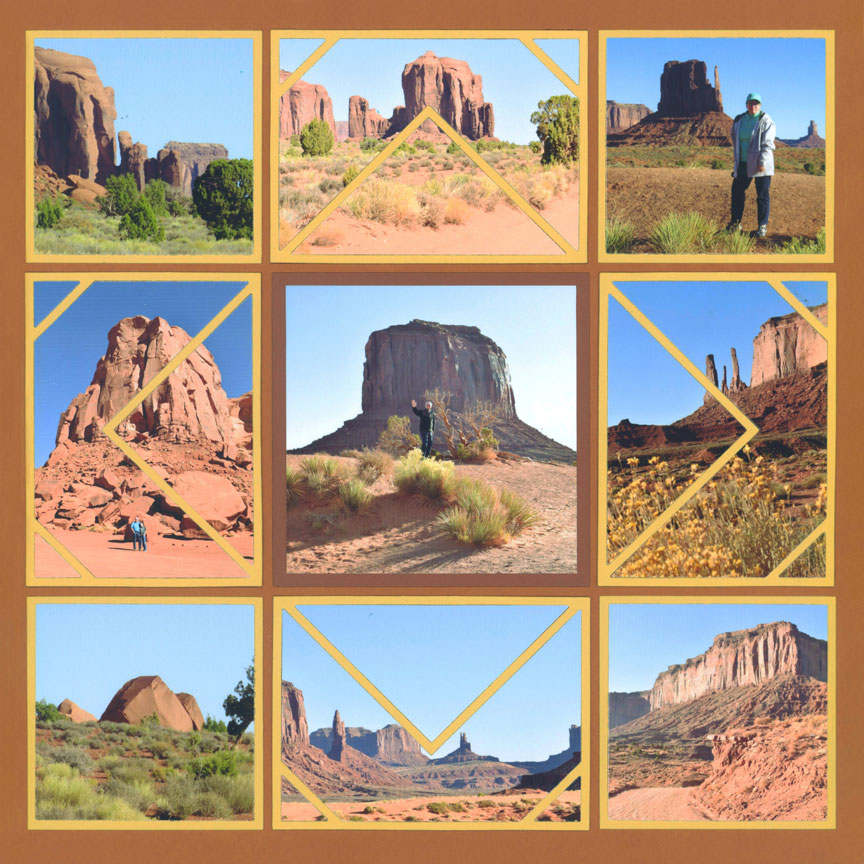
"Monument Valley" by Paije Potter - Pattern #344
Take a mix of vertical and horizontal photos during your travels to help you completely fill up your specialty die layouts.
You'll have more flexibility for those Adventure and Discover dies. If you have lots of photos, especially horizontal and vertical shots, it'll be a snap to plan your page. Here, Paije was tempted by the scenery to only take horizontal landscape shots. Good thing she remembered how important it was to take vertical shots too!
Those vertical and horizontal shots look so good on her layout with the Diamond Mine Dies!
This Layout Features: Cinnamon from the Harvest Grid Collection, Diamond Mine Dies, Basic Die Bundle.
10. Add Small Details for Your Eyes to Rest
Use cardstock or patterned paper as places for your eye to rest on the layout.
Even though we want to fit in lots of travel photos - it may seem too busy. Here, the orange paper helps your eye rest between the details of all the photos and it helps rotate your eye around the page.
These little details make a huge impact on your photo designs!
This Layout Features: Sand Ripples from the Dockside Collection, and Dynamic Dies.
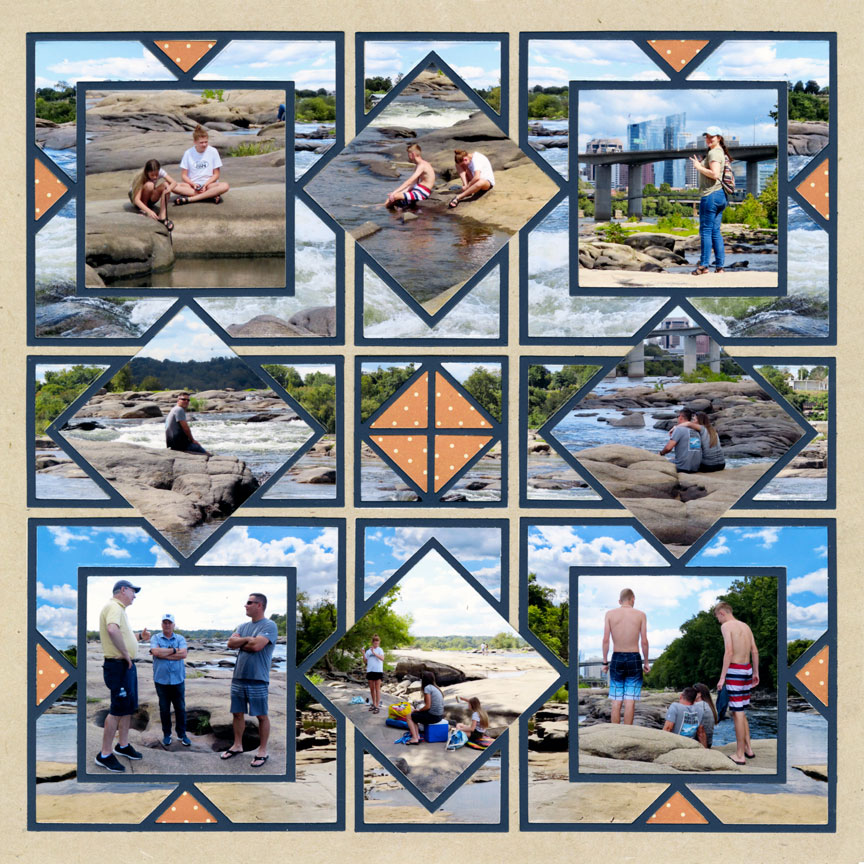
"Belle Isle" by Paije Potter - Pattern #368
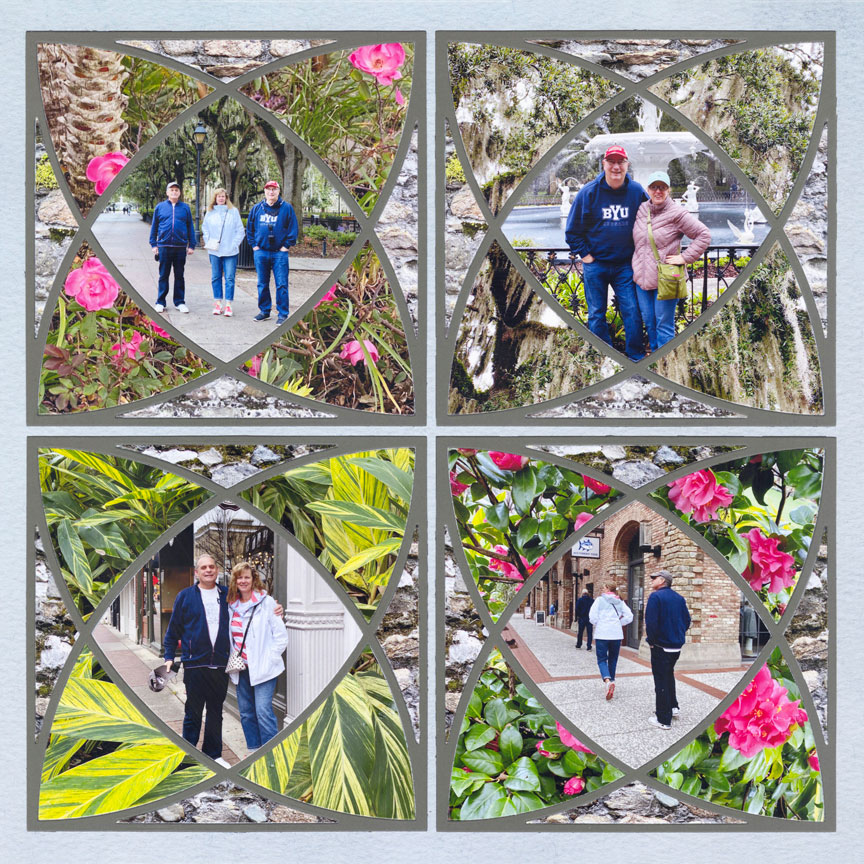
11. Adjust Your Photos to fit the Small Spaces

"The Lady & Sons - Savannah" by Tami Potter
There are a lot of small spaces in the specialty dies and it might be a challenge to use photos at a full 4x6 size.
There are things you can do to make them fit. You can take your photos from greater distances and then cropping them is a breeze. Another idea is to print your photos smaller. You can adjust the printing size on your printer or with applications like Photoshop.
We use the Epson PM-400 to print our photos to smaller sizes.
This Layout Features: Reflection from the Nantucket Grid Paper Collection, and Home Run Die Set.
12. Vary the Distances of Your Photos
Take photos from a variety of distances.
If these photos were taken close up, the subjects would not fit. Get up close then take three steps back (or more) and take more pictures.
You'll be pleased with the results when you go to scrapbook with specialty dies.
This Layout Features: Clear Skies Grid Paper from the In the Garden Collection, and Chic Dies.
"Exploring Savannah" by Paije Potter - Pattern #431