1. Create a Panoramic
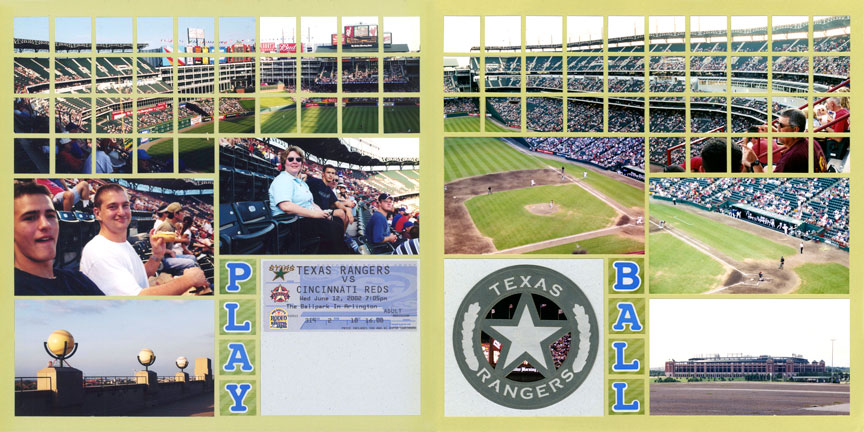
"Play Ball" by Tami Potter - Pattern #119 (mirrored on second layout)
2. Combine Multiple Photos
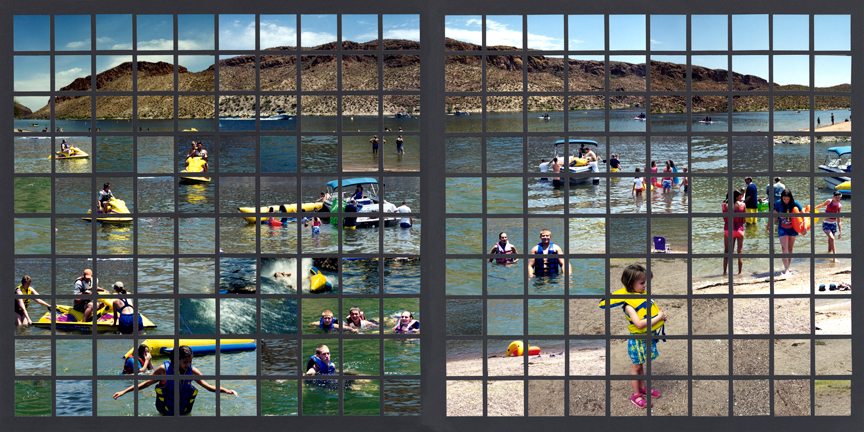
"Arizona Lake" by Tami Potter - Pattern #160 Twice
Using the same technique as above, you can turn an entire day of photos into one giant picture -- or two, if you want a two-page spread. It is absolutely amazing.
The trick is to keep similar colored photos next to each other. So, those with green-colored water should be near each other. Likewise, those with light-blue water would be side-by-side.
3. Surround a Larger Photo
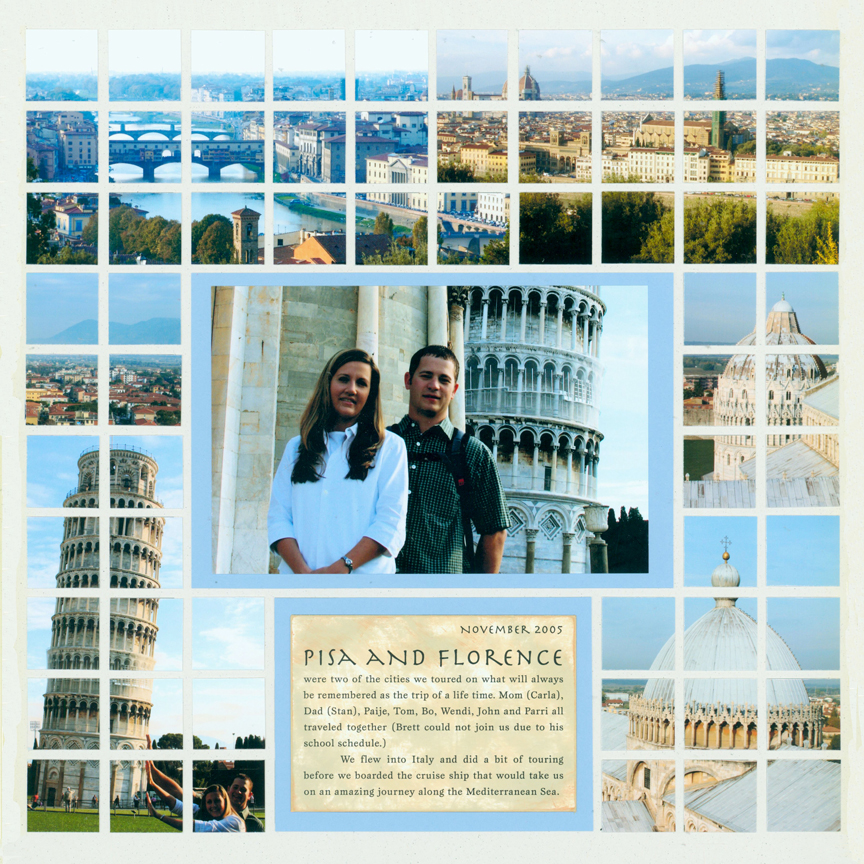
"Pisa & Florence" by Paije Potter - Pattern #
4. Try Paper, too
Patterned paper can also be cut into 1-inch squares to create all kinds of patterns.
In this example, the patterned paper resembles the tiles found at the aquarium and makes a great backdrop for the special title.
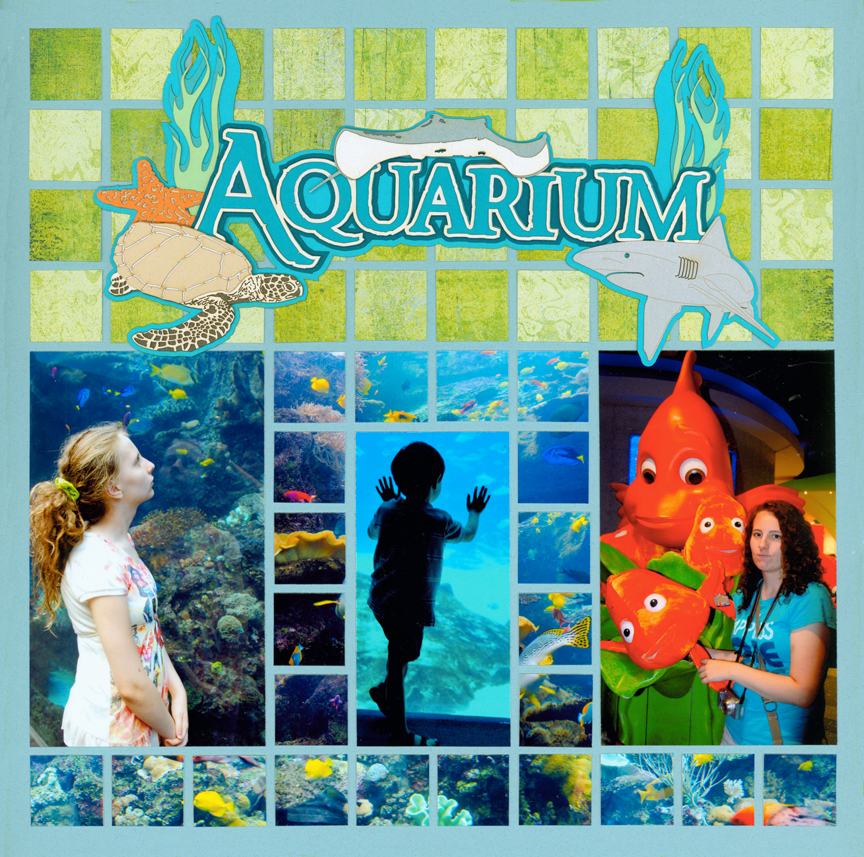
"Aquarium" by Tami Potter - Pattern #149
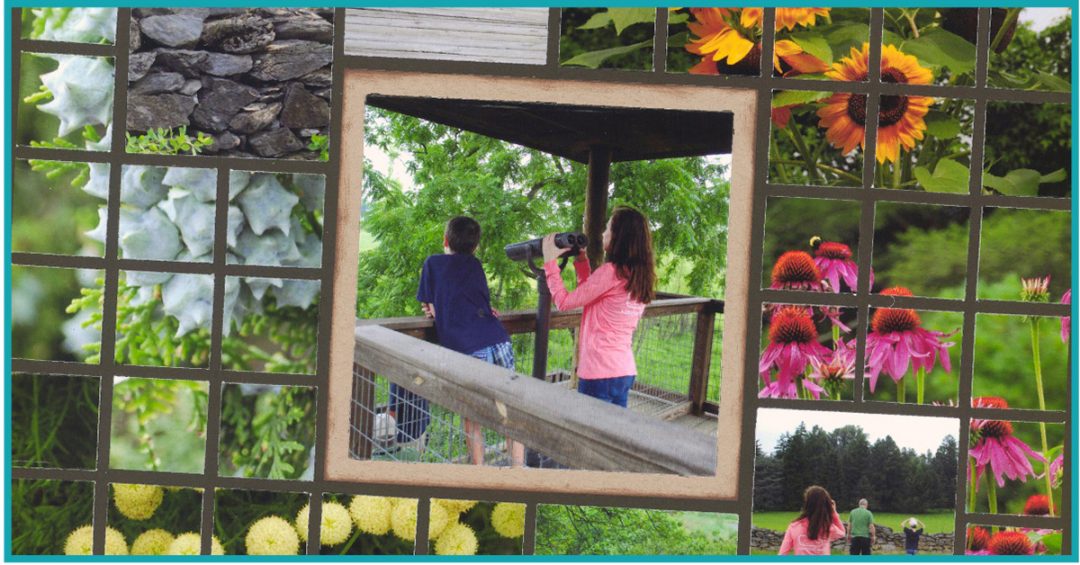
5. Show the Details
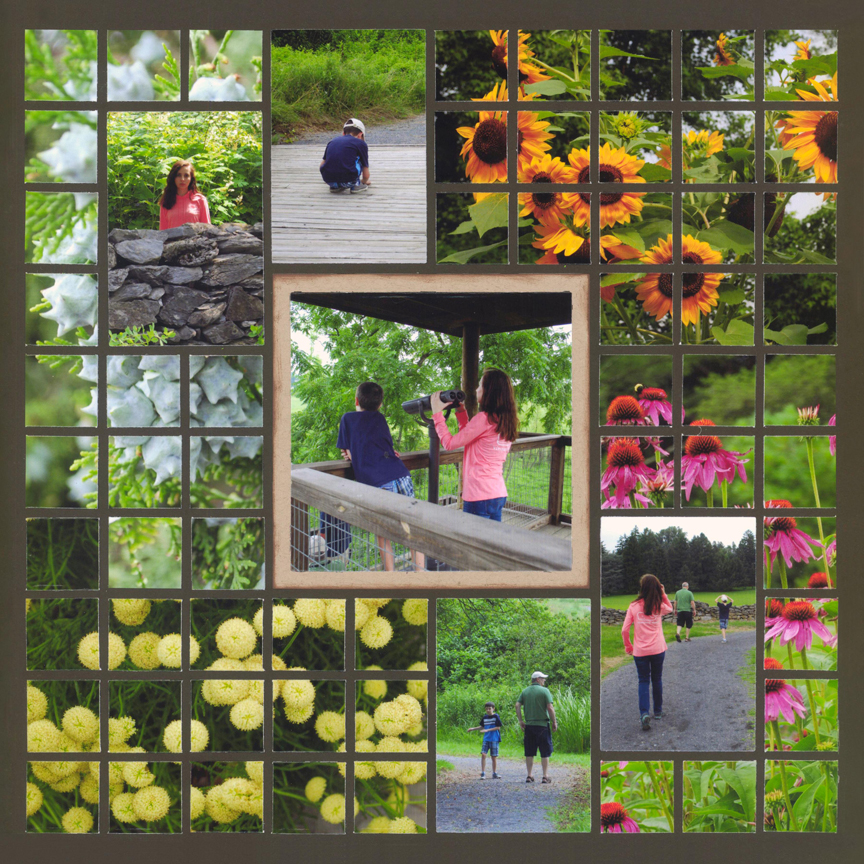
"Virginia Arboretum" by Paije Potter - Pattern #215
Surrounding a few photos with detailed images is another beautiful way to use mosaics. It allows you to see both the people doing an activity, and the magnificent things they saw.
Here, Paije used close-up photos of the flowers seen along the trail, but you could also try shells, sand and rocks along the beach; ornaments on a "forest" of Christmas trees; or even architectural elements in a city.
6. Make a Focal Point

"Powhatan" by Jodi Benson - Pattern #247
7. Mix and Match
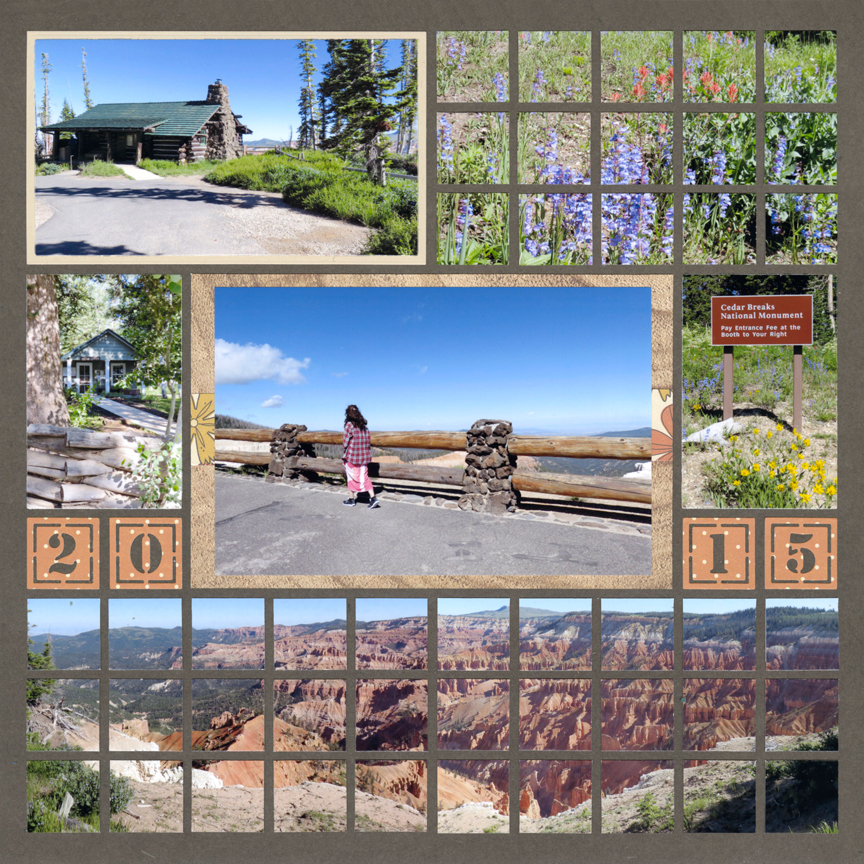
"Cedar Breaks" by Paije Potter - Pattern #286
Cutting some photos into mosaics and leaving some whole, creates interest on the layout.
On this example, Paije used photo mats on some of the pictures so your eye knows where to look first.
8. Accent with Mosaics
Sometimes, layouts need just a little extra touch and an accent of mosaic photos is the perfect solution. These little details help to set the mood or create the theme on your page.
On this layout, Paije used close-up photos of a flowering tree. You might also try fall leaves, brick paths, stone walls, or beach sand for this technique.

"Spring at Lewis Ginter" by Paije Potter - Pattern #395
9. Incorporate a Title
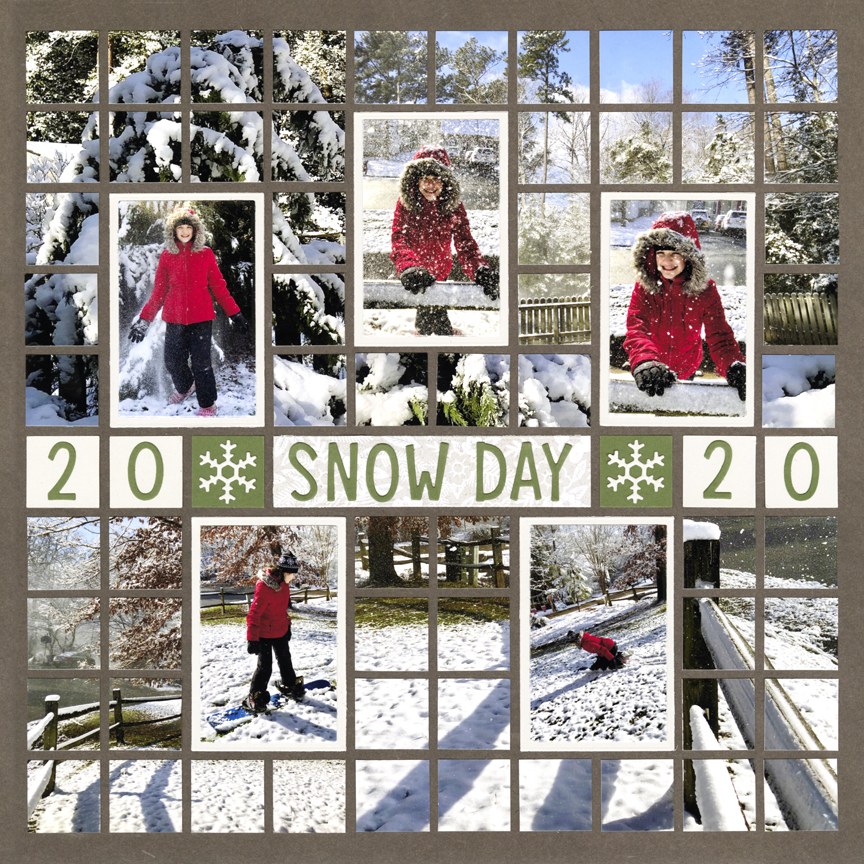
"Snow Day" by Paije Potter - Pattern #450
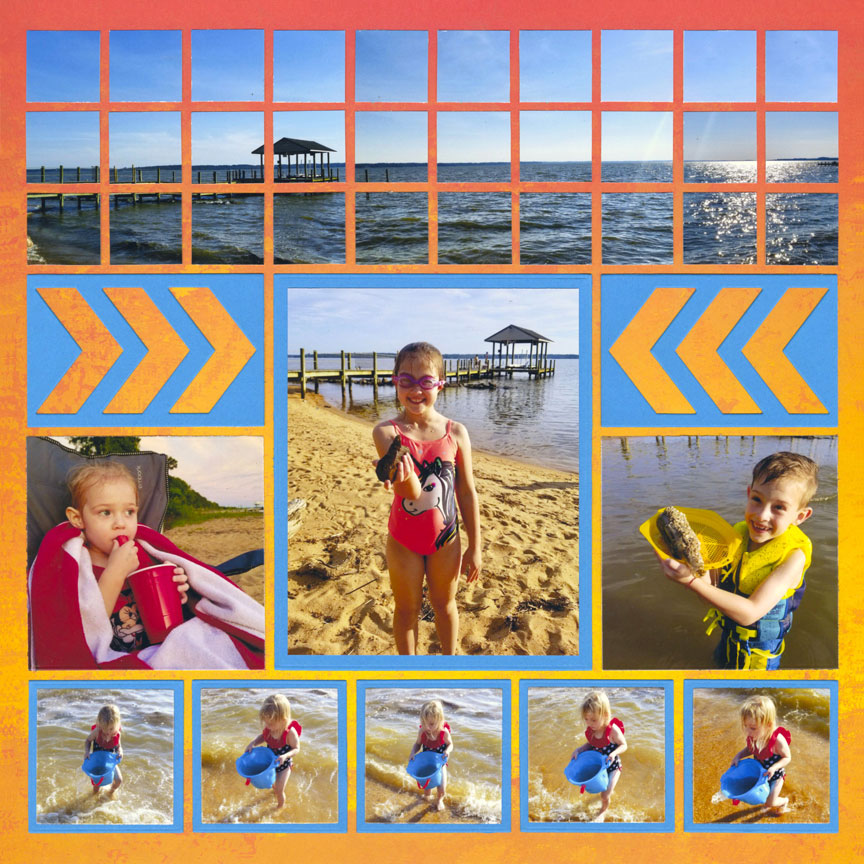
10. Set the Scene
Take the time to set the scene of your photos by including a panoramic at the top of your layout. You can easily do this by taking a picture, turning slightly to the right and taking another and repeating. Then, use a bit of Mosaic magic, aka cut the pieces into 1-inch squares and line then up, to create a topper to your layout. This way, you can remember the entire view, as well as the fun you had.
In addition to beach photos, try this with cities, mountains, forests, National Parks, and anywhere else you have a magnificent view.