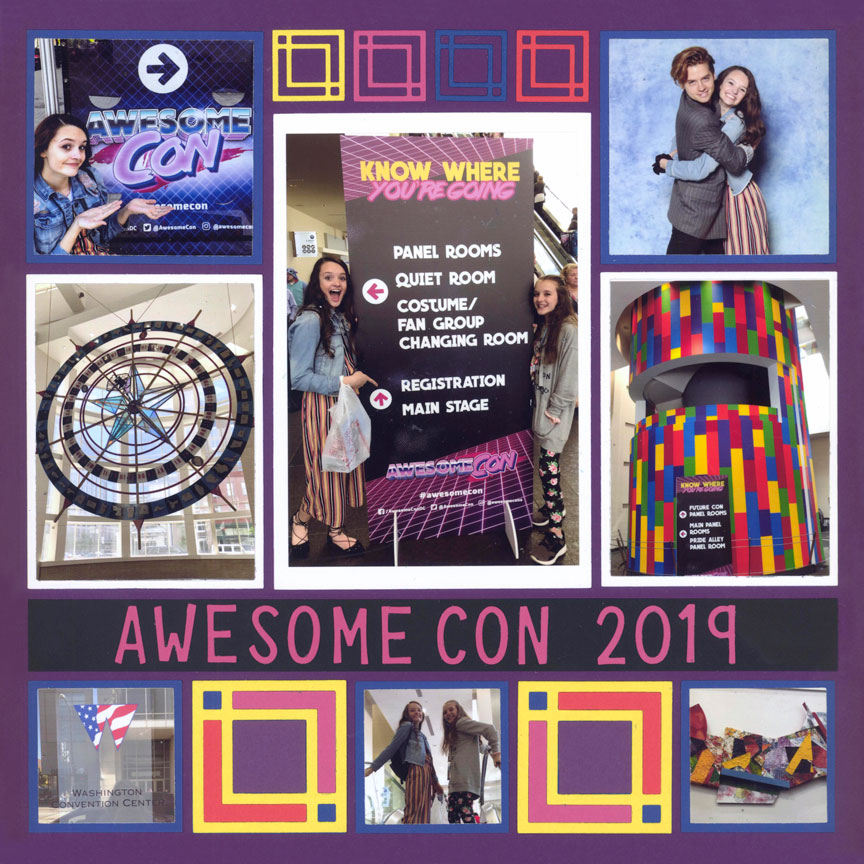
Many people think symmetrically, with things balanced on each side. They may place two pillows on the couch -- one at each end, or two candlesticks on the table with a basket of fruit in between. They probably do not even realize they are doing it; they just know it looks nice.
The same concept can apply to art. When we create a scrapbook layout with equal-sized elements on each side of the middle, we call it a symmetrical page.
There are hundreds of symmetrical page patterns in the Pattern Gallery simply because they are pleasing to our eye. You can find them by clicking on the drop down menu under "Select Category."
Check out these 10 examples to get inspired to create symmetrical scrapbook layouts.
Dress It Up
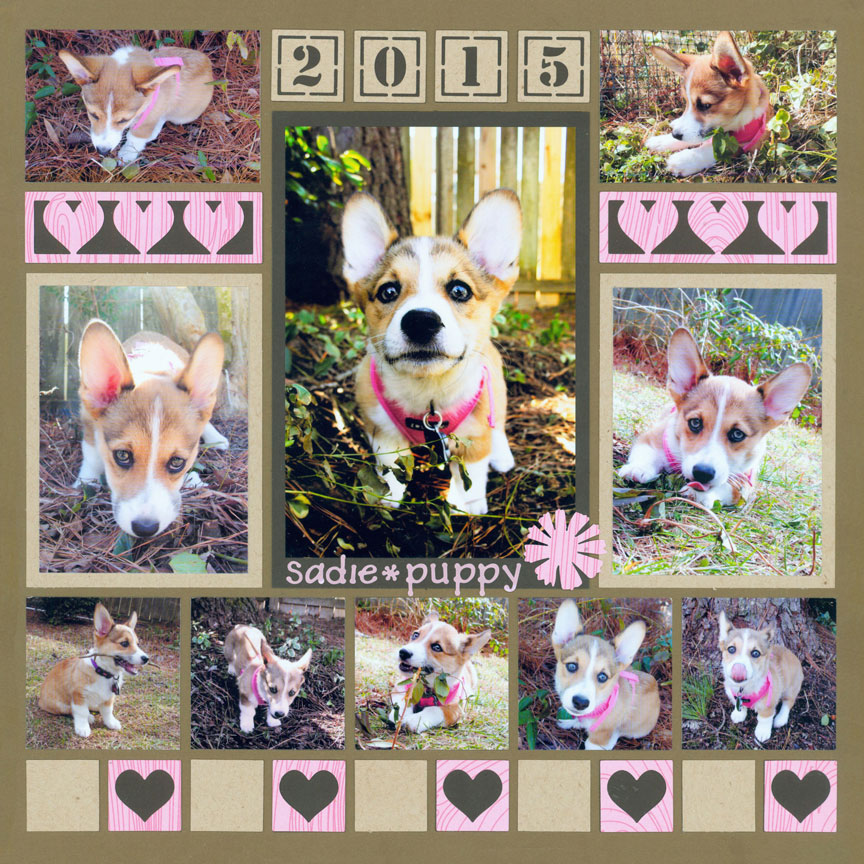
"Sadie" by Paije Potter - Pattern #131
Symmetrical patterns can be mirror images surrounding an imaginary line down the middle of the page. But they do not have to be boring.
Here, Paije used hearts, a flower and sticker letters to up the interest, and cute factor, in her layout.
Try a Mosaic
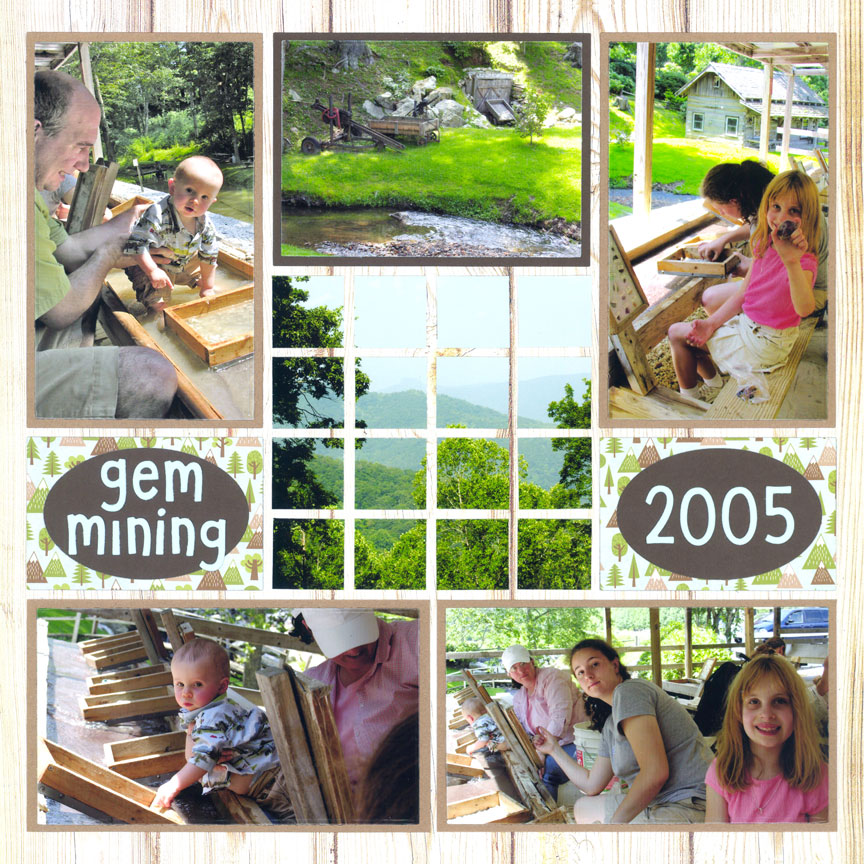
"Gem Mining" by Paije Potter - Pattern #154
Repeat Elements
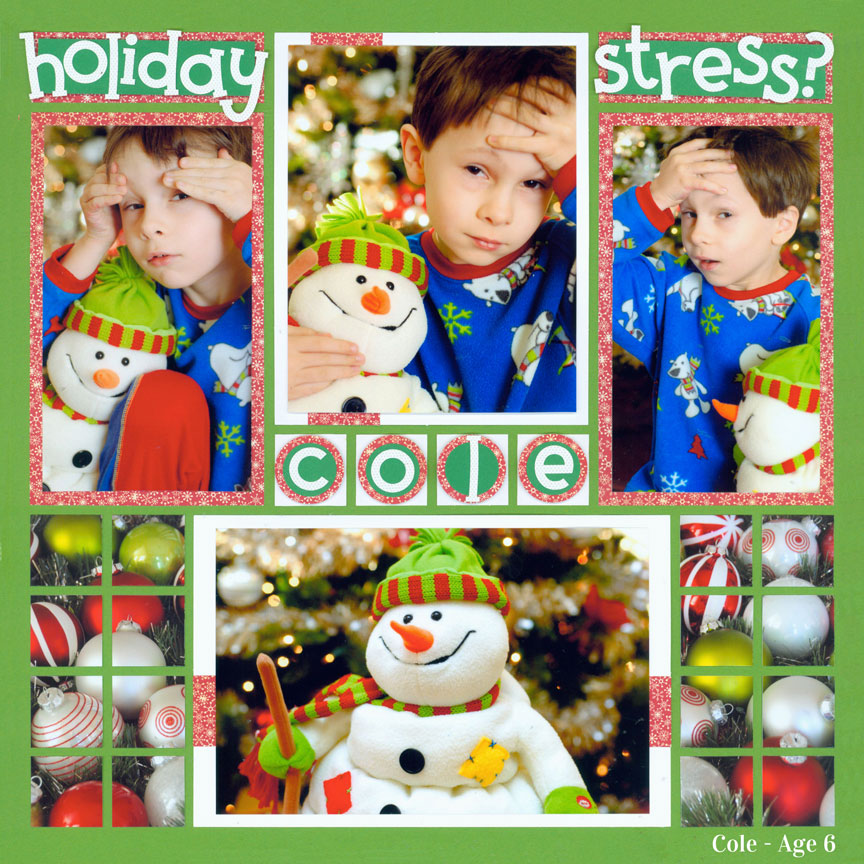
"Holiday Stress" by Paije Potter - Pattern #177
When you need to fill in some areas of the grid, try taking a close-up photo that goes with your theme and repeating it on each side of the layout. This creates a nice balance and adds to the feel of the page.
Here, Paije used close-up photos of Christmas bulbs, but you could also try crayons or chalk, cookie cutters, a brick sidewalk, pinecones, pumpkins, beach sand, well, just about anything!
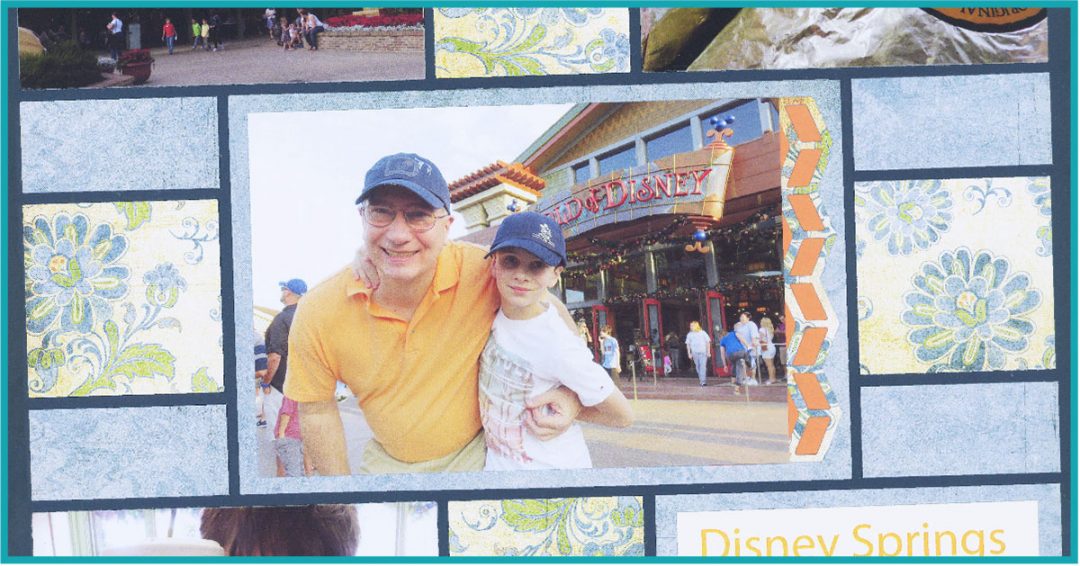
Include Journaling
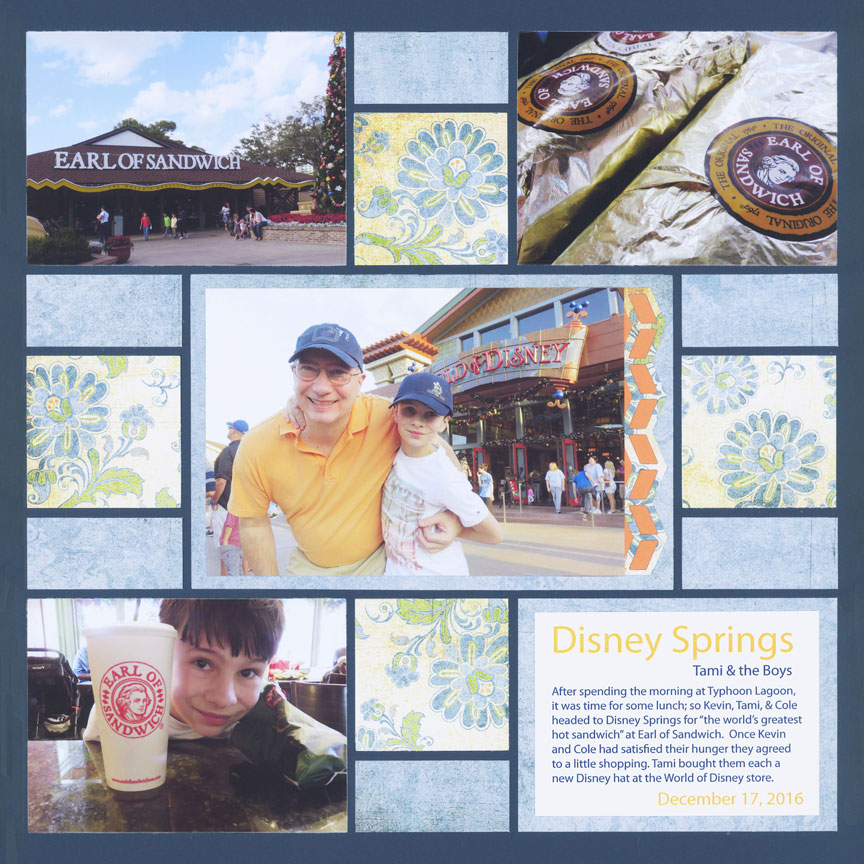
"Disney Springs" by Tami Potter - Pattern #202
Mix It Up
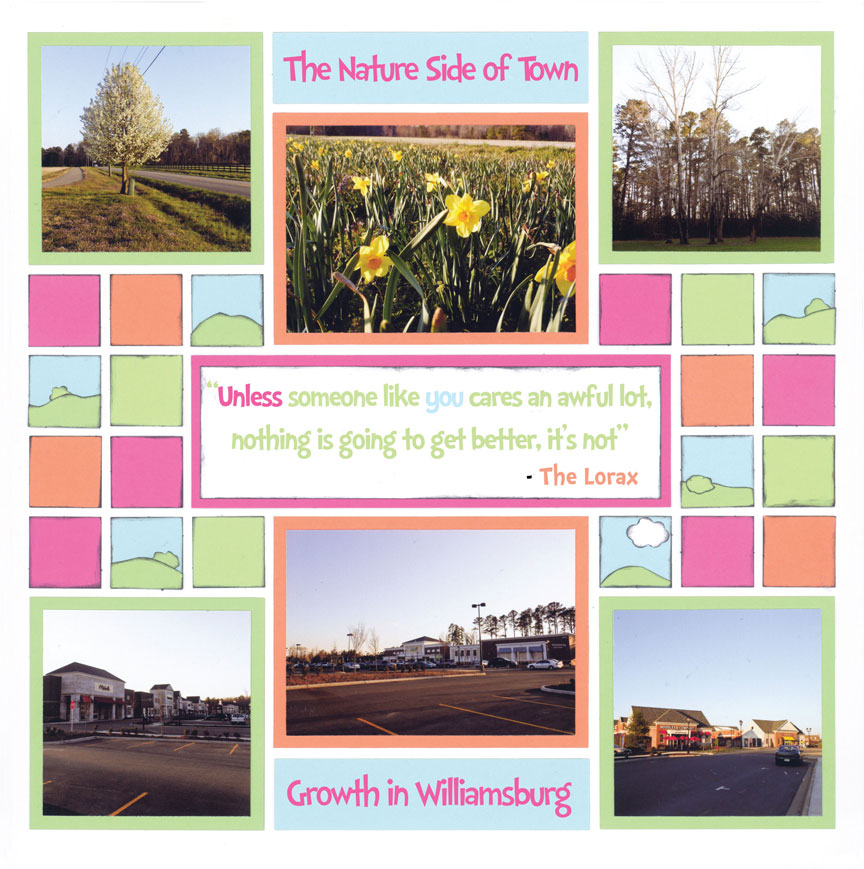
"Unless Someone Cares" by Paije Potter - Pattern #226
Spread Out the Date

"Alexis in Williamsburg" by Tami Potter - Pattern #309
Group it in the Center

"Discovery Cove" by Jodi Benson - Pattern #352
This layout puts all of the smaller elements in the center, creating a unique focal point.
By repeating the items on each side of the center photo, it creates stripes that carry the eye to each side of the page.
Repeat on Each Side

"Diagon Alley" by Paije Potter - Pattern #355
Add a Circle
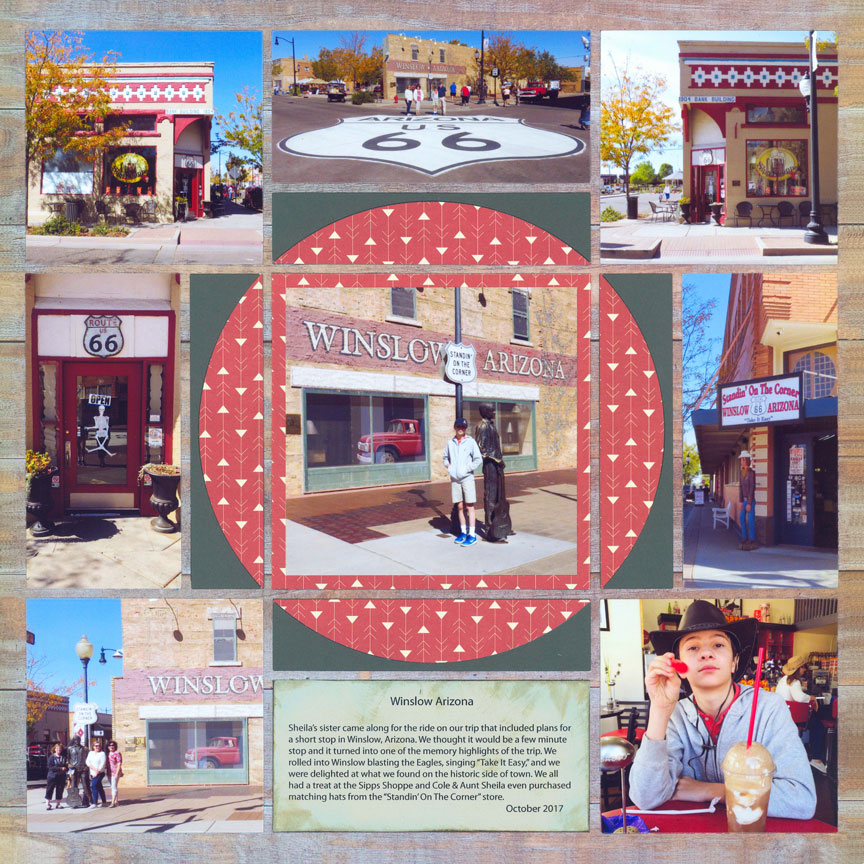
"Route 66" by Tami Potter - Pattern #402
Add a Title