
My favorite way to create a panoramic is still to frame a photo as I take it with plans to crop and print it out on a portion of an 8.5” x 11” photo paper and trim it to fit my space. I used to have a camera that actually had a setting for panoramic shots and then print out at a 4”x 11” size. However, not everyone has those options and so I’ll share a few tips today for achieving a variety of options for your next Panoramic layout.
Depending on how much of a strip you want…a full 10 squares across or something less the basic steps will remain the same. You have a choice of using 1” strips or a series of 2.125” strips/squares as a couple of options. For a full 10” across 2 – 4x6s horizontals or 3 – 4x6s vertical, each will give you 12” to play with, add in more photos and being able to blend things together smoothly will be possible. With the horizontal orientation you are limited to filling 3.25” and with the vertical it would be up to 5.5”.
In a previous article Panoramic Layouts: Getting the Big Picture I gave more info that you might find helpful.
So, how do you get the right pictures to work with? Like many things while working with Mosaic Moments Grid System, we challenge you to think differently about the photos you take, that includes how to shoot photos to use in a panoramic.
First Tip: Stand still, keep your arms close to your body for the best control and minimize unwanted movement. Find the view you want to capture. I like to get the picture directly in front on me first. That’s the view I want to focus on and I will have 6” of photo (horizontal) to use and then I can add in some from either side and expand the picture to get a full 10” view. Without changing the height or angle of your camera pan to your left, overlapping a ‘landmark’ a bit and snap, then repeat to the right!
Landmarks can be just about anything like buildings, trees, or even signs, these will be points you will overlap and find easy to fit your photo pieces together. If you are brave or just prefer…start at either the left or right and pan across the view snapping as you go.
A minimum of three and up to five photos should cover what you need. In the days of digital, it doesn’t hurt to take several to choose from ensuring your focus and view are what you want to have to work with as you compose your page. It won’t help if one photo turns out blurry!
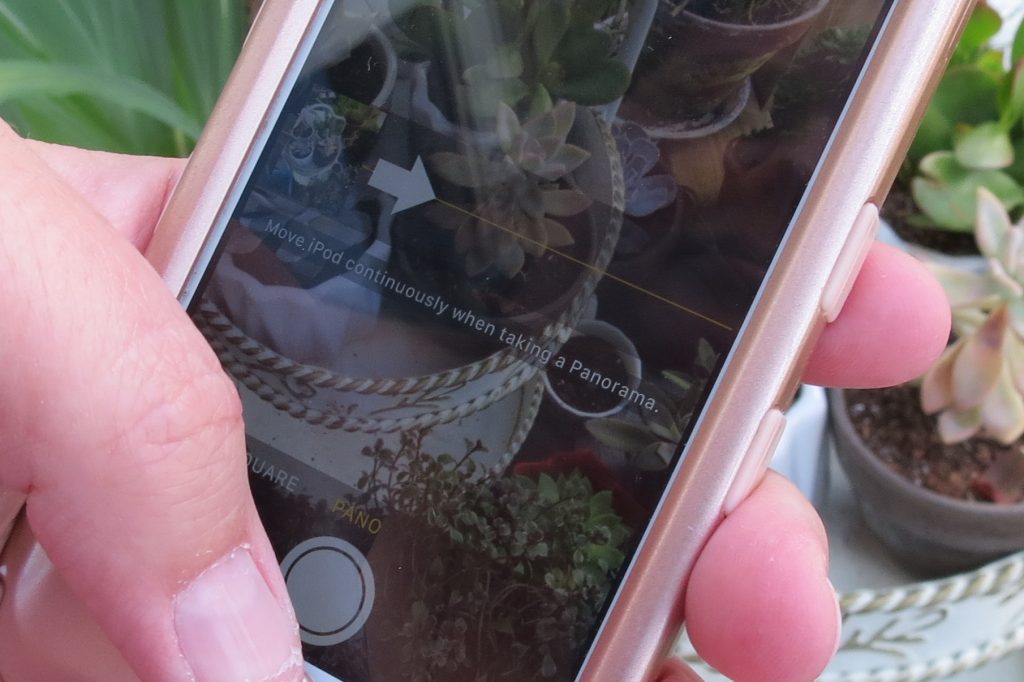
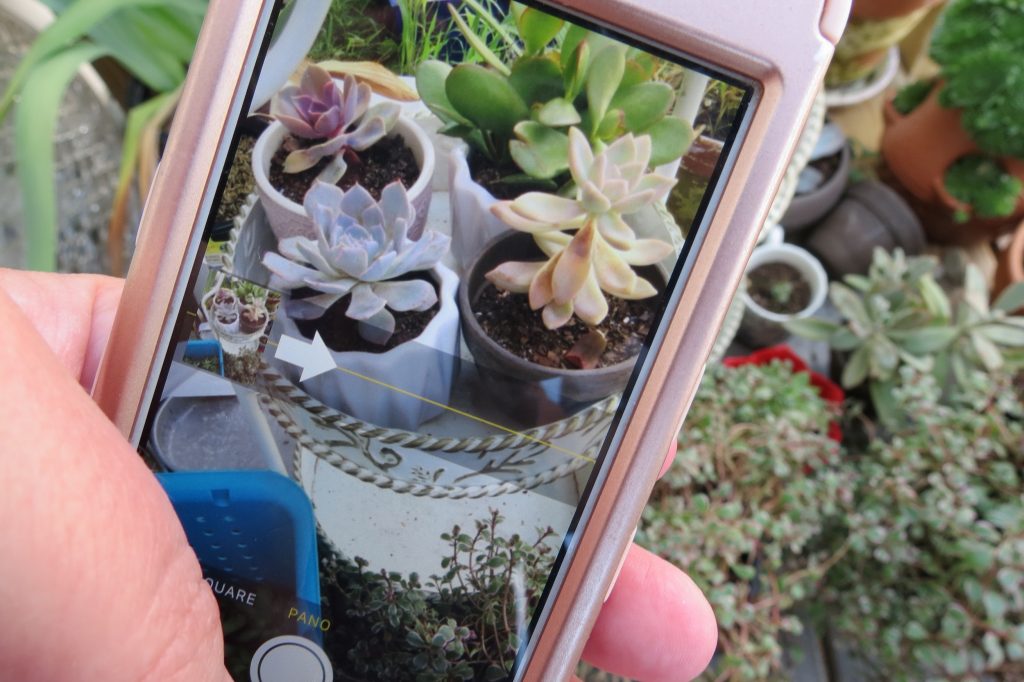
Second Tip: Know your camera! What features does it have? If you have an iPhone or iPad with a camera feature that allows you to keep your horizon line in view to snap your pics as you move across your view, use it! This will be perfect for shooting in the vertical orientation.
Third Tip: Use your Quick Glance Guide to help determine where you can cut for a smooth transition. Your Double-sided Craft mat will be helpful for lining things up on both the horizontal and vertical and making your cuts.
Because I’m making a suggestion about using a technique I never have tried, and I’ve written on the other methods before, I thought I’d try it out for myself.
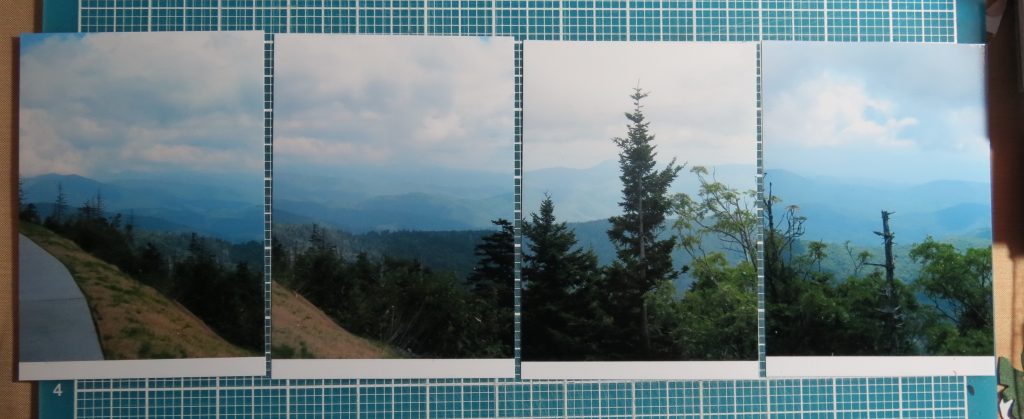
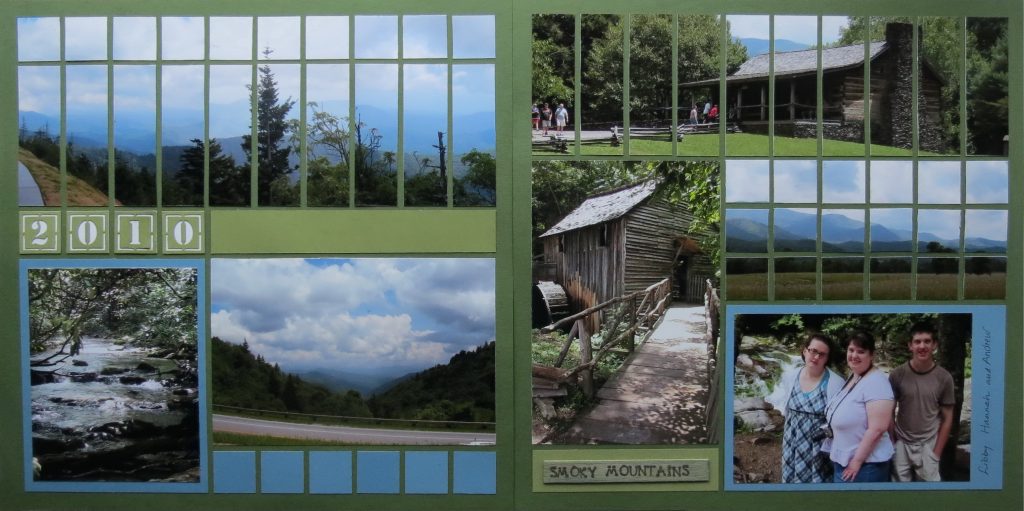
If you have an iPod or iPad you may be very familiar with the pano feature on the camera. It’s new to me, so my daughter showed me the basics and off I went with the iPad. Keep the arrow level with the line and you will be able to get your picture from left to right at the correct position. It gives you a bit of a fisheye perspective, but you can also keep snapping as you move keeping the arrow on that horizontal line and that’s what I’m using for this layout. The horizon line and arrow are a great tool.
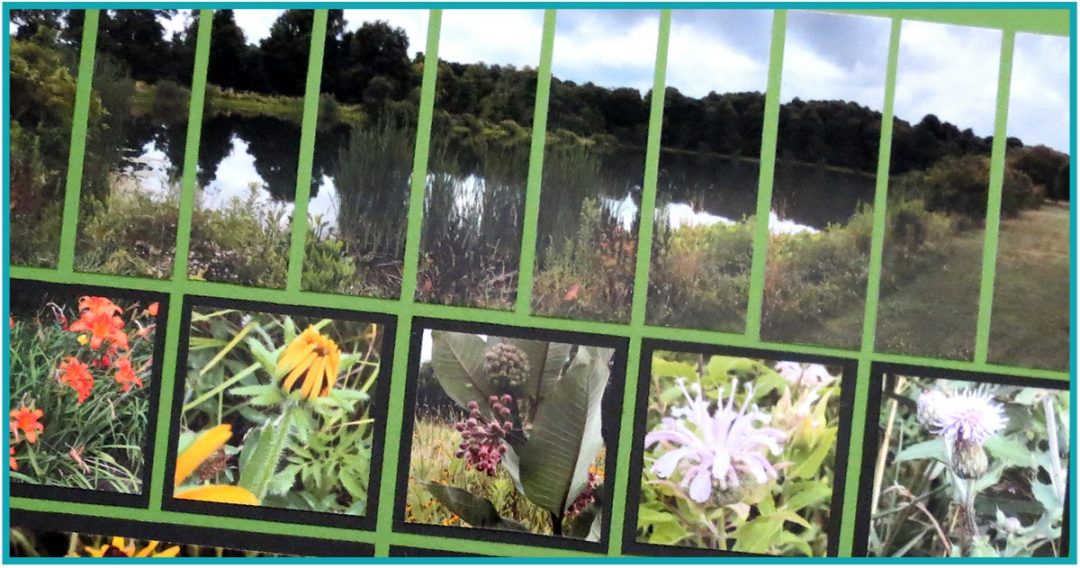
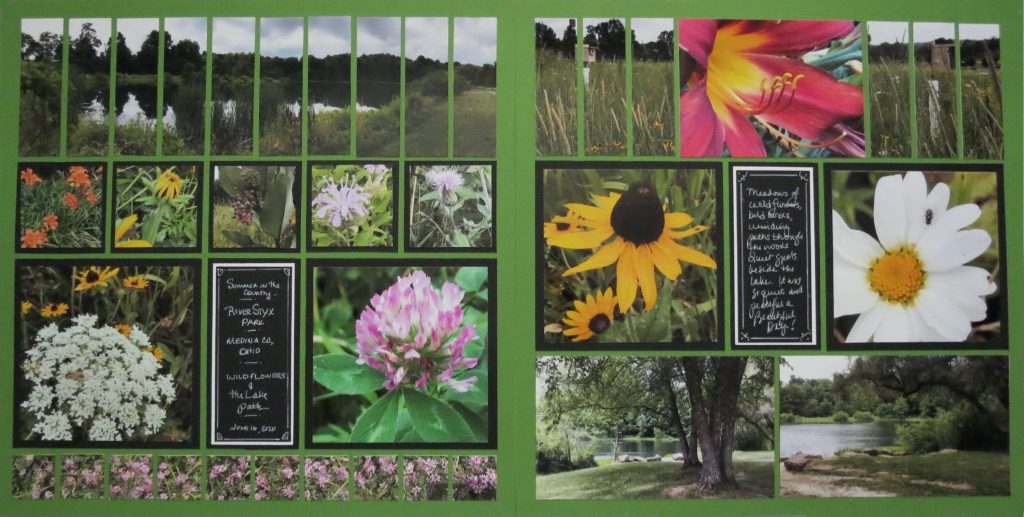
One of my favorite local parks is a spot that has had a beautiful view in the fall of the farm and woods below showing off great colors most years. I thought I’d tried there first. Unfortunately, a lot of things have grown and blocked that view, but in turning around to face the lake the view was so peaceful it seemed like a good alternative. I also walked the edge of the wildflower meadows and snapped lots of flowers to include in this layout.
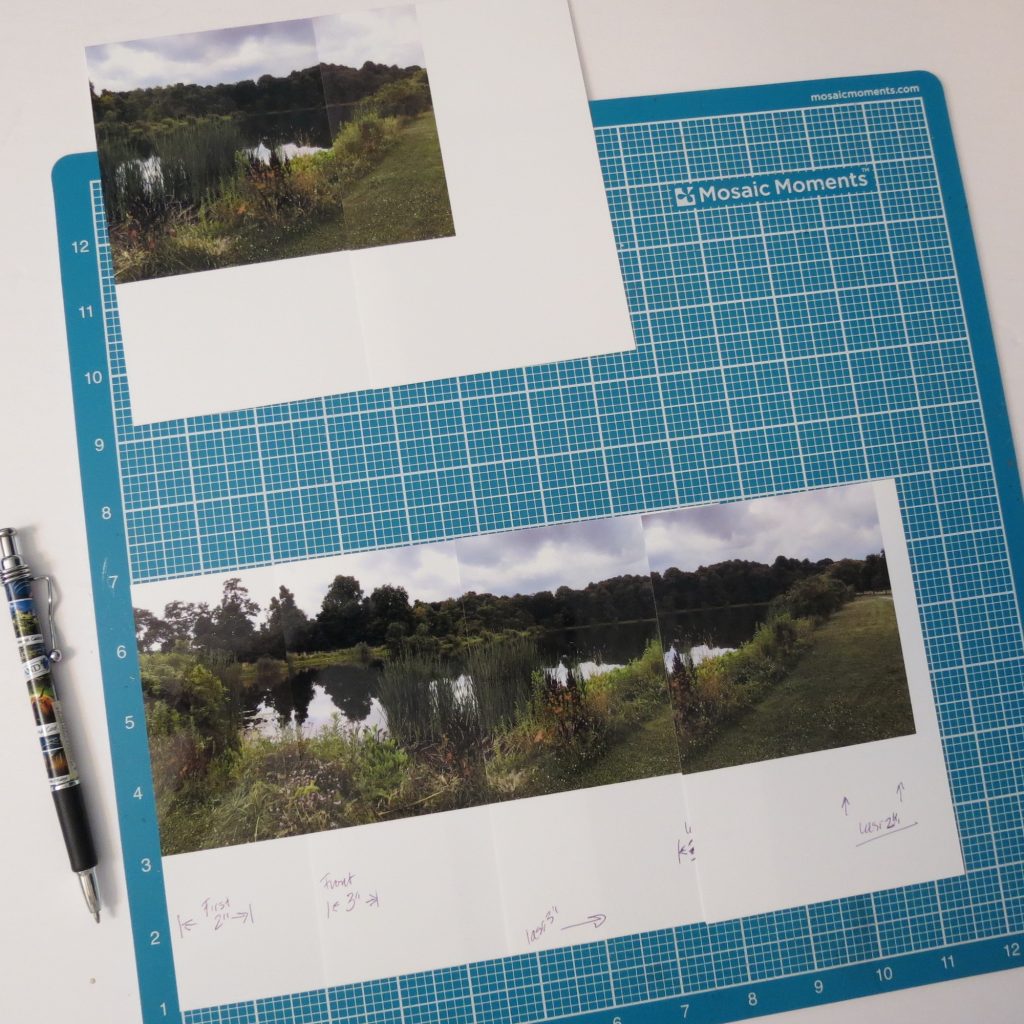
Printing out the pictures and lining them up seeing where the spots are to overlap was my first step. If I’d listened to my own advice, I would have snapped a few more or spaced them a bit better as I snapped it wouldn’t have been as difficult to get my 10” together! So, keep snapping!
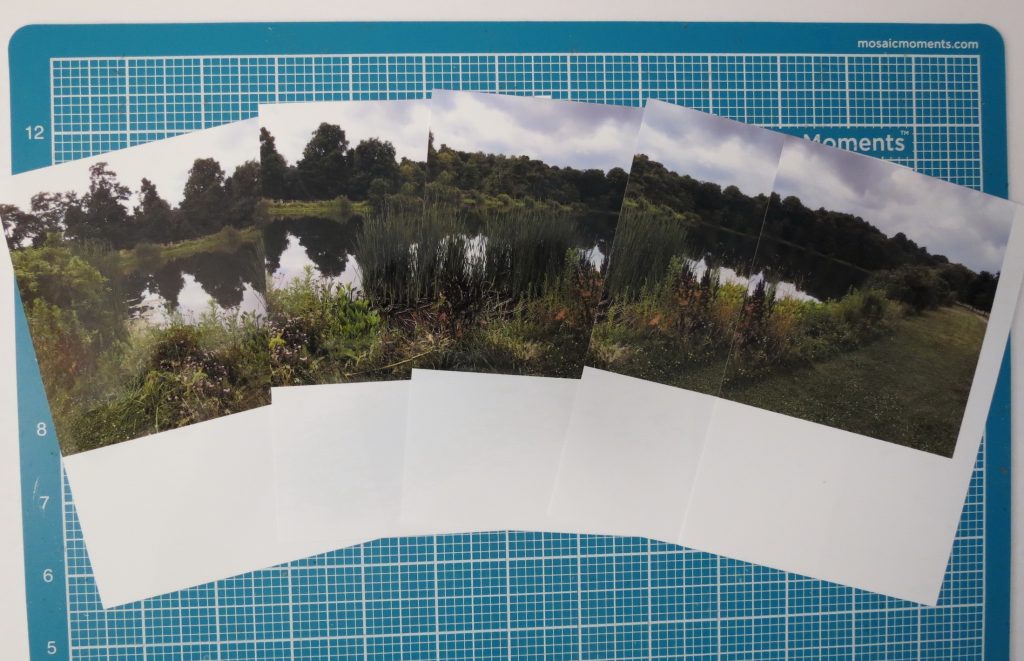
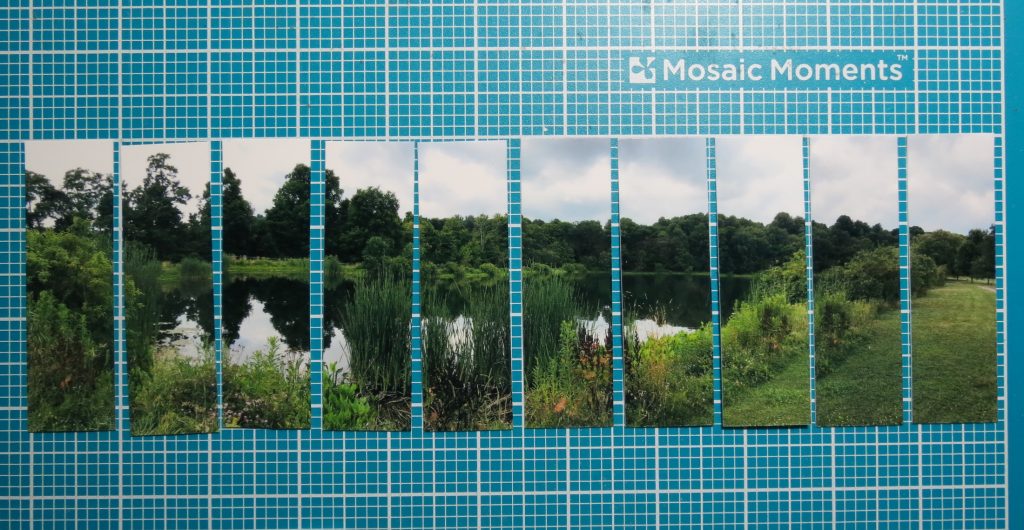
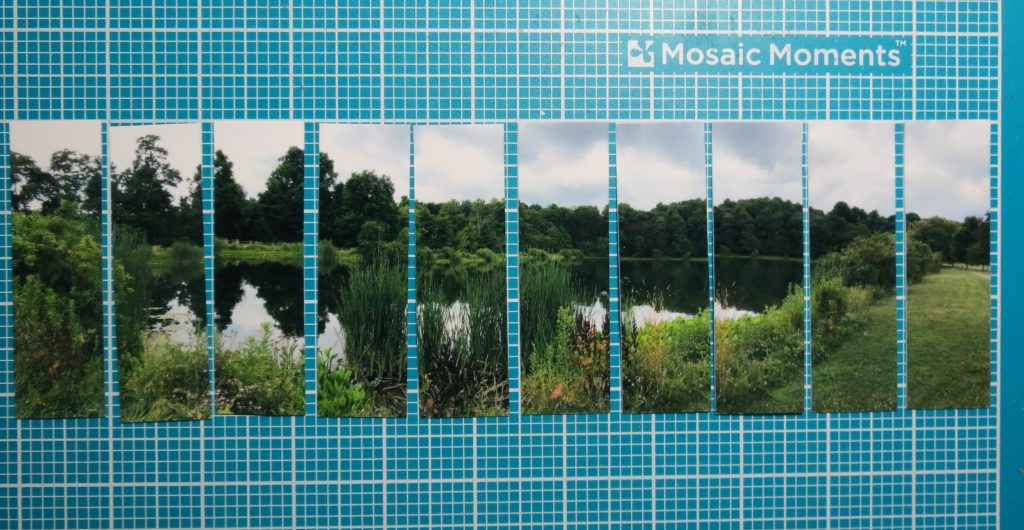
My pattern calls for a 3.25” strip so trimming away the excess from the bottom was the best choice. Lining them up on the grid and working on matching tree lines and shoreline brush made it quick work. After cutting away what I didn’t need, I kept the leftovers and attached them to the bottom off my first cut, just in case I might need it.
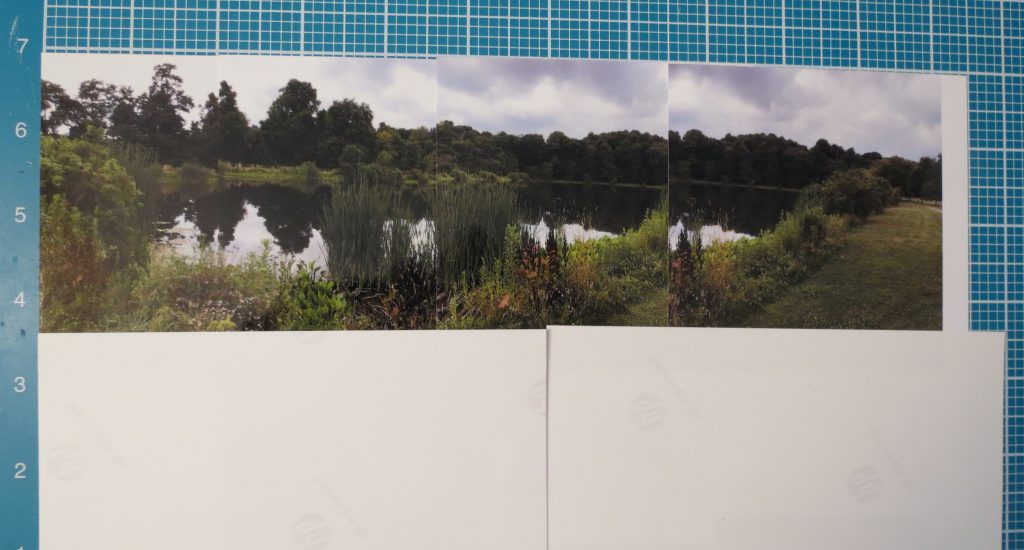

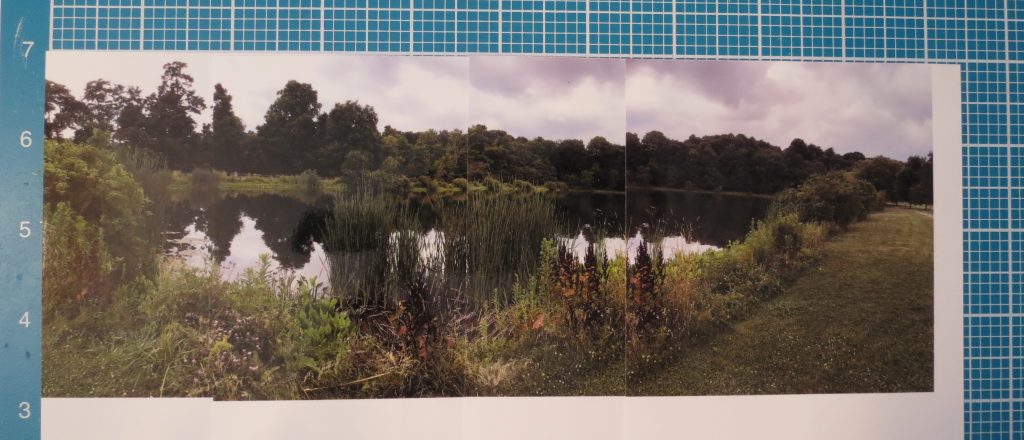
On the last photo I worked back from that outside edge for my 10”. Once I have the pieces together, I can see that my shoreline is off. I switch out another section I cut from the last photo and now, my shoreline blends better into the next frame. Yes, the tree line duplicates a bit, but it doesn’t show up as much as the previous way. Lesson learned to take more pictures!
All in all, if the iPad or iPod is the camera you have with you and are using, creating a panoramic is very possible!
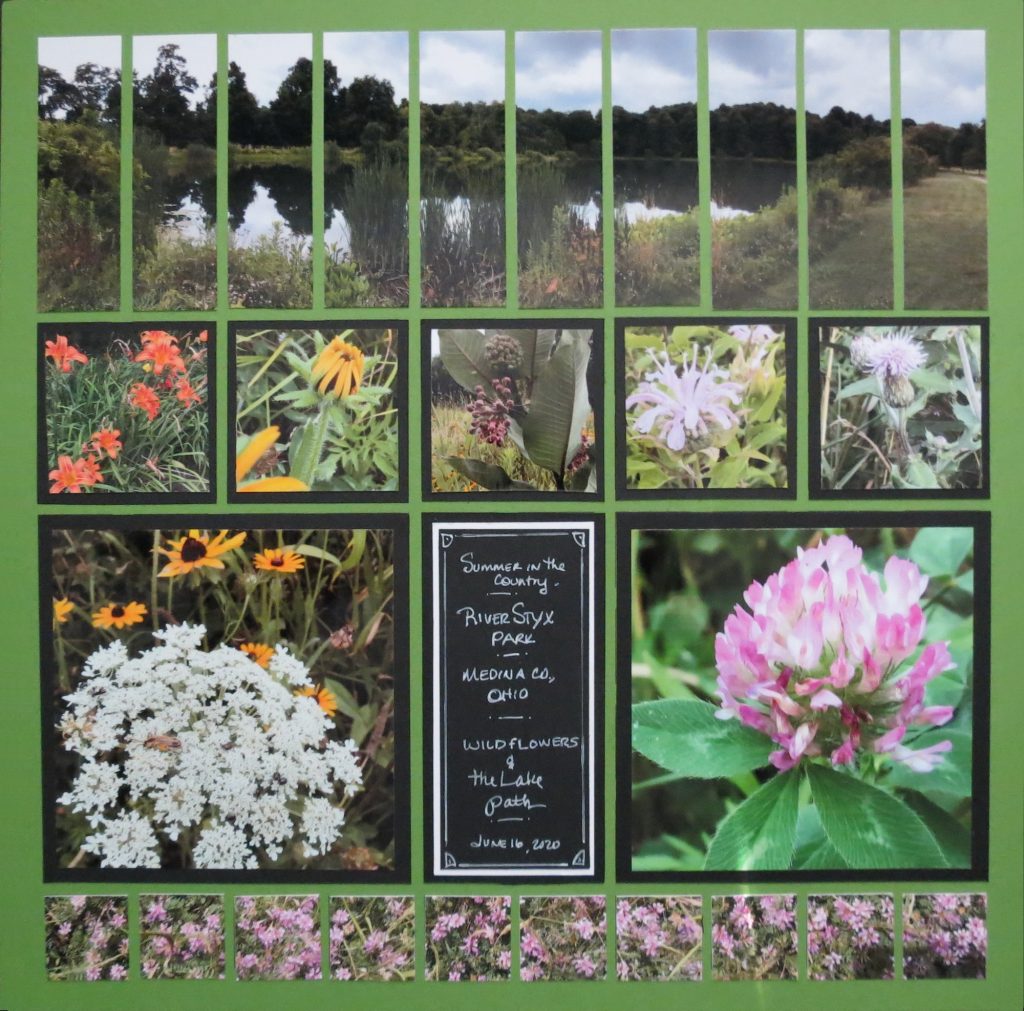
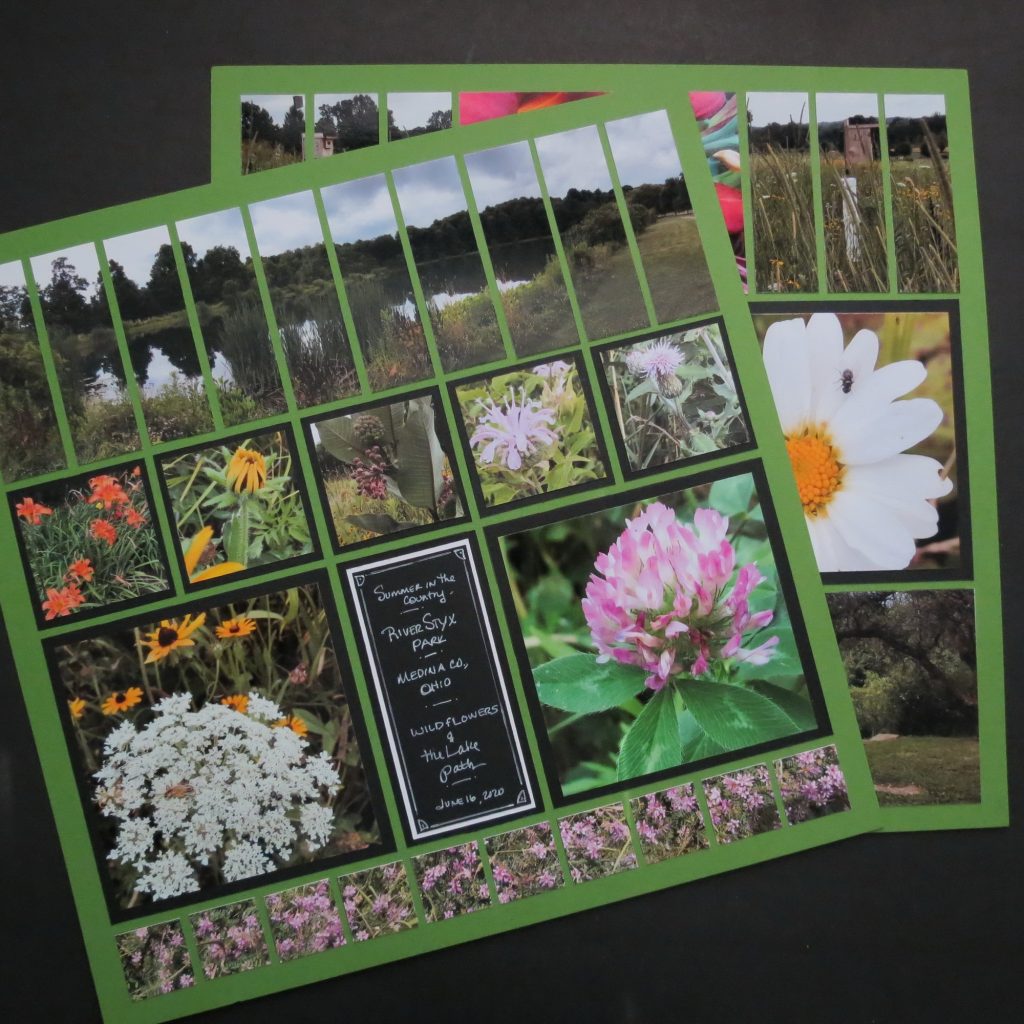
On the second page of the layout I’ve used another photo in strips to mimic the opposite side. One photo divided into two sections of three strips each. While not a continuation of the lake it does give that illusion by continuing the strip pattern.


The two patterns from the Pattern Gallery that I’ve used are #195 and #302. Both have a series of strips although to get a full pano strip I altered the top section slightly. Both also have a row with 2 – 4×4 sections and a center 2×4 and this helps the two patterns to work well together. My grid paper for these layouts is Spring Green and black cardstock mats frame the pictures. My journal blocks have been triple matted and written with a white gel pen.
When you are out on a drive next time, you might want to try taking a few photos to try building your own Mosaic panoramic pages for a new dramatic look.
Andrea Fisher