
Discover Dies are not complicated to use. Many require only a single cut, but they may take a little thought before cutting.
To show you just how simple it can be, our design team compiled 11 tips, along with lots of inspiration, to help you discover these dies.
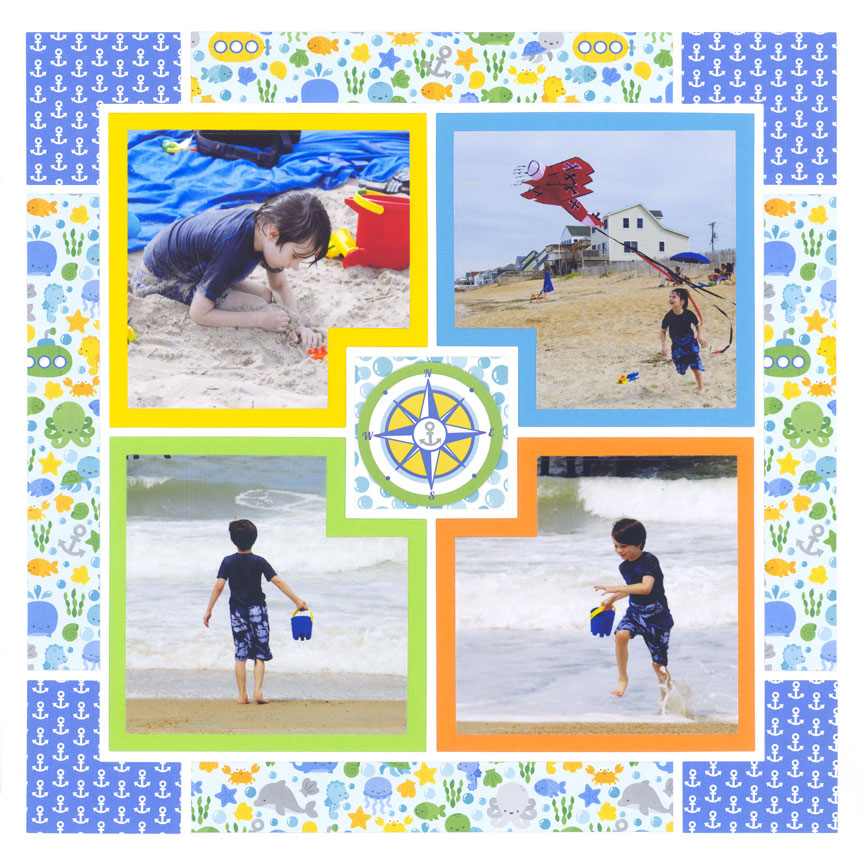
1. Use Pattern Paper

"May Woods" by Candy Spiegel - Pattern #508
When getting started with the grid die, make it simple by using patterned paper.
Sometimes we are nervous to finally cut a photo with the grid die, so using paper eases you into using it. Also, you may want to start with a page pattern with only one mosaic spot such as #508 shown here. The next step would be to make a multiple photo mosaic!
If you line up the 1-inch Grid Die just so, you can cut all of the 1-inch squares you need for this pattern with one pass through the machine.
2. Save Time with Strips
Strip dies cut much more than just panoramics.
They can turn a single photo into a great focal point on your layout. Just one cut through the machine and you are done!
You can also use the Strip Dies with card-stock to make lots of strips with a single pass.
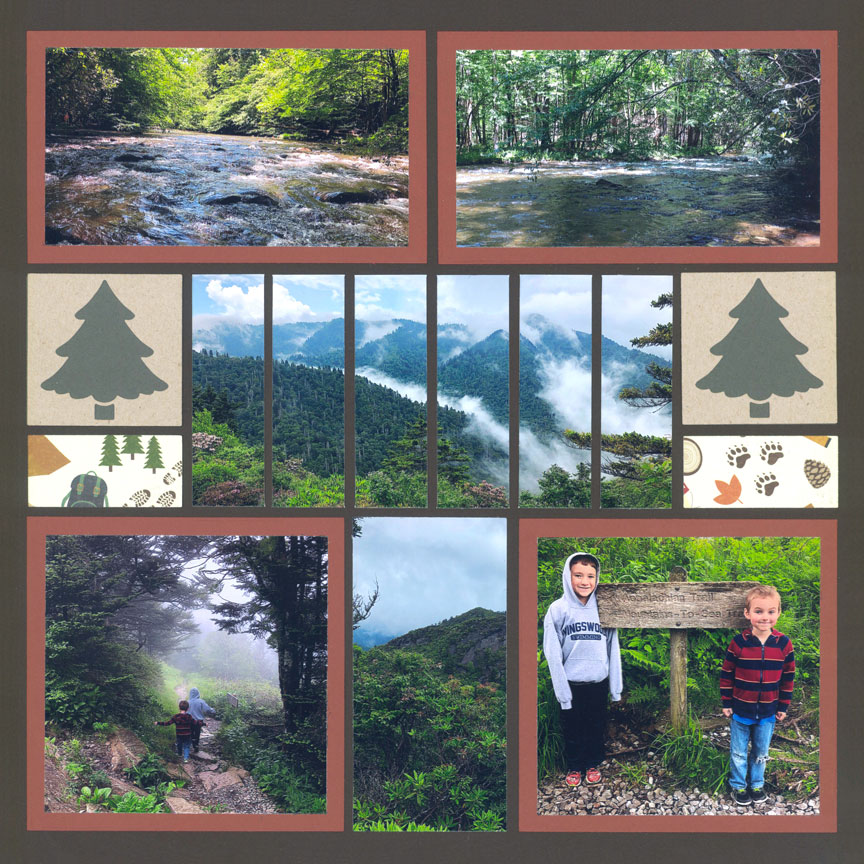
"Great Smokey Mountains" by Amber Lewis - Pattern #415
3. Make a Chevron
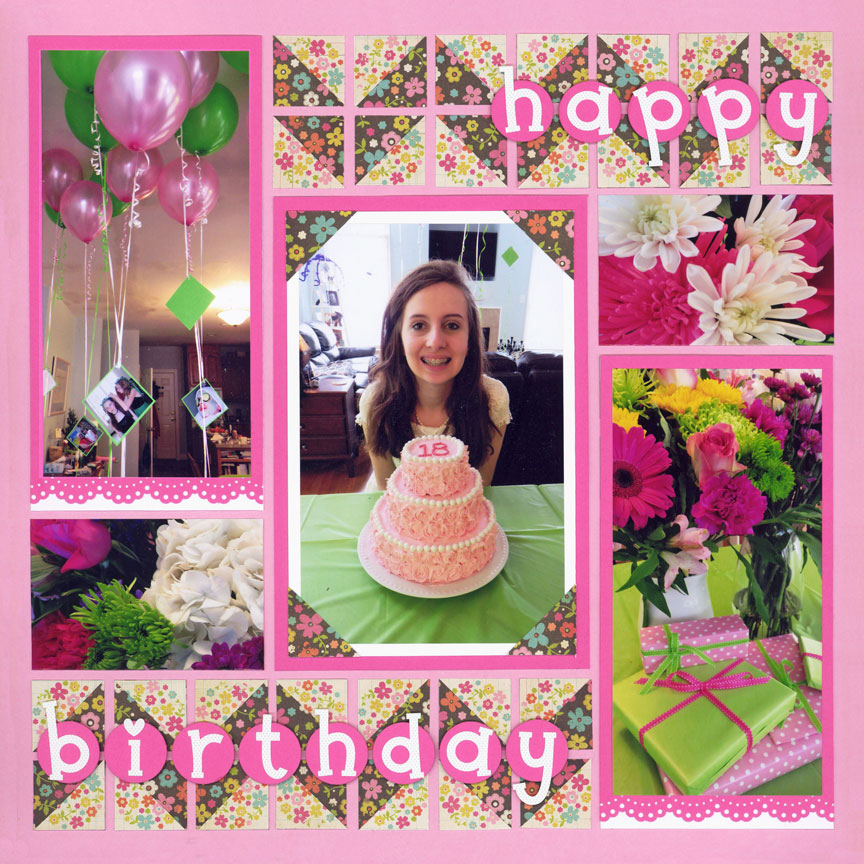
"18th Birthday" by Paije Potter - Pattern #426
The Chevron pattern is one of the easiest to make using the Corner Tile die.
You simply cut corners from two different papers and alternate how you place them. Page patterns with rows of green squares on them work best for this technique.
Once you've tried the chevron pattern, try out other designs with the corner tile dies. See 9 more ideas here.
4. Substitute a Strip Frame
Strip Frame Dies can easily be substituted for a plain square or rectangle on the page patterns.
Here, Paije used the 3x3 Strip Frame Die in place of a 3x3 blue square on the pattern.
If you are using a photo of landscapes, trees or flowers, you can simply cut with the Strip Frame Die. However, if you are working with a photo of people, animals or a sign, be sure the subject fits inside one of the strips on the die.

"Beautiful Park" by Paije Potter - Pattern #371
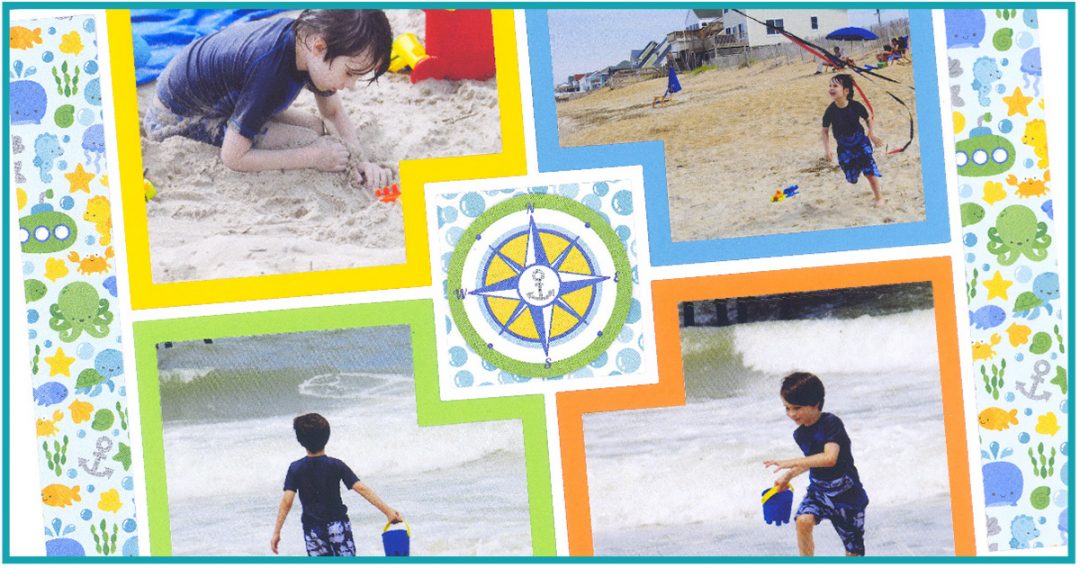
5. Cut Out the Corners
"Cole at Nagshead" by Paije Potter
The Corner Cut-Out Squares Die allows you to include an additional photo of embellishment on your layout.
Here, Paije used the die to make space for a 2x2 embellishment in the center of her layout.
The Corner Cut-Out Squares Die works exactly like the dies in the Basic Bundle ... cut the photo mat from the solid colored die (as pictured on the packaging) and the photo from the dotted die, then layer together.
6. Make Room in the Middle
Here, Paije used the Four Corner Cut-Out Die Set to add a photo to the center.
This die allows for a bit more space for the center photo and adds a huge "wow" factor on the layout. It only takes two cuts ... one for the photo and one for the photo mat.
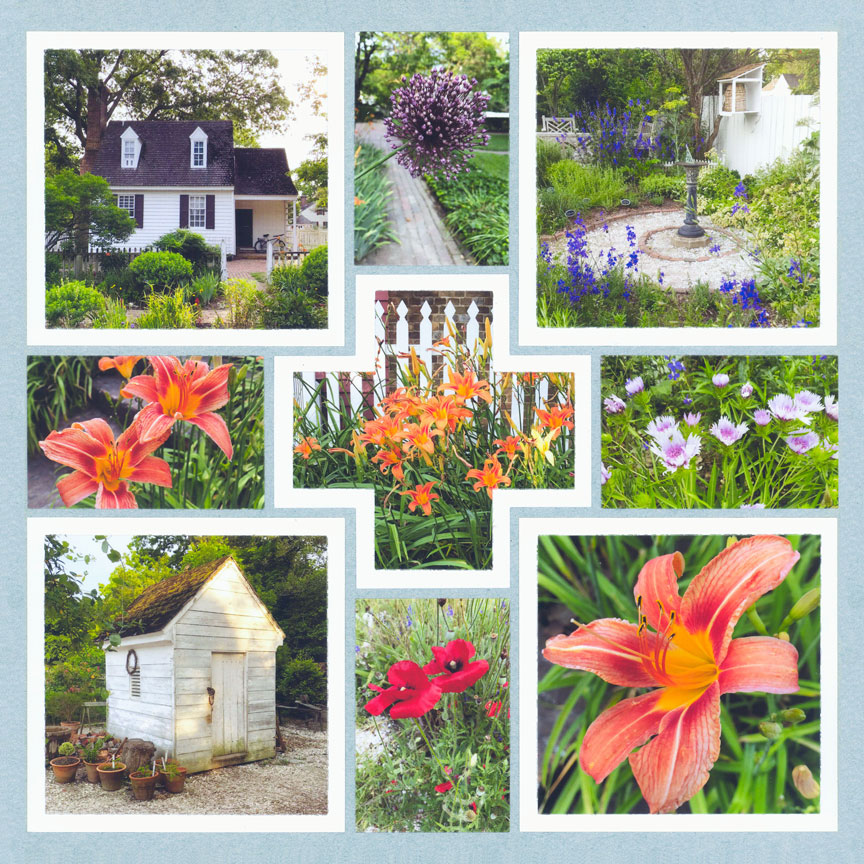
"Williamsburg Gardens" by Paije Potter
7. Try the Soleil Die
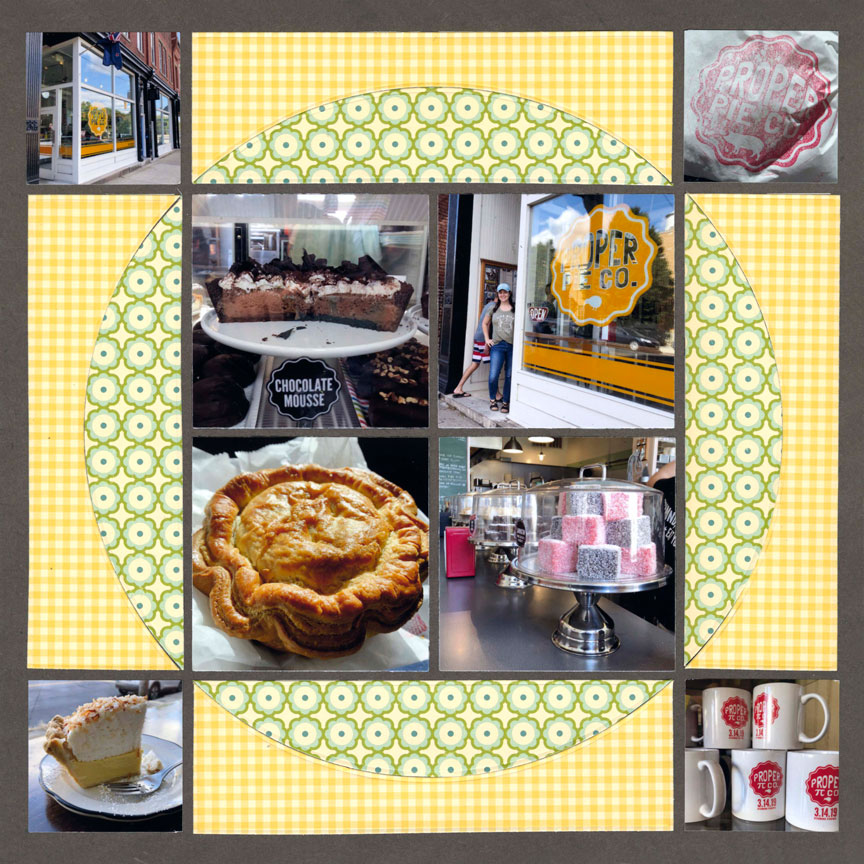
"Proper Pie Company" by Paije Potter - Pattern #493
Make something totally unique with the Soleil Die Set.
This set allows you to create a giant circle on your layout with two different colors of paper. There is no need to worry about photo size or direction ... simply cut and go!
If you are a patterned paper fan, this is a great die set for you.
8. Try a Few Steps
One easy way to try the Steps Die Set is to incorporate them around the Four Corner Cut-Out Die.
Jodi used the Steps Die here to create a beautiful focal background on her layout.
The only thing to remember is which corner of the photo will be cut out.

"Visiting DC" by Jodi Benson
9. Discover a Photo Circle
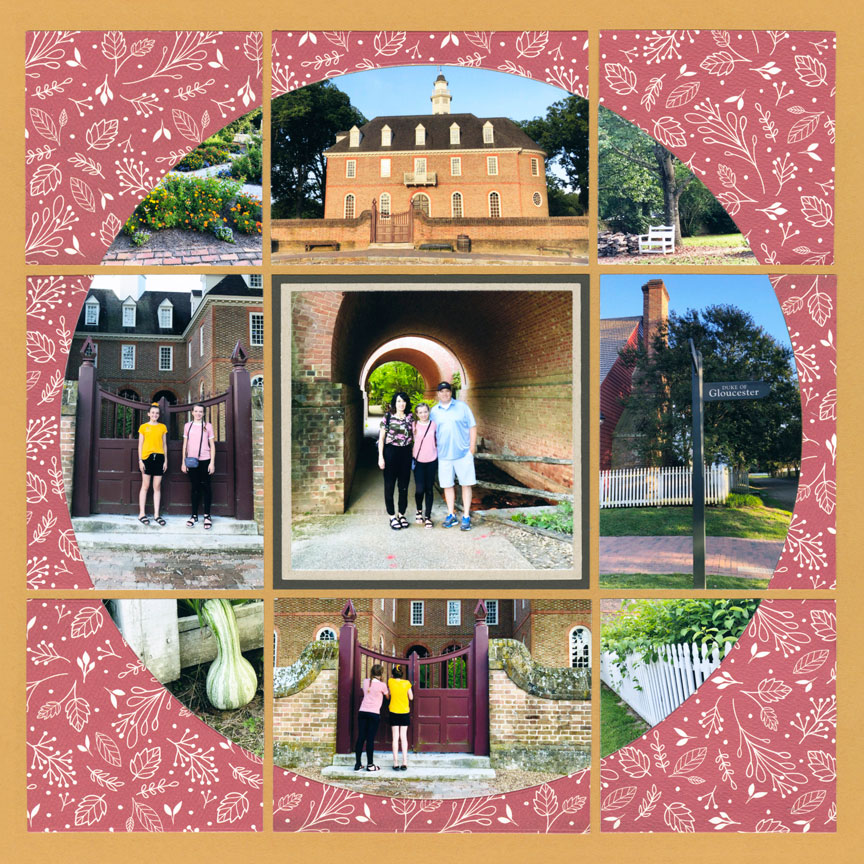
"Fun at Colonial Williamsburg" by Jodi Benson - Pattern #344
Easy Tip: The Horizon Set is the set to start with when you want to turn your photos into a giant circle. The other dies in the Horizon Collection are add-ons.
Use the dies to plan out your photos so you make sure they are in the right direction and will fill the space before making any cuts.
To keep it simple, use cardstock or a non-directional pattern paper for the outside frame of the circle. That way, you can cut multiple pieces at once.
10. Make an Easy Frame
The Corner Strips Die is a fun way to create a frame for a photo.
The die can be super quick and easy to use, if you follow these steps.
First, cut four 4x6 photos with the Corner Strips Die, rotating the die each time to fill in the corners on your layout. Flowers or landscape photos are perfect for this. Note: You will not use the largest corner of the die.
Now, cut four to eight additional prints with the Corner Connector Die to fill in the border. You may cut the leftover pieces of the photos you used on the corners, like Paije did here, or cut one of the photos twice with the Corner Connector Die to create your border.
Finally, cut a photo and photo mat to go in the center and your layout is complete. It only looks difficult!
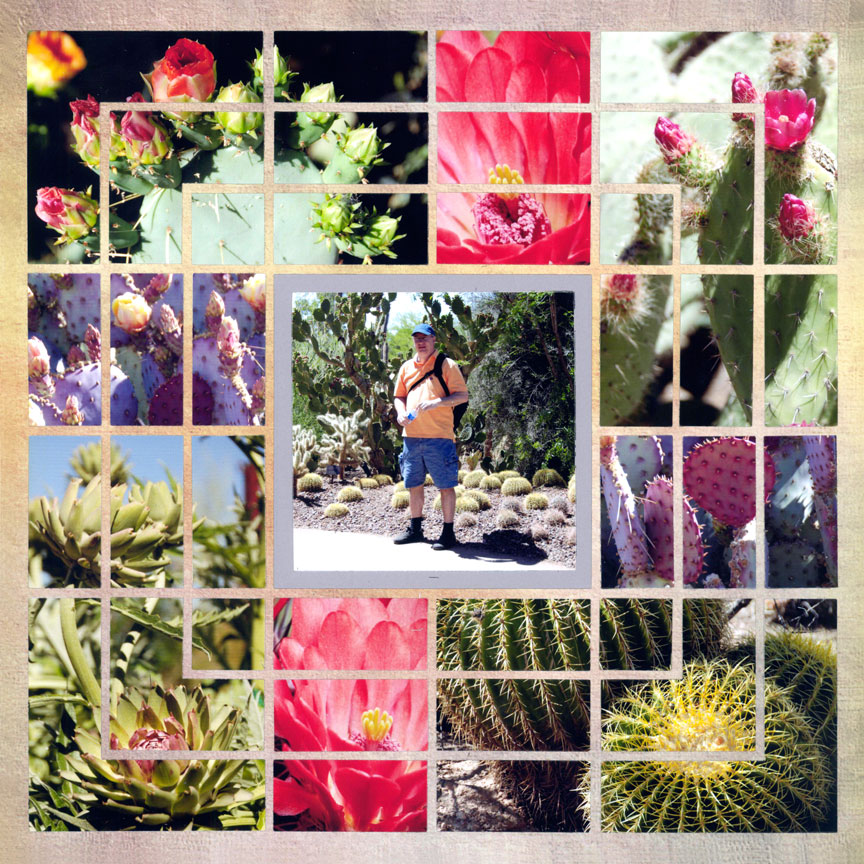
"Cactus Garden" by Paije Potter
11. Make a Unique Design

"Winter Sunset" by Candy Spiegel - Pattern #181
This is another layout that only looks difficult. The amazing scene at the top of the page was created with just two cuts of the Corner Grid Die.
First, cut a single 4x6 photo using the Corner Grid Die. Carefully remove the outer pieces and adhere the rest of the photo to your Grid Paper.
Then, use the same die to cut a bunch of corners at one time and fill in the remaining pieces. Yes, it's that easy!
Note: If you want the "frame" to vanish into the background, like Candy did here, use the backside of a piece of Grid Paper. The back is left without gridlines so you can use it on your layout to match perfectly.