
Updated: May 2021
You have been working with, and loving, the Mosaic Moments® dies. You have mastered layering, framed your photos, and created beautiful embellishments that fit the grid. You are ready to move beyond the Explore Level Dies and Discover something new!
Discover Level Dies take a little more time and some preplanning; but, the results are incredible. Just take a look ...
Corner Tile Dies
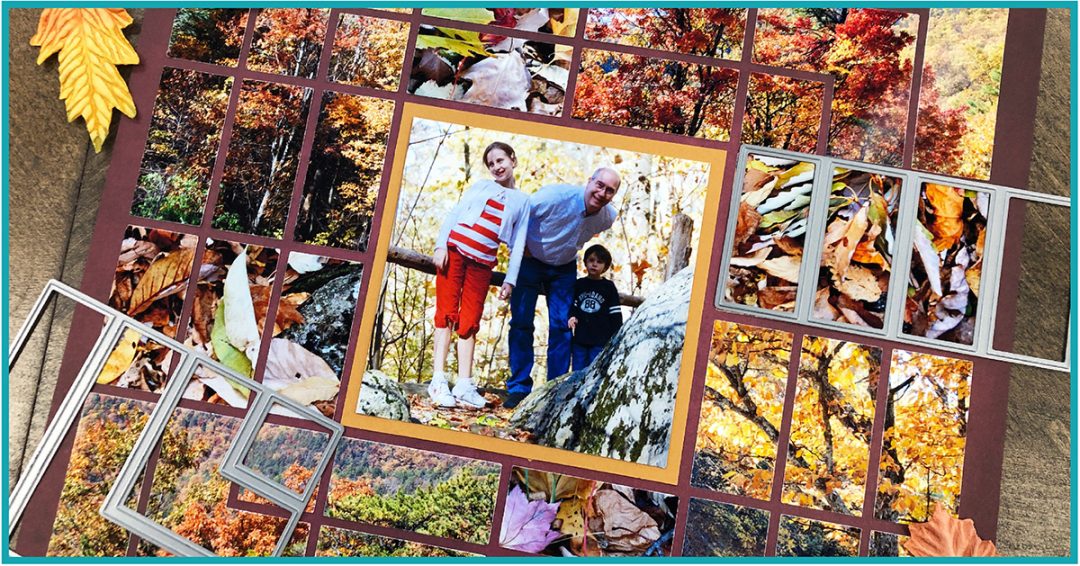
"Fall with Sadie" by Paije Potter - Pattern #162
Corner Tiles can be used to create amazing designs, including stripes, chevrons and more.
For inspiration, take a look at some simple quilt patterns, like Paije did on this amazing layout.
Corner dies come in several different sizes. This one, which covers half of a 3x3 square, and is used to create interesting triangles with patterned paper in the center square.
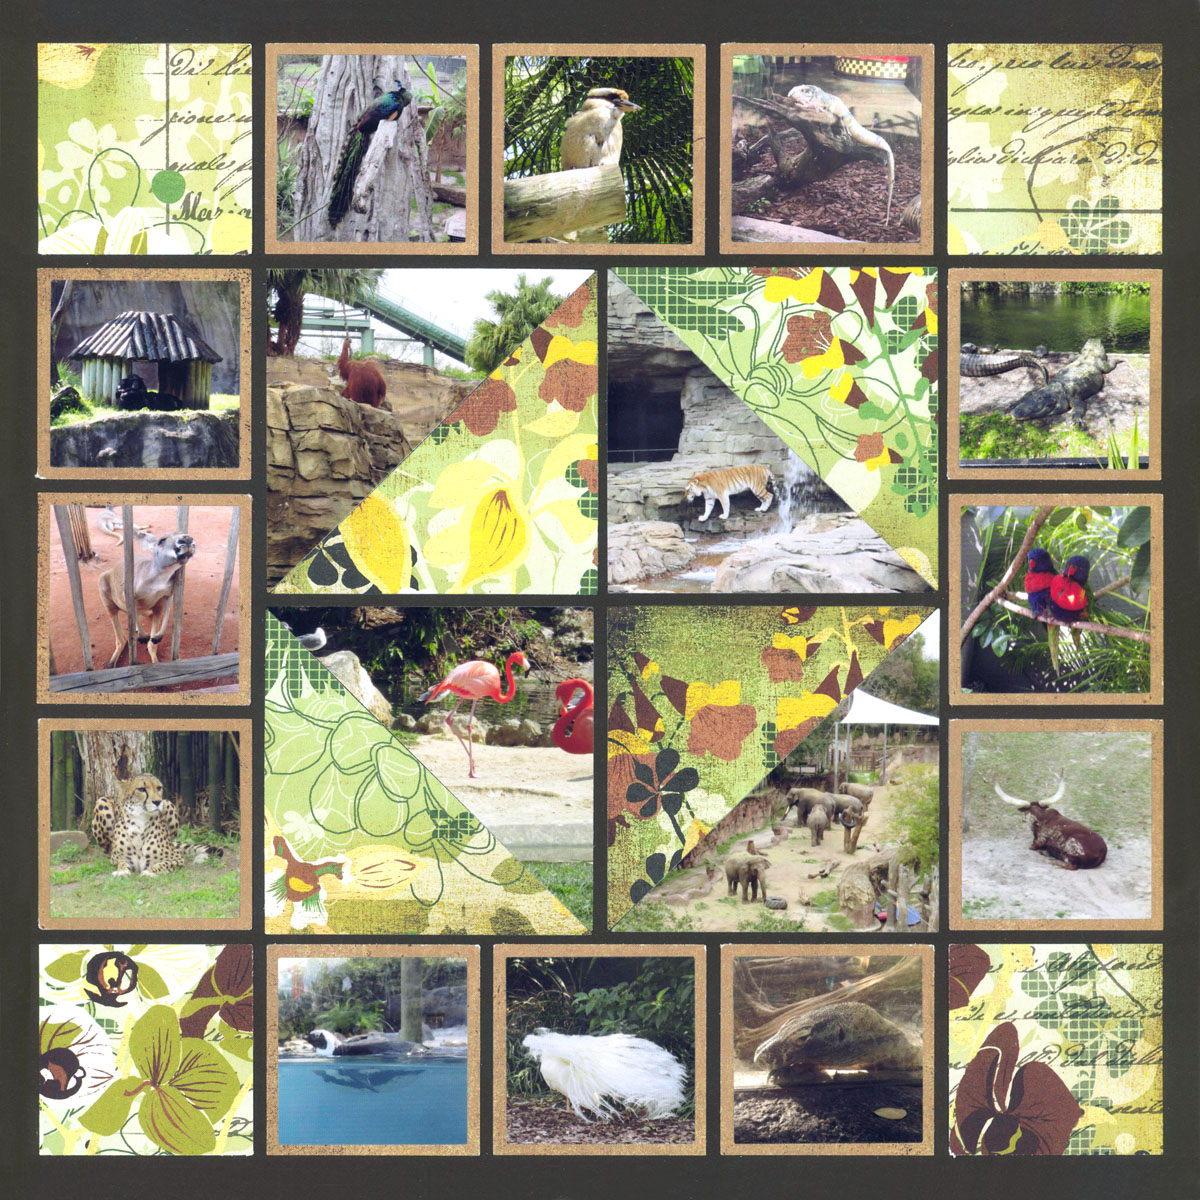
"Animals of Busch Gardens" by Paije Potter - Pattern #392
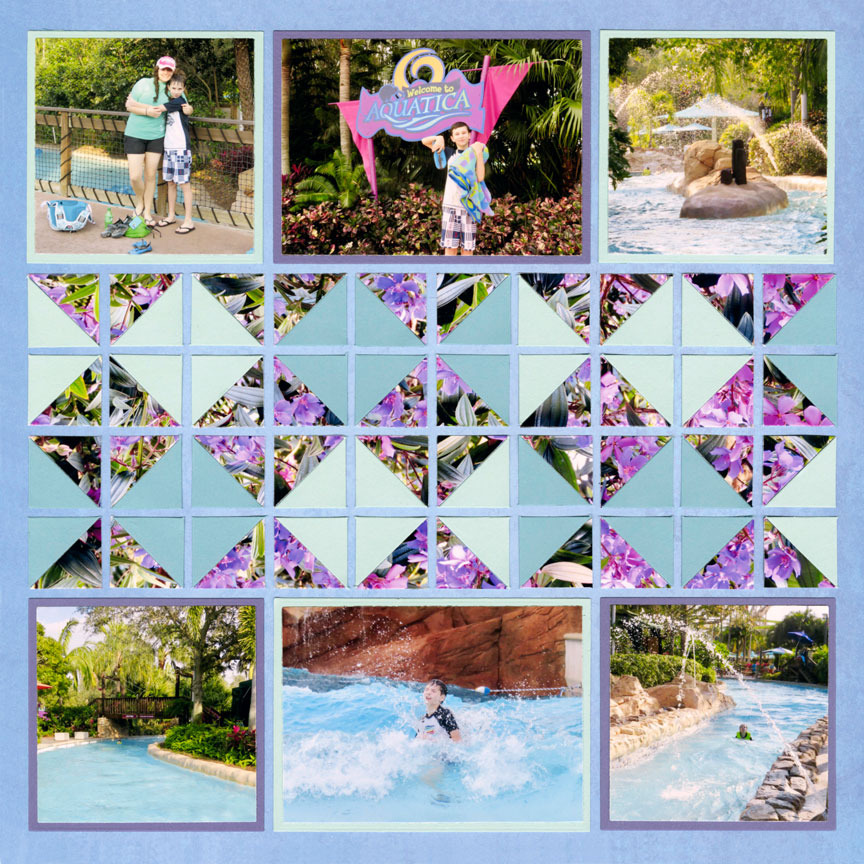
"Fun at Aquatica" by Paije Potter - Pattern #609
North Pole & Box Kite

"Snow Day" by Paije Potter - Free-styled design
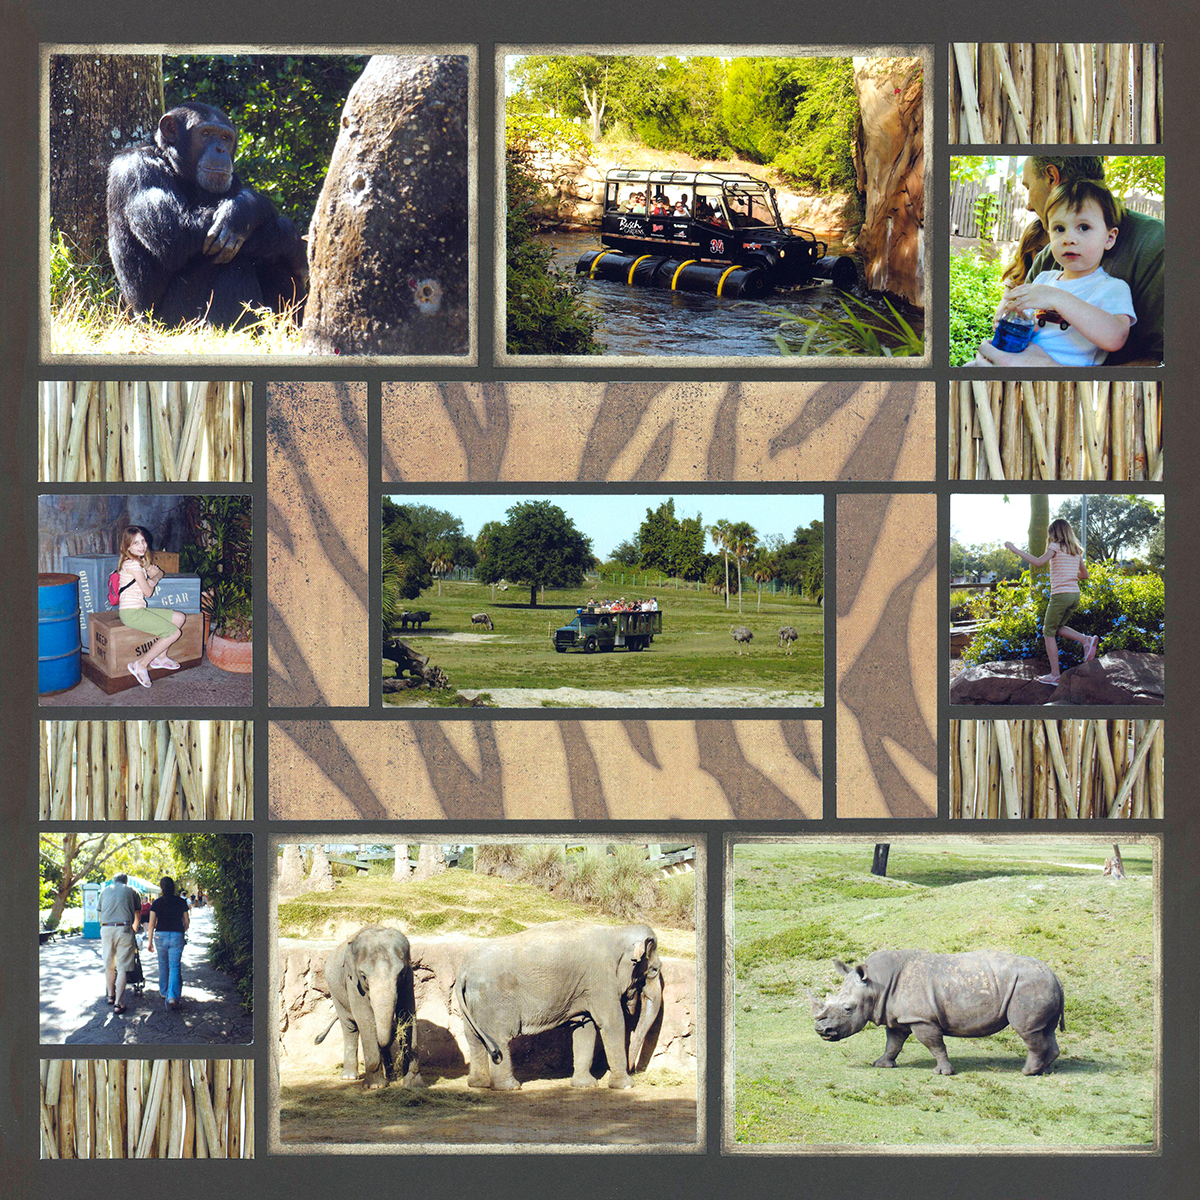
The North Pole Set can also be used to create stripes and chevrons on your layout.
Here, Paije also overlapped some of her photos. It allows more pictures to fit, covers up any parts of another photo you do not want to see without making it smaller, and provides some extra variety on the design.
Box Kite can be used to make a mosaic - 2x3 size is shown. Box Kite also comes in 3x4 size.
Here Paije used different pictures to make two large diamond shapes overlapping one another and placed two different pattern paper on the outside triangles of the Box Kite 2x3 Dies in the center of her lay out.

"Safari Ride" by Paije Potter - Pattern #574
Corner Cut-Out Dies
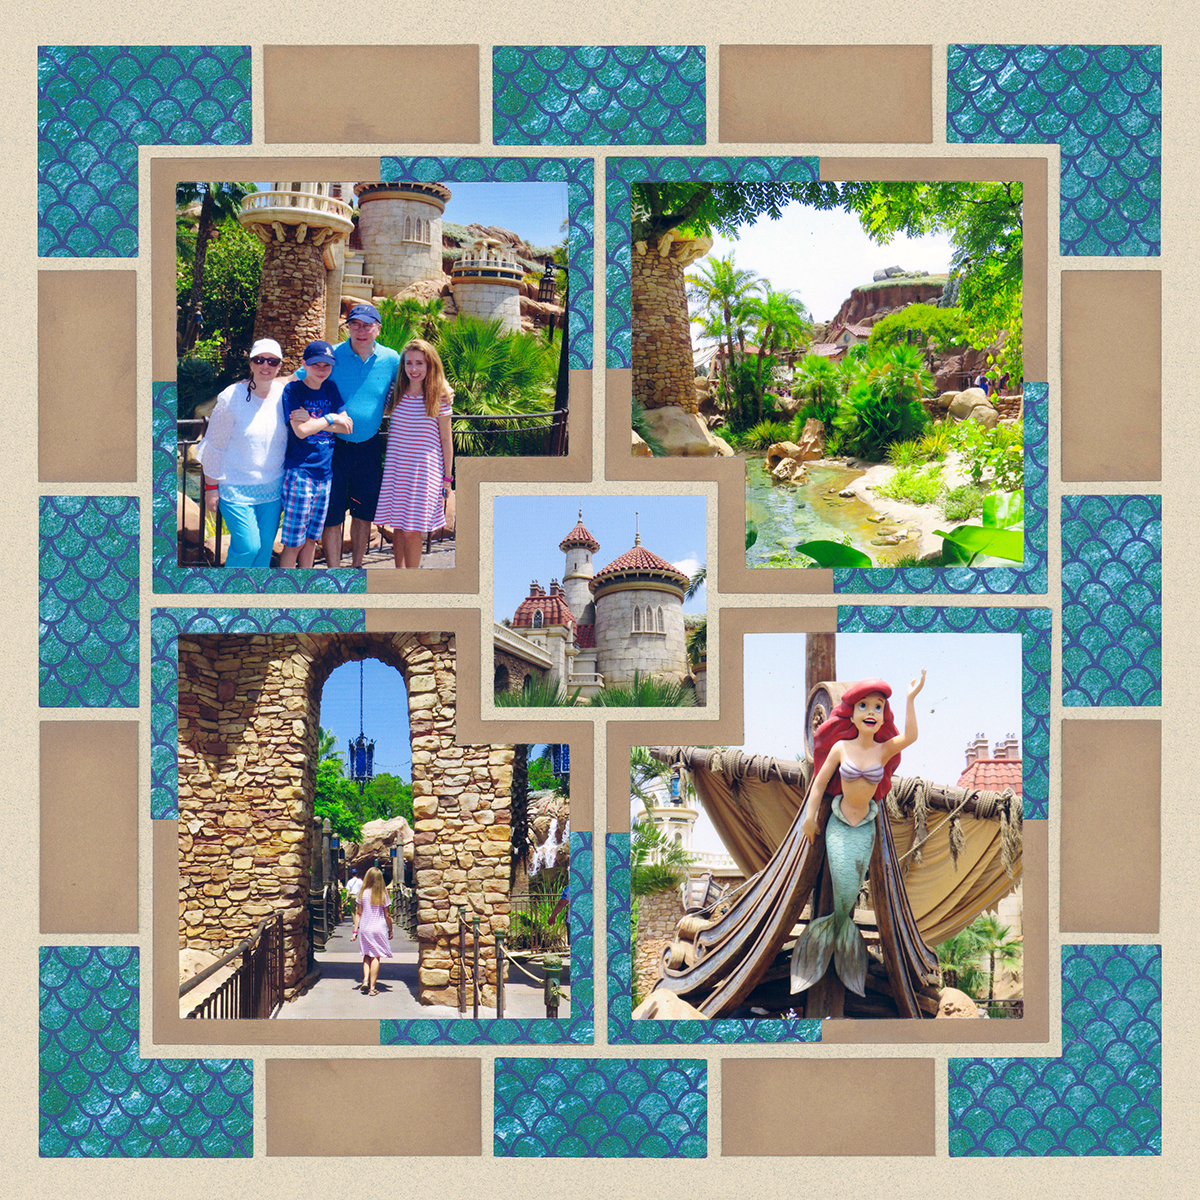
"Under the Sea" by Paije Potter
Continuing with our corner theme, we come next to the Corner Cut-Out Dies.
Look closely, these squares are missing a corner; so, you can easily wrap your designs around another photo, journaling block or element on your layout.
They also come with layering dies, so you can create some spectacular layouts.
The Four Corner Cut-Out Set can be used along with the Corner Cut-Out Dies pictured above.
The die looks like a plus sign and fits in and around your other elements.
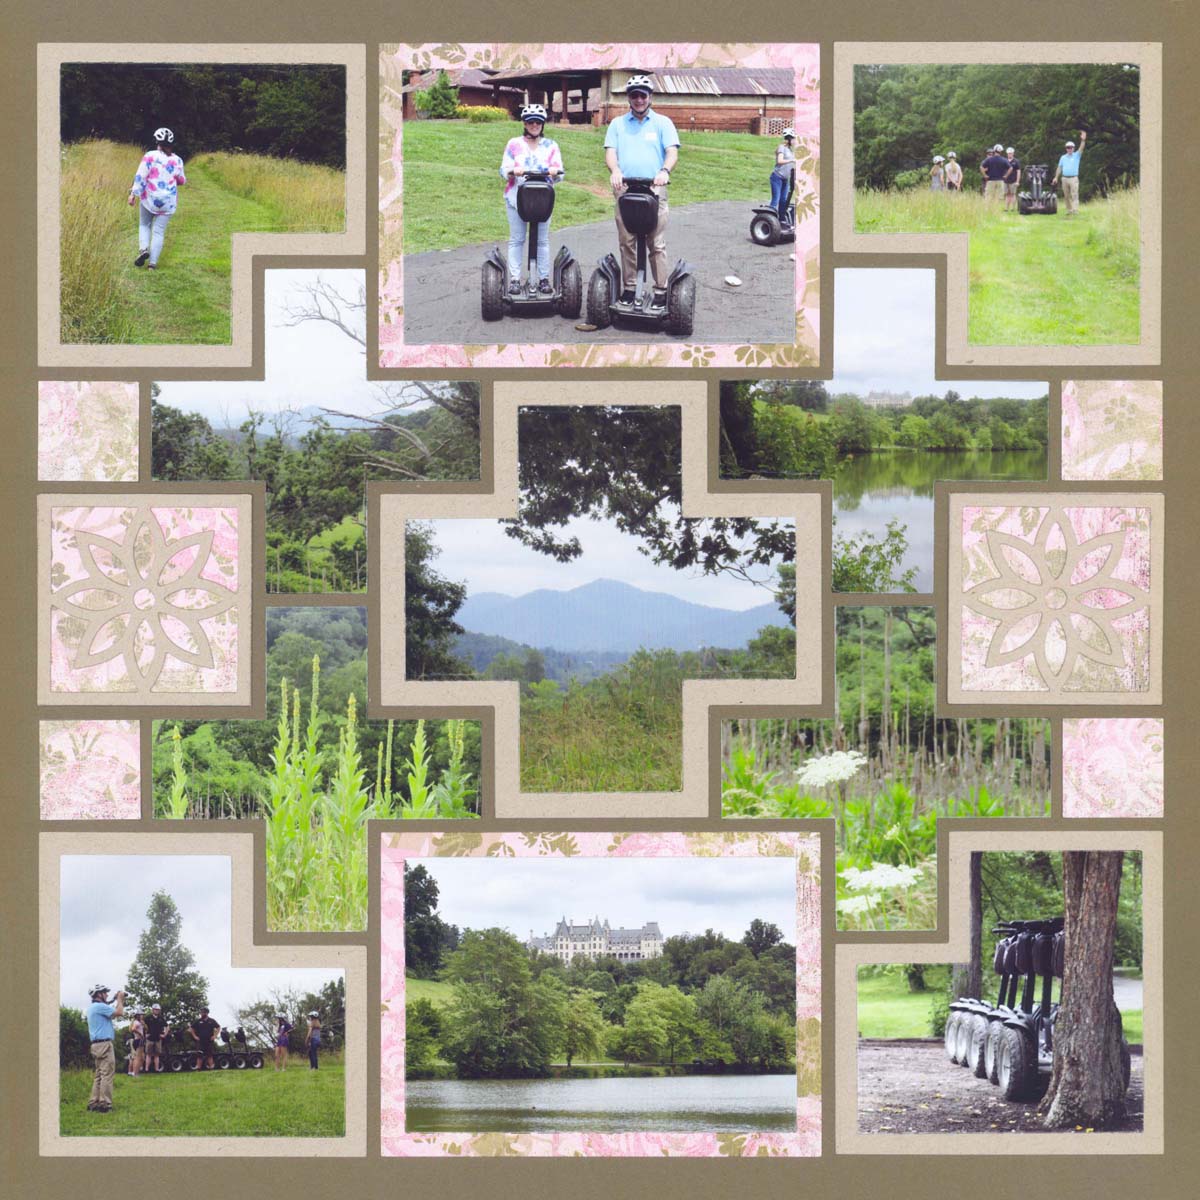
"Segway at the Biltmore" by Paije Potter
Steps Die Set
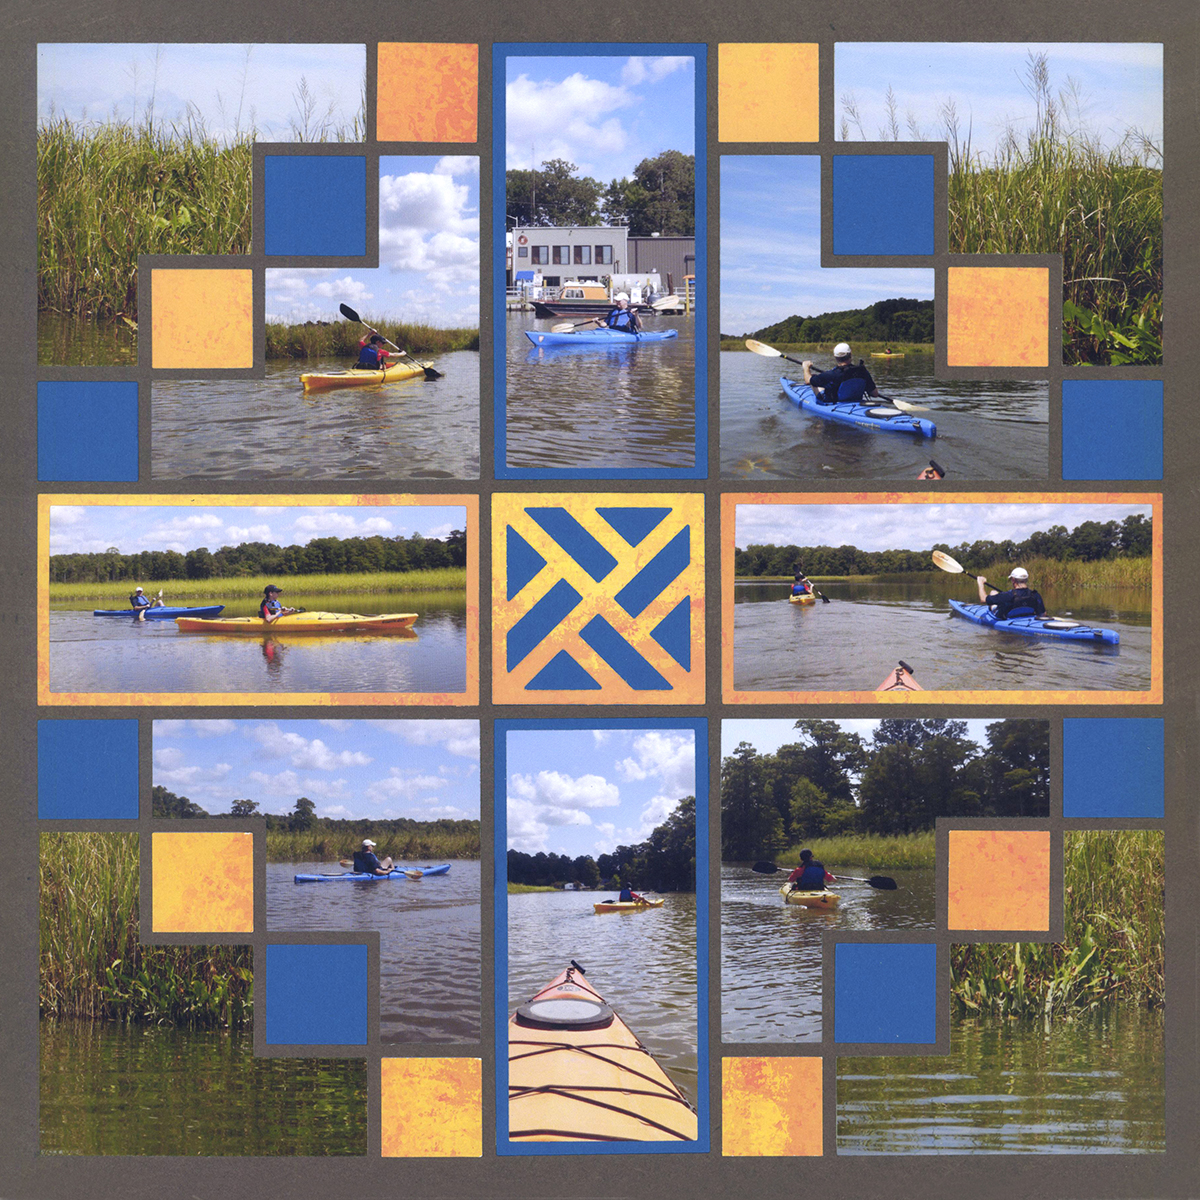
"Kayak Fun" by Paije Potter
The Steps Die also allows you change up the formal square and rectangle designs.
Here, Paije placed photos cut with the Steps Die next to each other and filled in-between the pieces with colored paper.
For this one, Tami used the Steps Die to create a unique focal point on her layout.
The 1 inch squares, in-between the steps shapes, highlight details from the gardens.
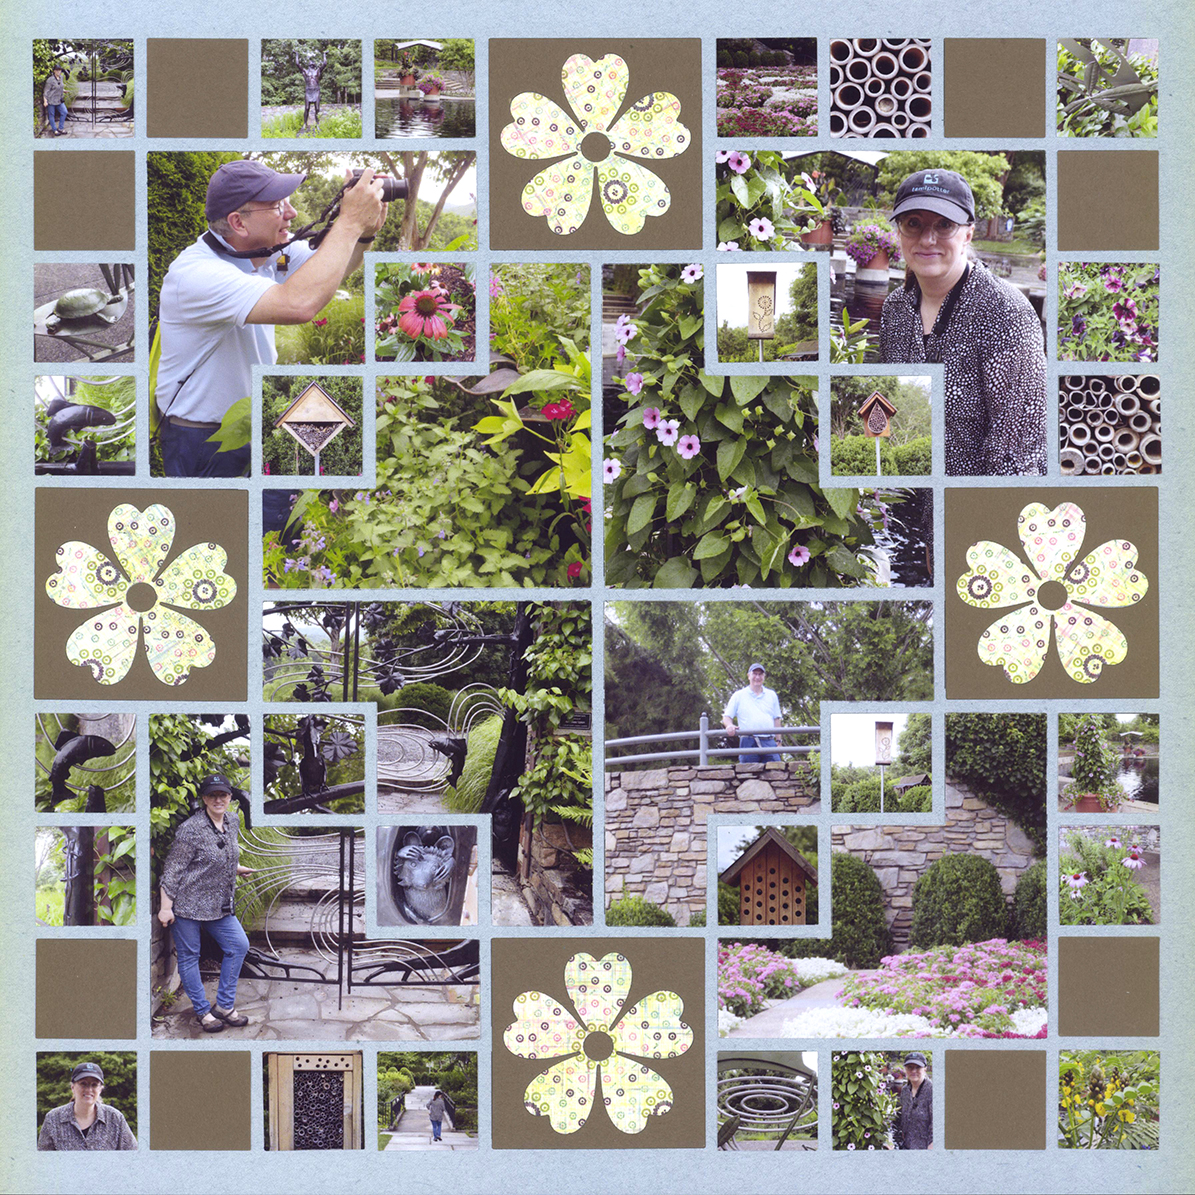
"Asheville Gardens" by Tami Potter
Horizon Die Sets

"Spring Day" by Paije Potter - Pattern #344
While we love our squares and rectangles, sometimes we need things that are round. And that's where the Horizon Dies come in.
The Horizon Dies are actually part of a large collection of dies. You can buy the basic pieces to make the giant circle as shown, or add to them with different sizes that help you fit just about any photo you would like into a circle.
By changing up some of the Horizon Dies, you can create a pinwheel in the center of your giant circle, like Jodi did here.

"Freedom Park" by Jodi Benson - Pattern #103
Soleil Die Set
"Katelyn" by Jodi Benson - Pattern #152
The Soleil Die Set also creates a giant circle on your layout.
However, this one leaves the corners of your page alone so you can place a 2x2 photo or die cut in each corner.
Soleil comes in a set. It is not designed to work with the Horizon dies.
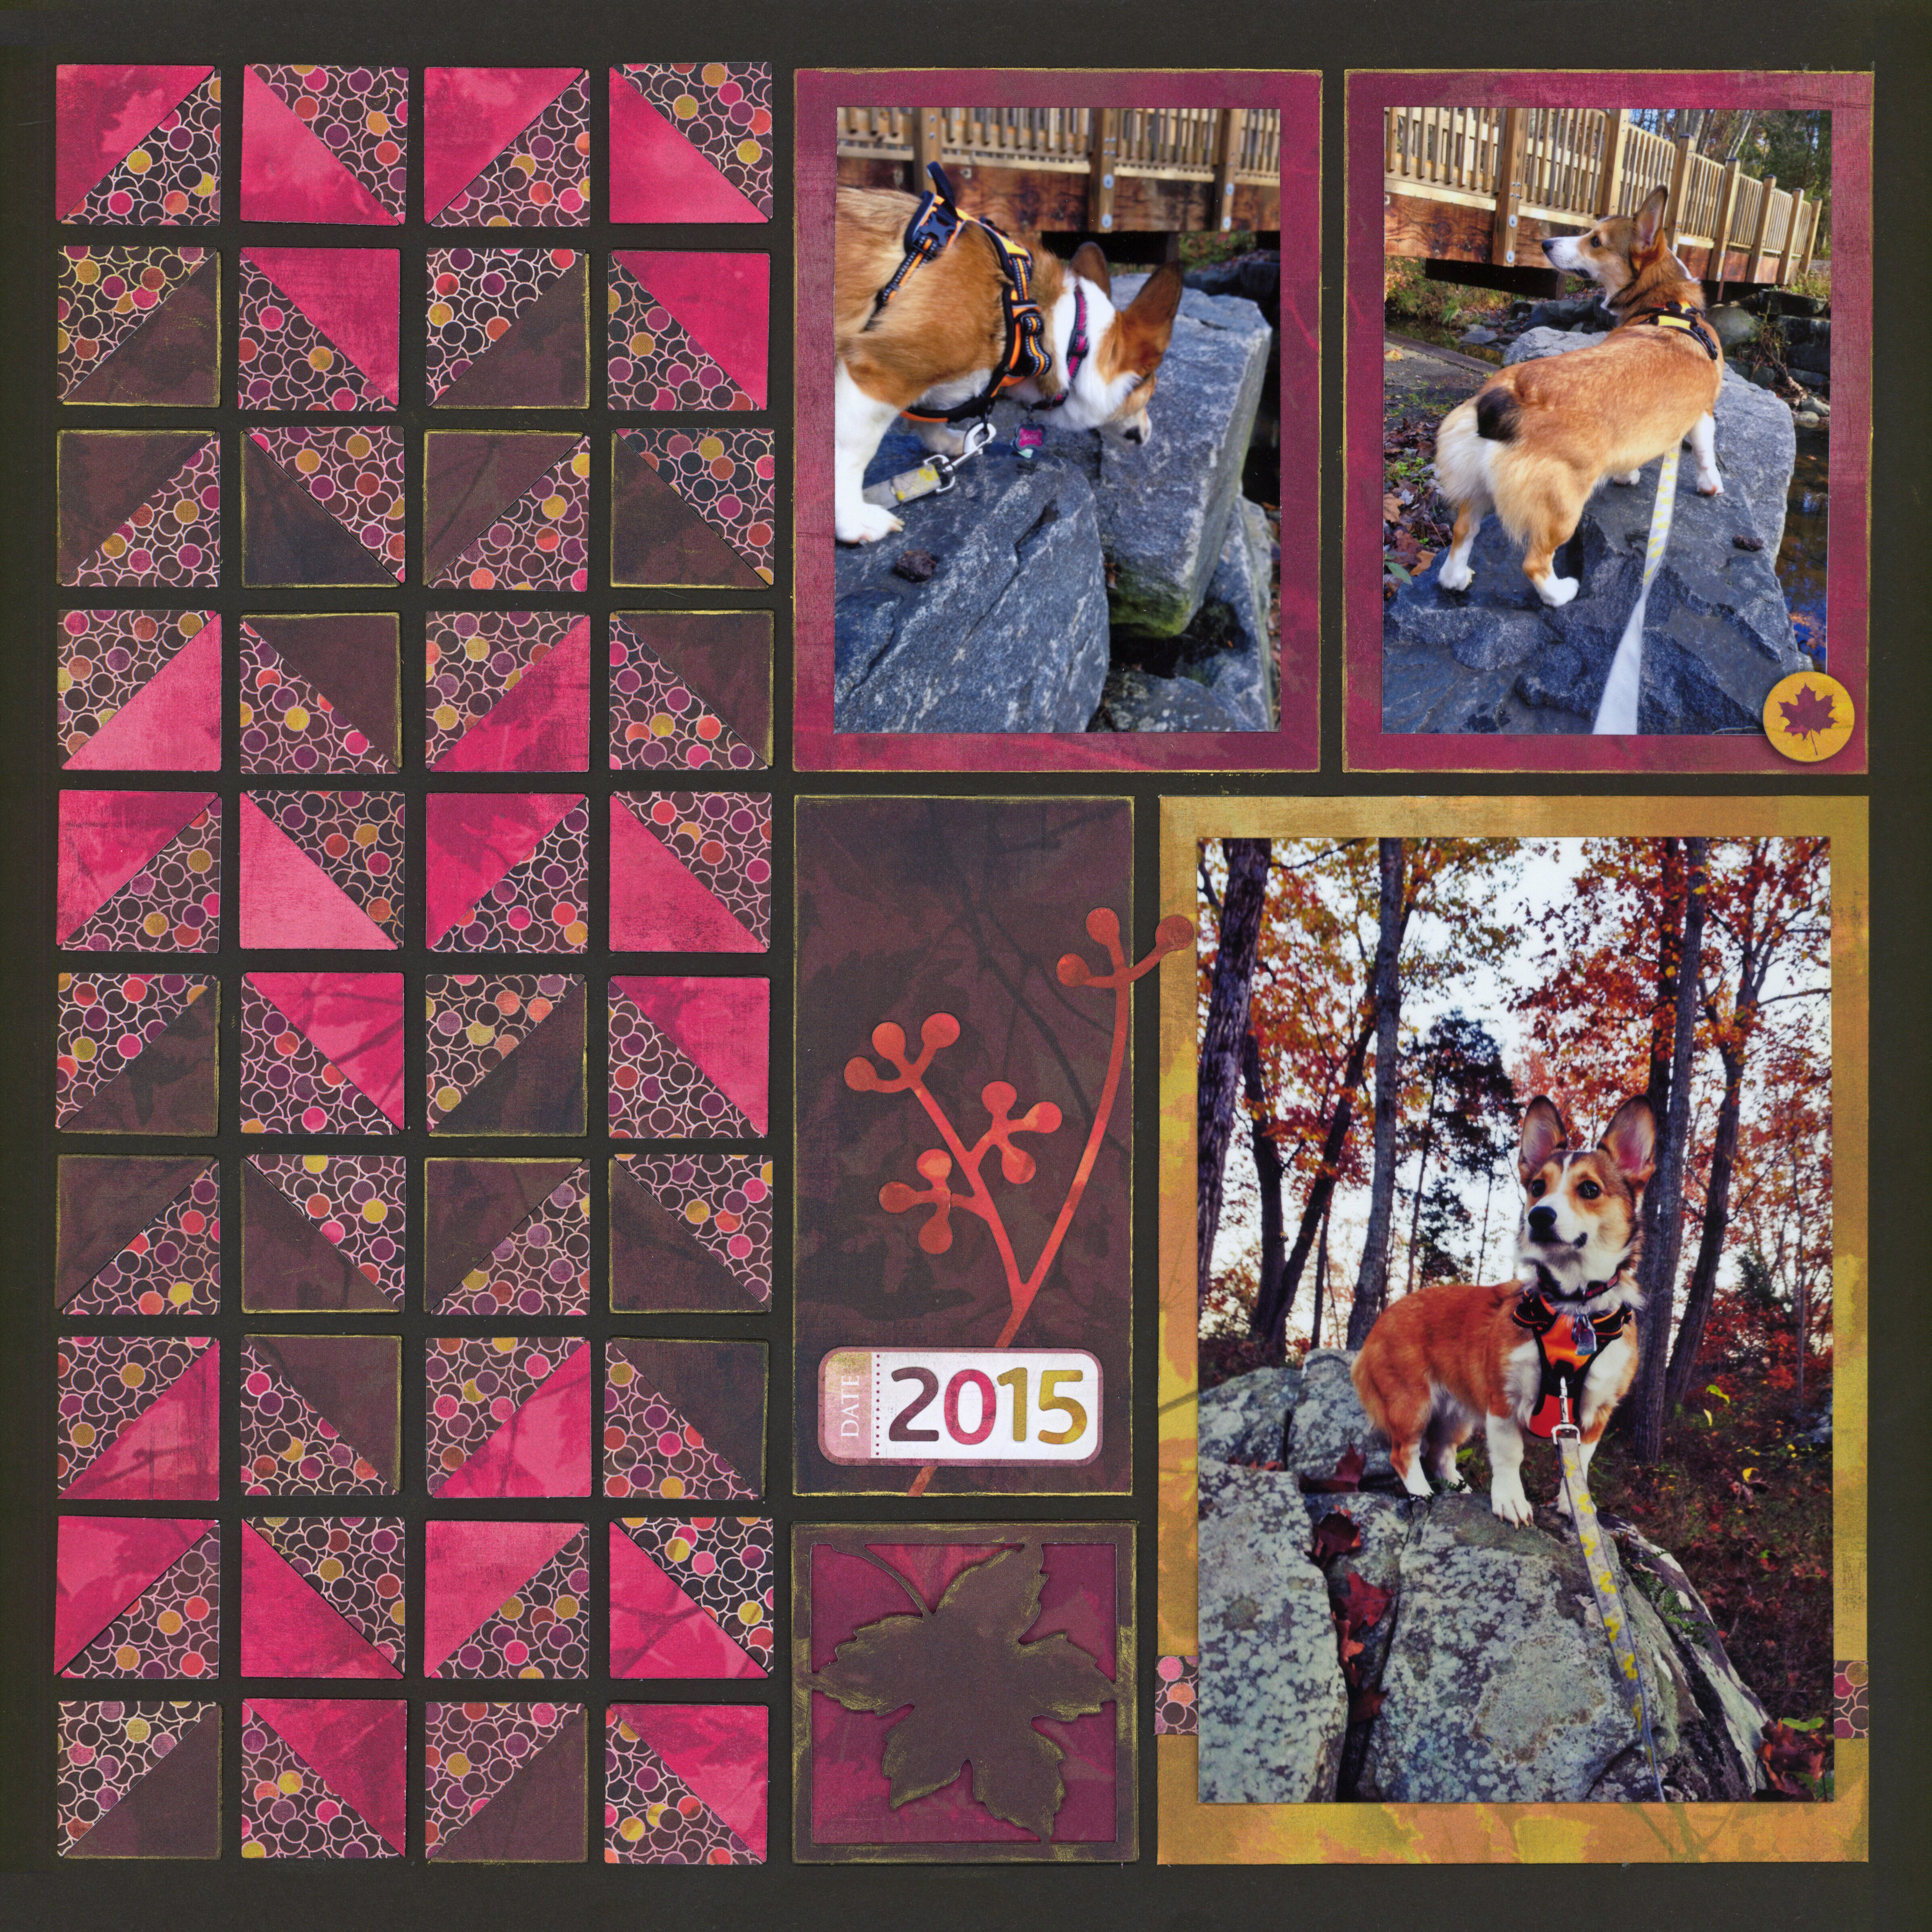
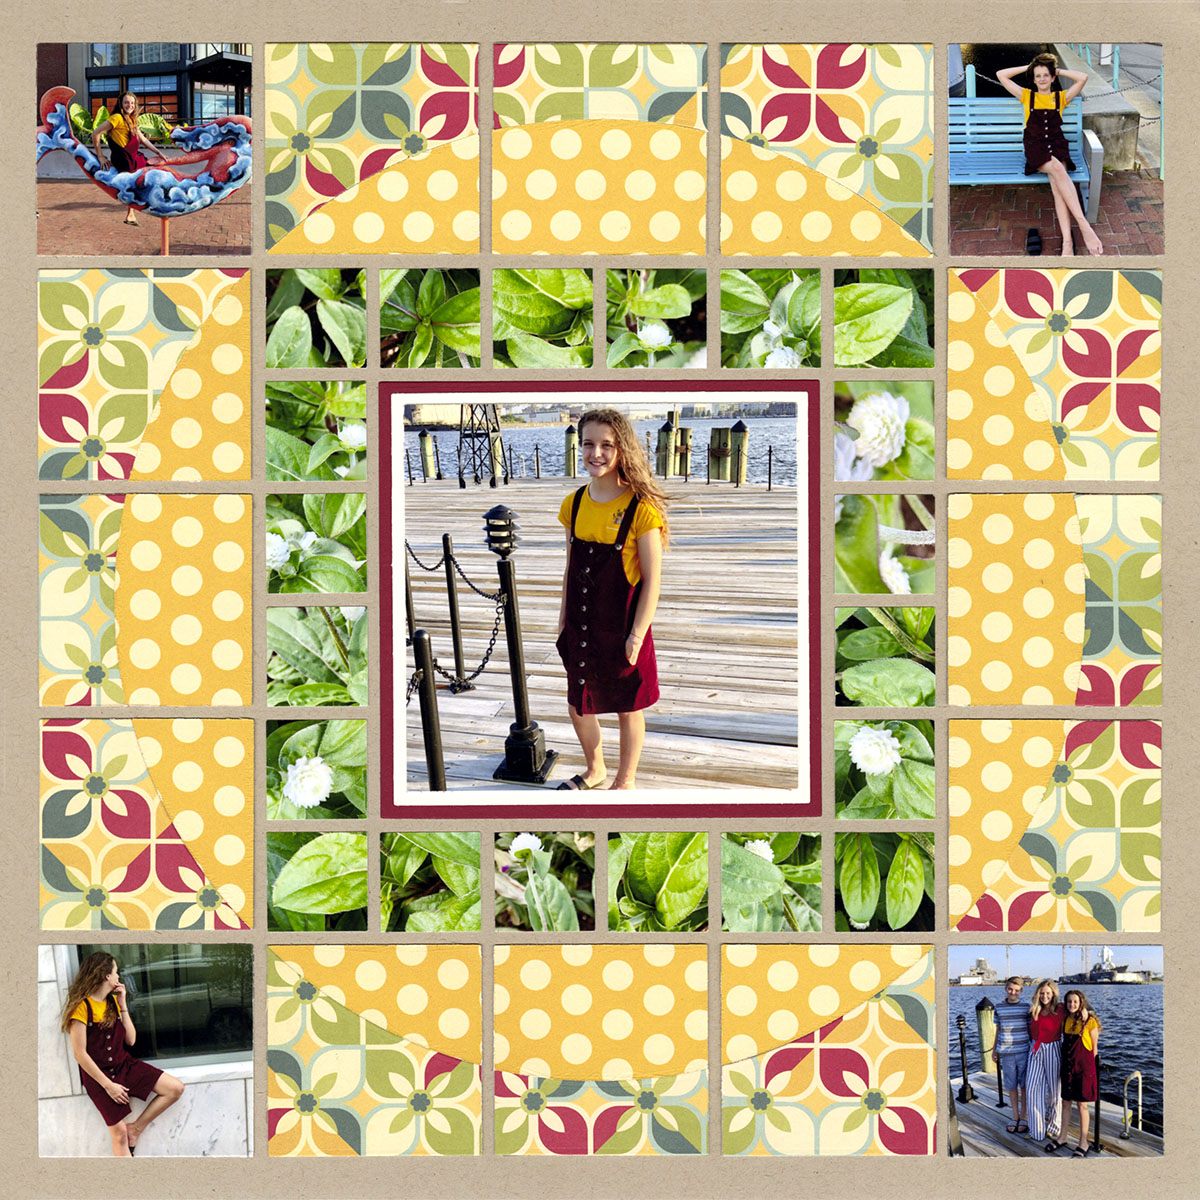
Bricks Die
Bricks Die is a great way to make Mosaic Magic.
Here, Paije used a picture of colorful fallen leaves for her brick mosaic. She added a few blocks of matching color cardstock to journal on. She numbered her journal entries so you can easily follow along.
Notice how she cropped her pictures' horizons in each of center photos to mimic the Bricks Die!
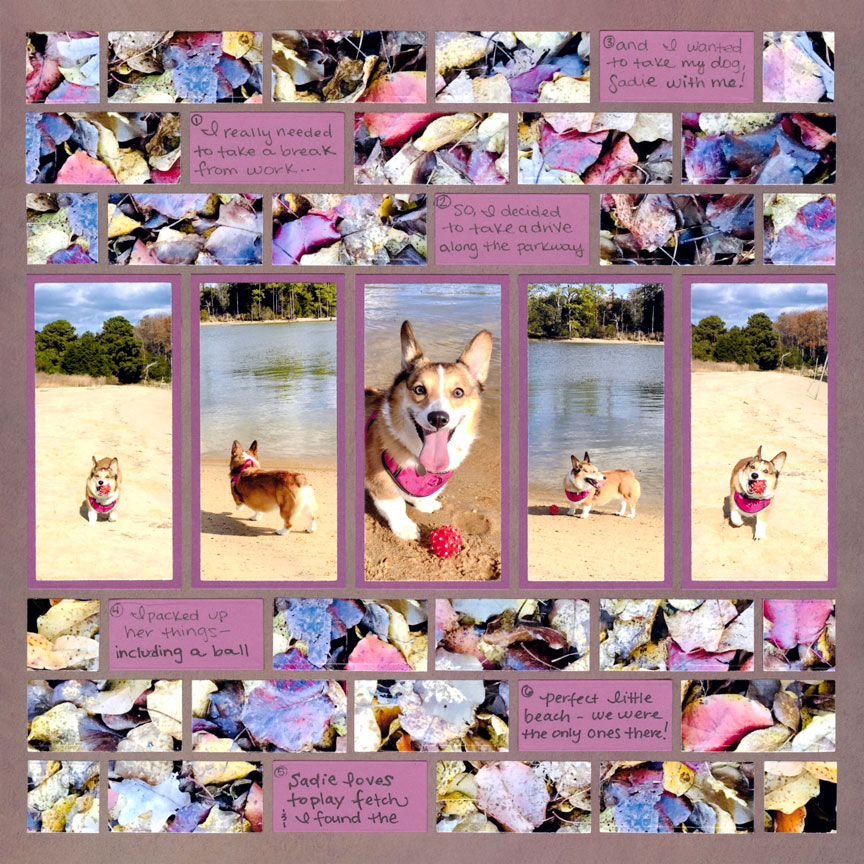
"Play Fetch" by Paije Potter - Pattern #336 (adjusted)
Perfect Spots
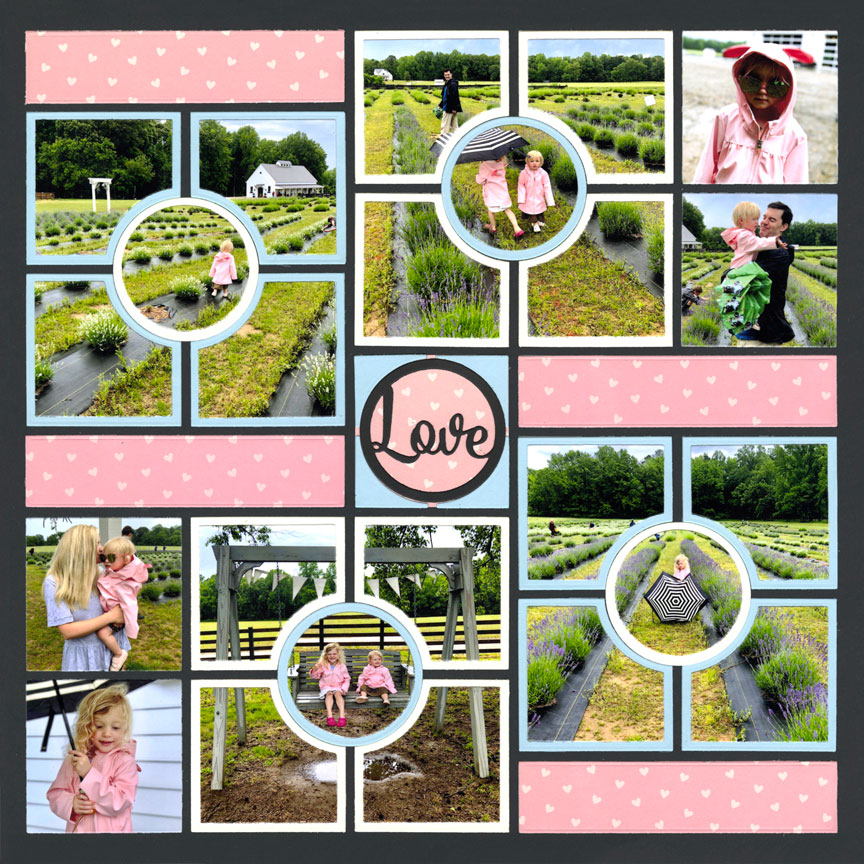
"Lavender Love" by Jodi Benson
Perfect Spot Die Set makes a perfect mosaic on your layout. The Perfect Spots Inserts Die makes a perfect center tile too.
Here, Jodi chose 'Love' as her center square. She used the Perfect Spots Die to create four square mosaics with a circle framed center.
Whimsy Die Sets
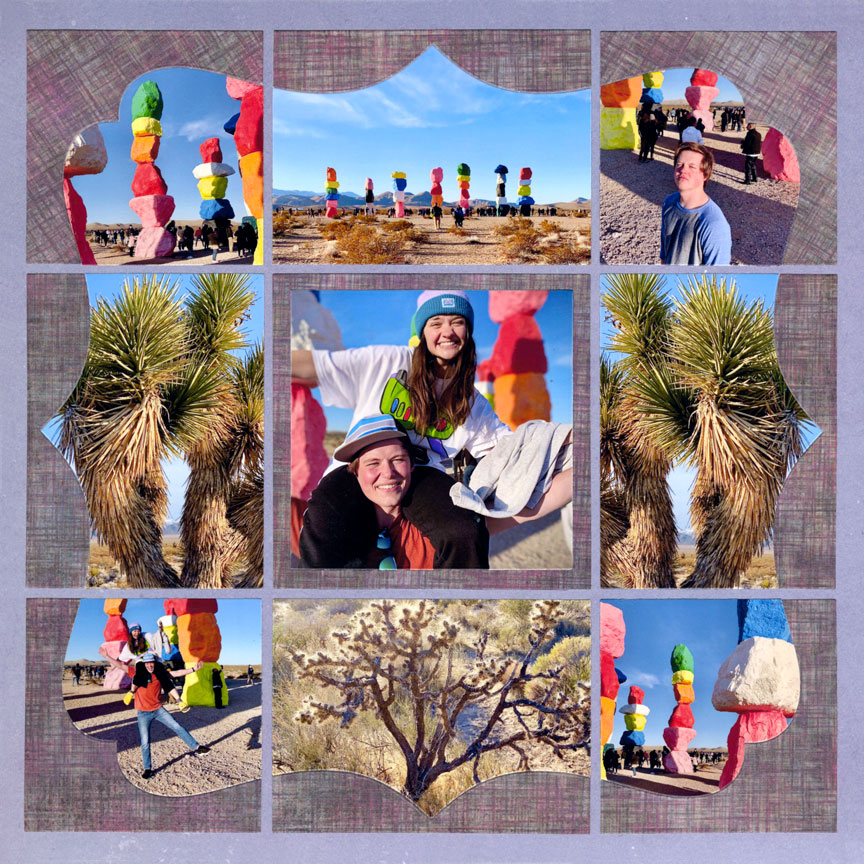
"Seven Magic Mountains" by Jodi Benson - Pattern #344
Whimsy Die sets create a whimisical frame around your whole layout.
Here, Jodi used the Whimsy 3x3 and 3x4 to frame her page.
Paije used the Whimsy 4x4 and 2x4 to frame her layout. She also the 2x2 miniature Whimsy frame that came with the set to frame her center picture.
Don't the Whimsy Sets make these two pages look magical?
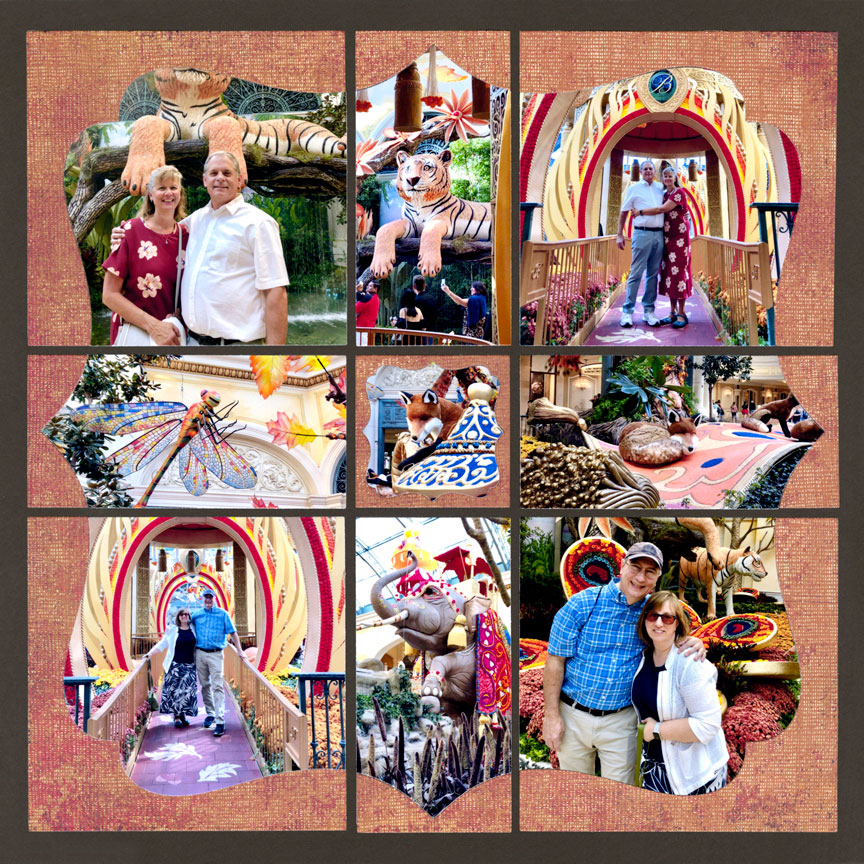
"Fall at the Bellagio" by Paije Potter - Pattern #368
Corner Strips & Connector
"Beautiful Fall" by Paije Potter
The next two die sets work together to create frames around your layout.
First, use the Corner Strips Die to cut each corner.
Then, use the Corner Connector Die to create strips in between to connect them together.
You can mix in patterned paper with the dies to create entirely new looks.
Note: If you wish to cut the entire four corners of the Corner Strips Die, you need to print your photos as 5x7. Or, you can use only three strips, like Paije did in the fall layout, or put in patterned paper like she did here.
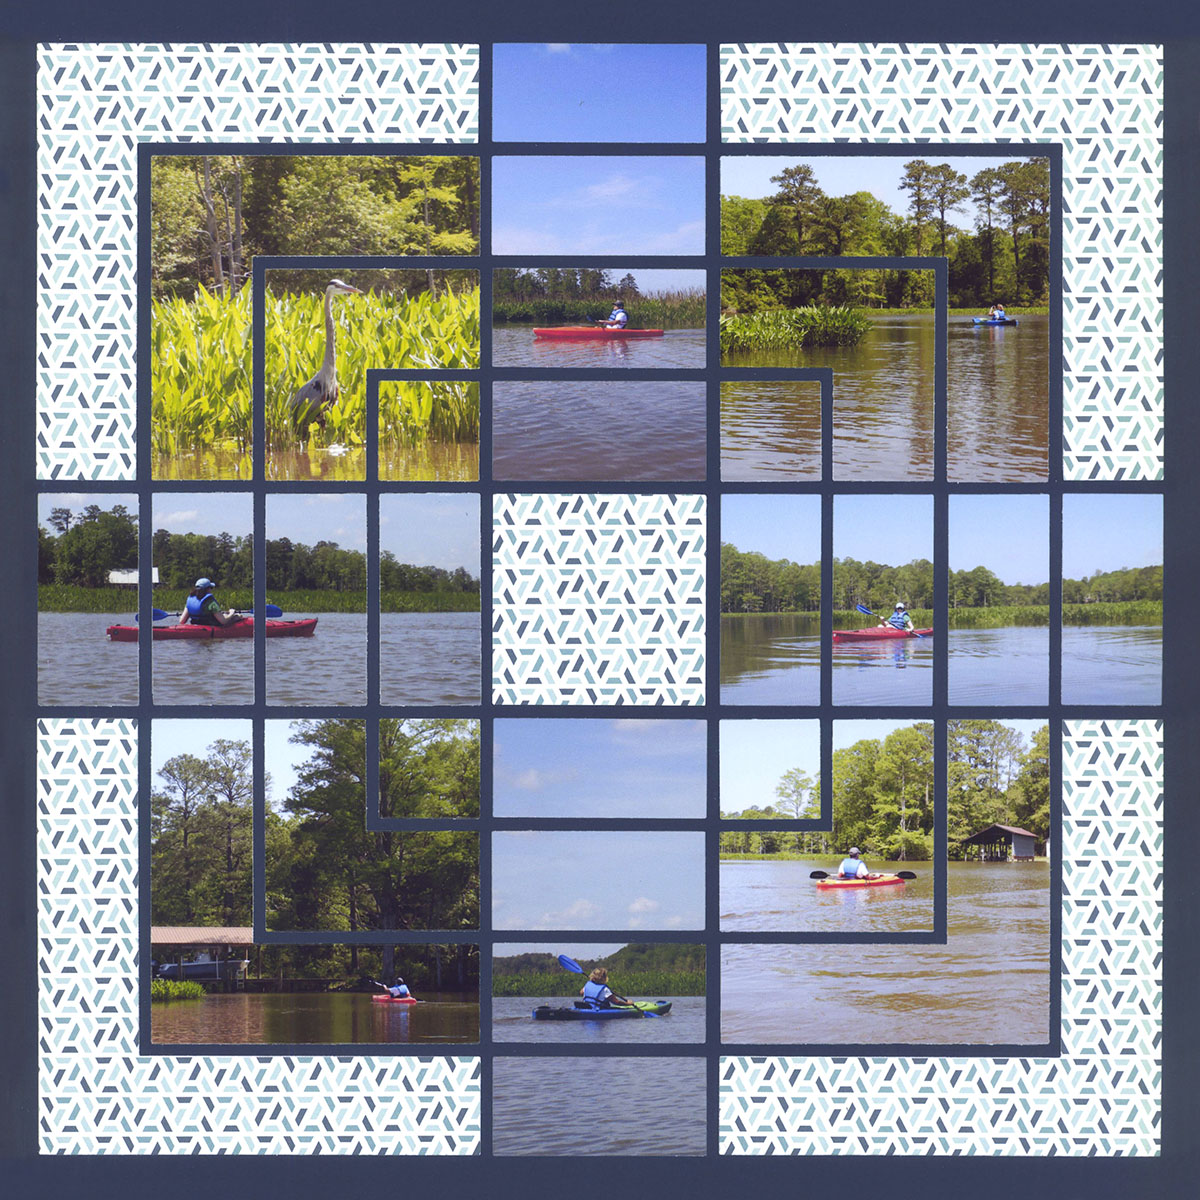
"Kayaking on the Creek" by Paije Potter
Strips & Strip Frames
When you are ready to "show off" to your friends and family, try out the strip and strip-frame dies.
These easy-to-use dies will help you make Mosaic Magic.
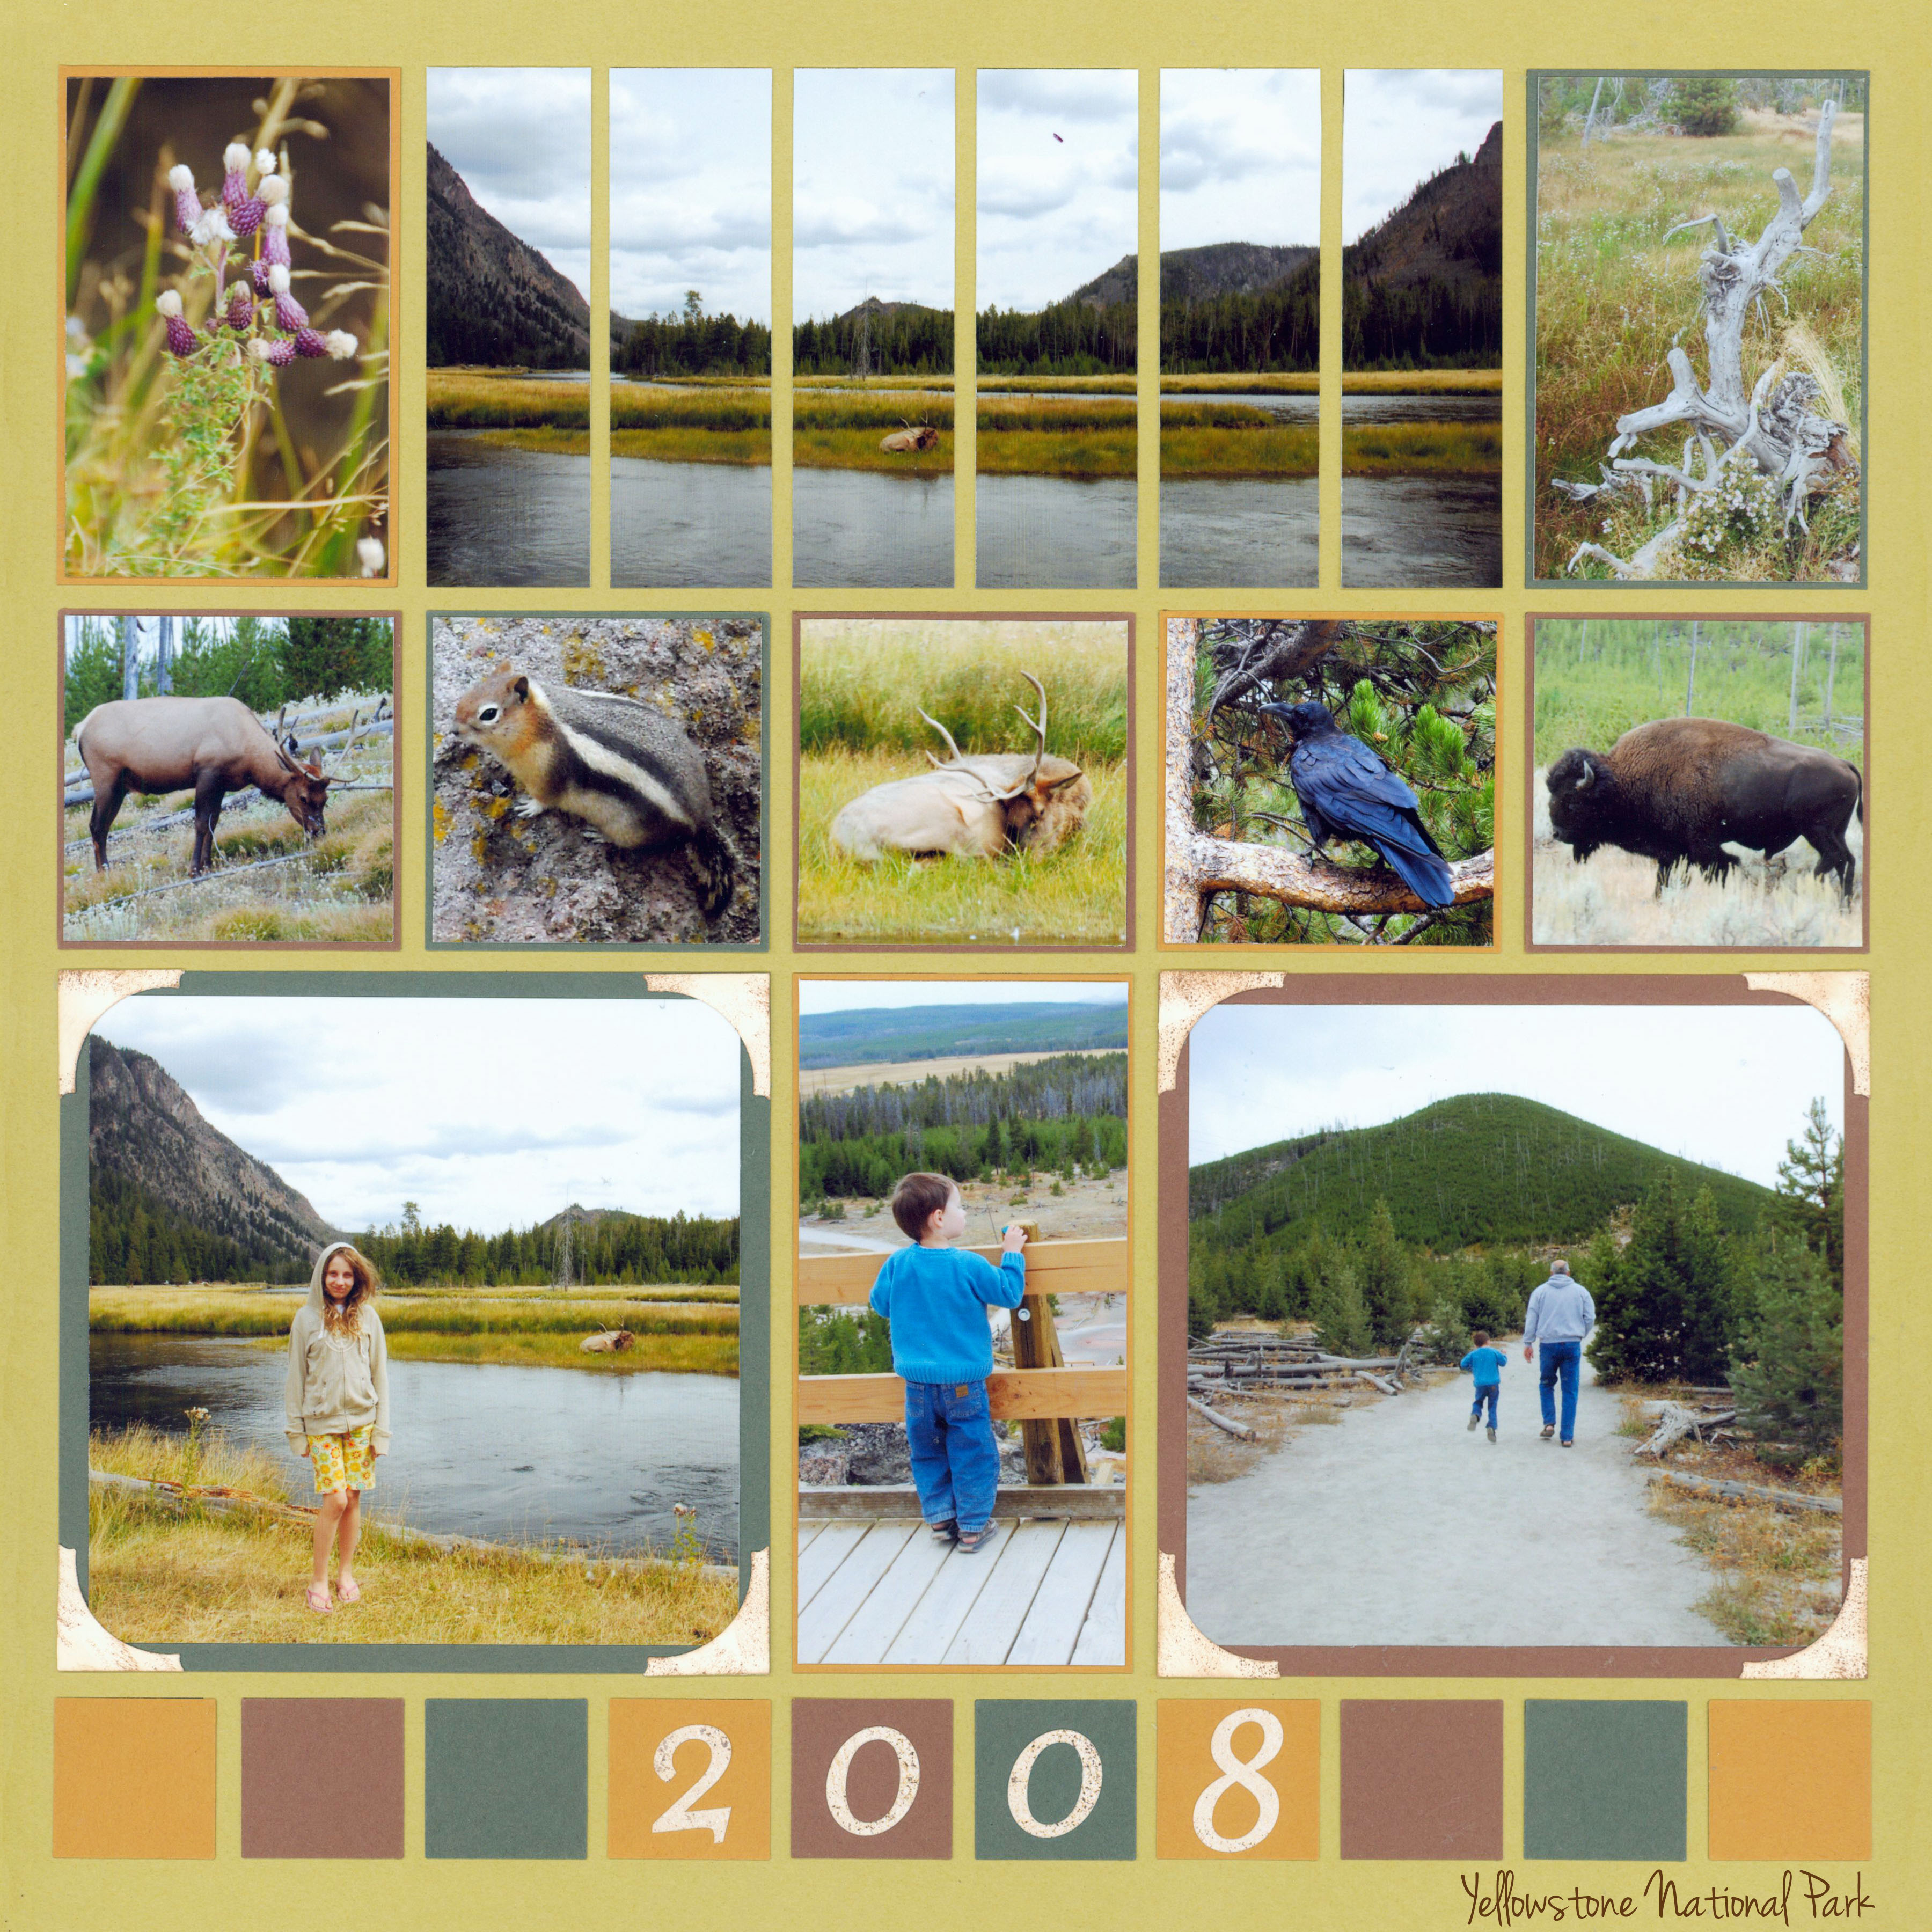
"Yellowstone" by Paije Potter - Pattern #195
Strip dies cut your photo into a series of strips. Ideal for scenic views, strip dies come in different sizes and can be used to turn multiple 4x6 photos into a panoramic view all the way across your layout.
There are dozens of page patterns that show how you can use the strip dies, as well.
It's really quite magnificent.
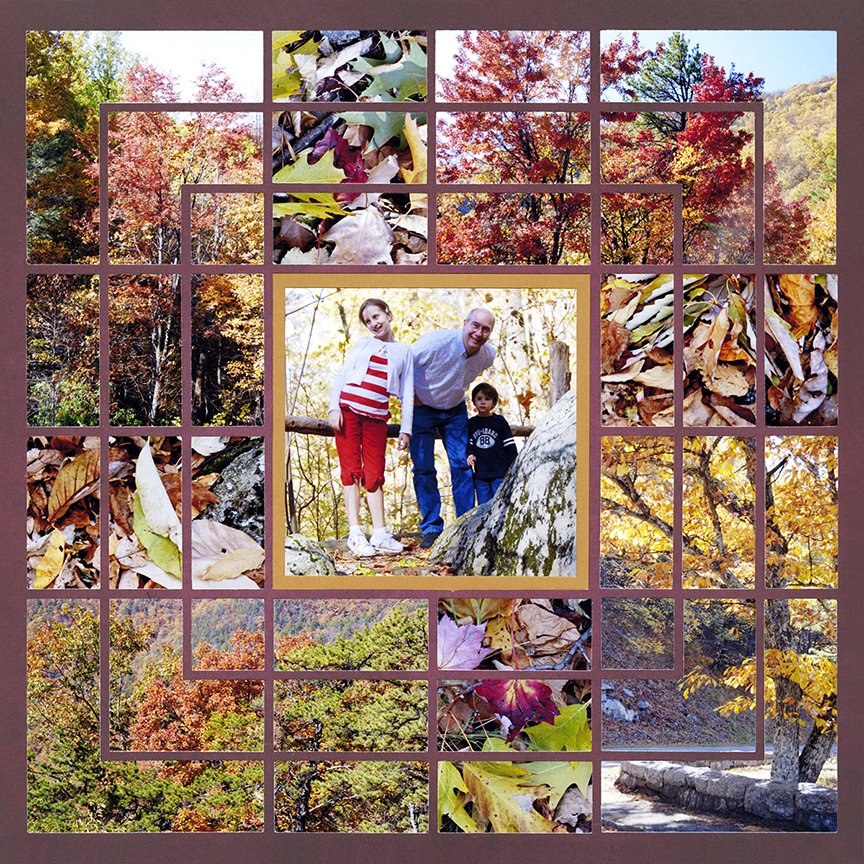
Strip Frame Dies provide a quick-and-easy opportunity to cut a photo into a small focal point surrounded by strips, like the Jeep in the layout, here.
You can use them with patterned paper, like Paije did here, or just cut the entire photo.
Strip Frame Dies are ideal for picturing someone near a large monument, mountain or forest. The center gives you a spot for showcasing a person or sign in the distance, while showing the surrounding scenery for scale, as well.
"Watching the Animals" by Paije Potter - Pattern #394

"I Love NY" by Paije Potter - Pattern #315
Combining multiple photos with this technique gives you a beautiful cityscape view, as well.
Grid Dies
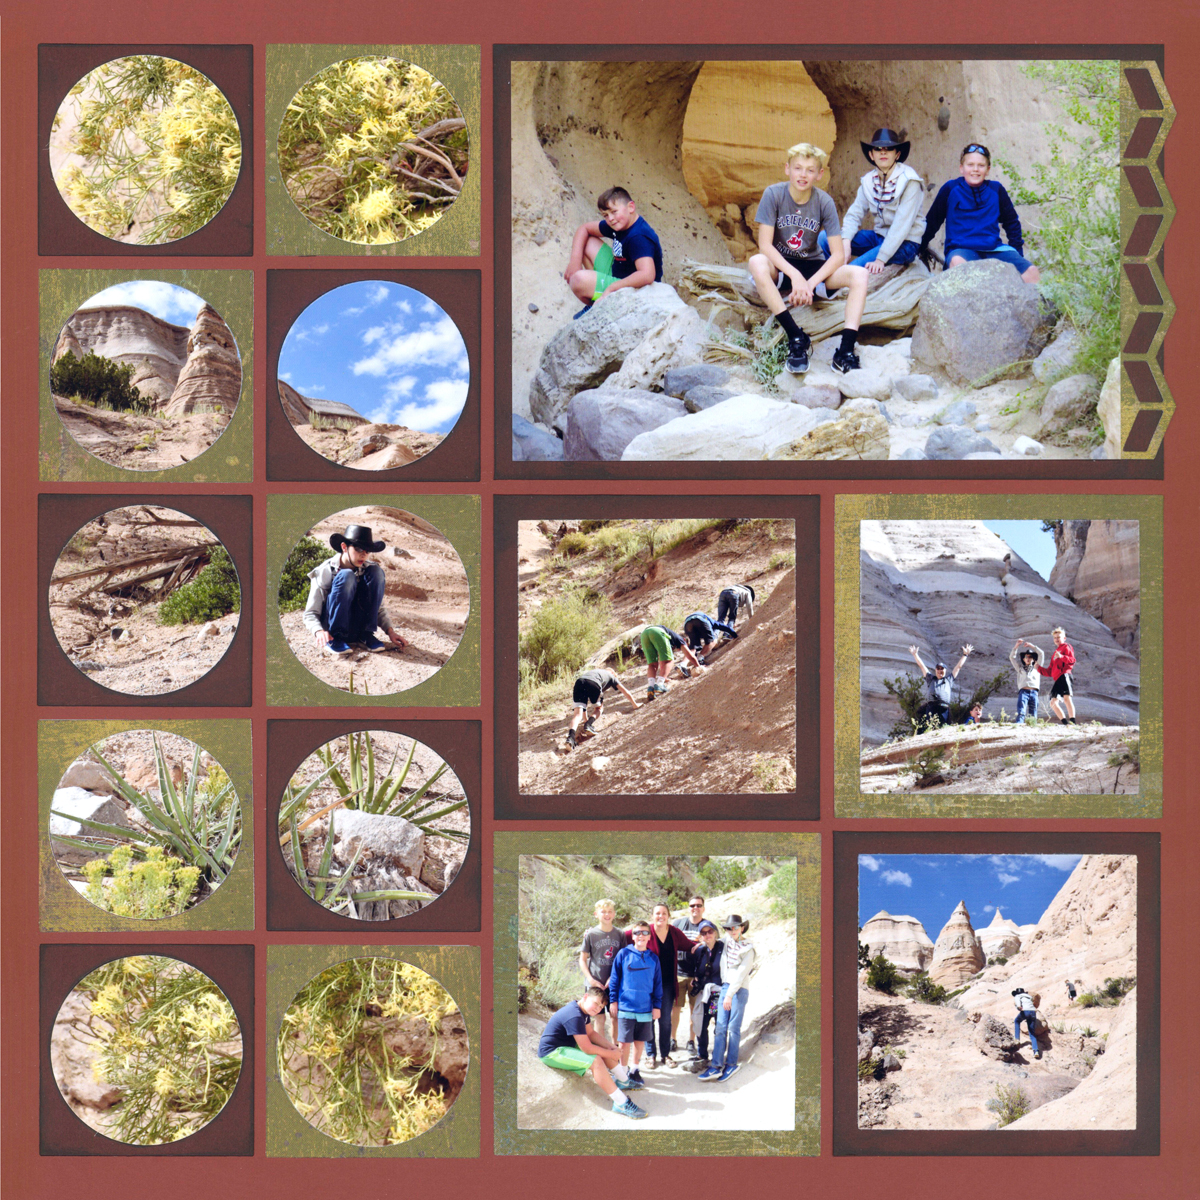
"Tent Rocks" by Paije Potter - Pattern #413
These die sets make quick work out of cutting repetitive designs.
The Circle Grid Die cuts six circles with one pass through your die-cutting machine.
The Soft Corner Grid Die also cuts six shapes at one time.
By adding the Soft Corners Die Set you can create new shapes and add to the grid pattern.
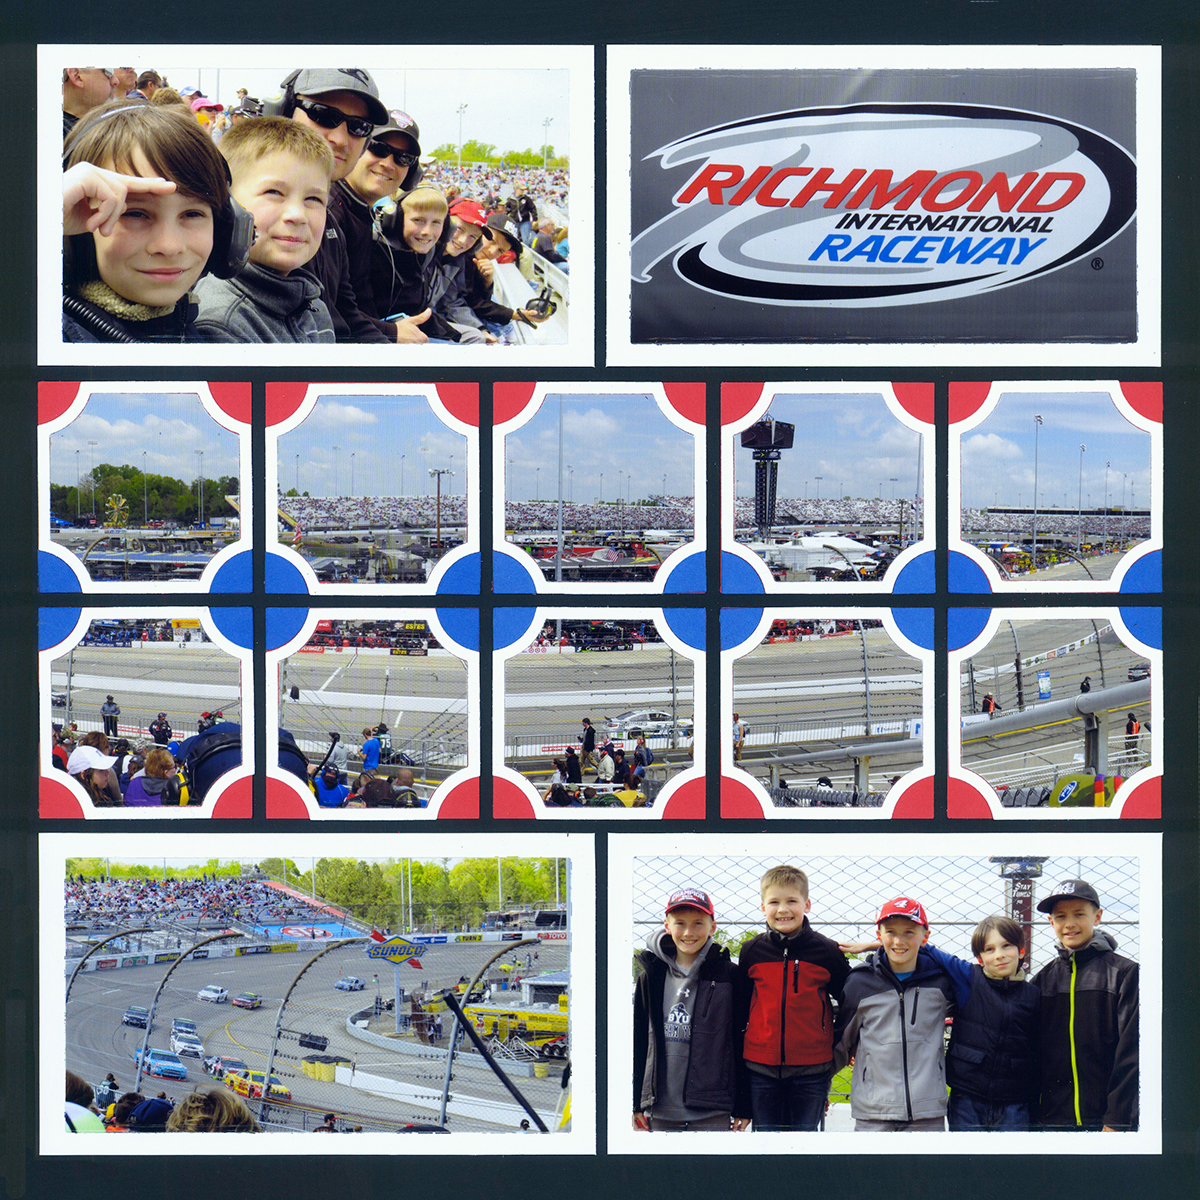
"Richmond Raceway" by Paije Potter - Pattern #425

"Hot Air Balloon Festival" by Paije Potter - Pattern #413
You can also use grid dies to cut six squares at a time. The 1.875" Squares Layering Die cuts photos a bit smaller than a 2x2 square, so you can have a thin mat around your photos.
Use it with the 2.125" Squares Grid Die to cut six photo mats at once.
Note: Notice the balloon layout here and the rocks layout above ... they are the same pattern, but by using different dies, they have an entirely different look. This bit of Mosaic Magic keeps you from ever having boring or repetitious designs.
If you bought the colored Basic Bundle set, you already have the Grid Die. It's the green one that comes with your set.
If you bought the silver Basic Nested Dies, you will want to add the Grid Die to your stash.
You can cut multiple photos and line them up on your Grid Paper to look like a panoramic, like Jodi did here. Look closely at the clouds at the top ... four squares over from the right edge you can see where she combined two photos. Amazing!
Tip: The Grid Die cuts a 4x6 photo into perfect 1-inch squares. Pay close attention to make sure the entire photo is within the cutting edge on the die. It's helpful to use a piece of washi or painter's tape to hold it in place while you cut.

"Hannah" by Jodi Benson - Pattern #336