
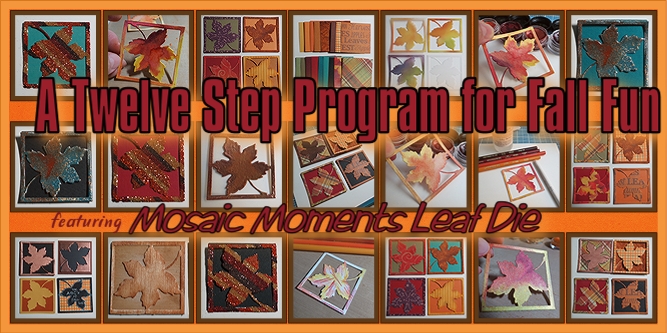
with the Mosaic Moments Leaf Die
Fall is in the air and with it all those memorable moments as you soak in the rustic rainbow of colors that bring the last gasps of warmth before the chill and stark skies of winter.
Tami has been featuring many of our fall photo ideas to get you in the mood and give you new ideas. Today, I’d like to feature the Mosaic Moments Leaf Die. As a popular cornerstone die on snapncrop.com the new leaf die allows you ultimate custom ability. Let’s go beyond just plain cardstock and try a few new techniques that will boost interest on your scrapbook pages.
I’ll present twelve techniques for the Mosaic Moments Leaf Die with step-by-step examples in photos to show off all you can do with a little time to play around! Have fun!! Here are some materials being used:
• Vellum
• Chipboard
• Cardstock
• Corrugated cardboard
• Copper sheeting
• Chalkstock trading cards
• Watercolor paper
• Balsa wood
• Twinkling H2O’s
• Chalks
• Inks
• Glitter
• Dry embossing
• Heat embossing
• Stamping
• Sandpaper
• Tea Stained Leather
Now to our techniques!
Technique One: Cardstock & Patterned Papers
Think about using patterned paper not only as background tiles but the leaf! Textured paper like the Tea Stained Leather paper or corrugated cardstock make interesting choices too.
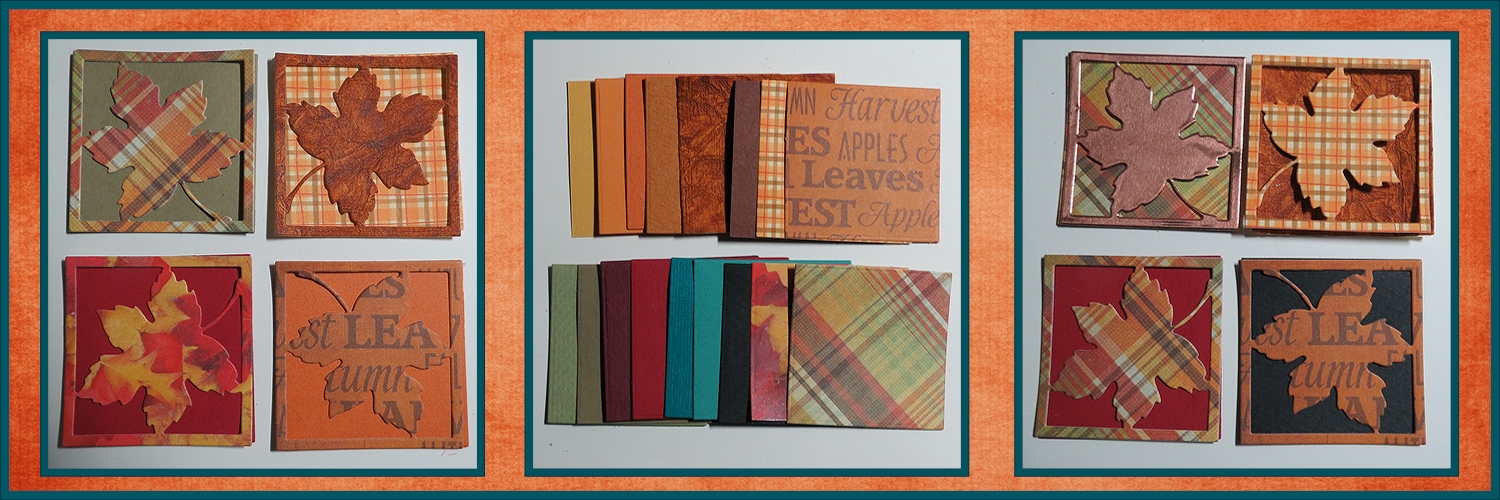
MM Leaf Die Technique One: Patterned Paper
Technique Two: Dry Embossing & Sanding
Core’dinations cardstock is designed for sanding. There are a variety of types available be sure to try them all. These cornerstones are made with the Kraft Core Nostalgic Collection.
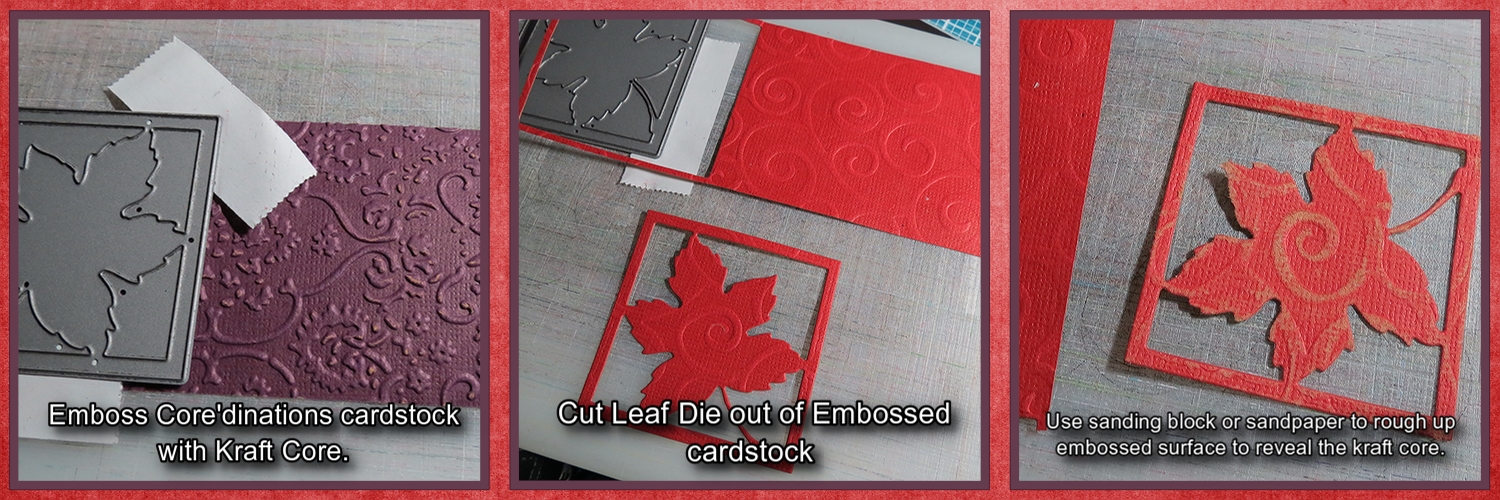
MM Leaf Die Technique Two: Embossing & Sanding
Technique Three: Stamping
This was originally shown in a Design Team Challenge as “Signs of Autumn” and can be found on the Story Board on Journella if you’d like to see the whole layout.
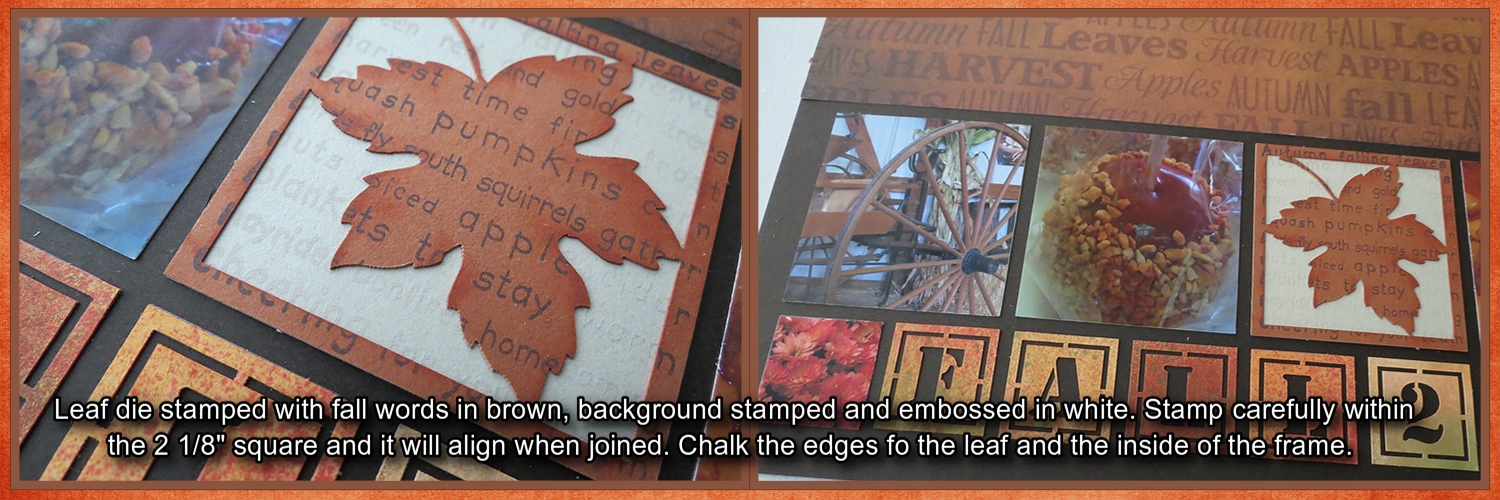
MM Leaf Die Technique Three: Stamping
Technique Four: Chalkboard
Chalkstock ATC is a product of Canvas Corp. The cards are approximately 2″x 3,” sturdy and the surface has the feel of a chalkboard. Also available in a variety of papers and tags. Black cardstock is easily substituted for this technique.
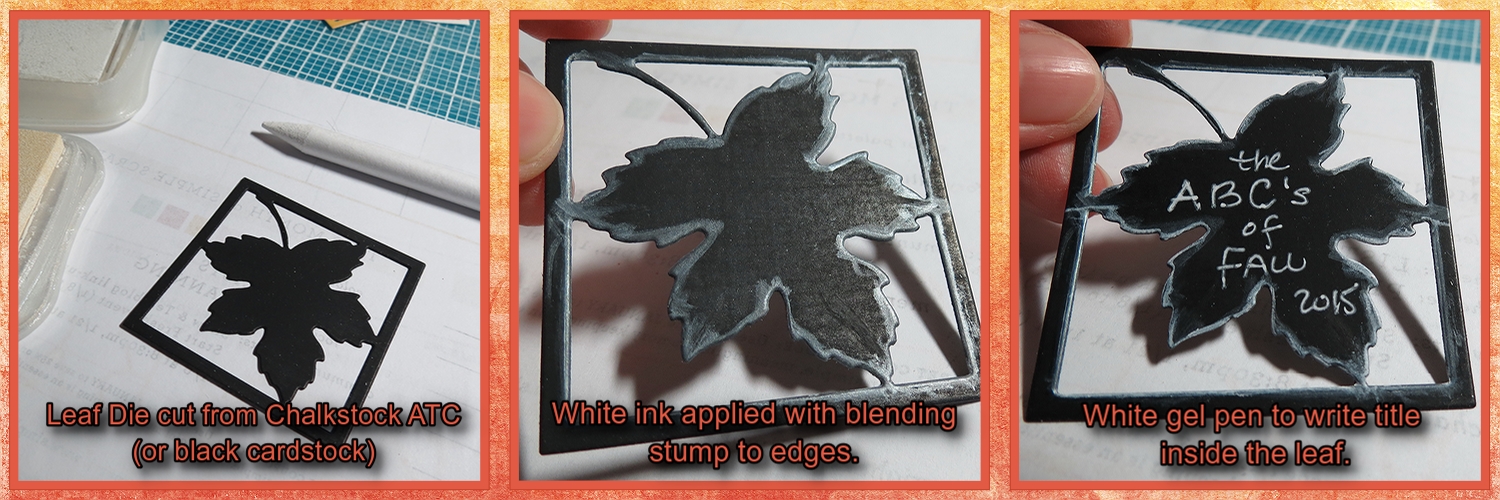
MM Leaf Die Technique Four: Chalkboard
Technique Five: Color Pencil
I use Prismacolor Color Pencils. They are well worth the price. I’ve used all the school supply types and they are just a poor imitation. After seeing a Gamsol demonstration I was sold on using my pencils even more with my rubber stamping, and now…scrapbooking! Craft stores offer coupons or buy one at a time (that’s what I did!) This is one technique that everyone can try.
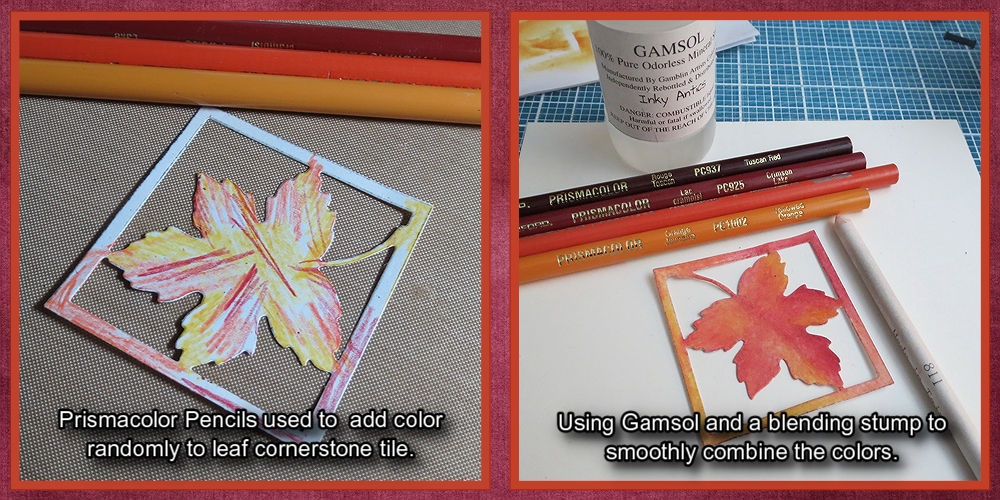
MM Leaf Die Technique Five: Colored Pencil
Technique Six: Corrugating Texture
Have you checked your scrapbooking supplies lately? Do you have a crimper that you haven’t used in ages? Maybe you’ll find a treasure you can use!

MM Leaf Die Technique Six: Corrugating Texture
Technique Seven: Wood
Balsa wood is inexpensive to purchase and will give you lots to work with. It is fragile in this application so do be careful. Mounting on another square of balsa gives more stability as does the corrugated cardboard.
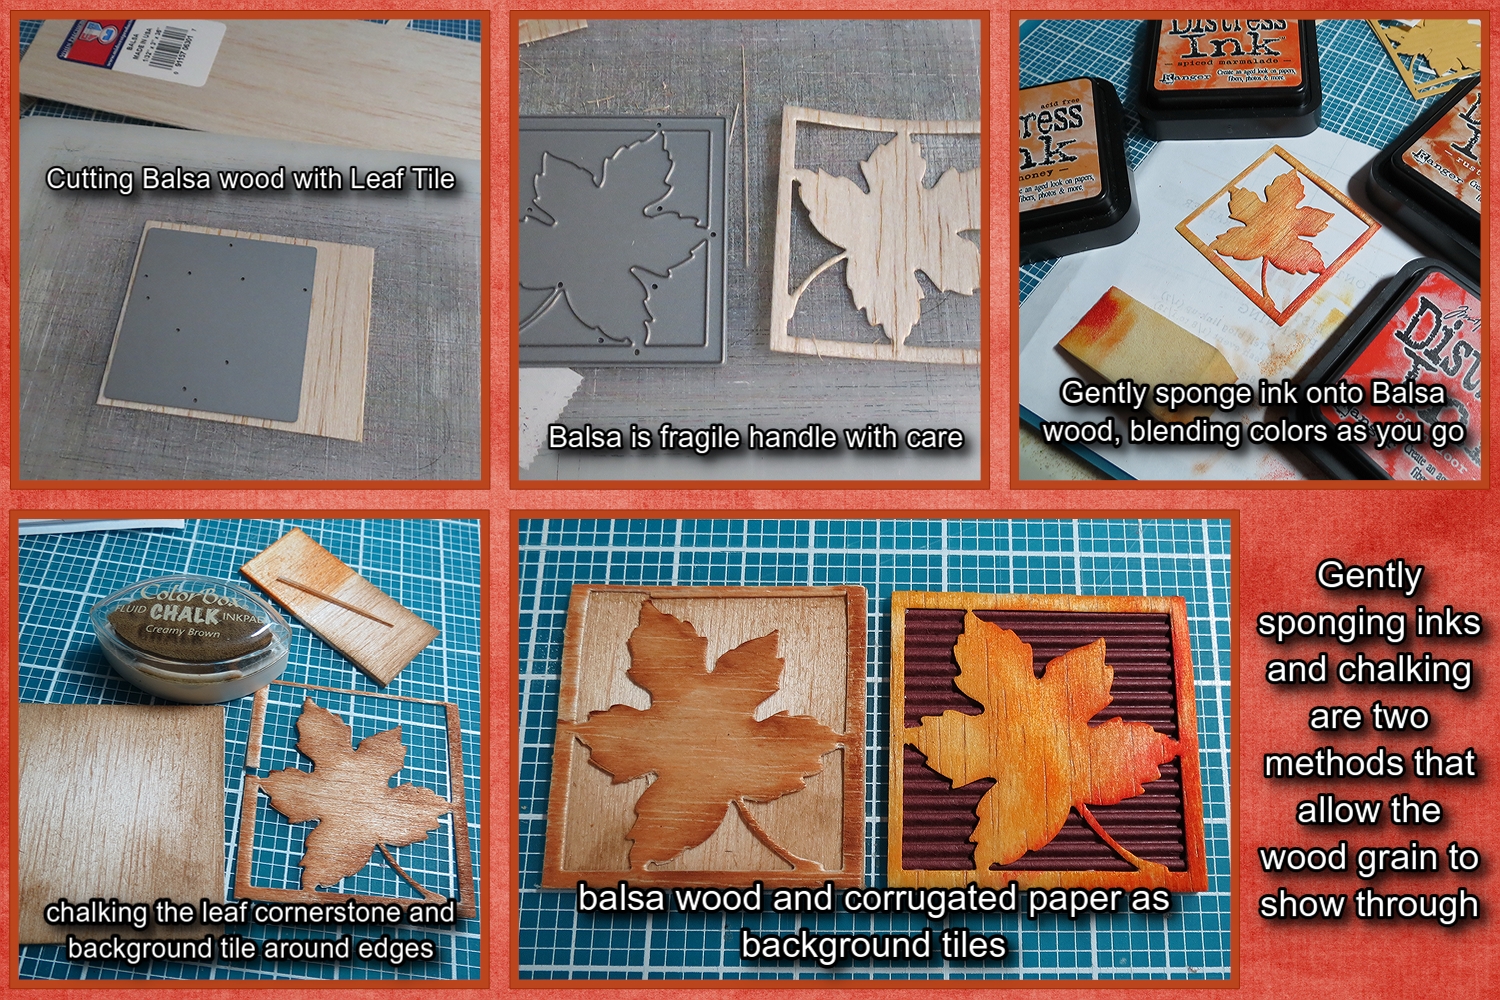
MM Leaf Die Technique Seven: Wood
Technique Eight: Glitter
Ah, glitter, the gift that keeps on giving. What was I thinking? But the sparkle is great! I will likely go back and use crystal lacquer to seal it off and have it appear glass-like.
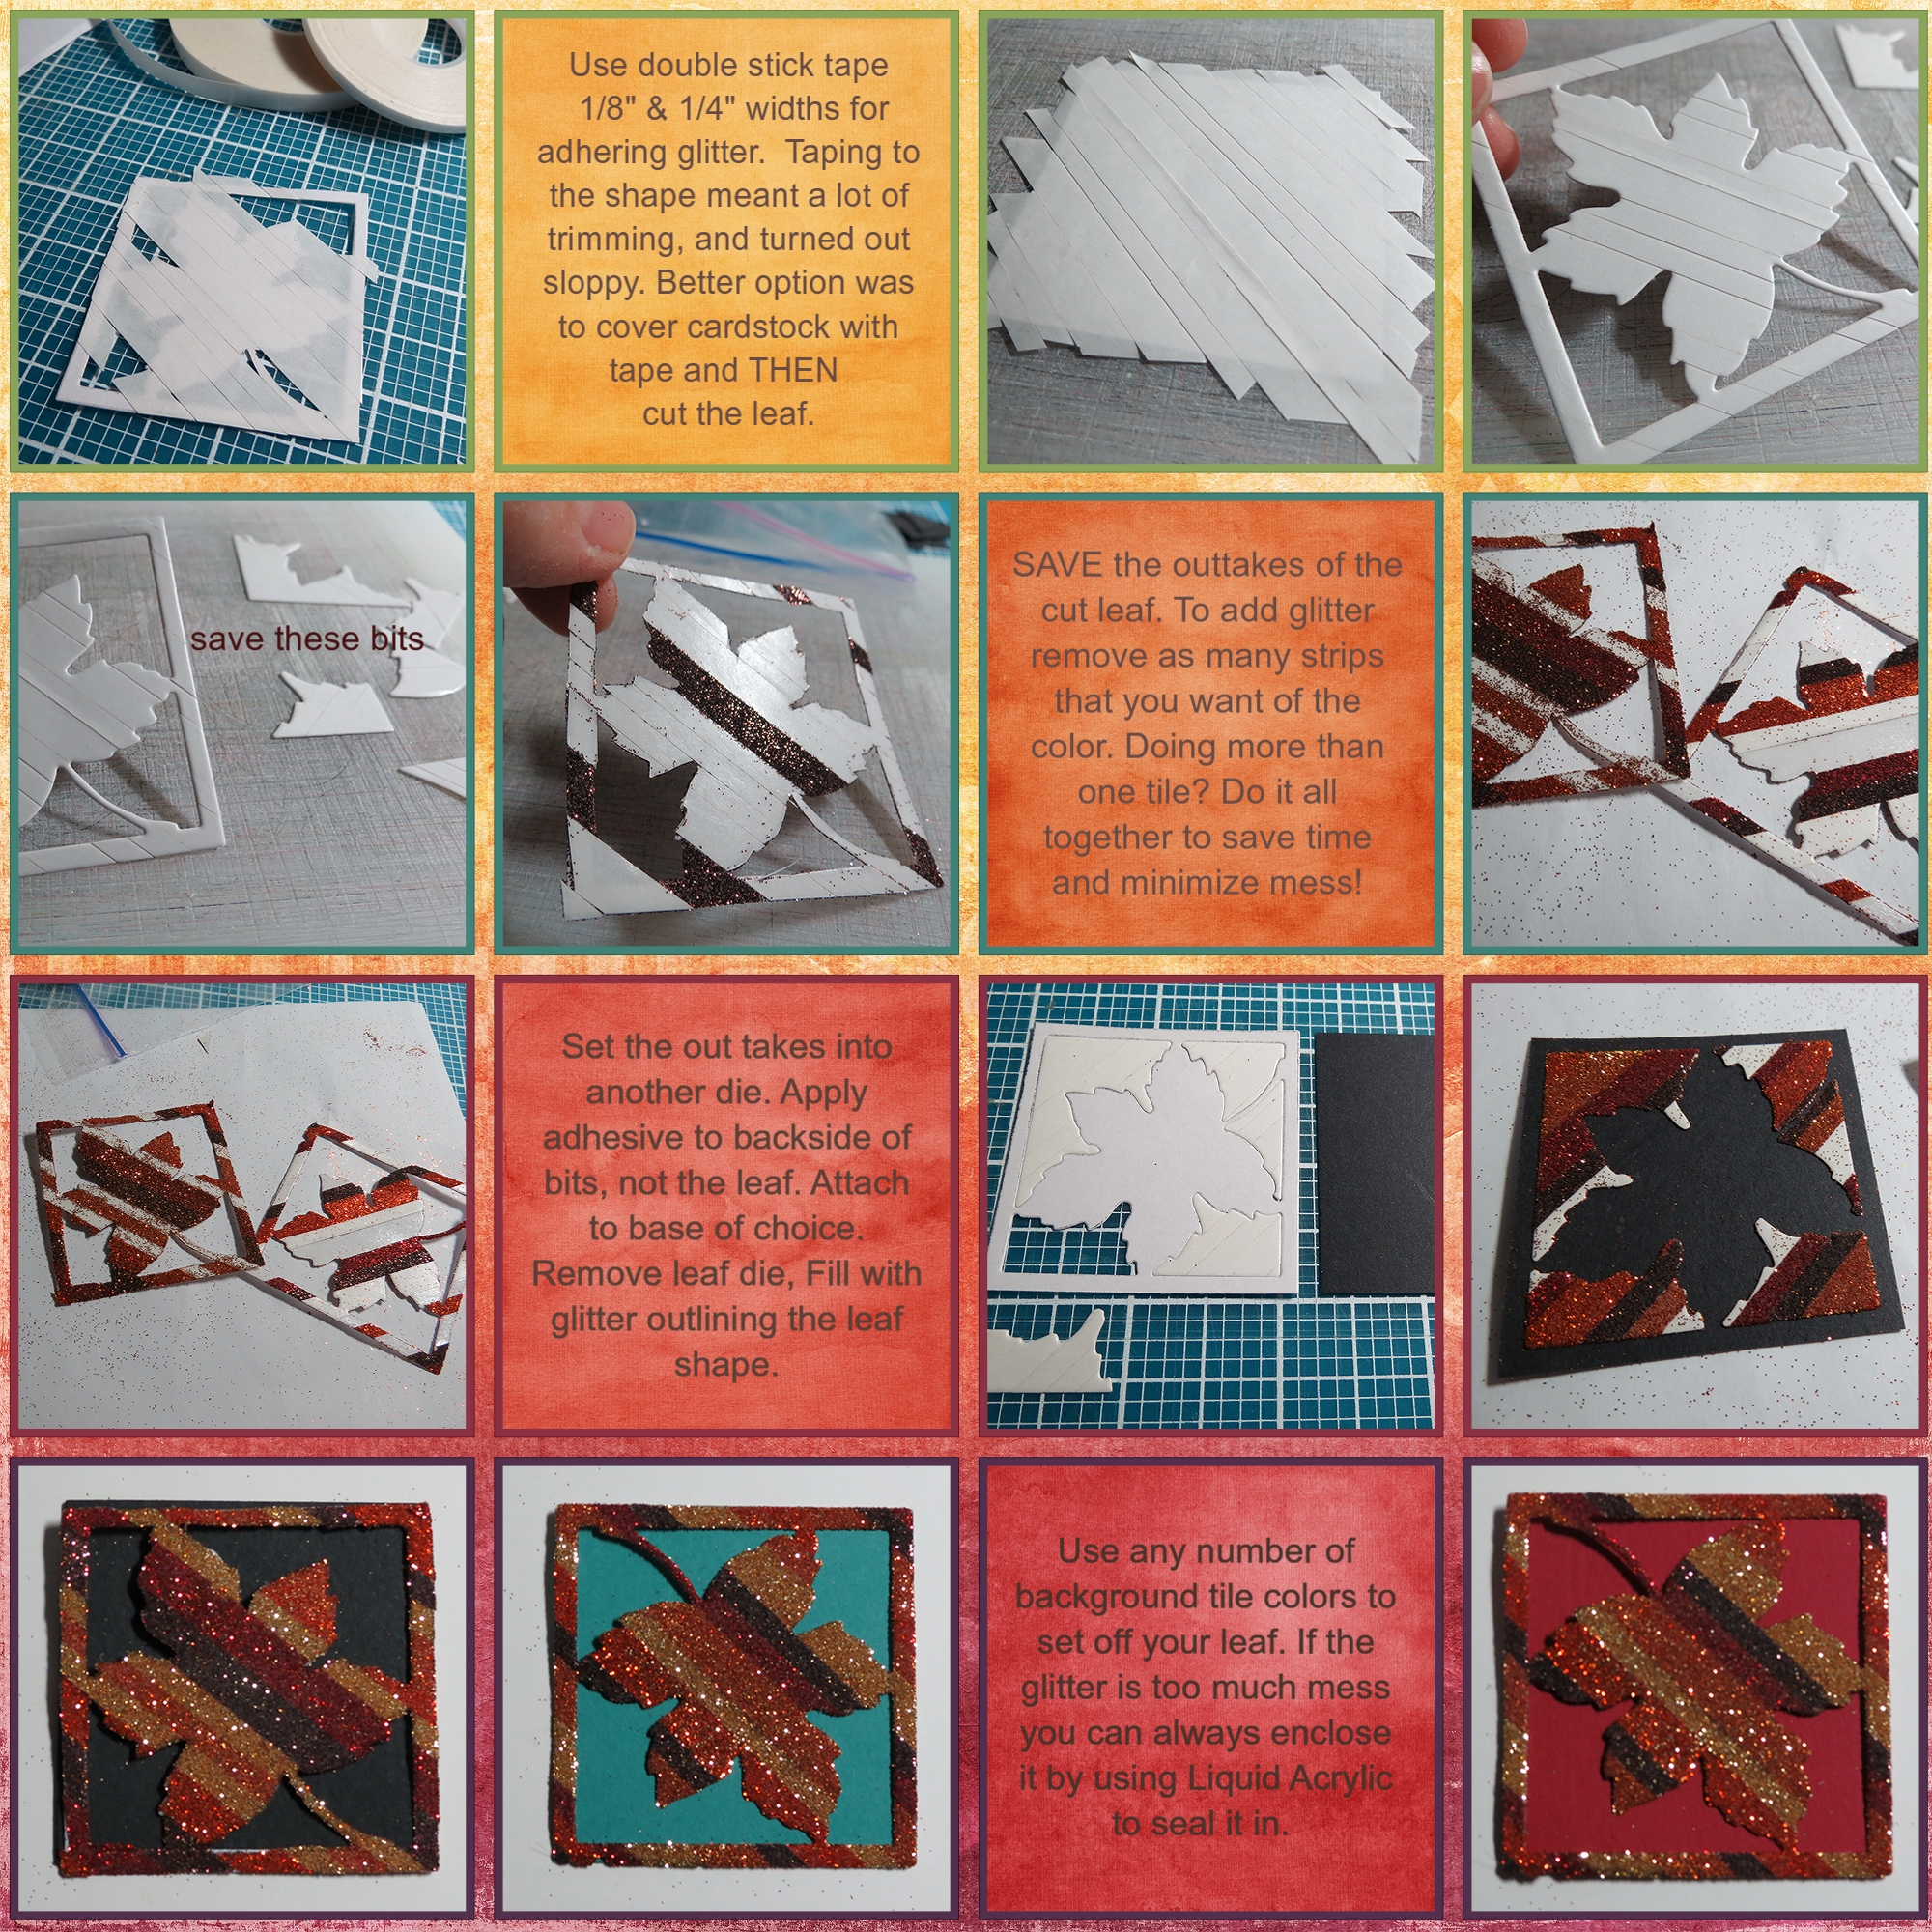
MM Leaf Die Technique Eight: Glitter
Technique Nine: Vellum
When chalking the backside the edges have a bit of a ridge from being cut. This allows you to rub ink along it for a nice edge all around like an outline adding definition.
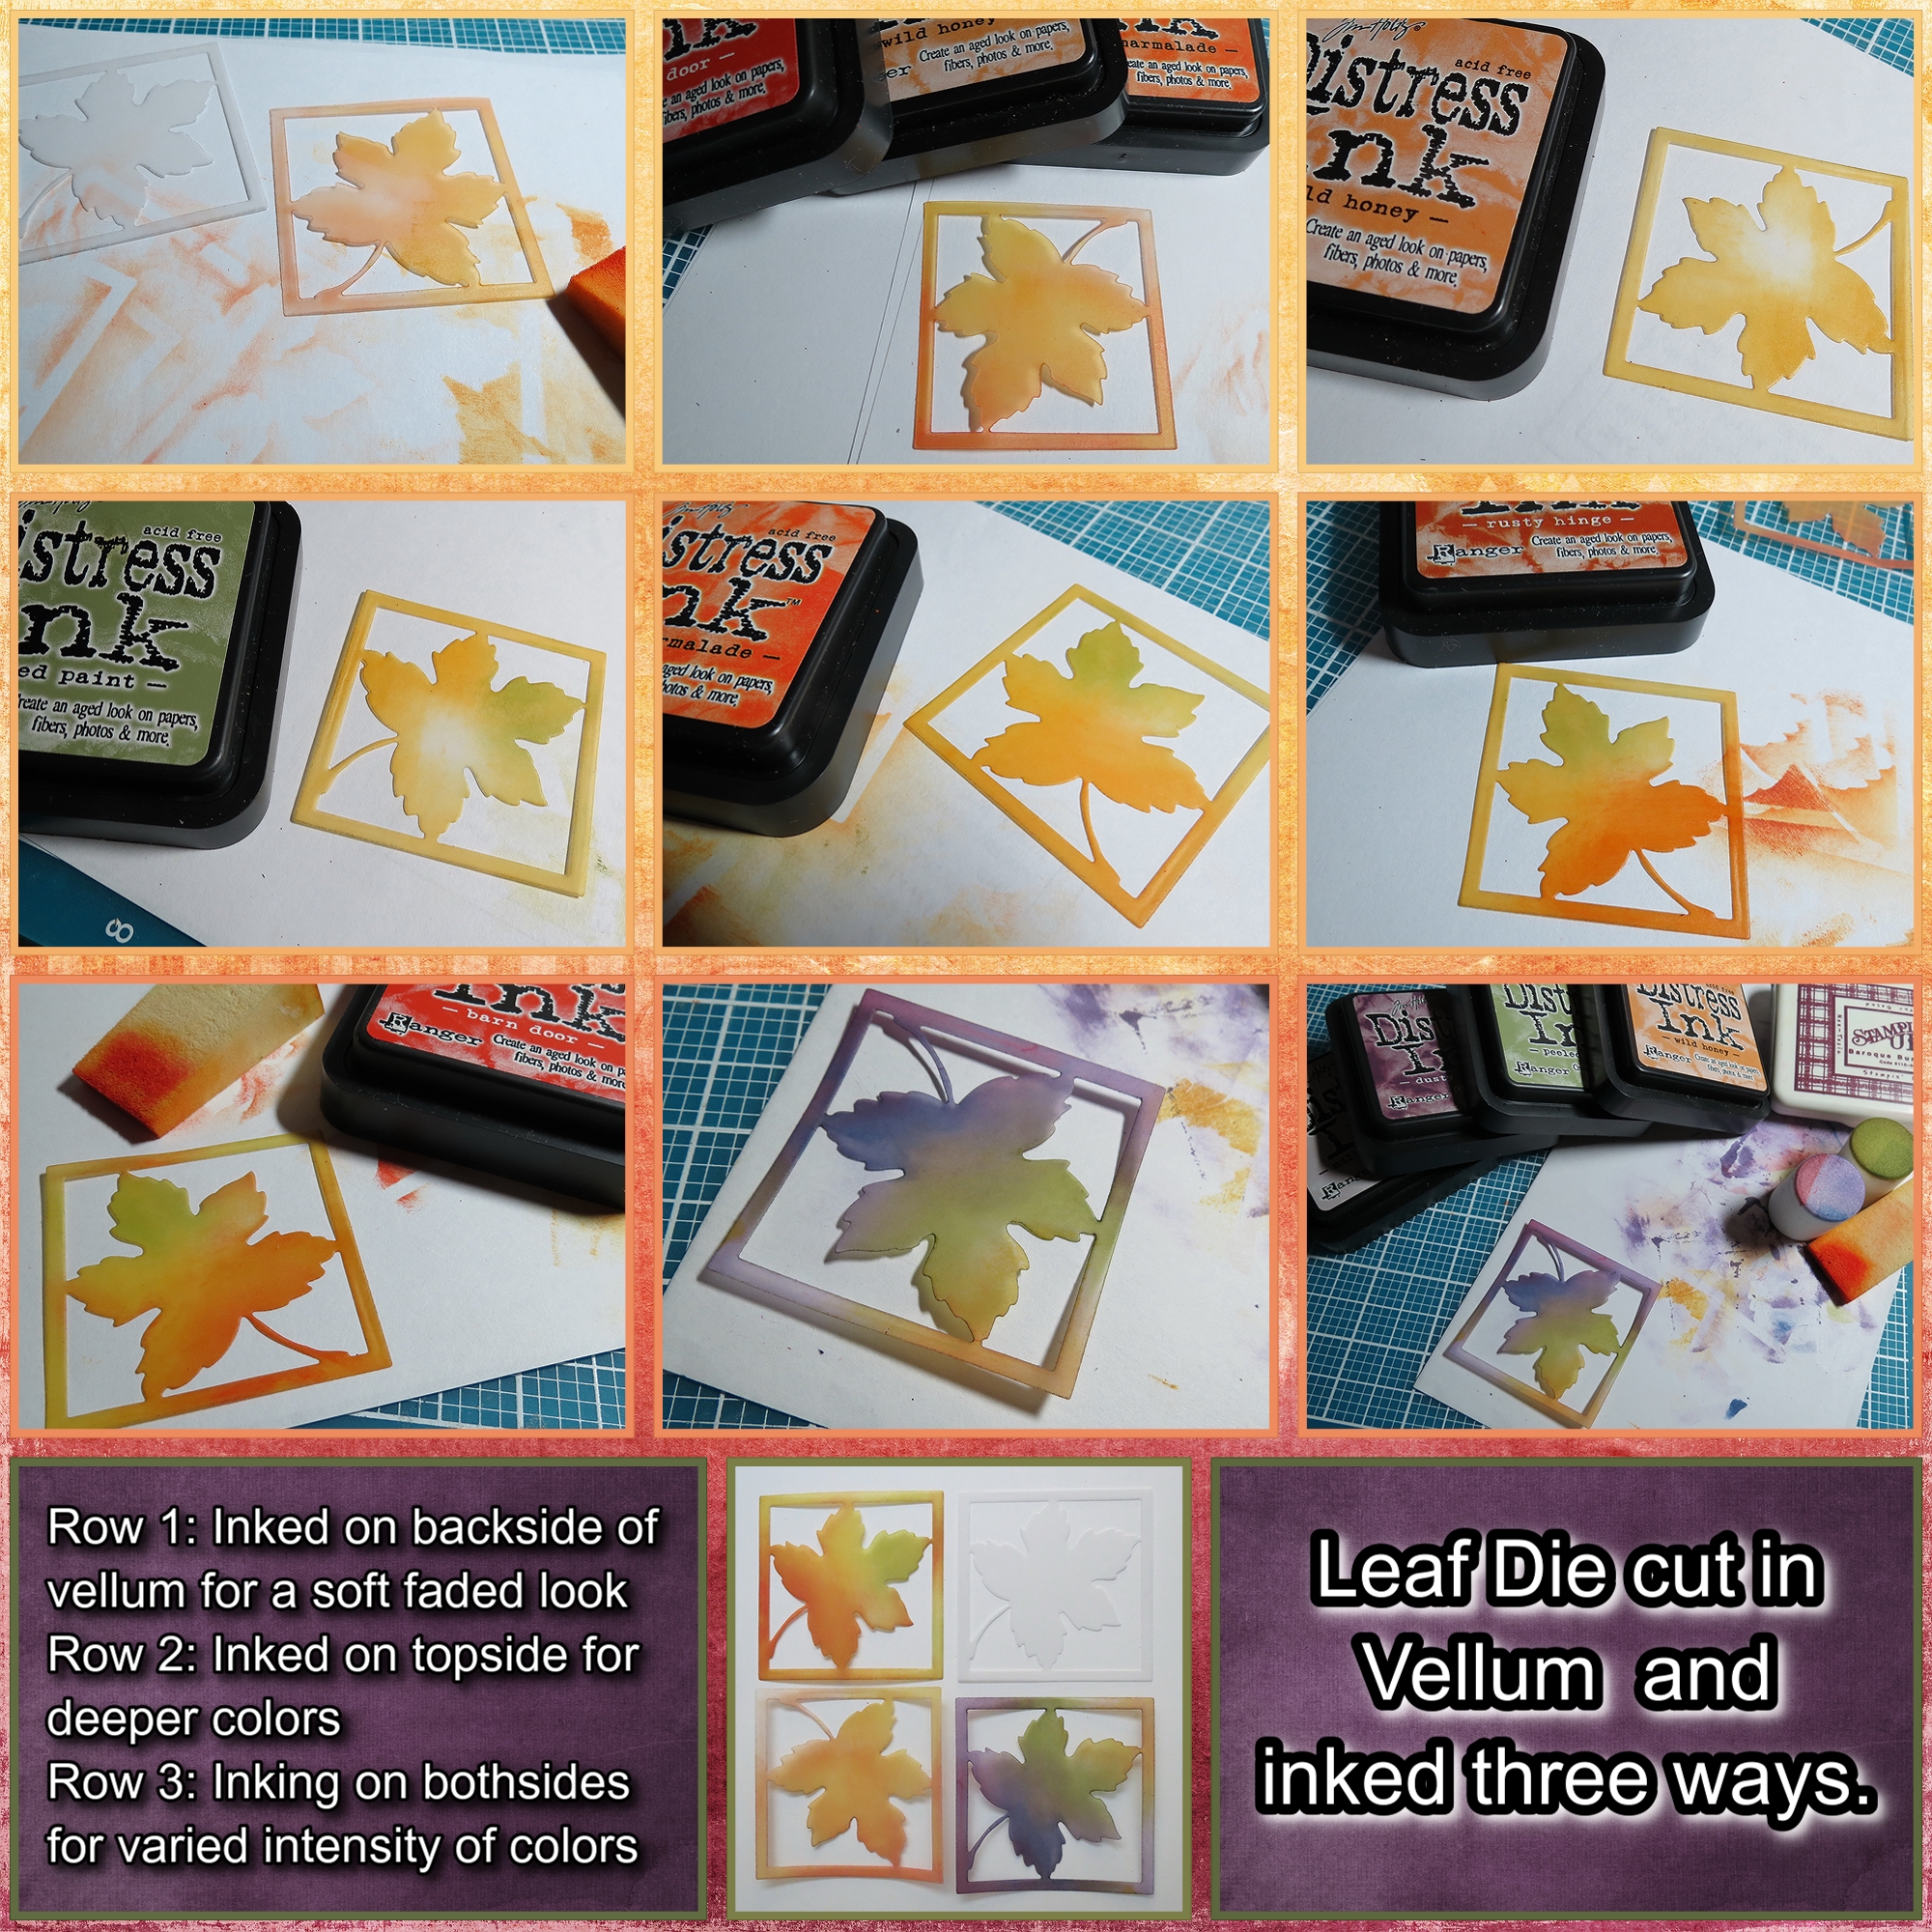
MM Leaf Die Technique Nine: Vellum
Technique Ten: Metal x2
This is a thin sheet of copper that cuts easily and gives a nice crisp, smooth surface. If you are adventurous you can also use a stylus to add a pattern or texture to your leaf.
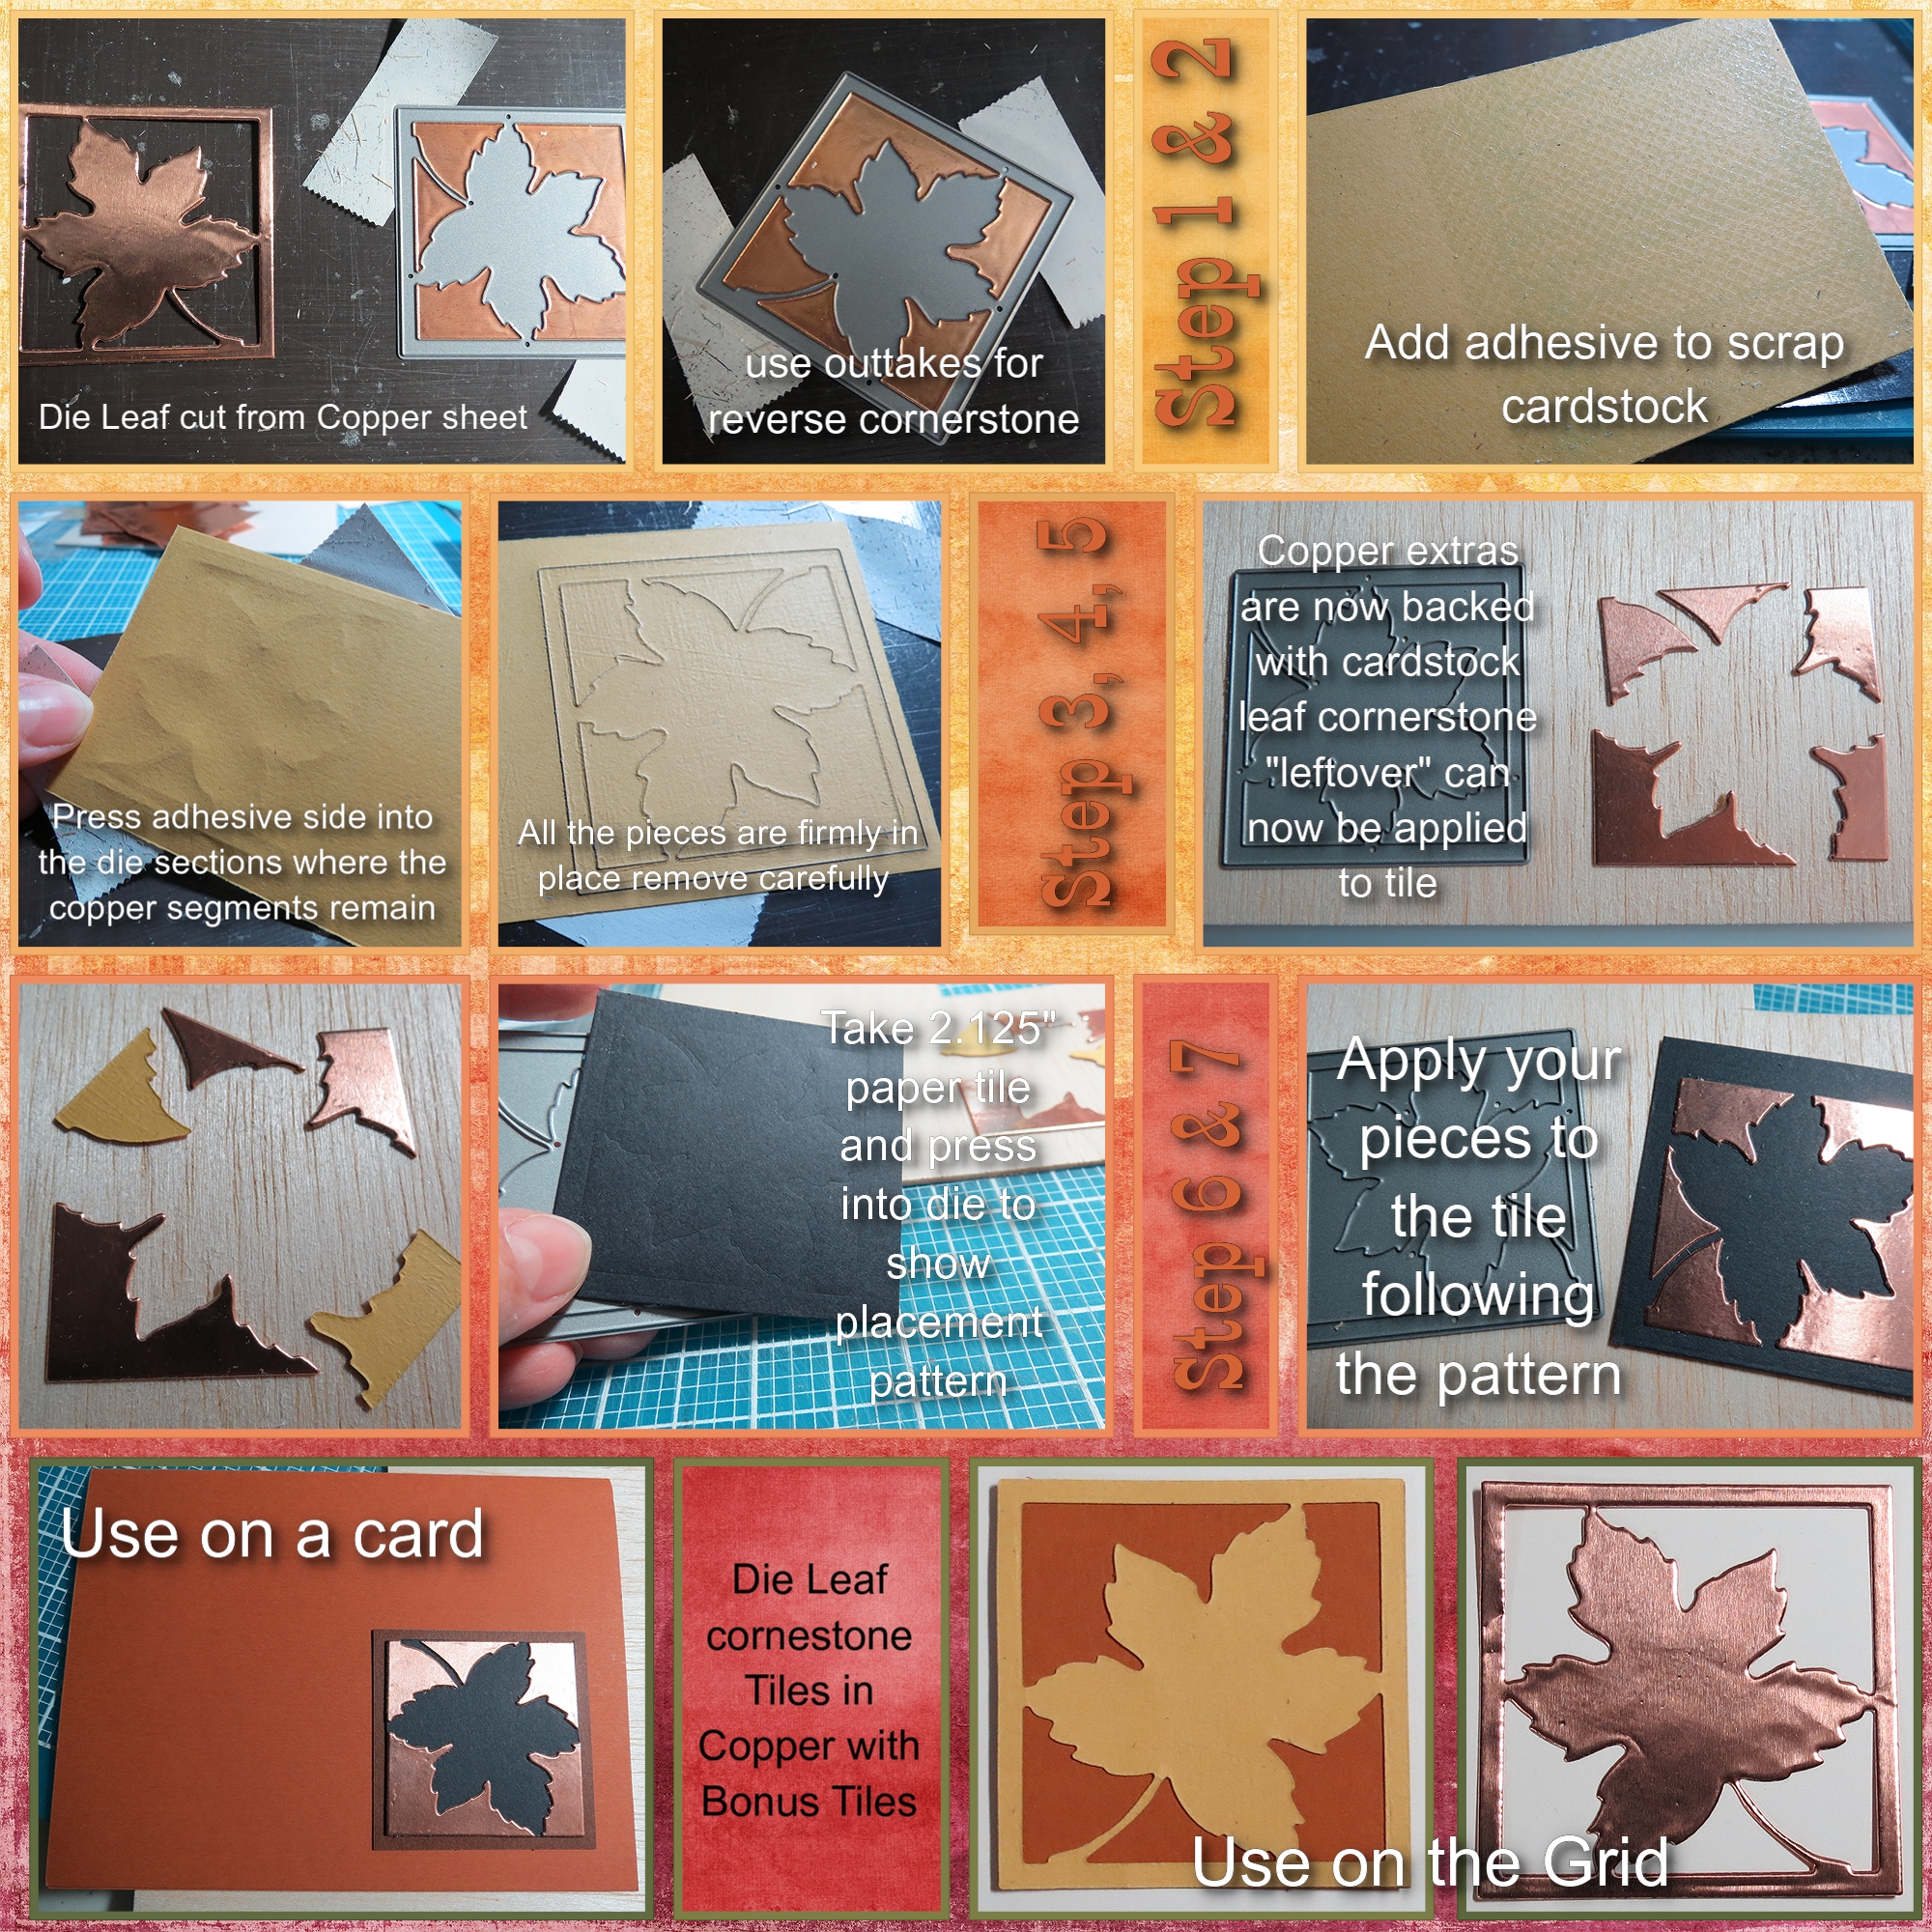
MM Leaf Die Technique Ten: Metal x2
Technique Eleven: Enamel and Heat Embossing
Using an heat embossing tool to heat embossing powder added in layers will give you the look of enameling. Use pigment ink not dye ink. Pigment ink stays wet long enough for the embossing powder to adhere then apply heat.
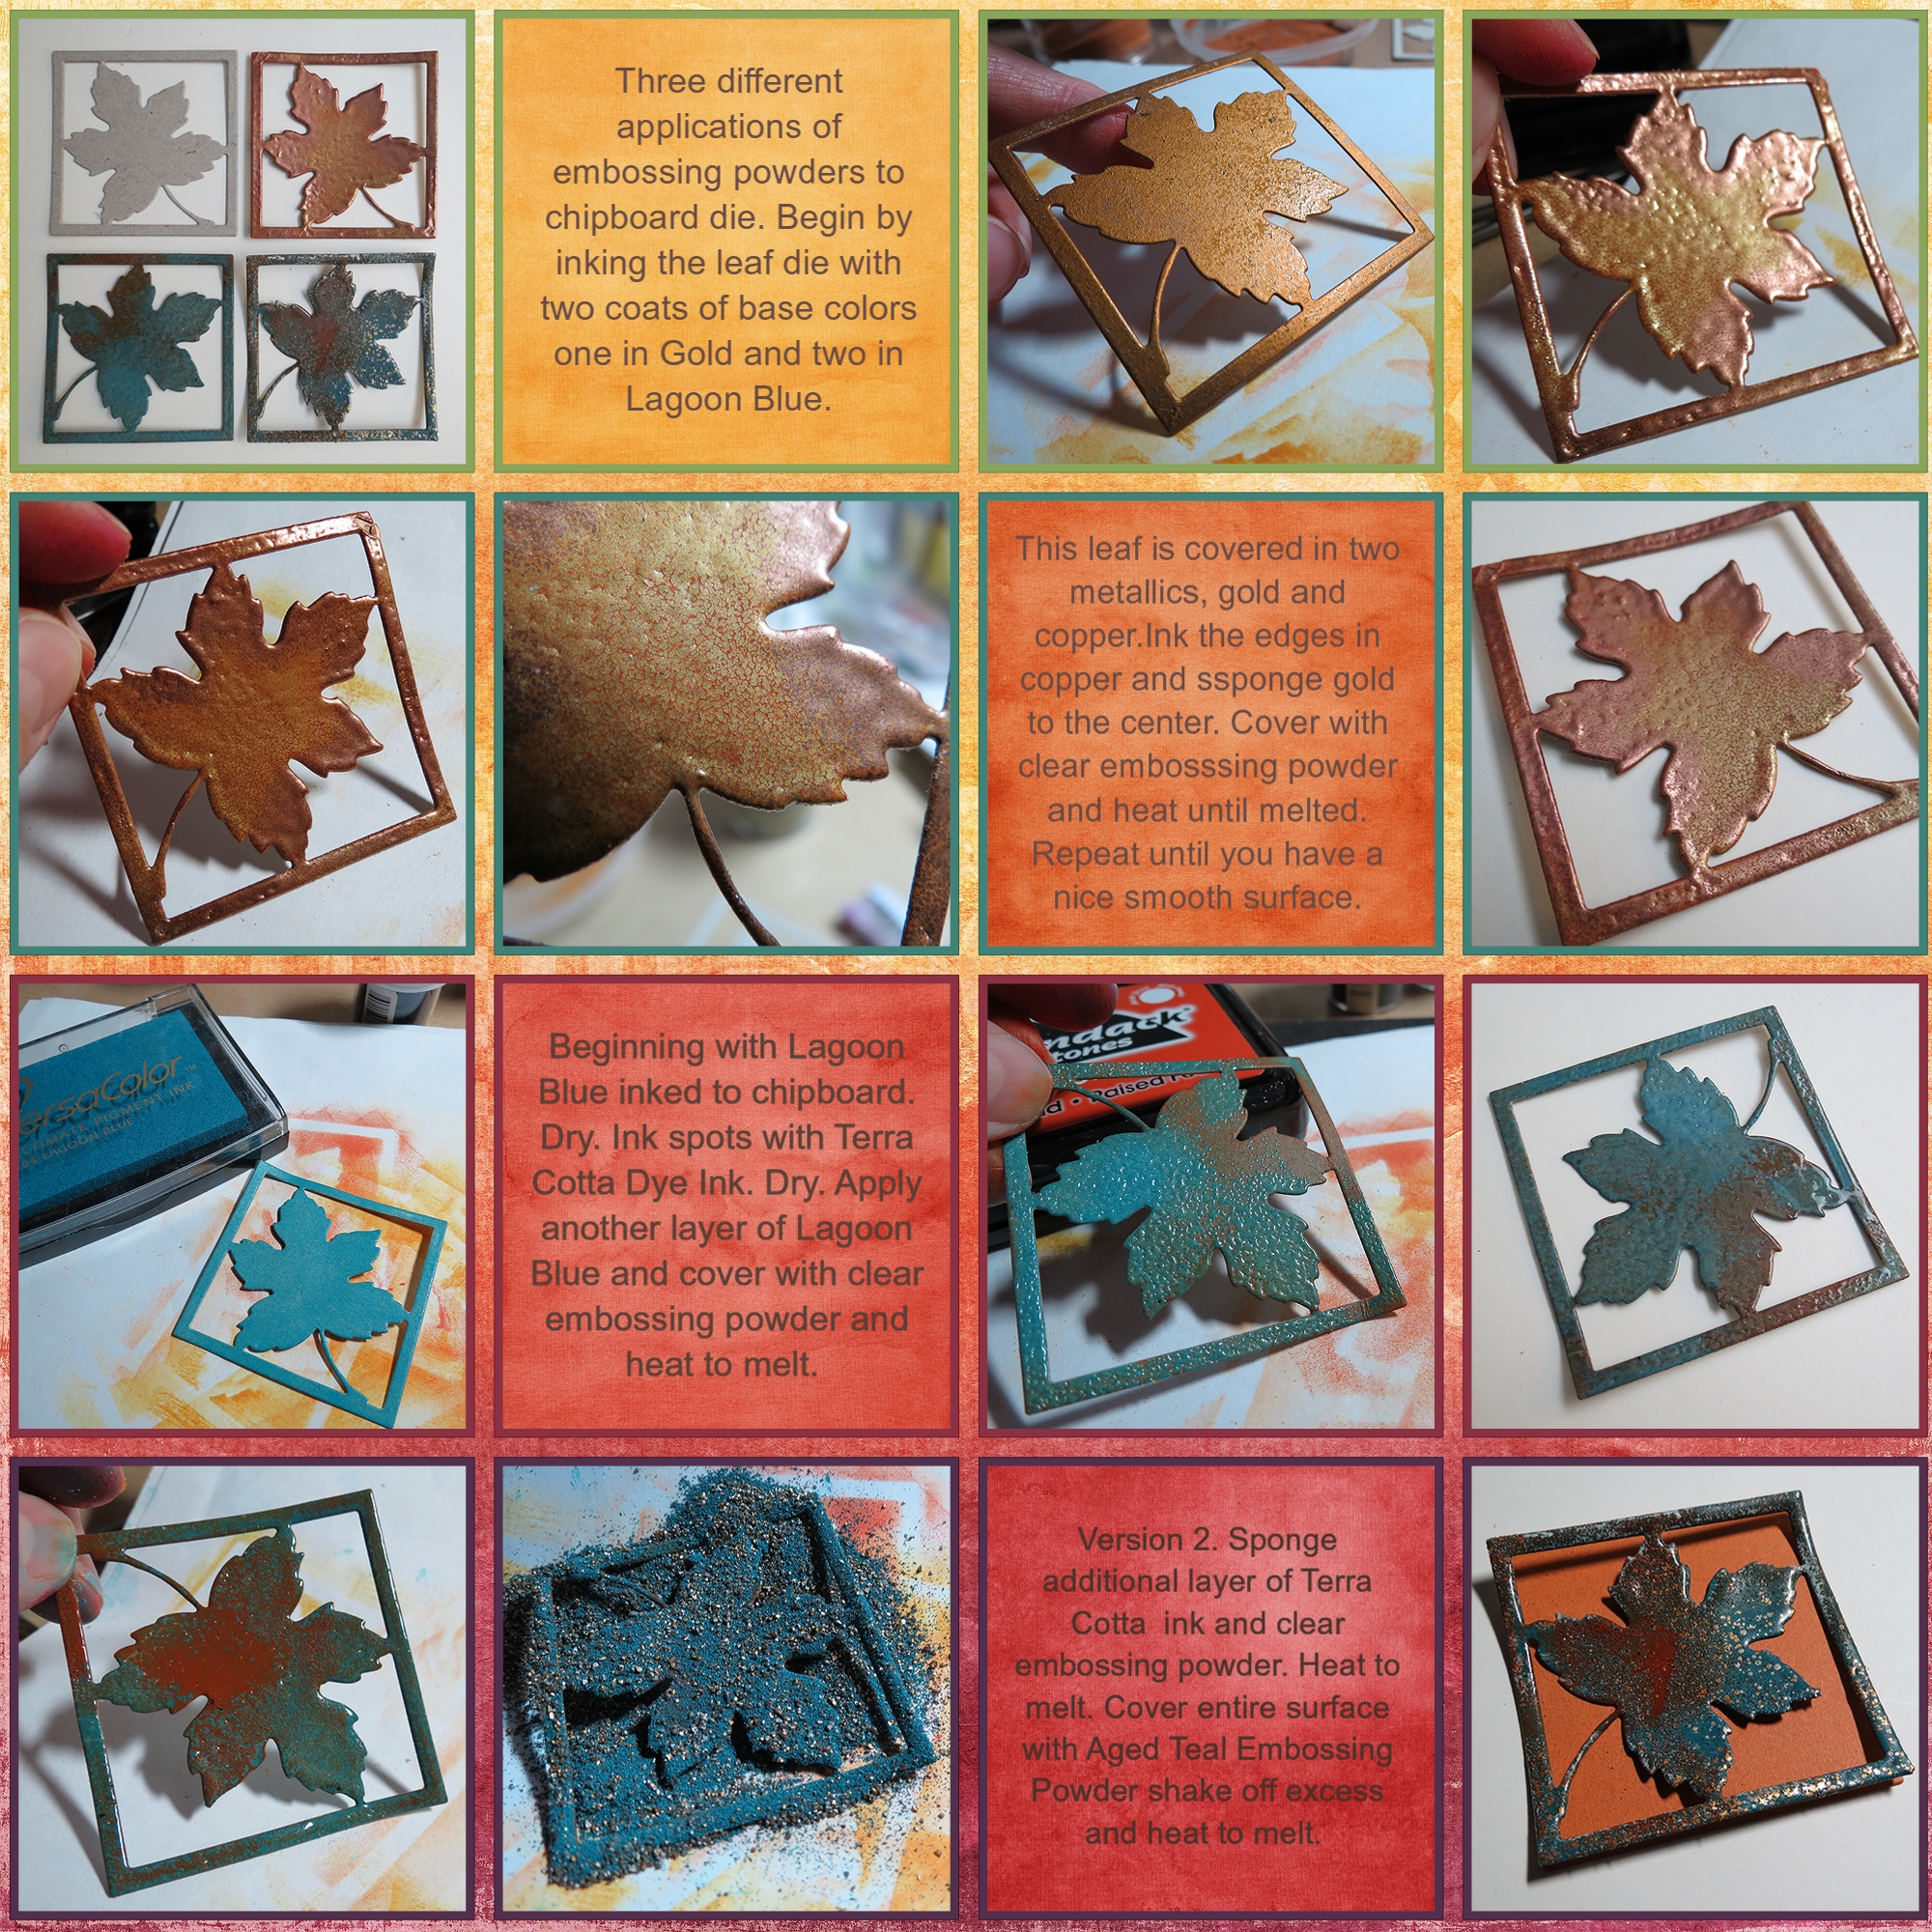
MM Leaf Die Technique Eleven: Enamel & Embossing
Technique Twelve: Watercolor
Any watercolors are perfect for this…even the Crayola’s from the kids dept! However, my personal favorites for a glamorous look I recommend Twinkling H2O’s and their shimmery luscious colors.
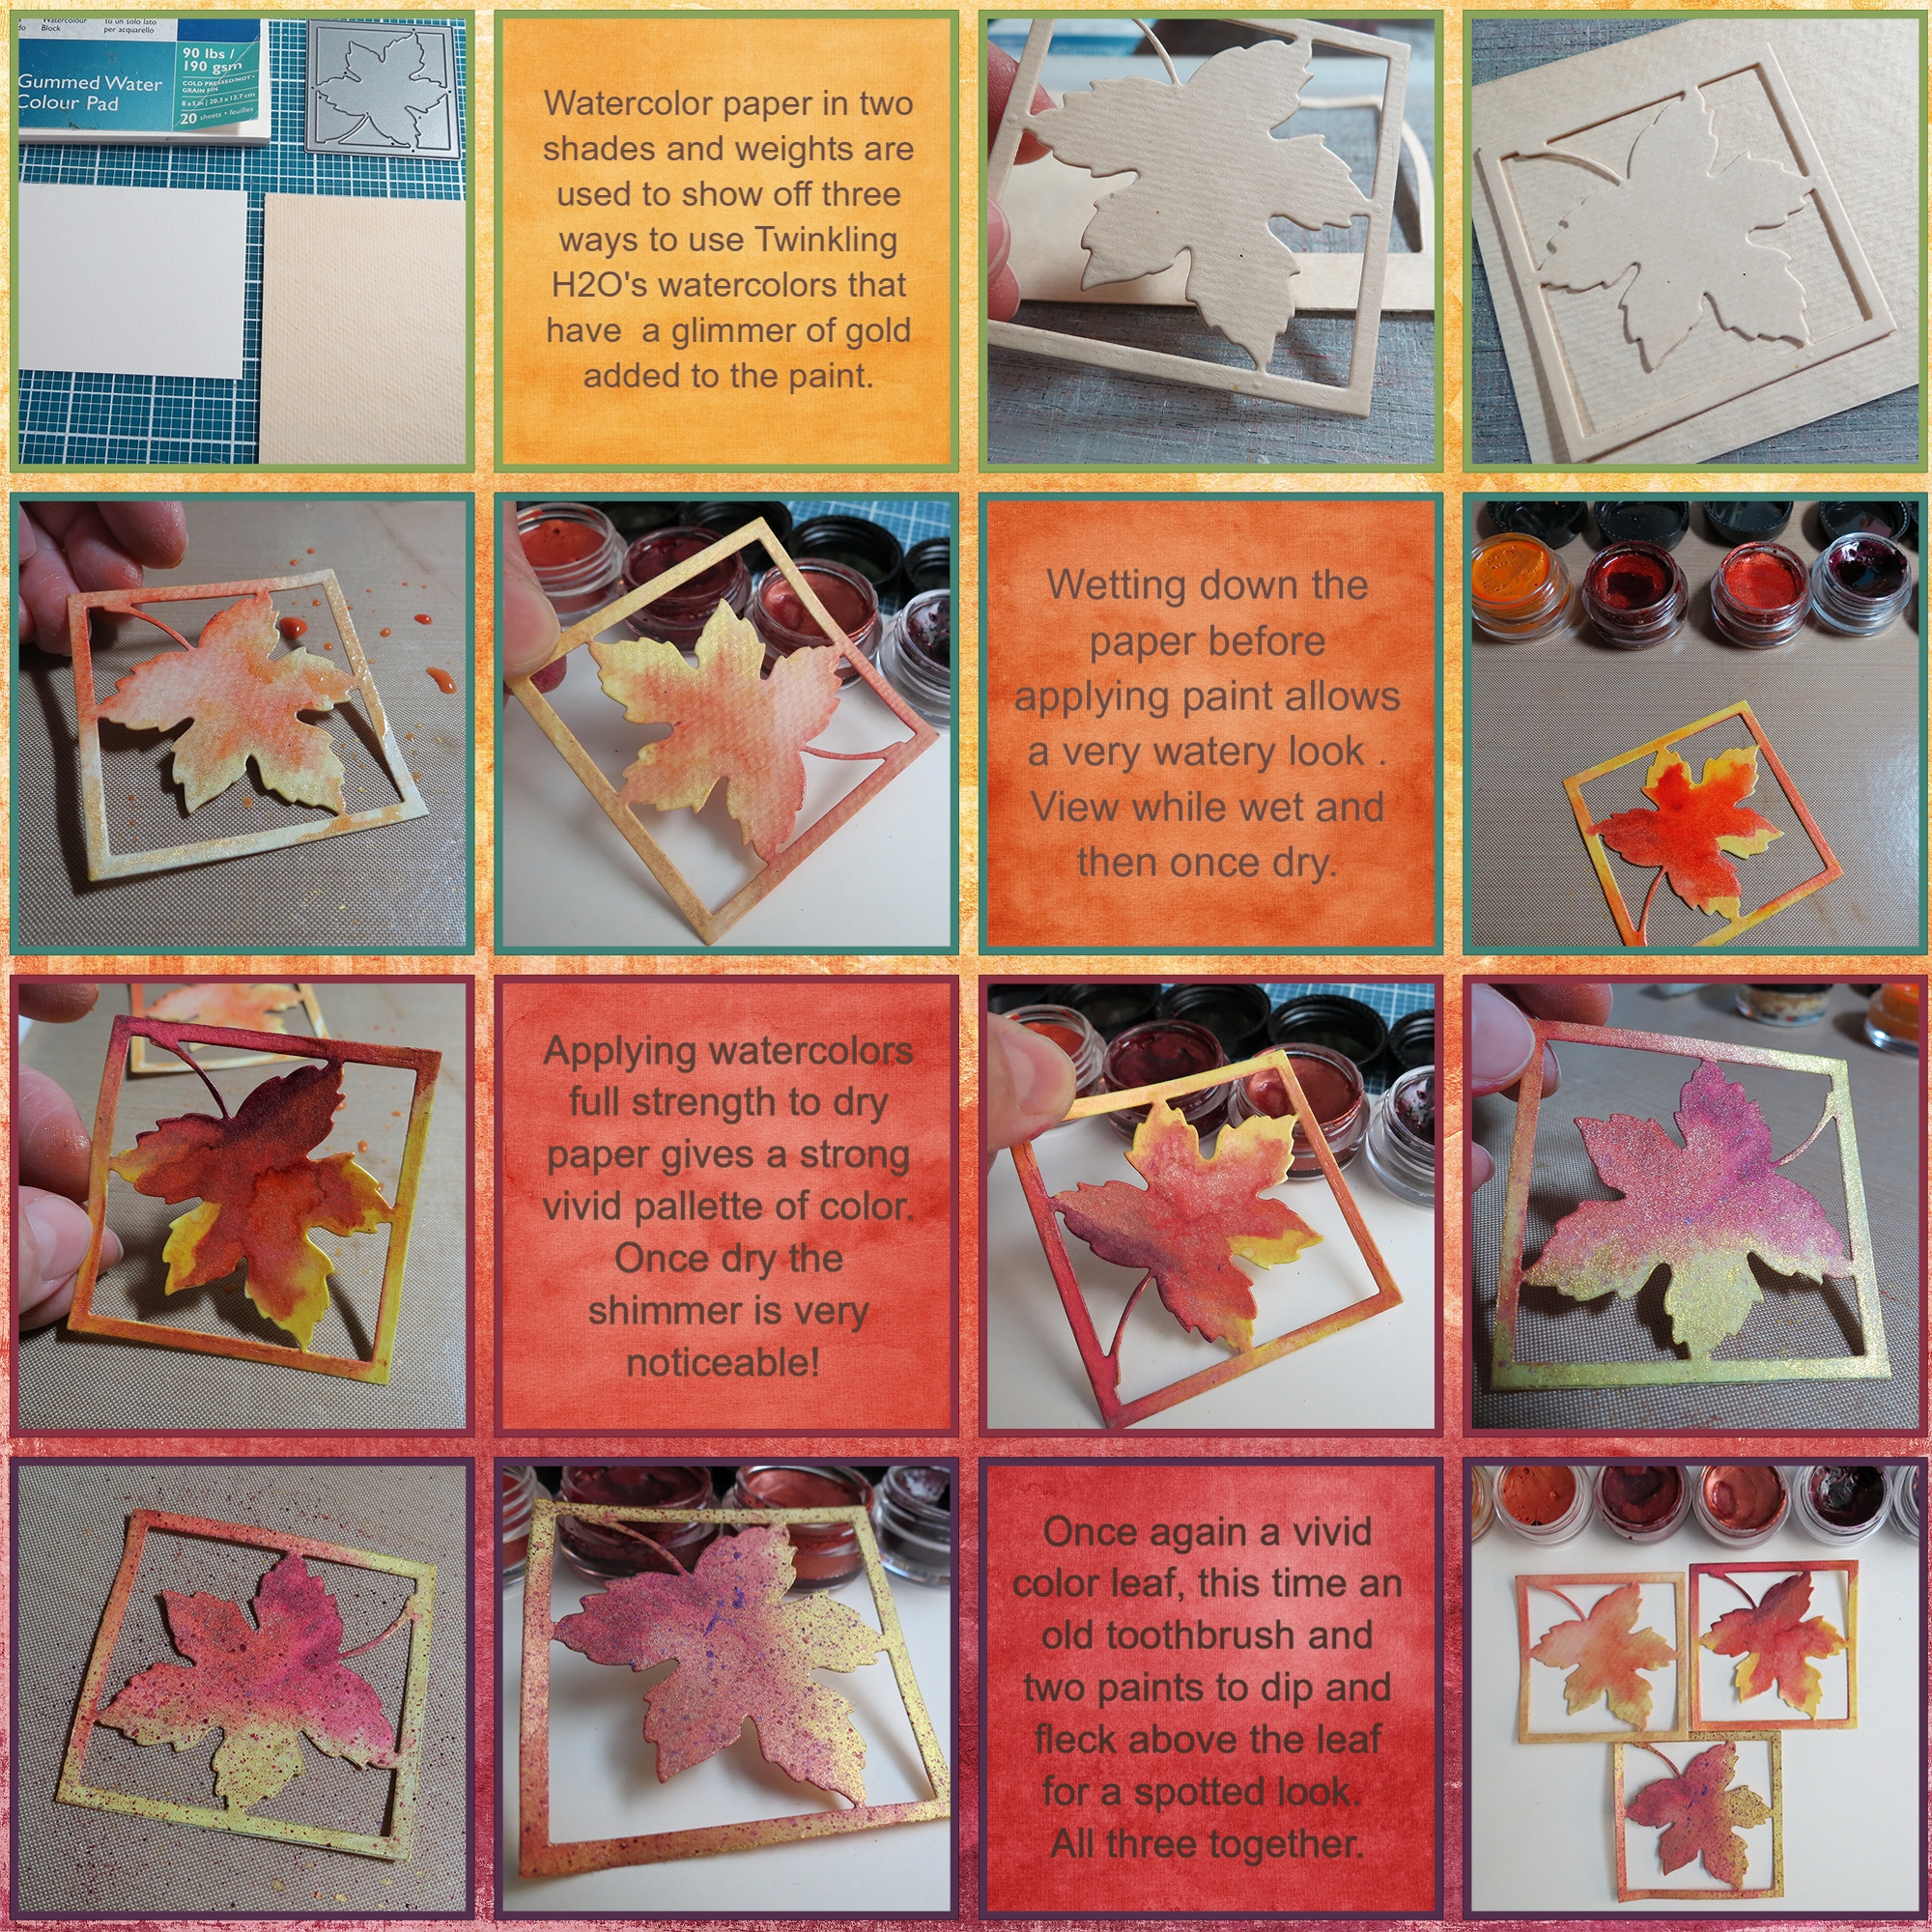
MM Leaf Die Technique Twelve: Watercolor
Here’s a sampling of the techniques we’ve used…hope there is one or two you’ll try and share with us on our Facebook page!
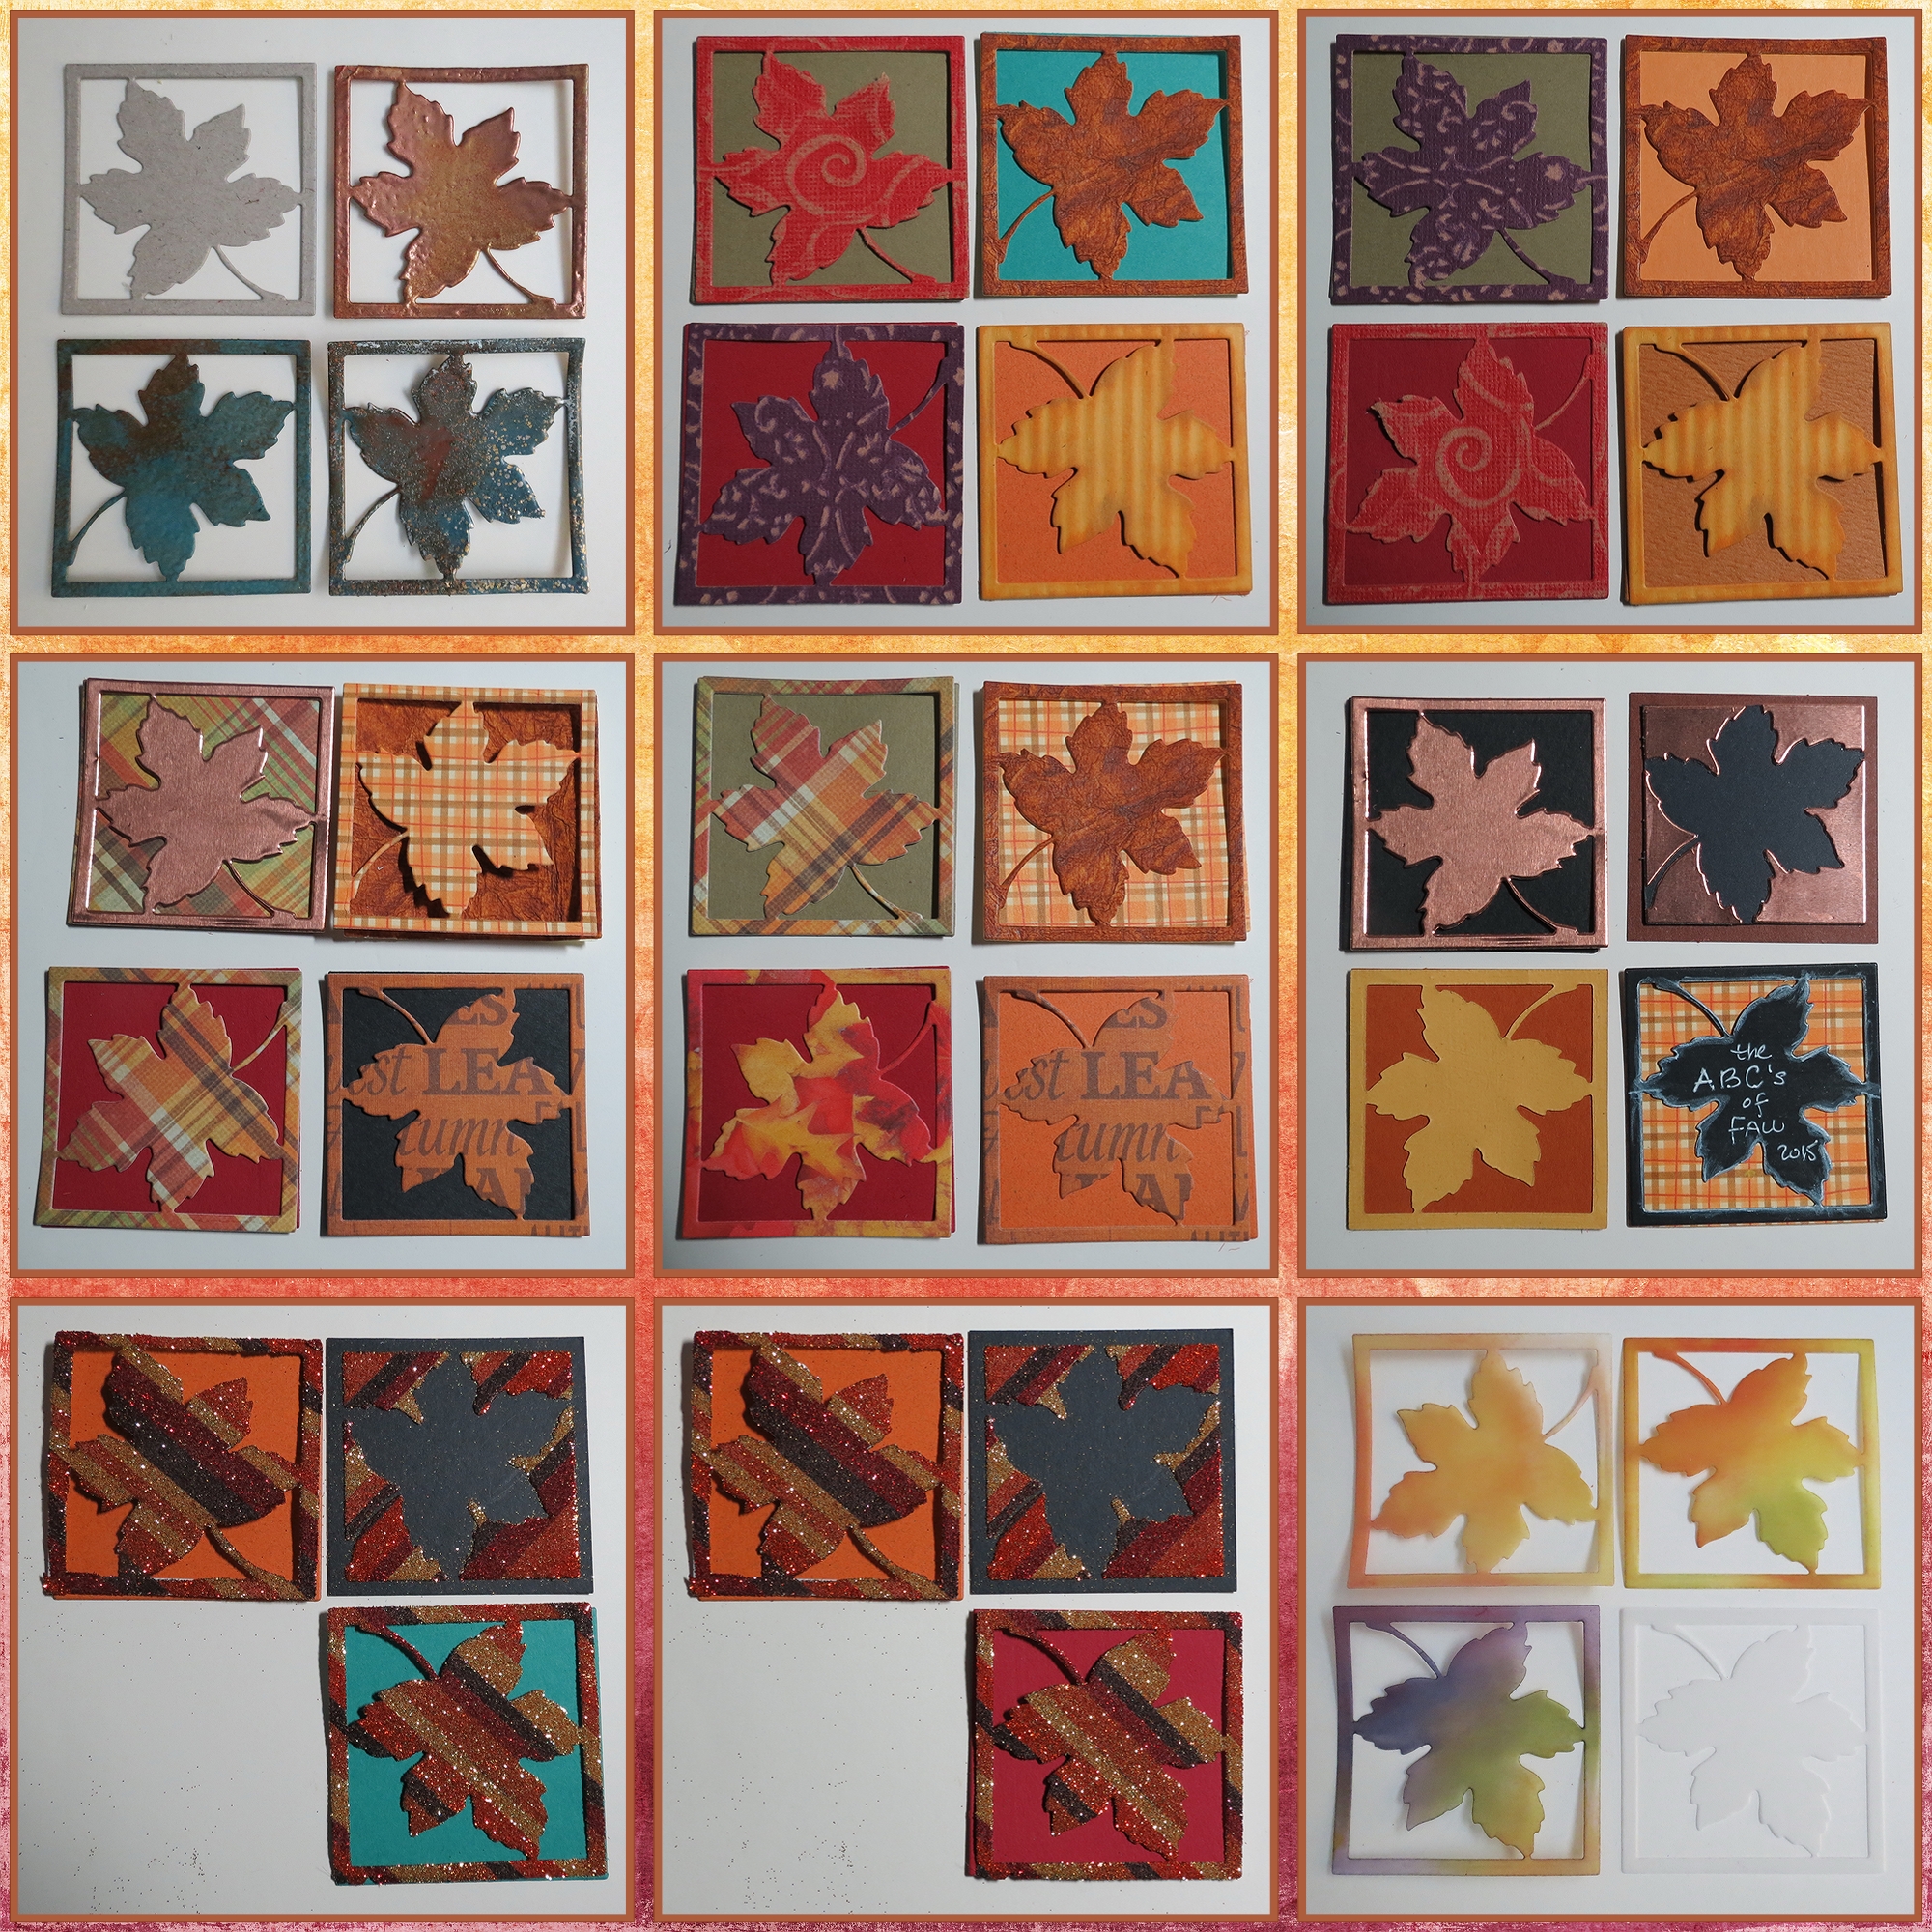
MM Leaf Die Technique Sampler
Andrea Fisher
Don’t forget to check on all things Mosaic on our Pinterest boards. You’ll find this pin too!
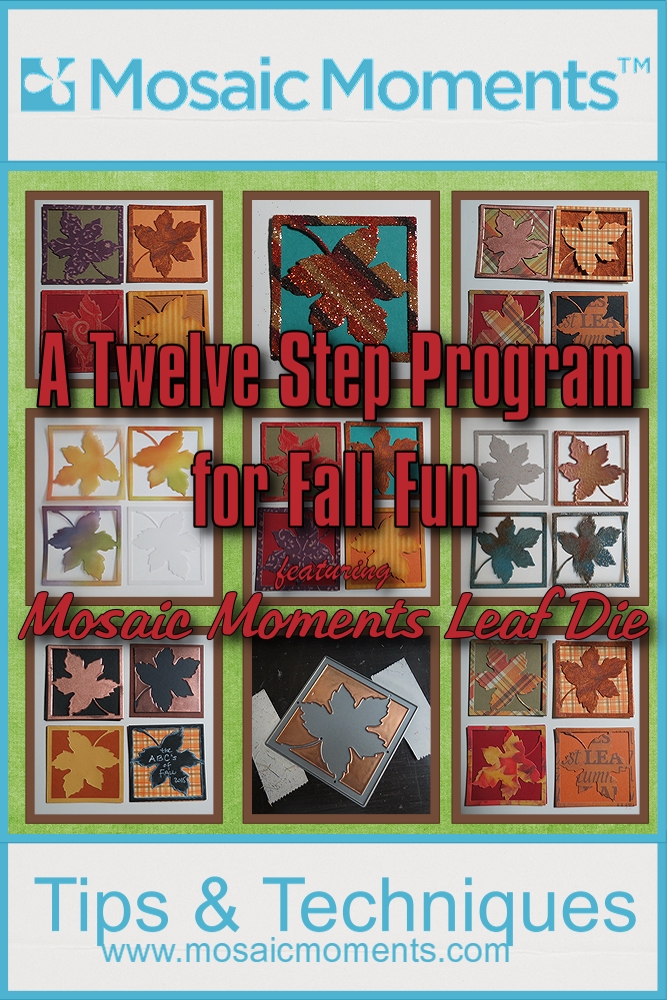
Mosaic Moments Leaf Die and 12 Techniques for adding fall fun to your scrapbook pages.