
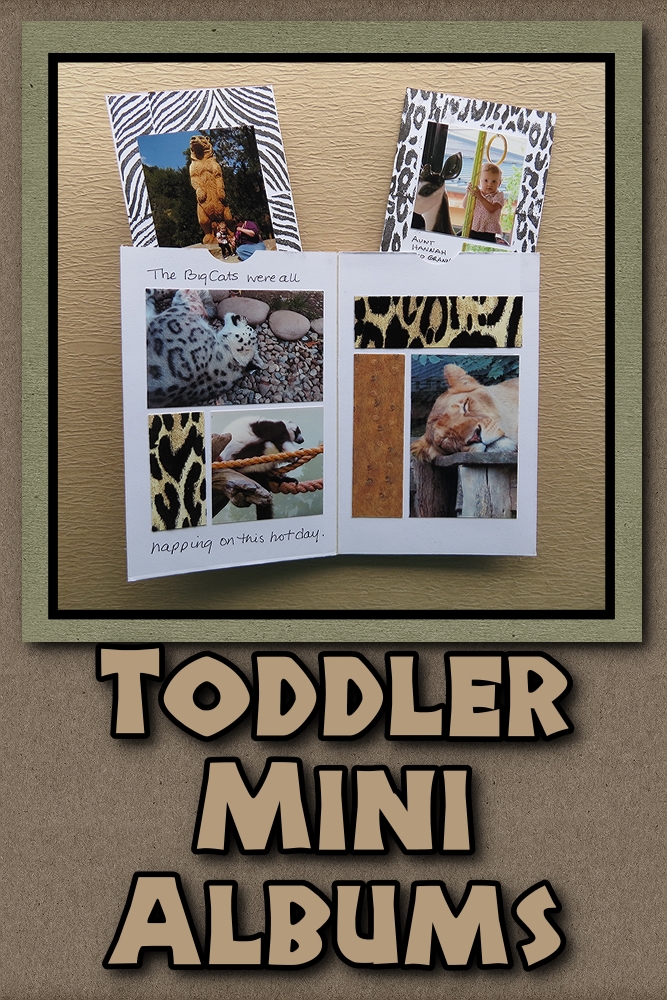
RTC Toddler Mini Albums
My granddaughter is a frequent visitor to my ‘studio’ to see what I’m working on and she loves to see pages that I’ve done of her! Last year we visited the zoo with her for the very first time at about 16 months old. I loved seeing her expressions and wonder at all that was going on around her. Although I did a layout then (posted on Journella) with photos of the day, I only gave it half a thought then to take the extra photos and make her a small book. I never got around to it and I think we can all relate to that, right? Well, today I‘d like to show you the toddler mini album I have finally put together for her to enjoy using our RTC grid papers.
I have taken two sheets of 4×6 RTC papers, (I’ve used white for this project but there are more colors that we’ll be adding soon, in addition to Sunshine and Bahama Blue already in the store,) assorted Anna Griffin animal print patterned papers and rubber stamps to make this mini album. I have used Score-Tape in ½” and ¼” widths as my heavy duty adhesive, which is key for making photos and papers secure from prying little hands.
Let’s show off the toddler mini album!
As you will see there are lots of possibilities in how to arrange a combination of photos, papers and writing. I had originally planned to use spots in the grid to write, but chose to use the nice wide top and bottom borders to add my story, leaving more room for photos and paper.
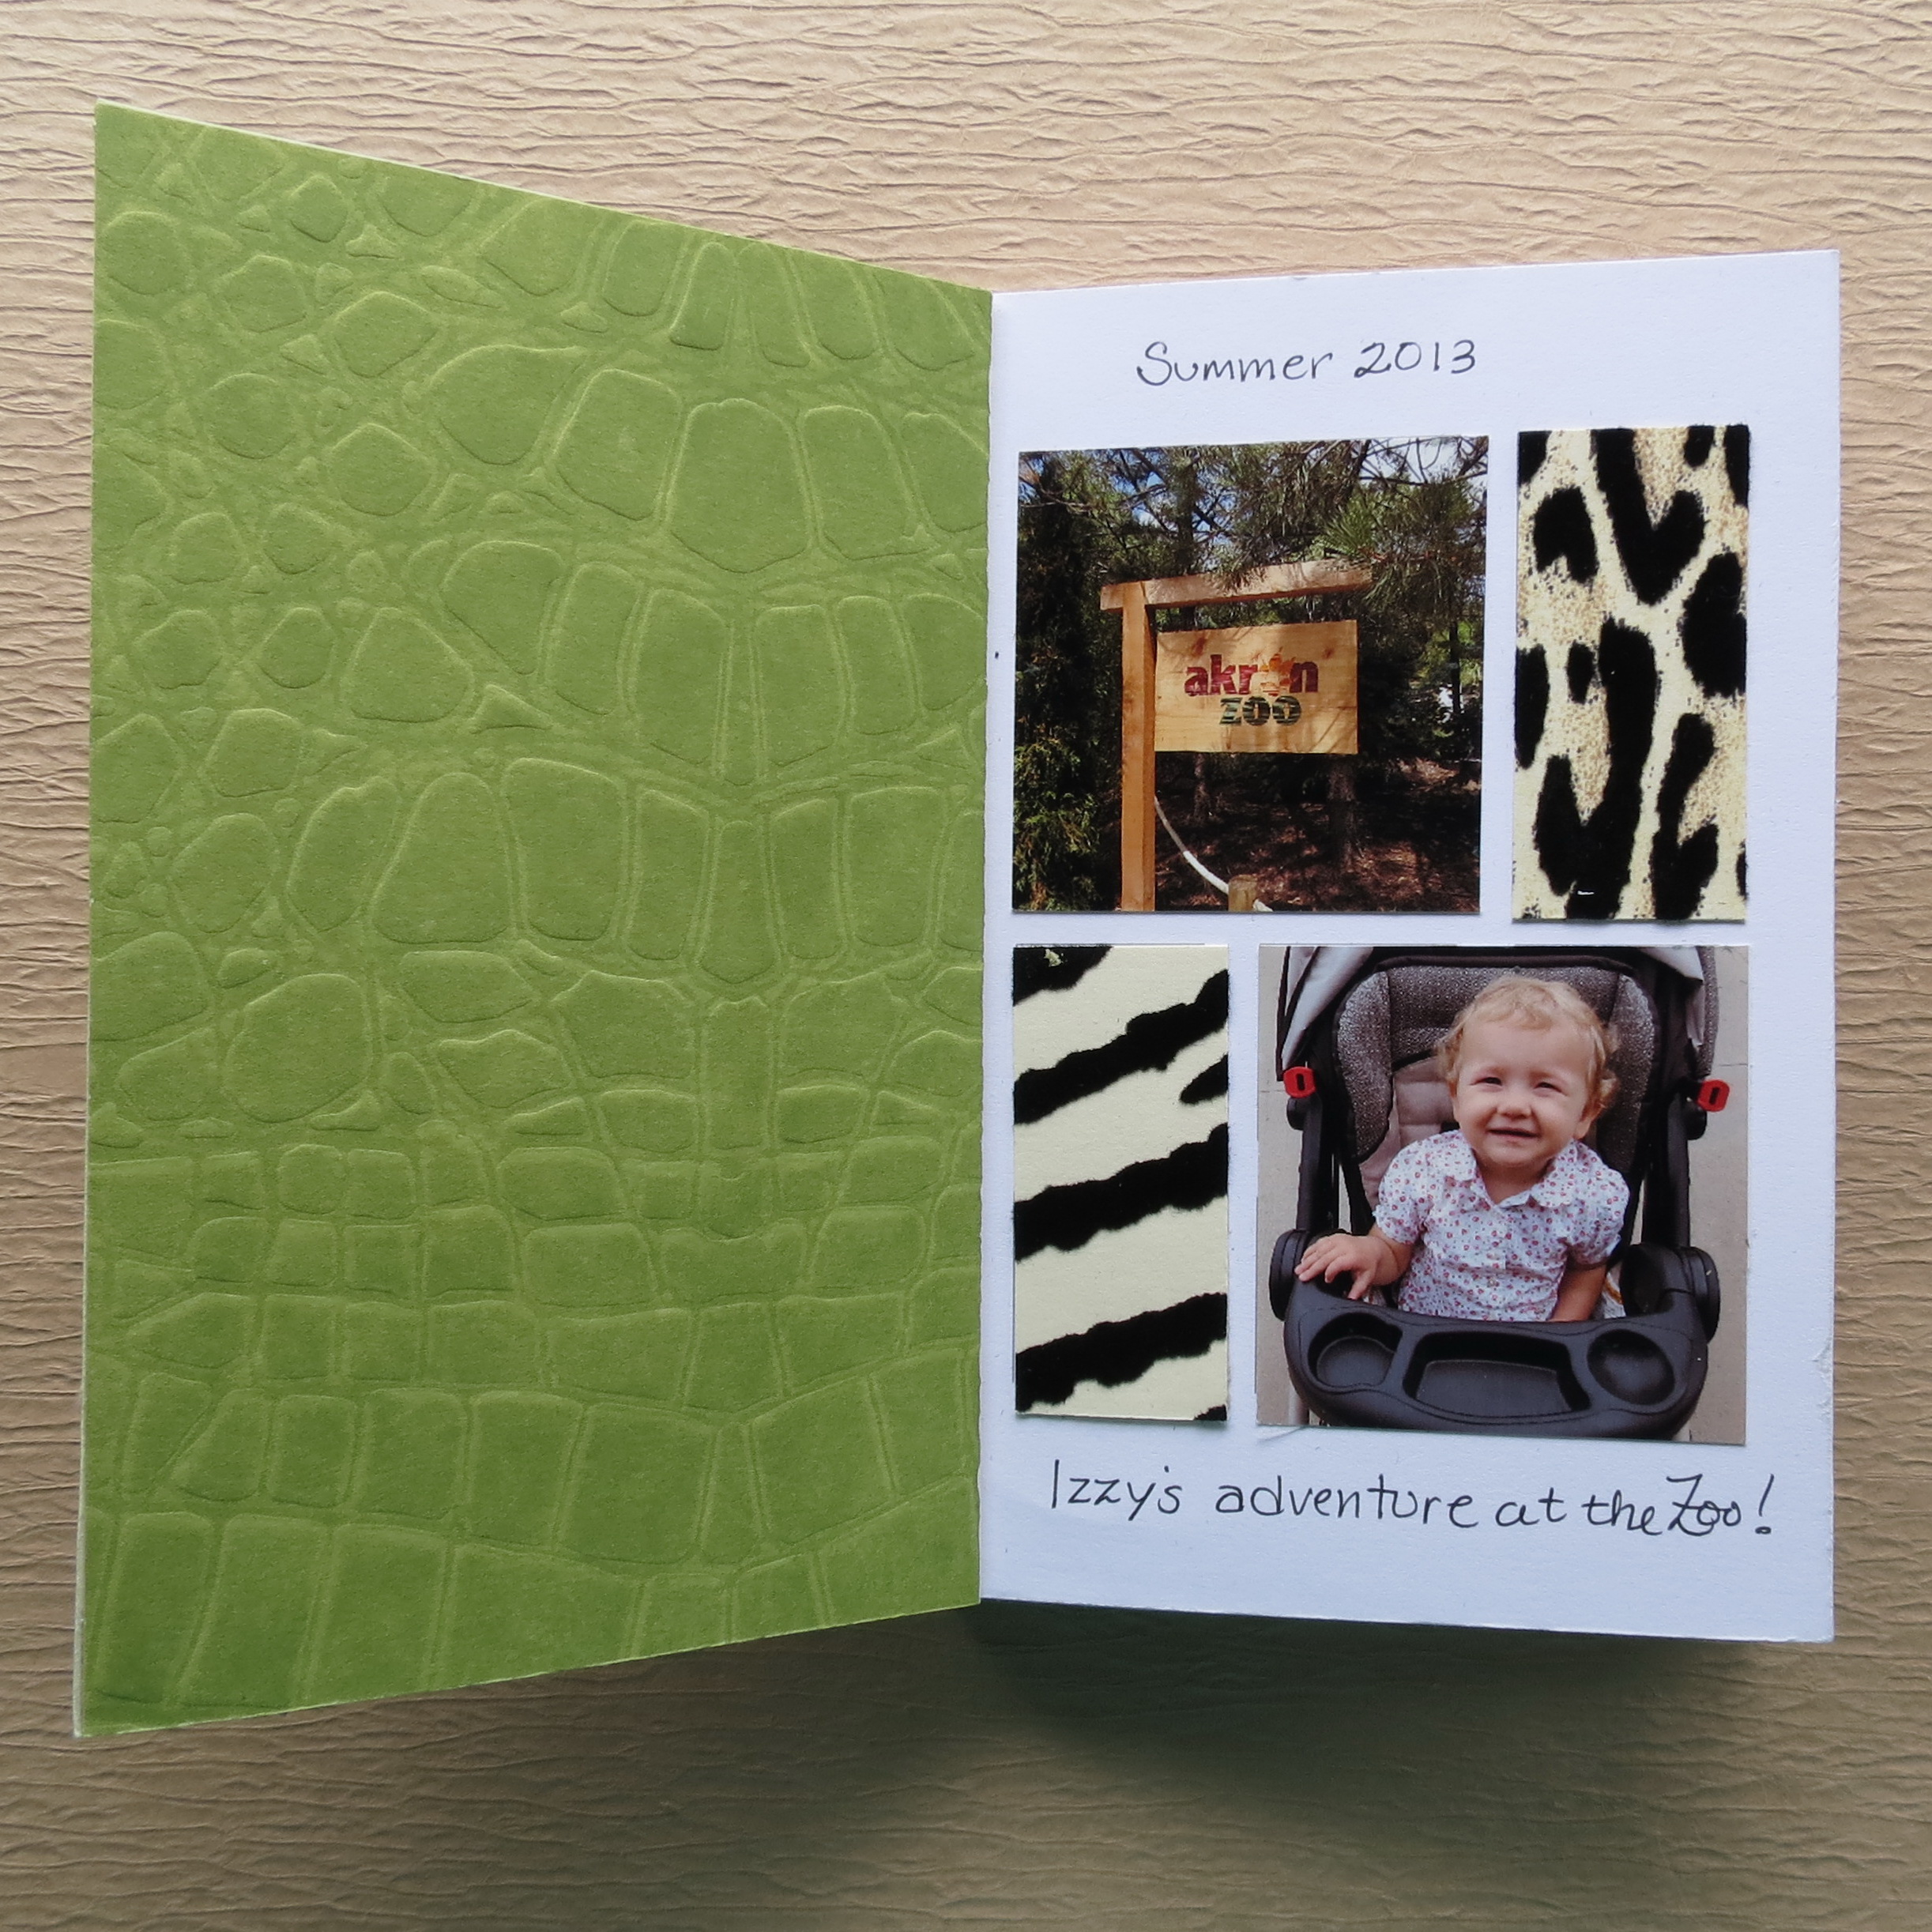
Opening page with green patterned paper lining the the cover adds color and strength to booklet.
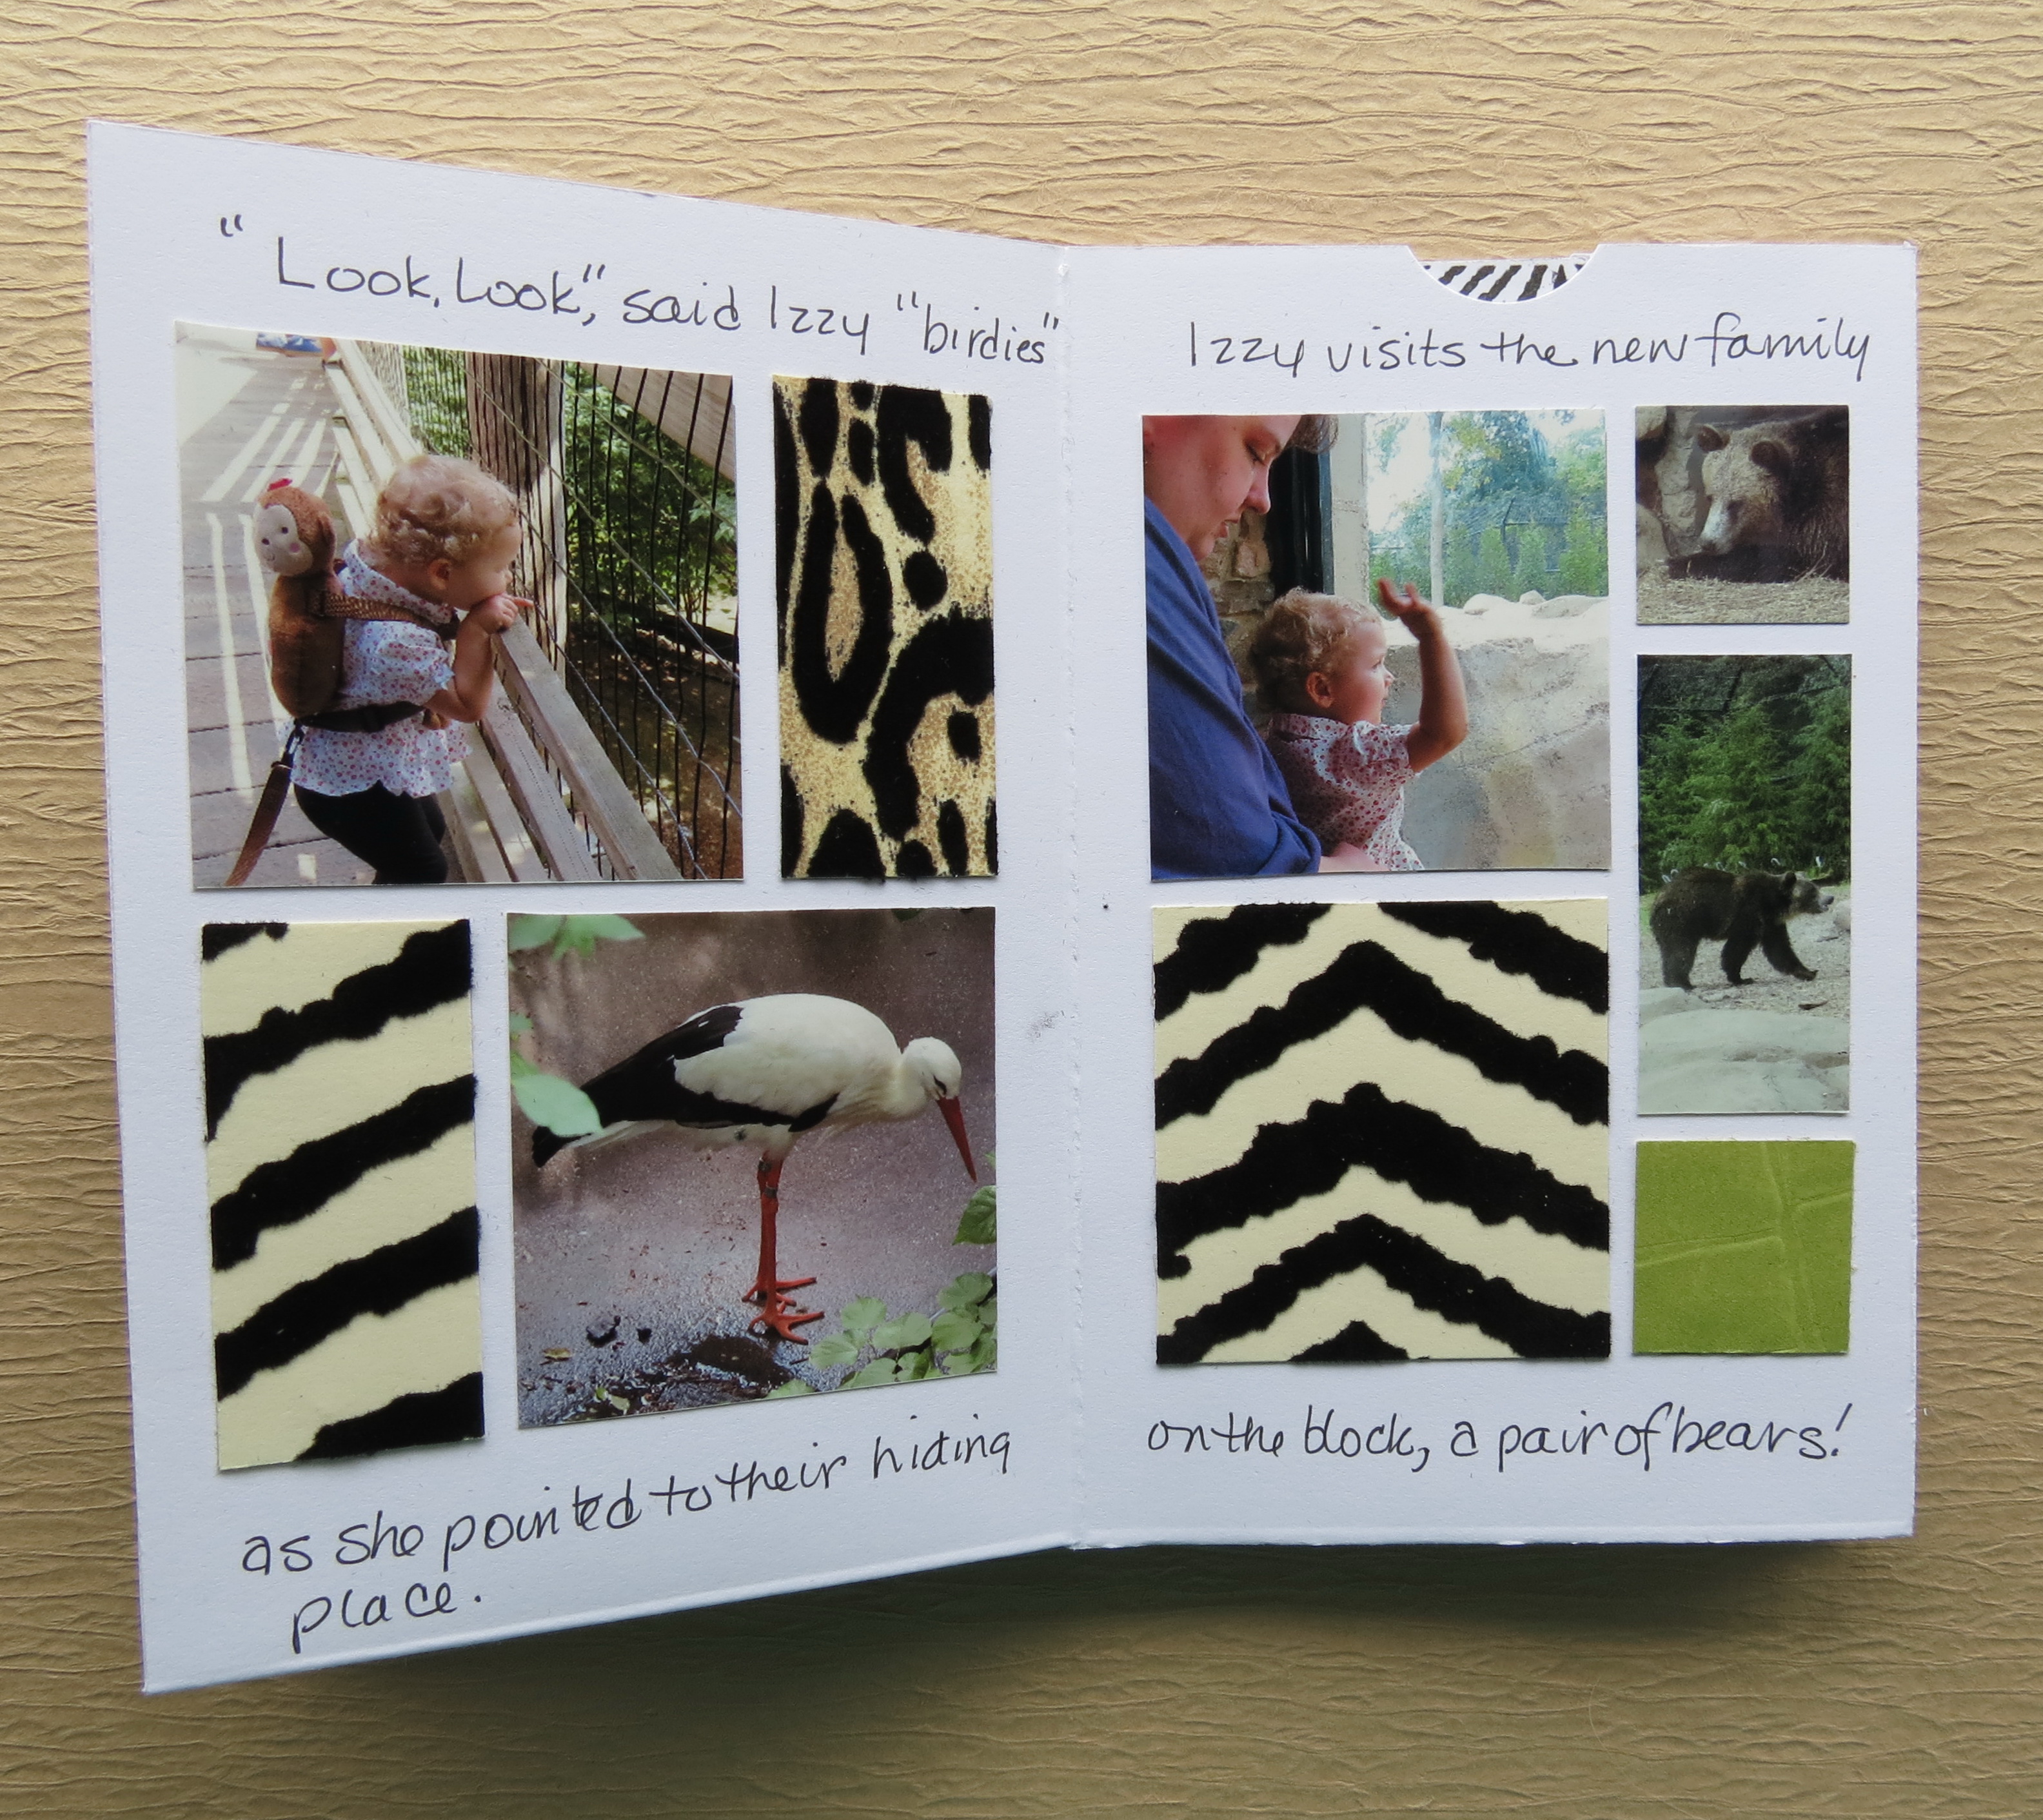
notice tab slots at top where hidden page can be accessed
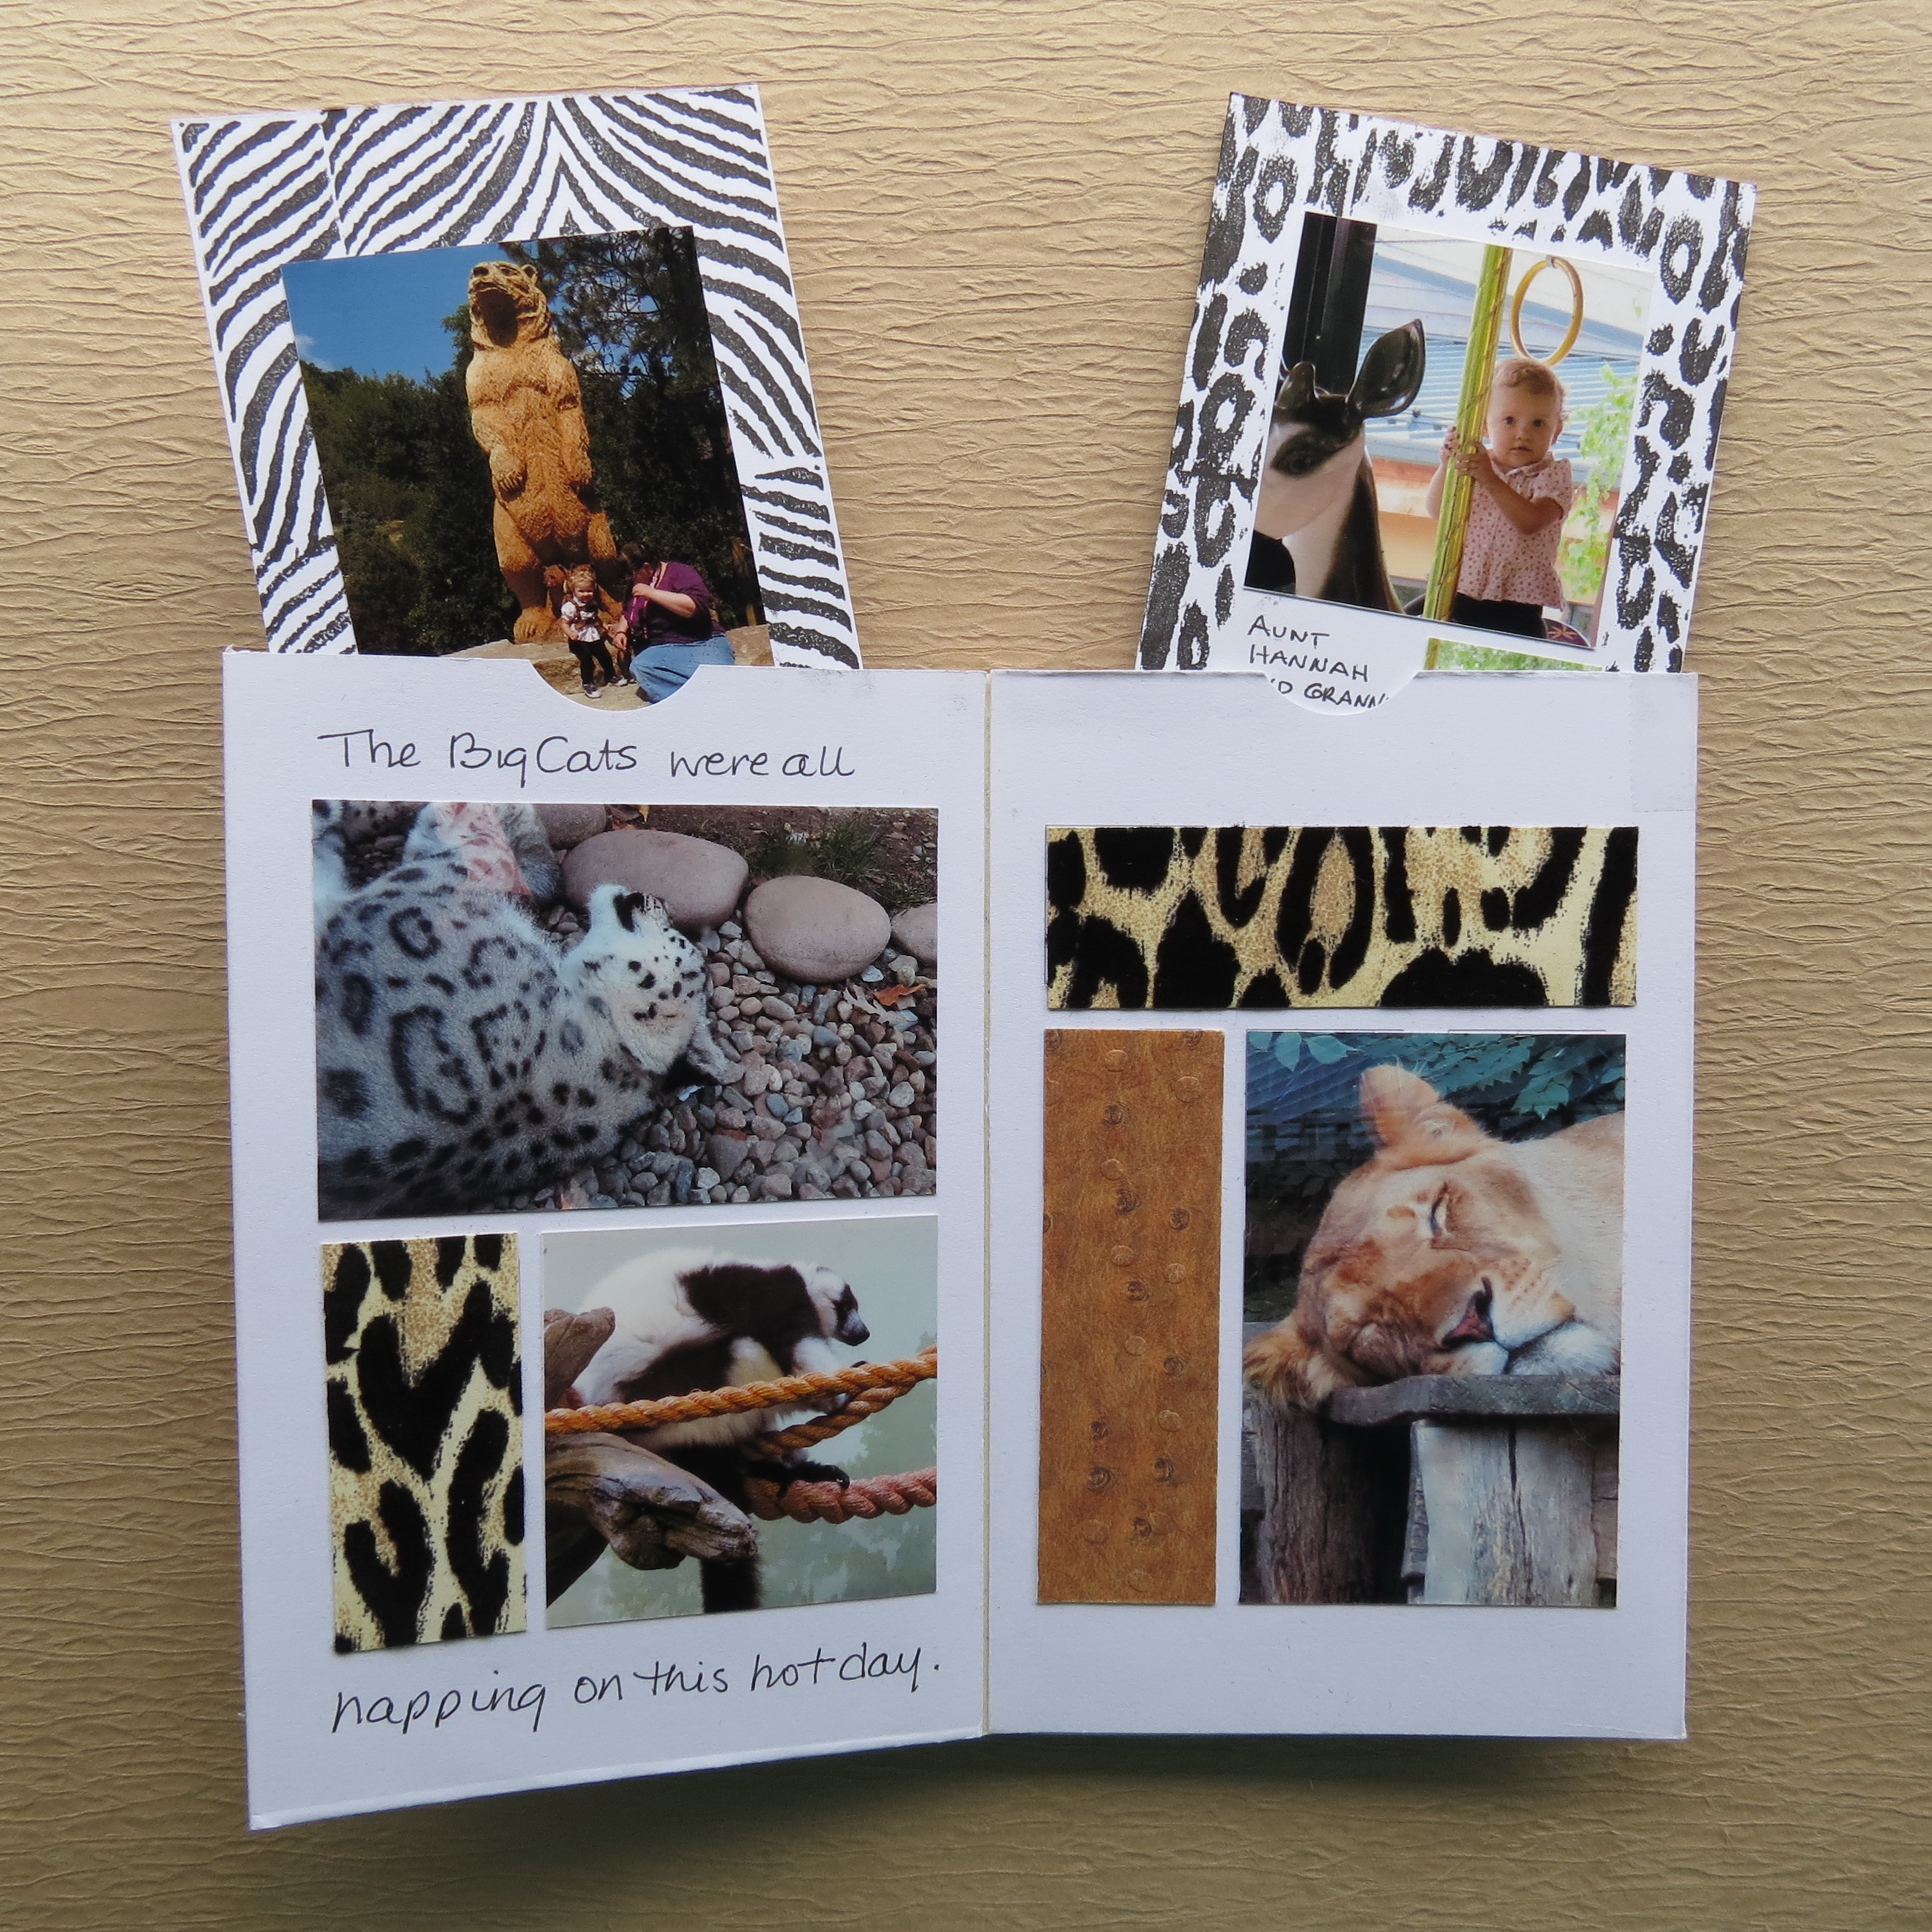
hidden photo/journal tag

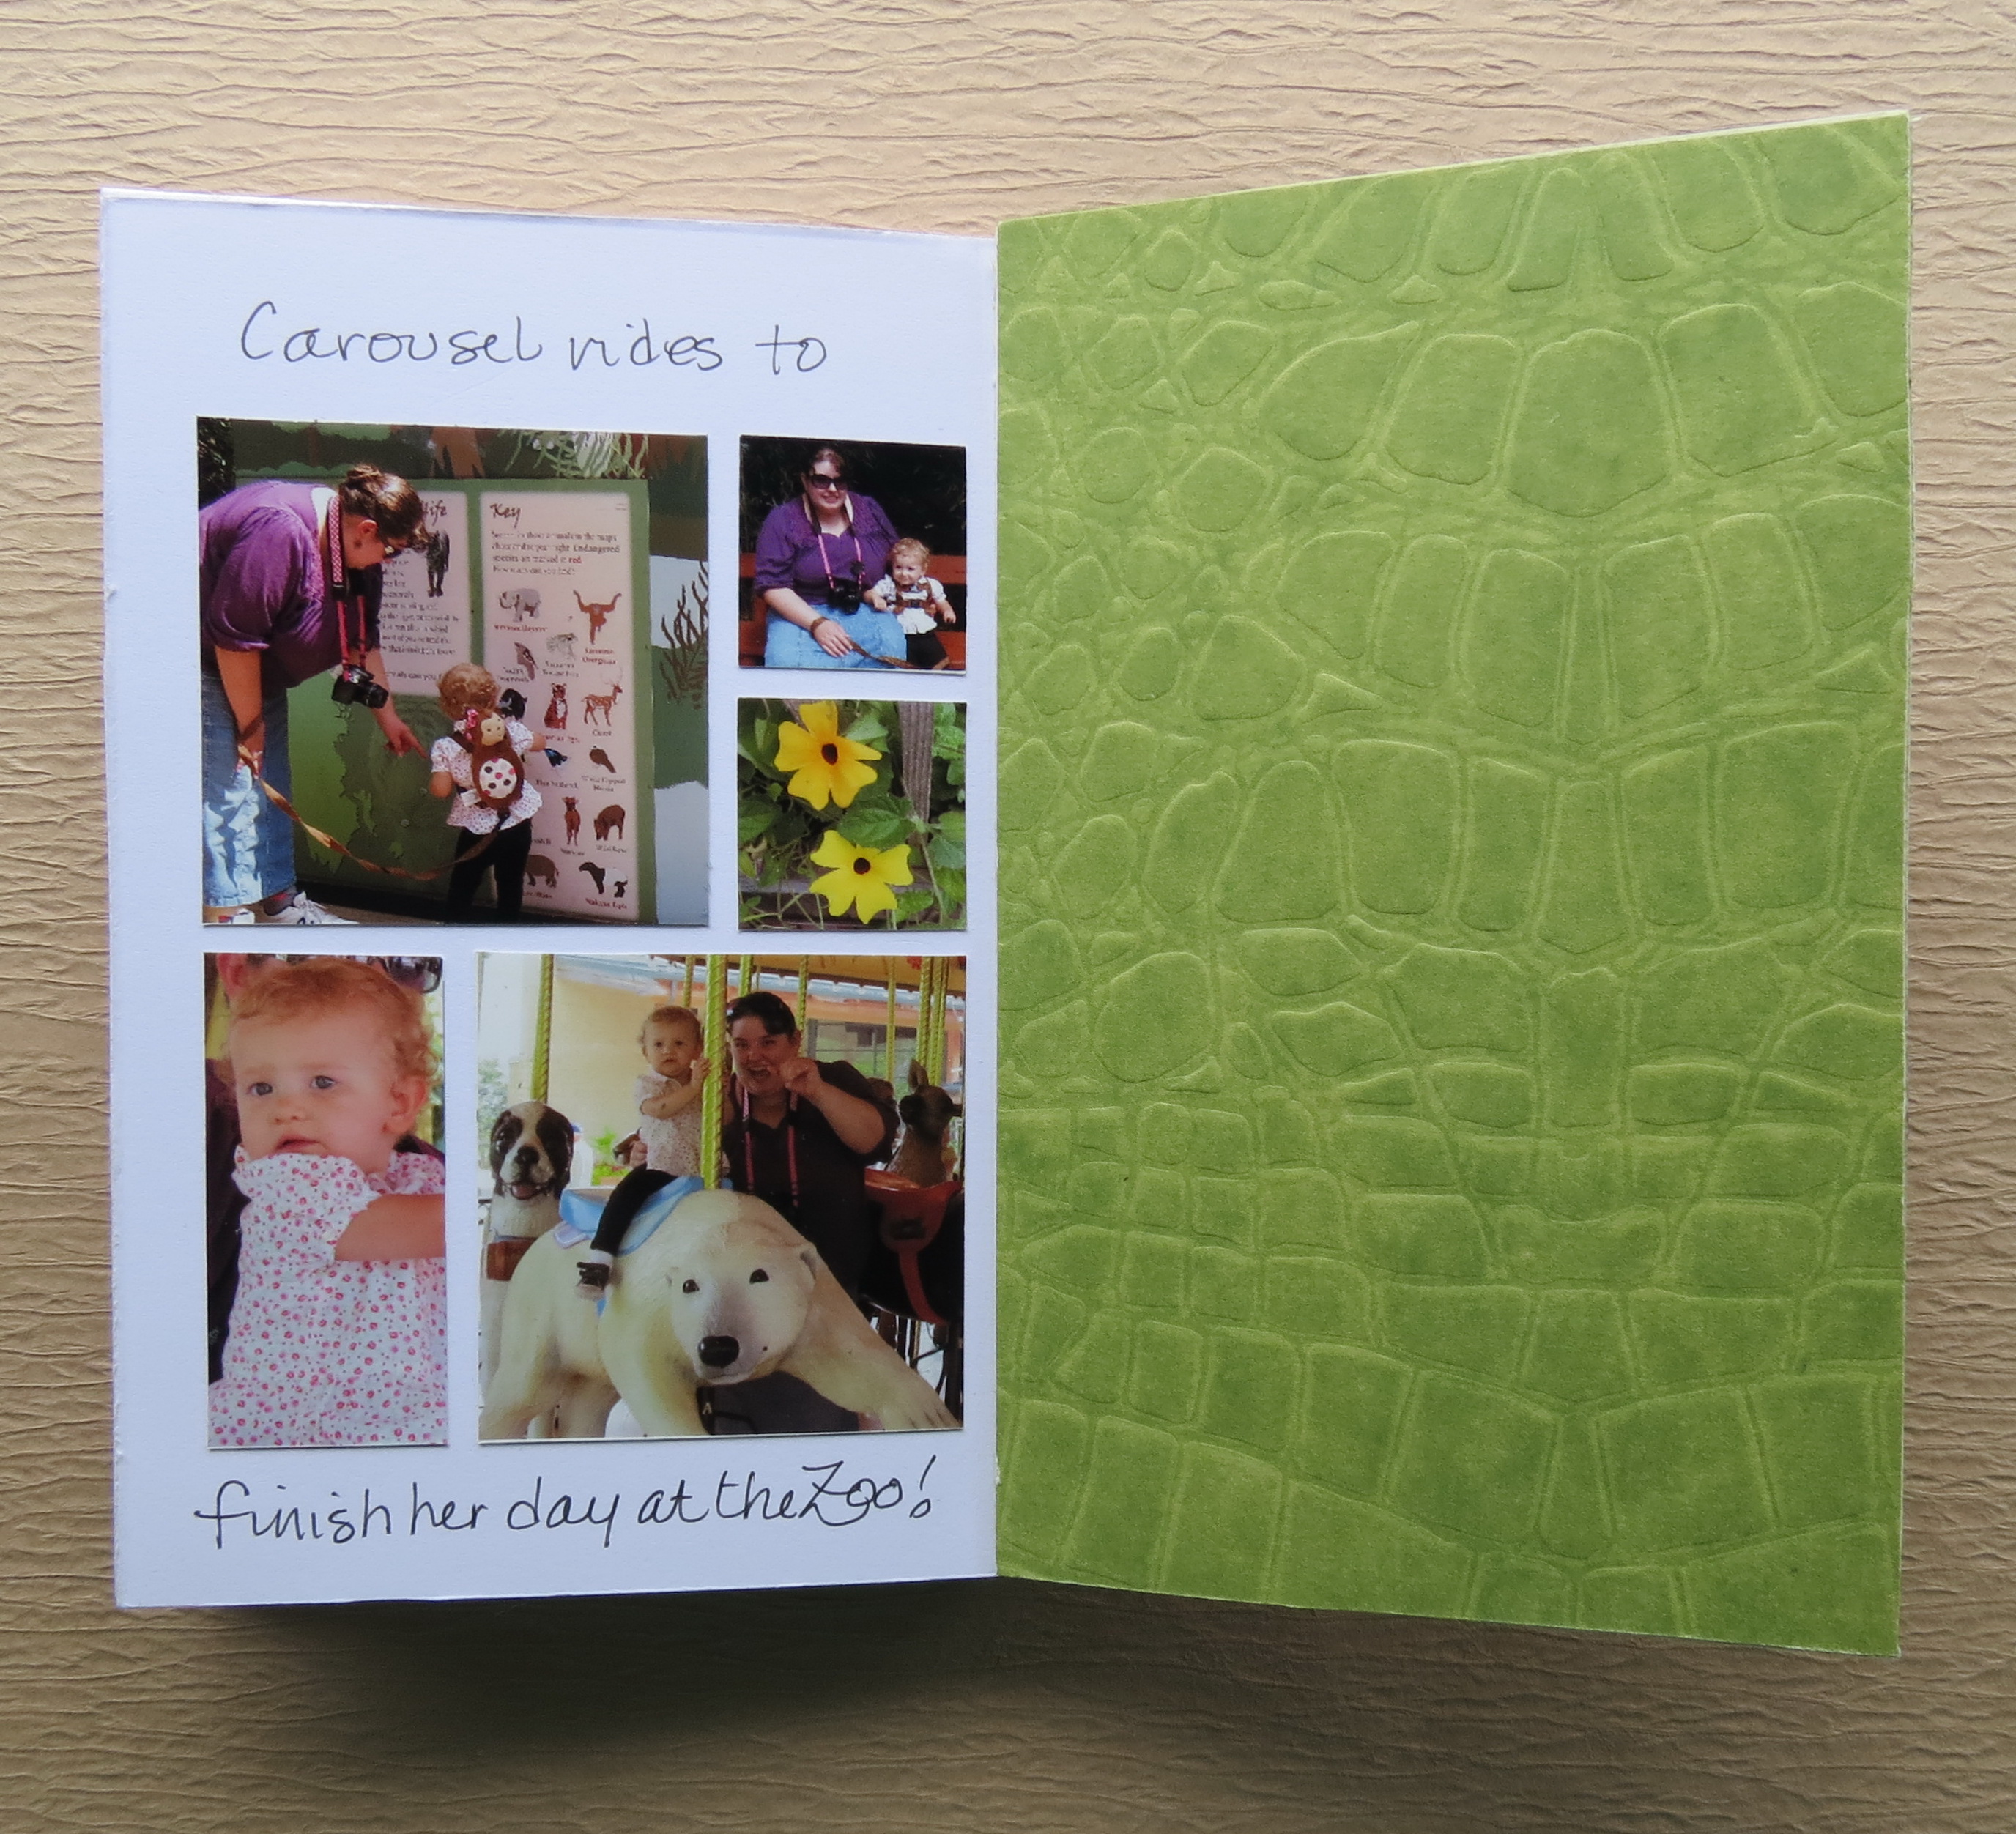
inside back cover is also covered in pattered paper as in the front.
Here are the simple steps to make your own:
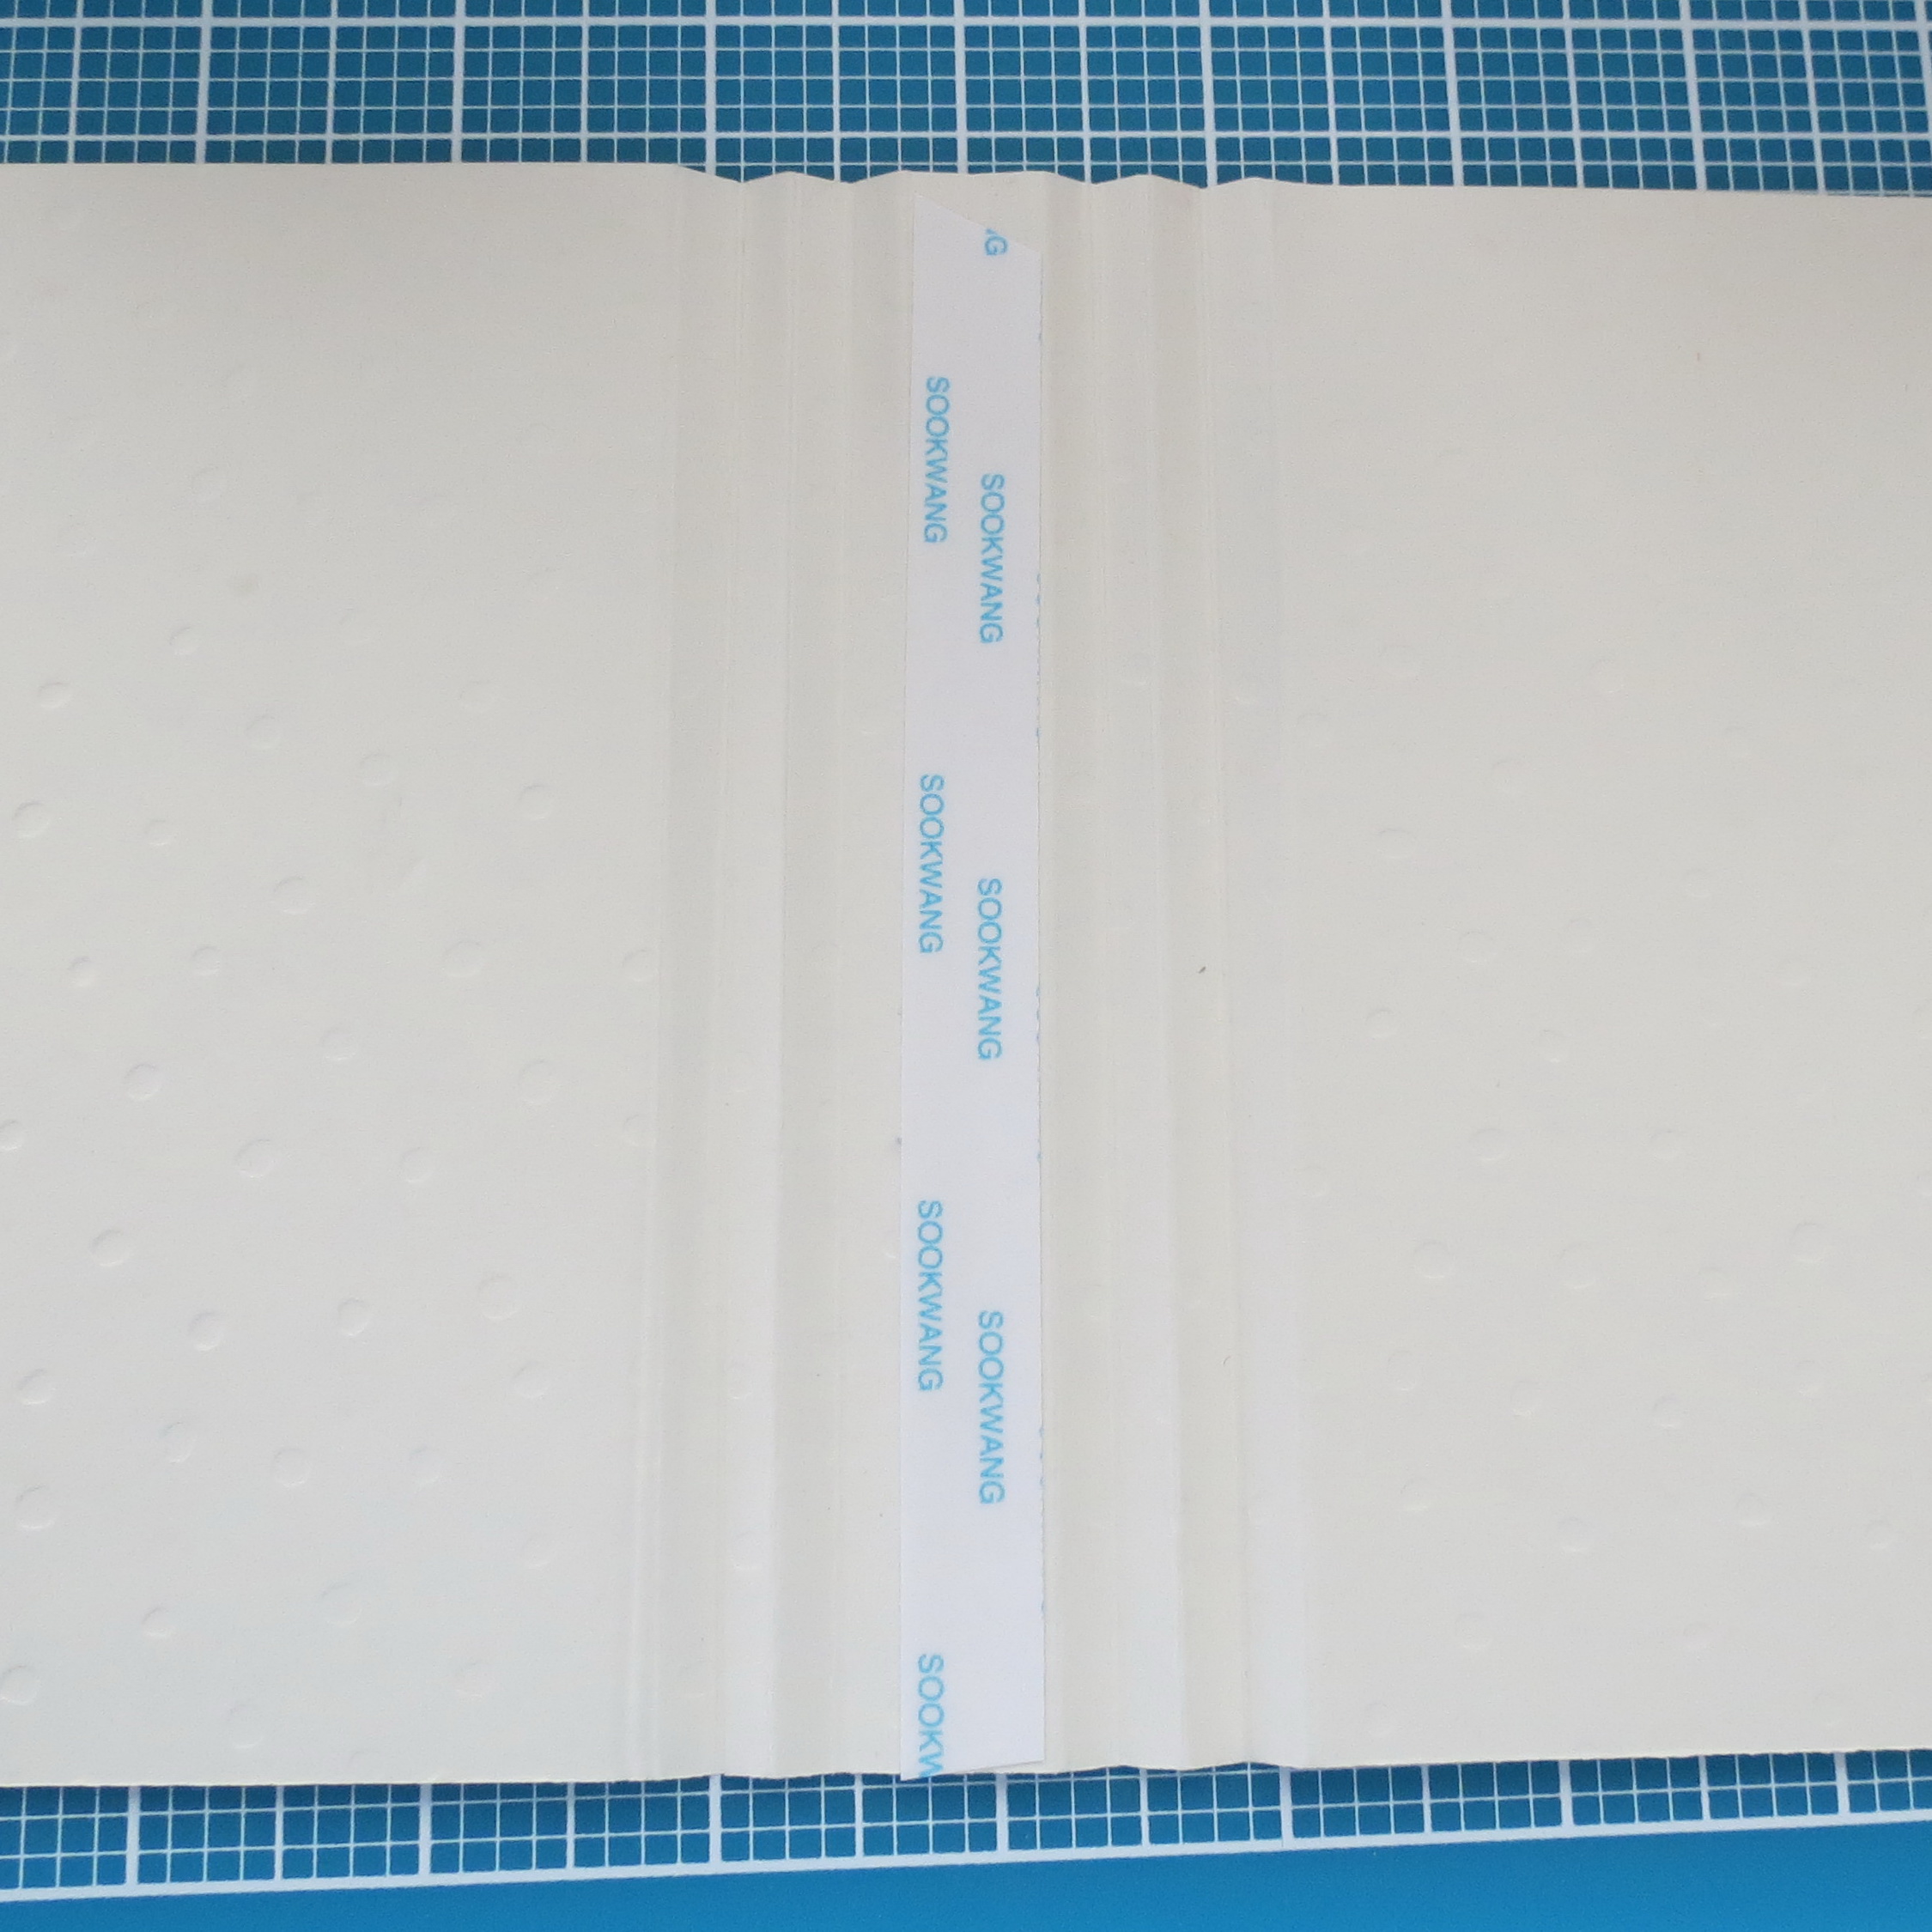
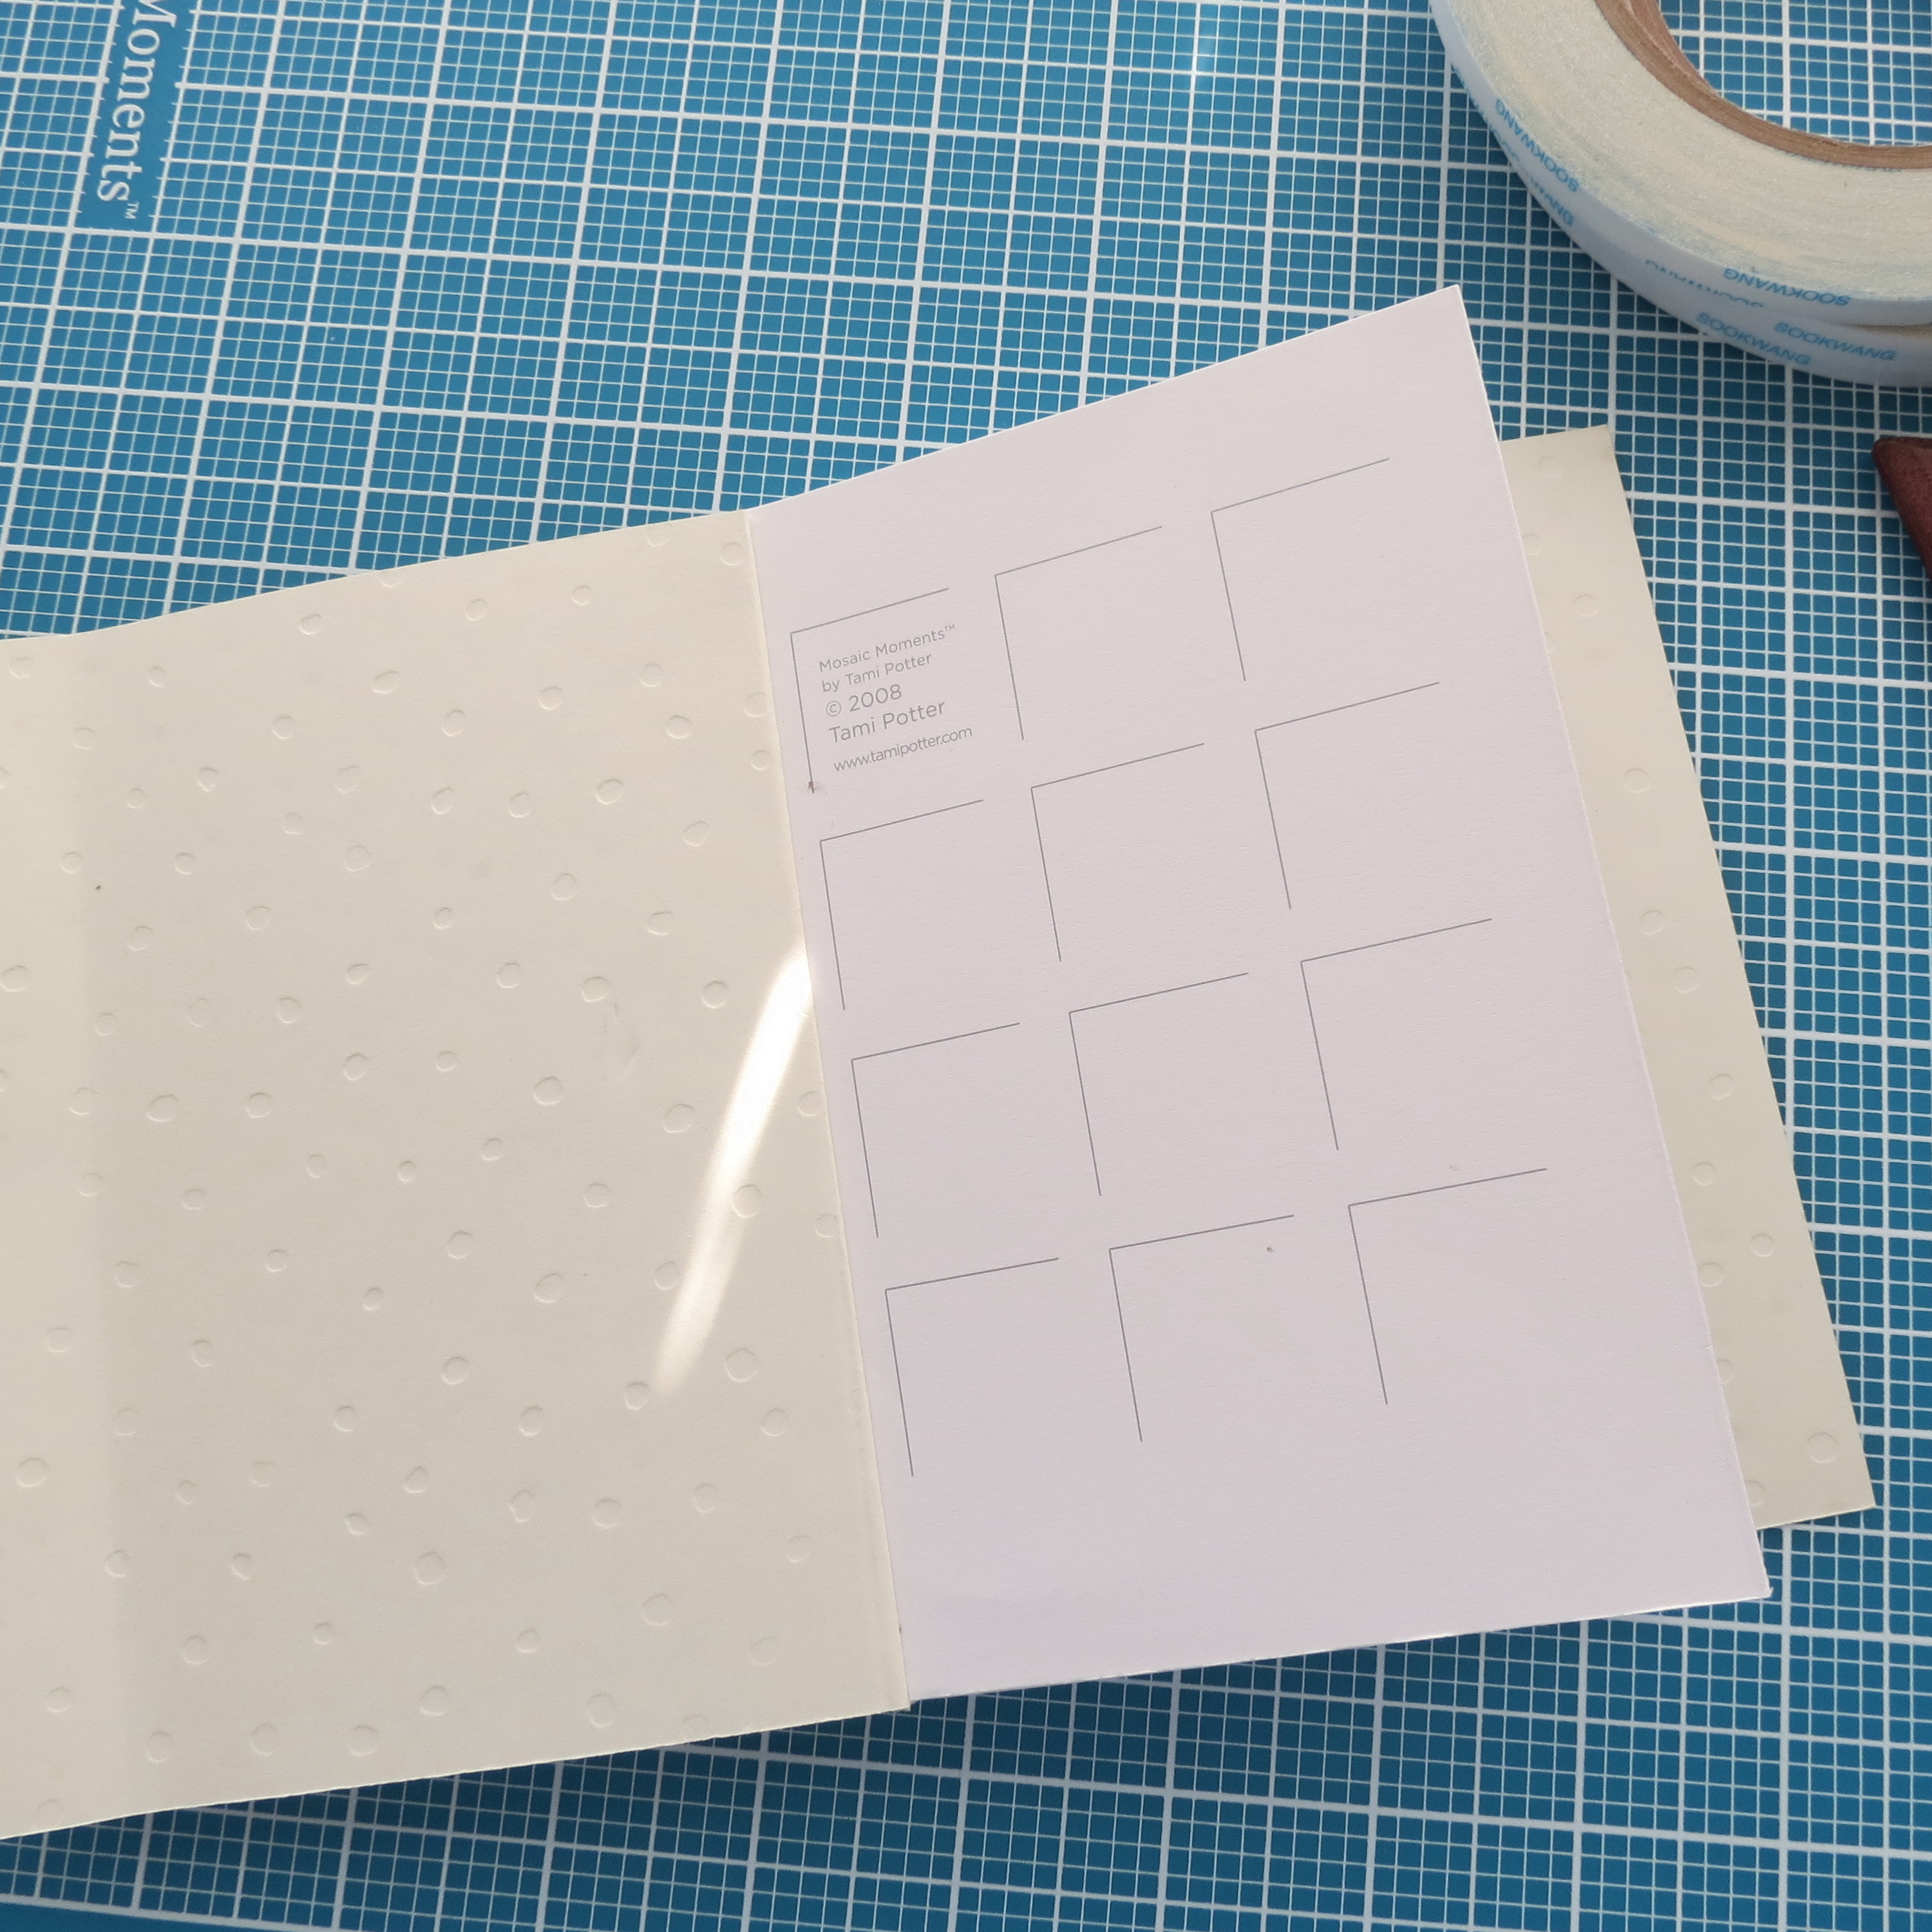
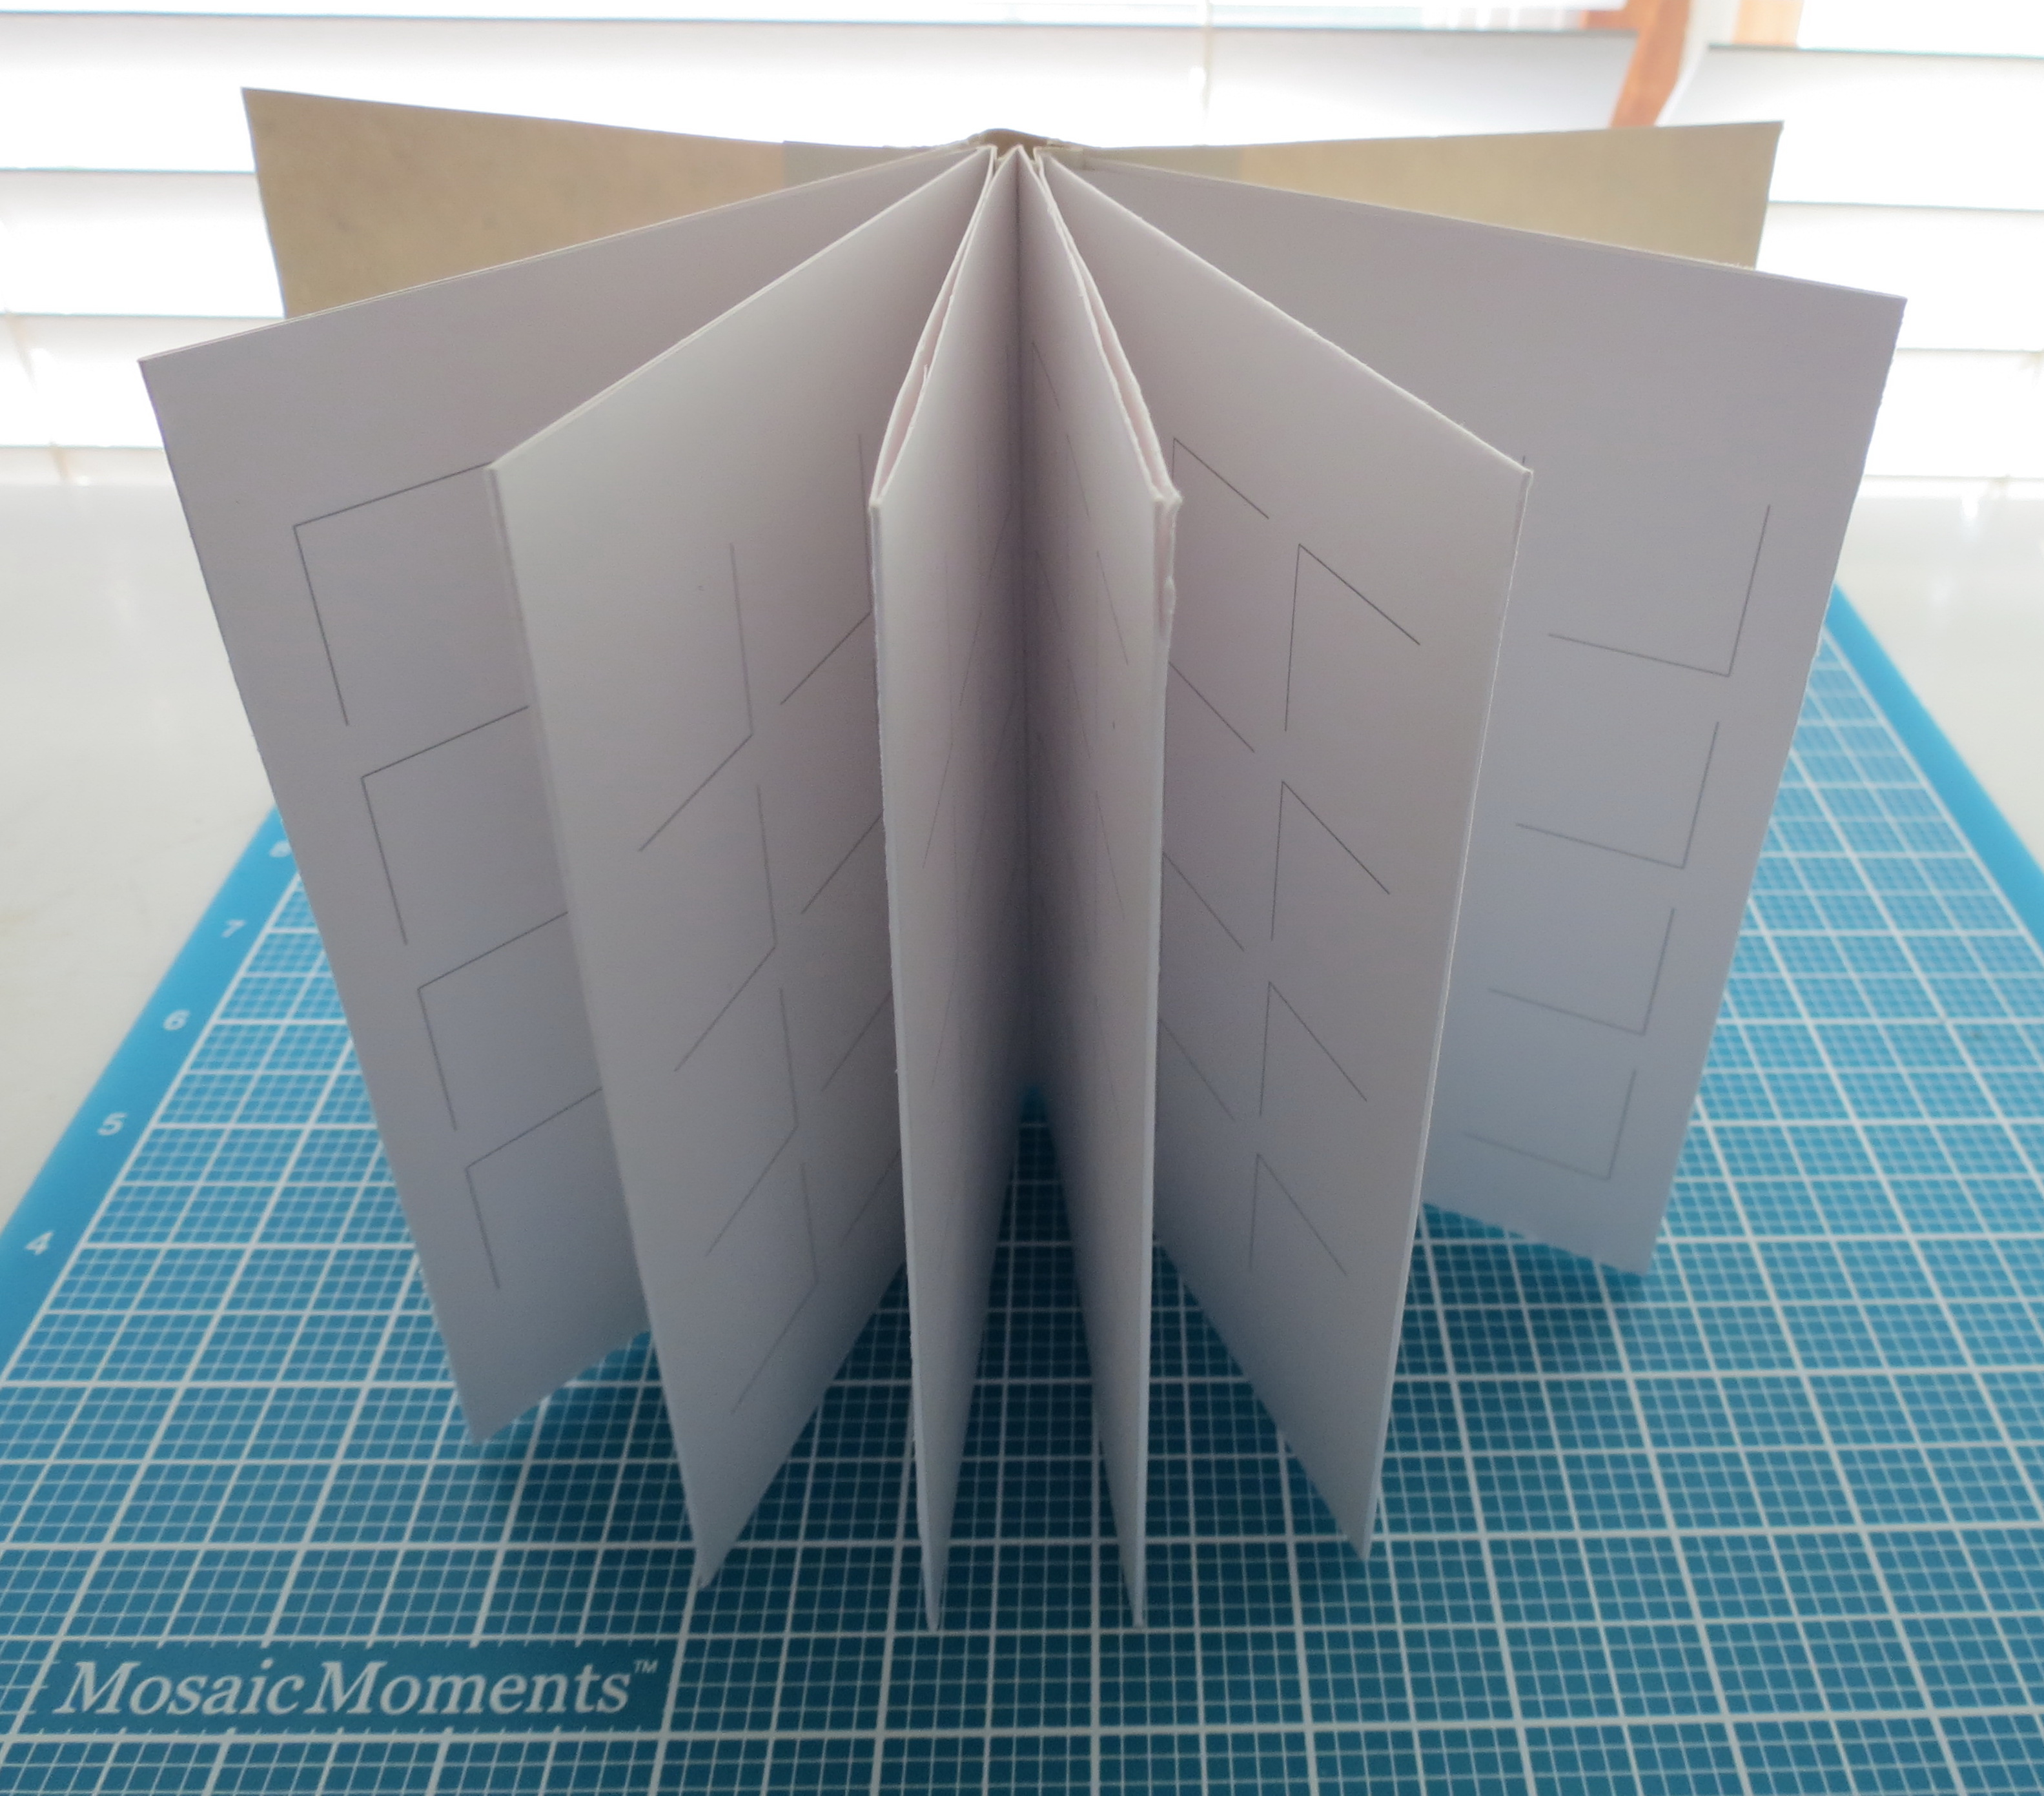
• Score the RTC papers in half across and at 4” from either side to give you six spaces.
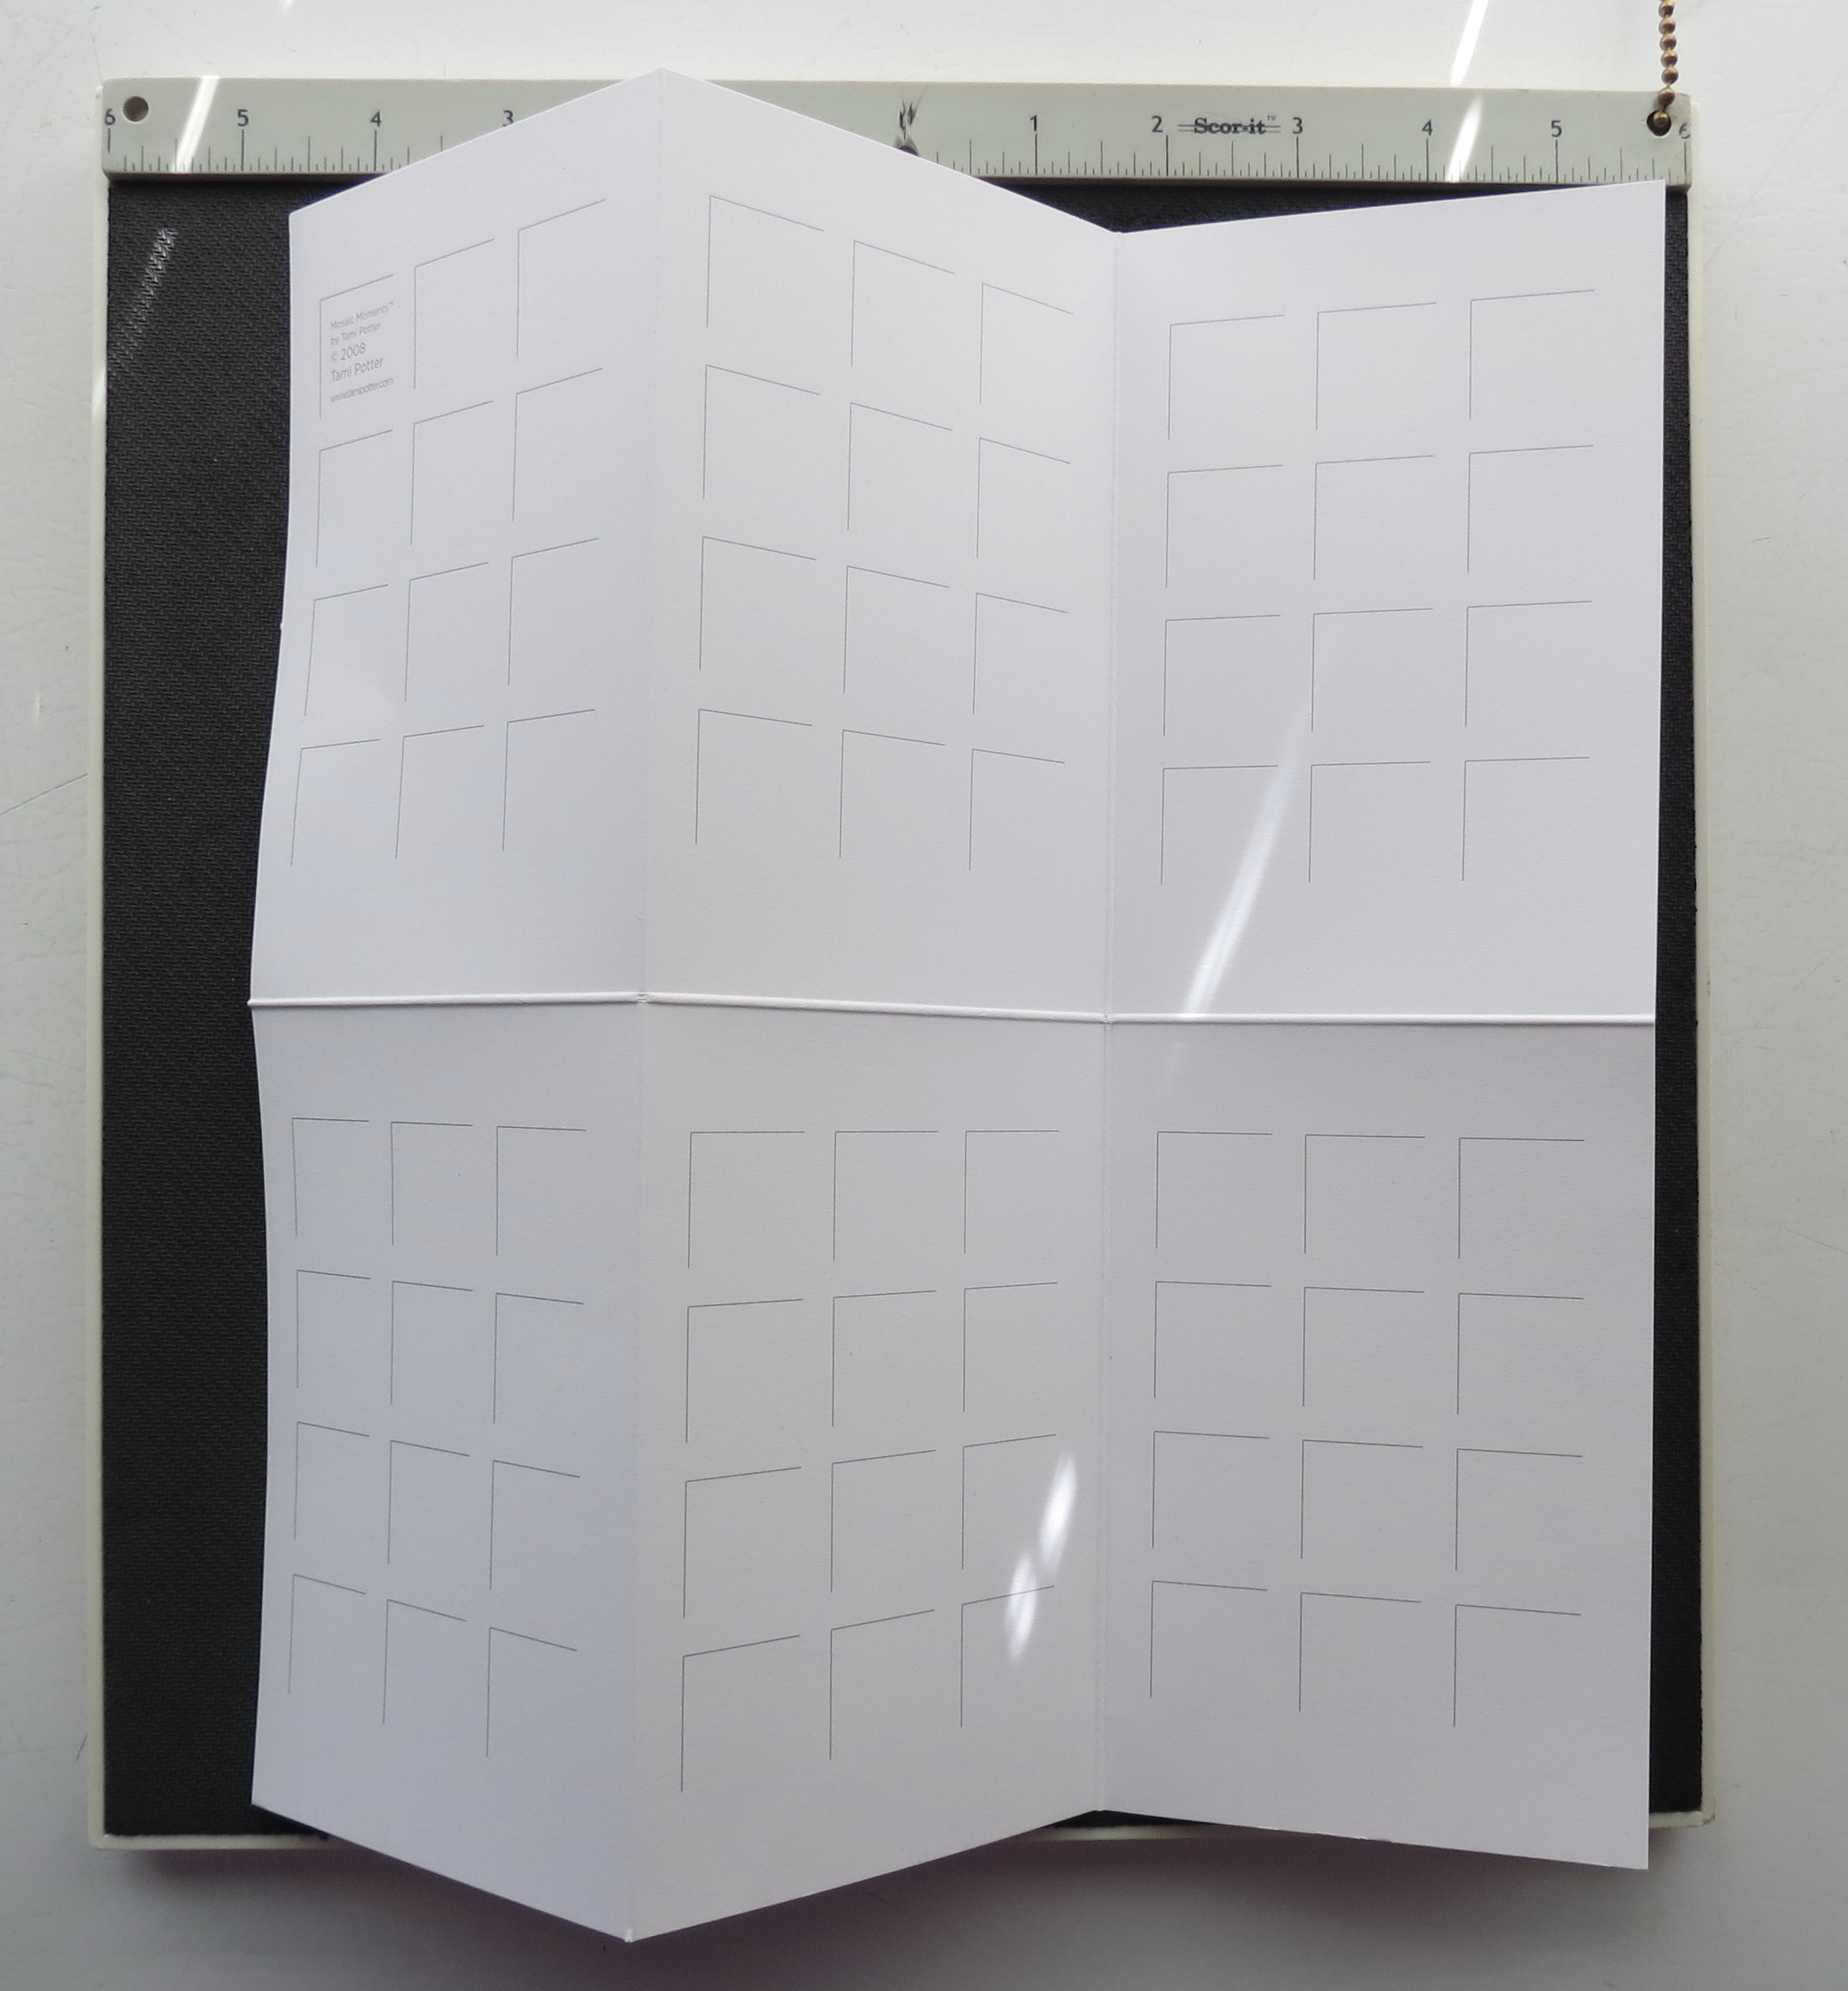
score at 6″ horizontally and 4″ intervals vertically
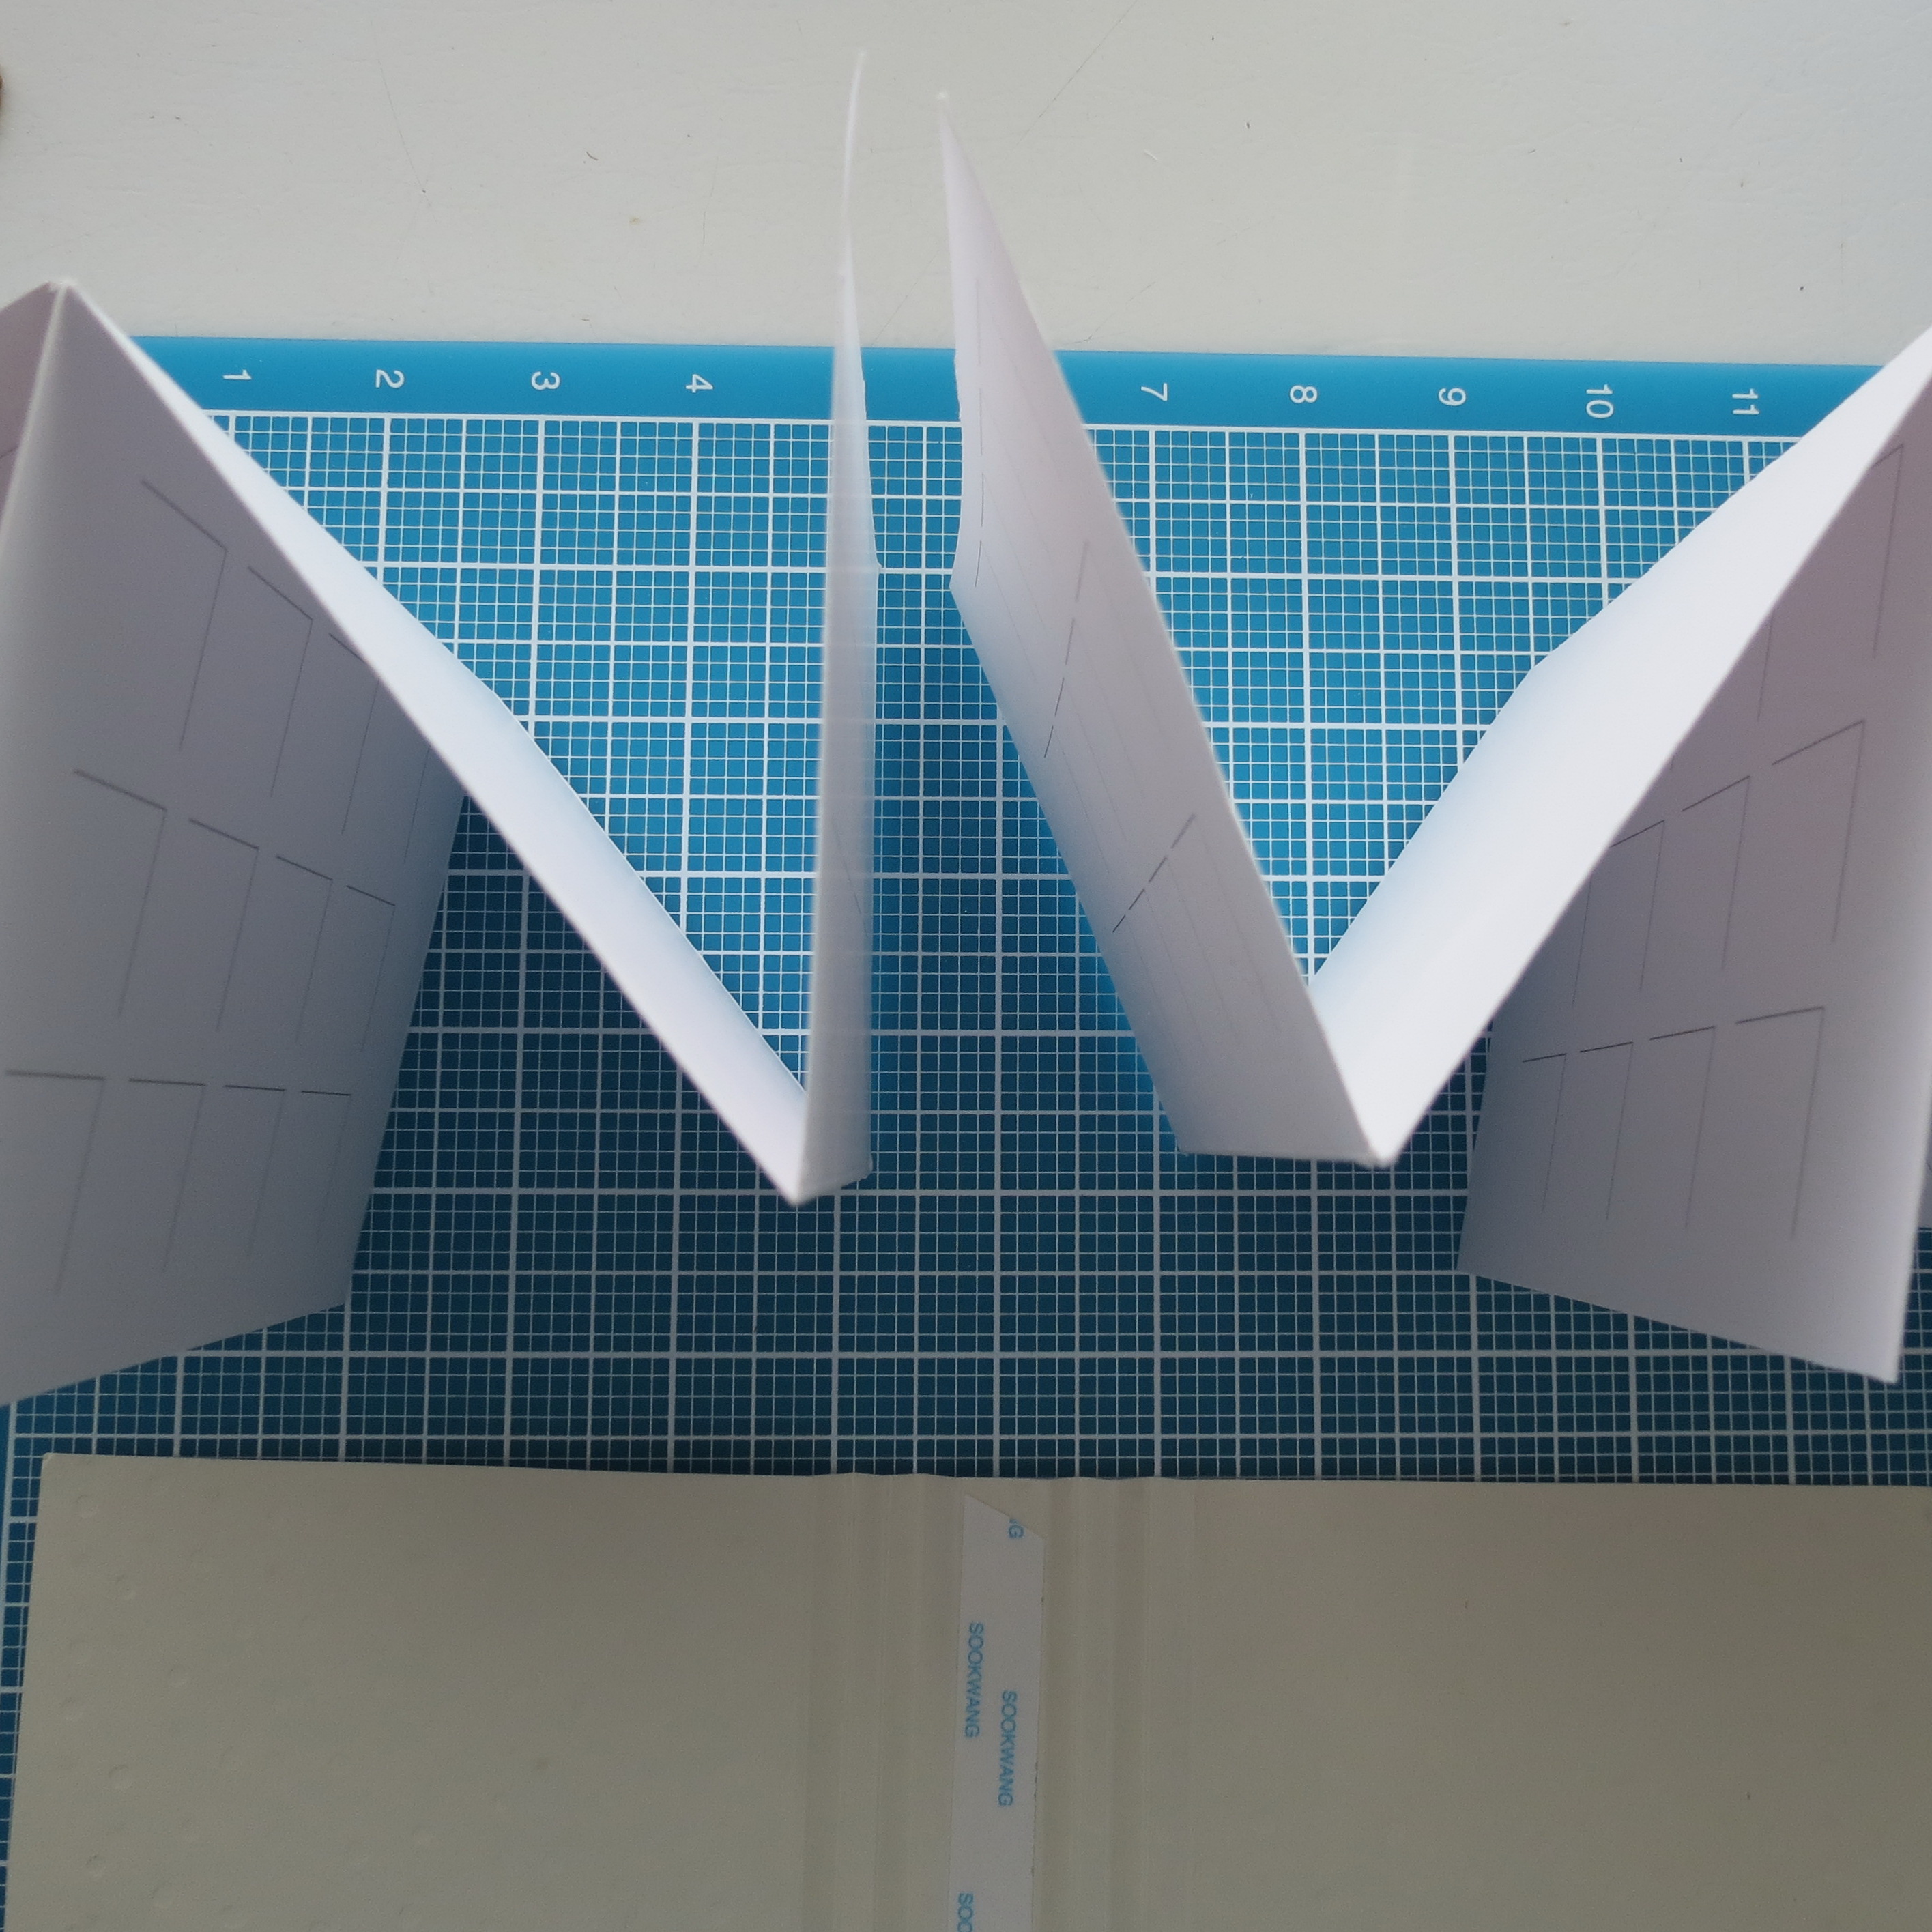
• Cut across two sections at the half page score. Fold in half and reinforce the scoring on all folds and fold accordion style.
two sections wide cut, burnish folded edges for crisp fold
one section folded ready to go
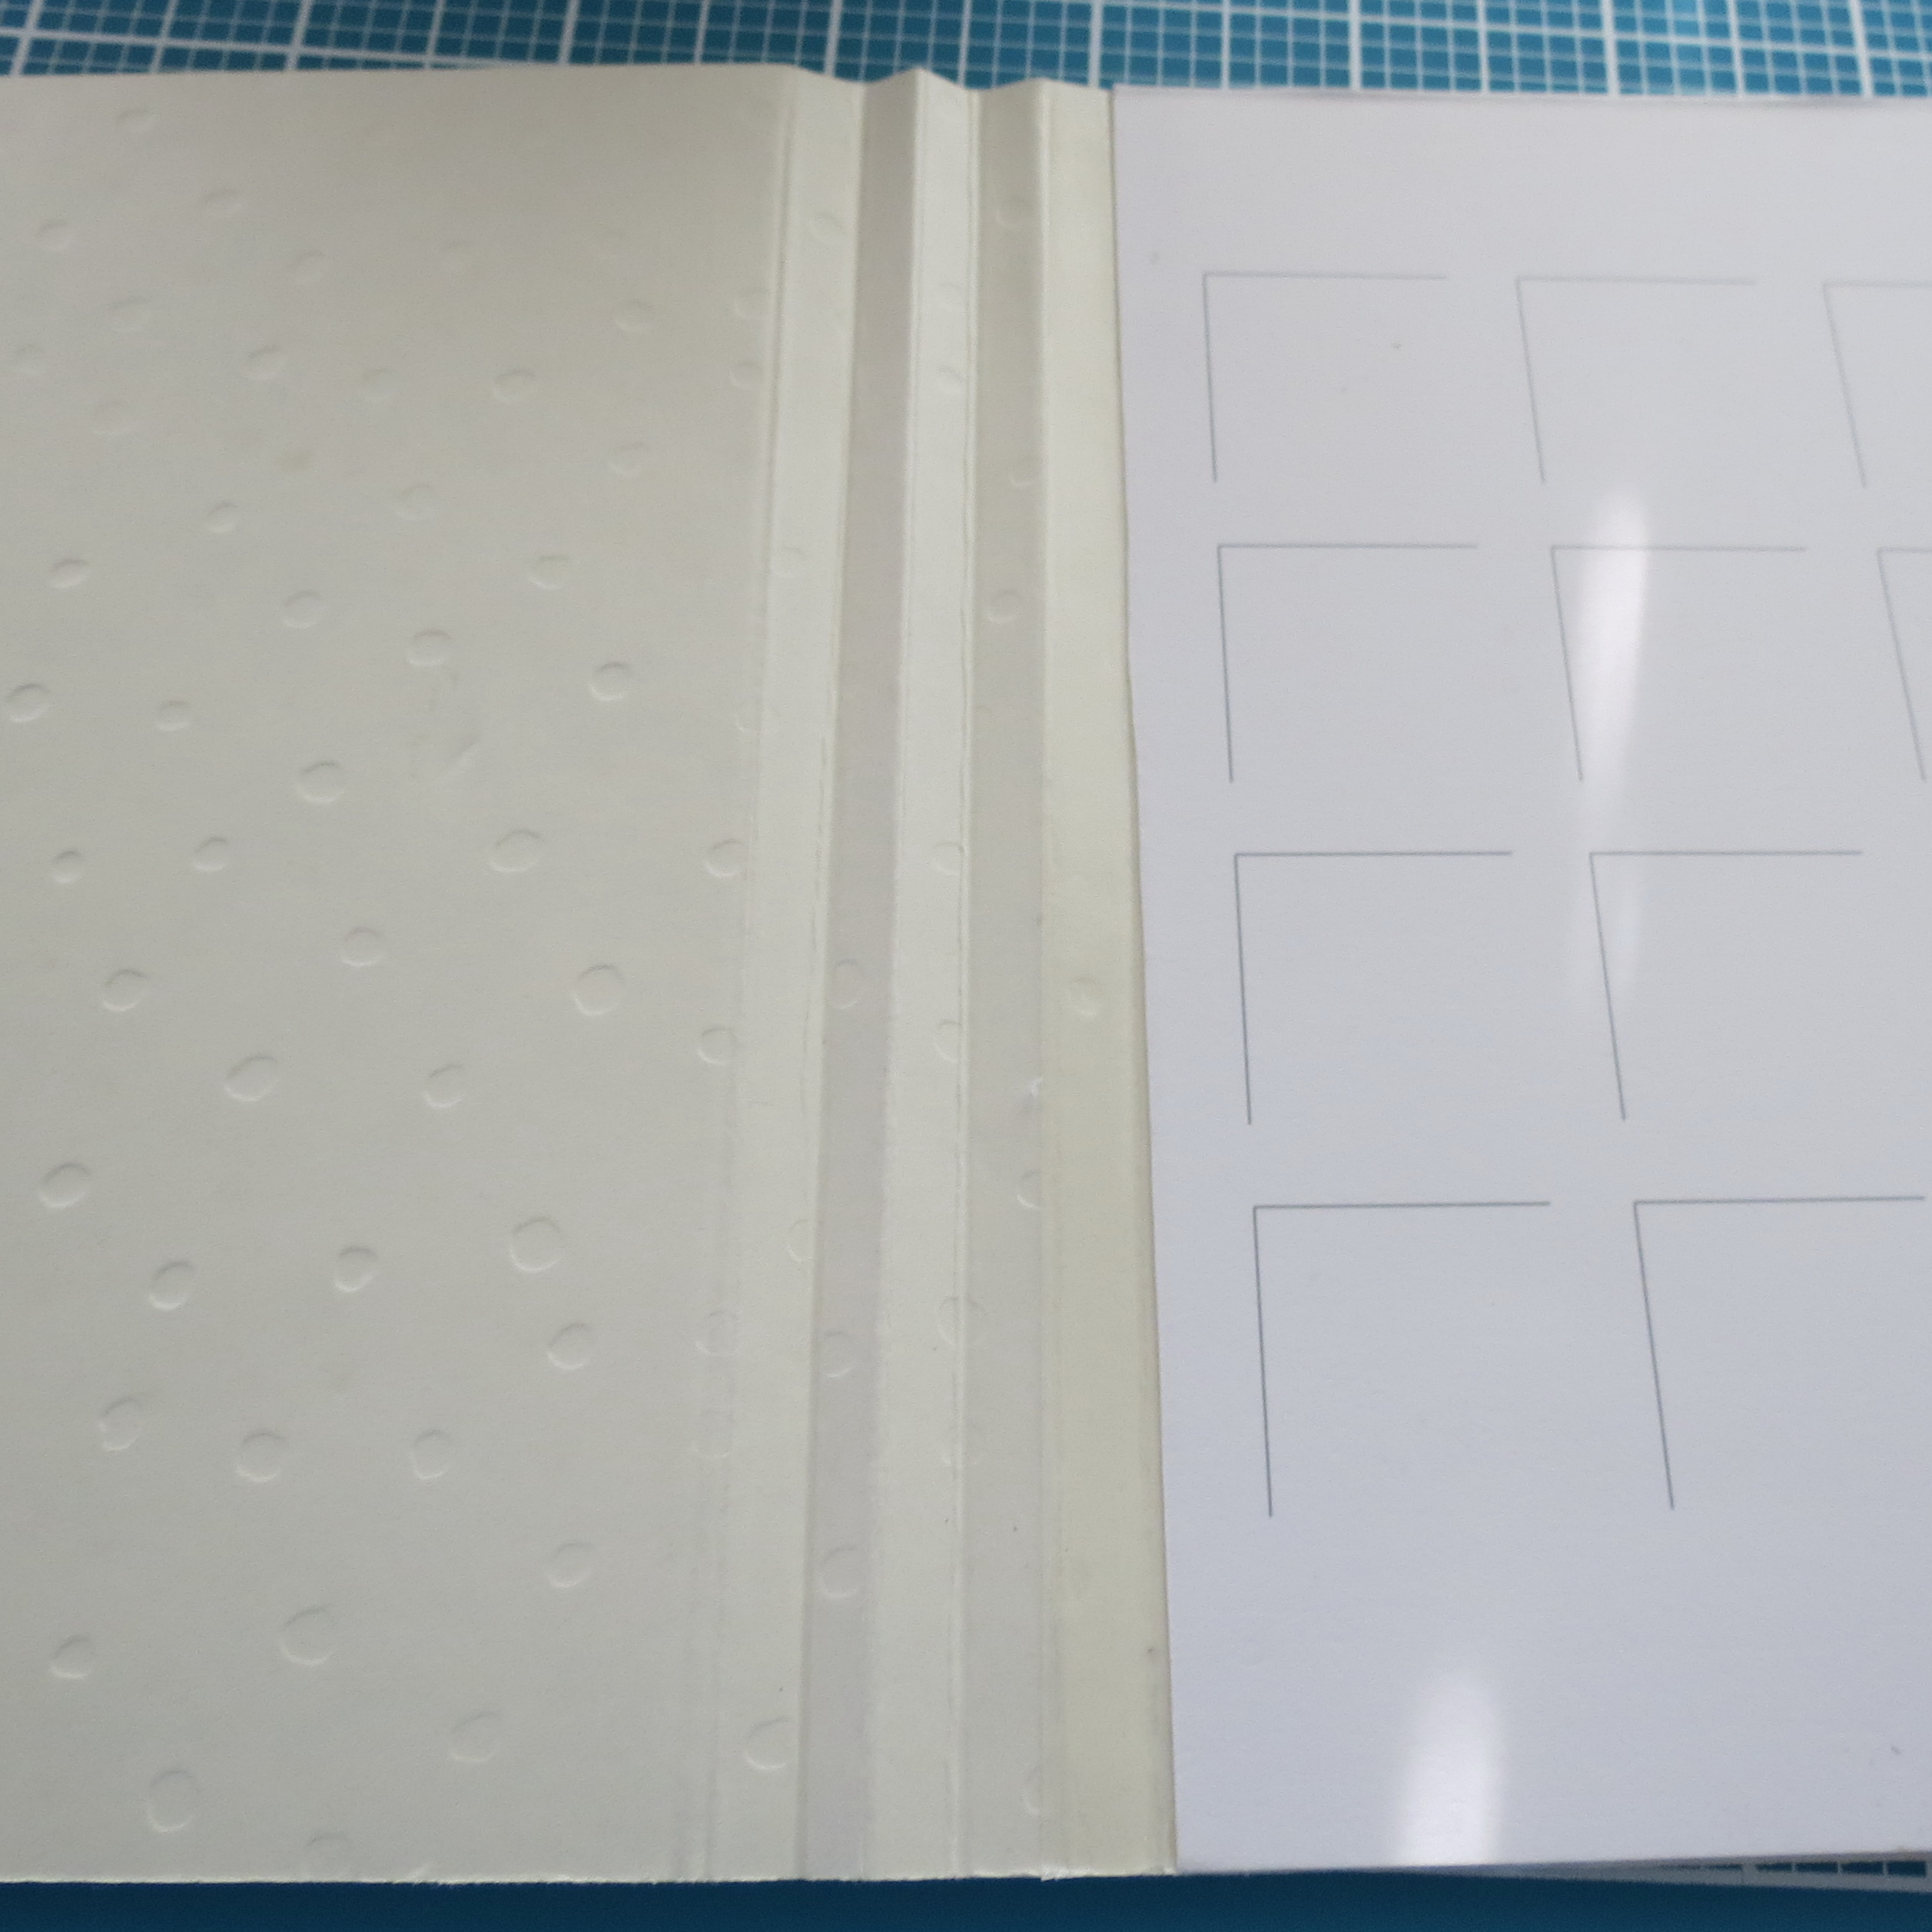
• Cut a 12 x 12 sheet into two 12 x 6 sections, you will only need one for this project.
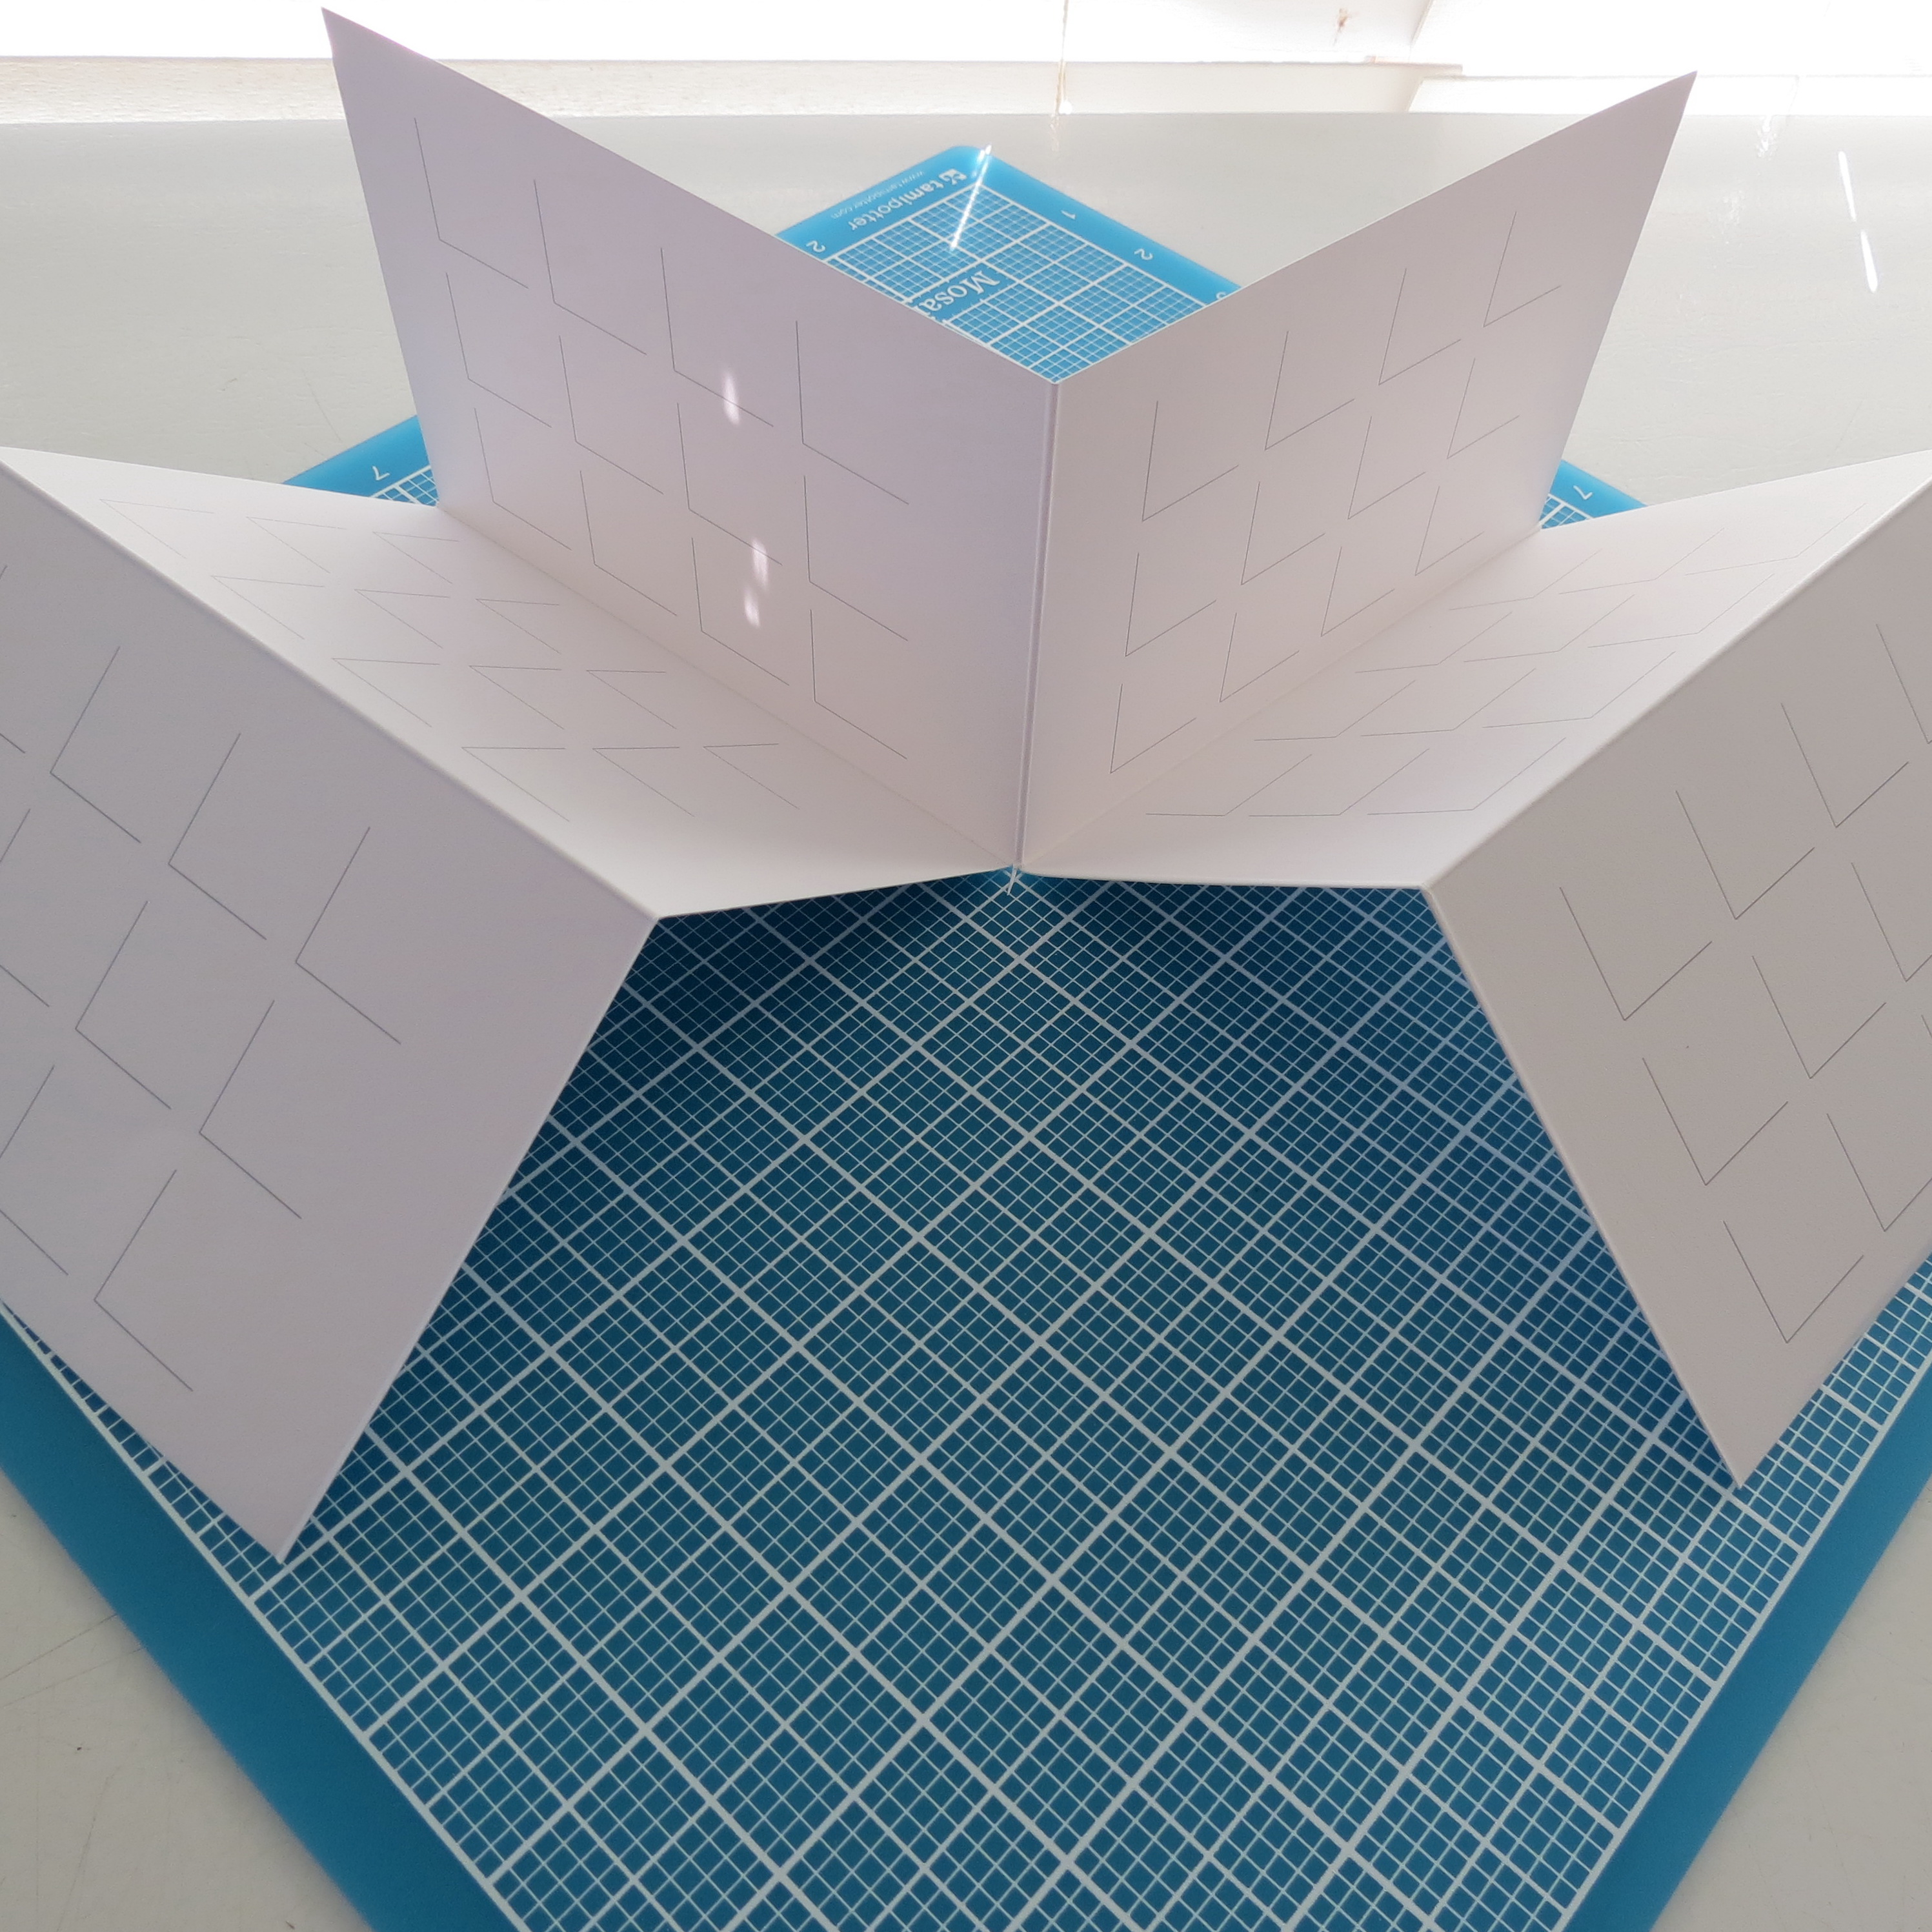
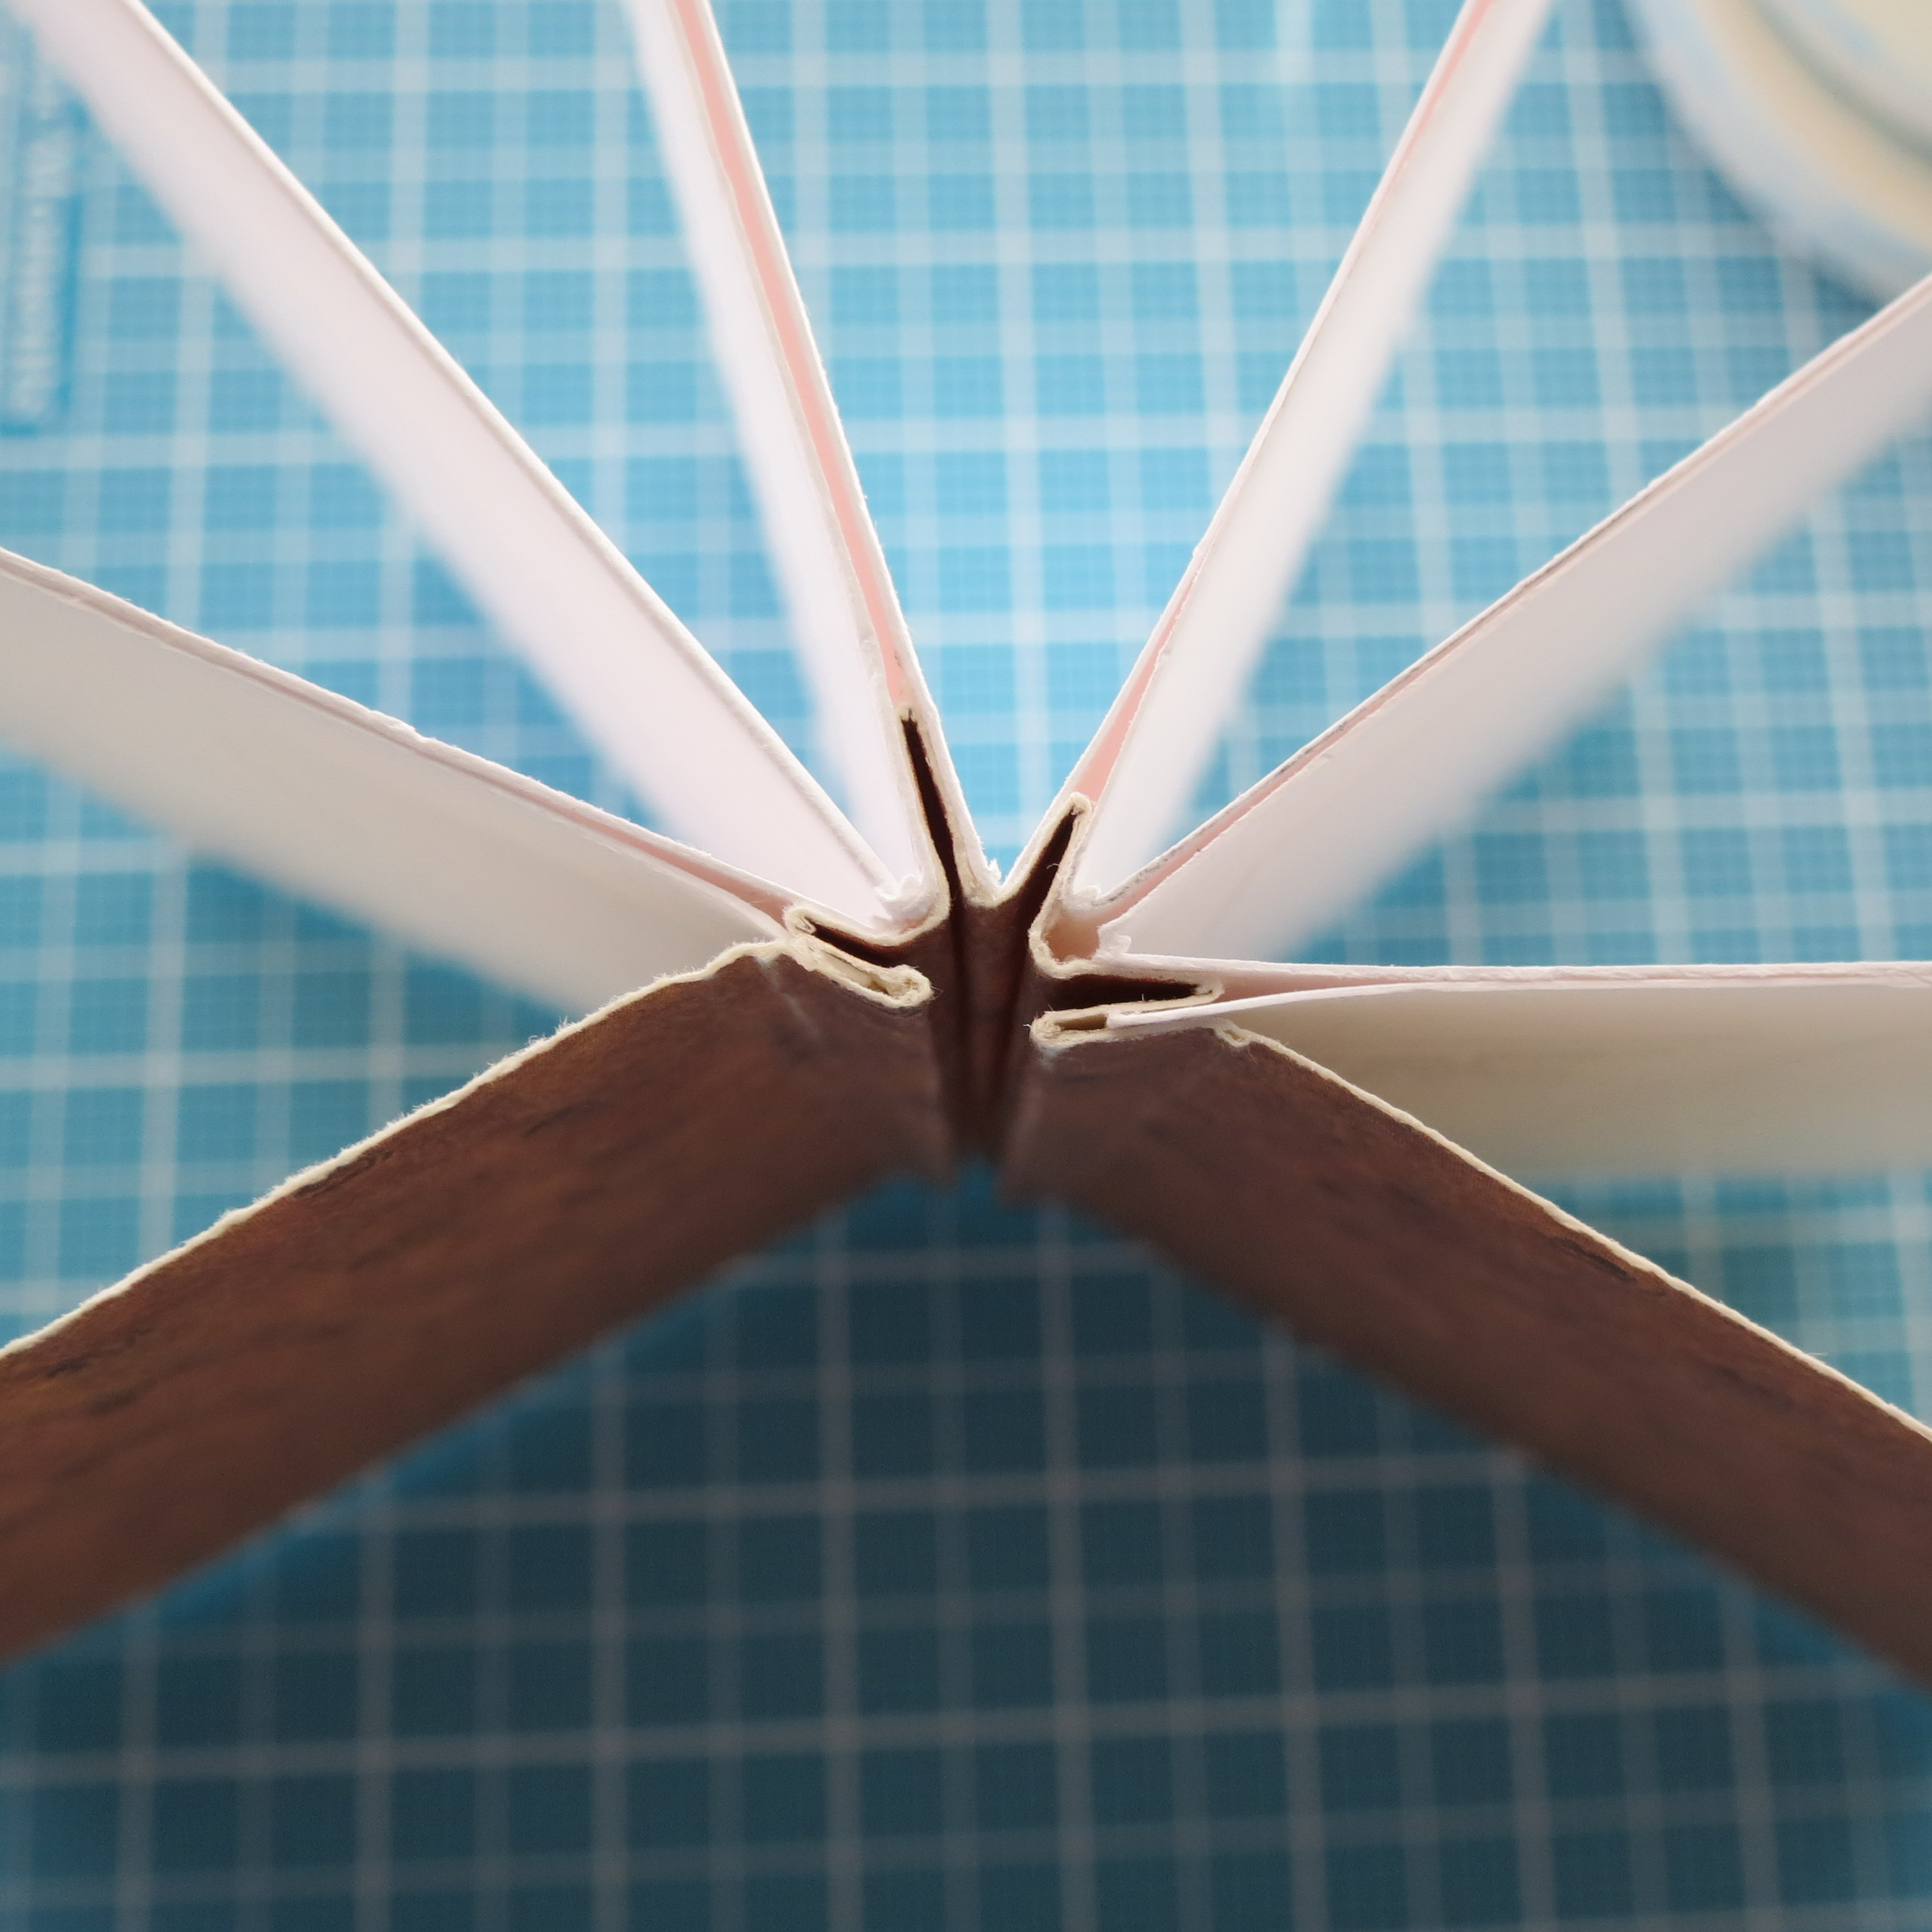
• Score this 6 x 12 sheet at the 6” mark and at ¼” increments on both sides five times, fold and burnish a crisp score line.
hill and valley folds will be used stabilize book pages and create a spine for the toddler mini album
• Use a strip of ½” tape in the center ‘valley’ fold. In this ‘valley’ fold you will join both pages together. Repeat the process of placing the tape in the valley of each fold and adding the next fold. It may not fit exactly, it will depend on the bulk you are working with so just ease it into place and crease anew if needed.
1/2″ adhesive place in valley of center fold
line up books how you wish to use them, the back page of the first book and the front page of the second will join to become the center.
lay each side in as close as you can to the center fold.
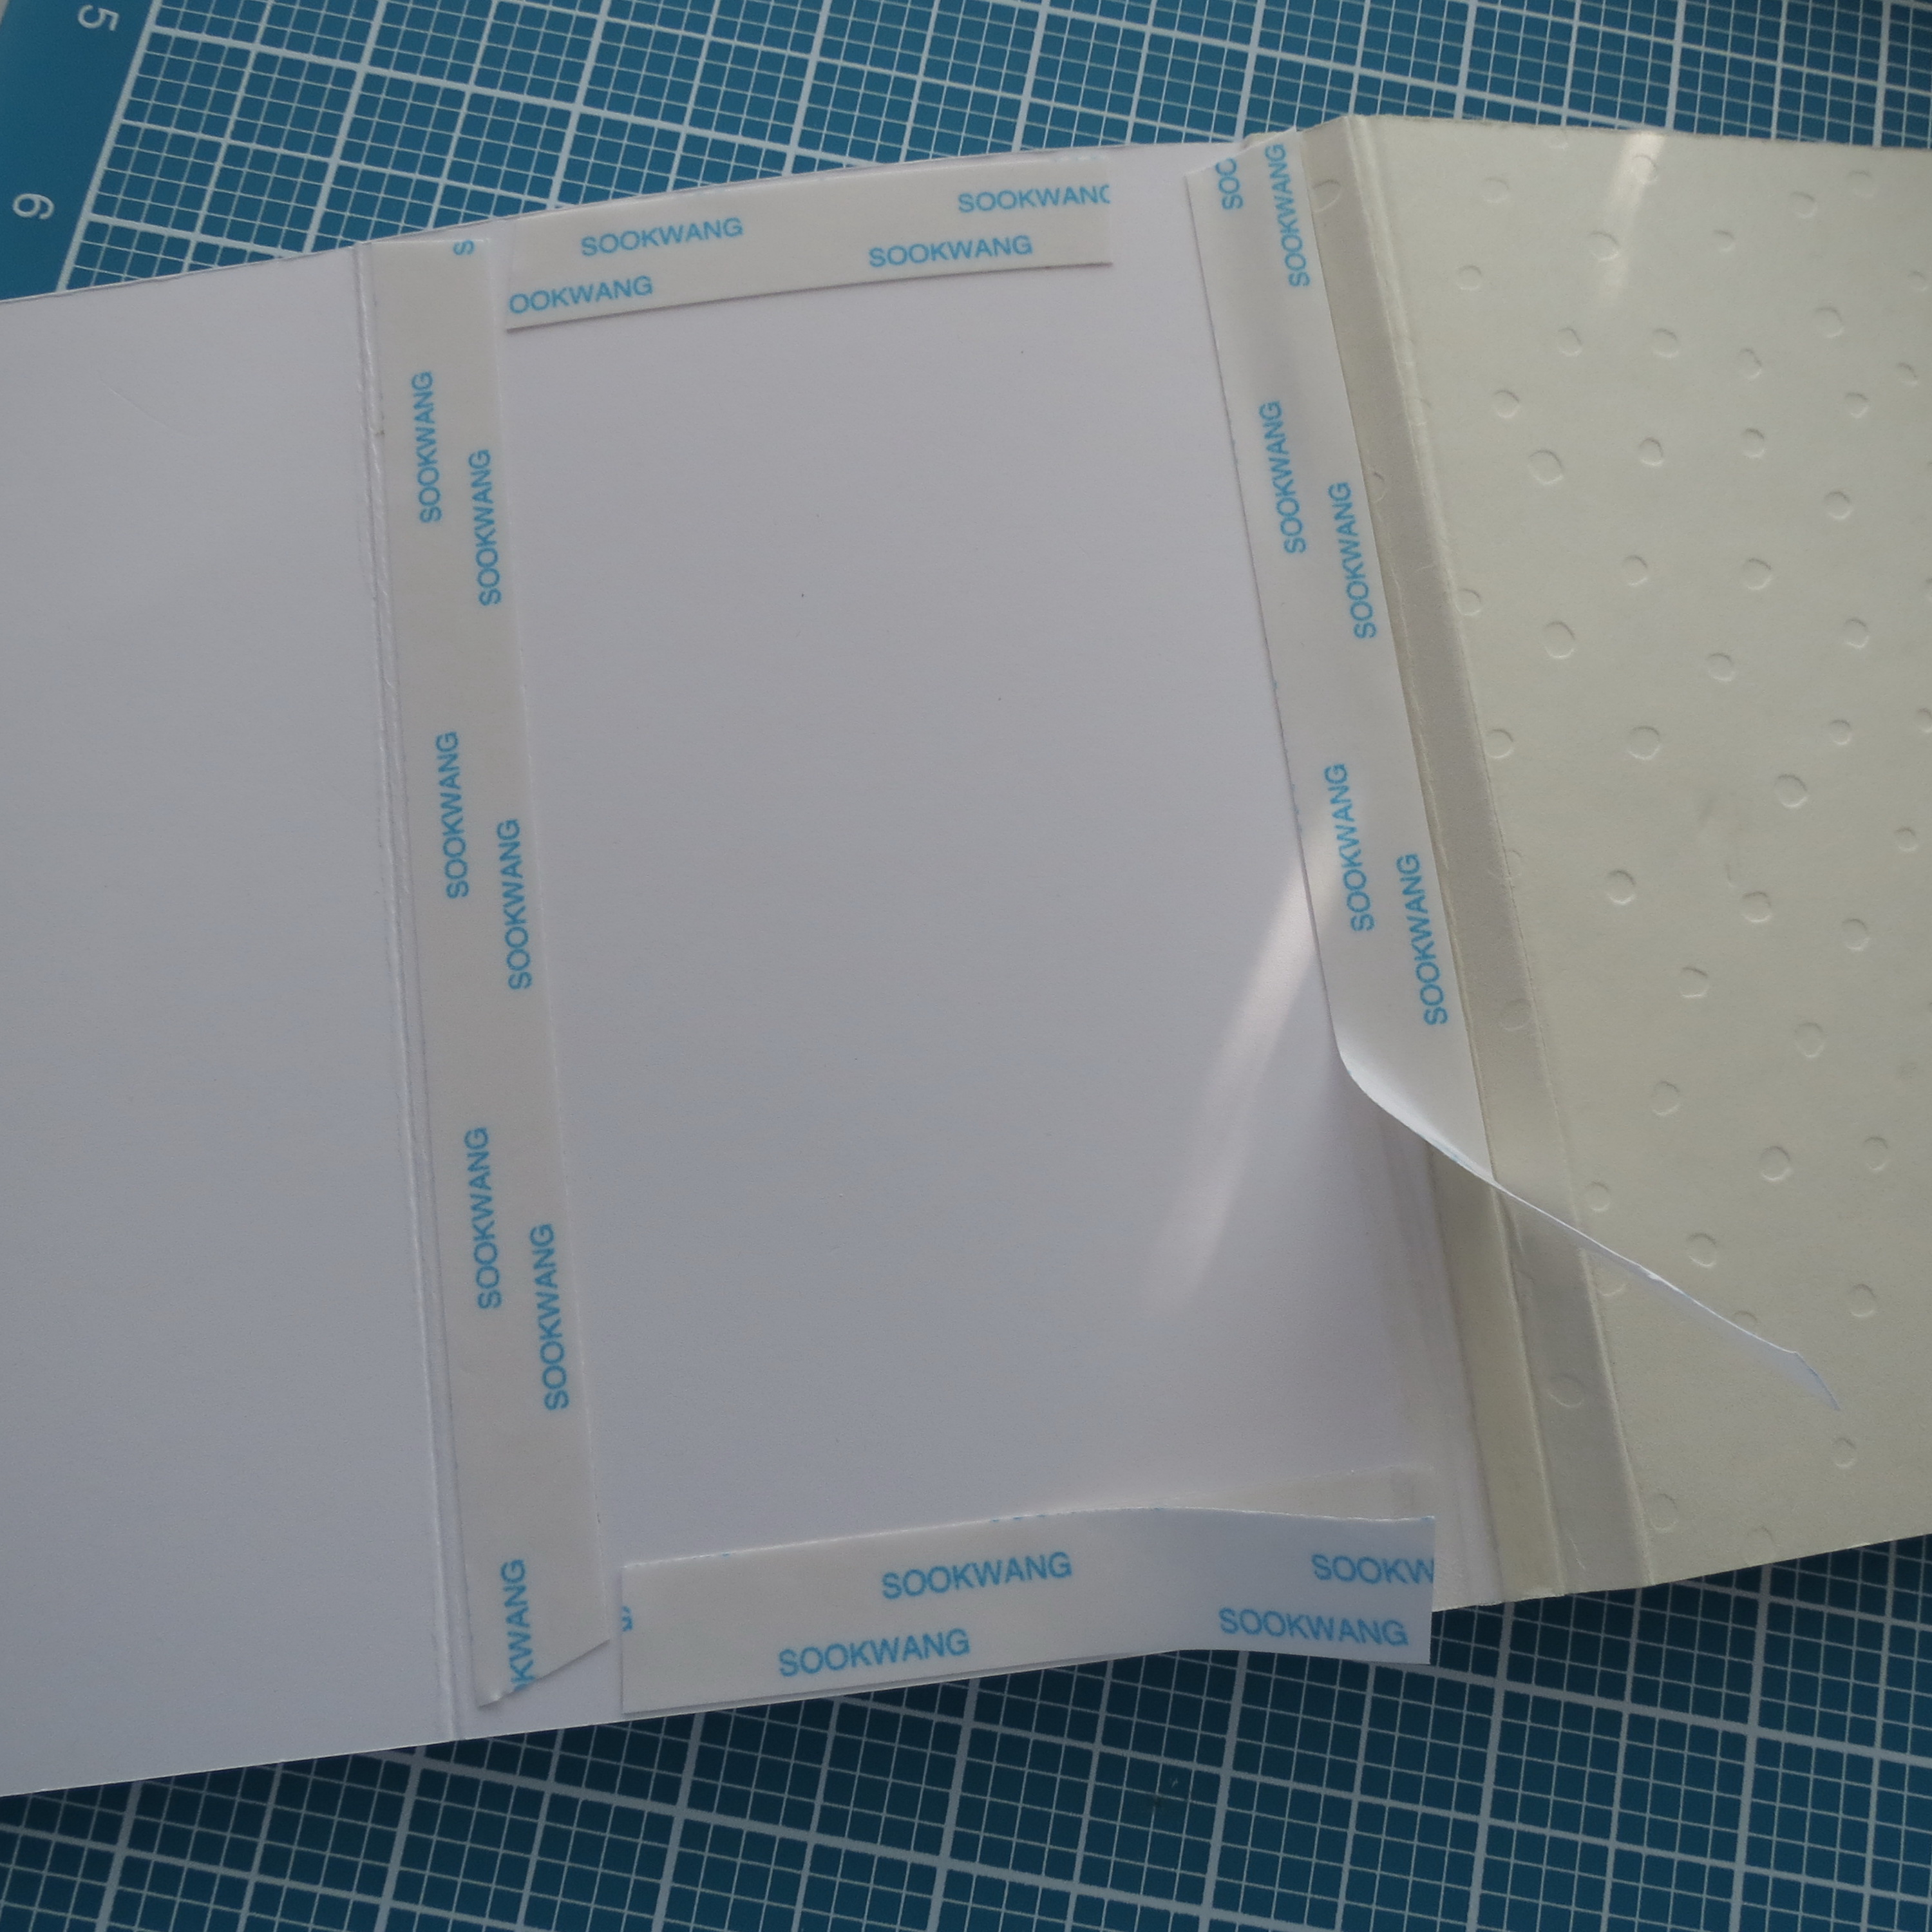
By taping the page inside together you add sturdiness to the book
use 1/4″ tape to adhere cover to the inside page front
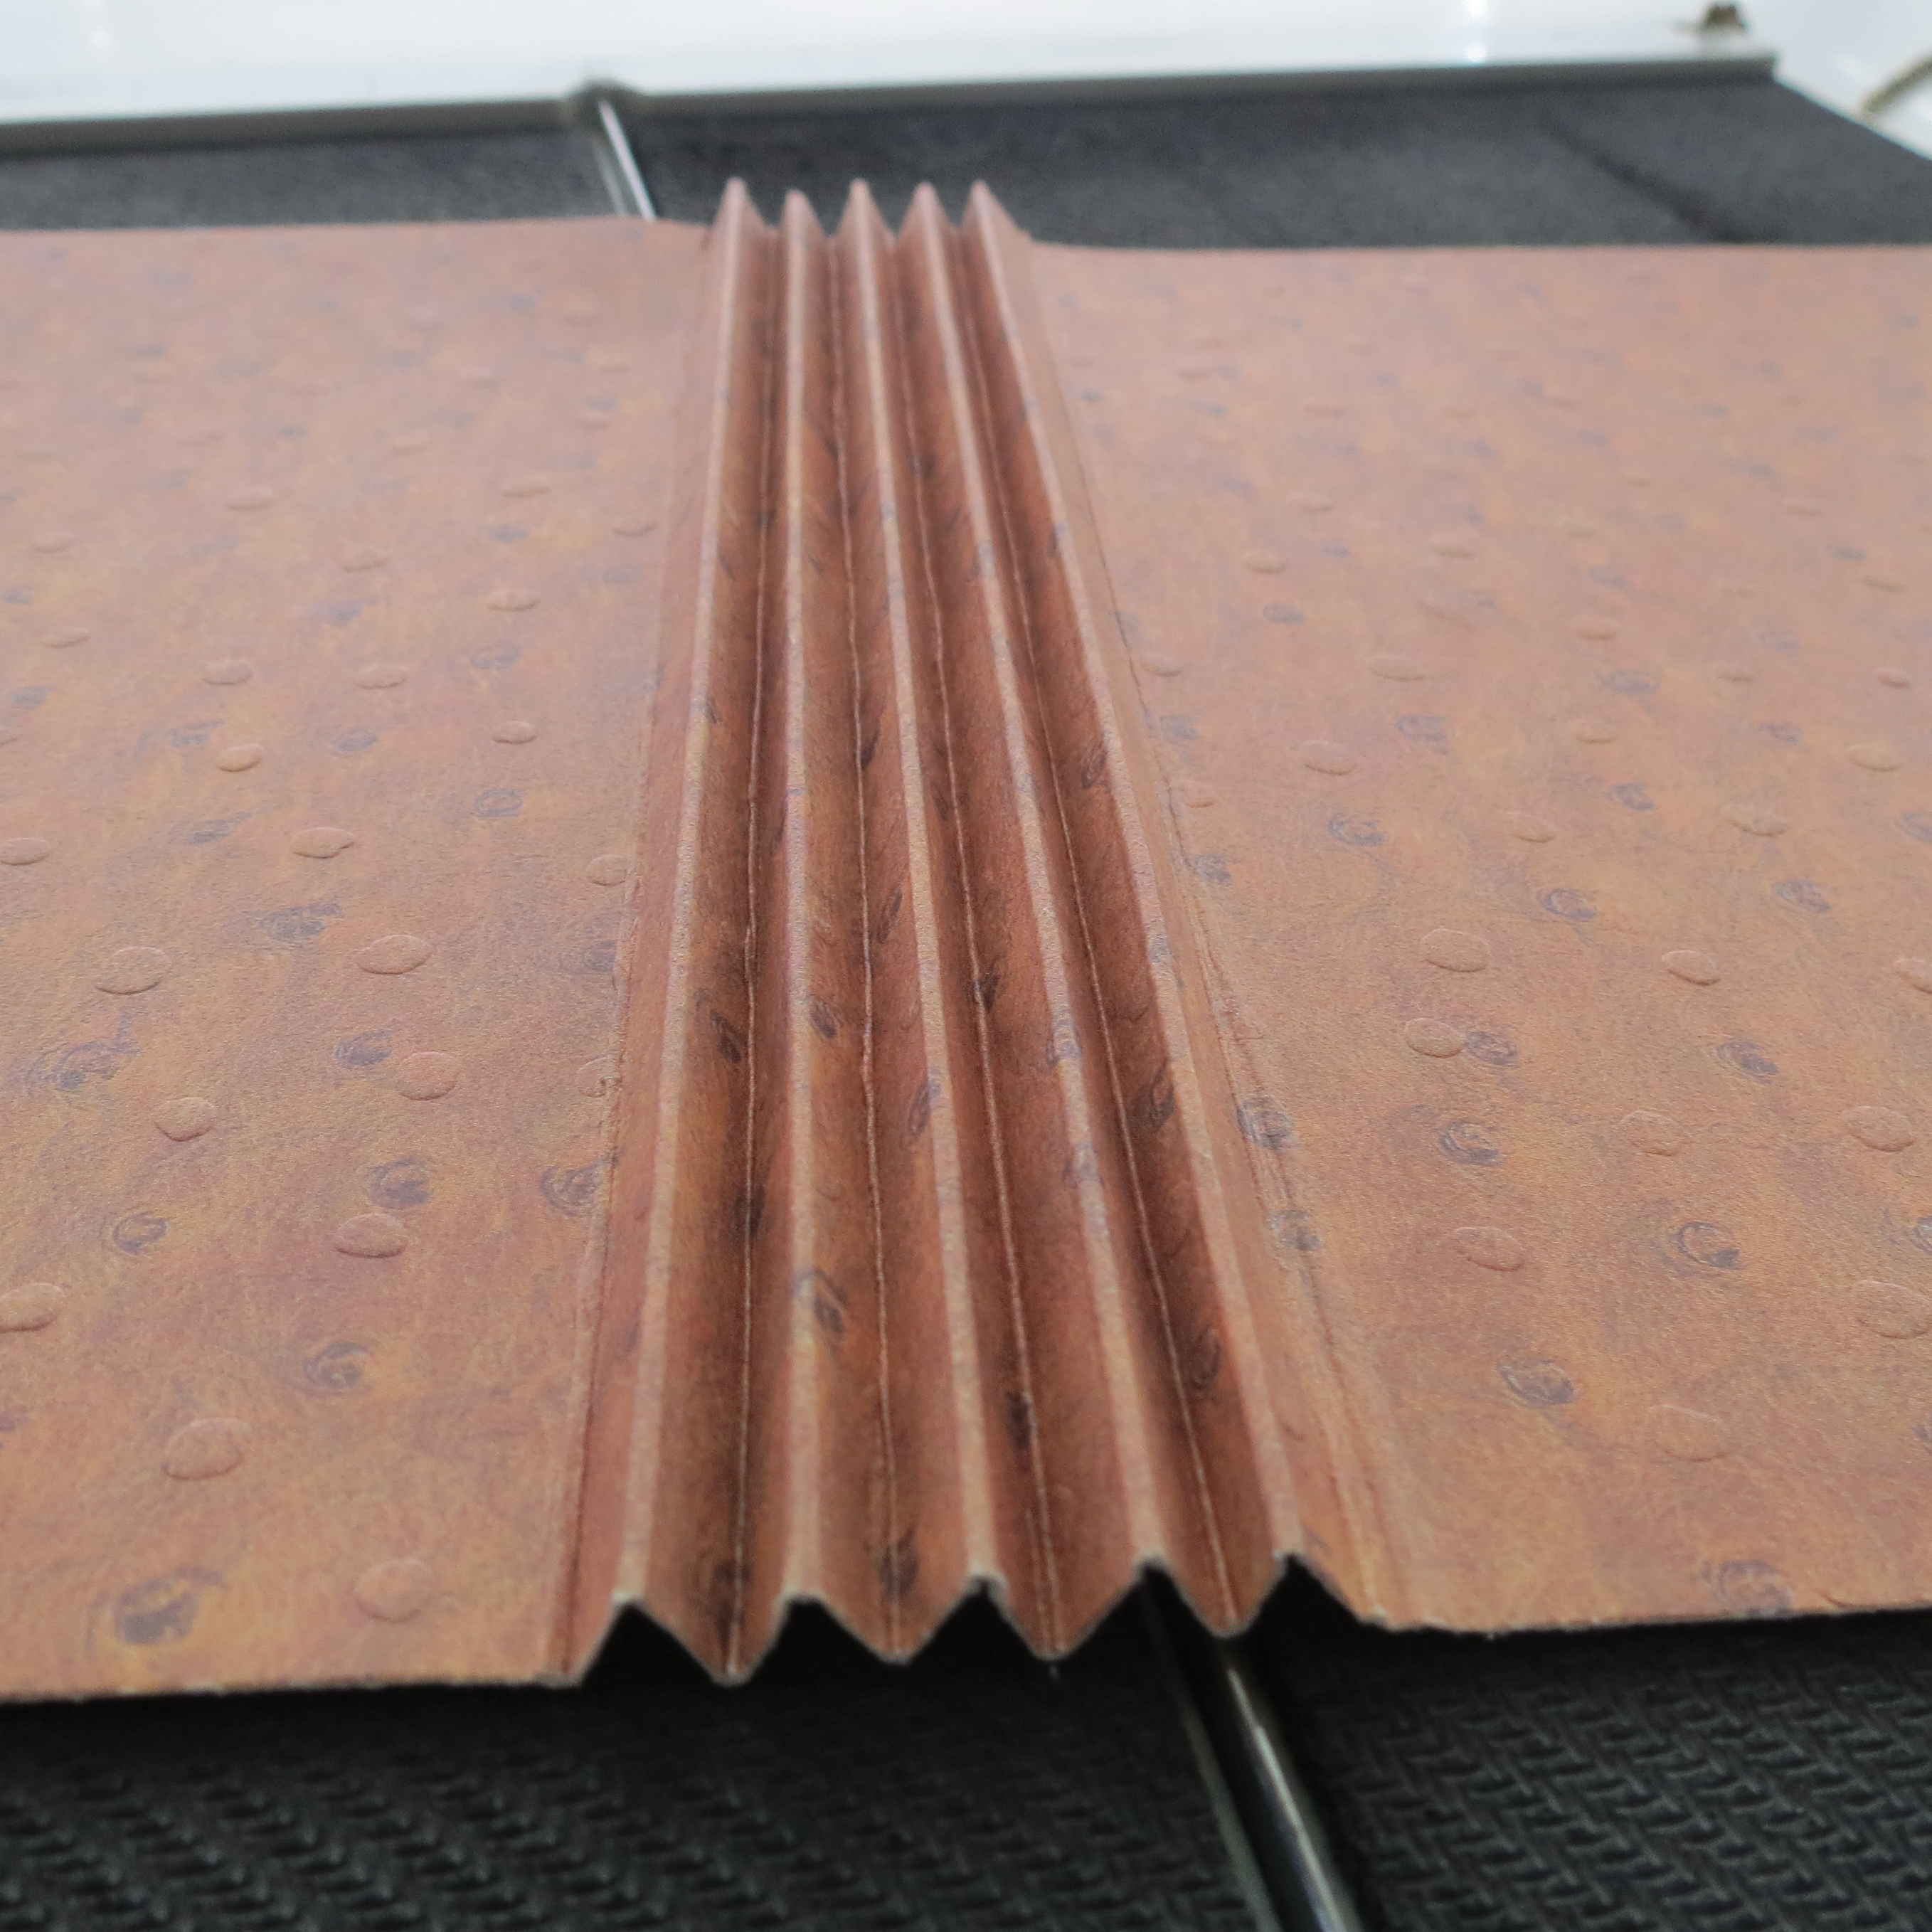
• Next, take a 2 ½”x 6” strip for the binding. Score it at 1” from each edge adhere to front and back to contain the spine section and add support.
this is what the spine should be looking like once all the pages are secured
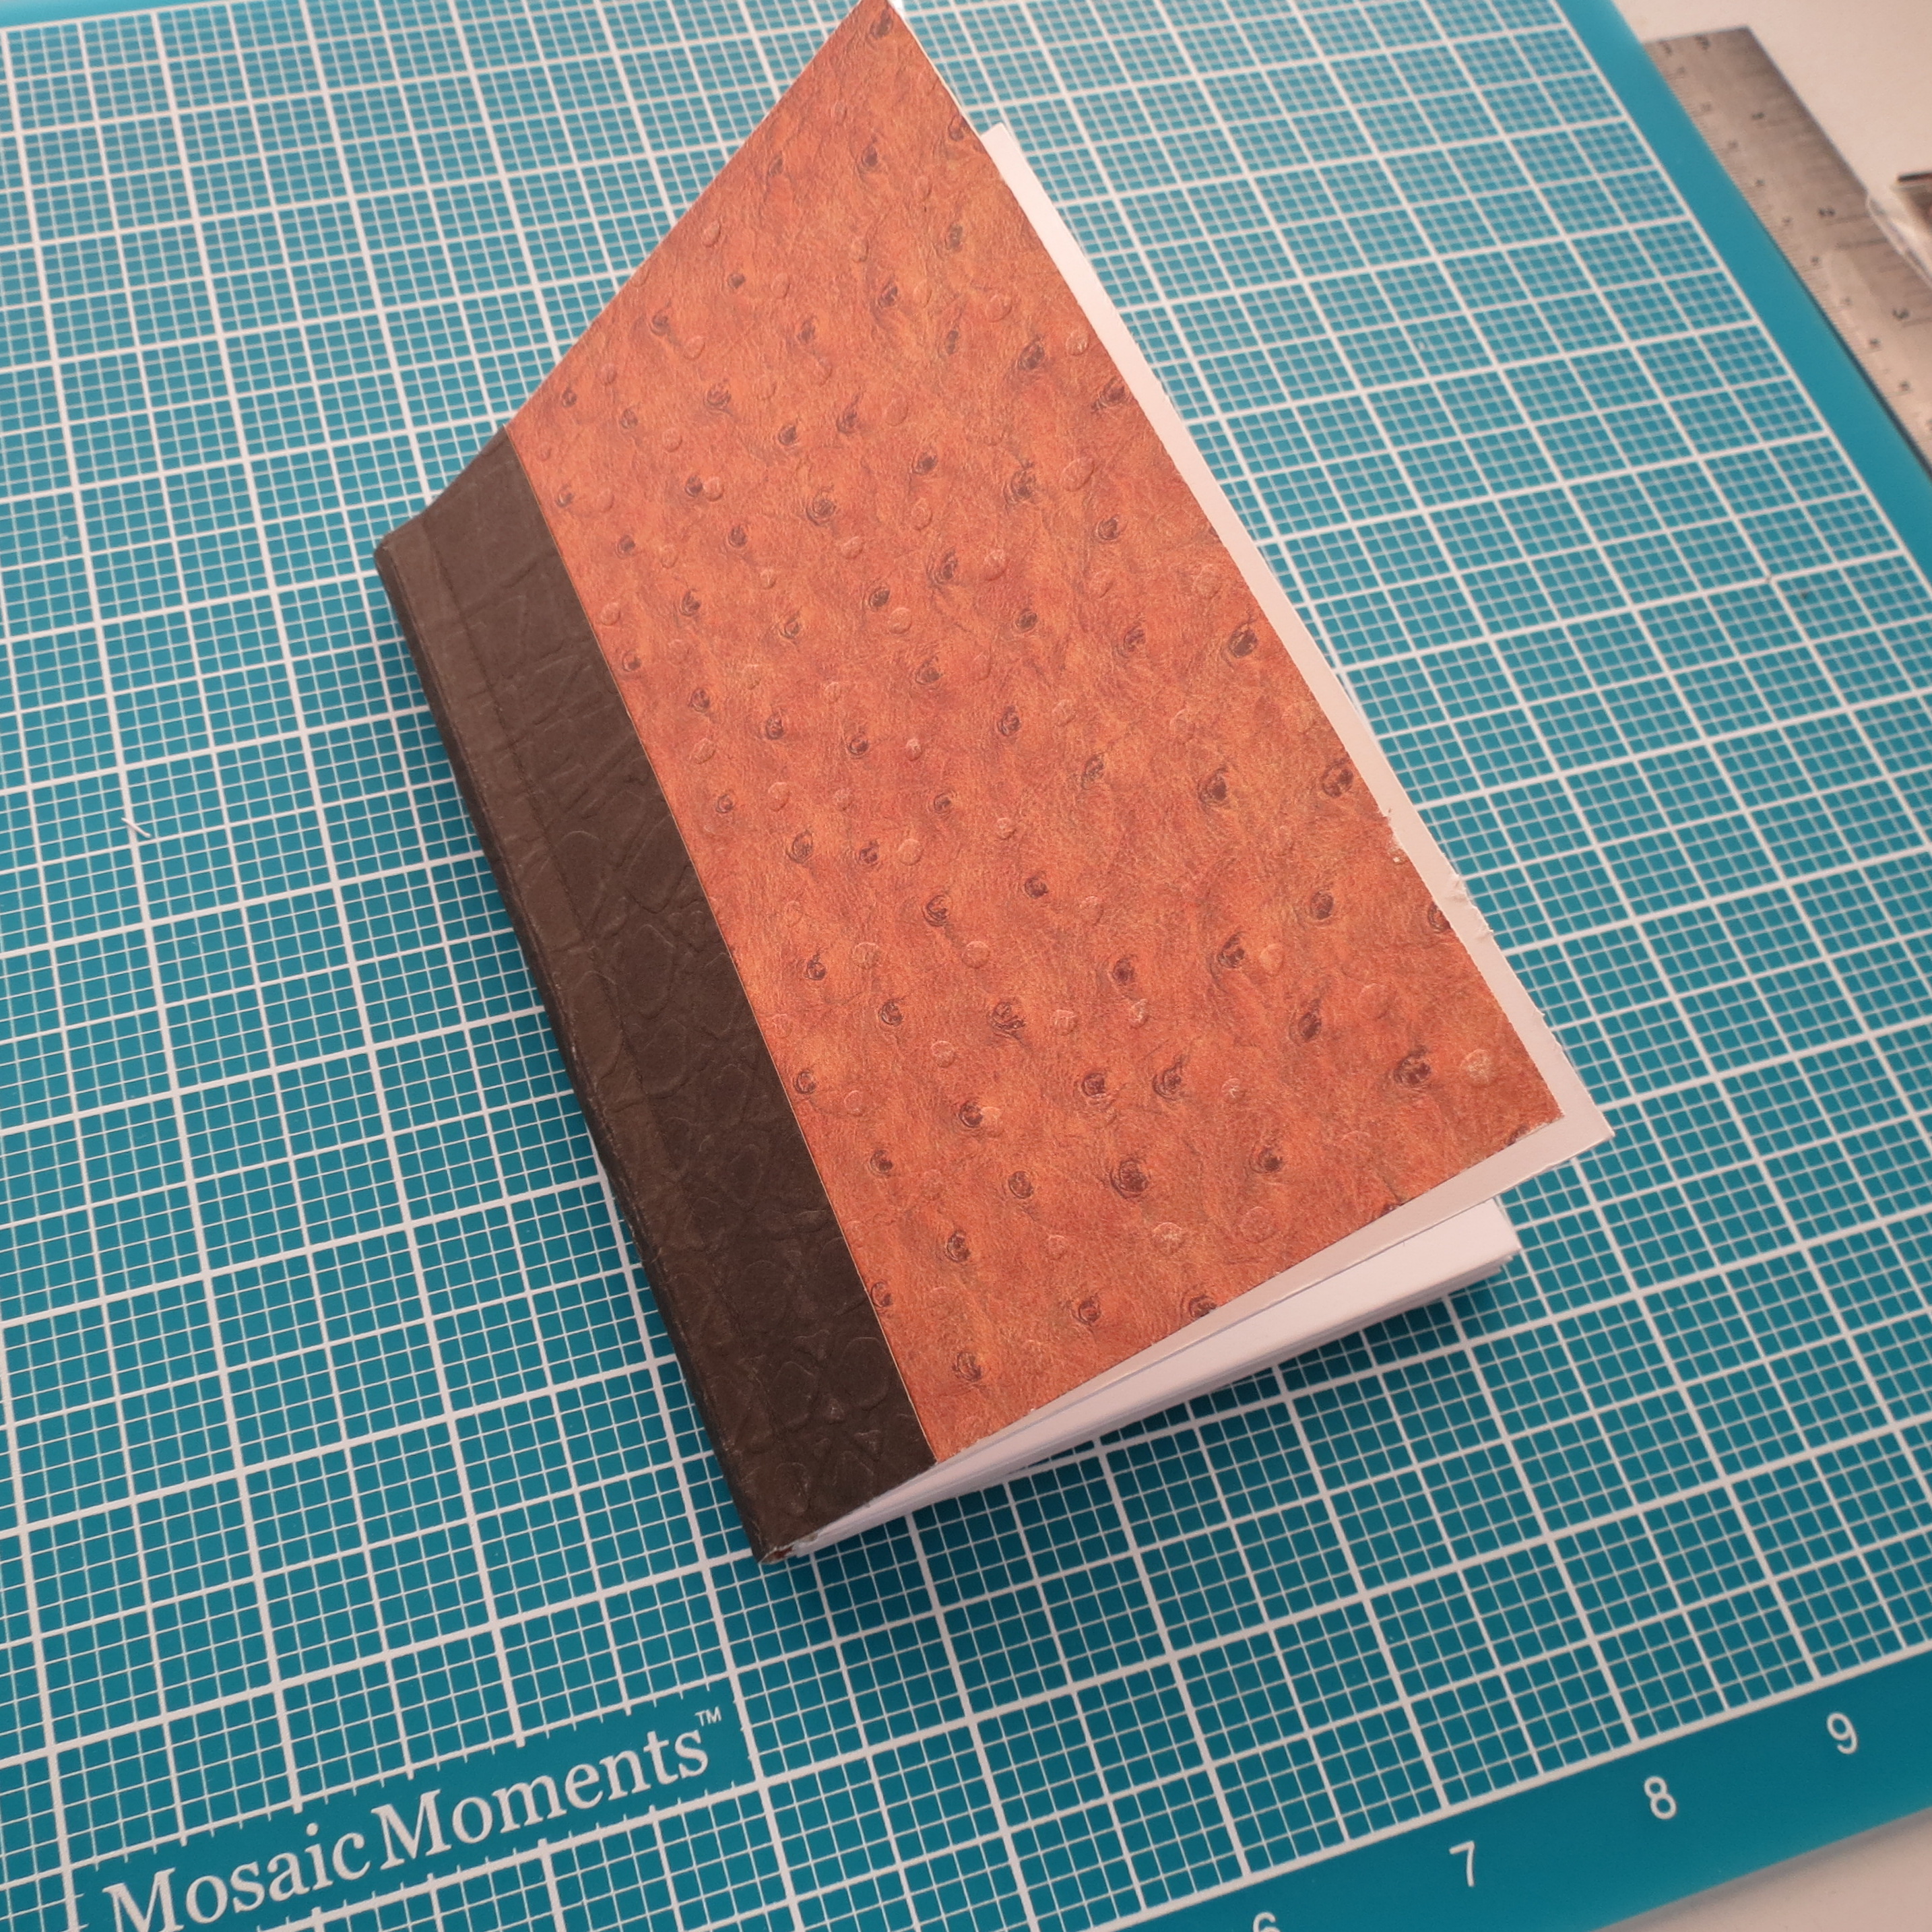
final outside mini album cover
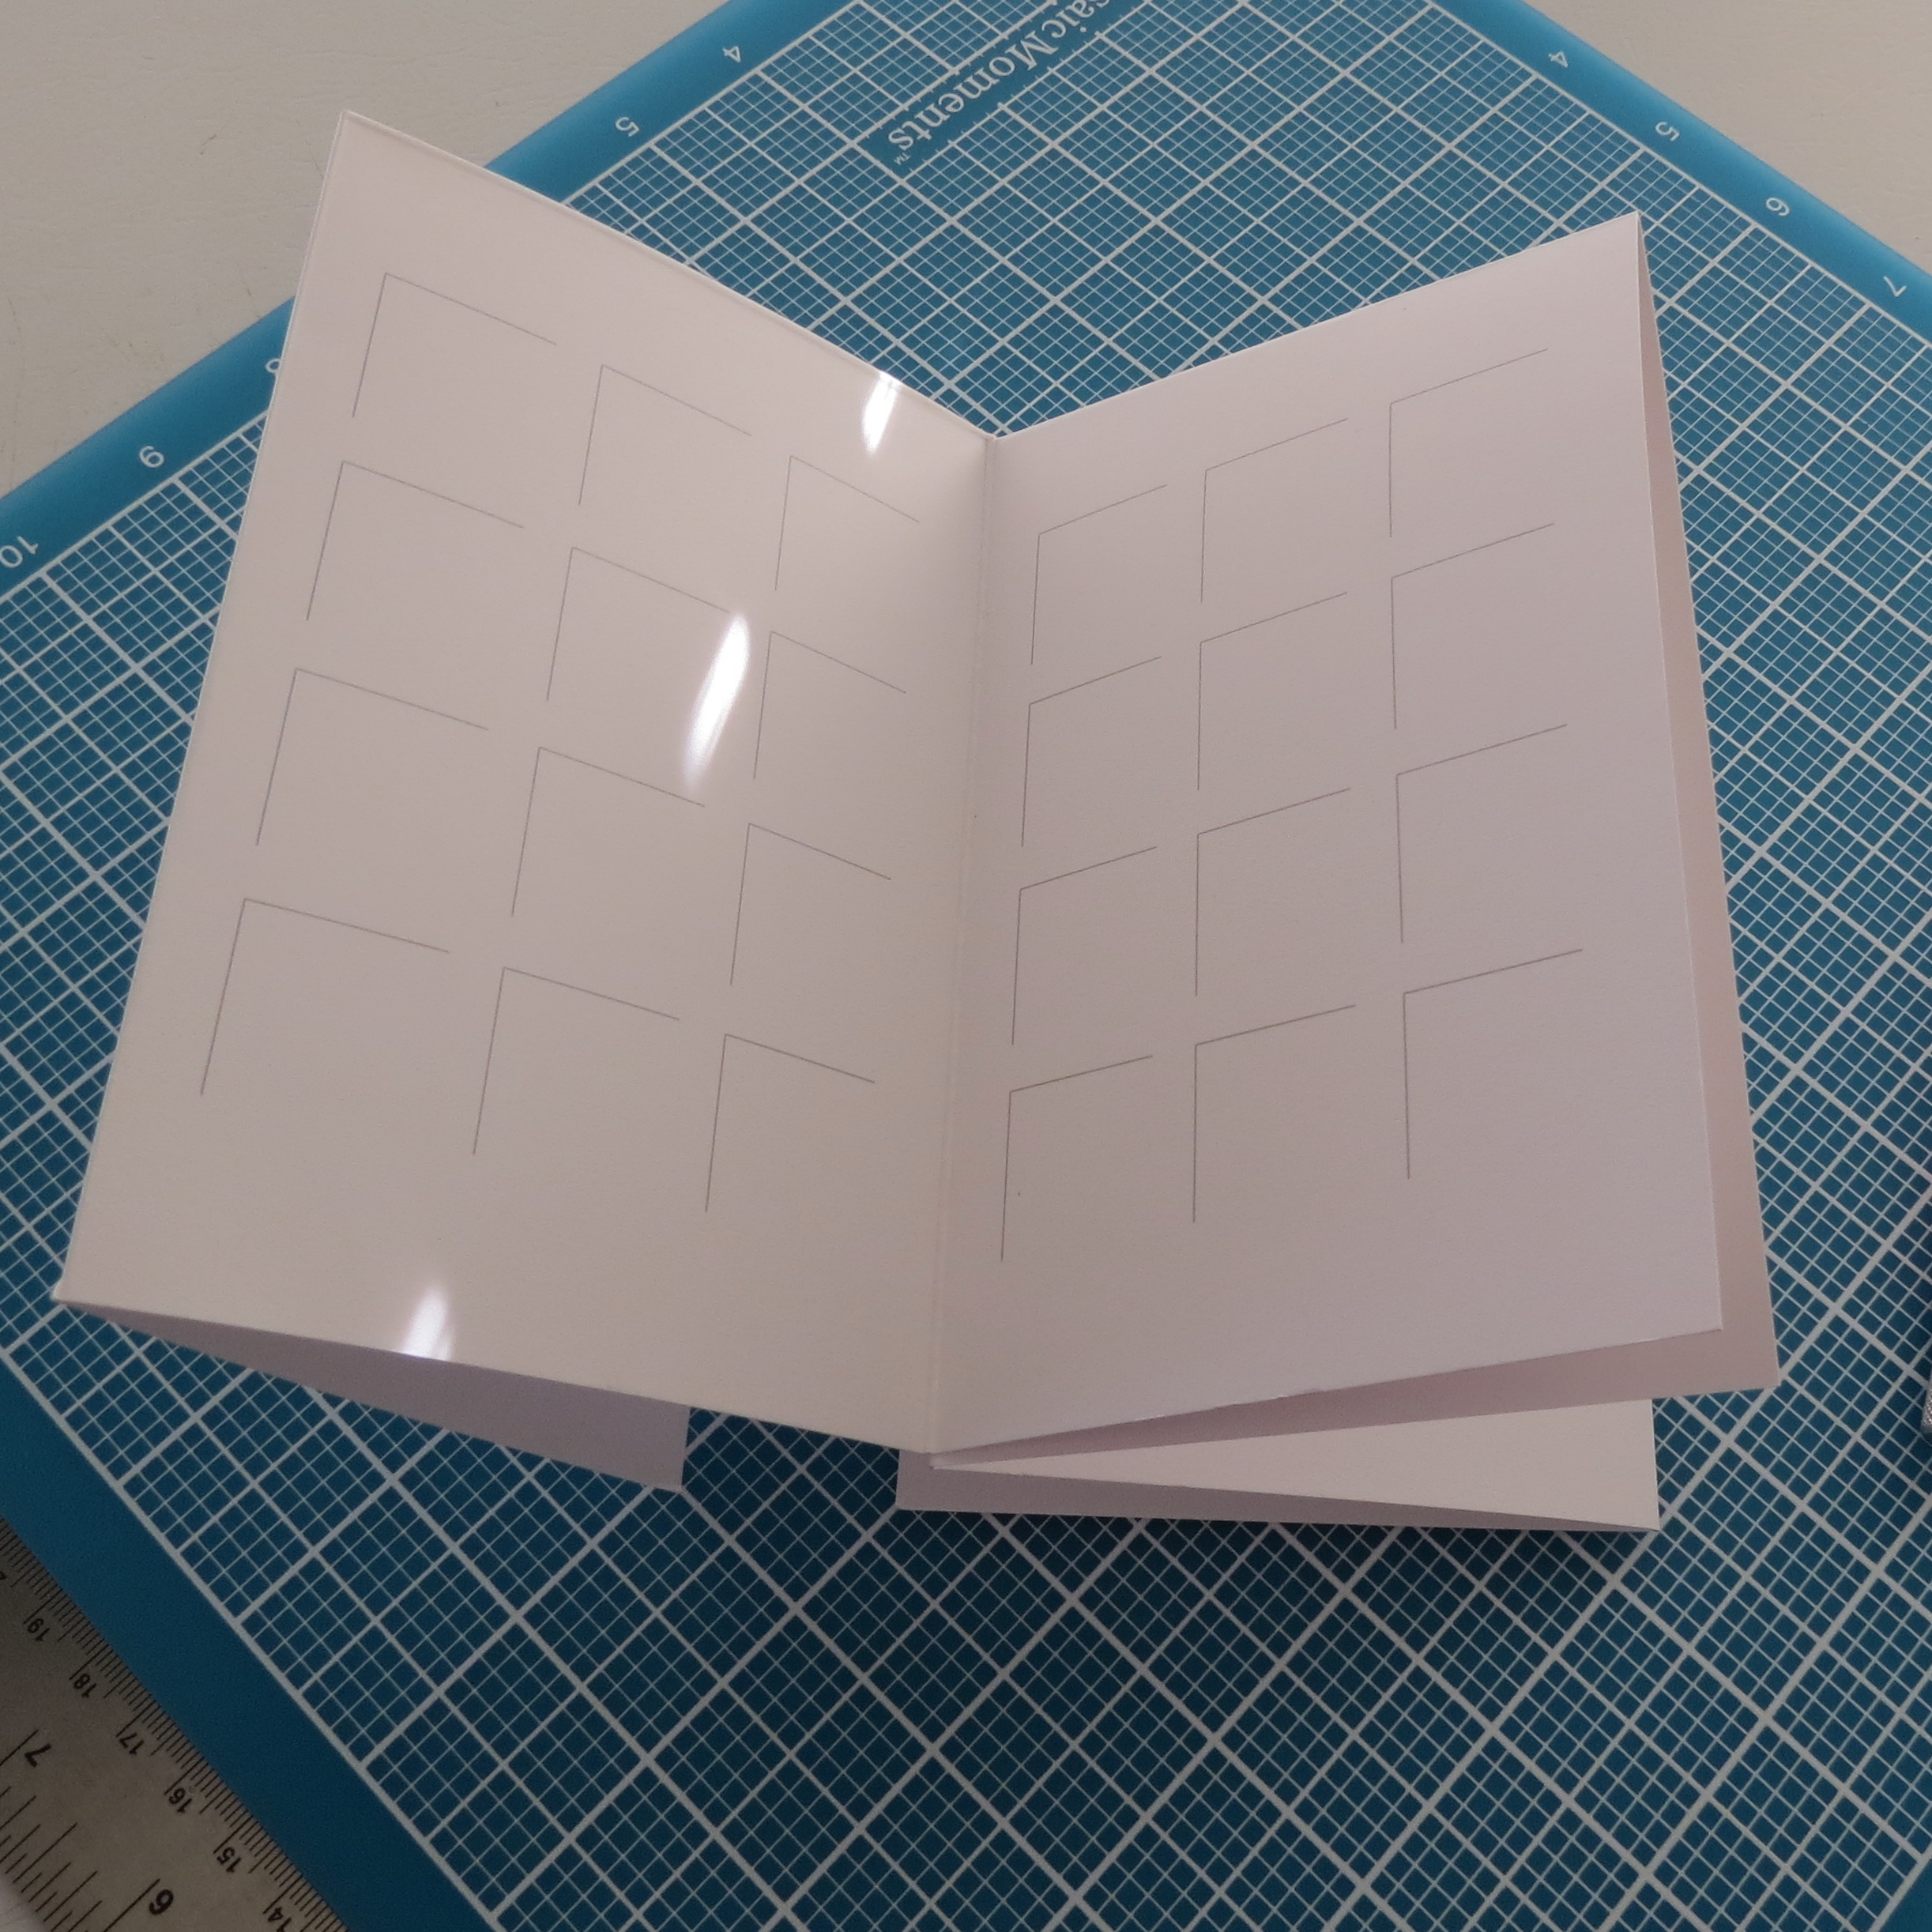
inside peek at mini album ready for photos
• Trim the overlap off. I leave this to the end because I don’t want to run short, it’s easier to trim of than try to add on if things don’t fit the way they are supposed to fit as you assemble the album.
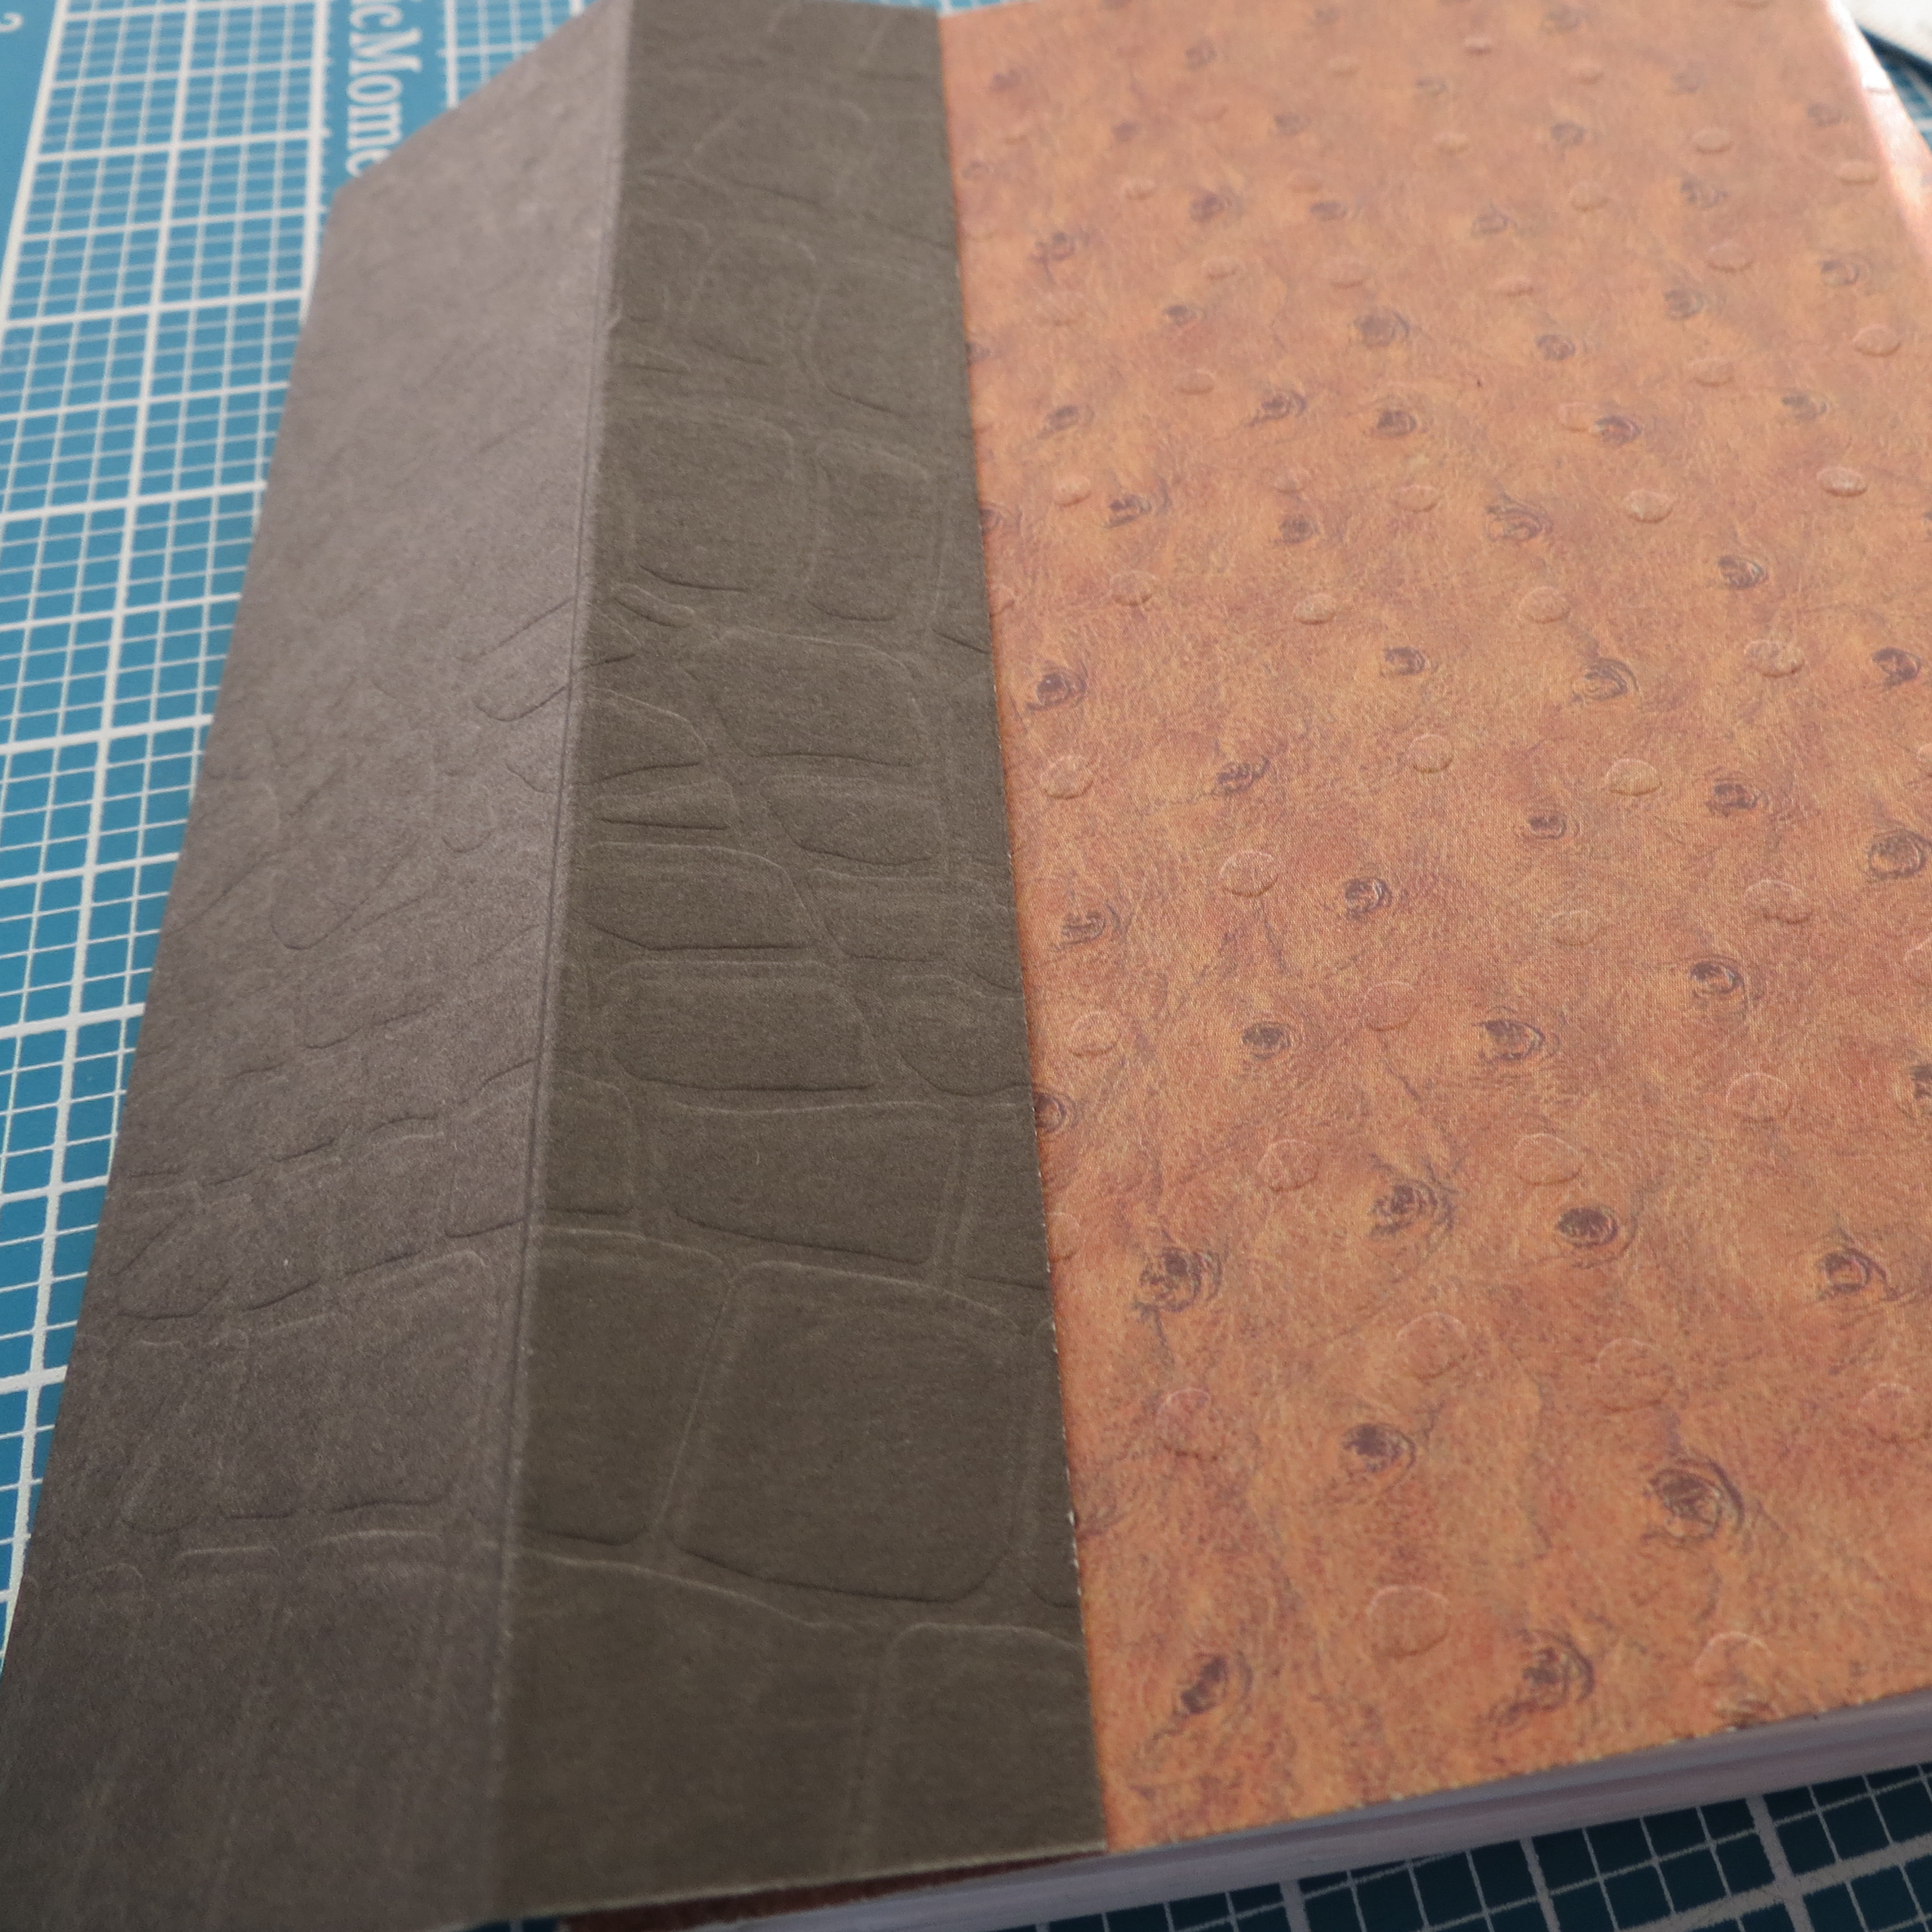
• Cut pieces of patterned paper for the inside front and back covers. This will add support and you want to have that structure for the toddlers handling them.
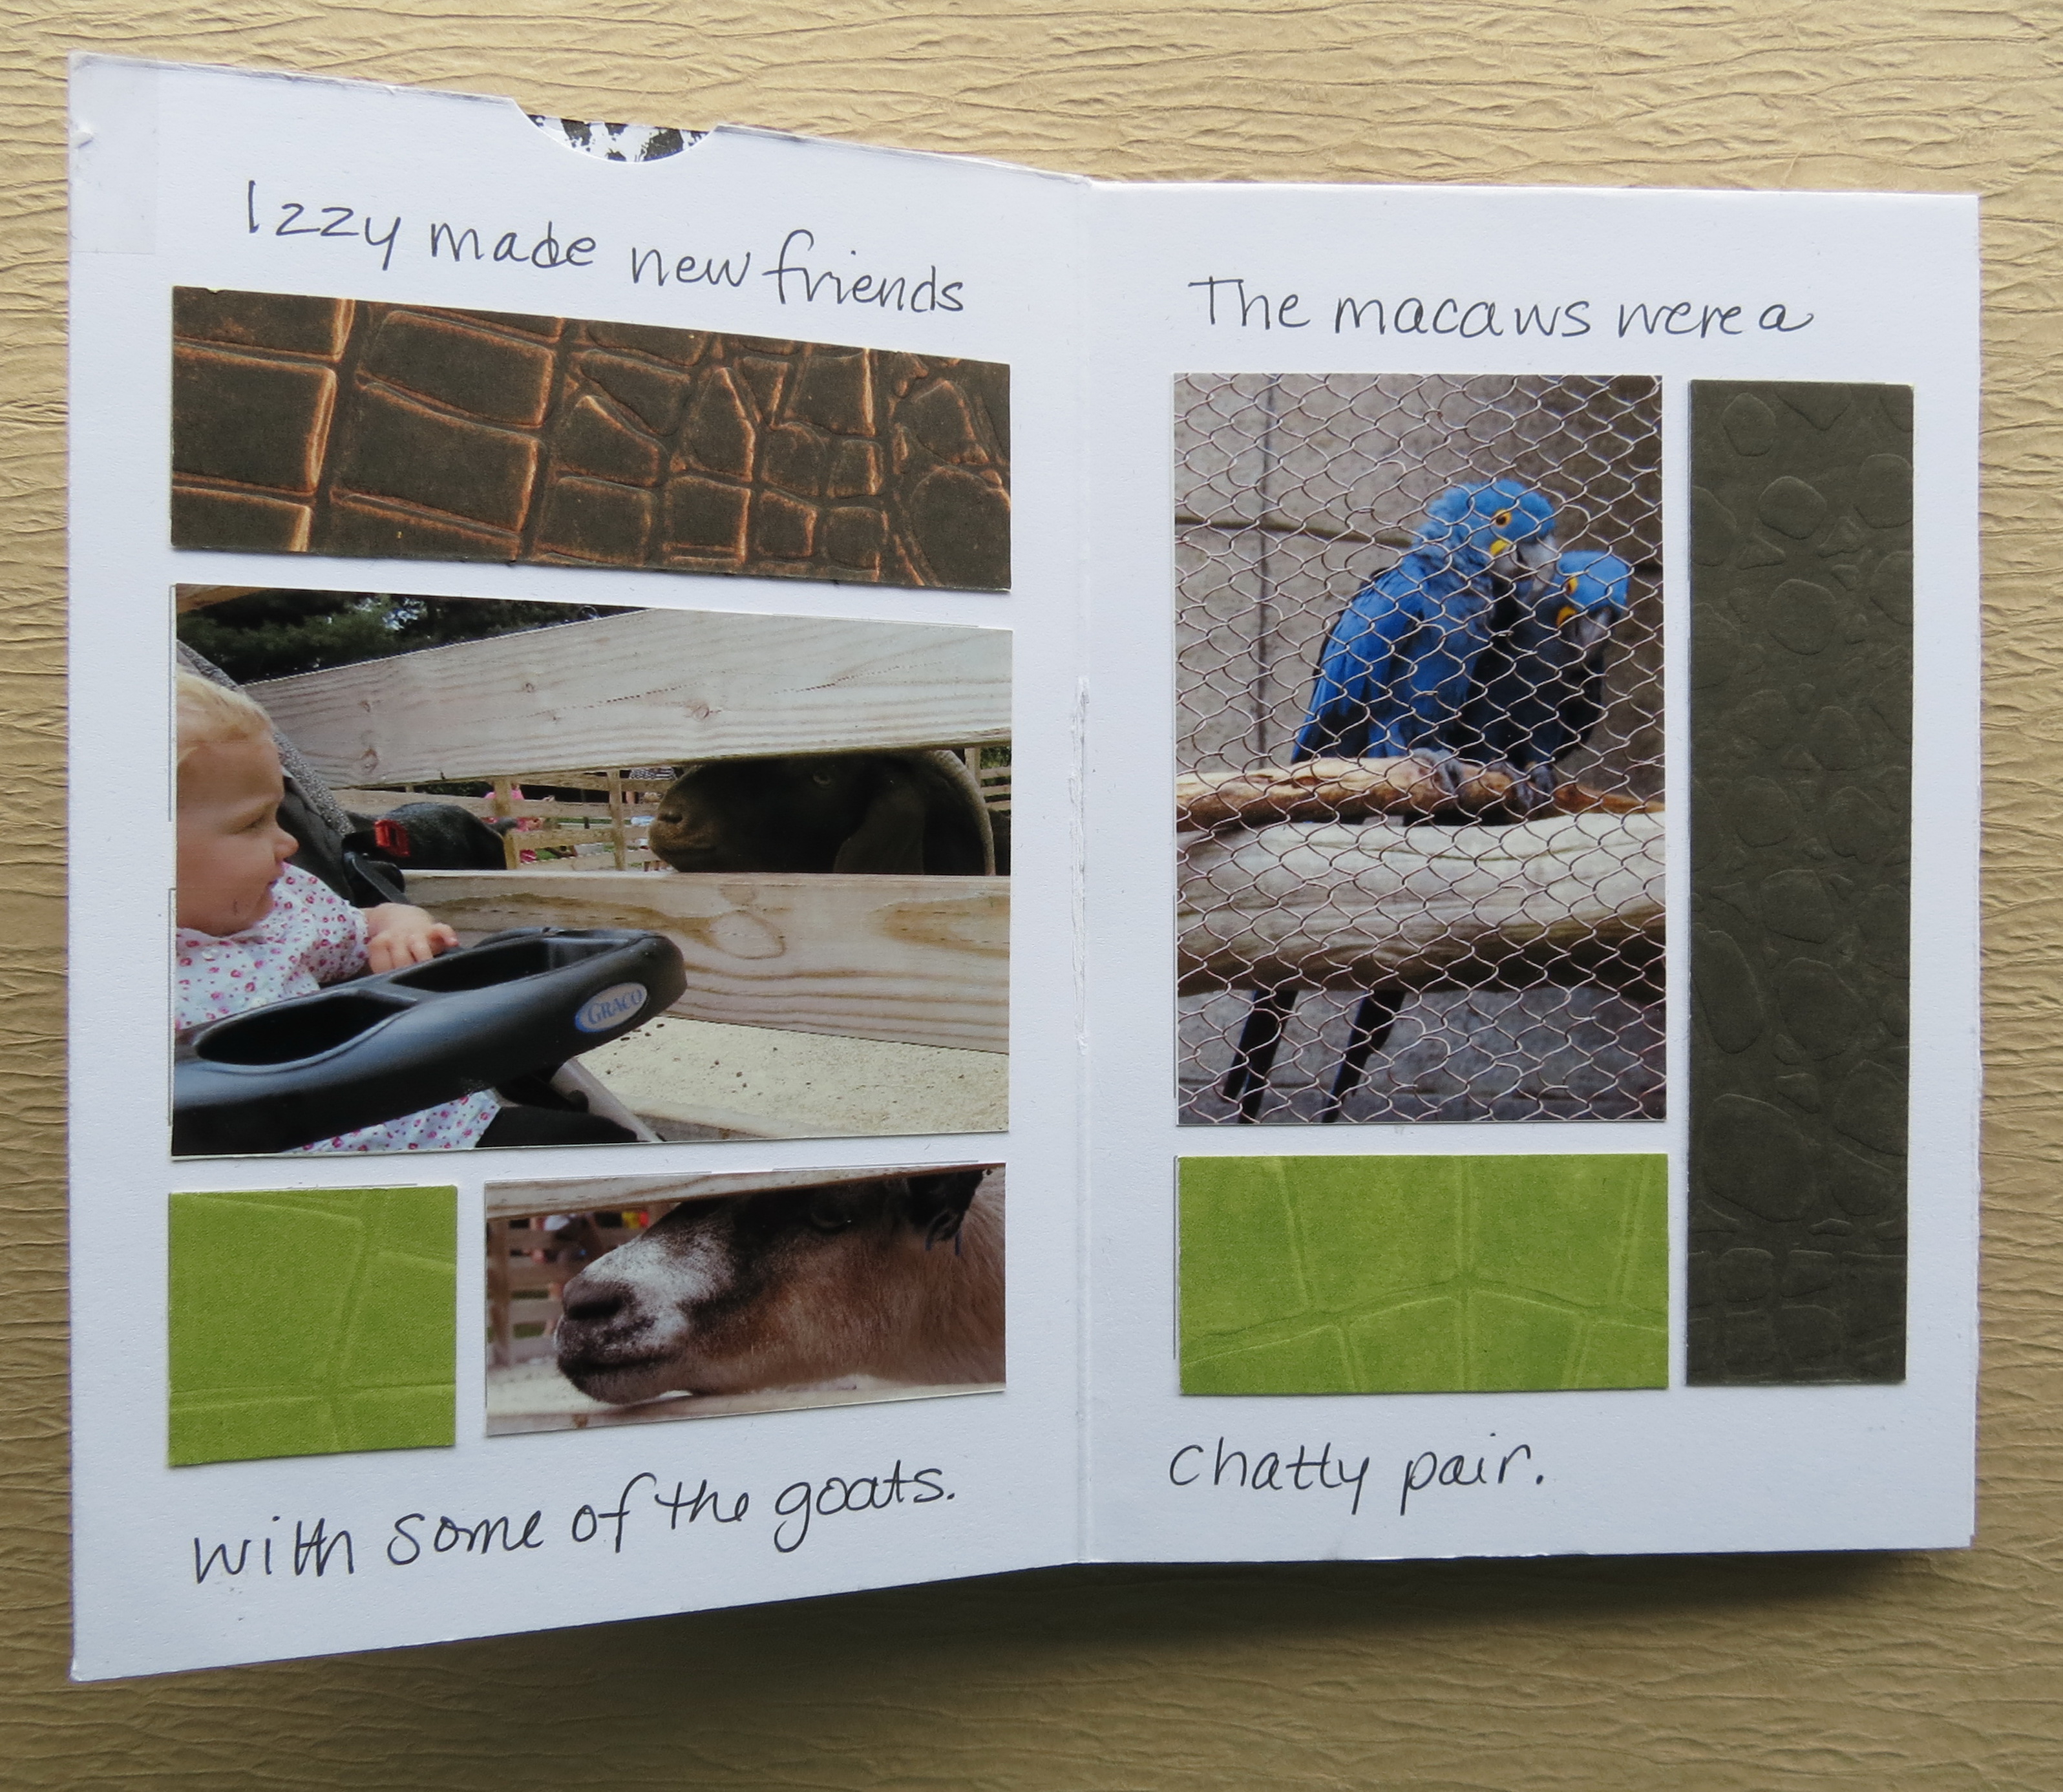
• Now add your photos.
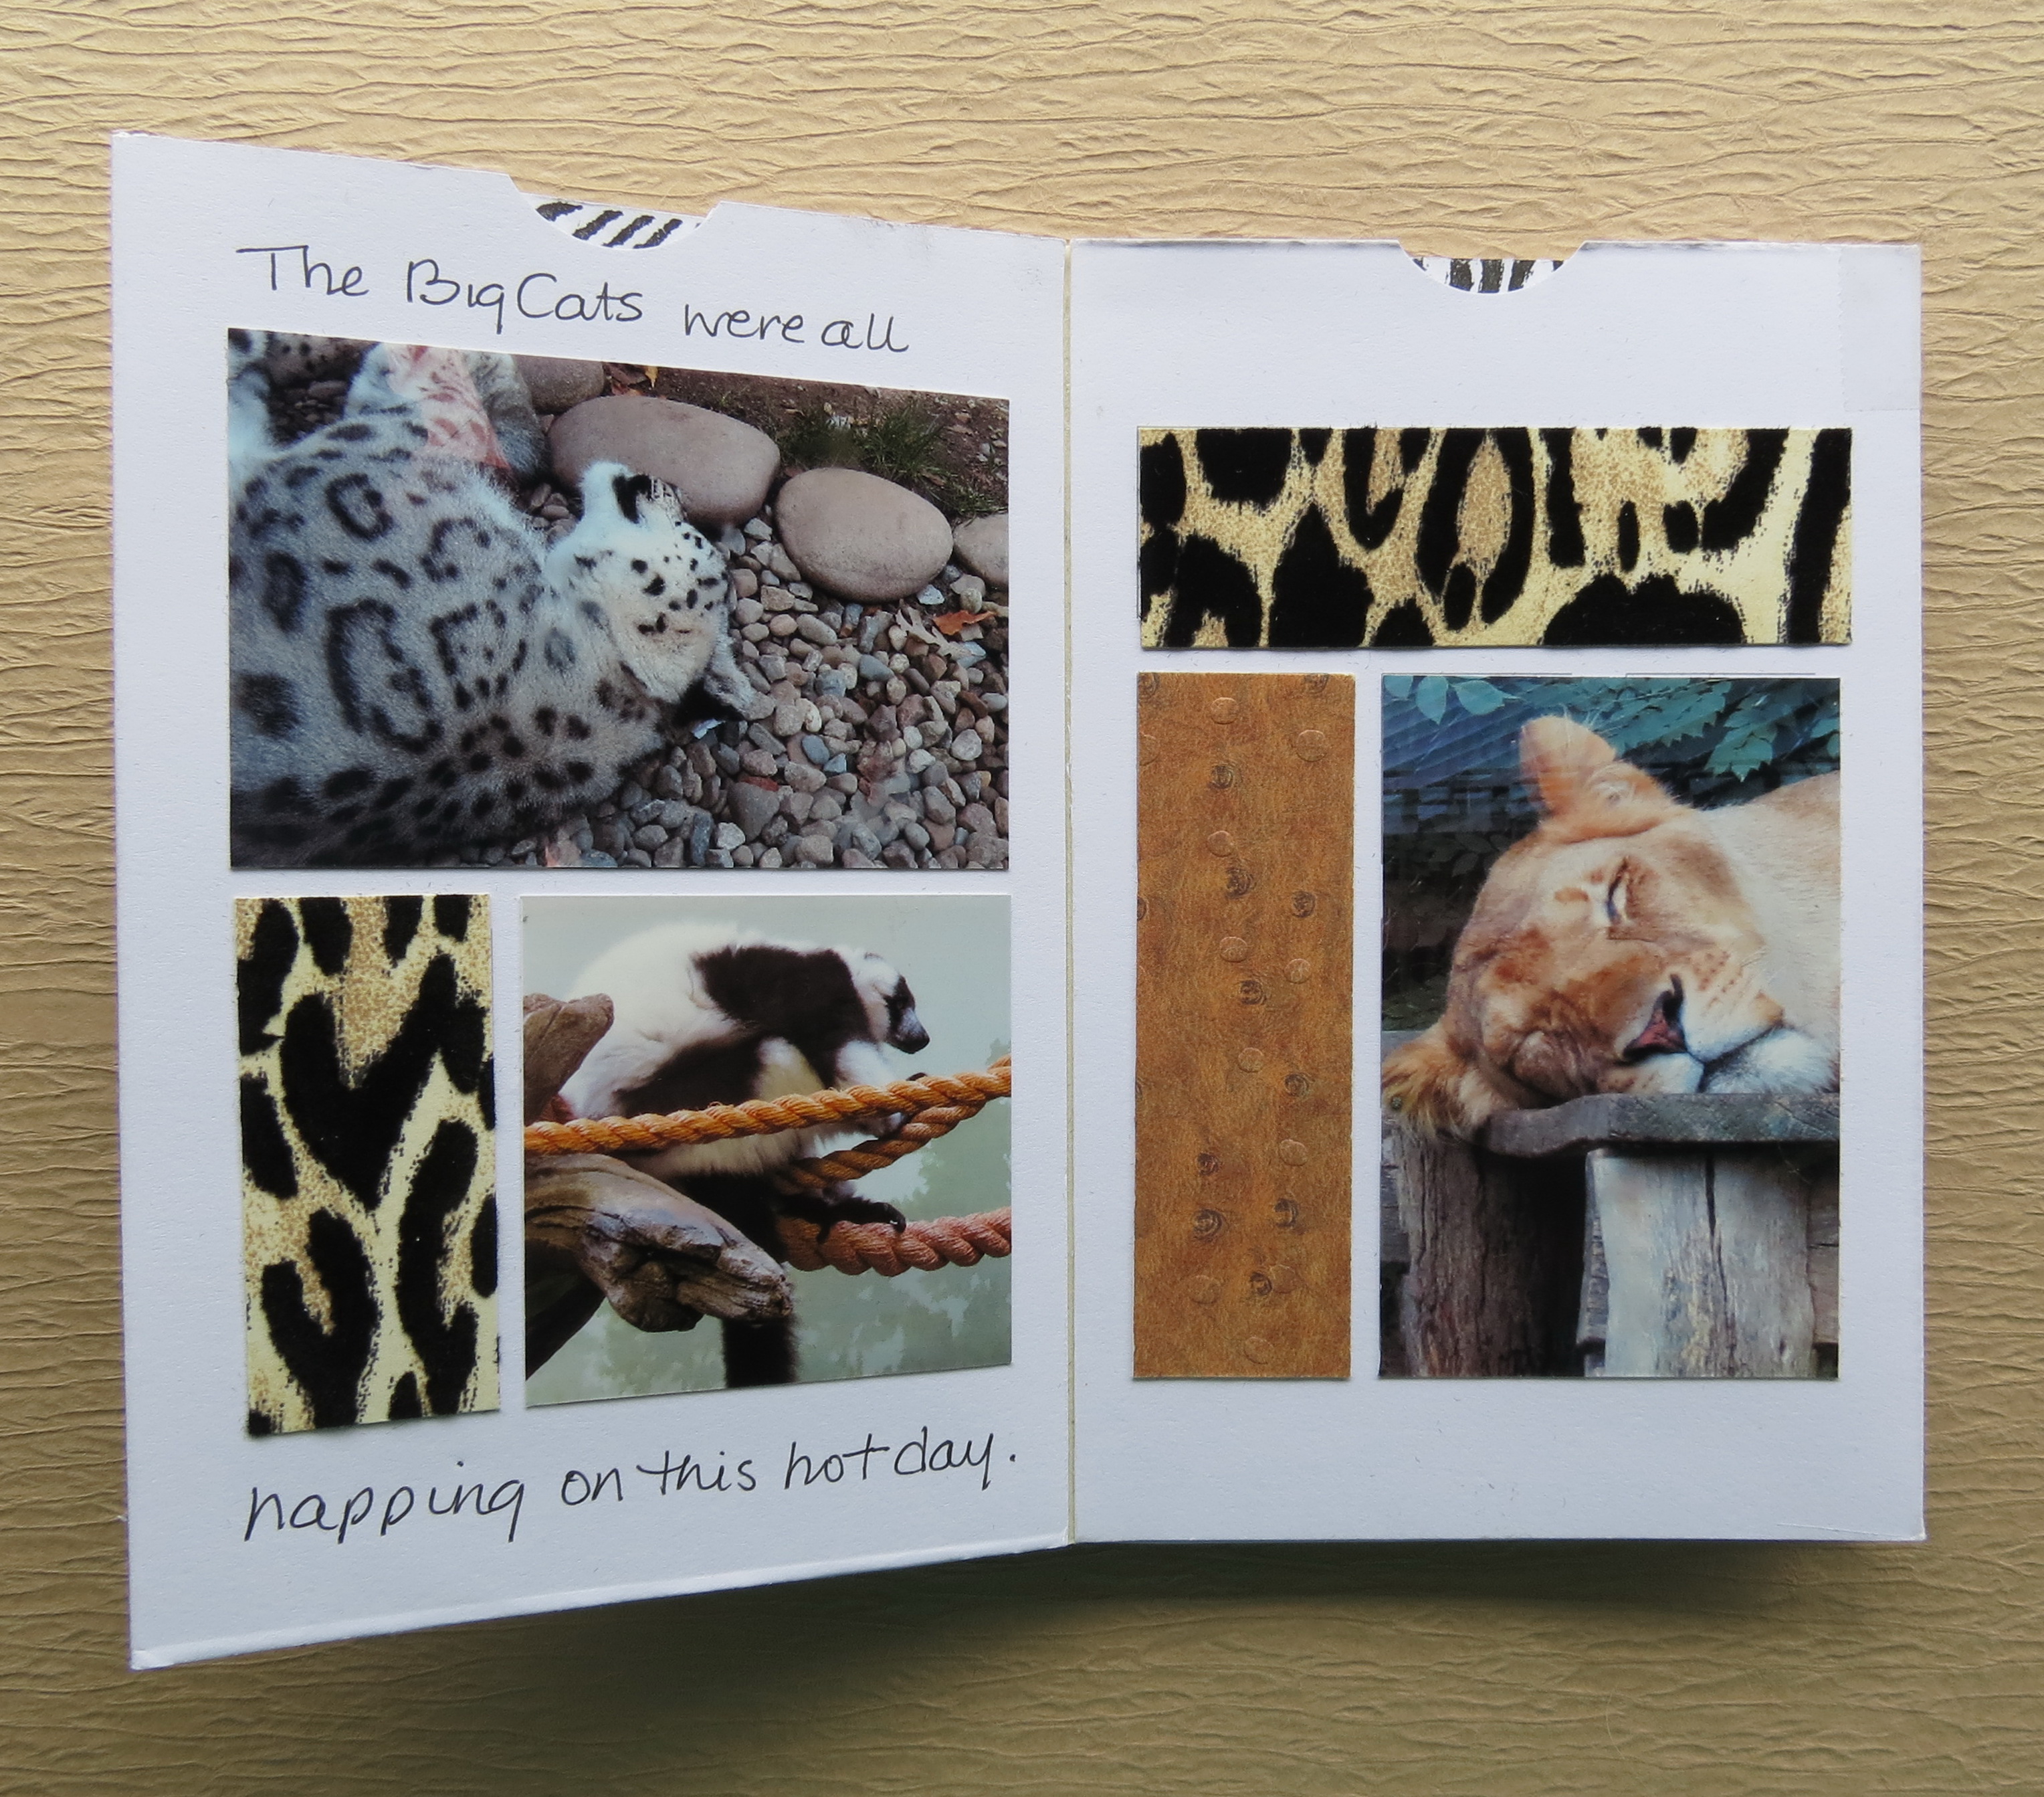
• In the center of the mini album I have left the pages open at the top and punched a thumb hold out of the pages with a 1” circle punch. This creates a pocket to insert a hidden photo or journal spot to add a little bit of extra fun. My granddaughter loves flip flap type books so this will add an extra bit of fun. The insert pages are 5 ¼” x 3” and this is where I used the rubber stamps to add the animal print as a border around the card leaving the center on both sides for photos and text. If you want to punch this out before assembling it might be easier. (note: within 5 minutes of letting Izzy see the book, in her eagerness to pull these out of the page, she torn the opening. If you can reinforce from behind the top edge of these pages, a bit of scotch tape trimmed at the opening should help, but needs to be done before assembling. Washi tape could be used if you had something that would work into your chosen theme and use it inside and out.

materials to create inserted tag
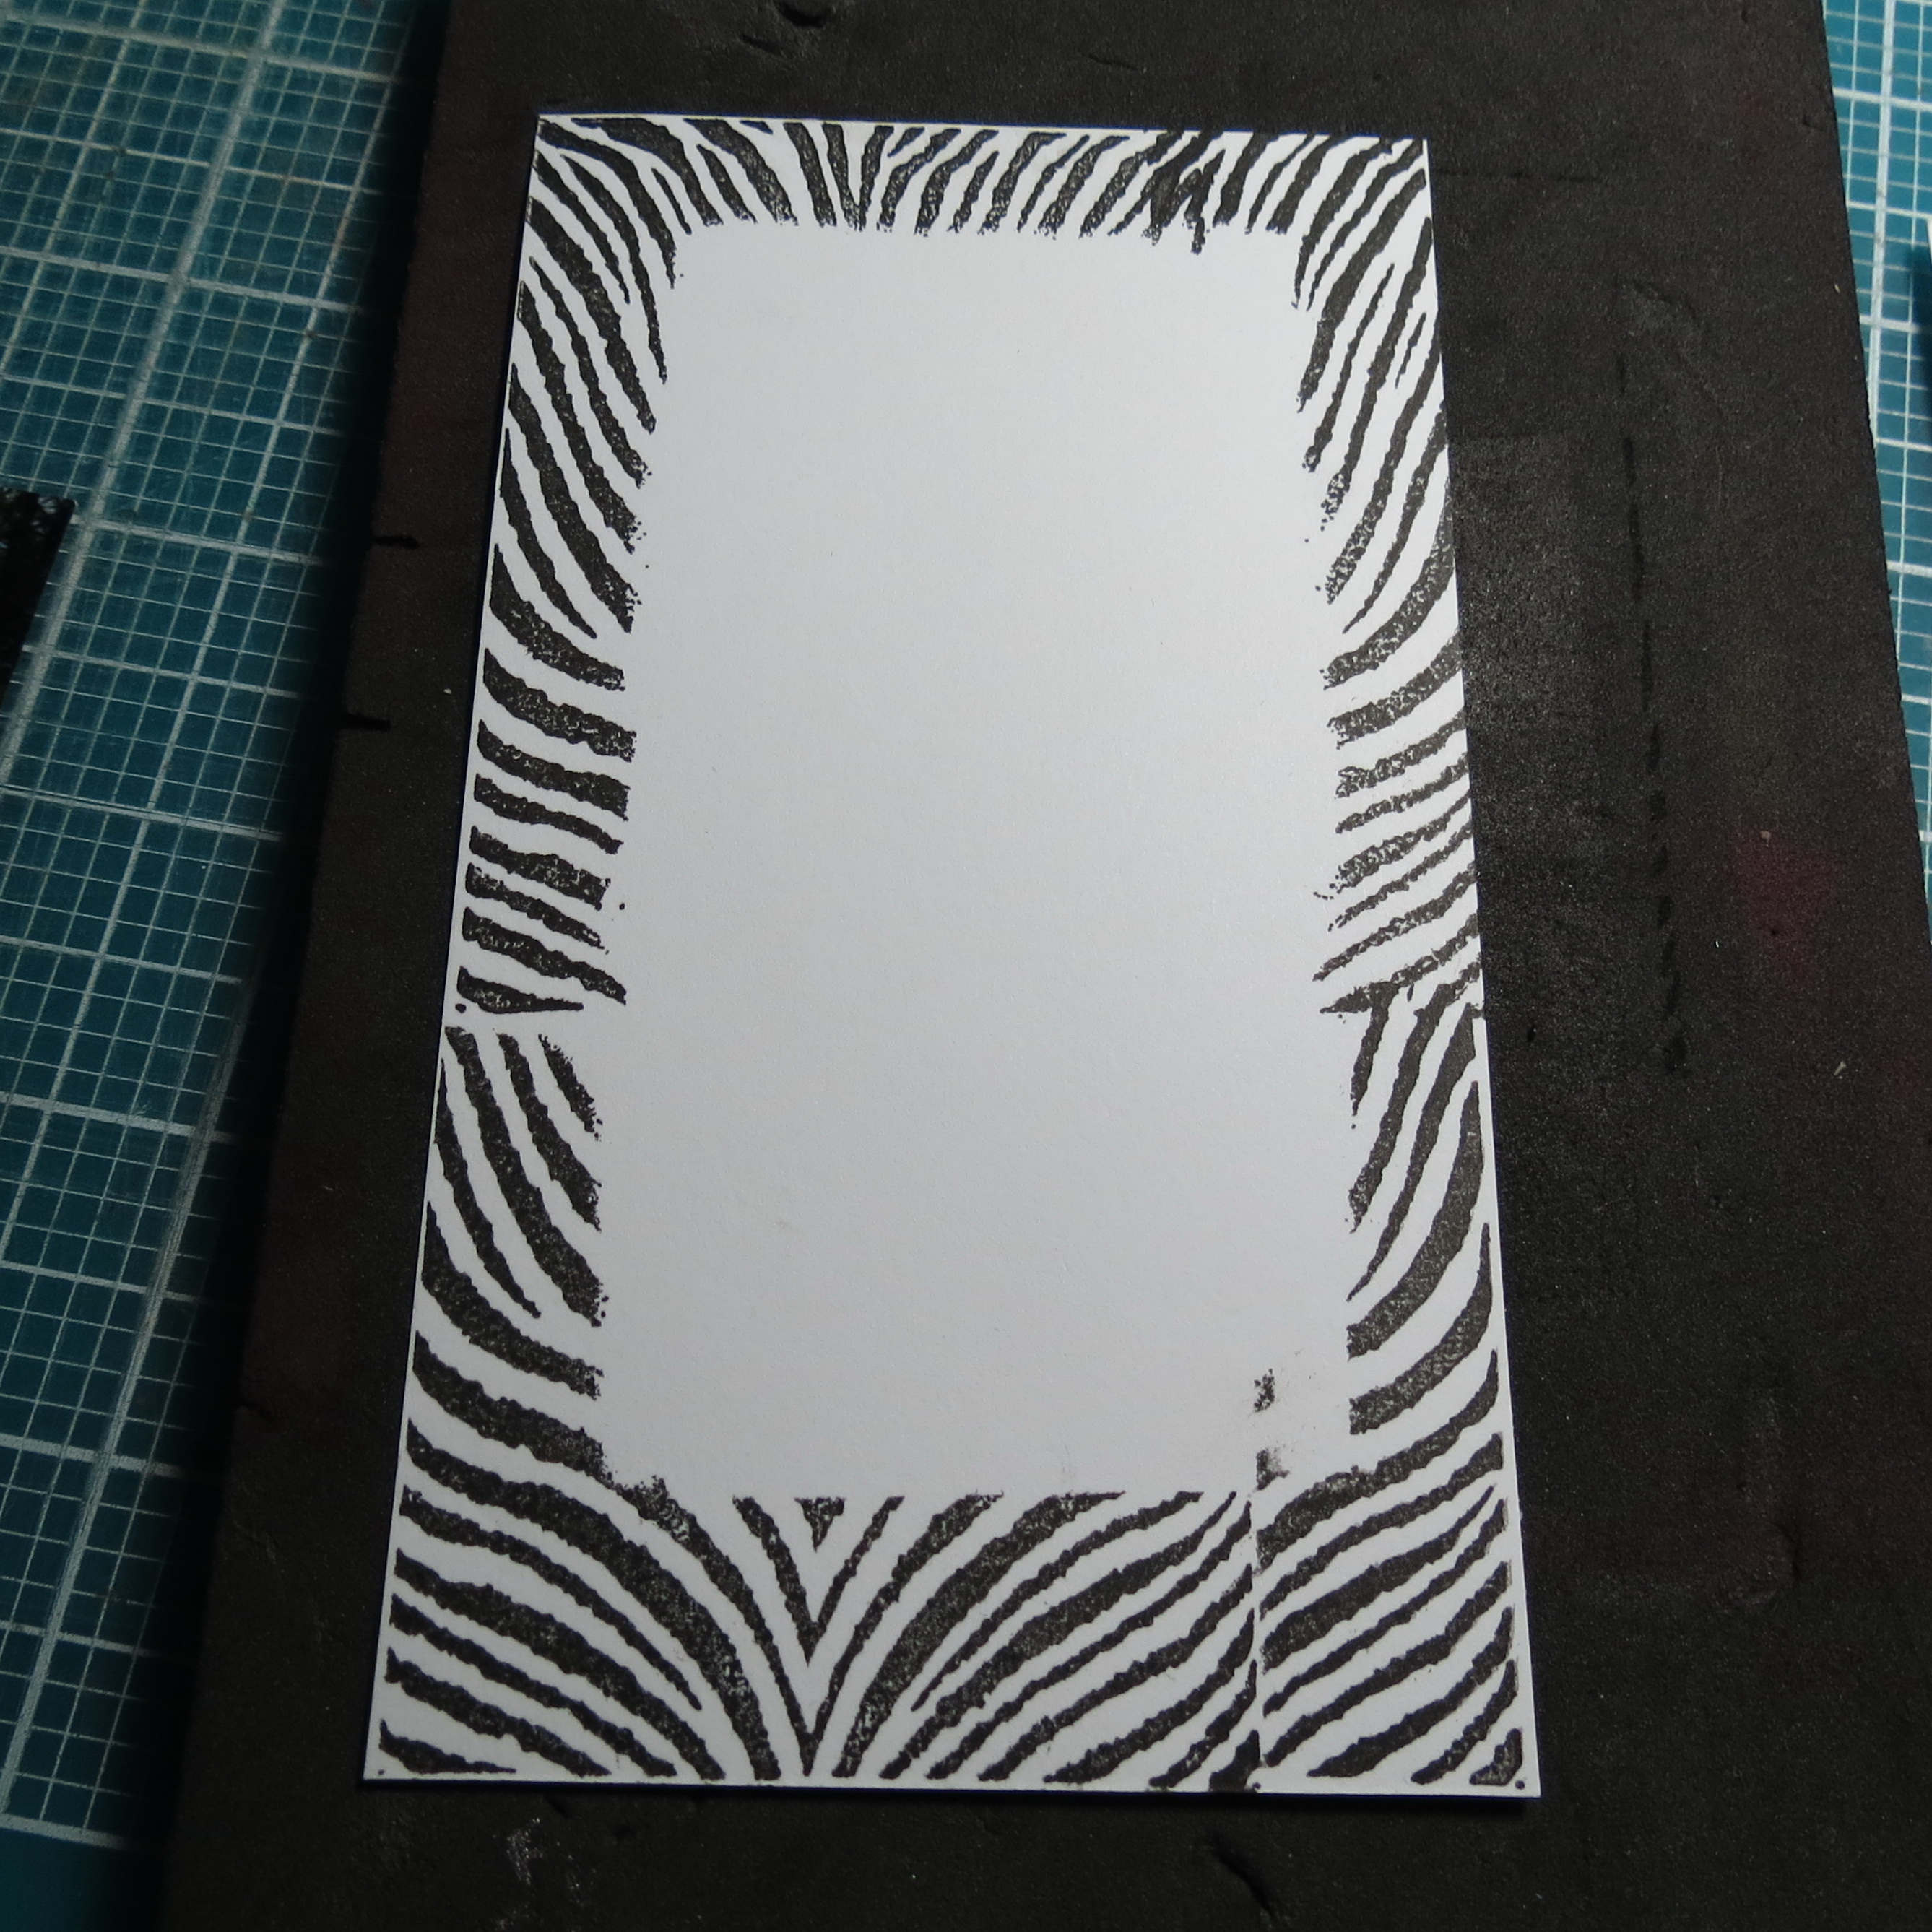
using a scrap paper to create a mask, stamp around the edges for a matching border
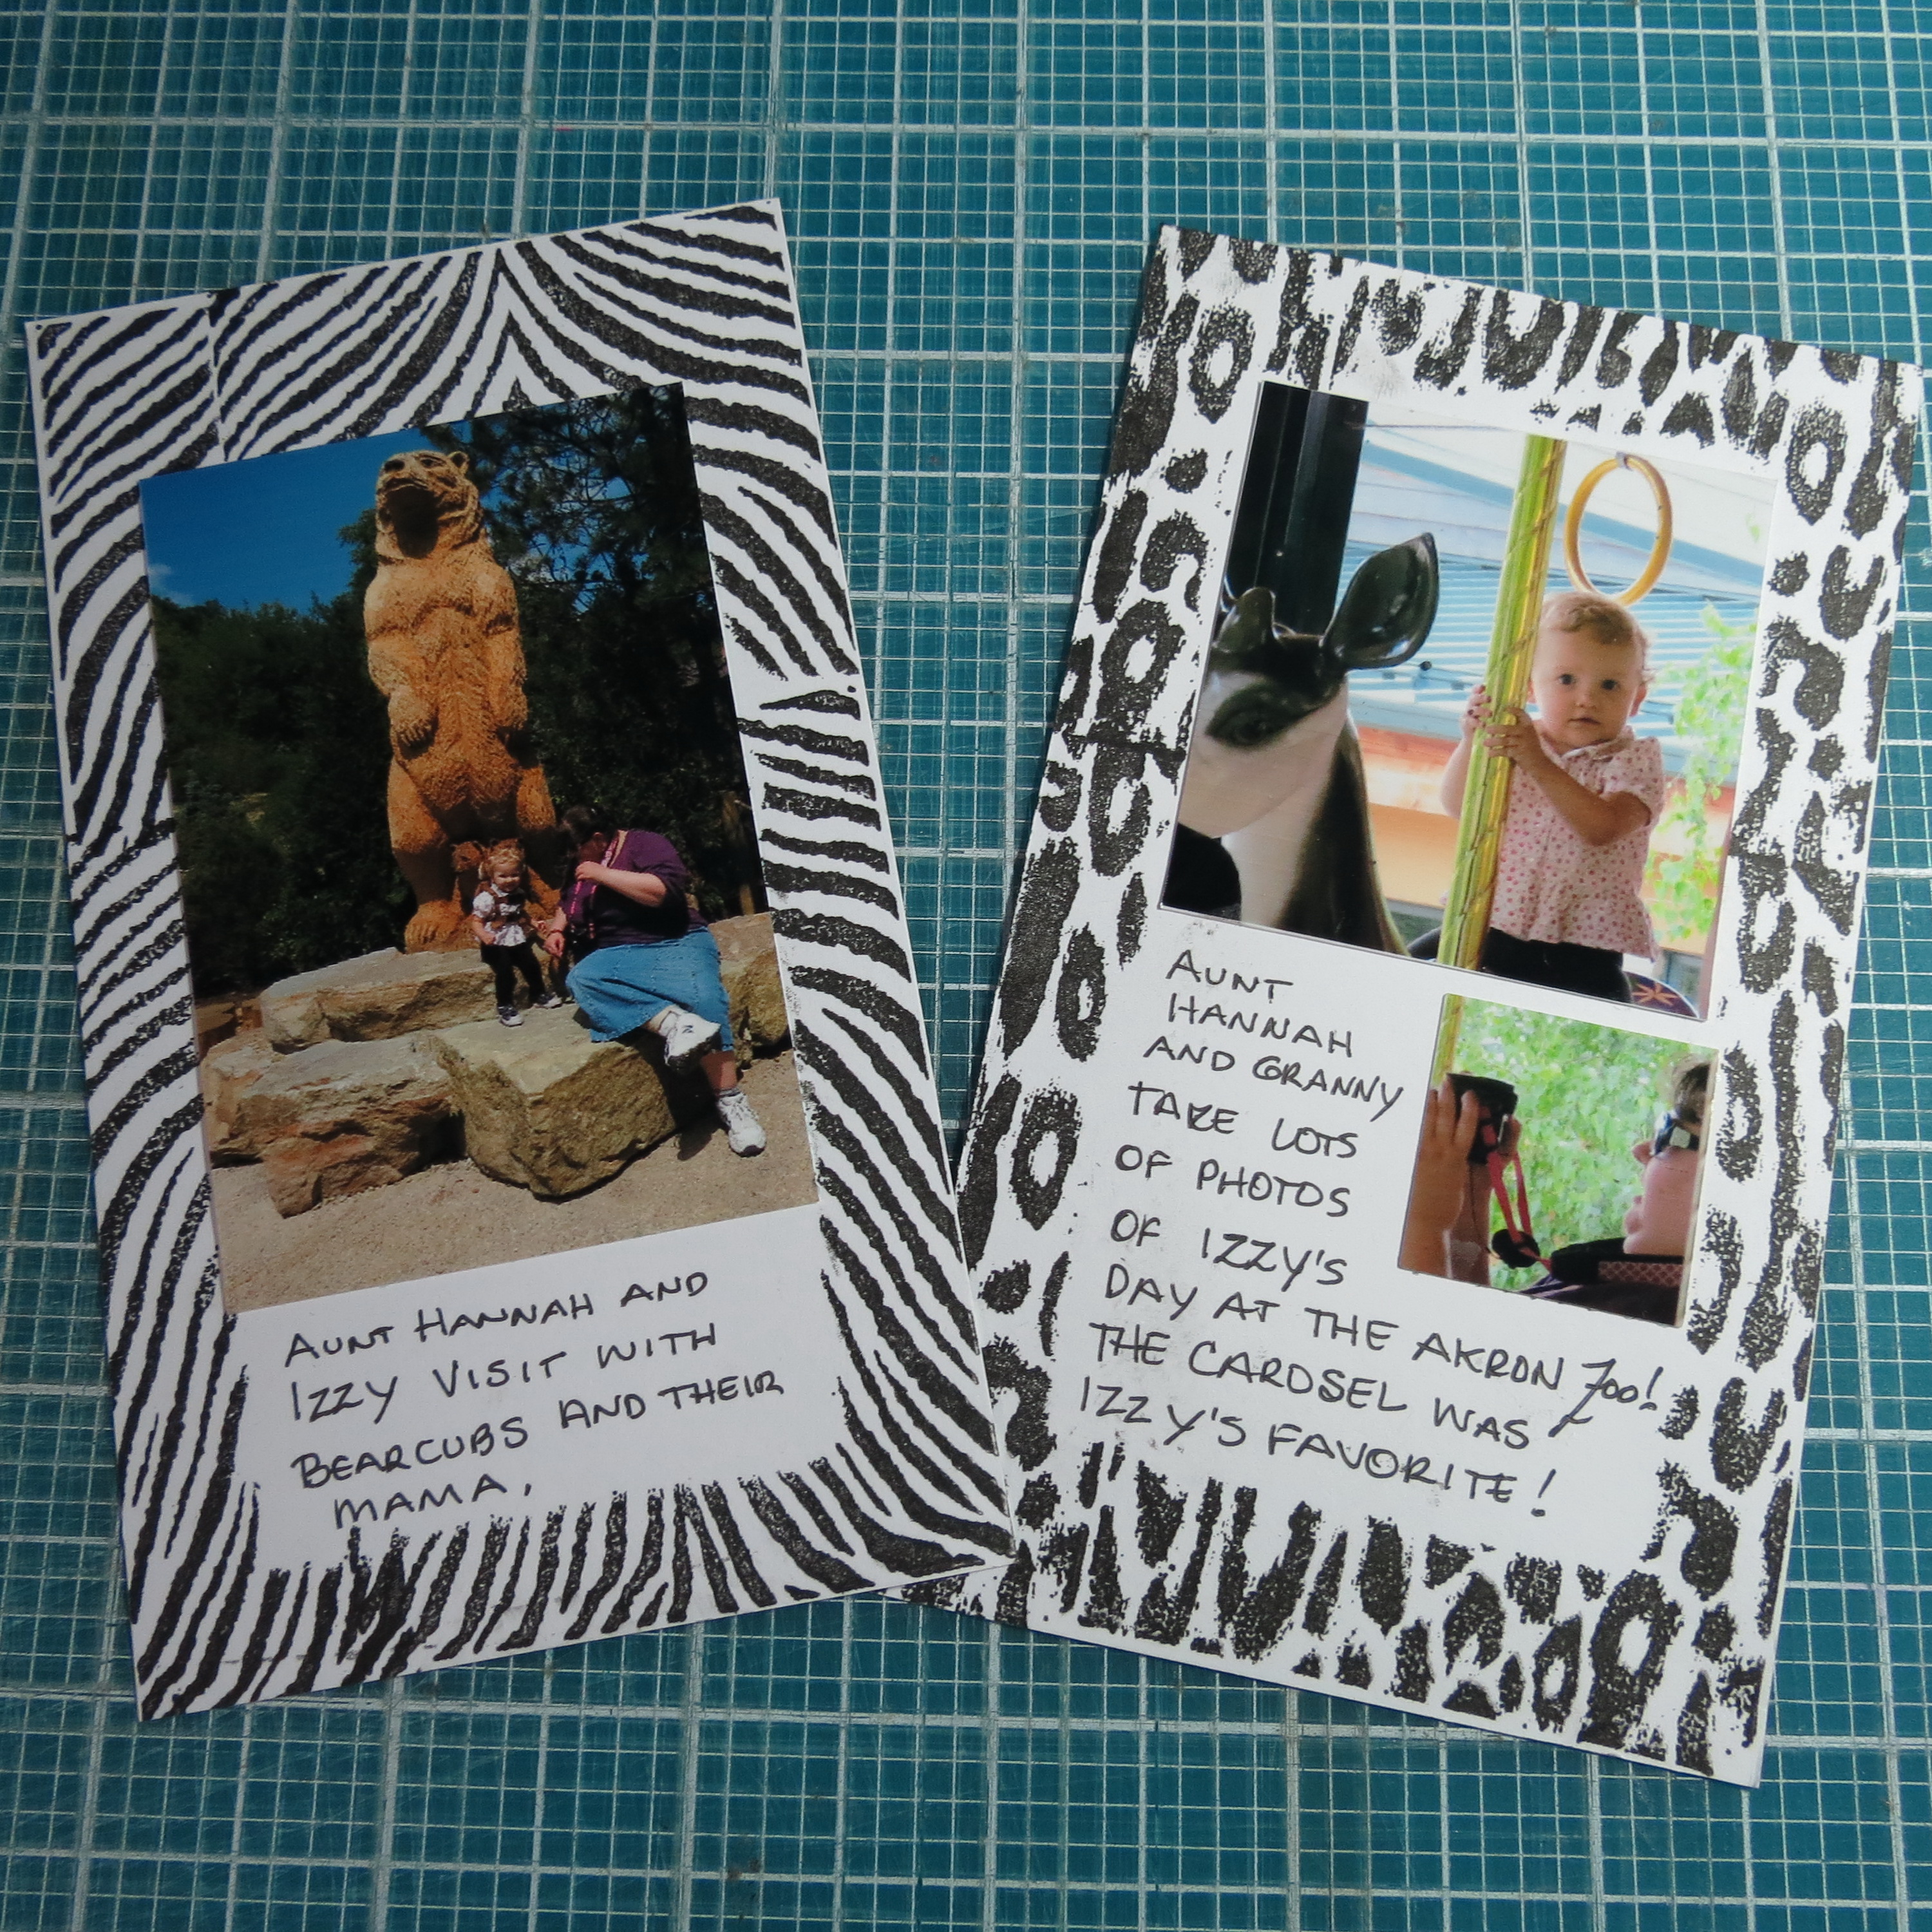
add photos and journaling as you chose.
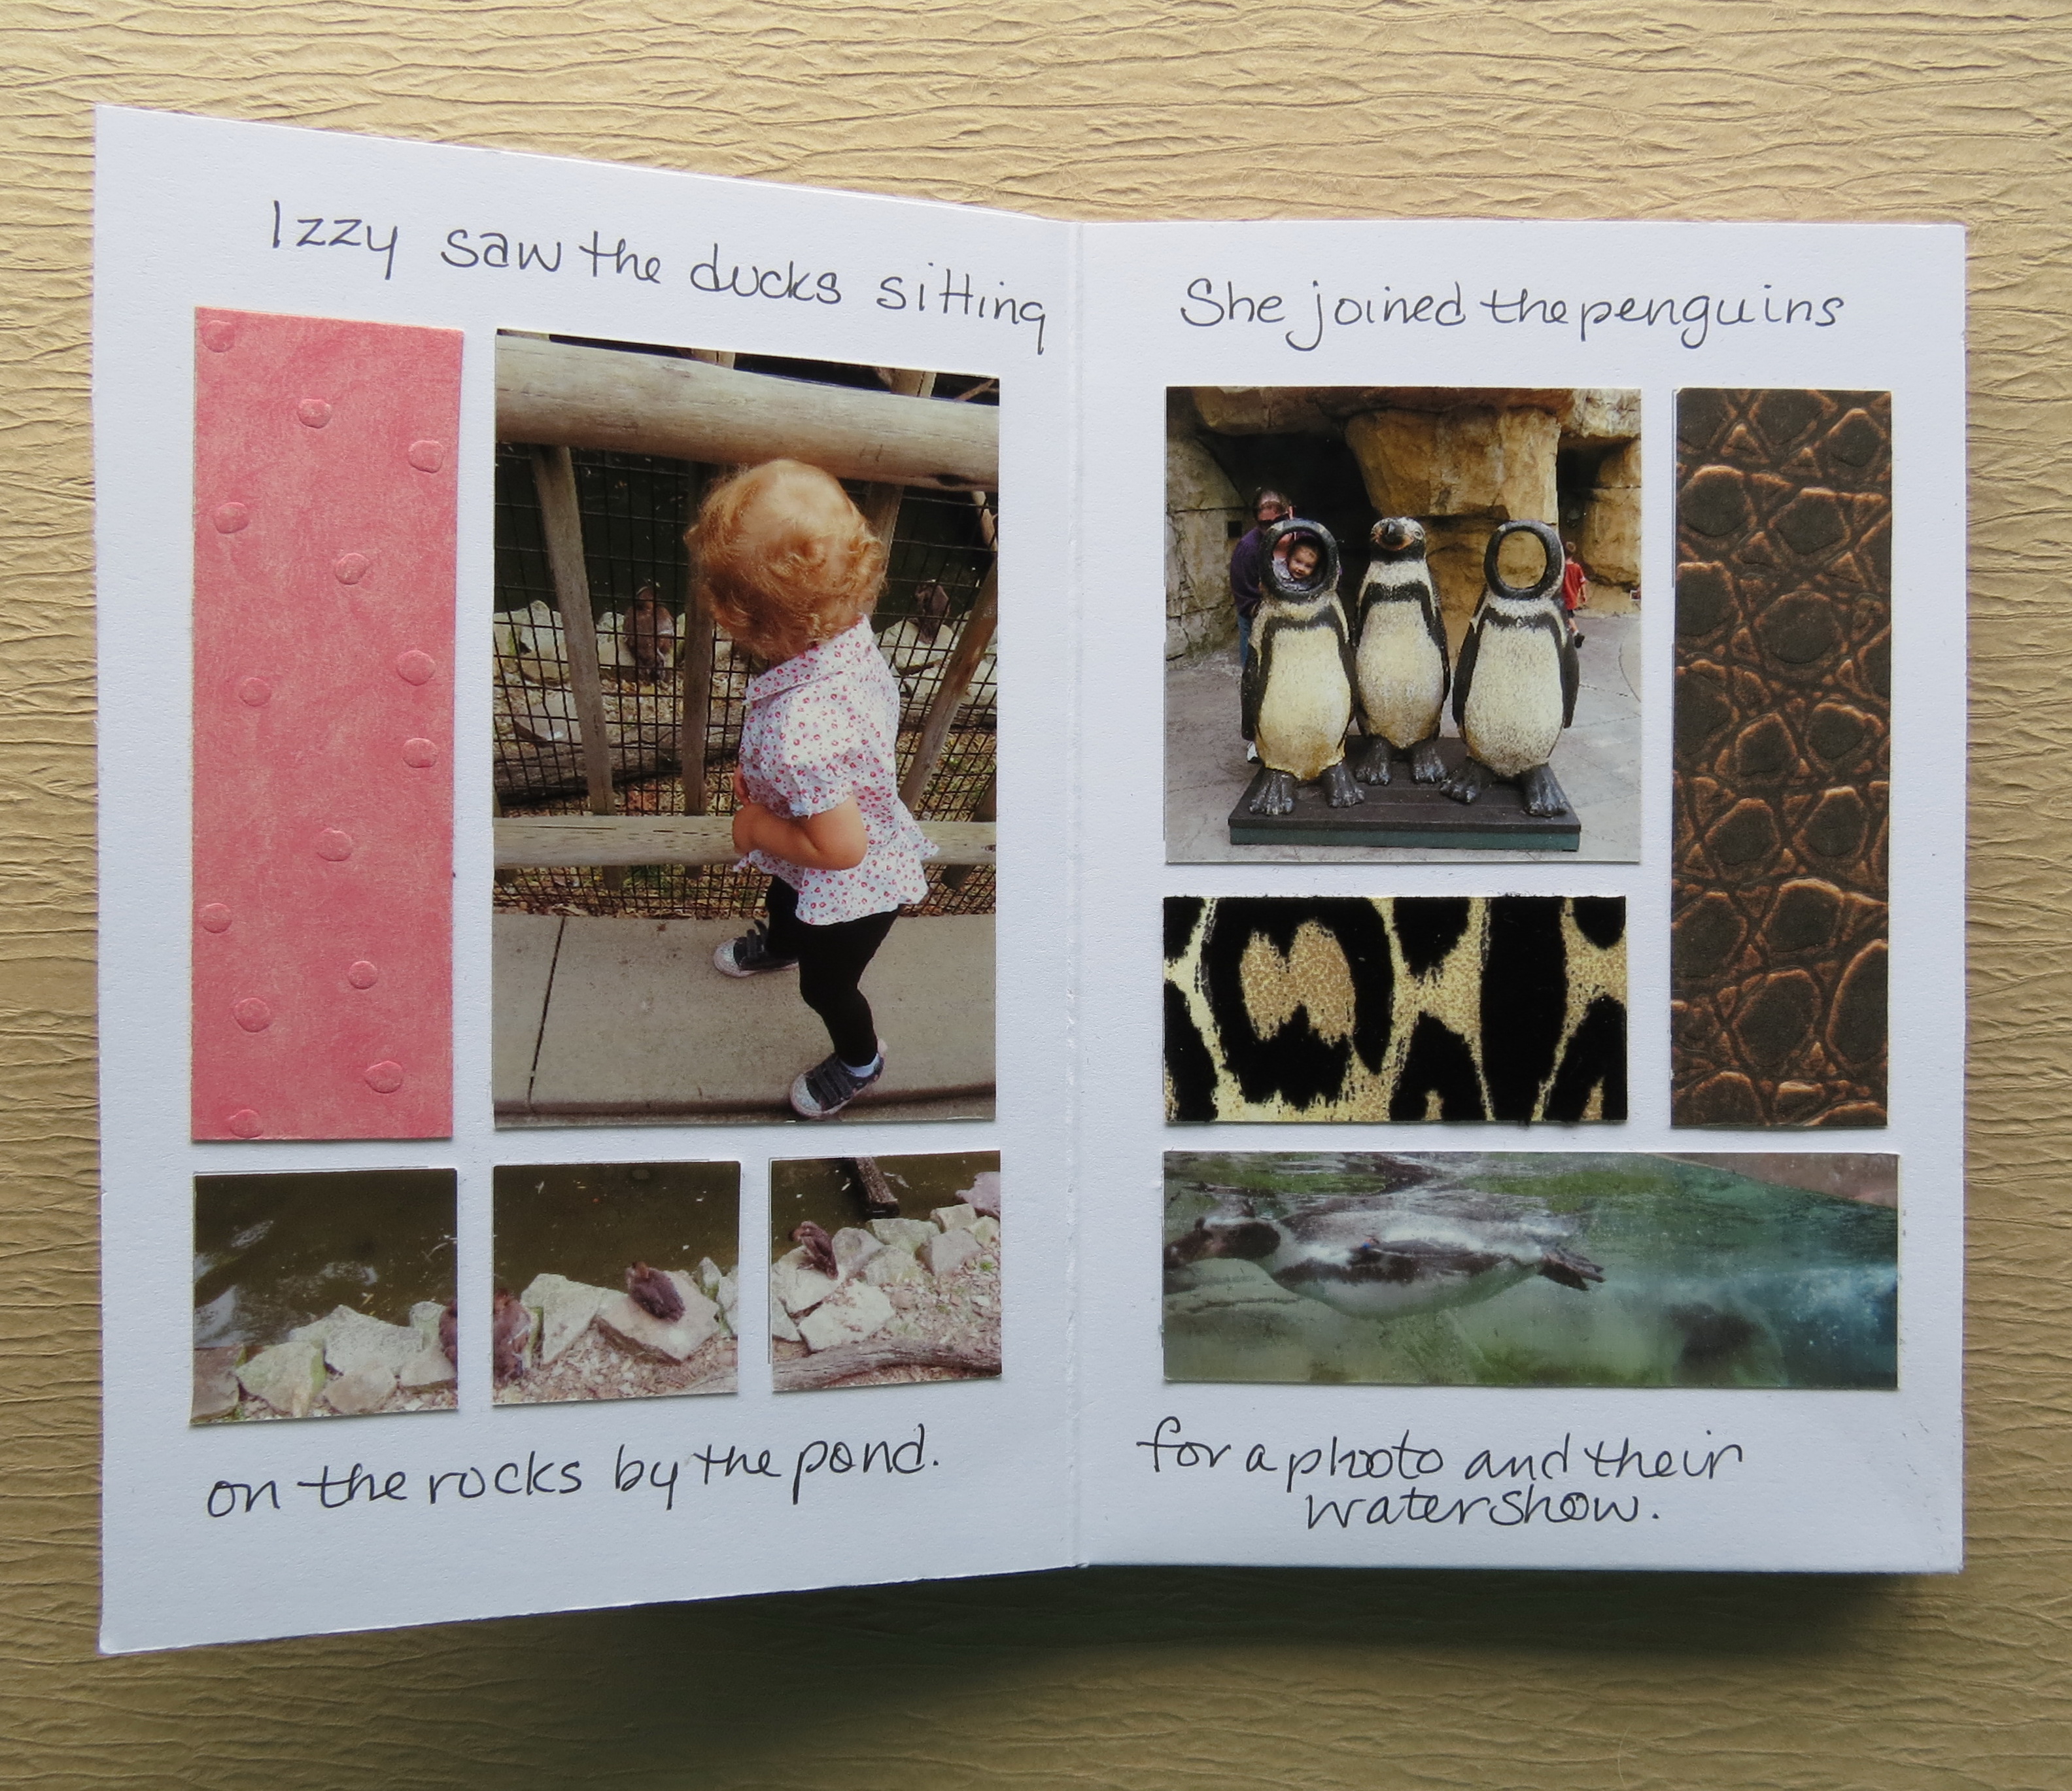
• The top and bottom borders of each page are a perfect spot for adding text if you are making it a story book.
The patterned paper I’ve used is also textured and flocked that will also bring a touch and feel element to the mini album. Izzy’s memory of the outing last year may be faded, but the photos had rekindled an eagerness to return…I’m afraid we’ll have no peace until we take her again!!
There are so many events we scrap for ourselves and maybe even for our kids to appreciate and enjoy…someday…but this little RTC Toddler Mini Album is one way to get them interested in things they have done and to build those memories into their minds and hearts. Let’s try to help them remember some of their fun times as little ones for a lifetime.
Thanks for joining us, I hope you found a spark of inspiration and have an idea of how to make it your own. If you do, remember we like to see what you do! We’ve got a wonderful sharing spot on Journella.com and we LOVE to have pages and projects with our Grid papers displayed to inspire others. Won’t you make some extra time and stop over and share what you’ve been doing???
For other tutorials on making a mini album with RTC paper you can visit the instructions here and here.
Hope to see you soon!
Andrea Fisher
hidden photo/journal tag