
Tips for the Quarter Pie Die
Have you tried the Quarter Pie die yet? If you have, you’ll know that it takes some thought and planning to get it just right. I’m of the opinion that not every photo is a candidate to be used in this design. So how do we go about picking and cropping the photos to make this work?
I’ll admit I haven’t used this die with a lot of photos in each pie section. I have created a bold embellishment to mimic peacock feathers, I’ve used bold primary colors and chalkboard panels for a back to school page and I designed a page to resemble a View-Master for a class I was teaching.
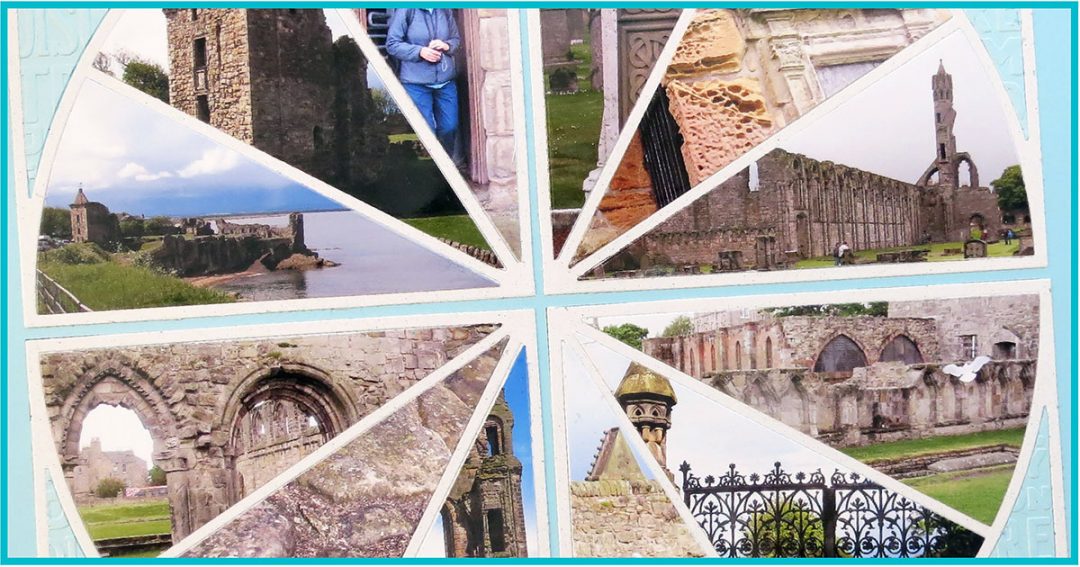
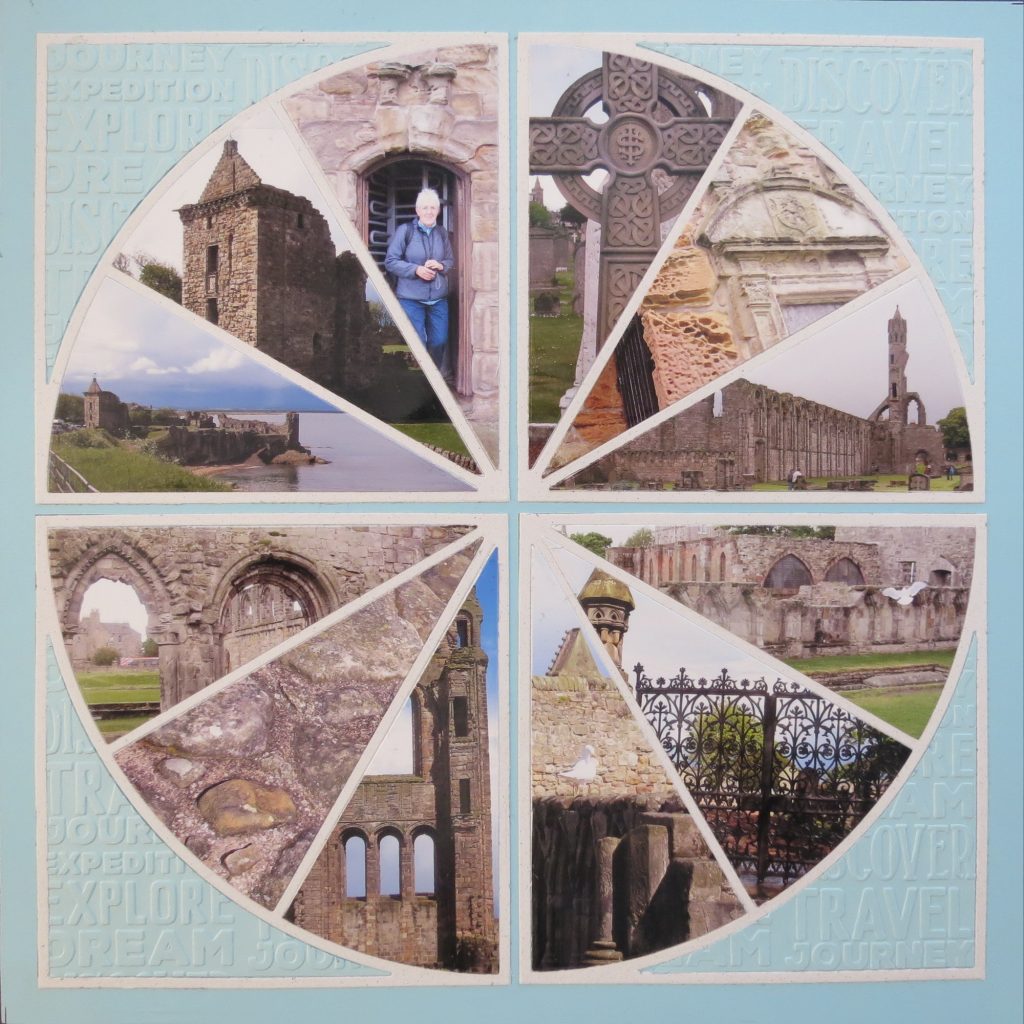
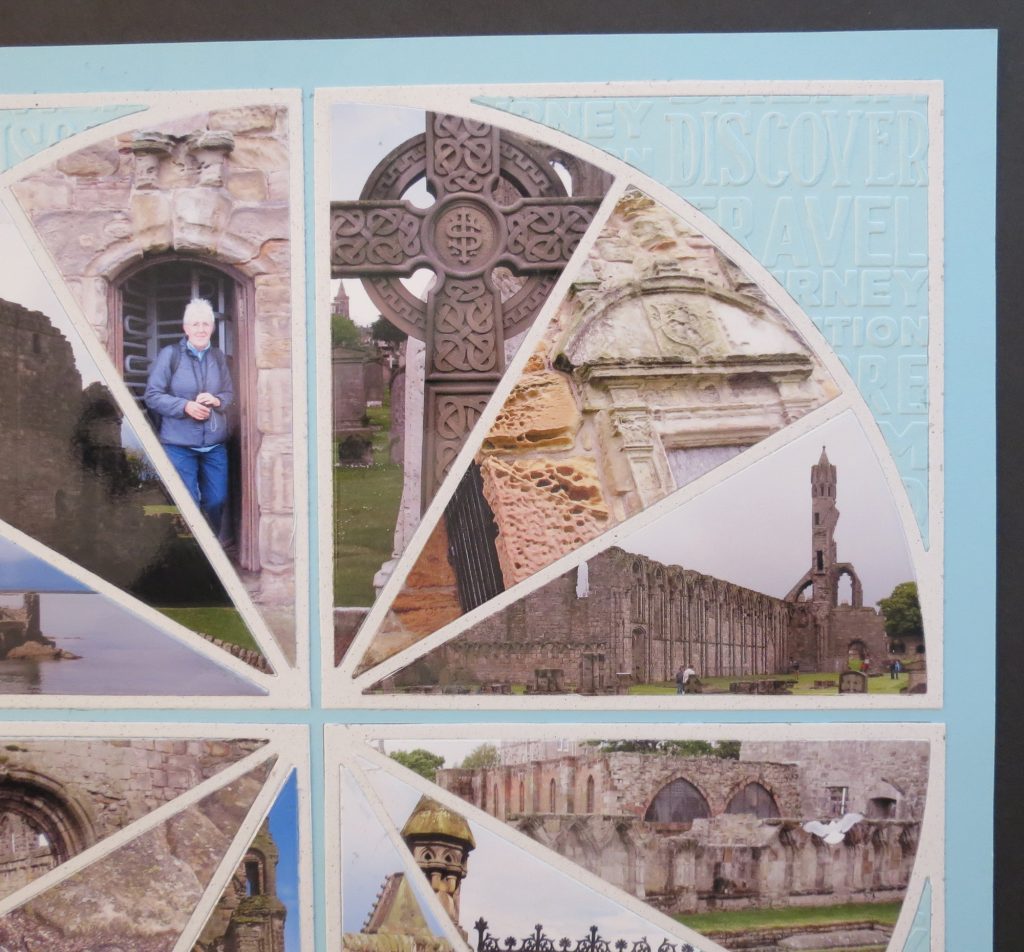
Today’s layout features photos from St. Andrews, Scotland and I’d like to share a few tips I’ve learned along the way.
Overall, I’m using three rules for composing this layout.
- Orientation
- Photo Size
- Variation
ORIENTATION
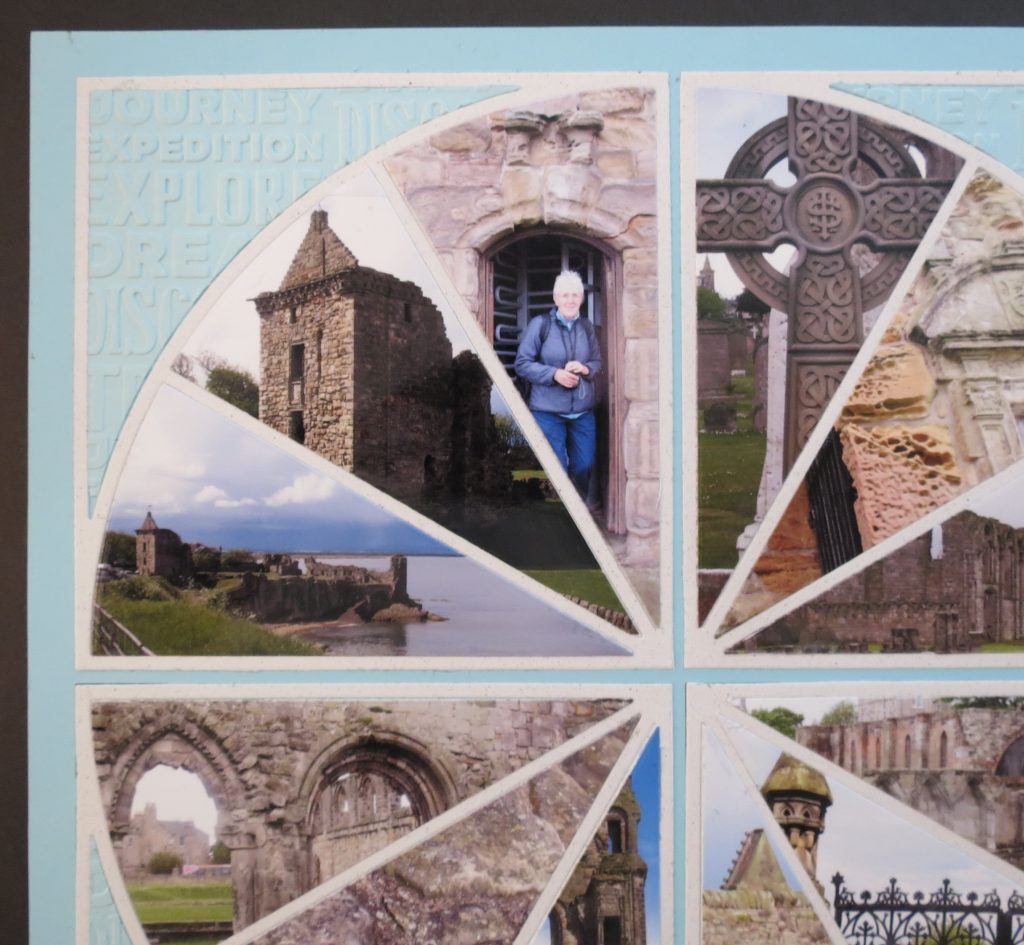
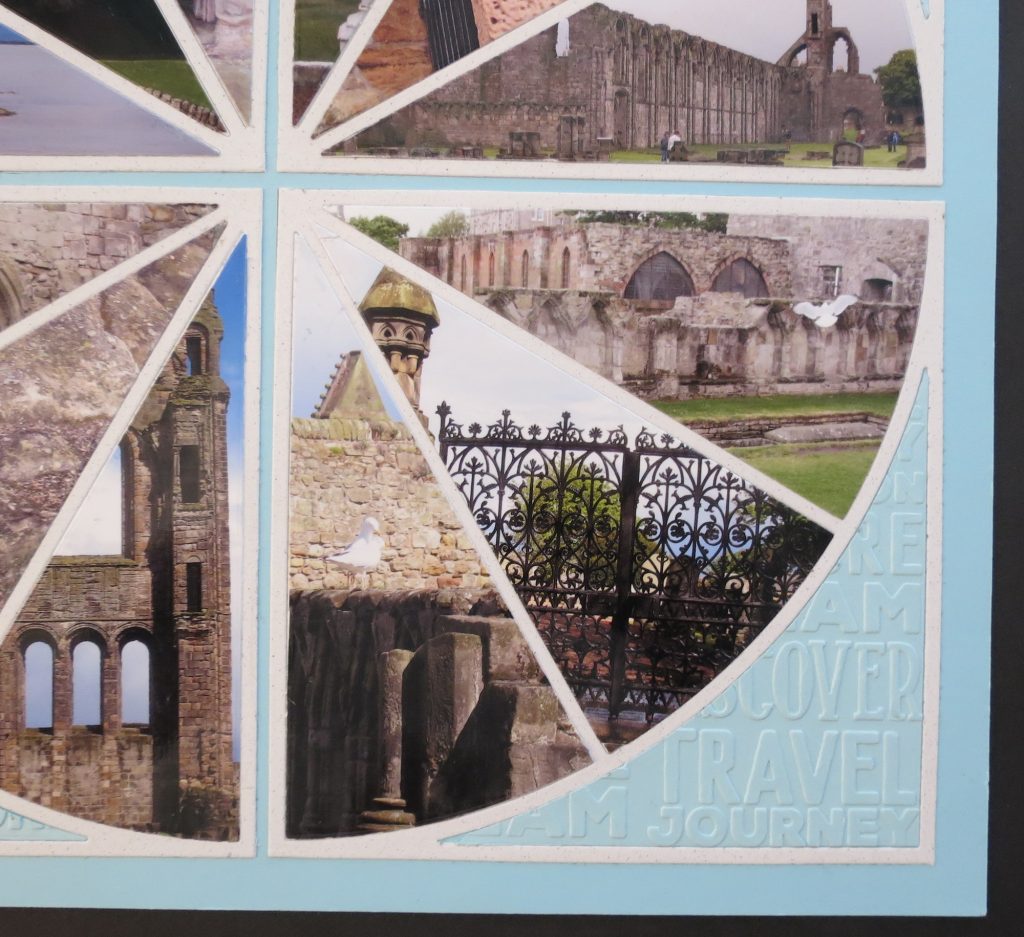
I don’t want to crane my neck and twist the page to see all the photos. I want to see at a glance, straight on the photos I have chosen. I plan the page to have a top and bottom. What do I mean by that? Well, the photos on the top half will feature the photo focal point in the wider top portion and then the bottom half of the page photos will feature the focal point in the bottom wider section so that you see it as you look at it directly without having to turn the page around. Everything is straight on.
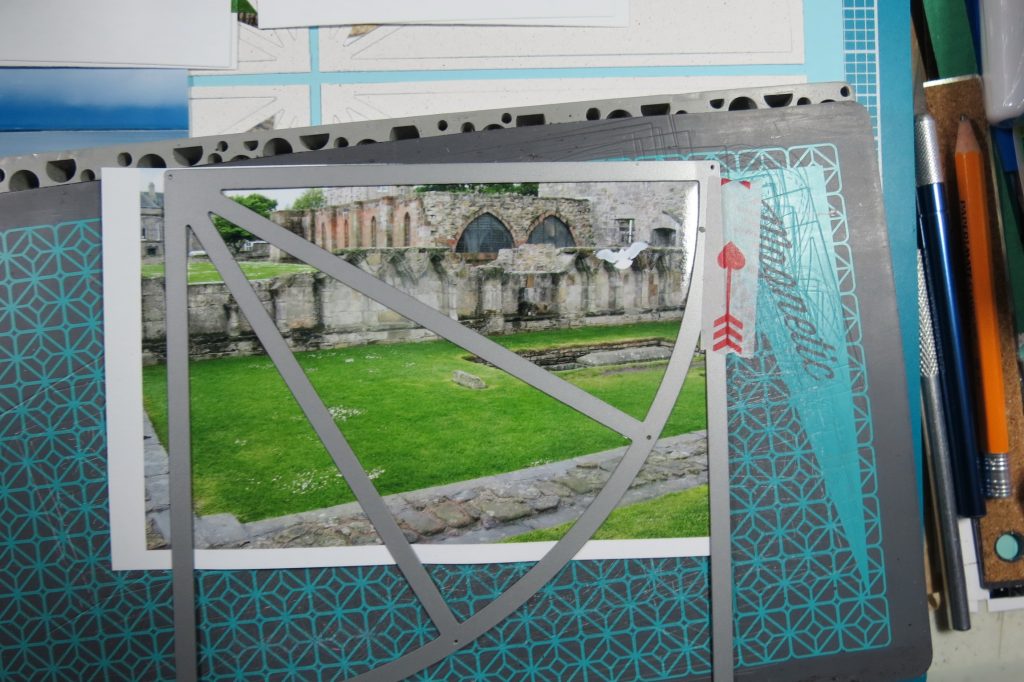
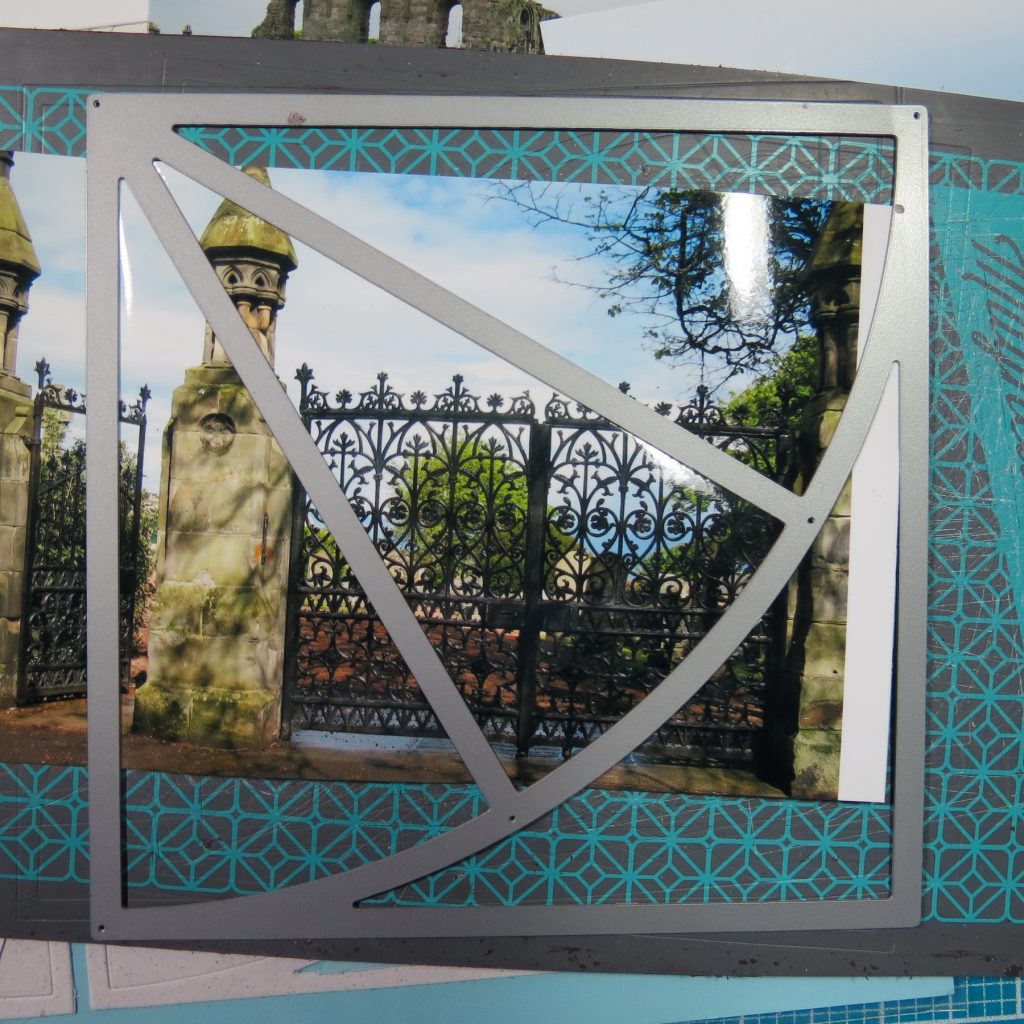
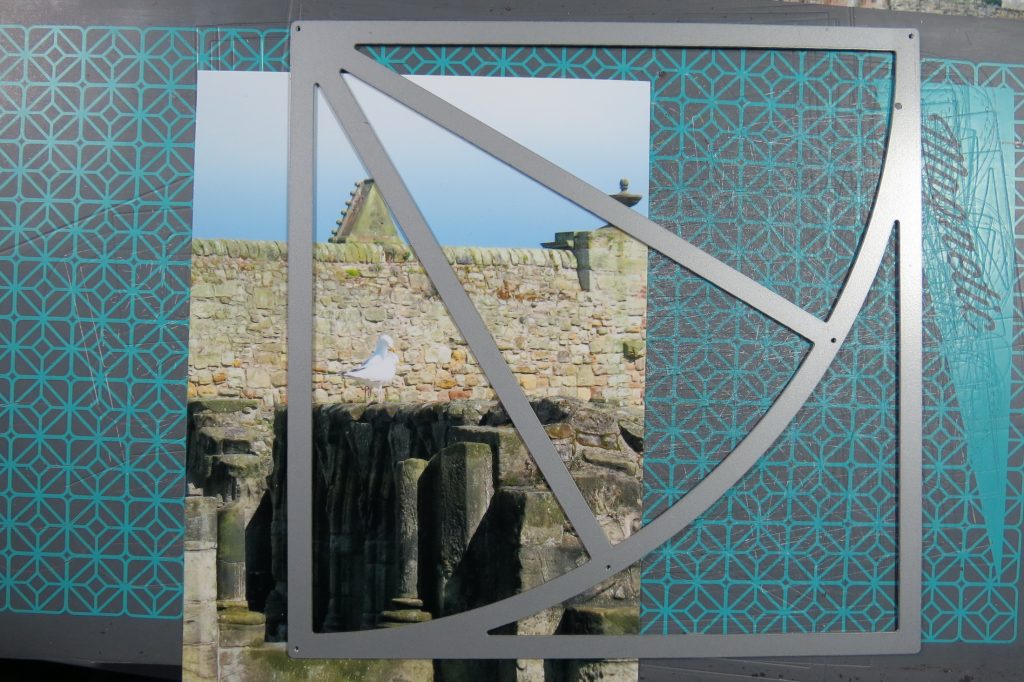
The first tip is in choosing your photos. I worked with the die itself to “frame” each photo to determine whether or not it would work and in what position. I thought it was important to keep all the photos I would use at the same angle. That means I would use the horizontal line and the vertical line to align my photos on each end of the die by keeping the die level and at right angles. This allows me to easily use a 4×6 photo in the layout with a little careful planning.
I took my grid base and used little tags to marked off the sections and the photos I was going to use. It helped me to see at a glance what photos I had and what ones I still needed assuring I had all before I began to cut them out.
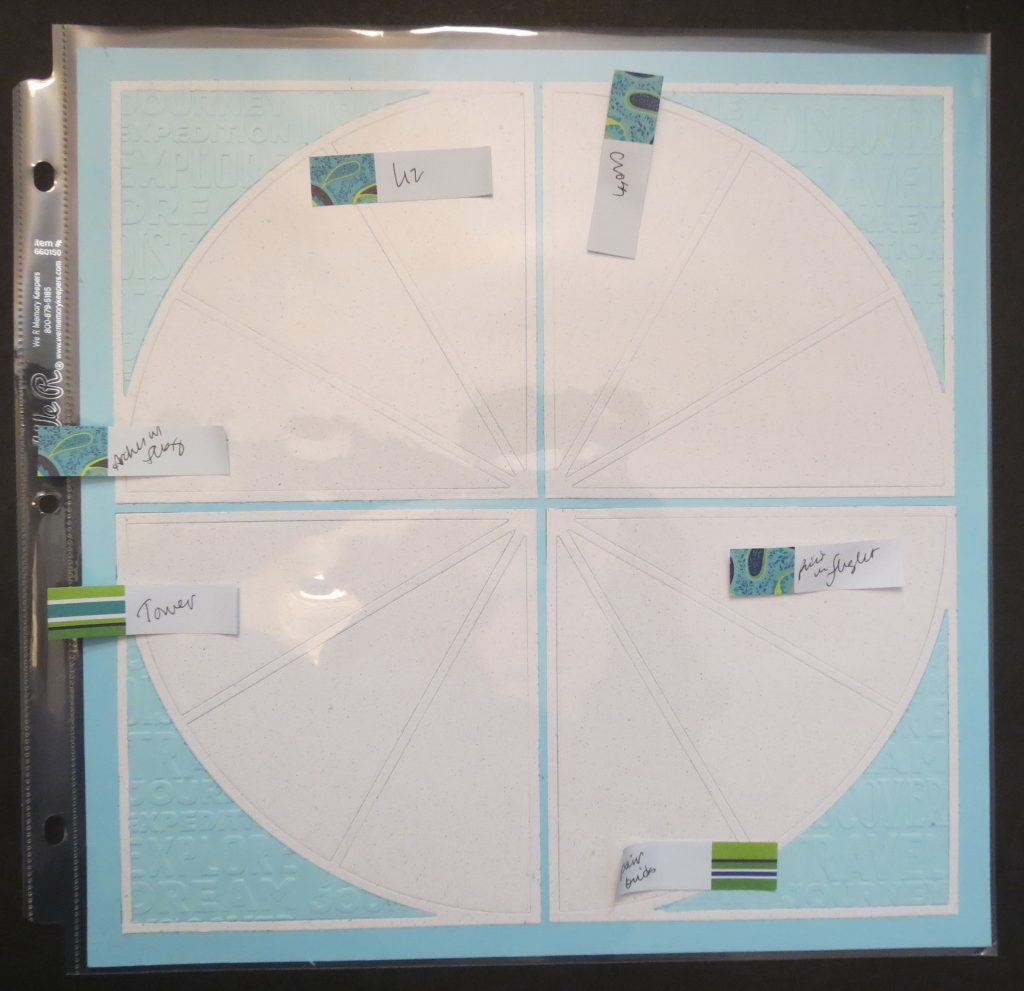
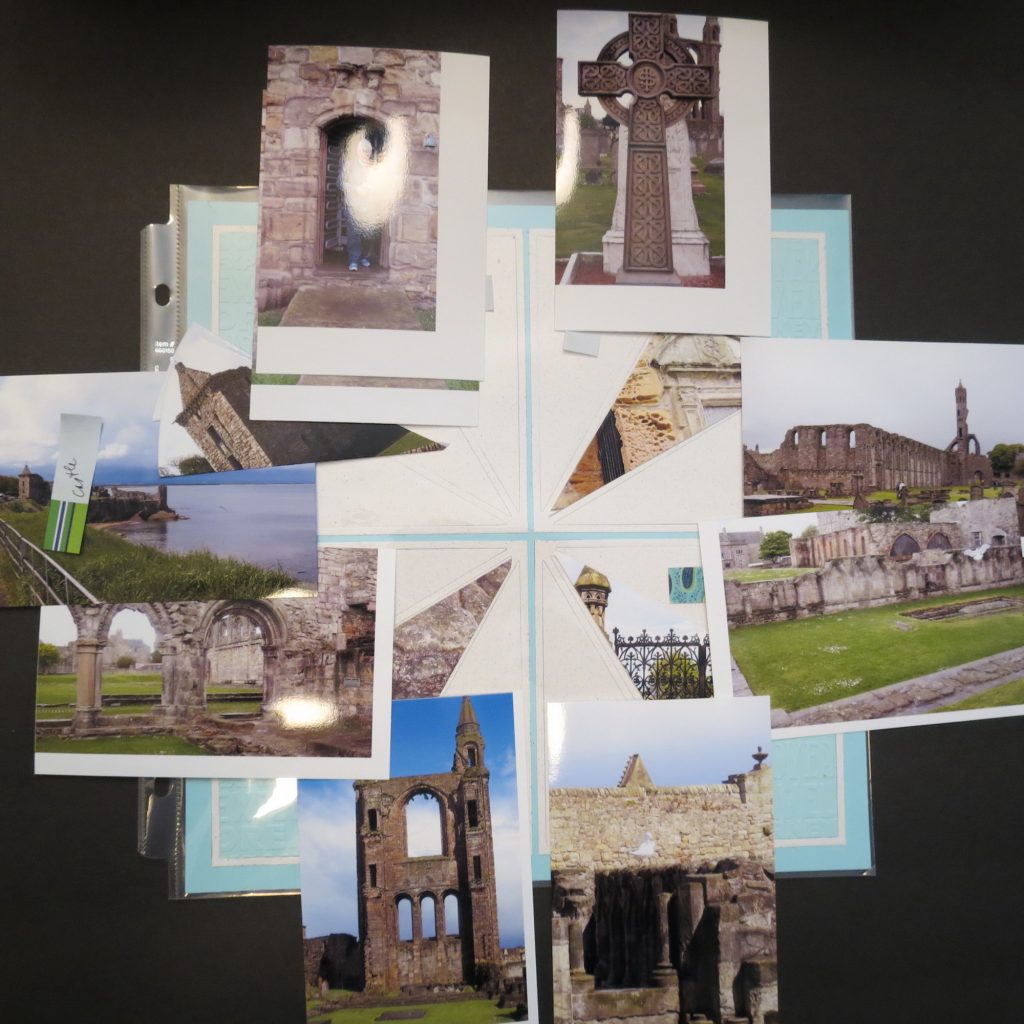
PHOTO SIZE
For working with the center photo, it’s a bit trickier to keep the angle upright (but not impossible!) using a 4”x6” photo. However, the second tip is you may even consider printing your photo on a 5”x7” print (you can adjust the borders so you aren’t printing a full 5”x7”, but just enough of what you need) without a lot of effort and it’s so much easier to get exactly what you want.
NOTE: I haven’t used the Piece of Pie die for this project. I find it difficult to keep the correct angle I want to achieve. It’s perfect for cardstock insets or detailed photos where the angle isn’t important. Using the Quarter Pie lets me achieve my goal.
VARIATION
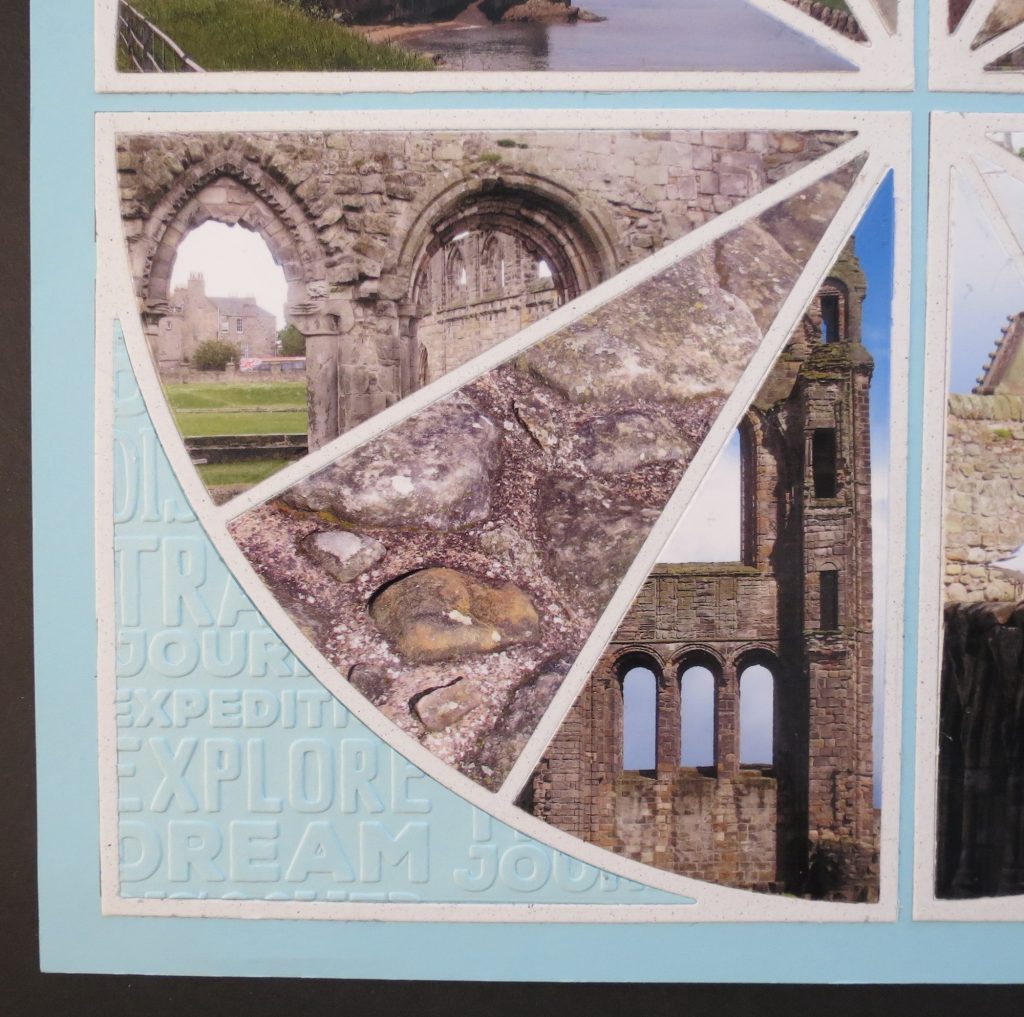
The third tip is to consider using a filler photo in the center position of the Pie Pattern. These photos can easily disguise their direction and let you play with the position and successfully use a 4”x6” photo. I’ve included stone paths and brickwork from the side of a wall to cut and fill a couple of these center spots.
The photos I’m using are the ruins of the castle and cathedral and that was a lot of stony surfaces. While we there the weather went from a pending storm, to rain to a beautiful sunny day and back to another storm. At each time the stone took on different colors depending on the conditions.
Being able to include some of the skies and grassy areas added a little color breaking up all the stonework of the buildings.
It is easy to crowd things in using this die, so the fourth tip is to choose several views, close by to something further in the distance. I also chose photos with people, birds, and ironwork to add a few different focal points and textures. These variations help create an interesting page.
FINISHING TIPS
Consider the color of your grid and how it will compliment your photos. I chose to use a lighter background Mosaic Moments Grid Paper in Sky so that the page wouldn’t feel too heavy or closed in.
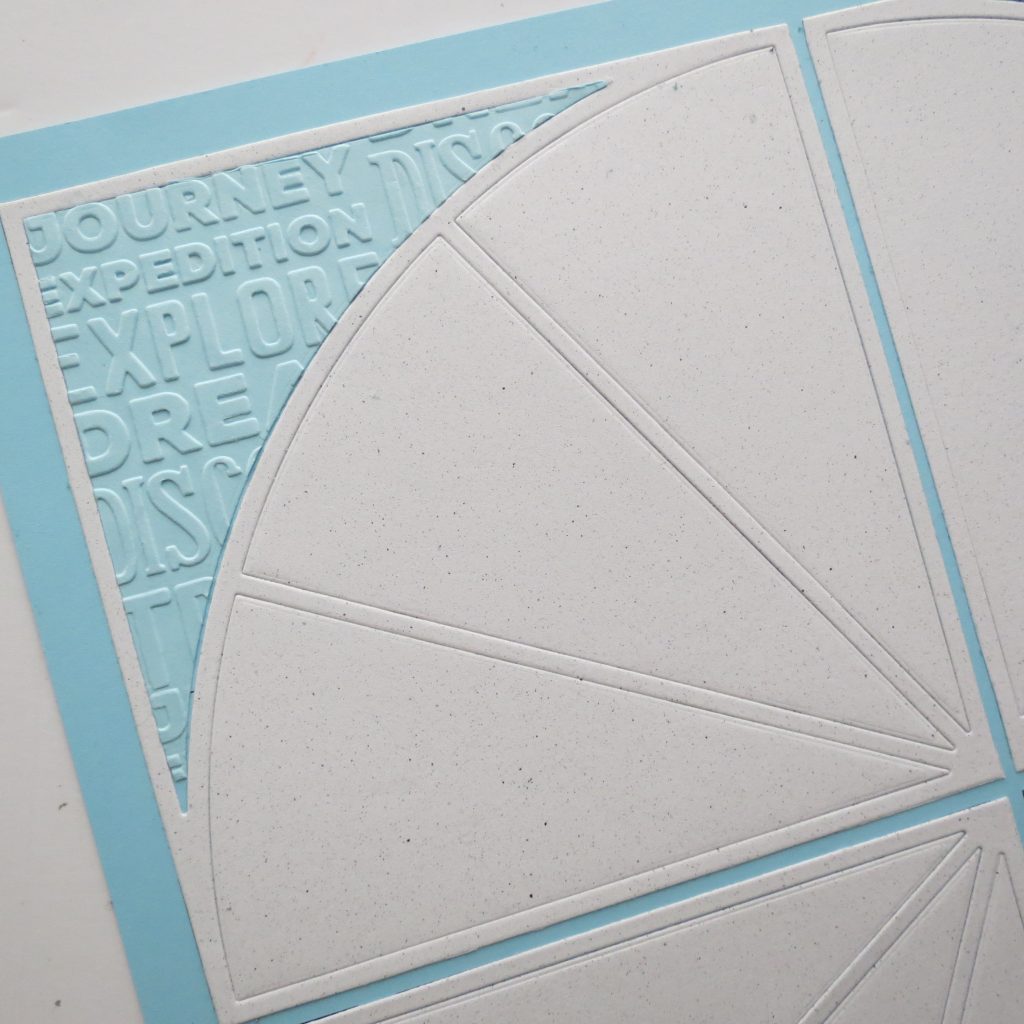
I also added texture to the corner sections of the Quarter Pie Die with an embossing folder with travel words. It’s a good match for this vacation page of the day my cousin Liz and I explored St. Andrews.
Supplies

- Mosaic Moments 12×12 Grid Paper – Sky
- Mosaic Moments Quarter Pie Die
- Embossing Folder – Echo Park
Other Quarter Pie Die Layouts:

- Peacock Die
- Seasonal View and Izzy and Emmi
- View-Master layout
Andrea Fisher