
Introducing new ways to use new dies is often a challenge so I’m going to show three techniques to create exciting scrapbook layouts with the new Step Set Dies.


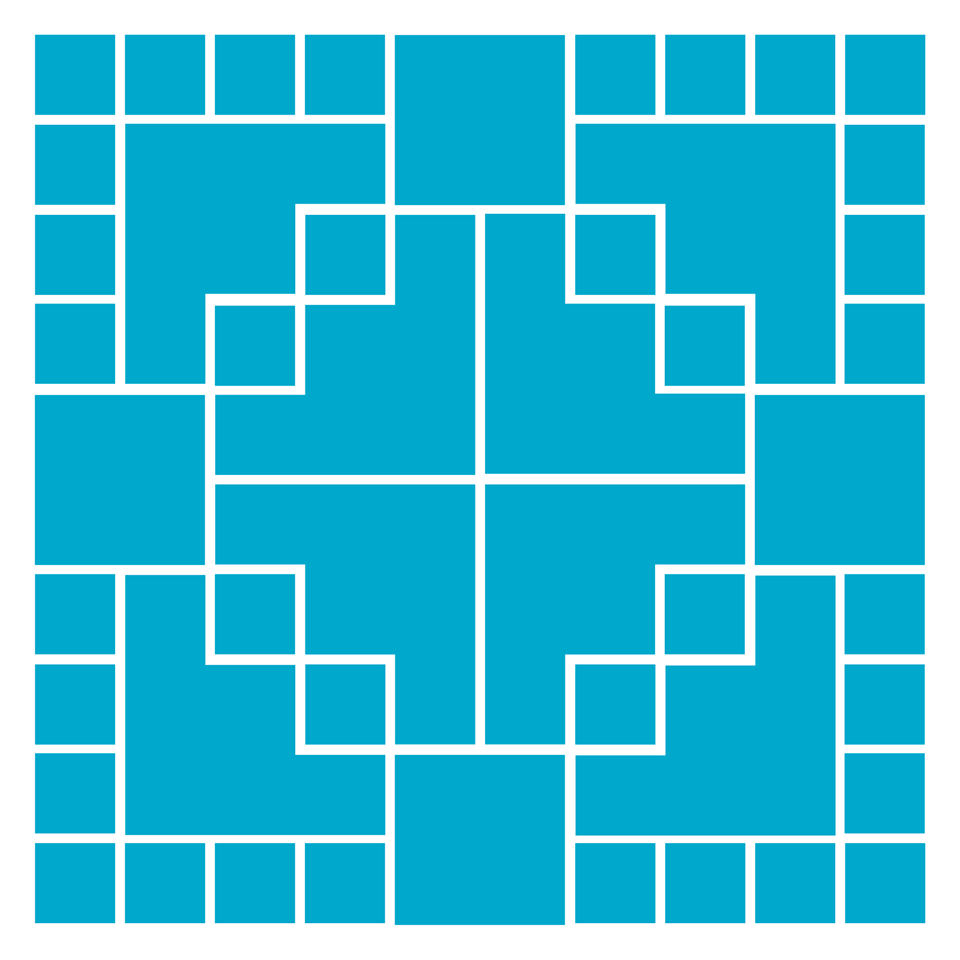
This set consists of two step dies and 4 – 1” square dies. One of the step dies is three blocks wide by three blocks high while the second die is four blocks wide and four blocks high. I’m going to limit myself to the three step die to fit this pattern.
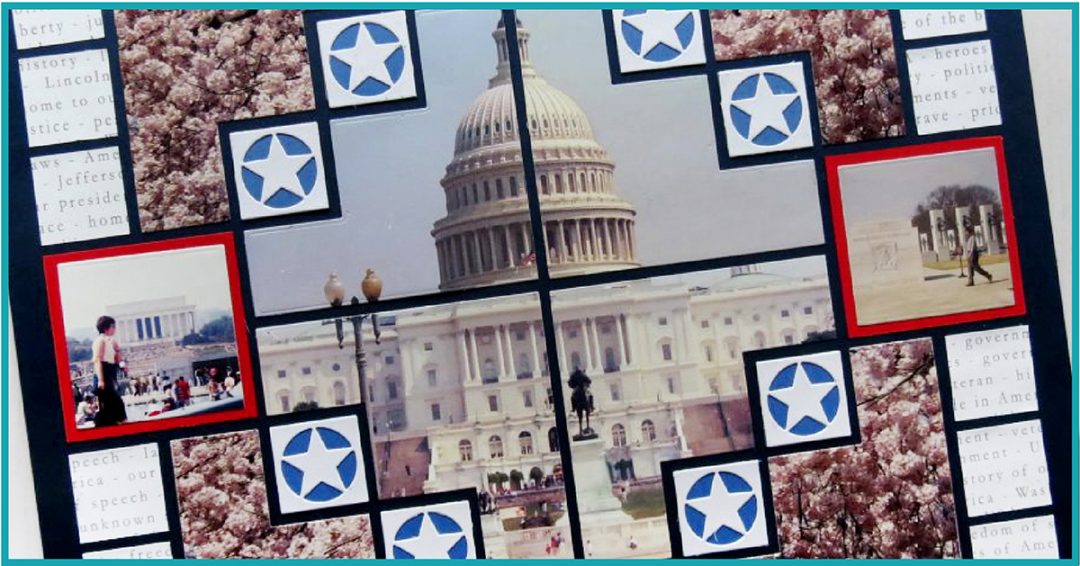
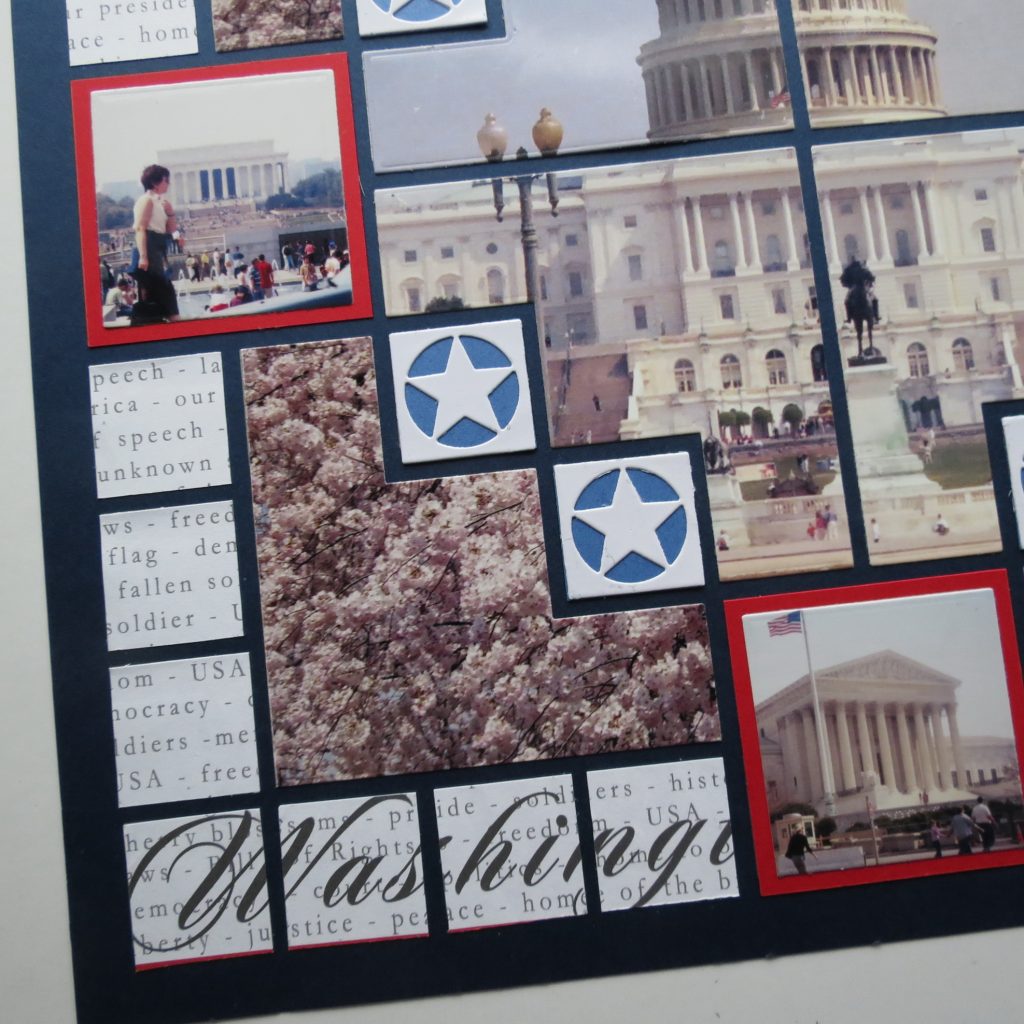
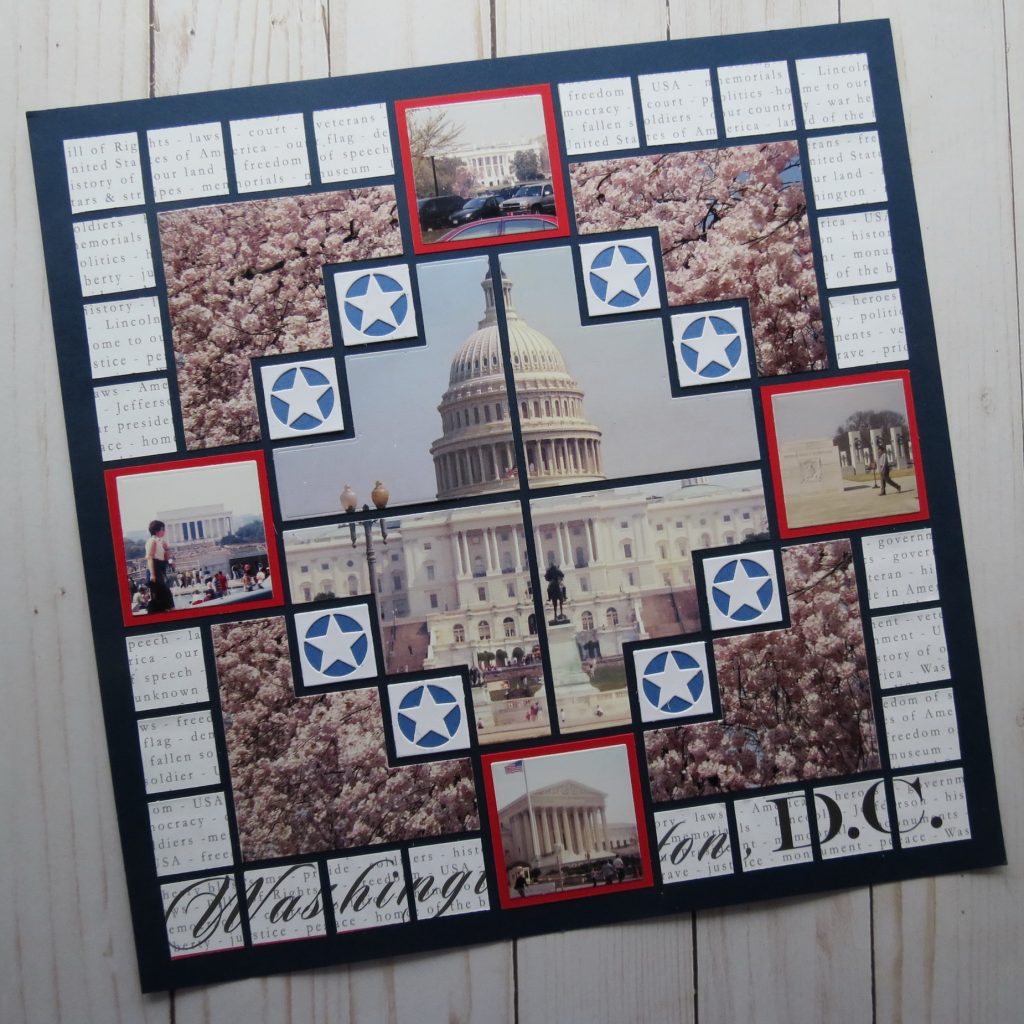
For this Memorial Day weekend, I thought I’d choose a red, white, and blue color scheme with a Capital City page theme. I’ve chosen one photo to feature prominently on the page, four smaller photos of other important DC buildings and memorials and because it was the Cherry Blossom weekend I’ve included some great blossoms to frame the central photo. Everything is placed on a Mosaic Moments 12×12 Navy Grid Paper.

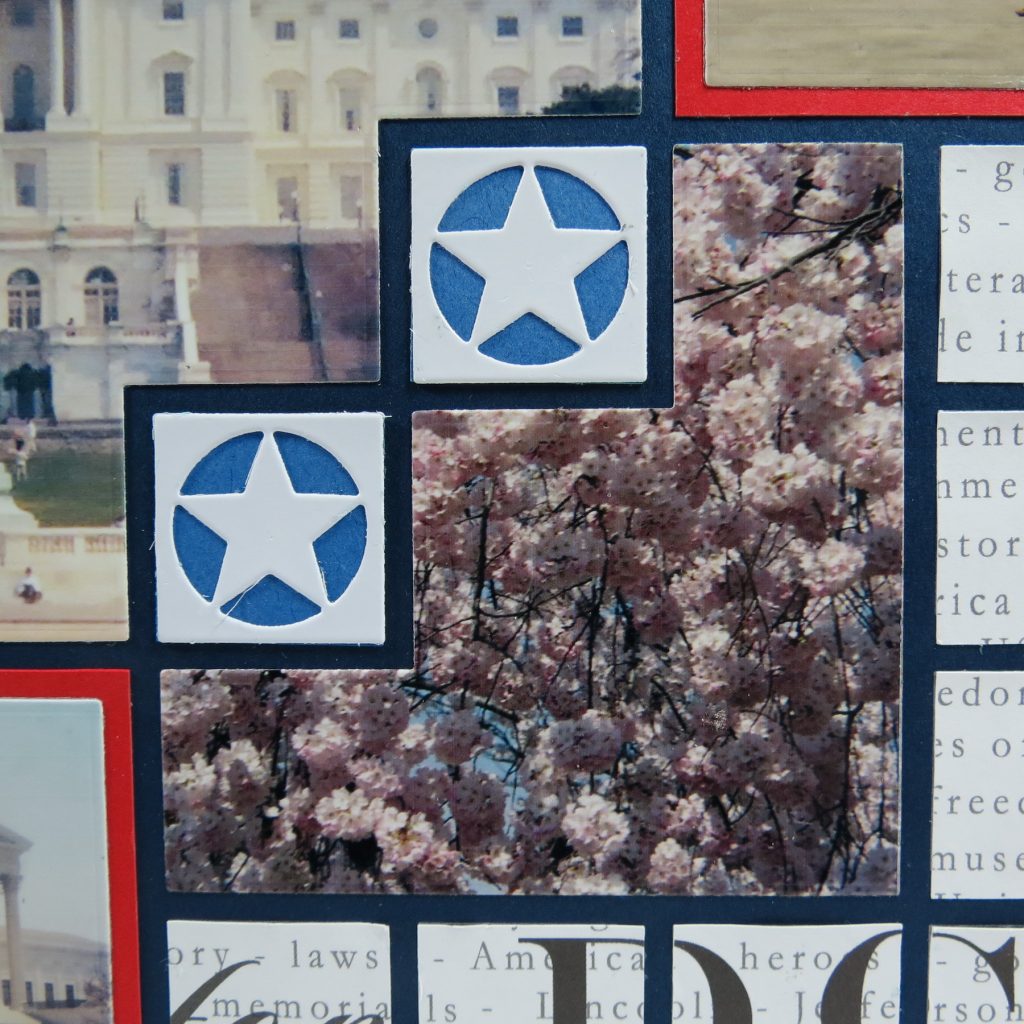
Let’s begin with that Blossom Technique.
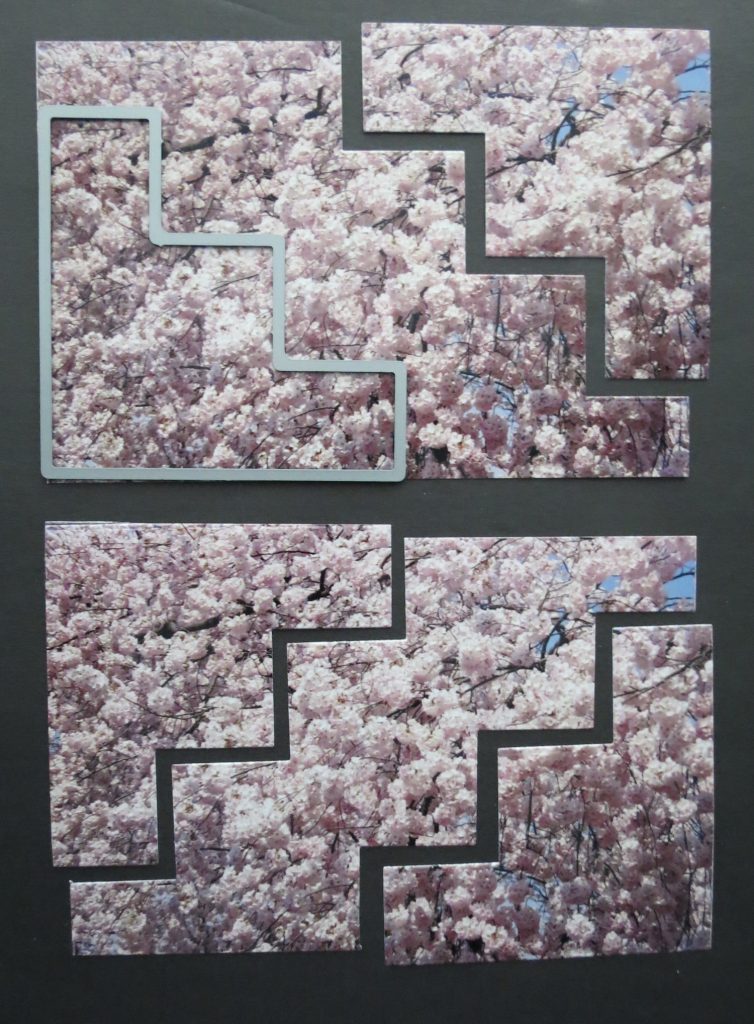
1. For this I printed the same photo out twice. Then cut two of the three steps die from each. When cutting I was careful to place the cut from the top left of the photo to the top left of the grid space. And the lower right to the lower right grid spot. On the second photo I cut from the top right and bottom left and placed them in the corresponding spots on the grid. This leaves me with enough photo to cut 1” squares to use in another DC layout if I want.
Large Central Photo Techniques

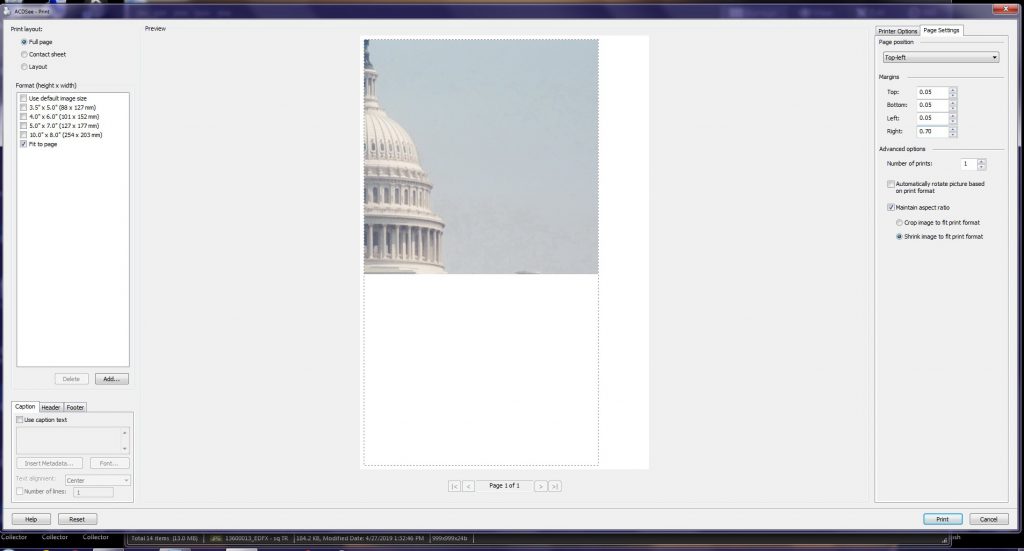
2. Perhaps the quickest and easiest way to get one large photo to cut to fit the central section of the grid is to print it out on an 8.5” x 11” photo paper. To do this you will need to first crop your photo to a square.
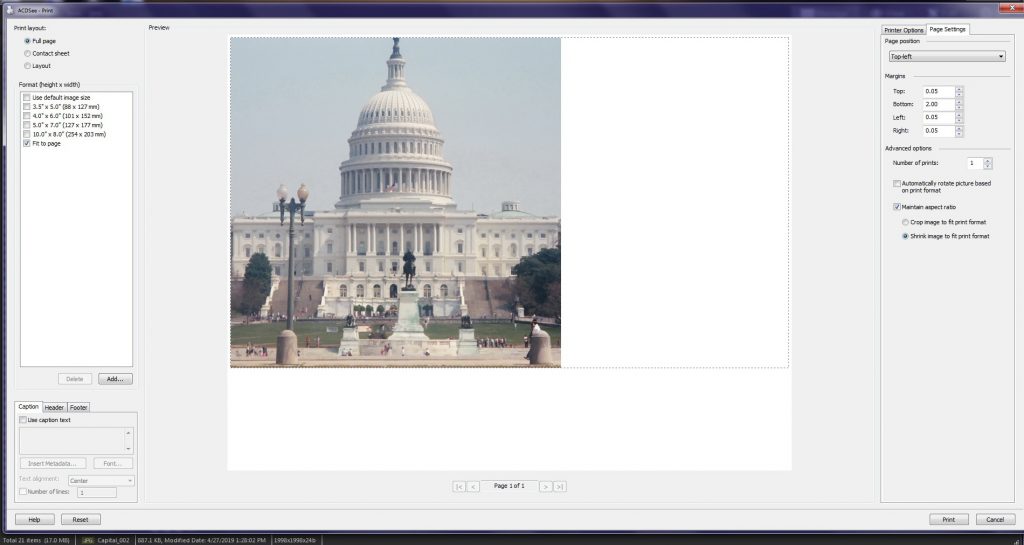
Then when you go to print it you will need to set your borders to be able to print it at 6.5”. Once printed you can divide it into four sections and then use your die on the inside cut edge to cut it to fit the pattern shape.
3. Then for the third technique, there is a second way to accomplish this large center photo and it’s how I did it. It is easy to do but will take a little more time to accomplish.
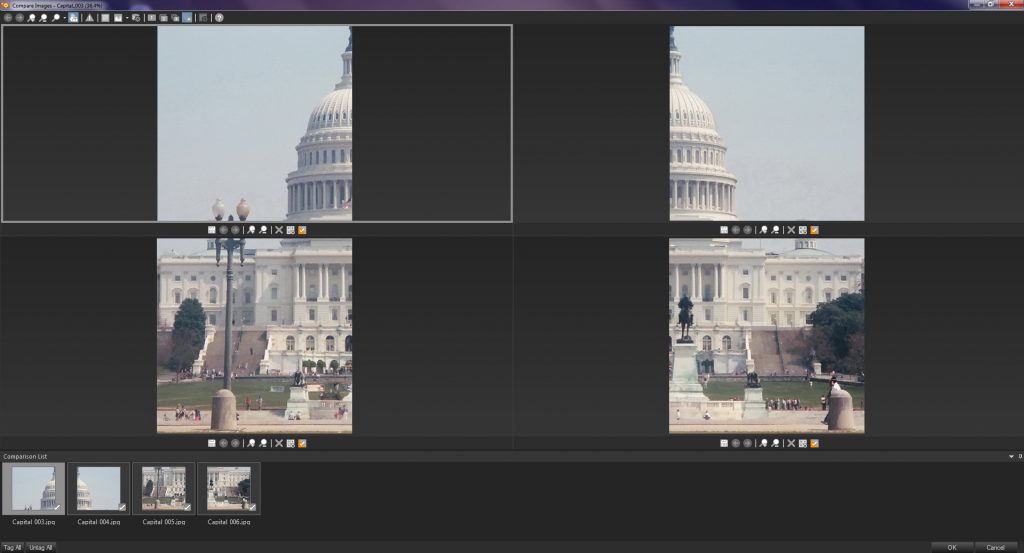
After cropping my photo into a square, I then cropped the square four separate times to get each of the portions I needed.
Print with a margin that will give you a square that is 3.25” and then crop placing the die along what will be the center lines of the arrangement.
The small 2×2’s are printed 4 to the 4×6 photo paper with the contact sheet format for 2” squares. Once printed, I took the layering die for the 2×2 from Die Set AL and then mounted the photos on a red cardstock mat.
To fill in the 1” squares on the diagonal I thought our small star 1” squares from the Star Die Set would work nicely. I save the extra photo paper that I don’t print on when I crop a photo to print, so I thought it might be nice to have that glossy surface for the stars and placed a royal blue base behind the stars.
For the outside border I have chosen a print paper of DC words to fill the 1” squares. Along the bottom edge of the paper the words Washington DC are written in script. I decided I wanted to see how that would work on the bottom, even though it would be split up on either side of the bottom 2×2 photo. In the end I liked how it looked plus, it gave me a title too!
Now it’s your turn to create. So have some fun and try these techniques out with the new Step Set dies.
Andrea Fisher