
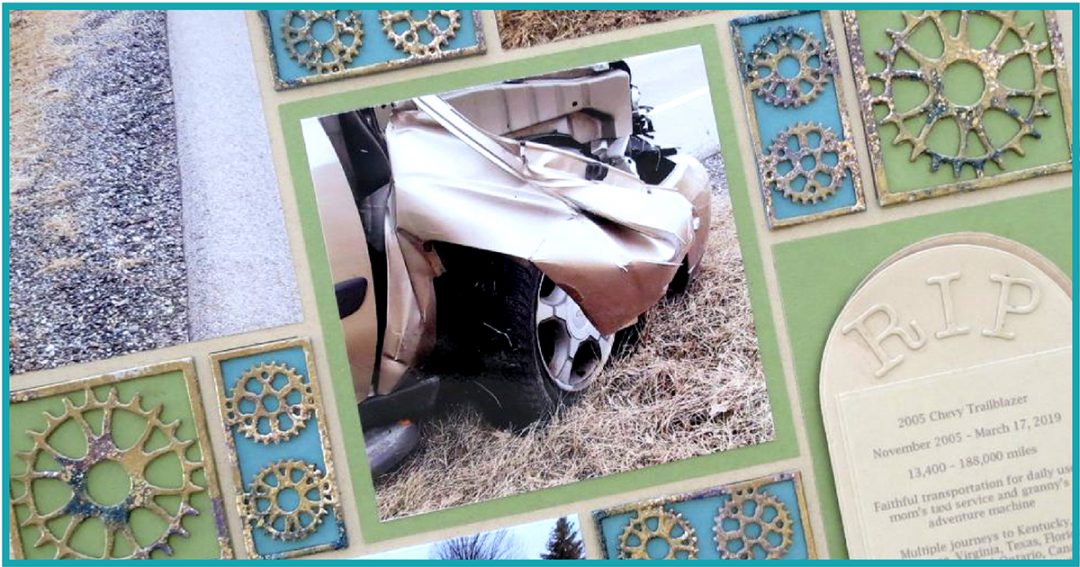
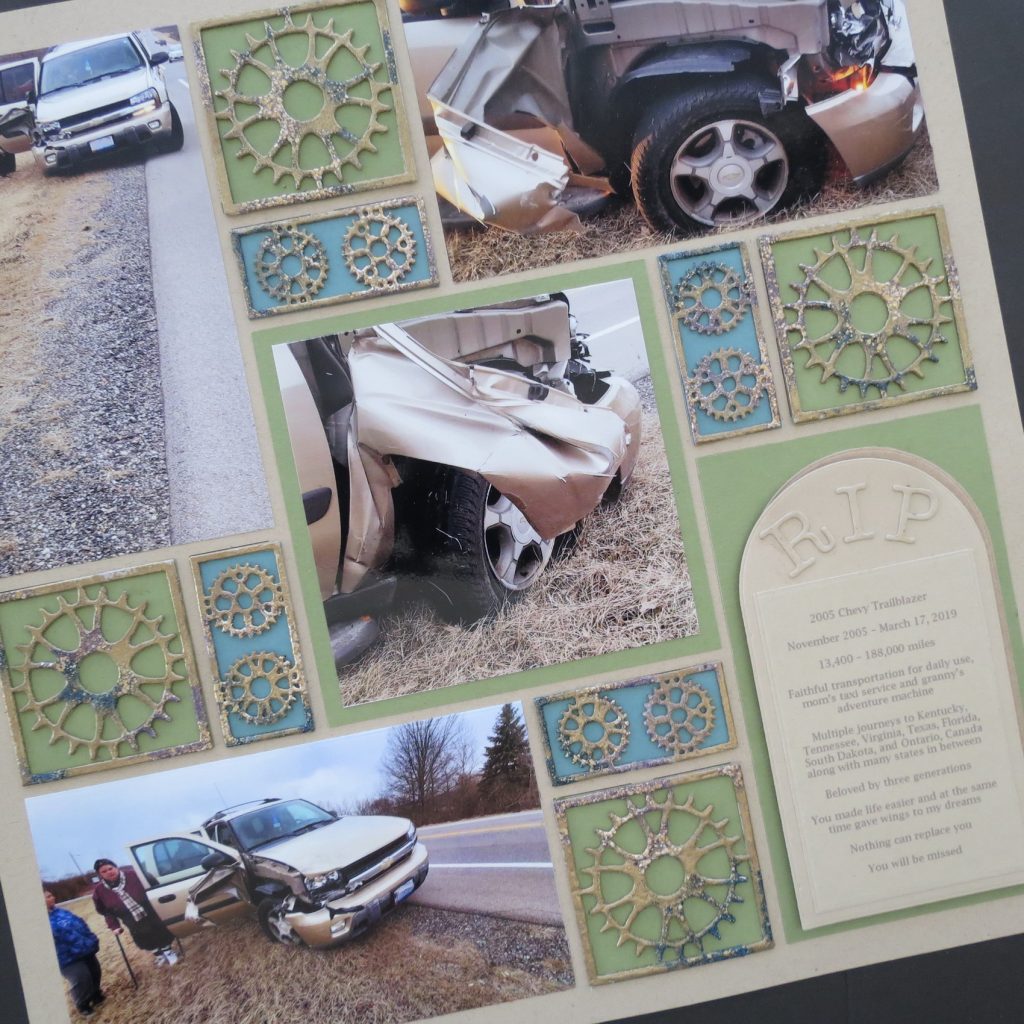
As I contemplated how to present our new Geared Up Die Set I thought about a layout I was hoping to do one day soon and that was to take photos from a recent accident, my first, that I was involved in and create a page to remember the event. The other driver did not stop. Even though I was hopeful that the car could be fixed, the insurance said no. Heartbreak. I loved my Trailblazer.

So I’ve taken the few photos that my family captured when they came to rescue us, the new Mosaic Moments Fresh Malt Grid Paper, and the pinwheel pattern #356 to bring this story together.

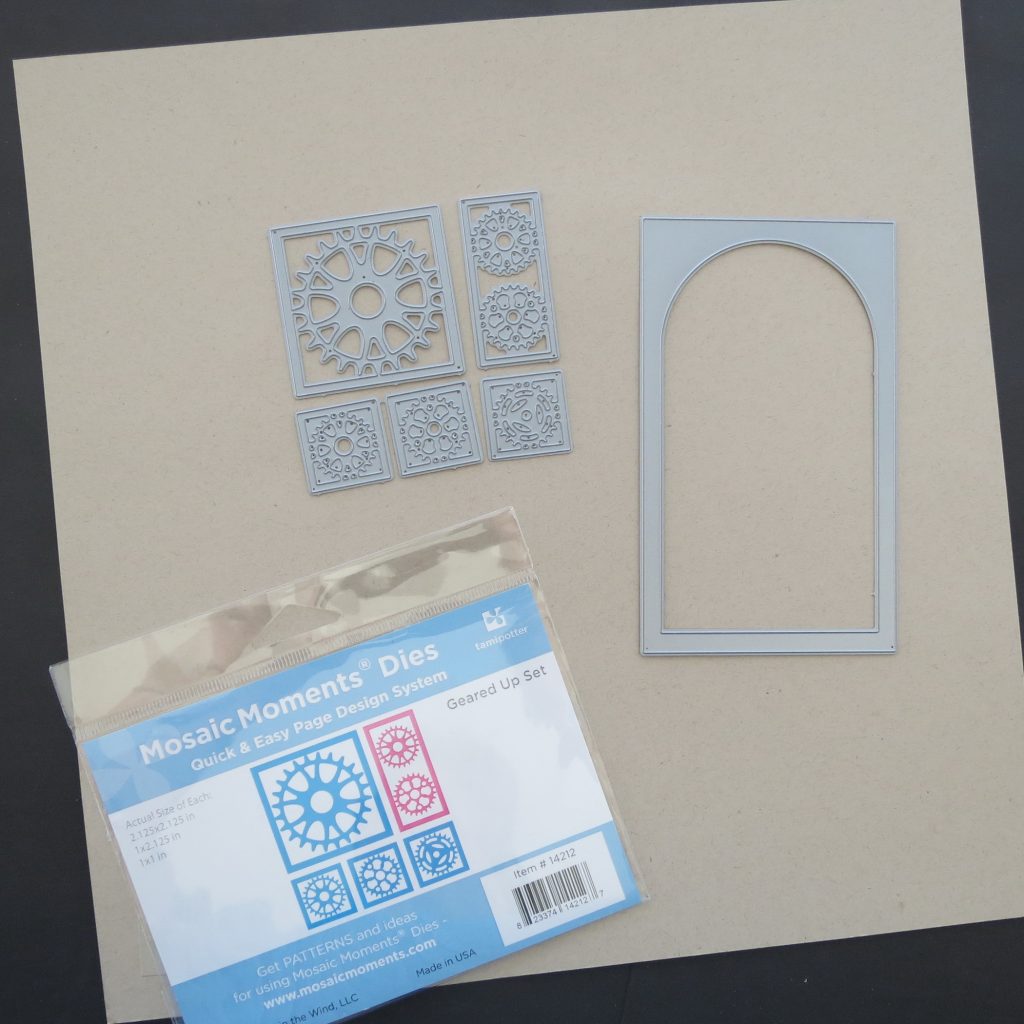
I’m using the 2×2 and the 1×2 dies from the Geared Up Set, the inside arch from the Arches Die Set cutting two in two colors for depth and the letters “R I P” from Alphabet 4. I cut two of each letter and stacked them together for a nice raised tone on tone for my ‘headstone’.
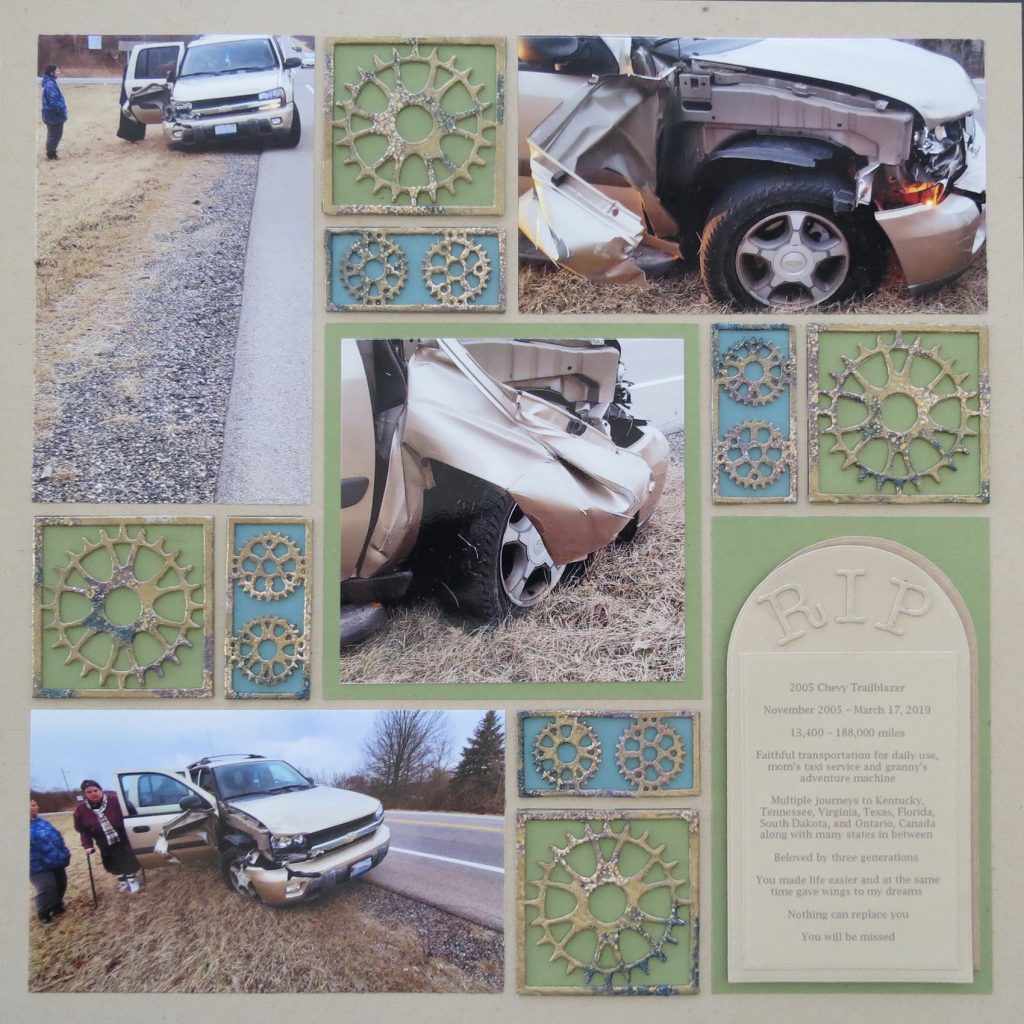
My center 4” x 4” photo is mounted on Dark Spring Green paper tiles as are all the 2×2 blocks in the pattern. I’ve used a blue from Michaels’s Recollections Earth Collection Paper for the 1×2’s.
Finishing Tip:
1. I have cut the 2×2 Geared Up dies from lightweight chipboard and glued two of each together for each of the spaces.
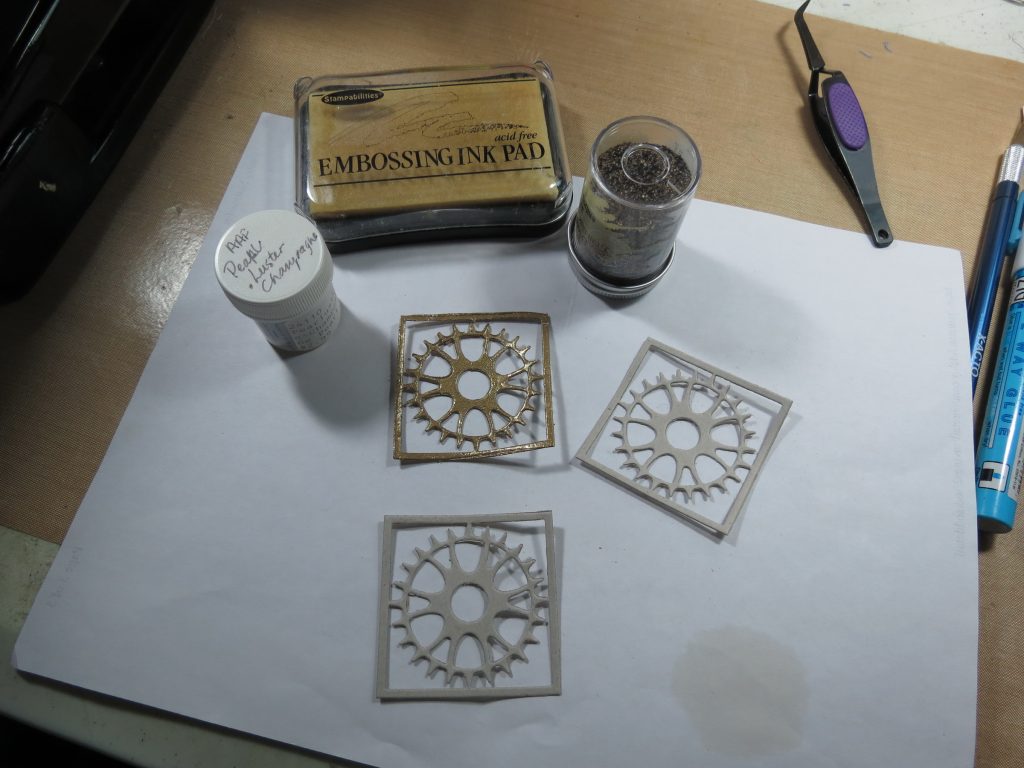
2. I then I have inked each with clear embossing ink
3. Then applied Pearl Champaign embossing powder (Stampendous) and heat embossed.
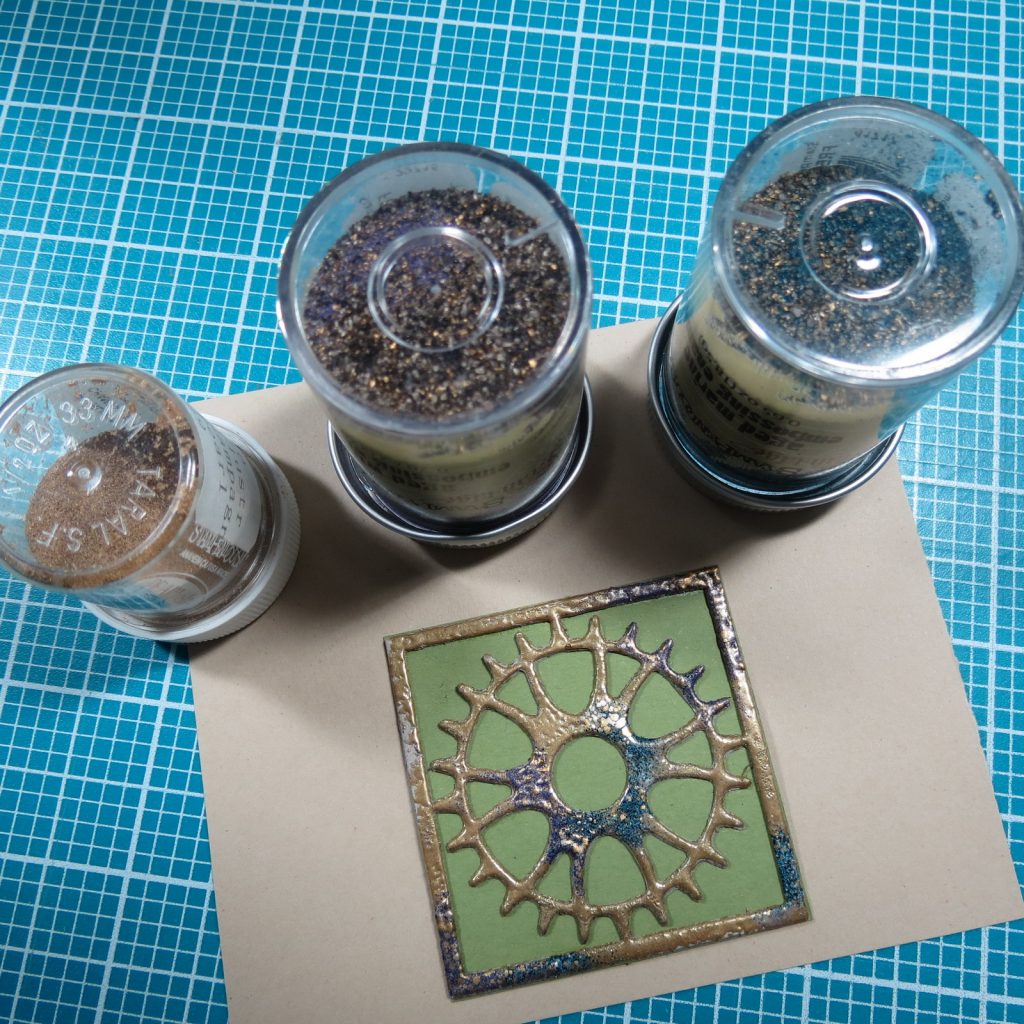
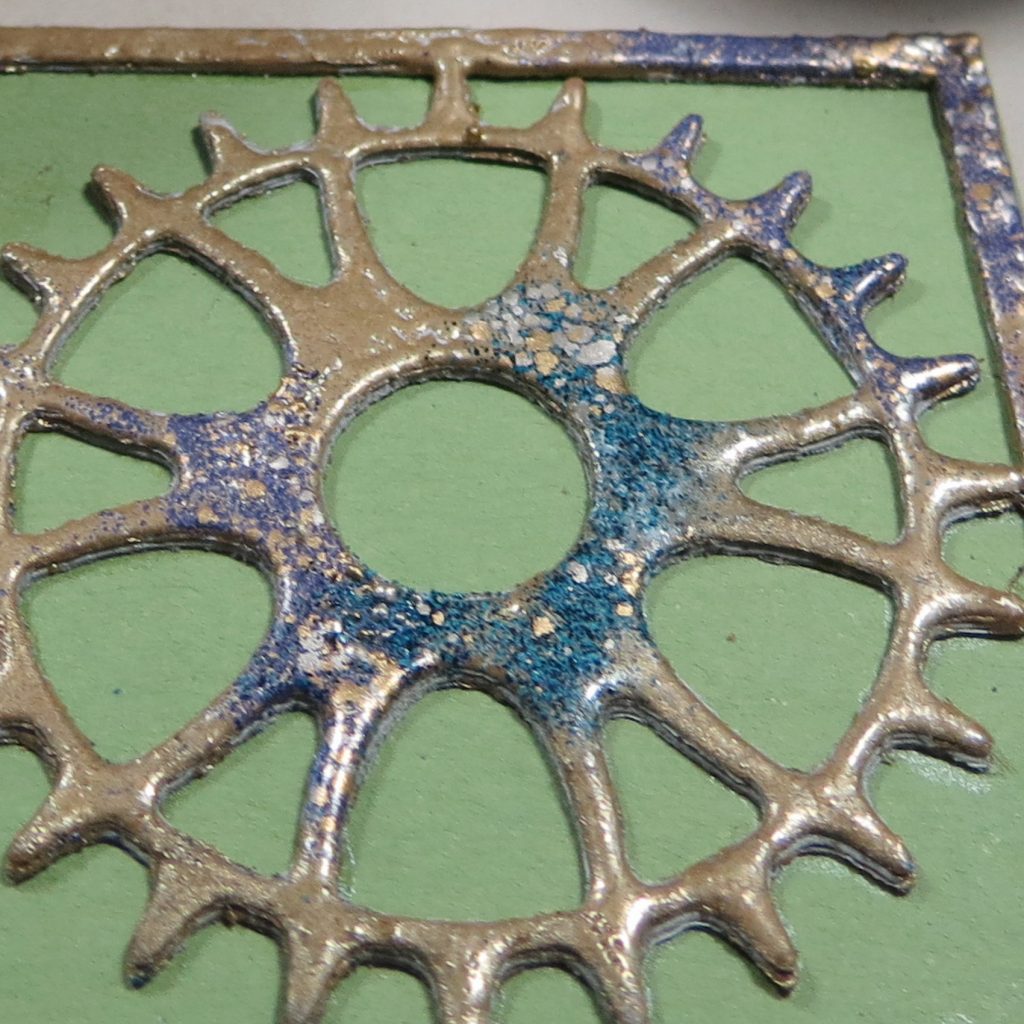
4. Then I went back and inked certain areas on the gears and applied Aged Marine and Age Wine embossing Powder (Stampendous) these powders have a color and flecks of metallic flecks that gives a speckled look to the finish.
5. Each die cut is them glued to the cardstock tiles and weighted down to dry flat.
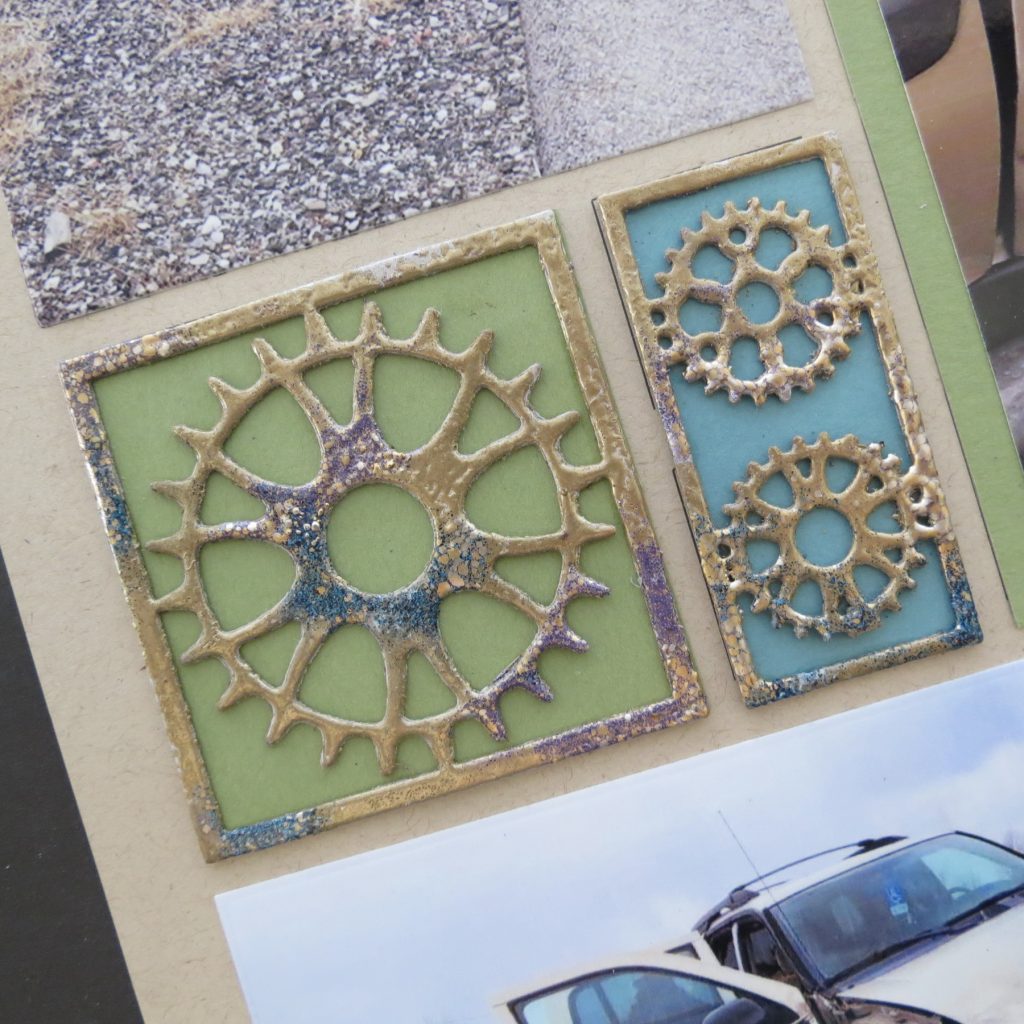
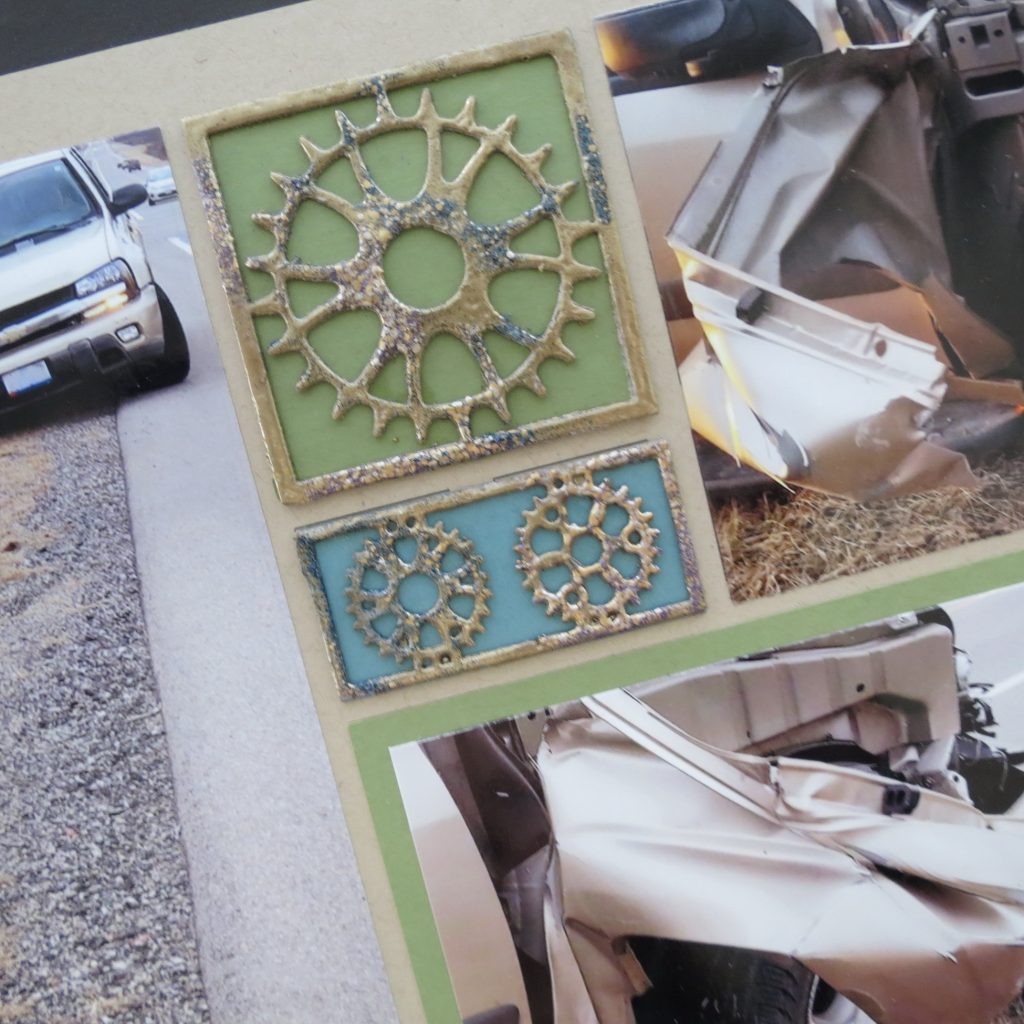
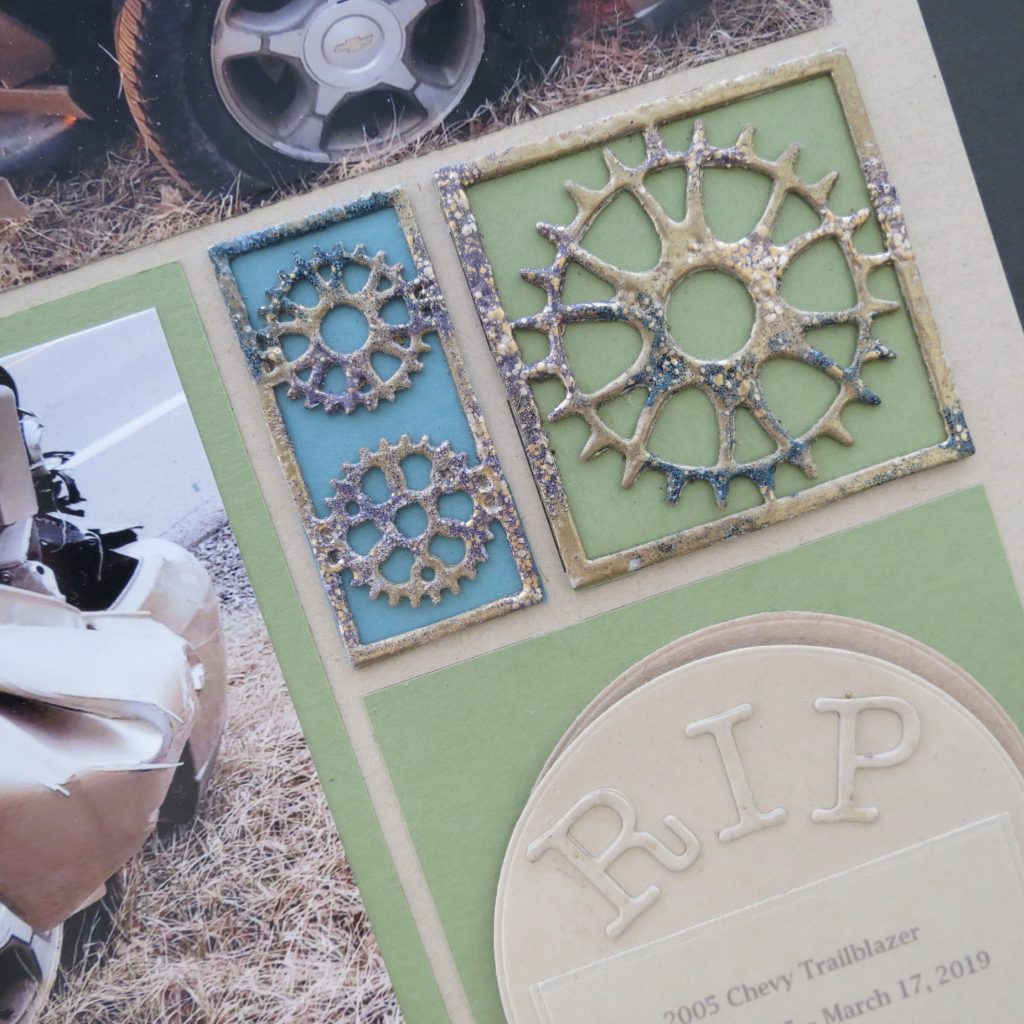
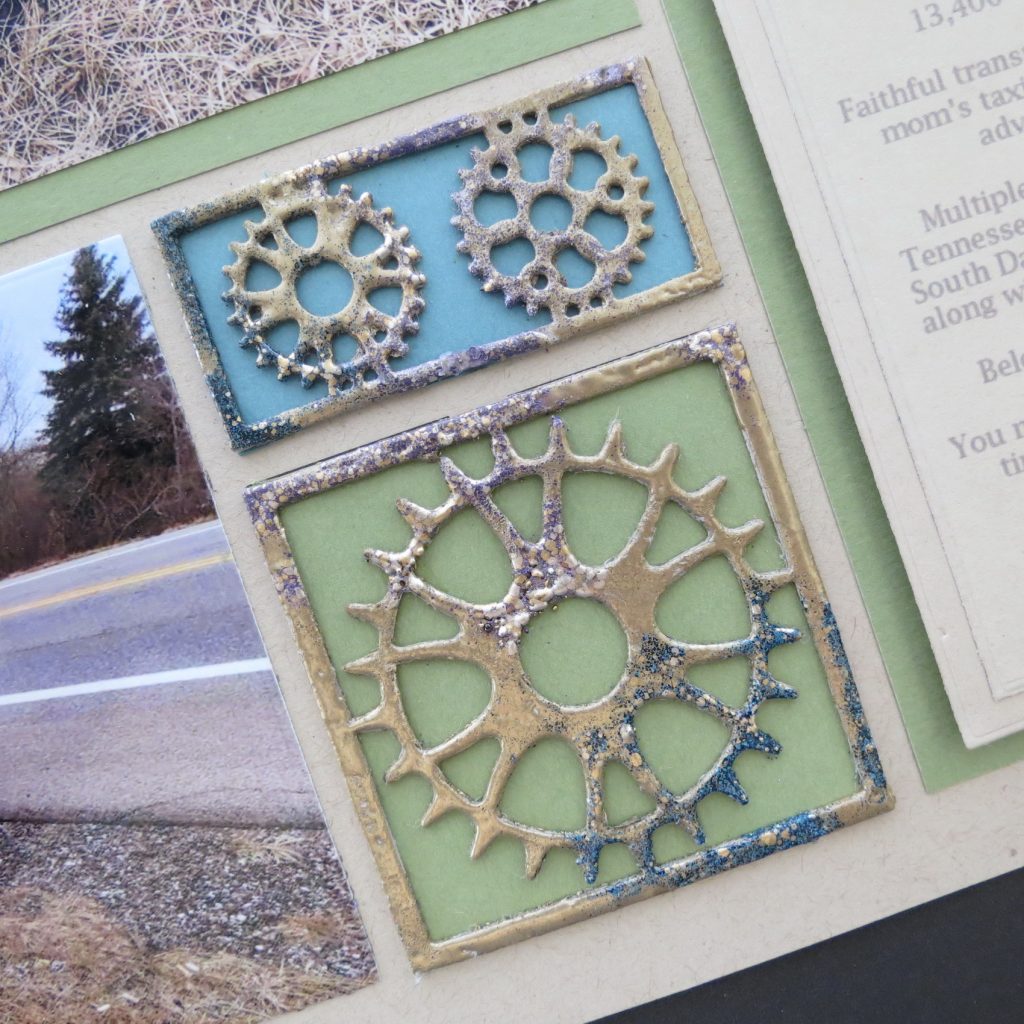
6. Each 2×2 and 1×2 are attached using a strong double-sided adhesive like Scor-Tape.
Headstone

1. Cut two 3×5 Arch die sections in two tones, the darker will be the shadow for depth
2. Cut R I P two times using Alphabet 4, stack and glue together and allow to dry before arranging on the headstone
3. Format and print your story on matching cardstock, Cut to fit headstone, adhere
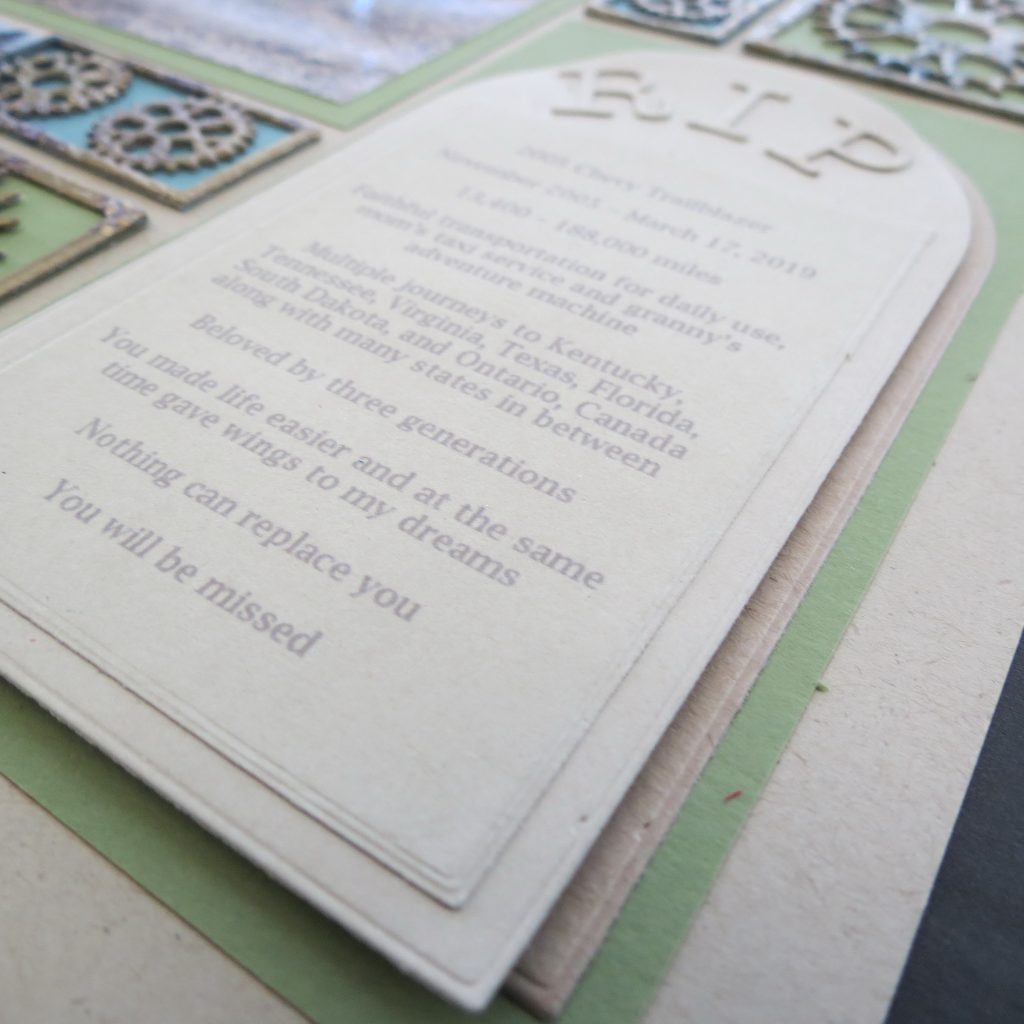
4. Using foam mounting tape set the top layer slightly off from the darker back layer for depth
Hope you liked seeing how you can change your die cuts for a little bit of a different look and find new ways to use your die cuts in ways that maximize your options for your dies. Enjoy!
Andrea Fisher