
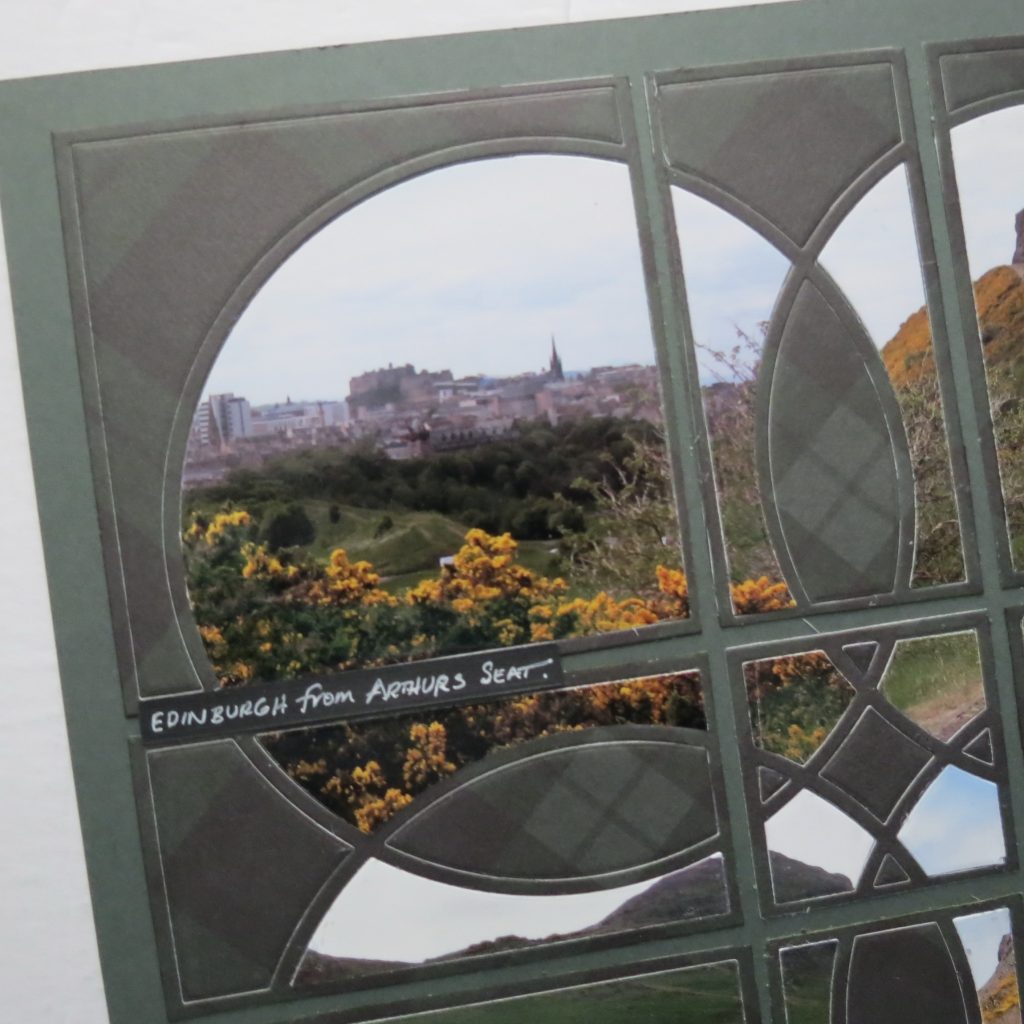
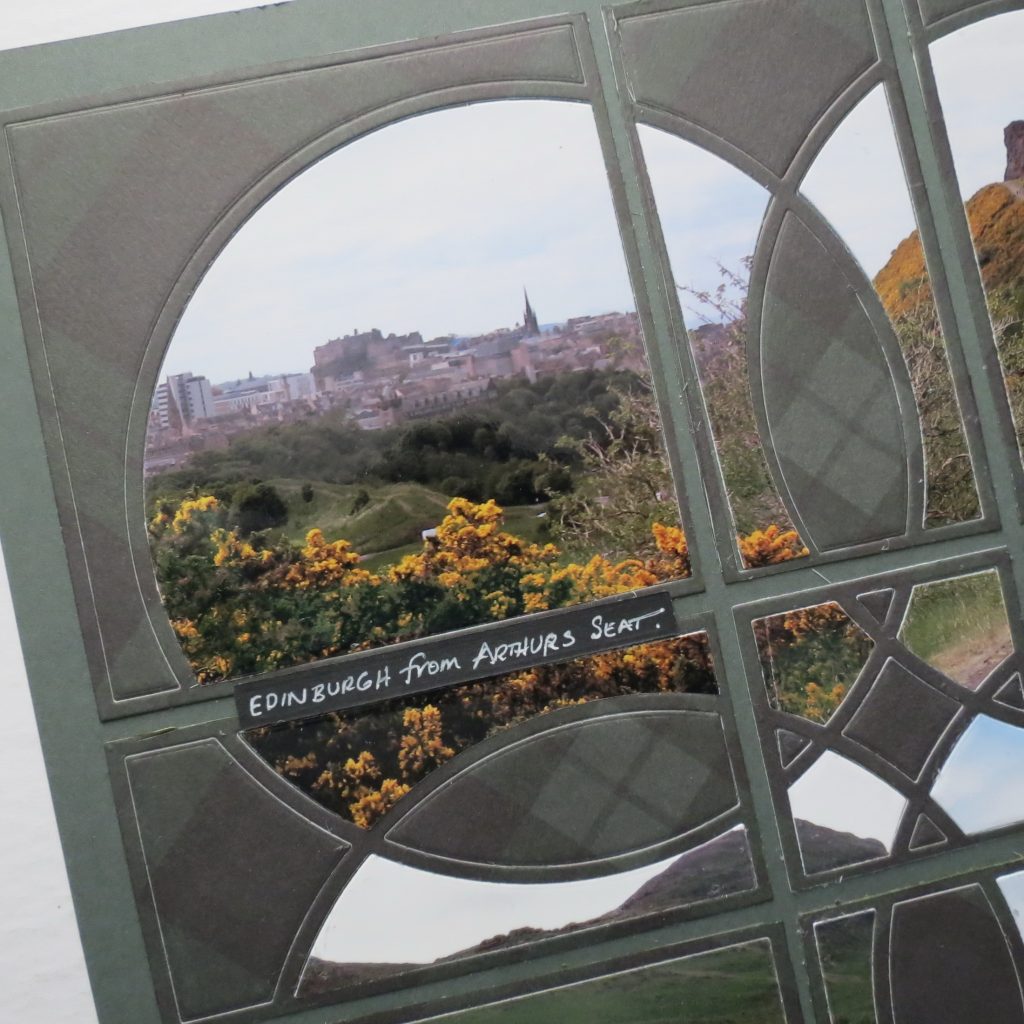
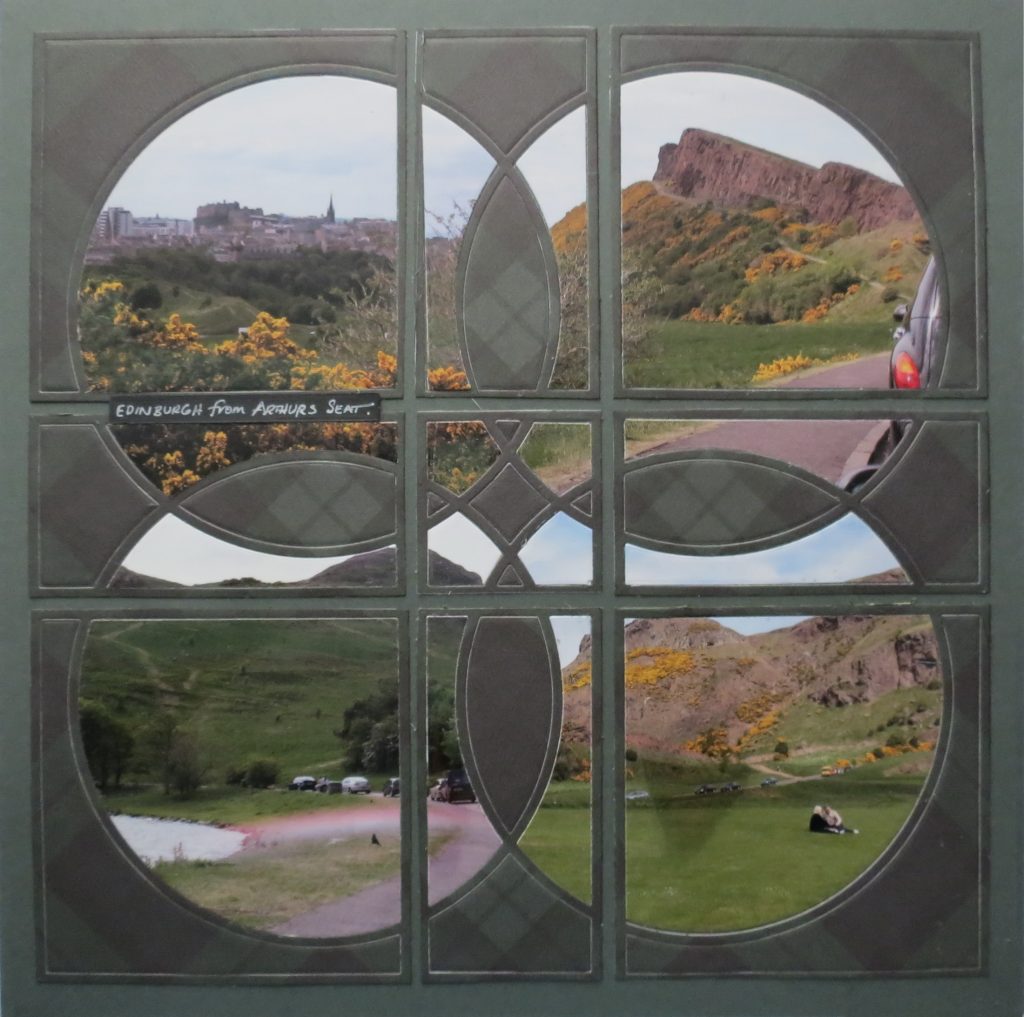
Edinburgh from Arthurs Seat
My challenge this week has been to create a two-page layout with the Clover die. So, I’ve been playing around with the die set this week and seeing what I might be able to do if I was going to do something different for a two-page layout.
As a one-page layout, the Clover die stands alone nicely with several different looks achieved by using color and patterned papers. But then the question often arises, what do you pair with it for a second page? Me? I like to repeat the pattern or use a mirror image of the pattern (same as repeating with this pattern) or even some of the die set’s components on the second page to keep some of the same elements.
I don’t want to overuse the specialty dies in my scrapbooks, you tend to lose some of that “wow!” factor if you do unless you try some new techniques or combinations of colors that makes it stand apart from the others. Hopefully, I can add one more idea to the mix of ways you create your Clover Die Layouts.

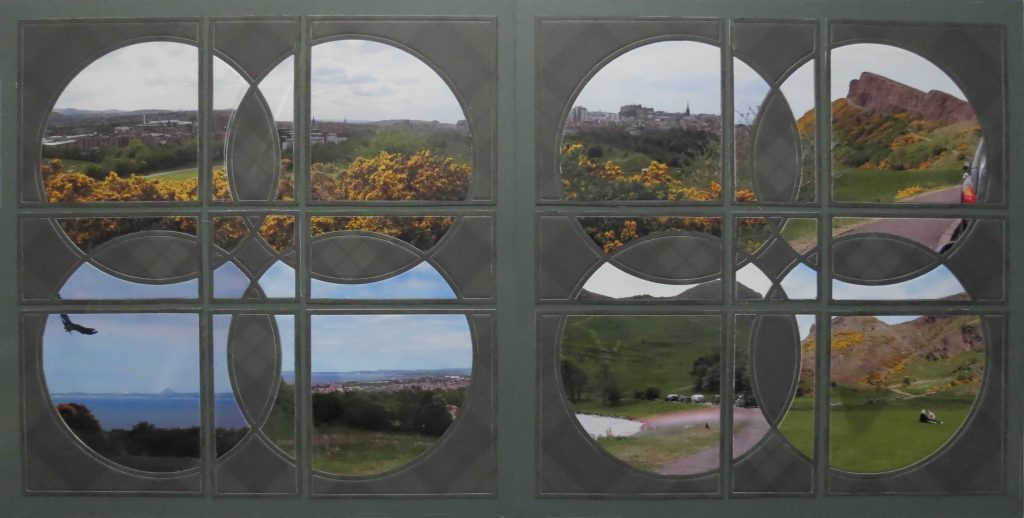
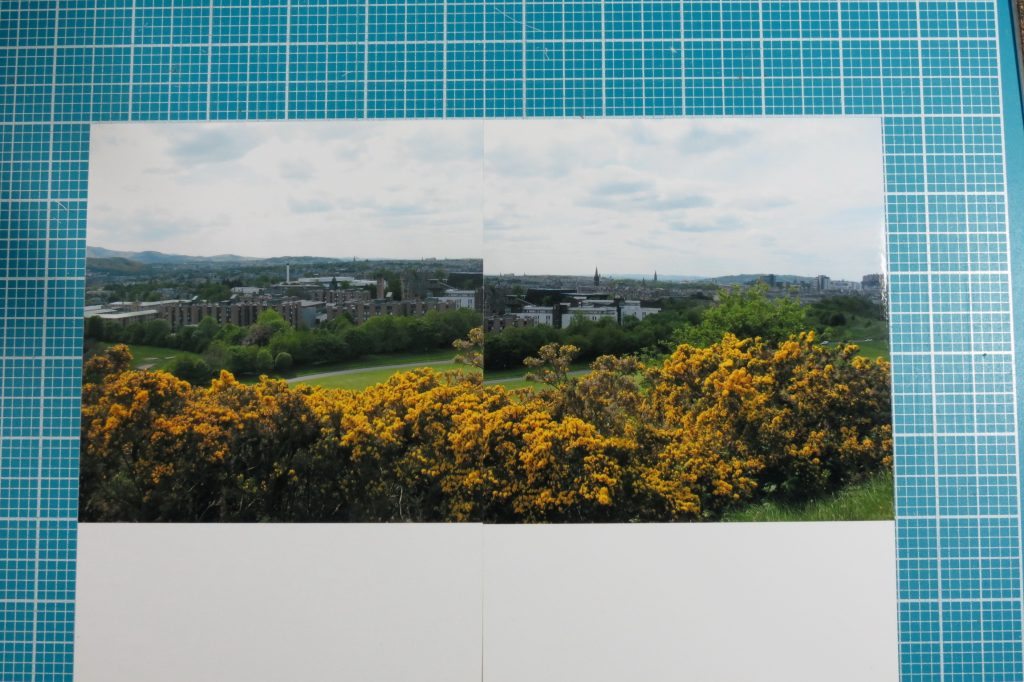
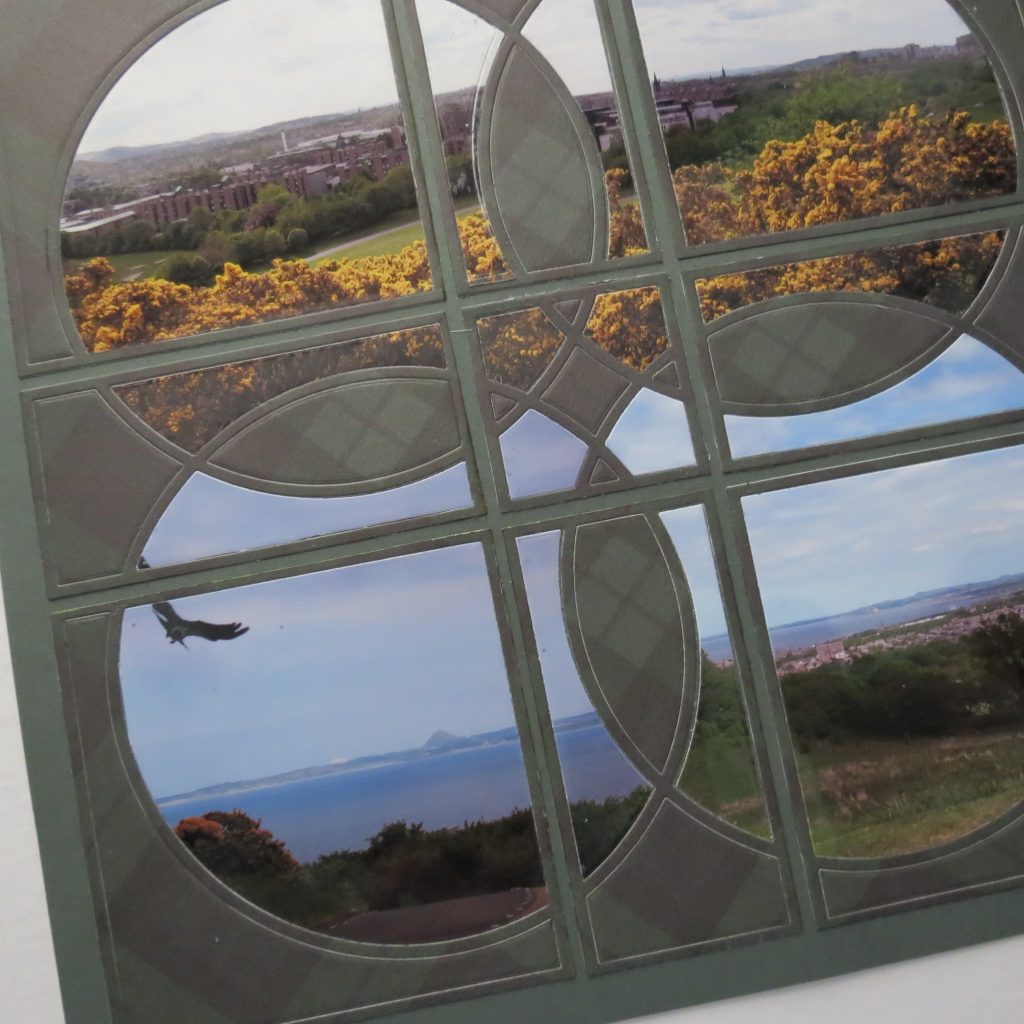
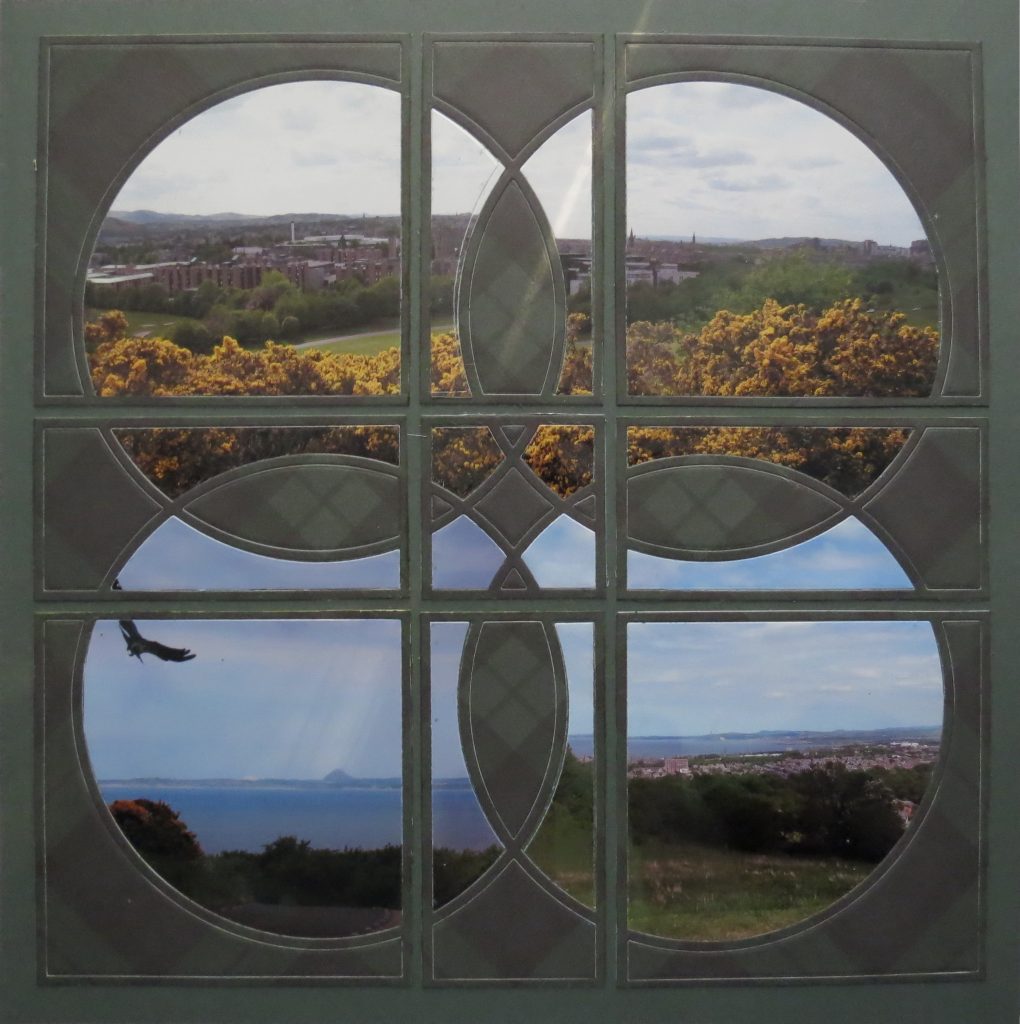
What I decided to try was a way to do a panoramic across two pages using the 2×4 die section. Each time, I felt I was losing too much of my scene. That’s when I decided to go with the standard pattern #368 but change a few key things.
Change one:
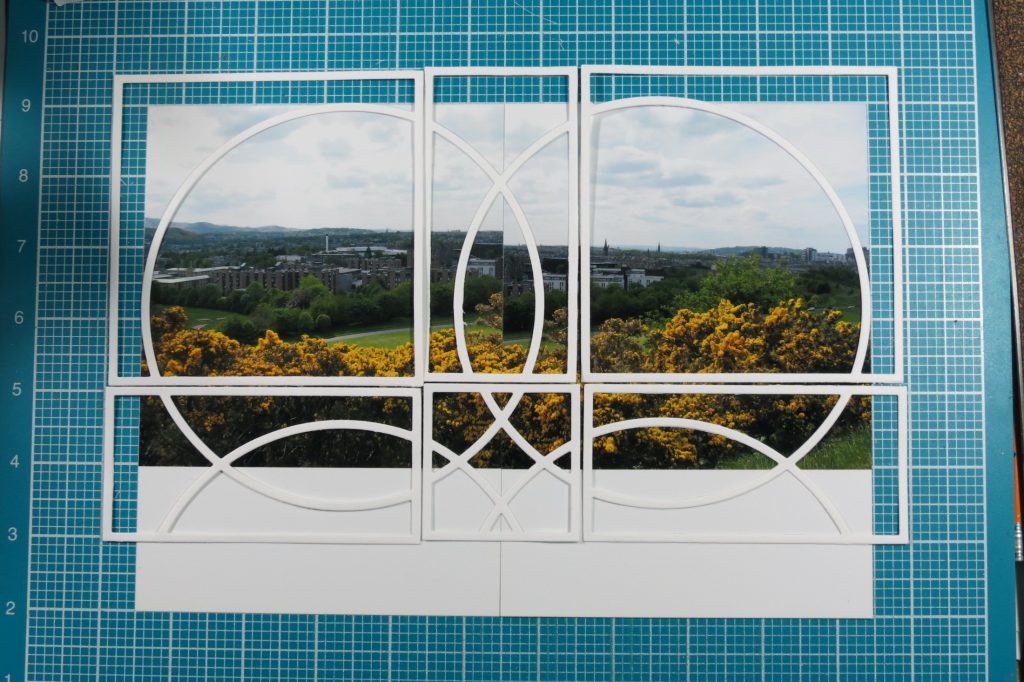
Instead of separate photos, I’m creating a full two-page panoramic to tie the two pages together. Instead of smaller sections, I’m using larger sections.
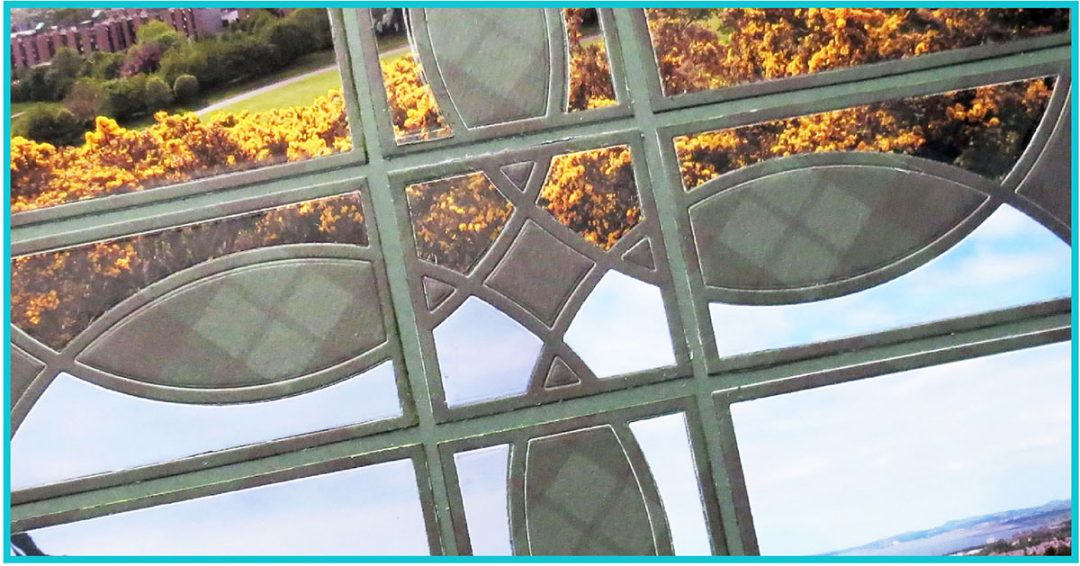
I printed my series of panoramic photos as 5” squares on 5”x7” photo paper instead of 4×6’s. This size allows me to fill the main section and the two sections top and bottom as well as the corner section of the center 2×2. This will let the photo take up more space and more importantly to me, give a fuller view.
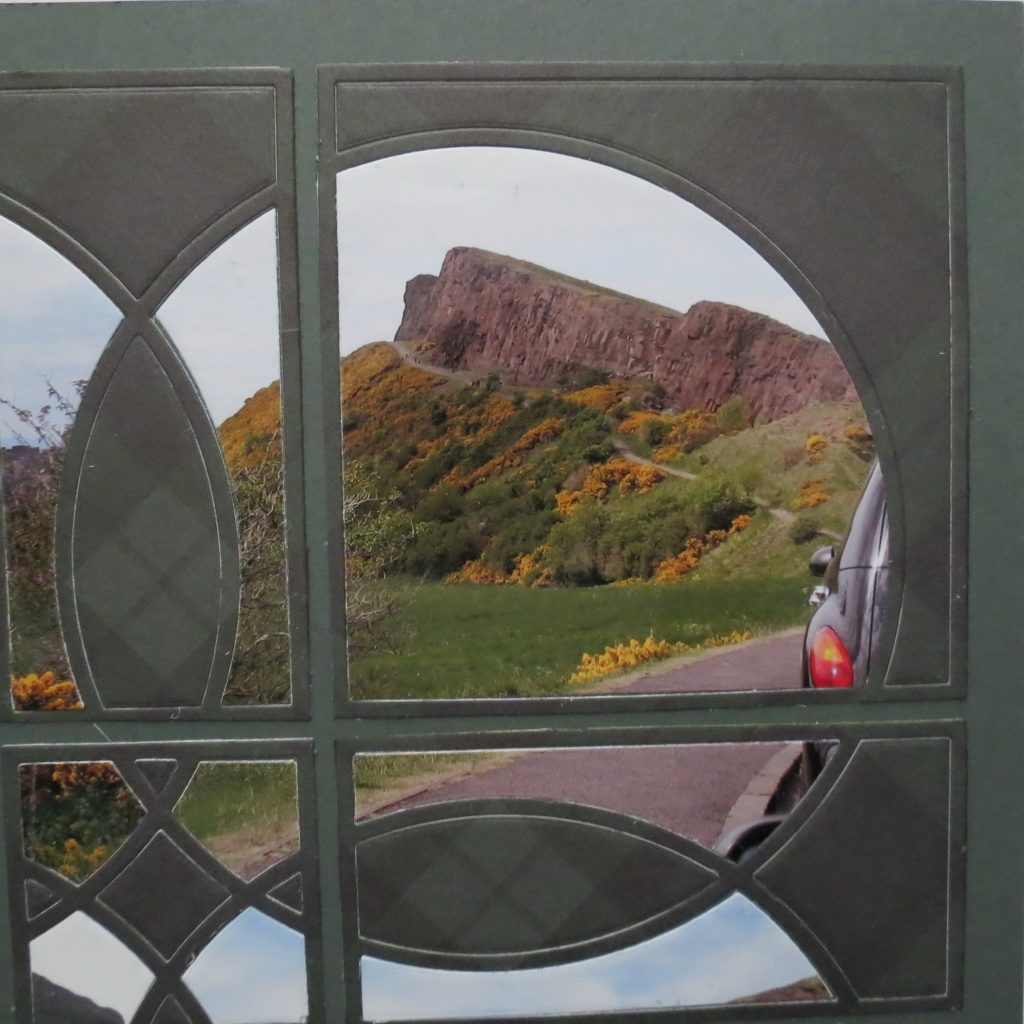
I will fill the lower row of die sections with other singular views from the trip up to Arthurs Seat. A view of the Sea where I managed to capture an eagle in flight, a rainbow nearly touching the ground, and two photos of other pathways to the top of Arthurs Seat, one showing how huge this mountain is by showing how small the people on the path appear.
Change two:
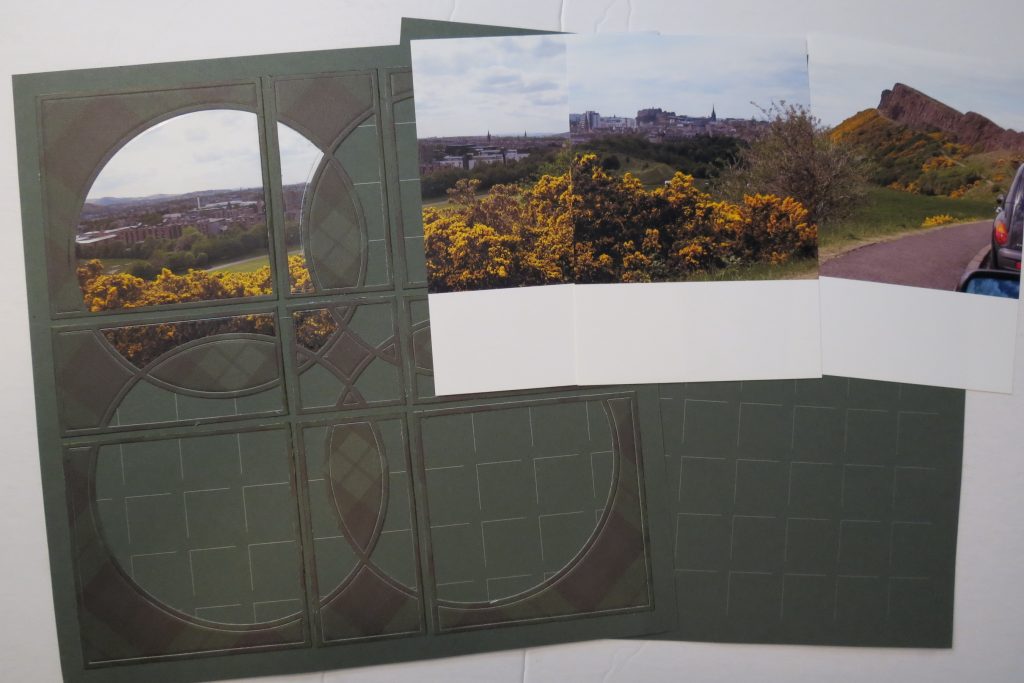
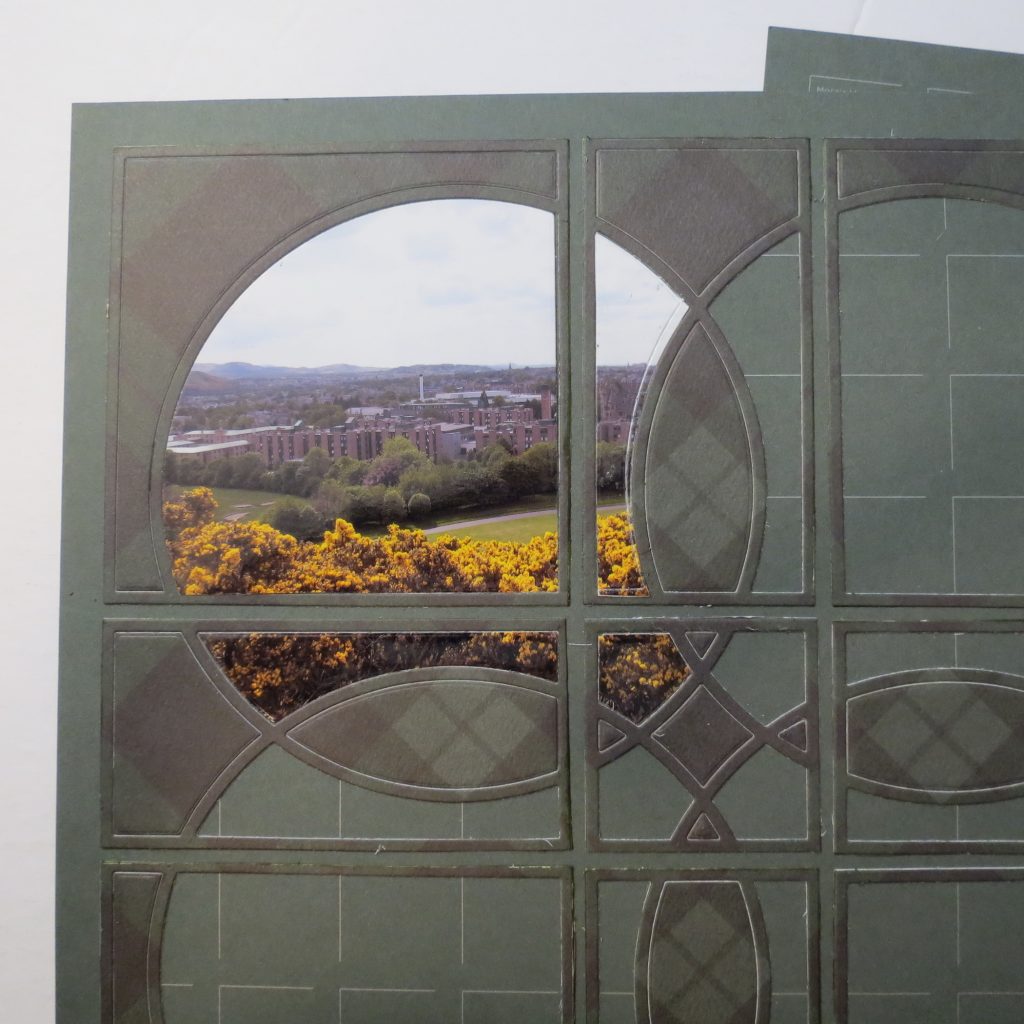
I did not use contrasting die frame pieces, but cut the pieces from the patterned paper and kept intact the sections I would not be filling with my photos.
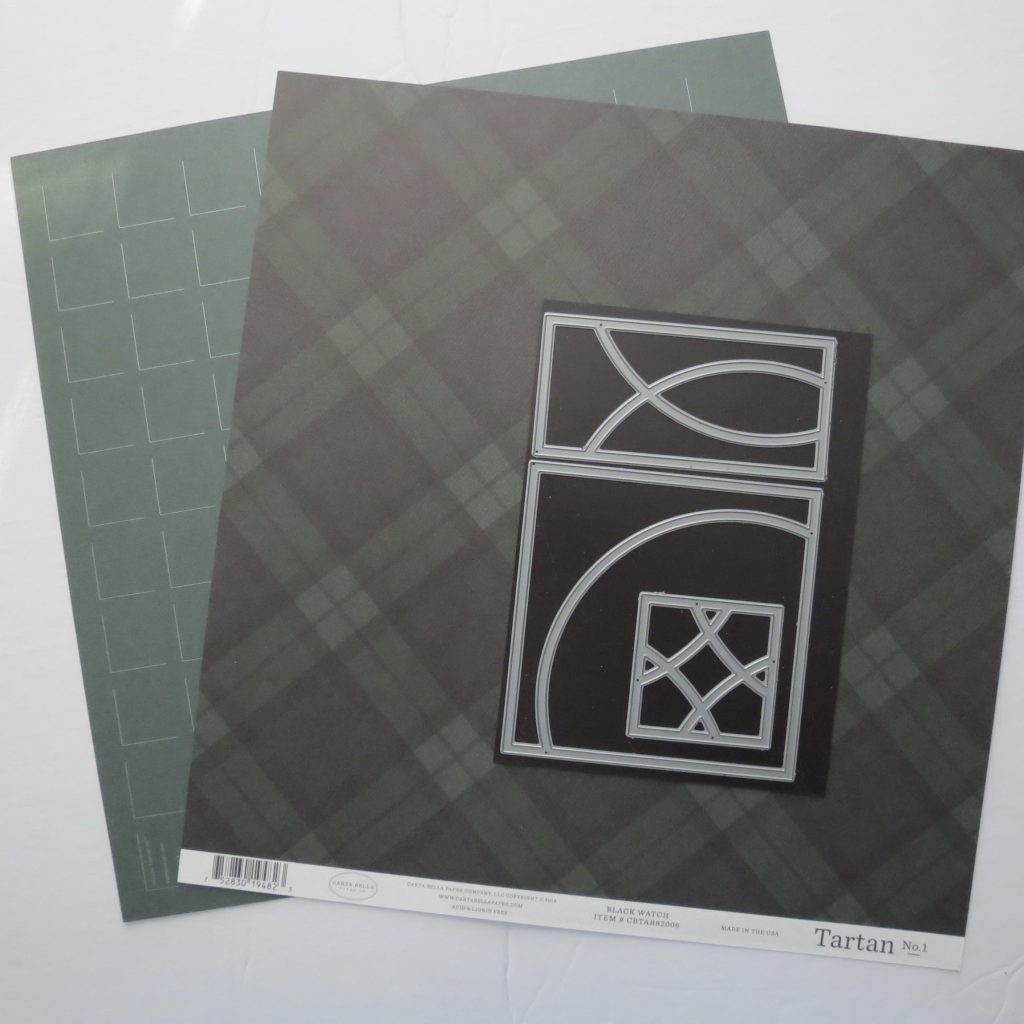
My paper is Mosaic Moments Grid Paper in Military Green and it blends together well with the Black Watch Tartan from Carta Bella that I have chosen to compliment my Scottish photos.
The darker colors provide a nice backdrop for the colors of the photos to stand out. It almost has a binocular look to it!
Change three:
Title placement. This page didn’t require extensive journaling. It is one of several groups of photos I’m working on for our day in Edinburgh. What was helpful was a brief place notation. I chose to use a narrow tag to slide into a spot where it won’t distract from the design or the photos. I tried two spots, the first between the two rows toward the outer border, but I decided it still stood out too much for me so I just slid it over a bit to the right so that it would fall in the section that completes the circle without interrupting it.
TIP: Cutting the Paper
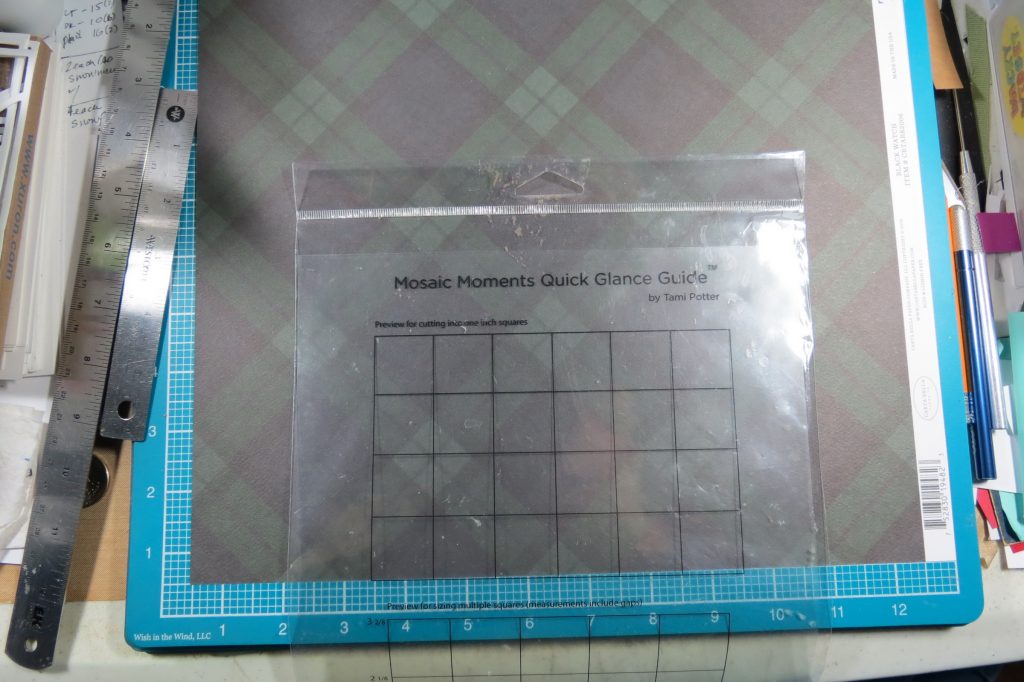
Because I was using a strong pattern paper, the Black Watch Tartan by Carta Bella, I needed to be sure the pattern would appear balanced in the cuts. To accomplish this, I found the center of the pattern and then used the Quick Glance Guide to line it up on the grid and marked my center 2.125” strip and on either side marked and cut the 4.375” strips by hand. I rotated my grid and made the same cuts.
Keeping the direction for each of the pieces in line, I carefully cut all the sections and then mounted each piece on the grid. The photo pieces can be added once all the Clover sections are adhered to the grid.

TIP: Cutting the Photos
I used a few template pieces to frame the photos to determine where I would need to line-up the dies to get all the pieces I would need. Because getting all these pieces cut accurately is important, be sure to use washi tape or something similar to keep the photo and die in place to cut.
In the end, this layout has only made a few simple changes to make the photos stand out in the shapes created by the dies. Four photos create a wide panoramic tying both pages together and then four additional photos taken in the area fill the bottom row. The darker colors of the pattern paper recede while the photos pop forward. Including more of the photo by adding to each die section gives you a fuller view of each photo. Hope this adds to your idea list as a way to work with the Clover Die.
Andrea Fisher