
You already know how to create beautiful pages using the Mosaic Moments® System. Now it's time to take your pages to the next level -- impress your friends and family and make pages that really make you say, "WOW".
Read these eight tips and incorporate some or all of these ideas in your next page.
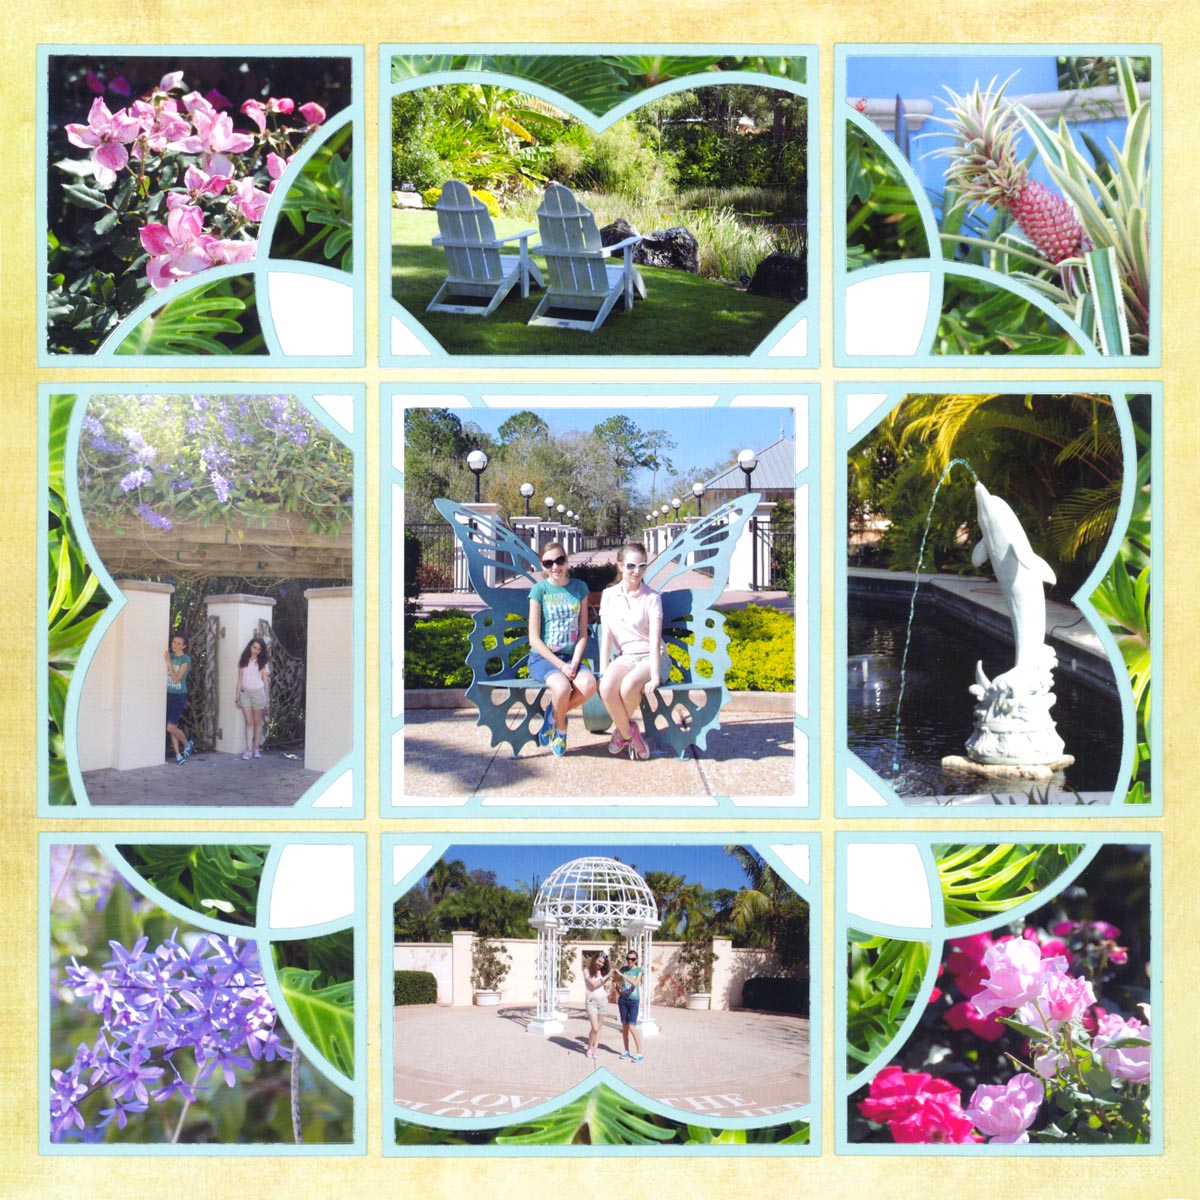
1. Don't Miss the Little Details

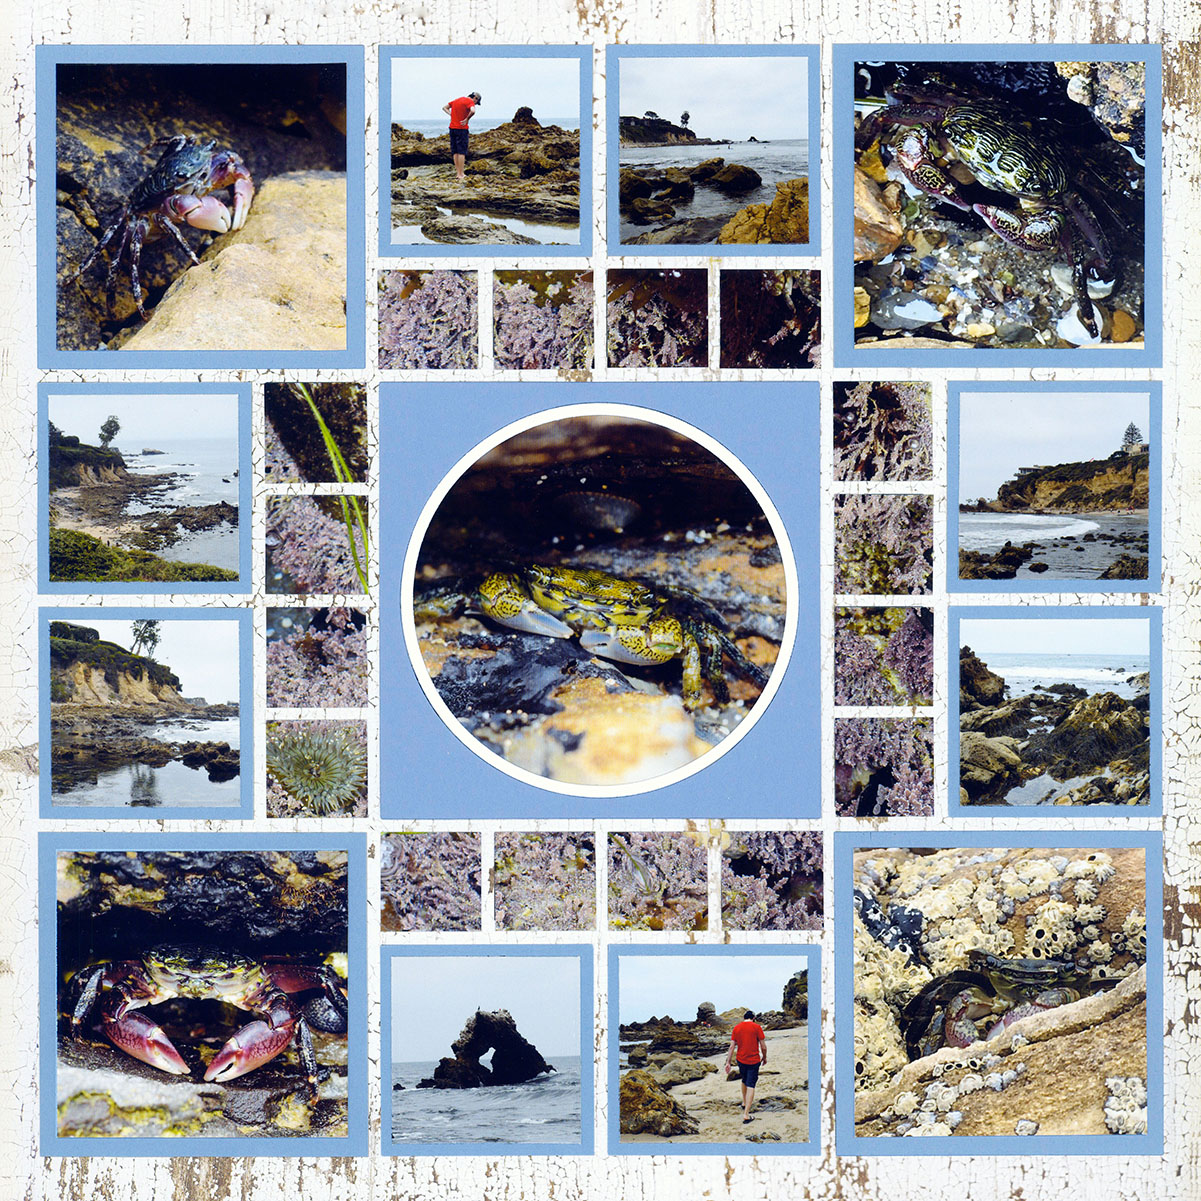
This Layout Shows Close Up Photos of Mosaic Decor
Include the details when you are photographing a place. Details, like murals, vegetation and rocks help set the mood on your pages -- even if they have little to do with the subject of your layout.
For example, this Friends page includes close ups of some of the mosaic decor found at the place they visited. The details make the page "sing."
On this one, a close-up photo of a plant is used around the circle of photos. It makes for an interesting border, but it also helps the viewer experience the encounter more than the traditional photos. It adds a whole new level of intrigue.
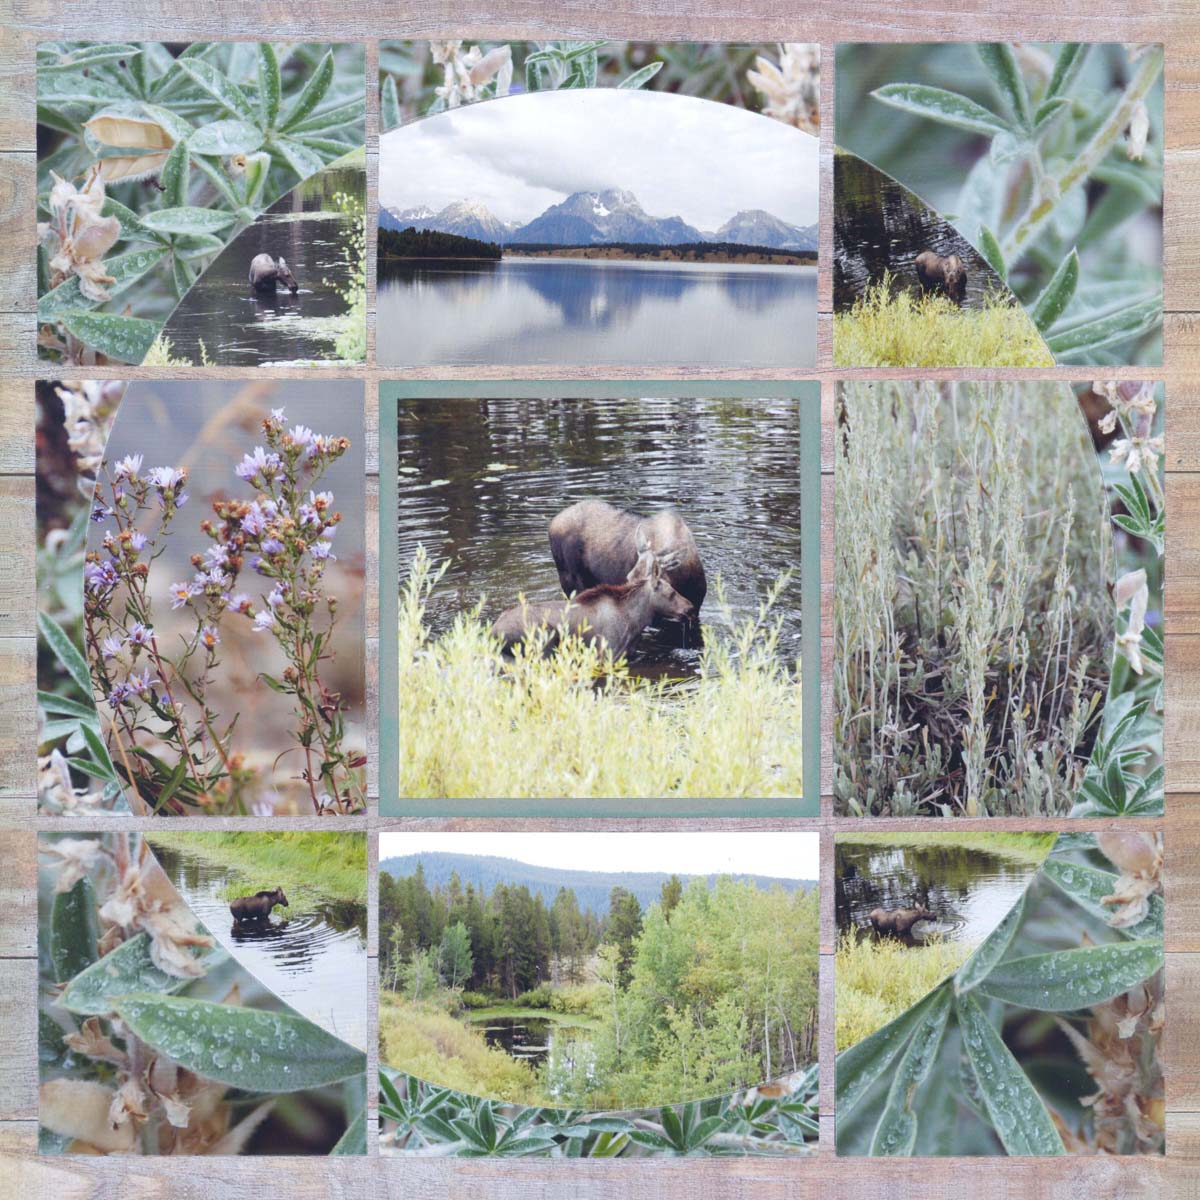
Photos of this plant make a unique frame around the subjects
2. Let Your Embellishments Help Tell the Story

Elegant Embellishments were added to tell the story of high class
Embellishments on your layout add to the story being told by your photographs.
This page is showing the elegance found in New Orleans. So a Martha Stewart corner punch was used to carry on the charm.
Rustic, torn paper in traditional Indian colors adds texture and helps set the scene in this story. Granted, the photos were actually taken in Florida, but the embellishments transport you to the tigers' homeland.
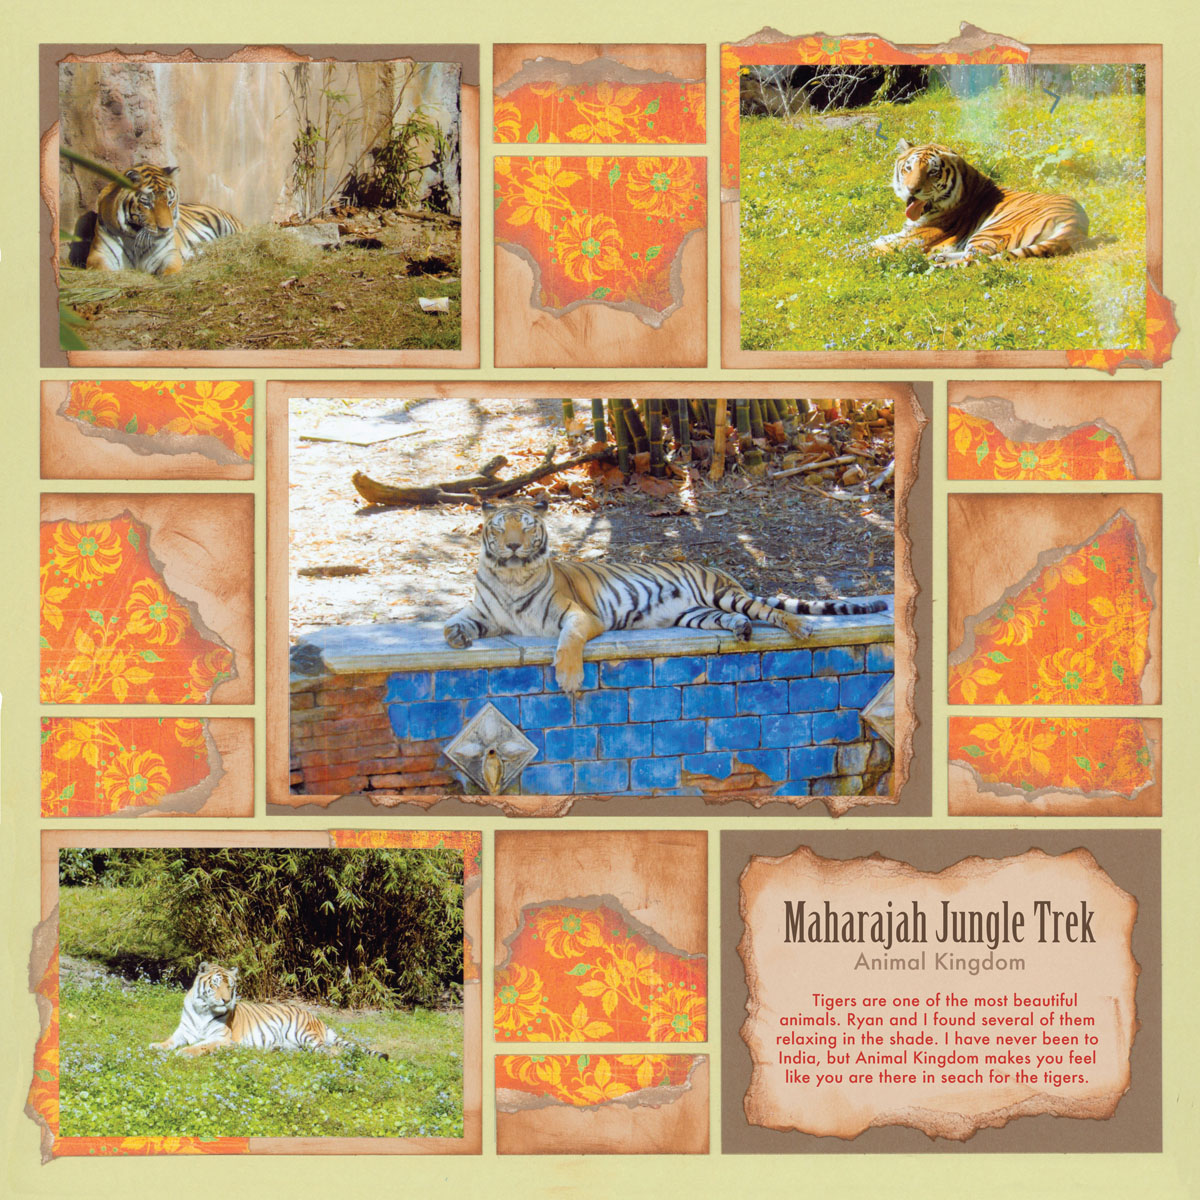
The elements on this page were inspired by India
3. Use Your Photos as a Reference for Your Theme and Colors
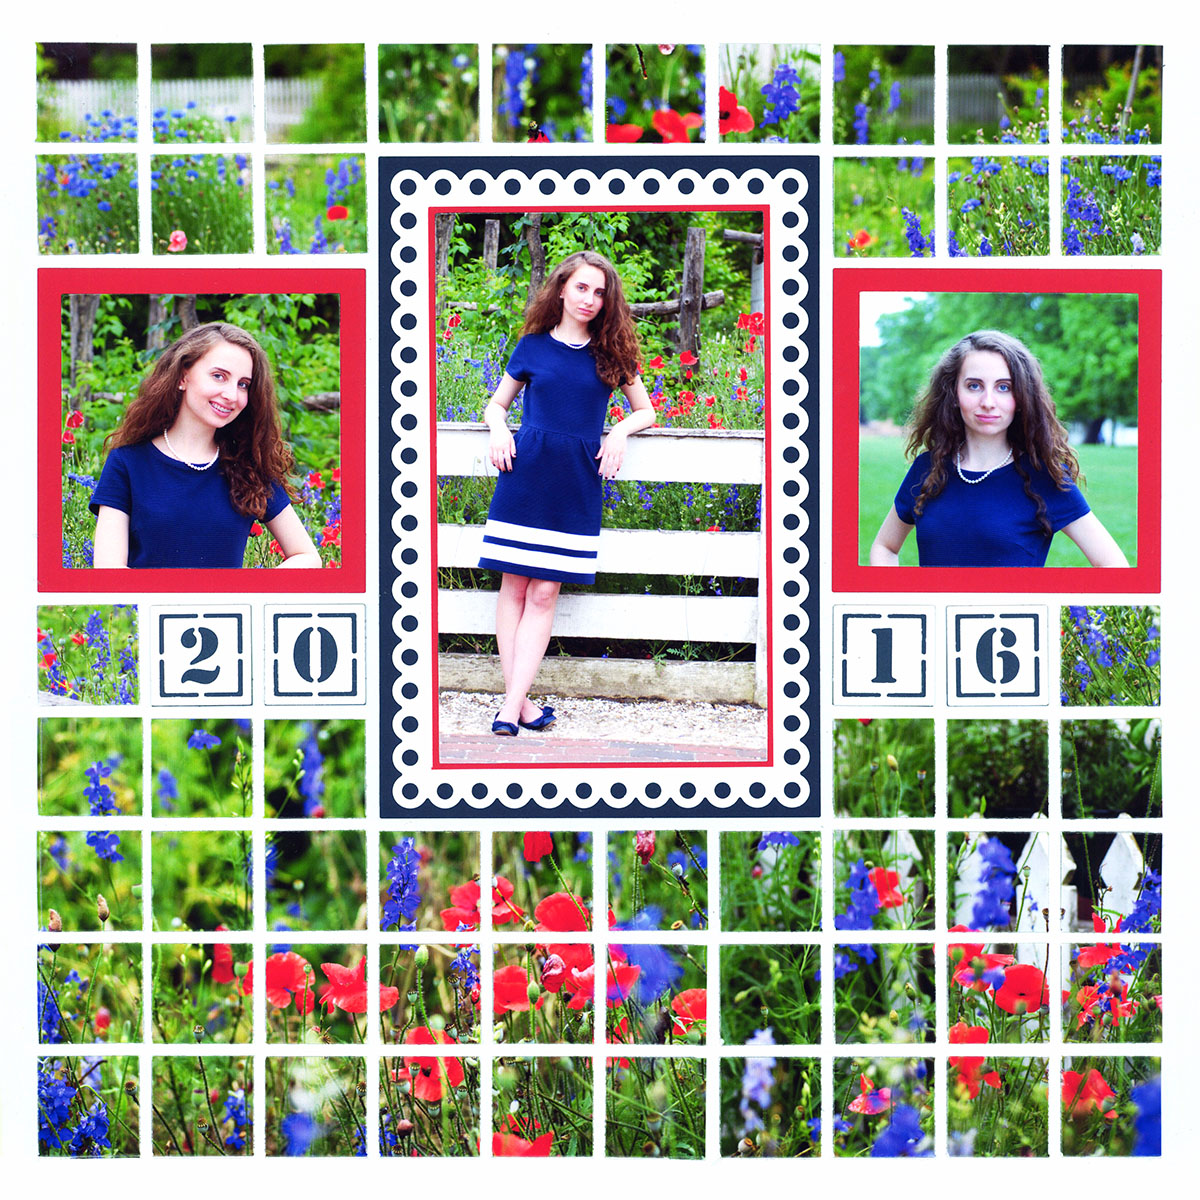
The Flowers inspired the Blue and Red Paper Mats
Choosing the perfect colors can easily take your pages to the next level. Choosing the right colors can also be overwhelming, if you don't know where to start.
One easy way is to pull colors right out of your photos. Notice how the paper colors on this layout are pulled from the subjects dress and the flowers around. The white grid paper helps all of the colors to pop.
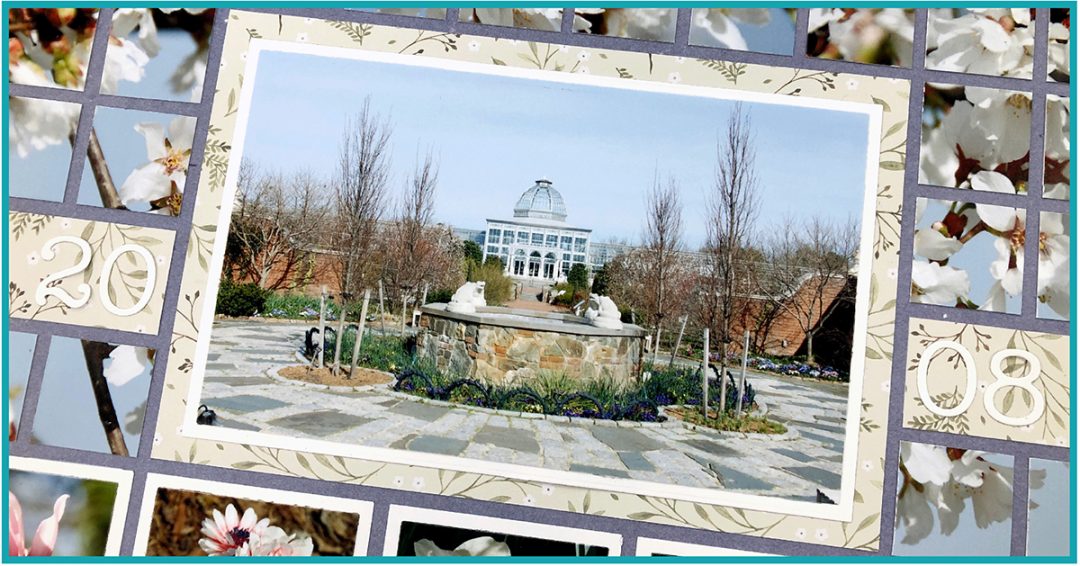
This layout also uses the colors of the building in the photos to set the tone. The gears were nearly replicated by the ones on the building.
The teal from the actress' dress could also have been used, but the page would lose the drama that naturally comes with the metallic color palette.
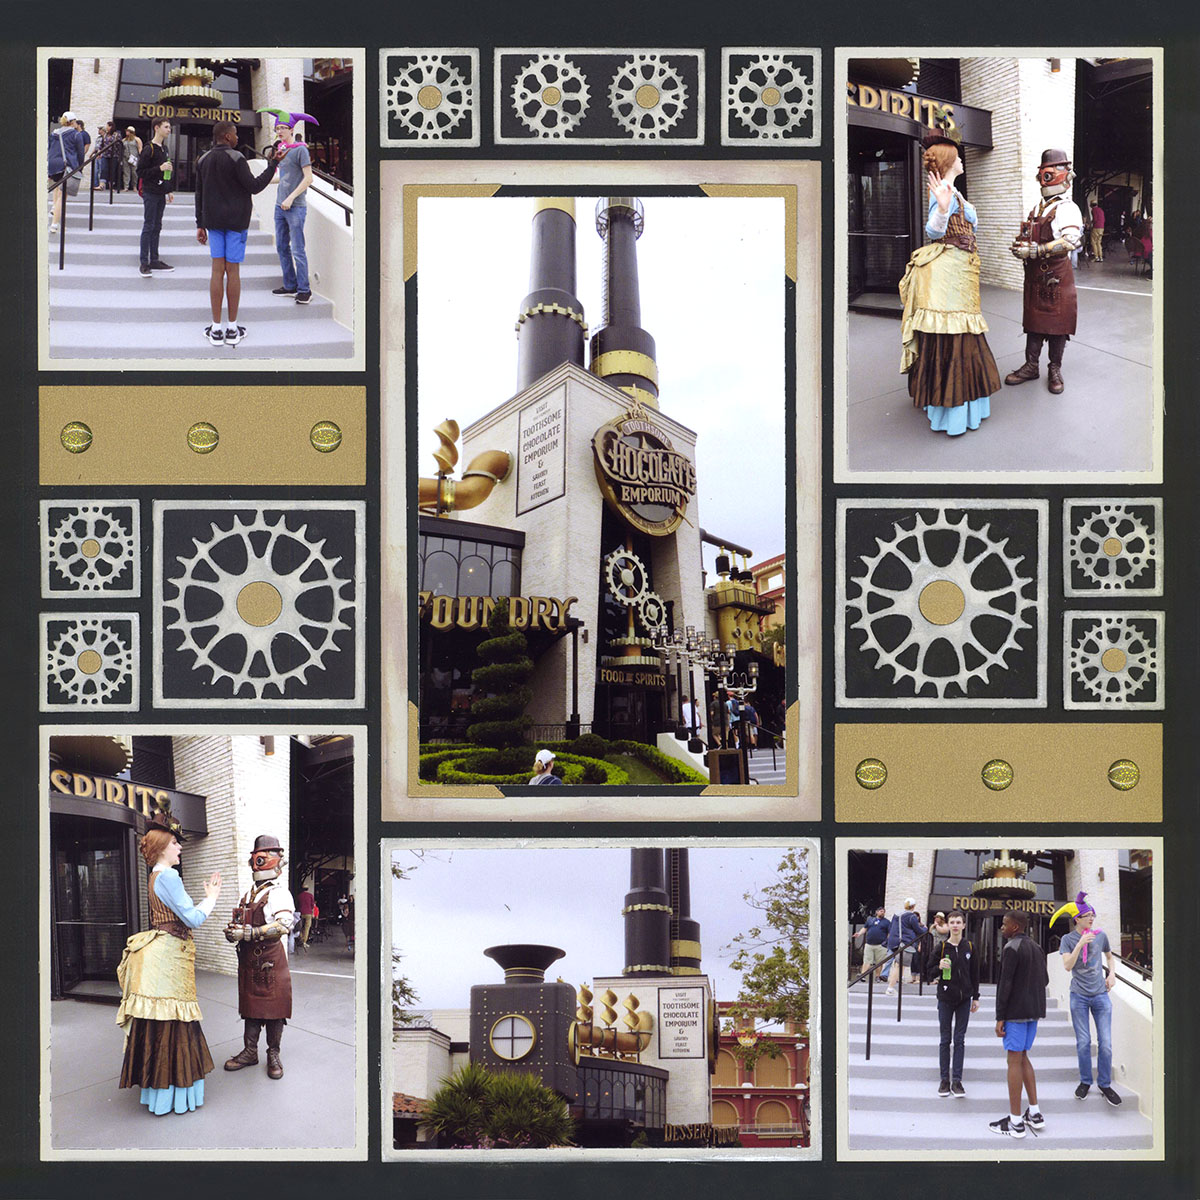
Theme of page was inspired by the steam punk building
4. Try a Blending Technique
Blend multiple photos to make it appear like one large image
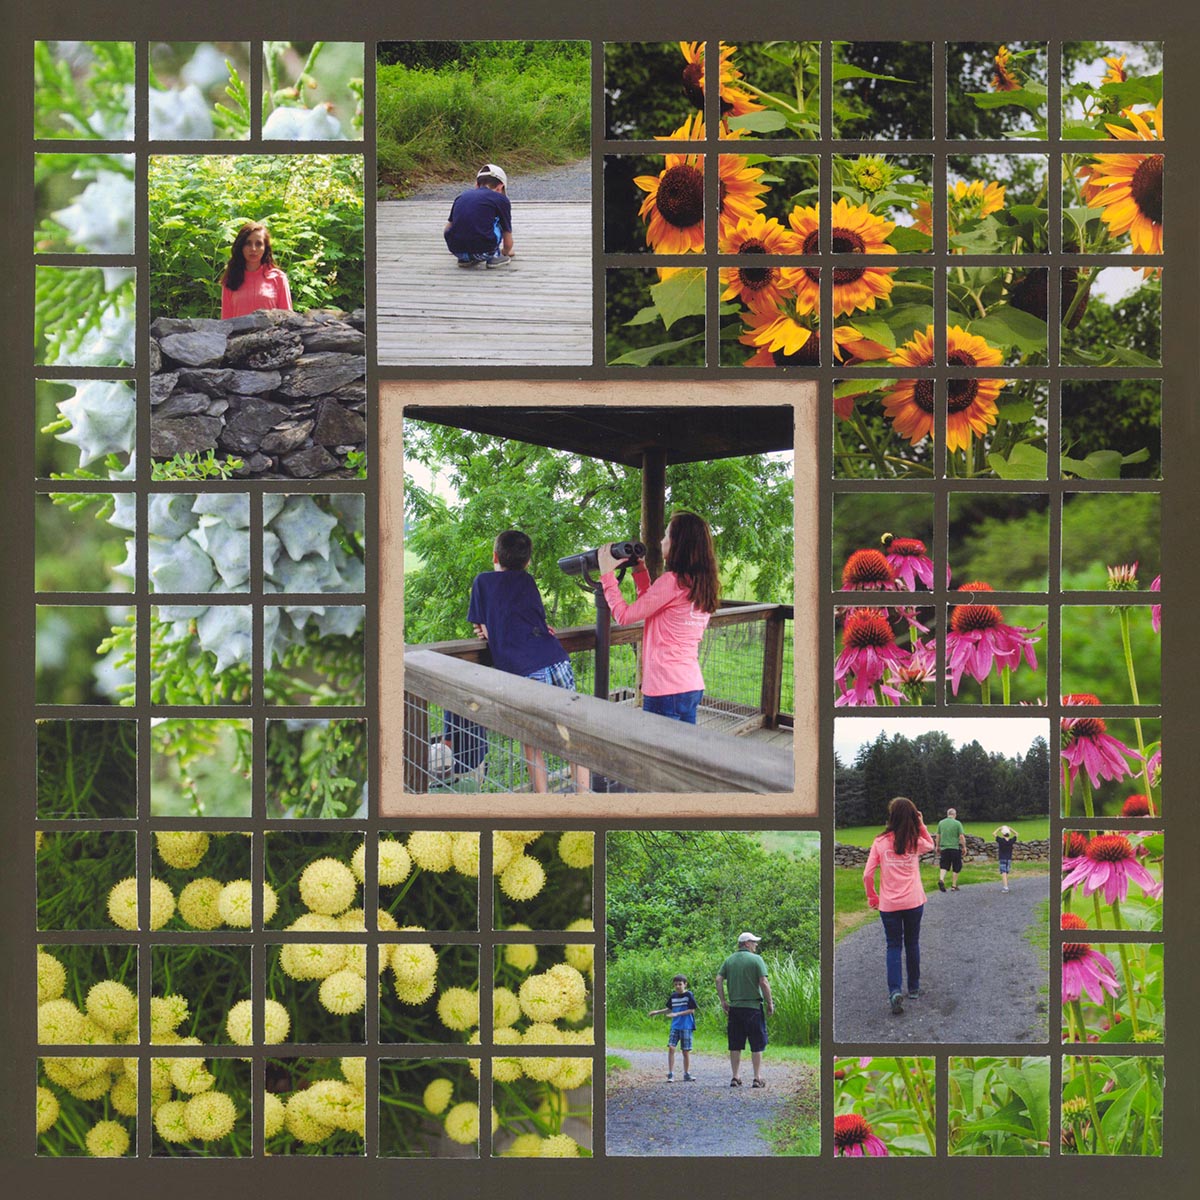
Blending two or more photos together can create spectacular, larger-than-life results.
To create it, cut photos into 1-inch squares and place matching hues next to each other. It tricks the eye into thinking it is one large photo.
For example, look at the coneflowers in the layout ... they appear to be growing under the sunflowers, but it is actually two different photos. And a bit of Mosaic Magic!
Photos can also be cut into strips and placed side-by-side to create panoramic shots with any camera or cell phone.
Two recreate this, take a photo of a portion of the scene. Turn slightly, keeping the horizon at the same spot, so the edge of the first photo frame is now the beginning of this shot. Take the picture, and, if desired, repeat.
Your prints can then be cut with a strip die and placed next to each other to create a panoramic. Another bit of Mosaic Magic!
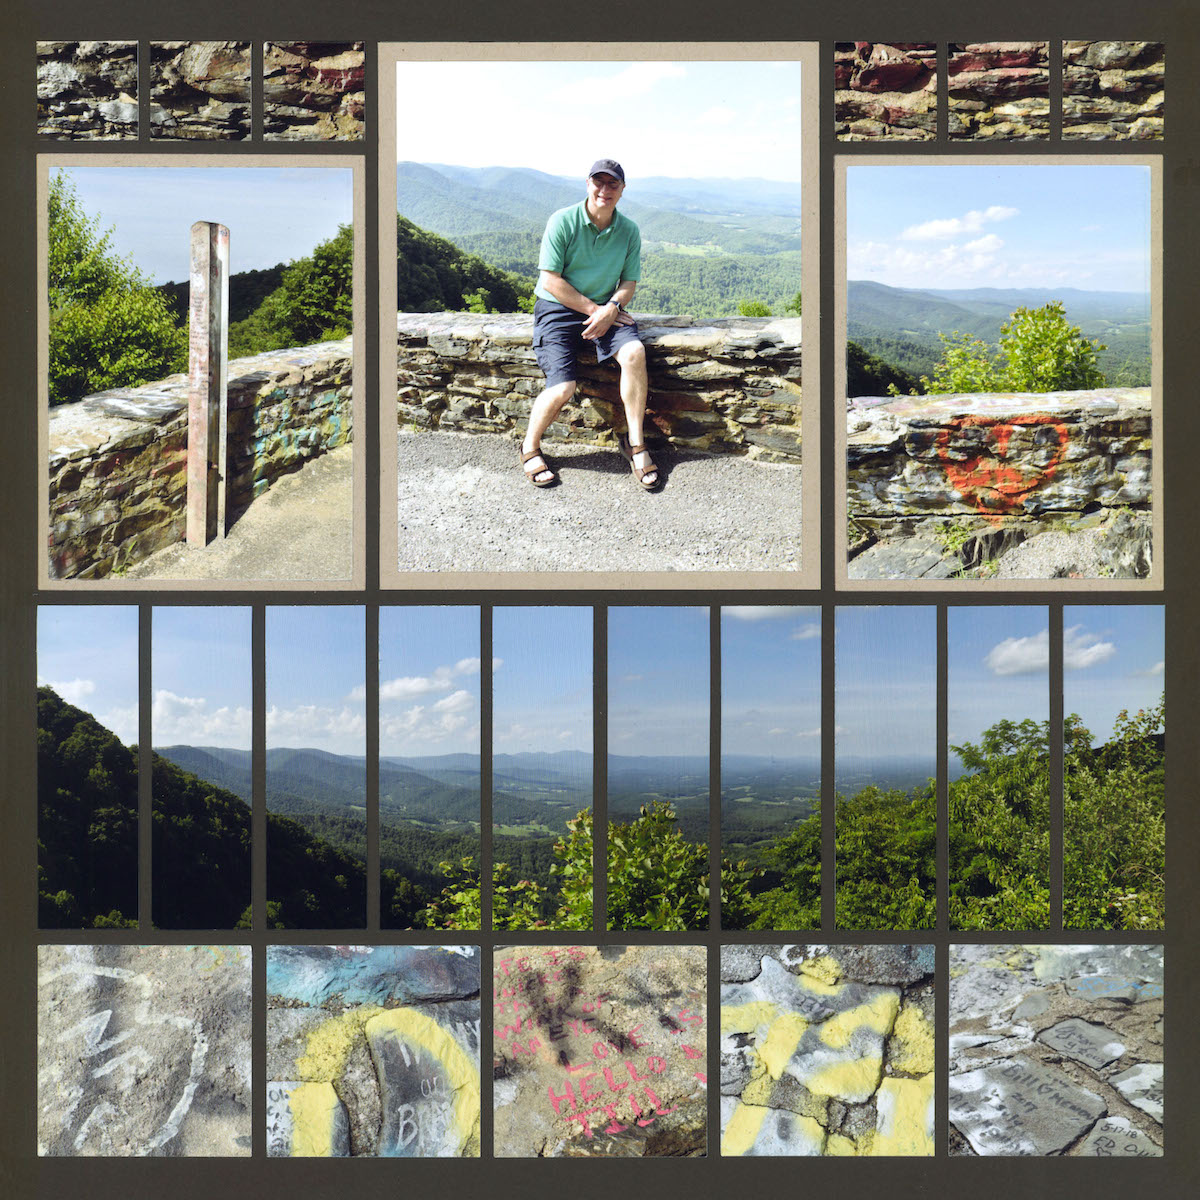
Blend photos together to create a panorama
5. Use Specialty Dies for Amazing Layouts
Layout Created with the Diamond Mine Collection
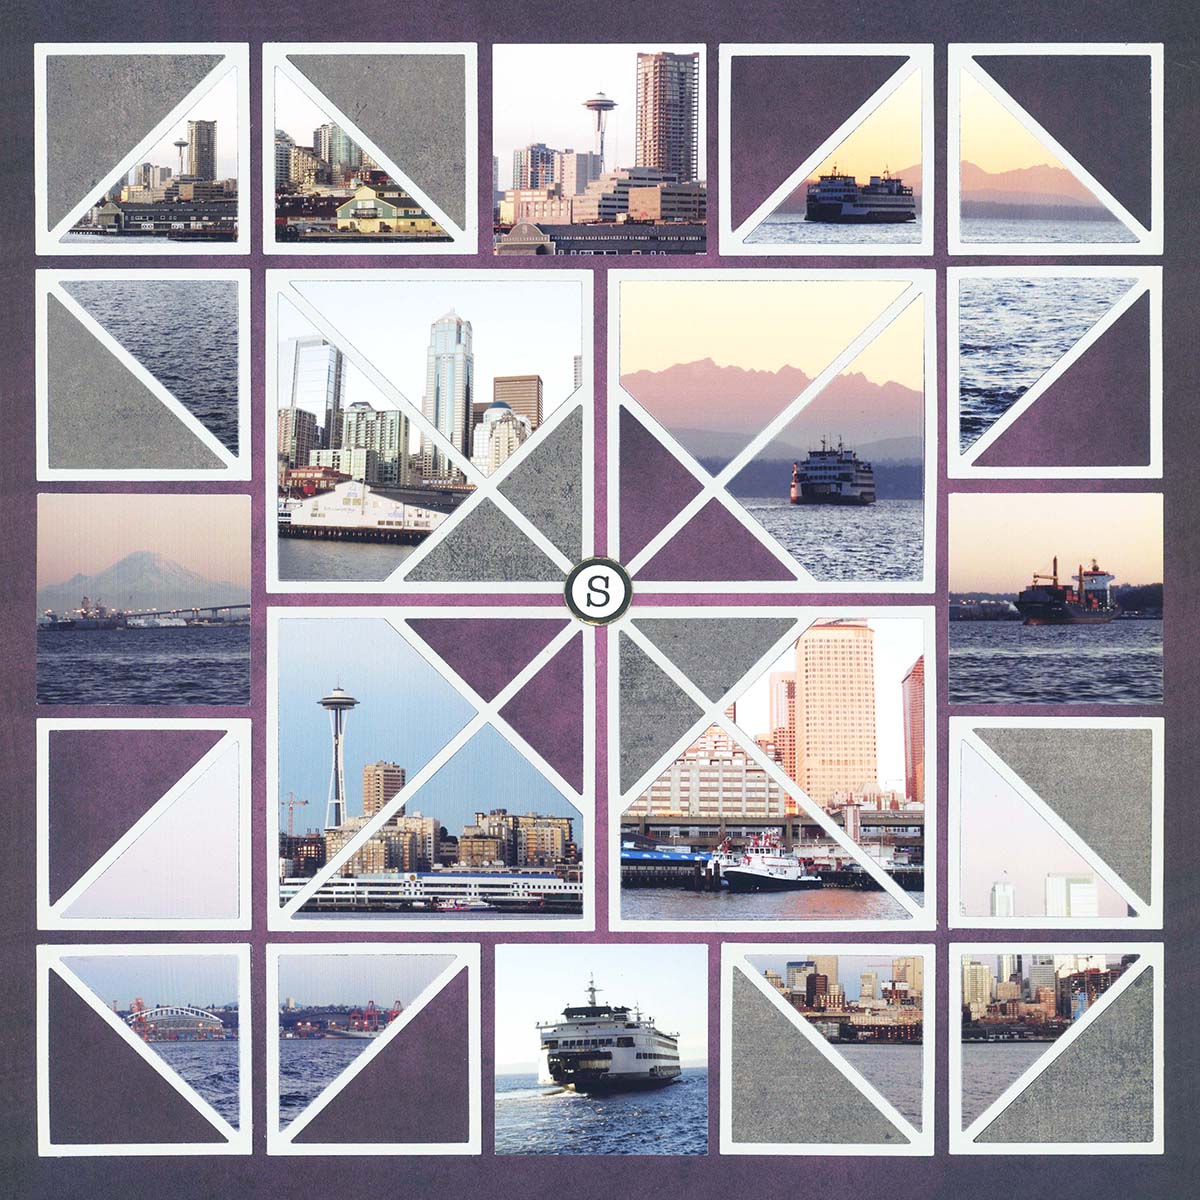
Scenic photos can become absolutely remarkable when using some of the specialty dies from Mosaic Moments®.
This layout uses dies from the Diamond Mine Collection to create beautiful angles that draw the eye right into the page.
Sweetheart Dies show the love for this location, while also helping the center photo stand out.
Layout created with the Sweetheart Dies
6. Cut with Care
Carefully plan cuts to avoid slicing through faces
The quickest way to make someone look like an alien from outerspace is to cut their face into 1-inch squares. The magic that happens when we cut photos into 1-inch squares simply backfires when we cut up people.
If you are want to create a mosaic page with people in it, make sure their entire face fits inside a 1-inch square.
You can use the dies or the Cutting Guide to help you dertermine ahead of time where the cuts will be.
Care is also needed when using some of the specialty dies.
The X Factor dies used in this layout help to take your eye around the page and allow you to fit more photos on the page.
However, if you aren't careful, the lines could easily decapitate someone -- something no one wants!
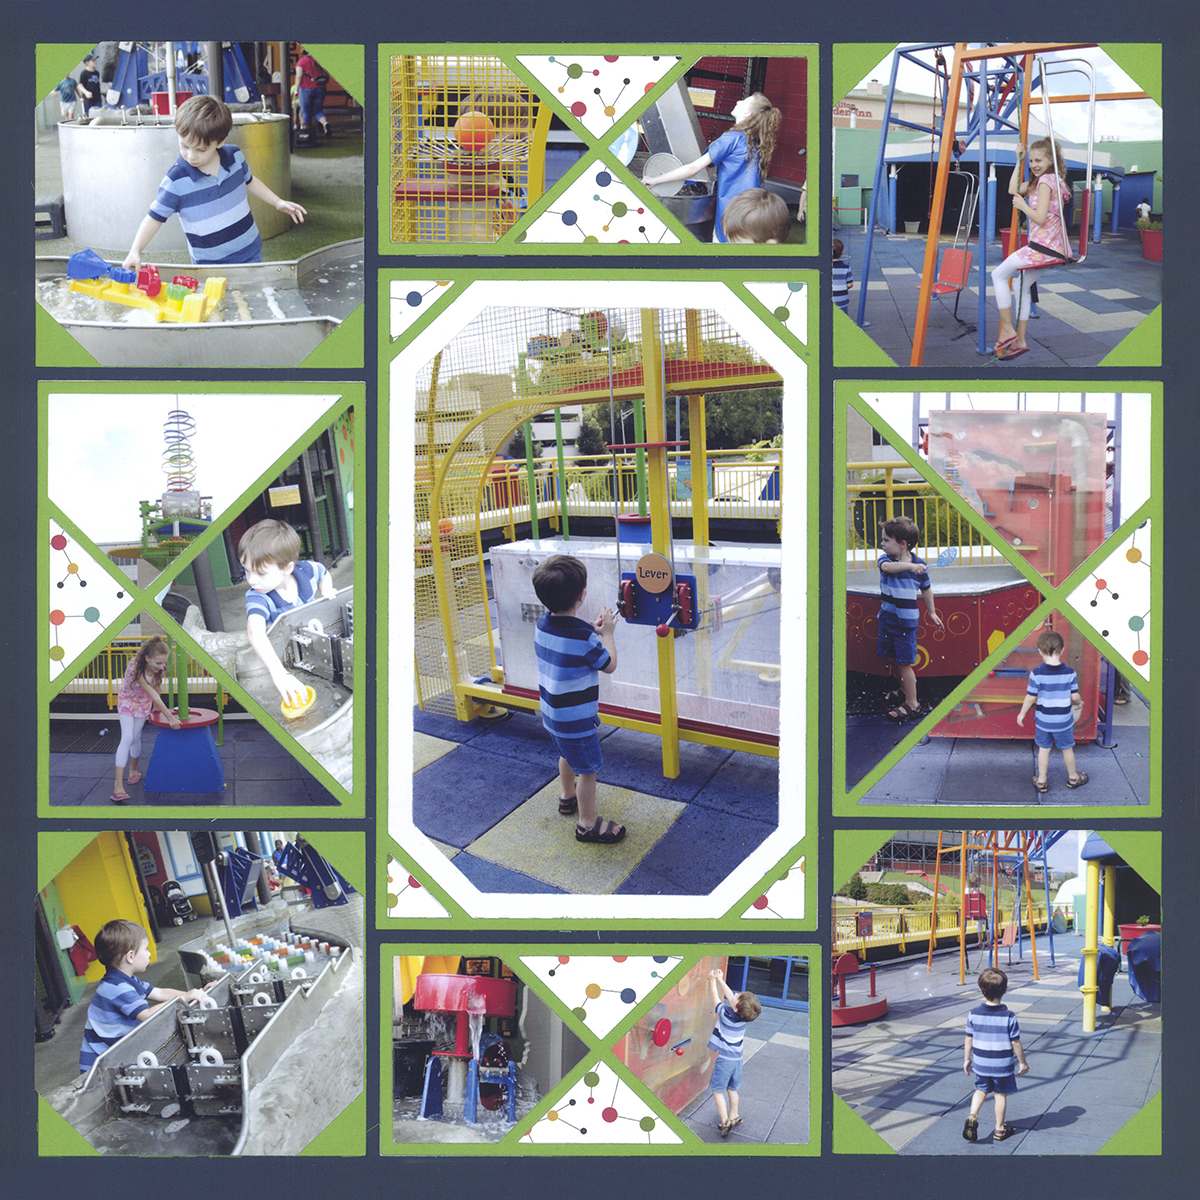
Take time to plan each cut when using specialty dies
7. Use the Pattern Gallery
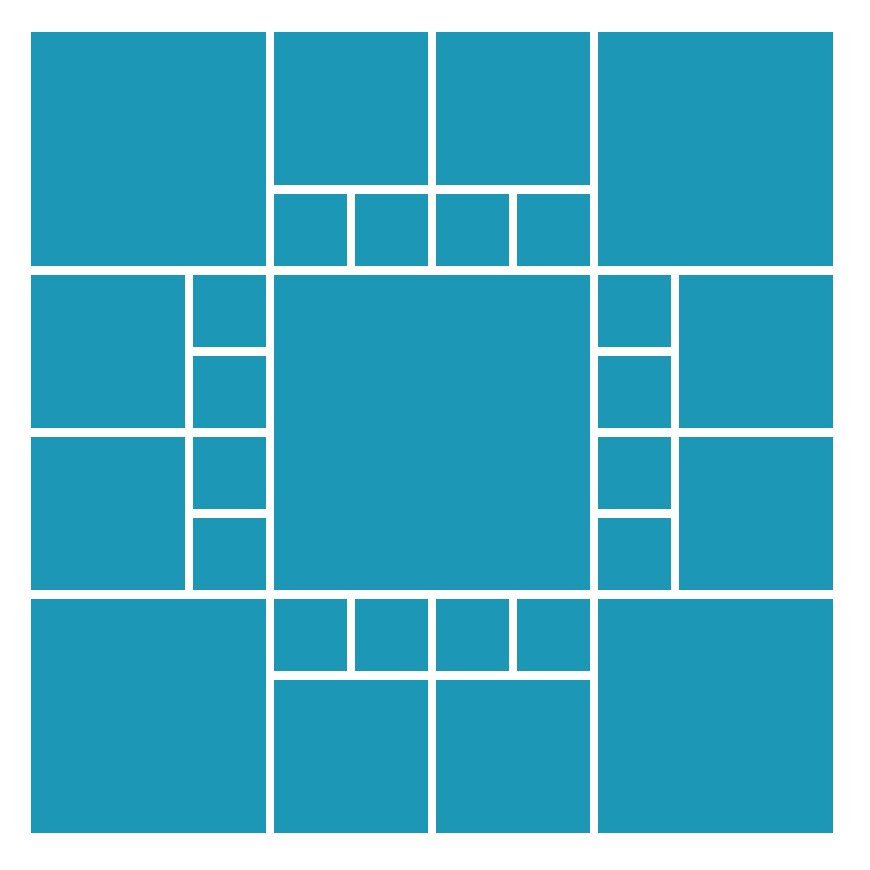
Pattern #339
The Pattern Gallery takes the thinking out of creating an amazing layout. The designs, more than 400 of them, are all balanced and created to make your photos shine.
You can follow them as pictured, substitue specialty dies, add mats, or even change out some of the boxes to make them your own.
The sky is the limit to what you can do, but when you start with the right foundation, you are guaranteed to soar.
8. Keep It Simple
Along with the basic set, Only the 'Hole In One' die was used, but it really stands out!
Editing oneself can be difficult, but keeping things simple is the way to go. After all, it's the photos that are most important. So, here are a few general rules to keep things simple:
- Use only one technique, like mosaics or strips. Too many can be overwhelming.
- Use only one die set or collection on a layout. Repeating the same design, like a flower, in different sizes will add more interst than putting in a flower in one square and seashell on another.
- Do not use more than one or two different patterned papers and make sure they coordinate well with each other in scale, shape and color.
- As with any form of art, sometimes breaking the rules is required!
