
Journaling, it’s an important element on our scrapbook pages, but how many of you also keep a journal for your everyday appointments and events? Maybe you’re a dedicated Happy Planner Girl or something a bit more streamlined like a Bujo Addict’s bullet journal. Planner Girls love their stickers and Washi tape while Bujo Addicts love their doodling, drawing and personalized themes.
Bujo style appealed to me when I first began. I followed people on Instagram and watched countless videos on YouTube. I had lots of inspiration and great ideas. I began with a dot grid book but found it difficult for me to see and the following year switched to a grid. All those tiny squares…without 1/8” separations! Who would guess? Follow through on making spectacular Bujo layouts…not so much…make a list, check it off…pretty much all I have time for, but I can dream!
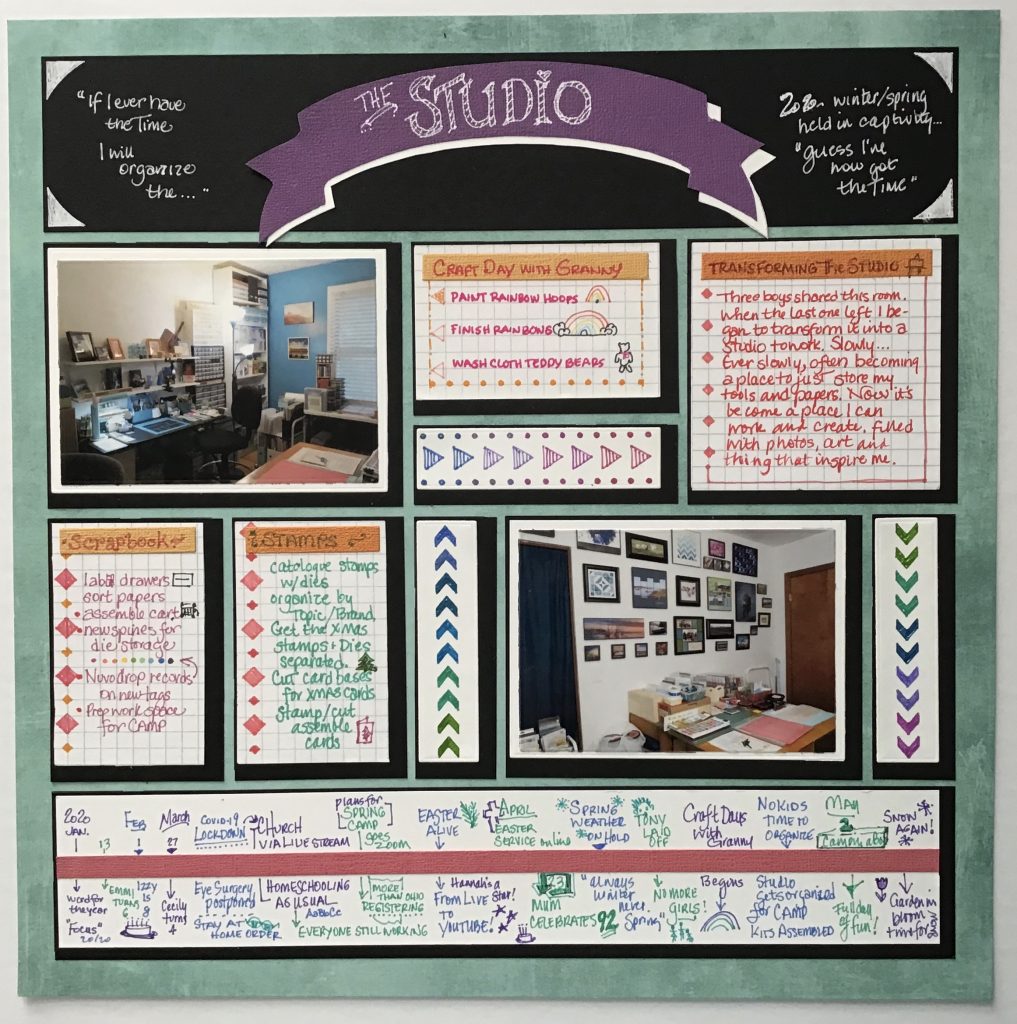
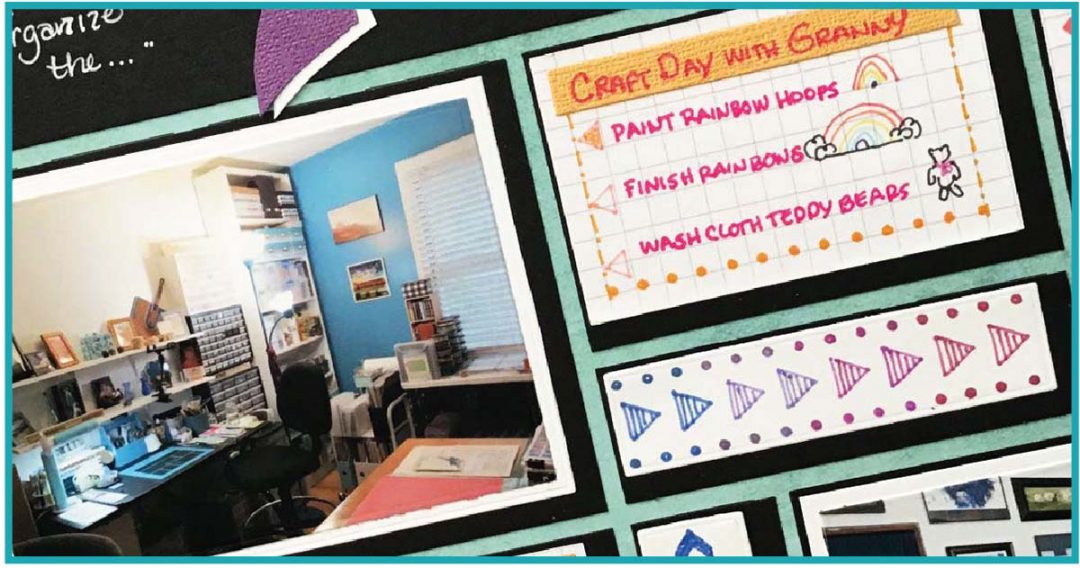
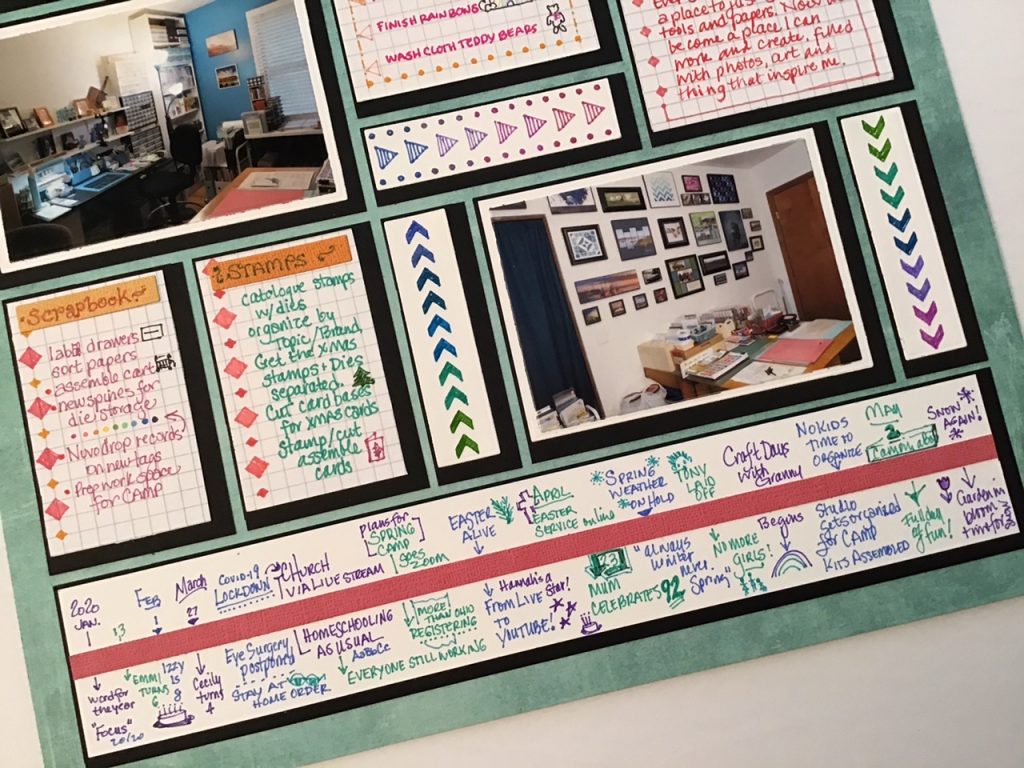
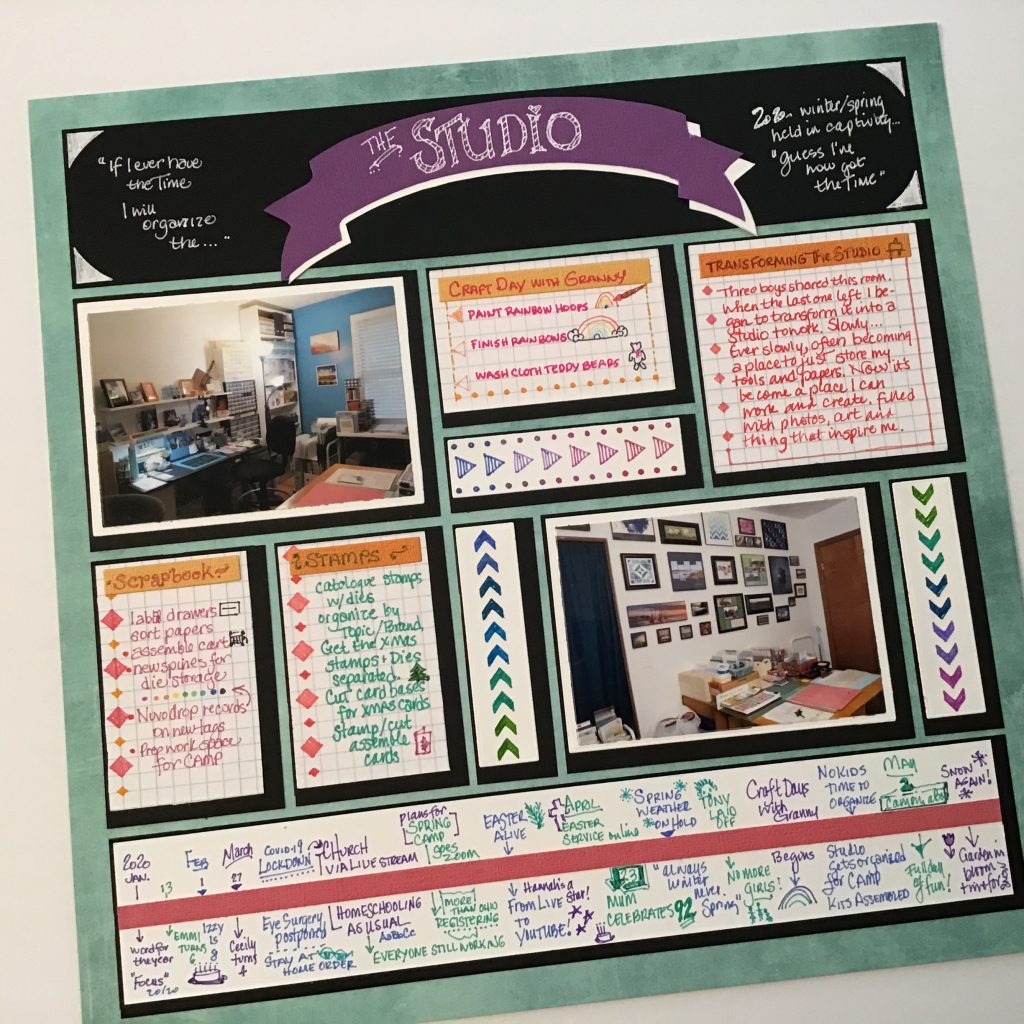
The layout I have planned today is going to mimic one of those Bujo style journaling pages. Some of the items included in Bujo Planners are stats, habits, favorites, lists of things to do and charts to keep progress on them. This page represents one of those things on my list of to-dos…organize my studio. This represents some of those things done, still to do and a modified time line of the events unraveling that allowed me to accomplish this task.

I began with one of the newer grid colors from the Cool Drinks Collection, the Energy Drink 12×12 Grid. For this project I’m going to rely only on our Basic Die Sets A, B and C, and the layering sets with each.
Black and white cardstock will be the basic foundation of all tile and mat choices. The white tiles will be covered with grid paper. I have used journaling stencils for doodling and a collection of gel pens, flair pens and fine point markers for lots of color options. Additionally I have included pops of color by using Doodlebug Designs Brights in Watermelon, Marigold, Tangerine and Lilac for title banner strips for each journal tile.
Each white tile, covered in 3/8” grid paper has been cut using the layering die from each die used to cut the black tile. This gives us a narrow 1/8” border, but for this application I’m going to offset these tiles and leave a very narrow edge on the top and left side, just wide enough to look like a line drawn edge like in a Bujo layout. The wider right and bottom edges are to get the drop shadow edge look.
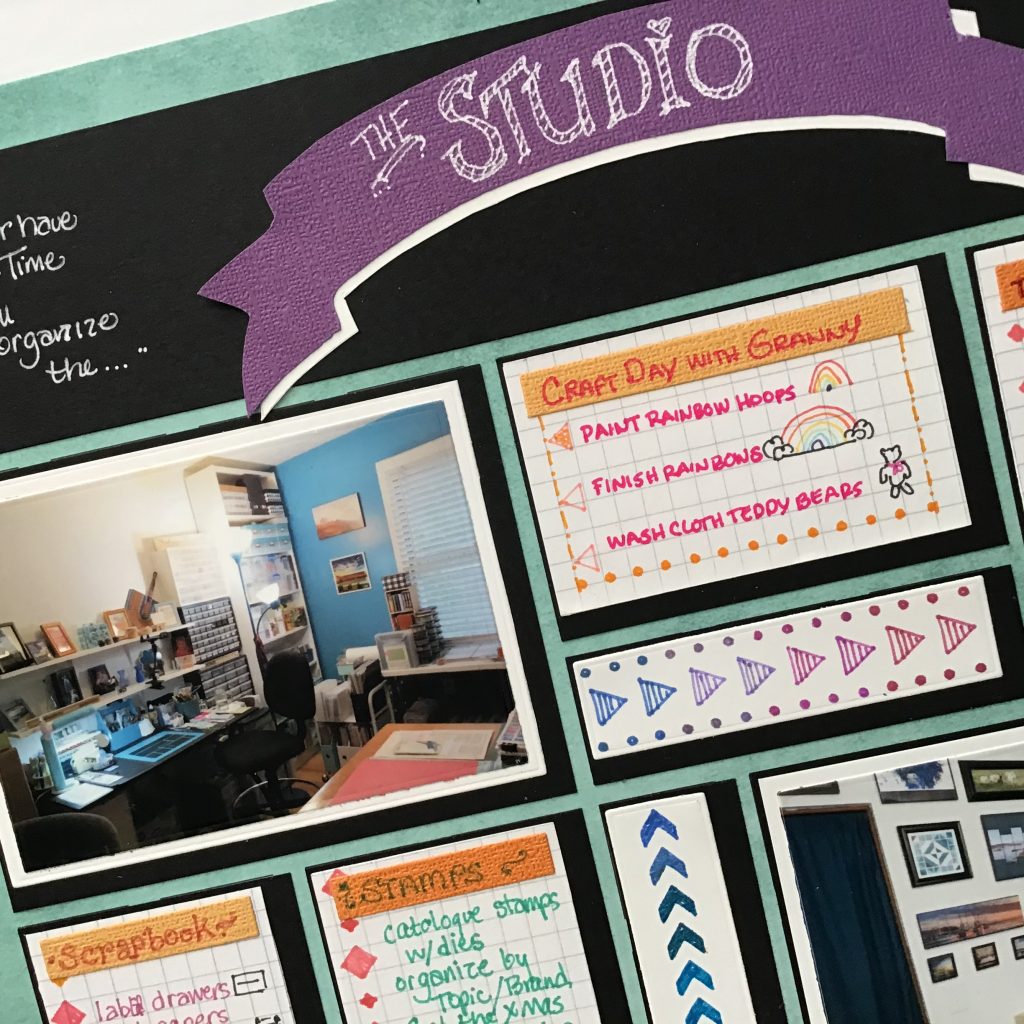
My title block is a full hand cut 2 1/8” x 11 1/8” panel in black with stenciled corners in white gel pen. The purple banner title, The Studio, has a drop shadow in white to stand out on the black grid.
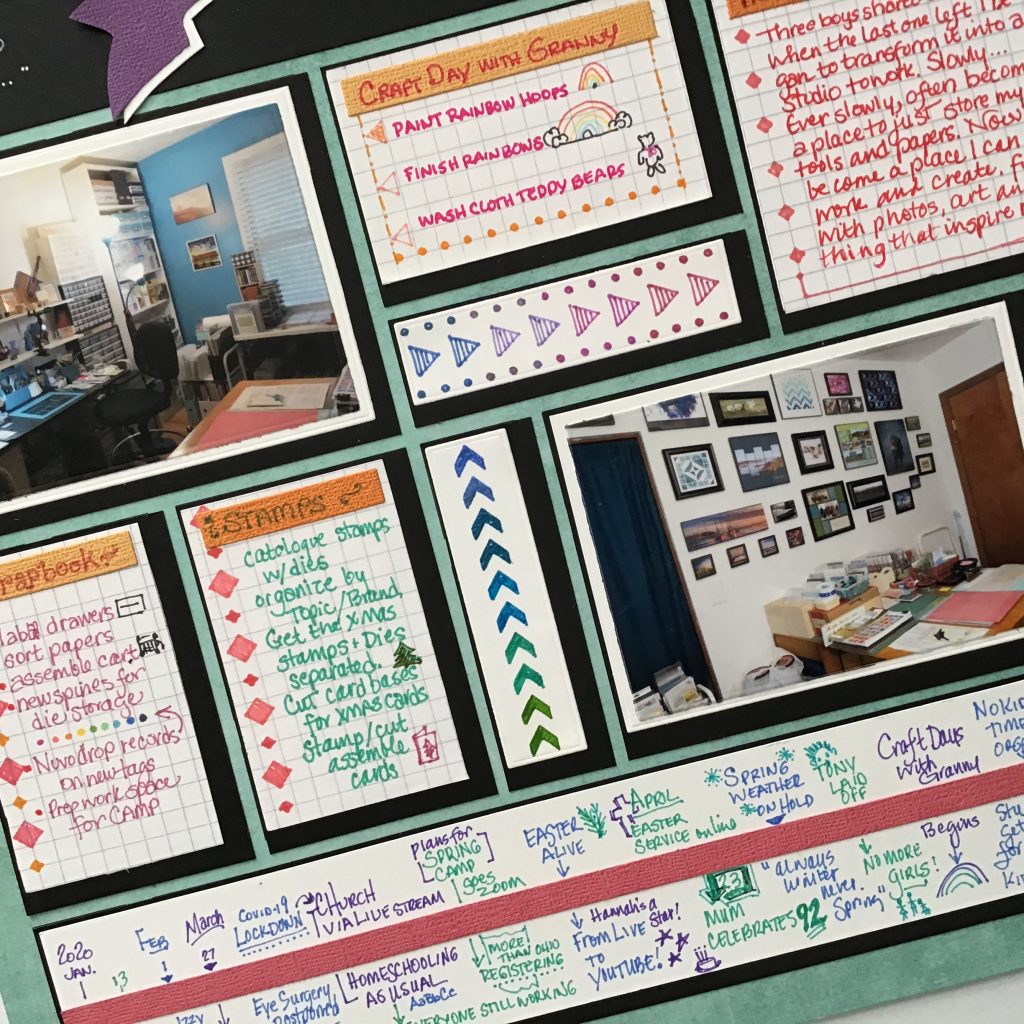
My timeline is a white strip mounted on a full 2.125” x11.125” black base. I have a 1/4” strip of Watermelon Doodlebug Designs cardstock in the midsection of the white stripes. I’ve used three colors to write in the details.
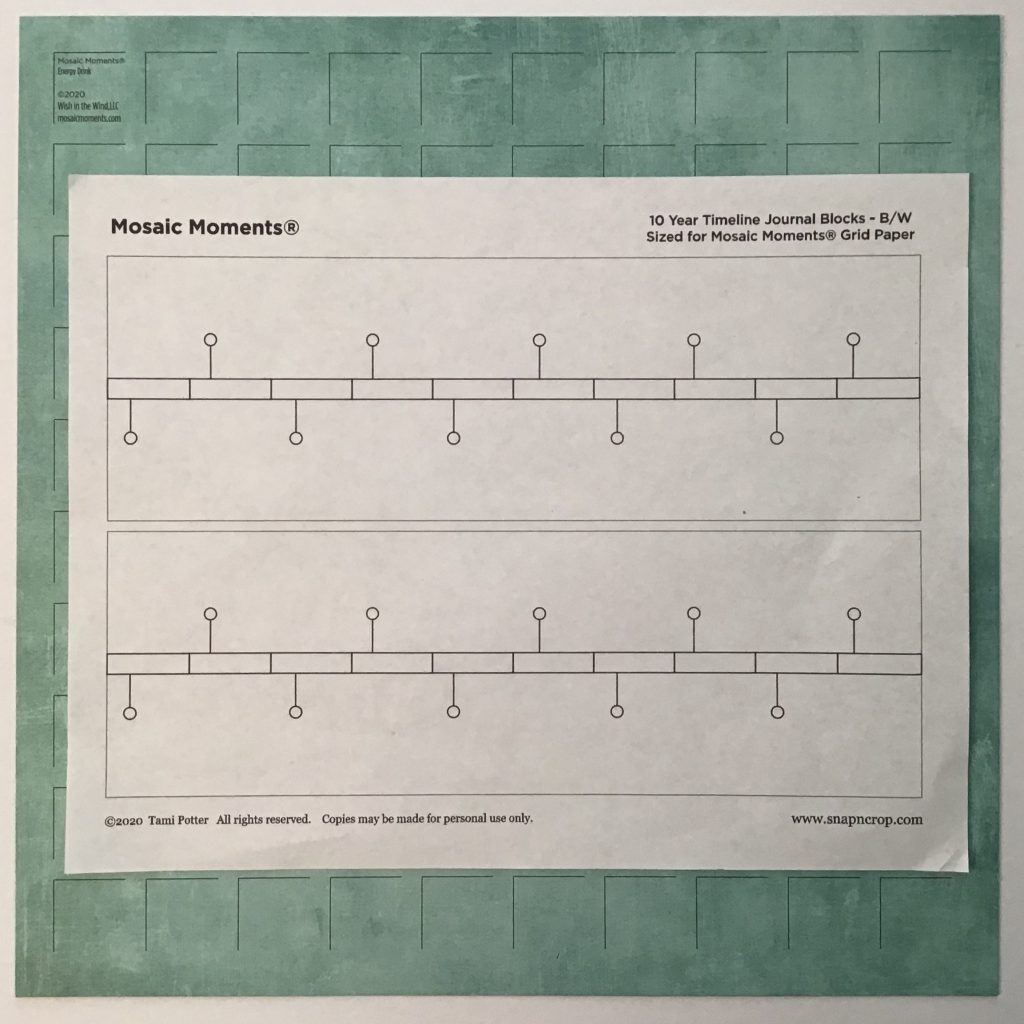
UPDATE: Tami has recently added a timeline to fit to the grid that you might find easier to use than creating your own. check it out!
Why not take a break from your normal style of scrapbooking and try this style to document a day, a week, an event or even a season?
You might not love your handwriting, but there’s something very personal about including this insight into you for those generations to follow. Don’t you love finding a handwritten note from an ancestor? Do you find similarities between yours and their’s…will those to come see themselves in yours?
Have fun putting a similar layout together. Relive your childhood of doodling, make it colorful, make it yours!
Andrea Fisher