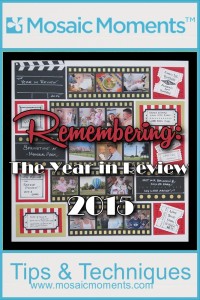
Welcome to a brand new year! Our scrapbook layout to begin this new year with is actually going to take a look at a way of remembering the year that has just passed. A Year in Review layout can be a fun way to begin an album as a preview of things to come, or to close out the album with a brief look back at the highlights of the year.
Supplies used:
• MM 12×12 White Grid Paper
• MM Red Paper Tiles
• MM Film Strip Die
• MM Die Sets A, C
• Gold cardstock
• White Sakura Gelly Roll gel pen 03
• Black Micron pens 005, 01, 02, 03, 05
• Red Micron pens 01, 03
• EK Success label punch and 1.75” sq. punch
• Fiskars postage stamp scissors
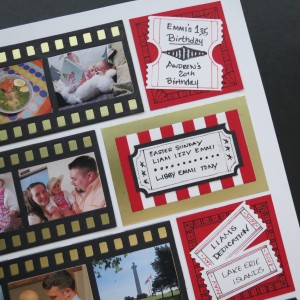
We’ll incorporate the film strip die, the perfect way to capture many moments, black & gold which are the trending colors in the craft world currently and the versatile and often under-appreciated white grid paper. We’ll add a dash of bold red to the mix, some doodling and creative journaling tags to reflect a classic Hollywood movie theme page.
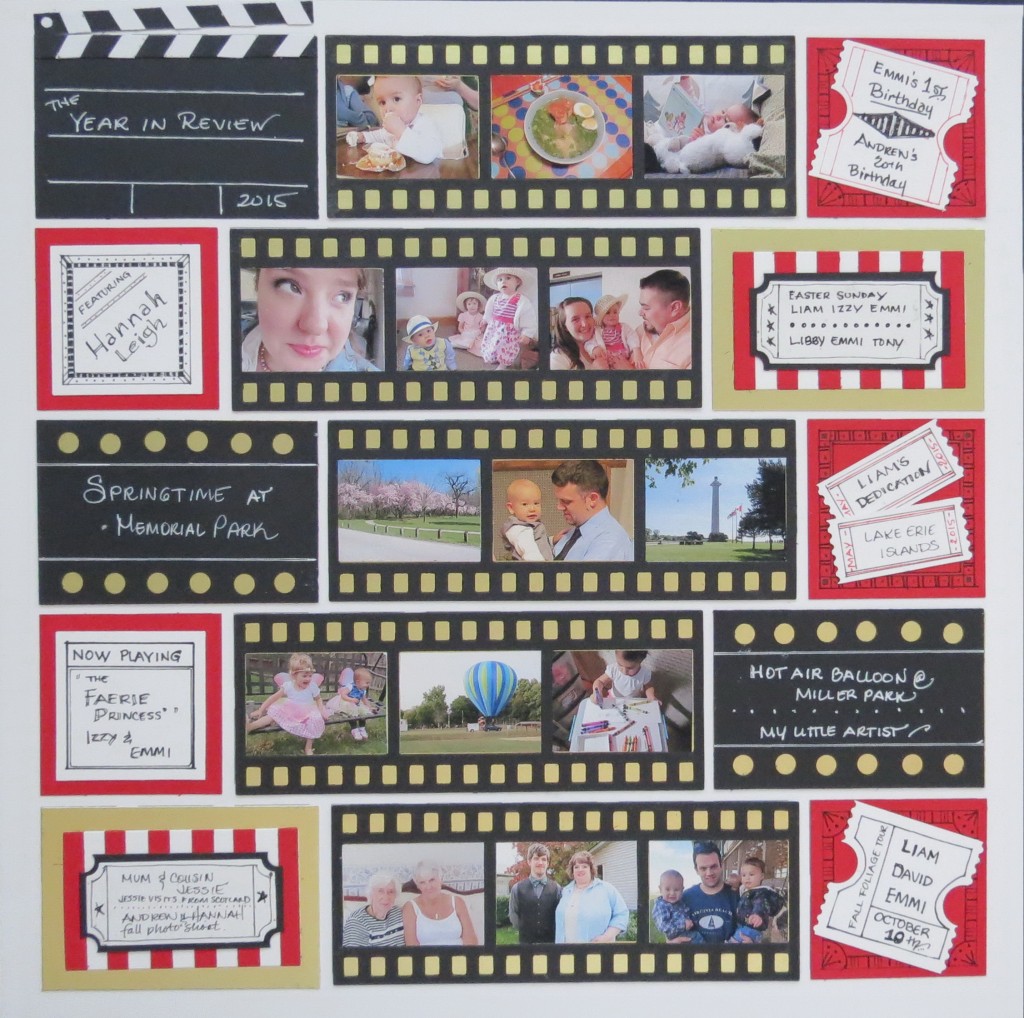
The layout I have used is the horizontal of the pattern I used recently for Liam’s page. I toyed with the idea of adding a second strip in the second and fourth rows, but that would also have reduced my spaces for journaling. It’s an option you could consider. This is presented as a one page layout with 15 photo spots enough to choose a photo from each month of the year, but expanding it to a two page layout will increase the amount of events you can cover.
The page flows nicely reading left to right as a book making it easy on your eyes, keeping interest and moving along to the end. As with any story or movie, keeping it moving and engaging is important to hold your audience.
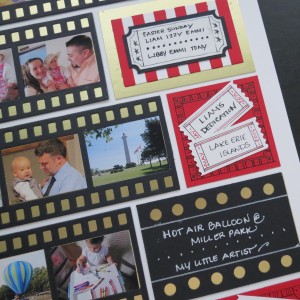
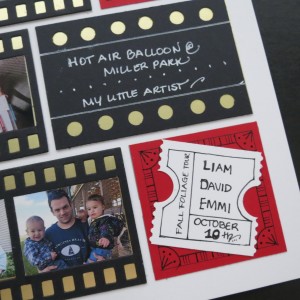
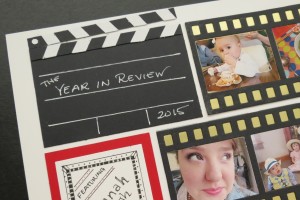
Gold cardstock backs each filmstrip. Using Die Set C four 2×3 tile blocks have been created. Two gold tiles have black cardstock with a marquee style edging. The journaling on these is done with a white gel pen. There are two additional gold blocks with a red and white paper tile reminiscent of the classic popcorn boxes, using the layering die, on top with a ticket style label tag for the journaling on the very top.
Five red 2.125” squares were created using Die Set A. A few of the squares have white squares mounted for journaling, the others have doodled borders with white ticket style journal tags.
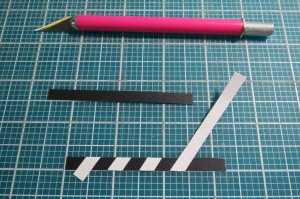
One black 2×3 paper tile was used to create a movie clapper board as the title of the page. To create the iconic striped clapper section I used two ¼” strips for black cardstock and one white ¼” strip. The Mosaic Moments self-healing mat grid helped me to get the angle I wanted and evenly space the strips. A white punched circle finishes it off. One strip is attached to top layer of the board while the other is slightly raised into the border area.
I hope you can see the possibilities for remembering your special moments in 2015 and give a few a try! Remember, we love to see what you do!! Share with us on our Facebook page and inspire us with your creativity!
Andrea Fisher
Our Pinterest page has lots of creative ways to dress up your Mosaic pages and improve your photo skills, stop by often and follow all the boards. All our tips and techniques can be found on this board.

