
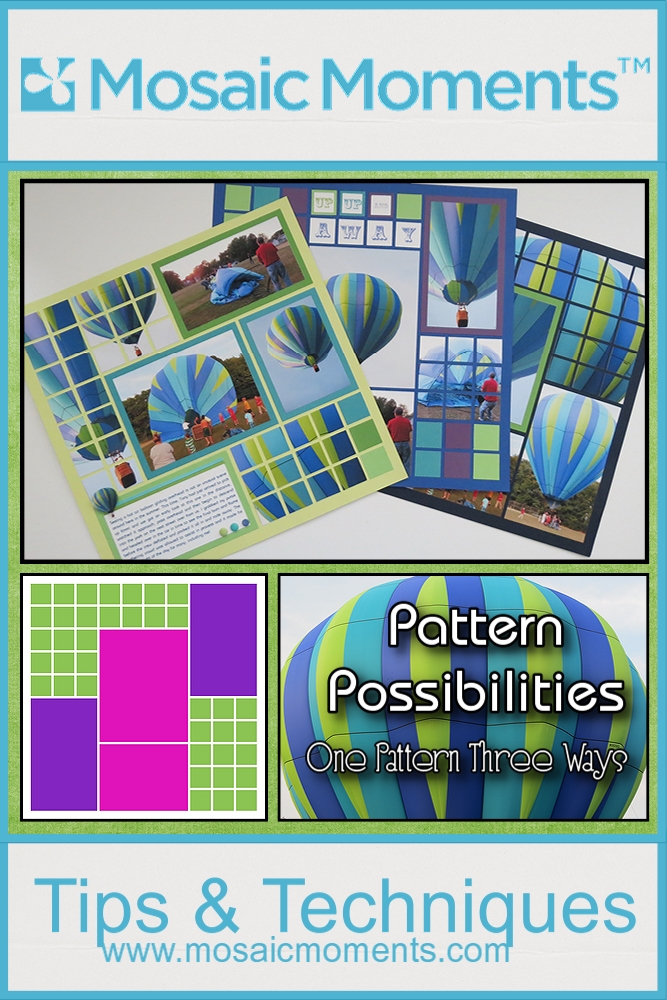
Up, Up and Away
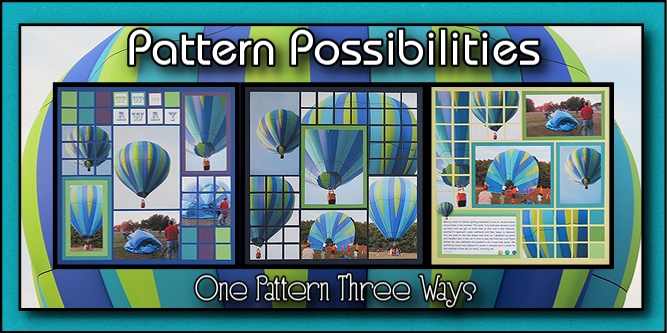
Pattern Possibilities! One Pattern Three Ways
I’m going to take a new approach to showing off some of the possibilities with our patterns. Beginning with one Pattern #167, a mosaic pattern and eight photos. We’ll see the pattern possibilities with three layout variations of the pattern, three different colors of grids and all the same photos to work with. The photos will be printed in three sizes, 3.5×5, 4×6 and 5×7. How they are cut and the sections they will fill will vary a bit but I think you’ll see how versatile the patterns can be.
Mosaic Moments Die Sets used: 4×6-1″ squares, Sets B, C
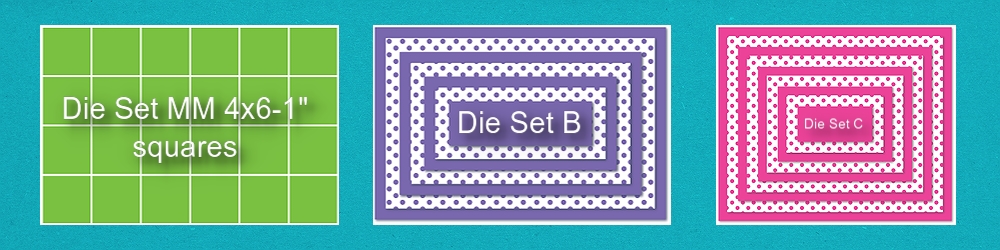
Mosaic Moments Die Sets used with Pattern #167
The photos:
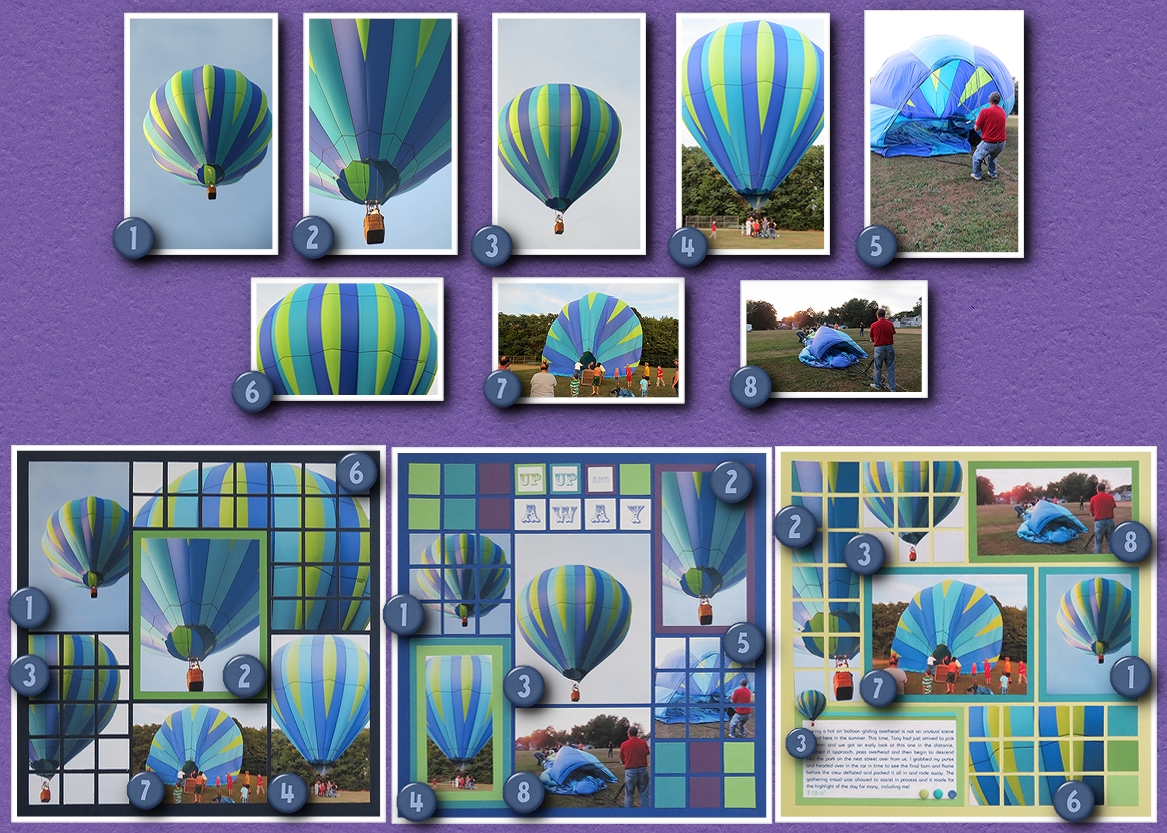
MM Pattern Possibilities Photos used for these layouts and positions
The original pattern and variations:
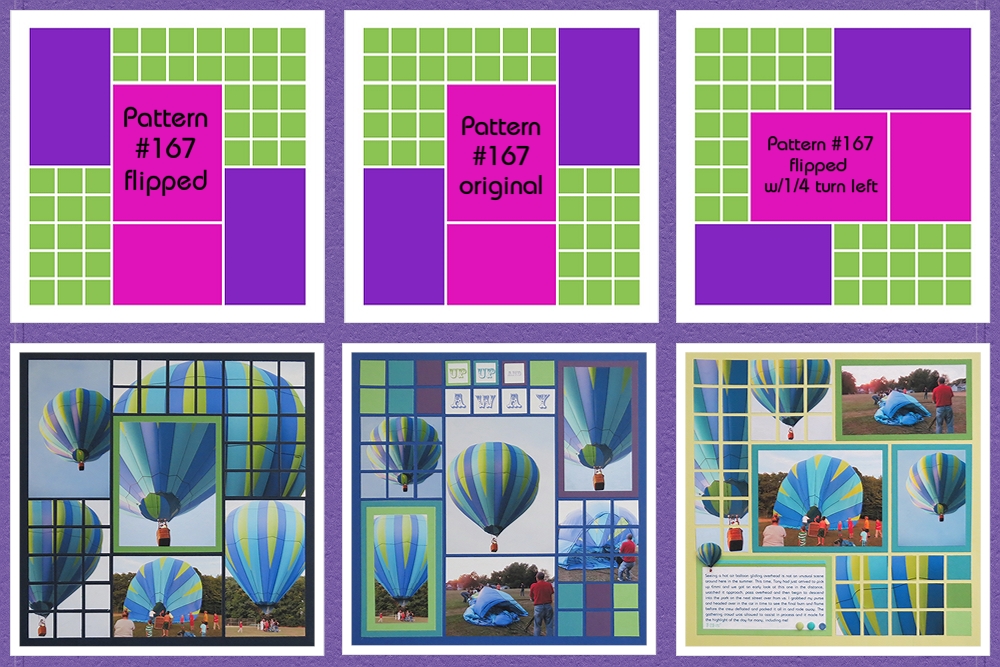
MM Pattern Possibilities Pattern #167 and layout to match
Let’s get started!
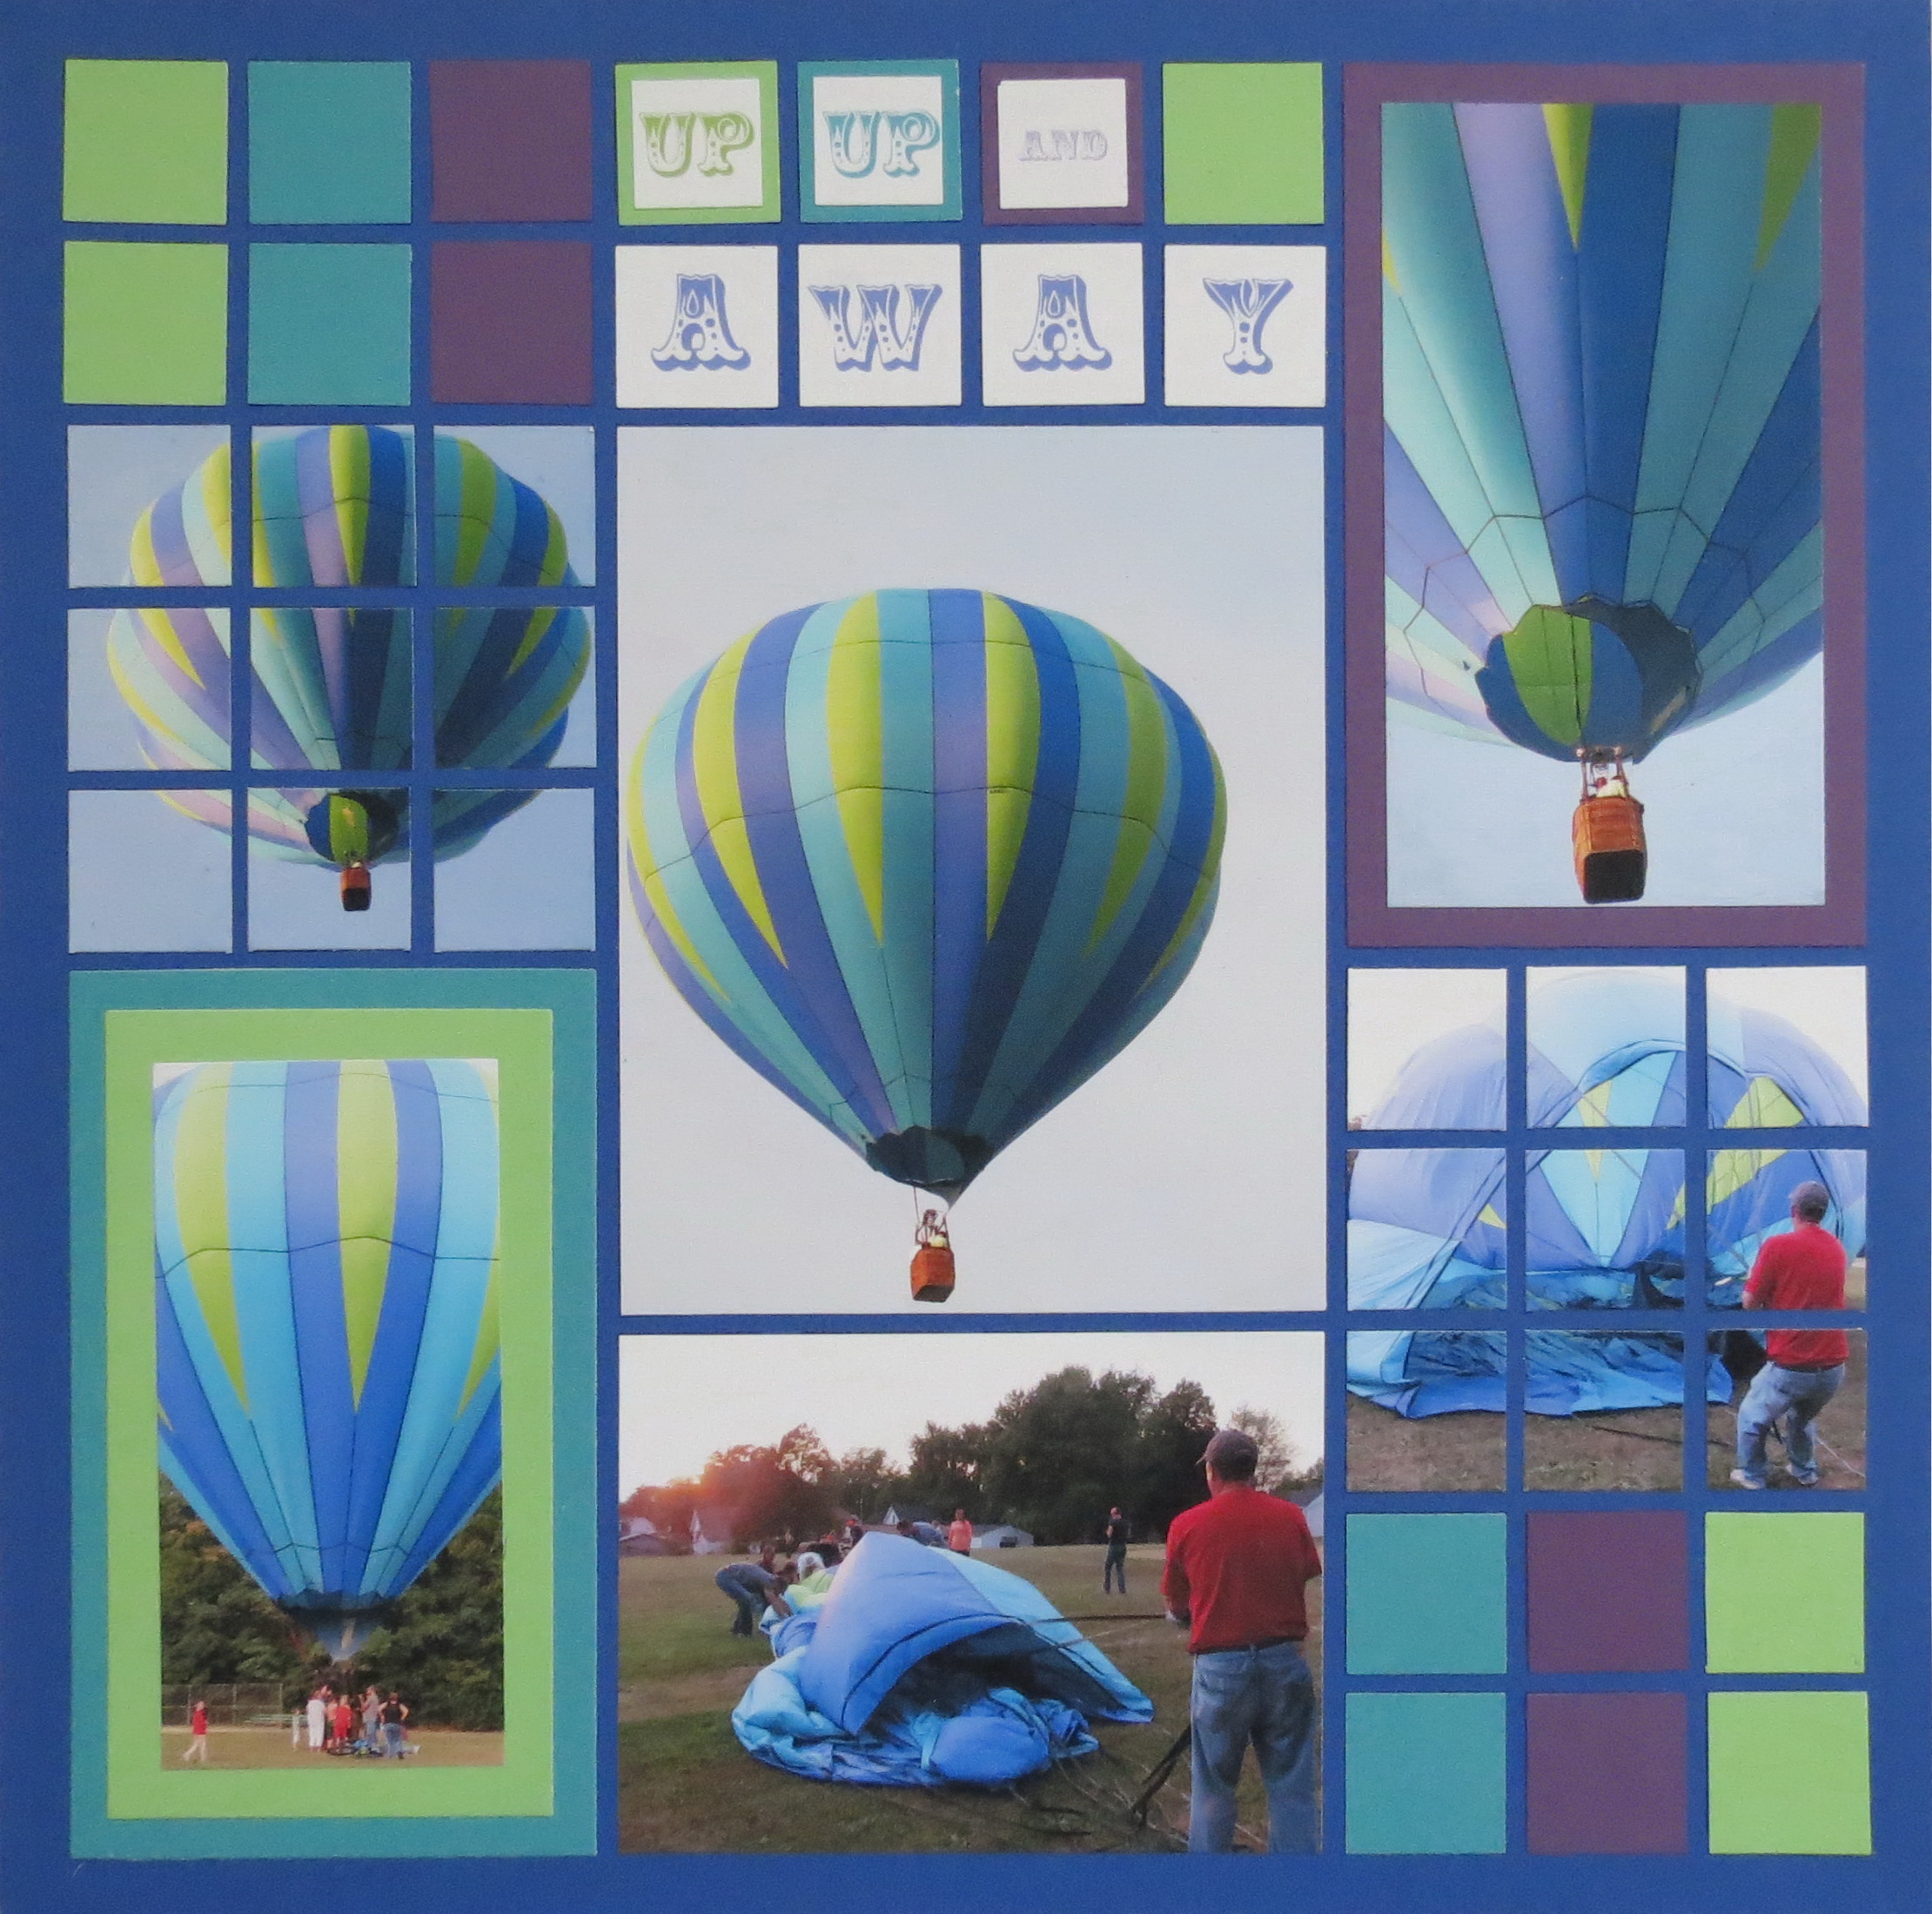
Layout One:• Flip of the original Pattern #167 mosaic
• Navy Blue Mosaic Moments 12x 12 Grid
• all photos, center photo with mat for focal point

MM Pattern Possibilities flip of original pattern
The top right corner mosaic is printed at 5″x 7″. The section that isn’t used on this page is saved to use on the Citron layout for fill color. The center photo is on a single mat.
Layout Two:• The Original Pattern: Pattern #167 mosaic
• Prussian Blue Mosaic Moments 12x 12 Grid
• Photos, paper tiles, mats and a title
MM Pattern Possibilities Pattern #167 original
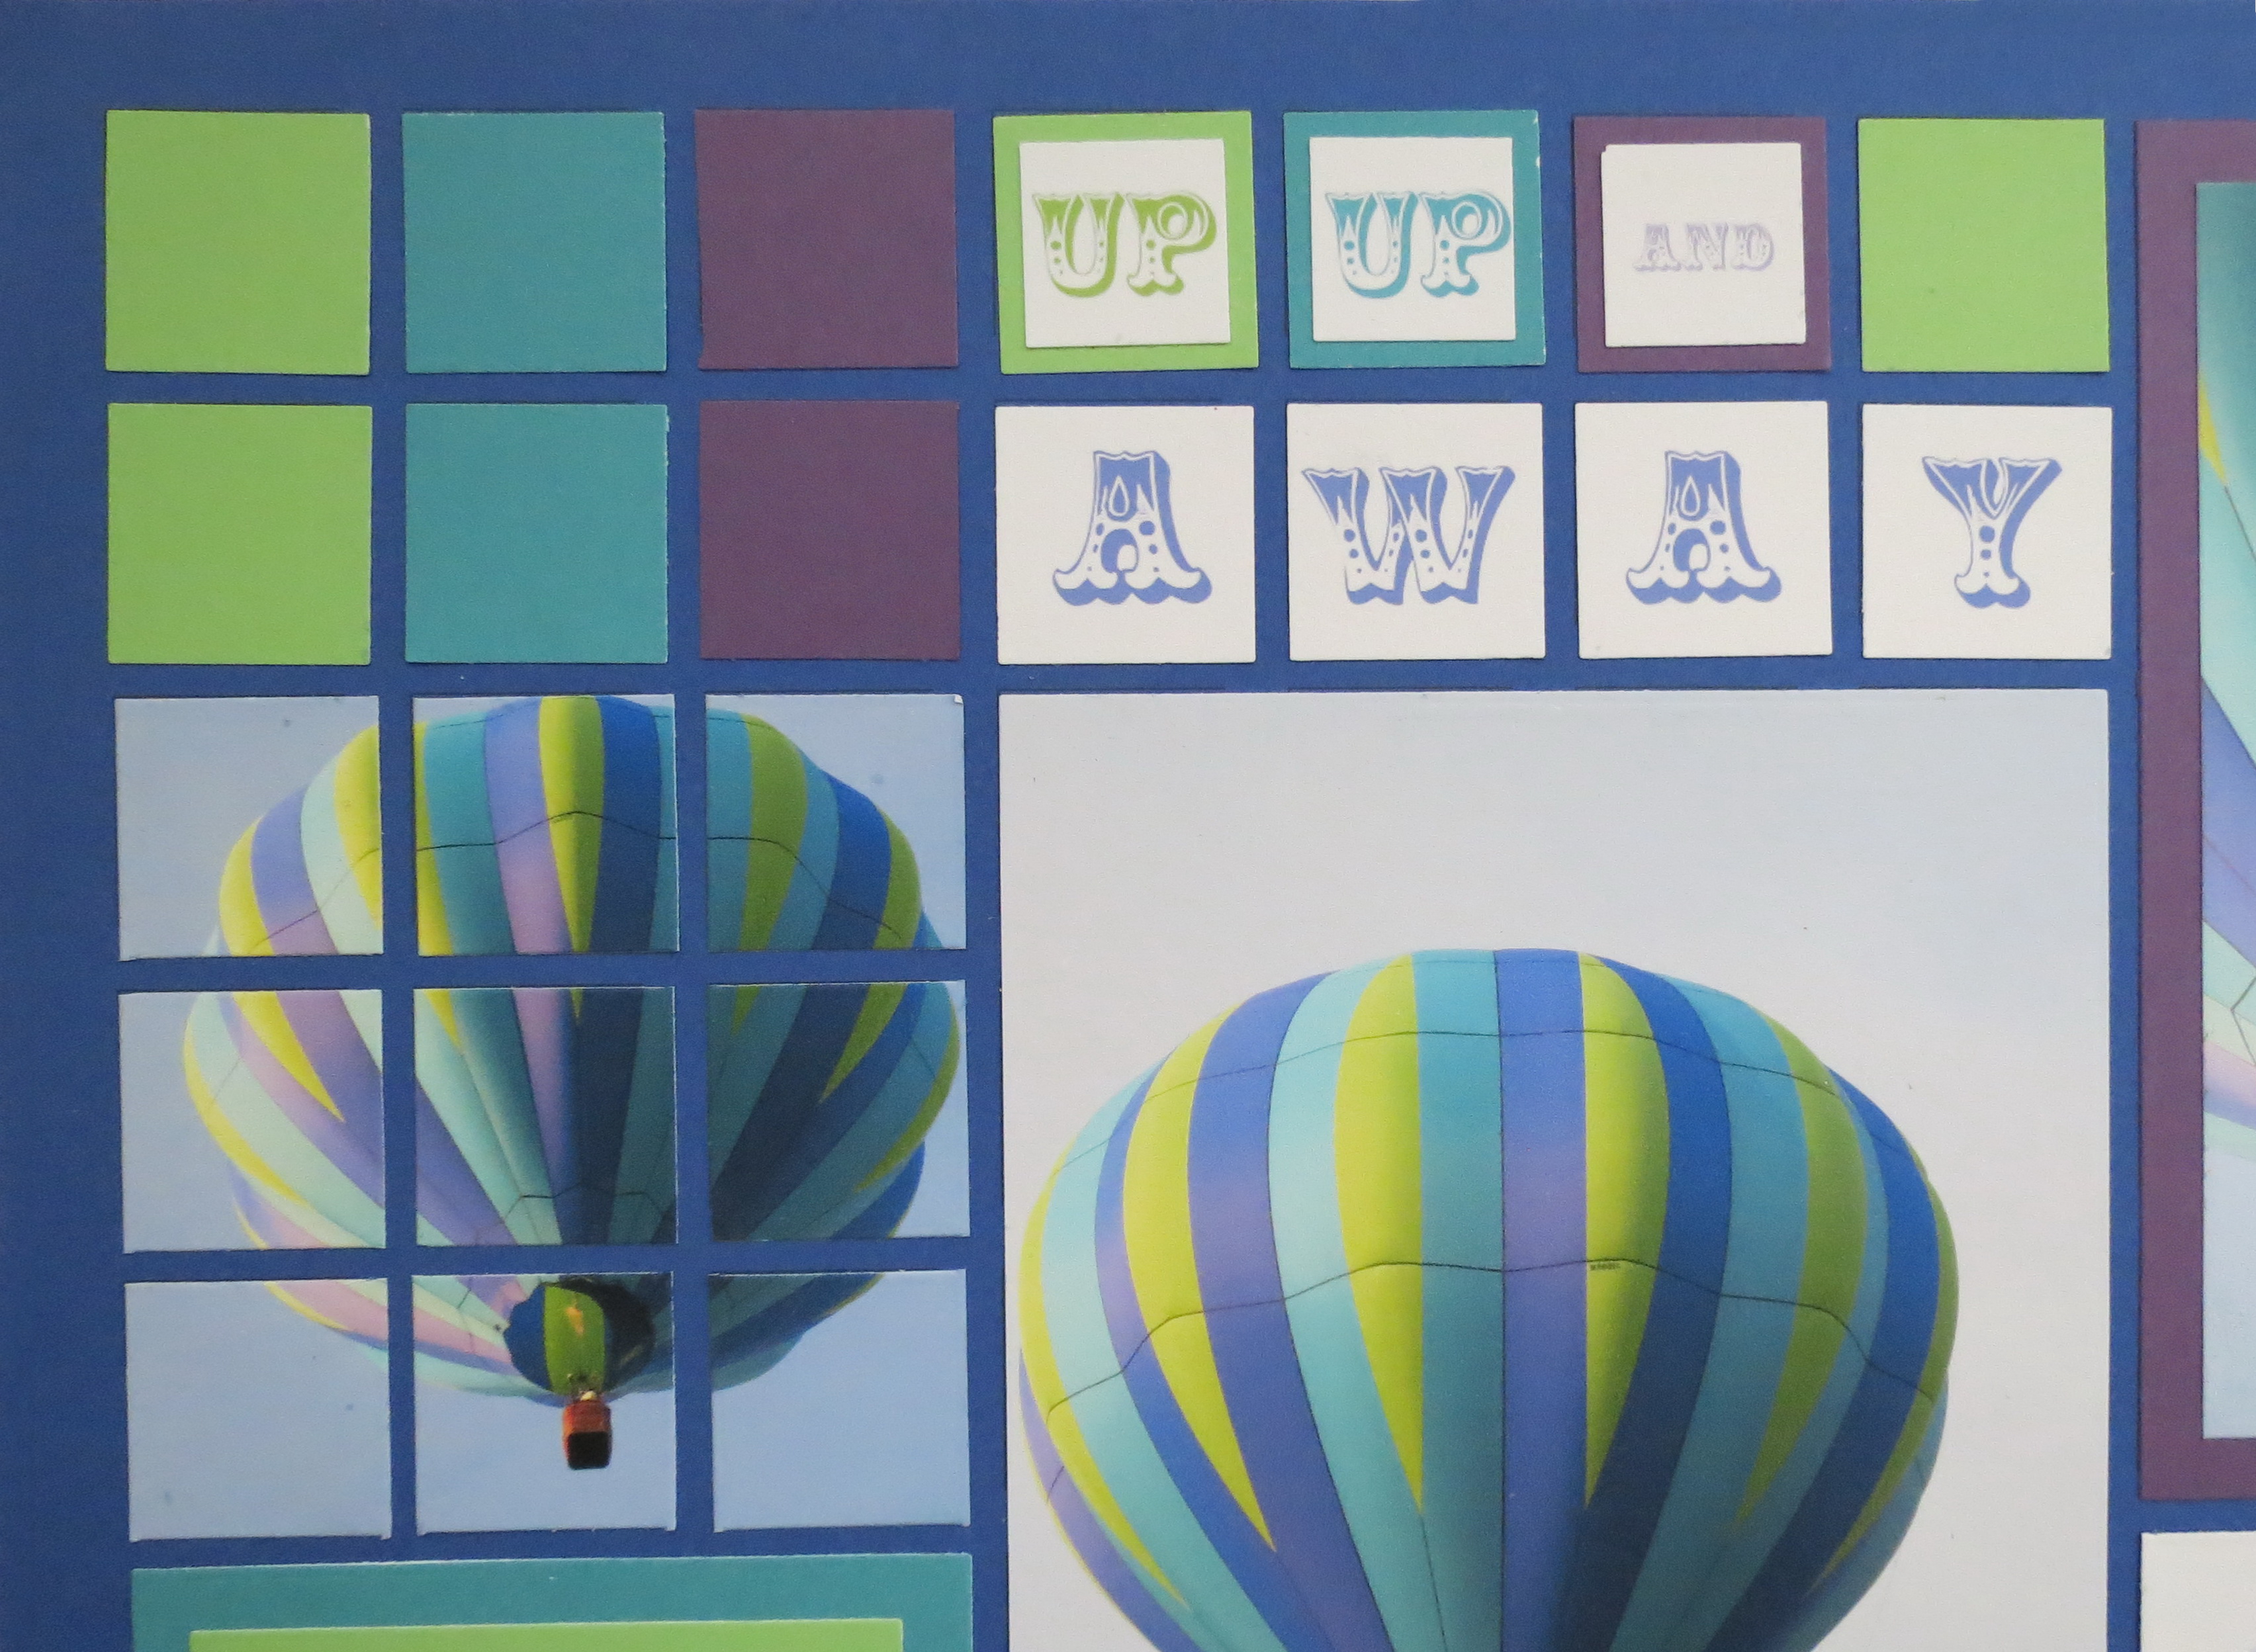
MM Pattern Possibilities using mosaic area for title and paper tile accents
Letters for title are printed on a 4″x 6″ white matte photo paper and a 1″ punch is used to trim letters for “away” and a 3/4″ punch for the words “up, up, and” then mounted on 1″ paper tiles.
MM Pattern Possibilities cropping photo and adding paper tile accents
This photo had a lot of dead grass so I opted to use only enough for a 3×3 area and then added paper tiles to match pattern in the top mosaic area.
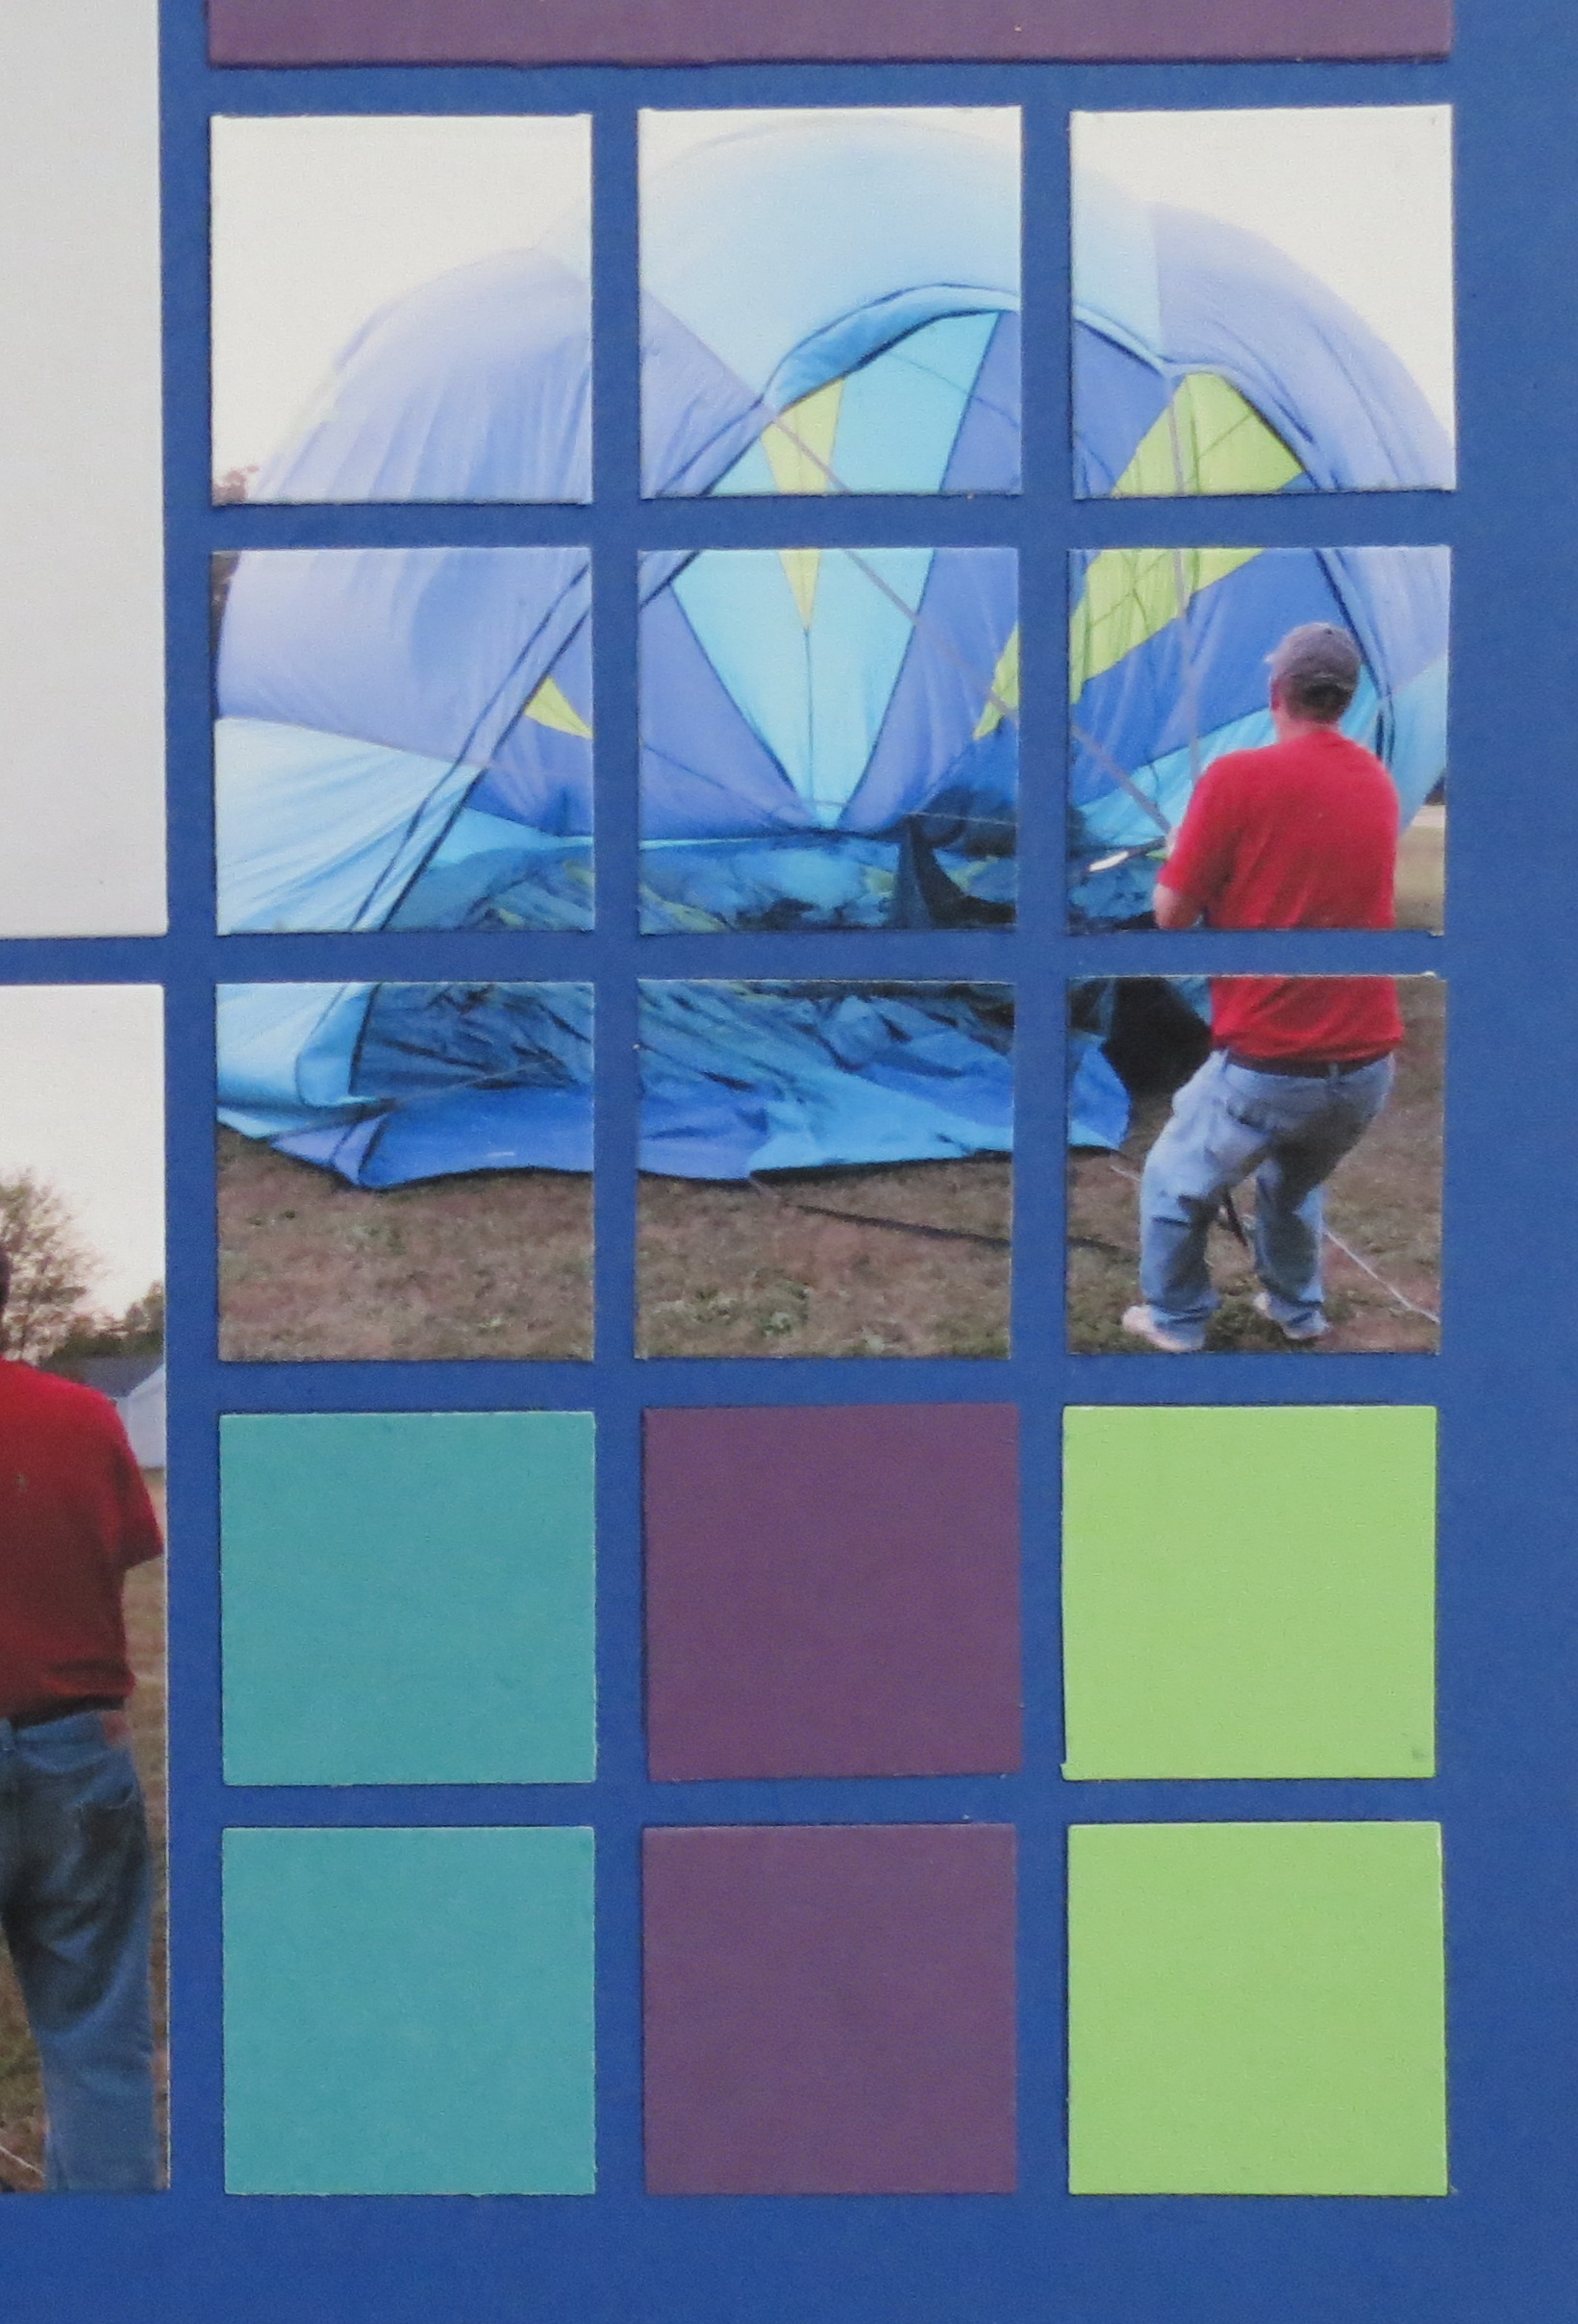
Layout Three:• Flip and a quarter turn Pattern #167 mosaic
• Citron Mosaic Moments 12×12 Grid
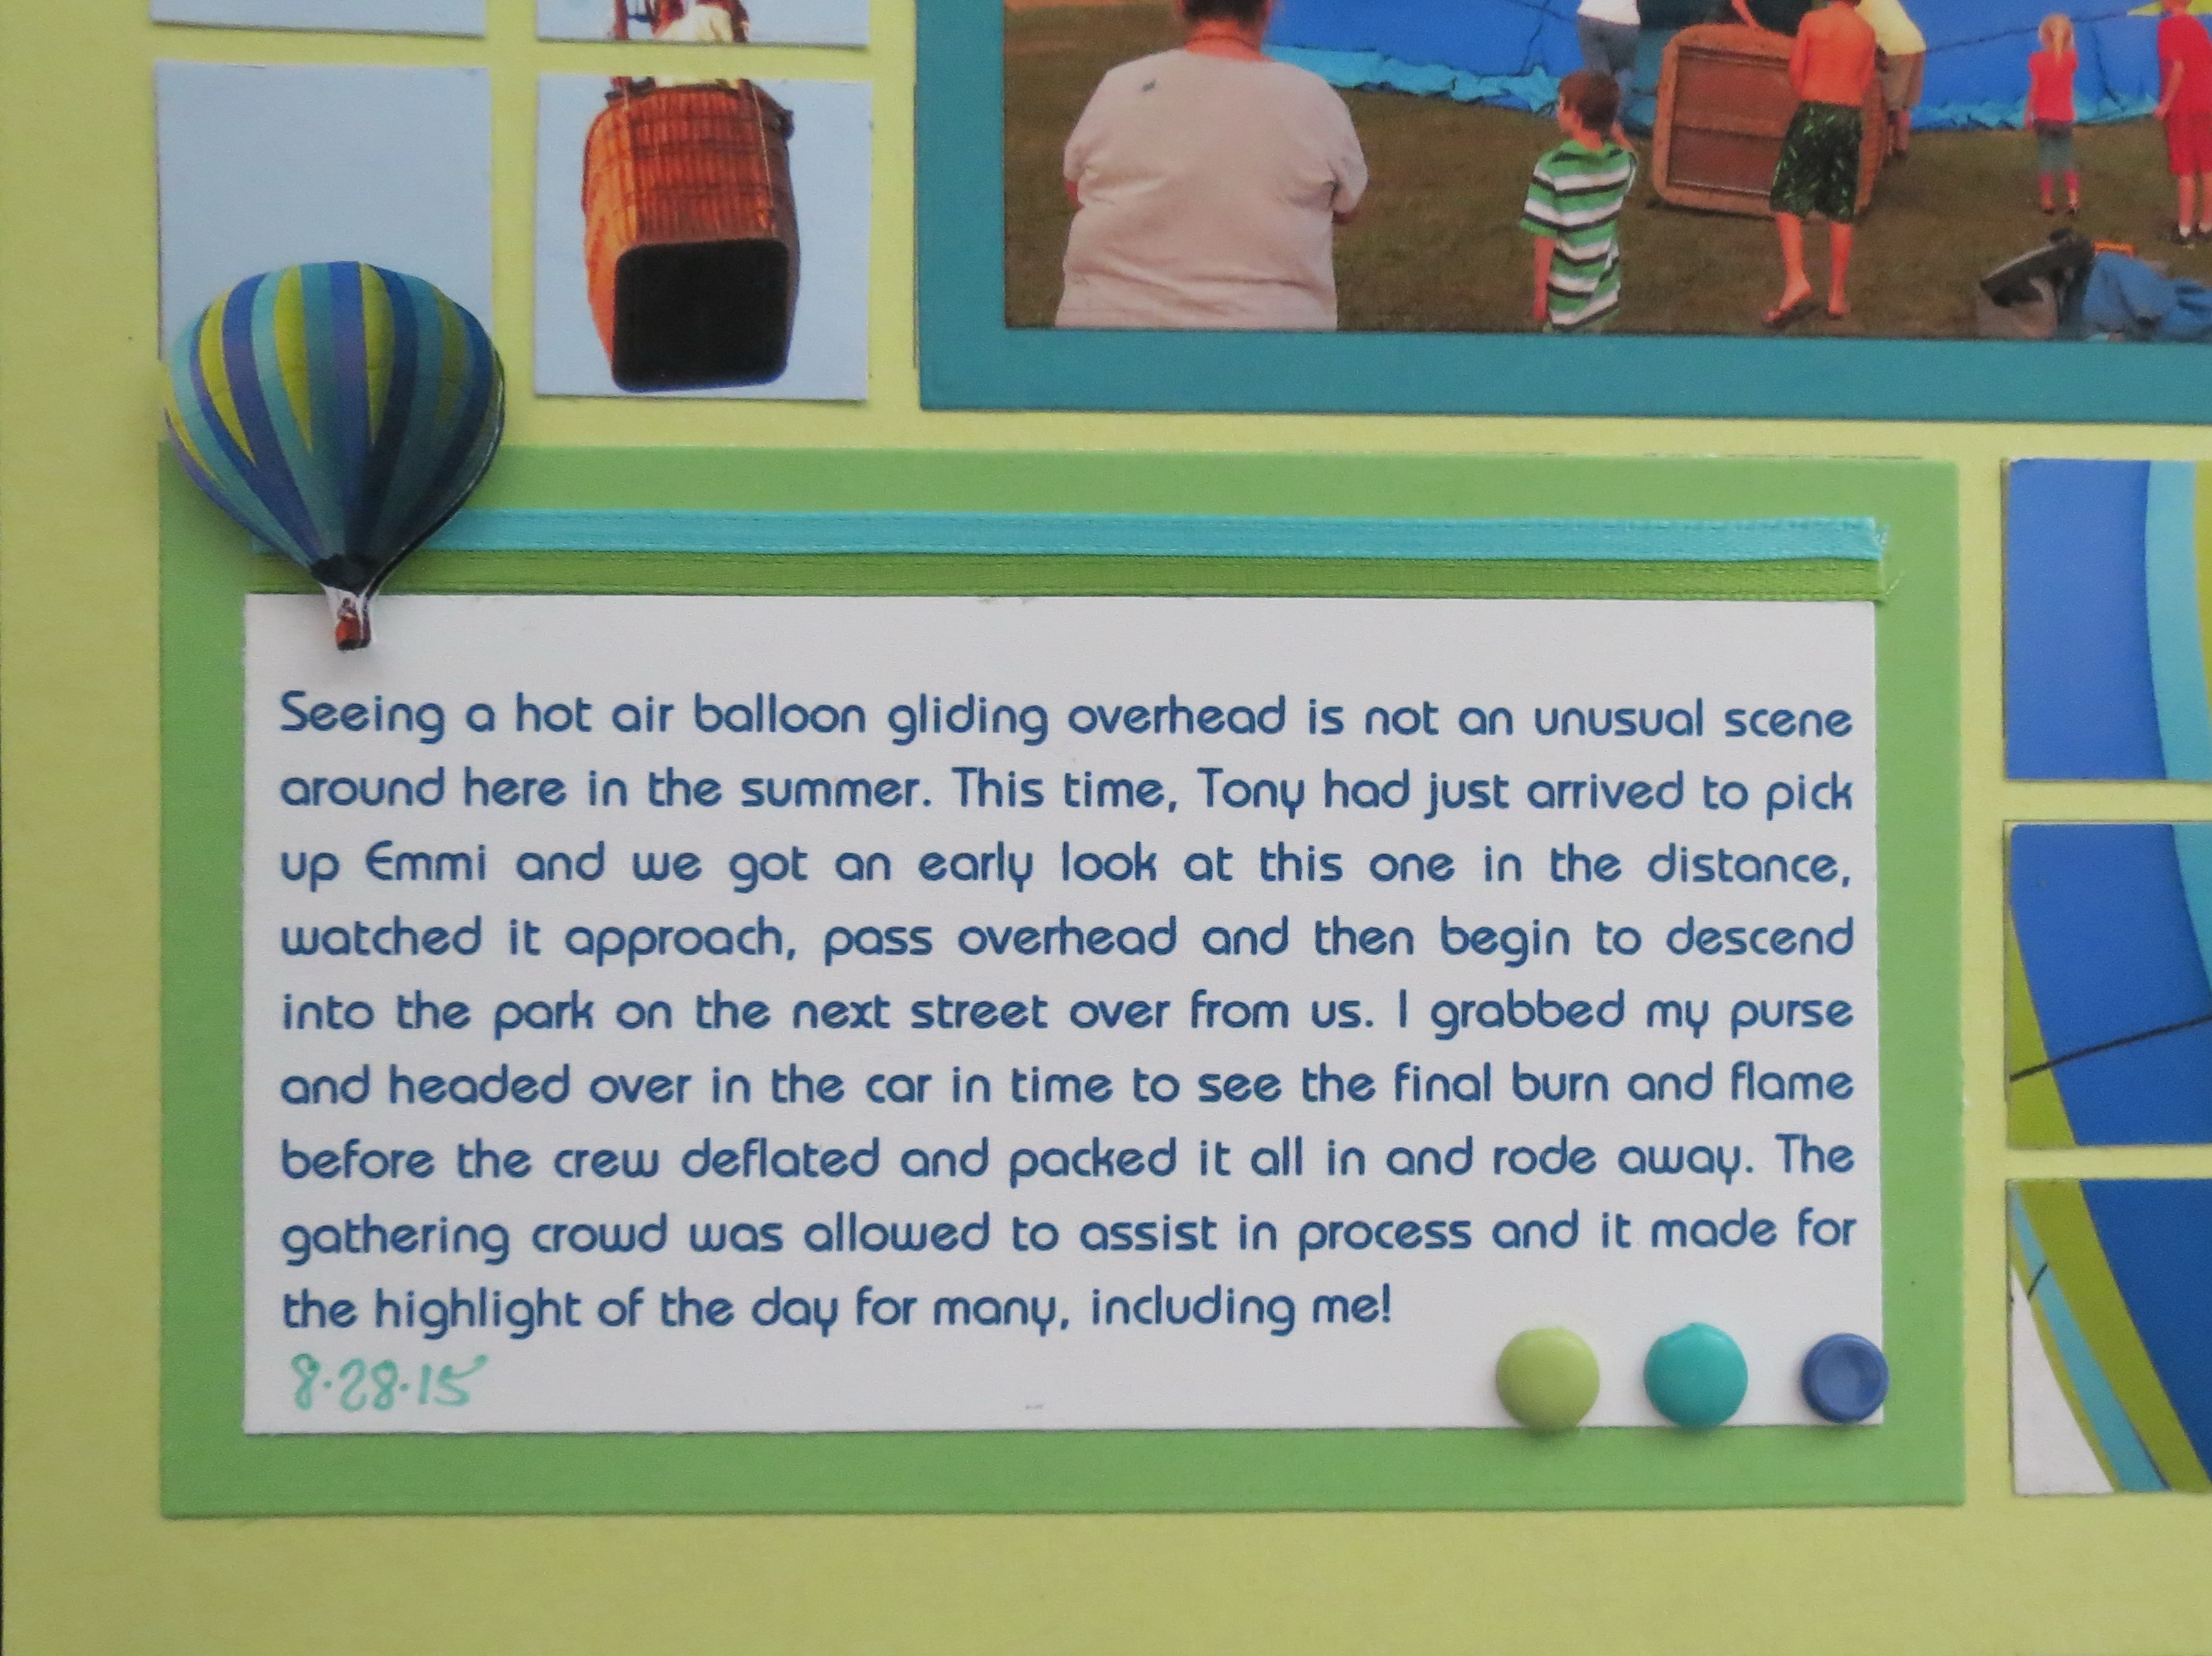
• Photos, journaling, mats and embellishment
MM Pattern Possibilities Pattern #167 flipped and quarter turn to the left.
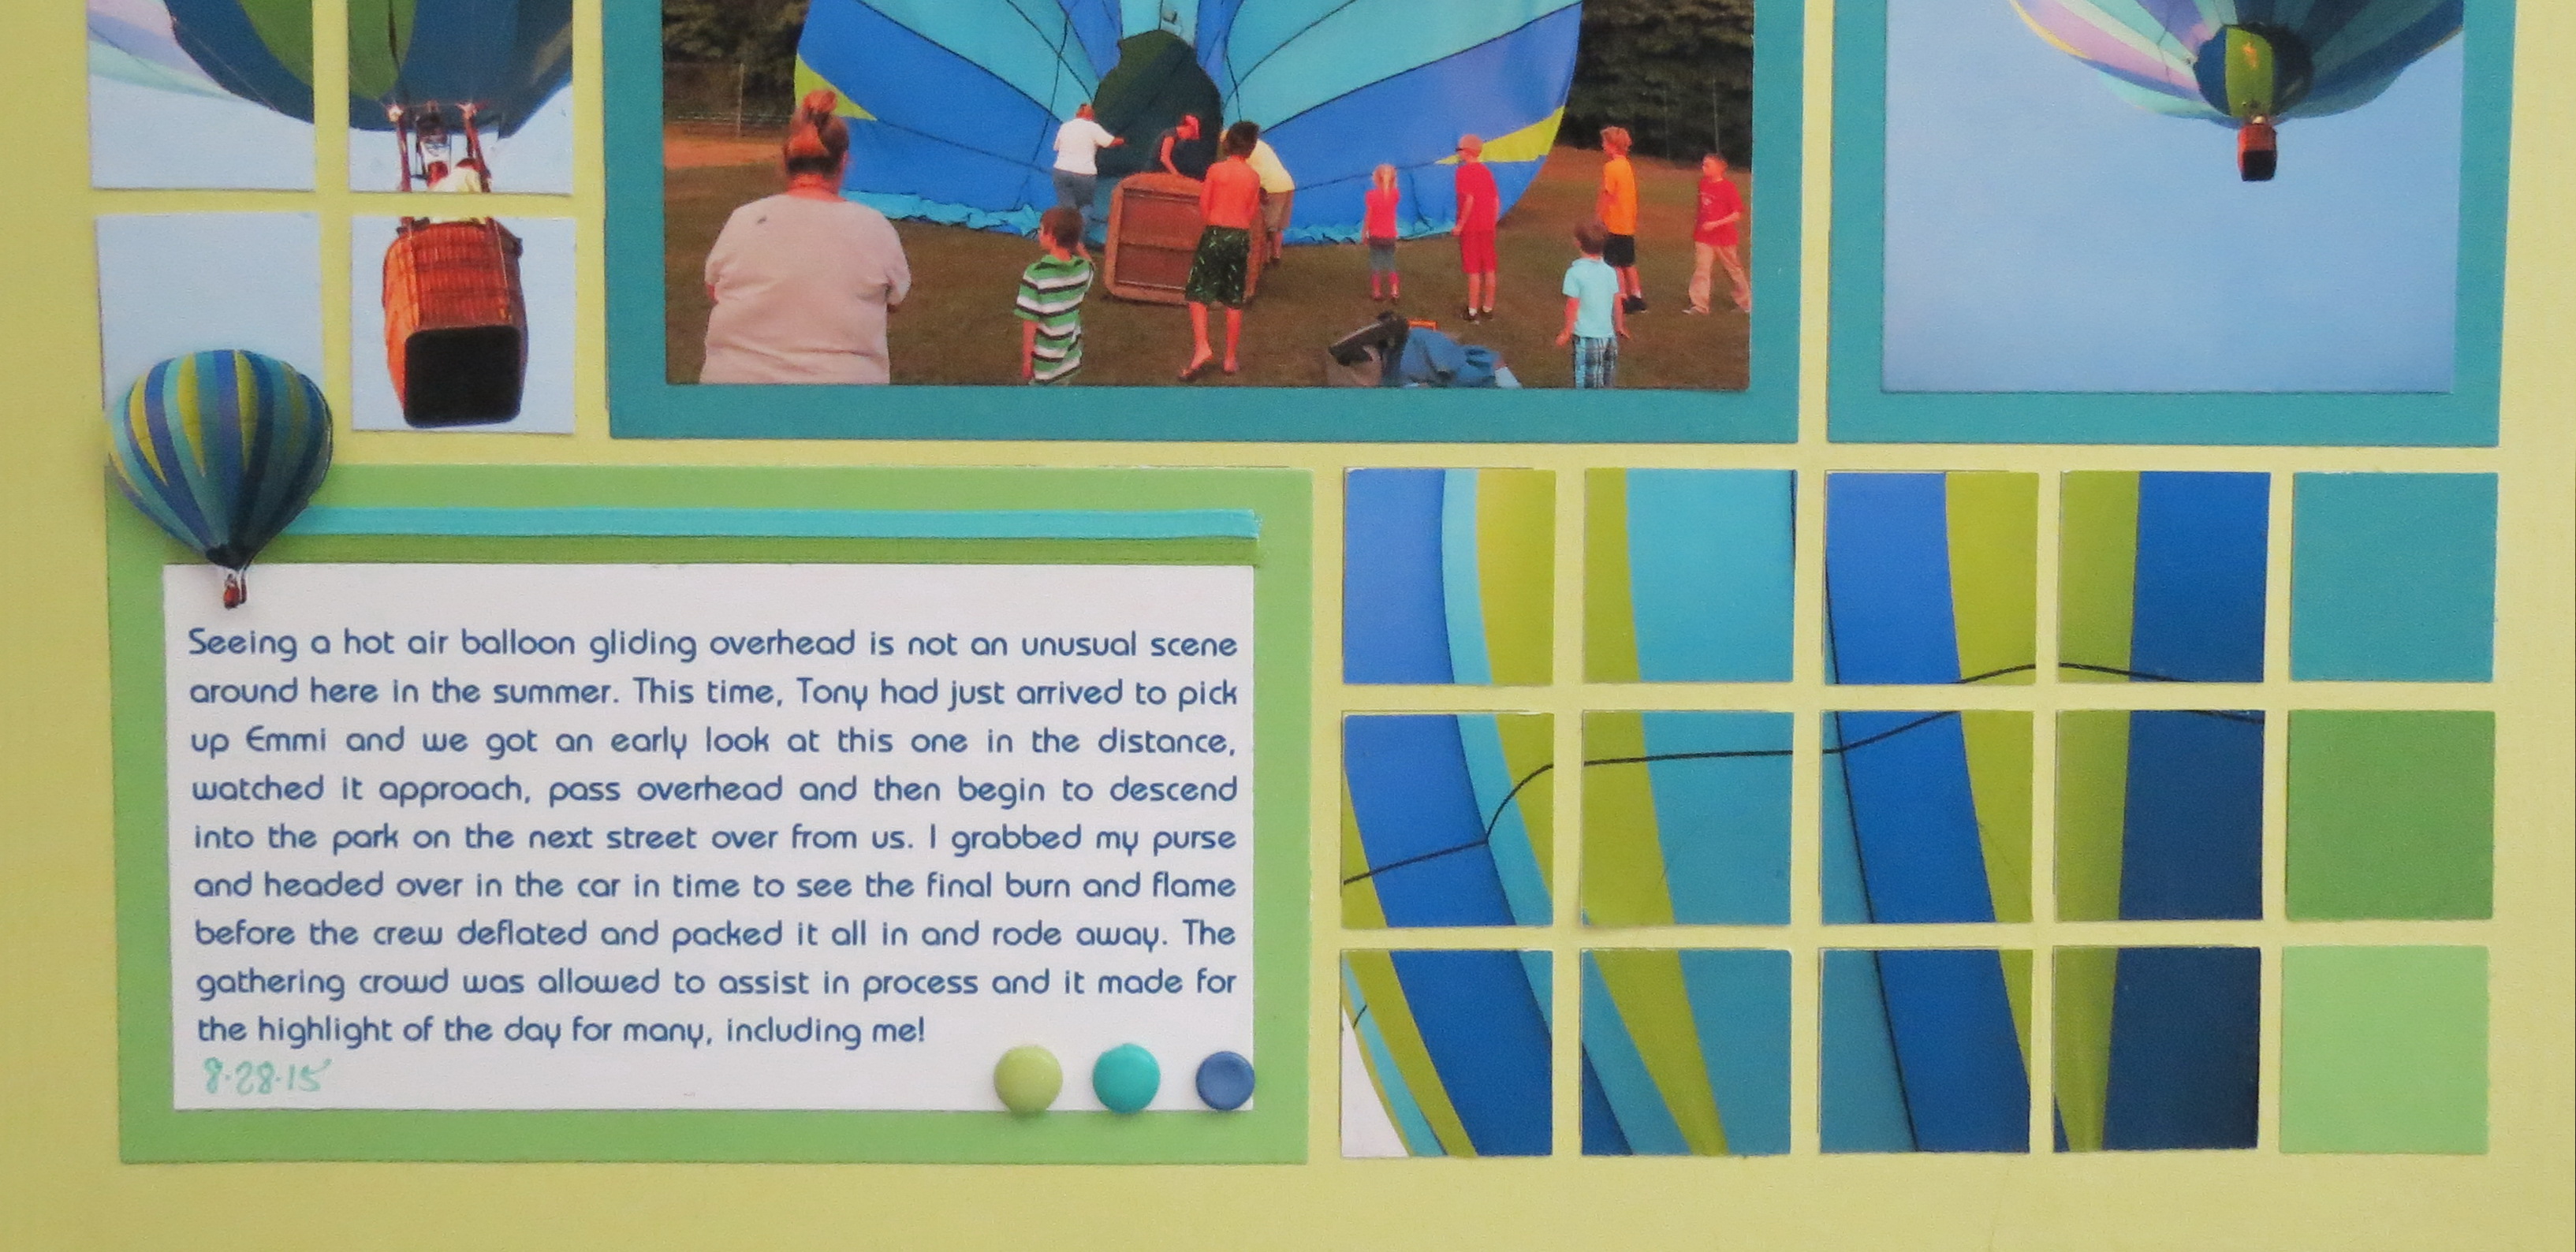
MM Pattern Possibilities journal block and embellishments, mosaic and paper tiles
The lower right mosaic area uses the ‘out take’ from the larger mosaic photo from layout one on the Navy grid. Three paper tiles matching the mats for the photos and journaling blocks round out the page.
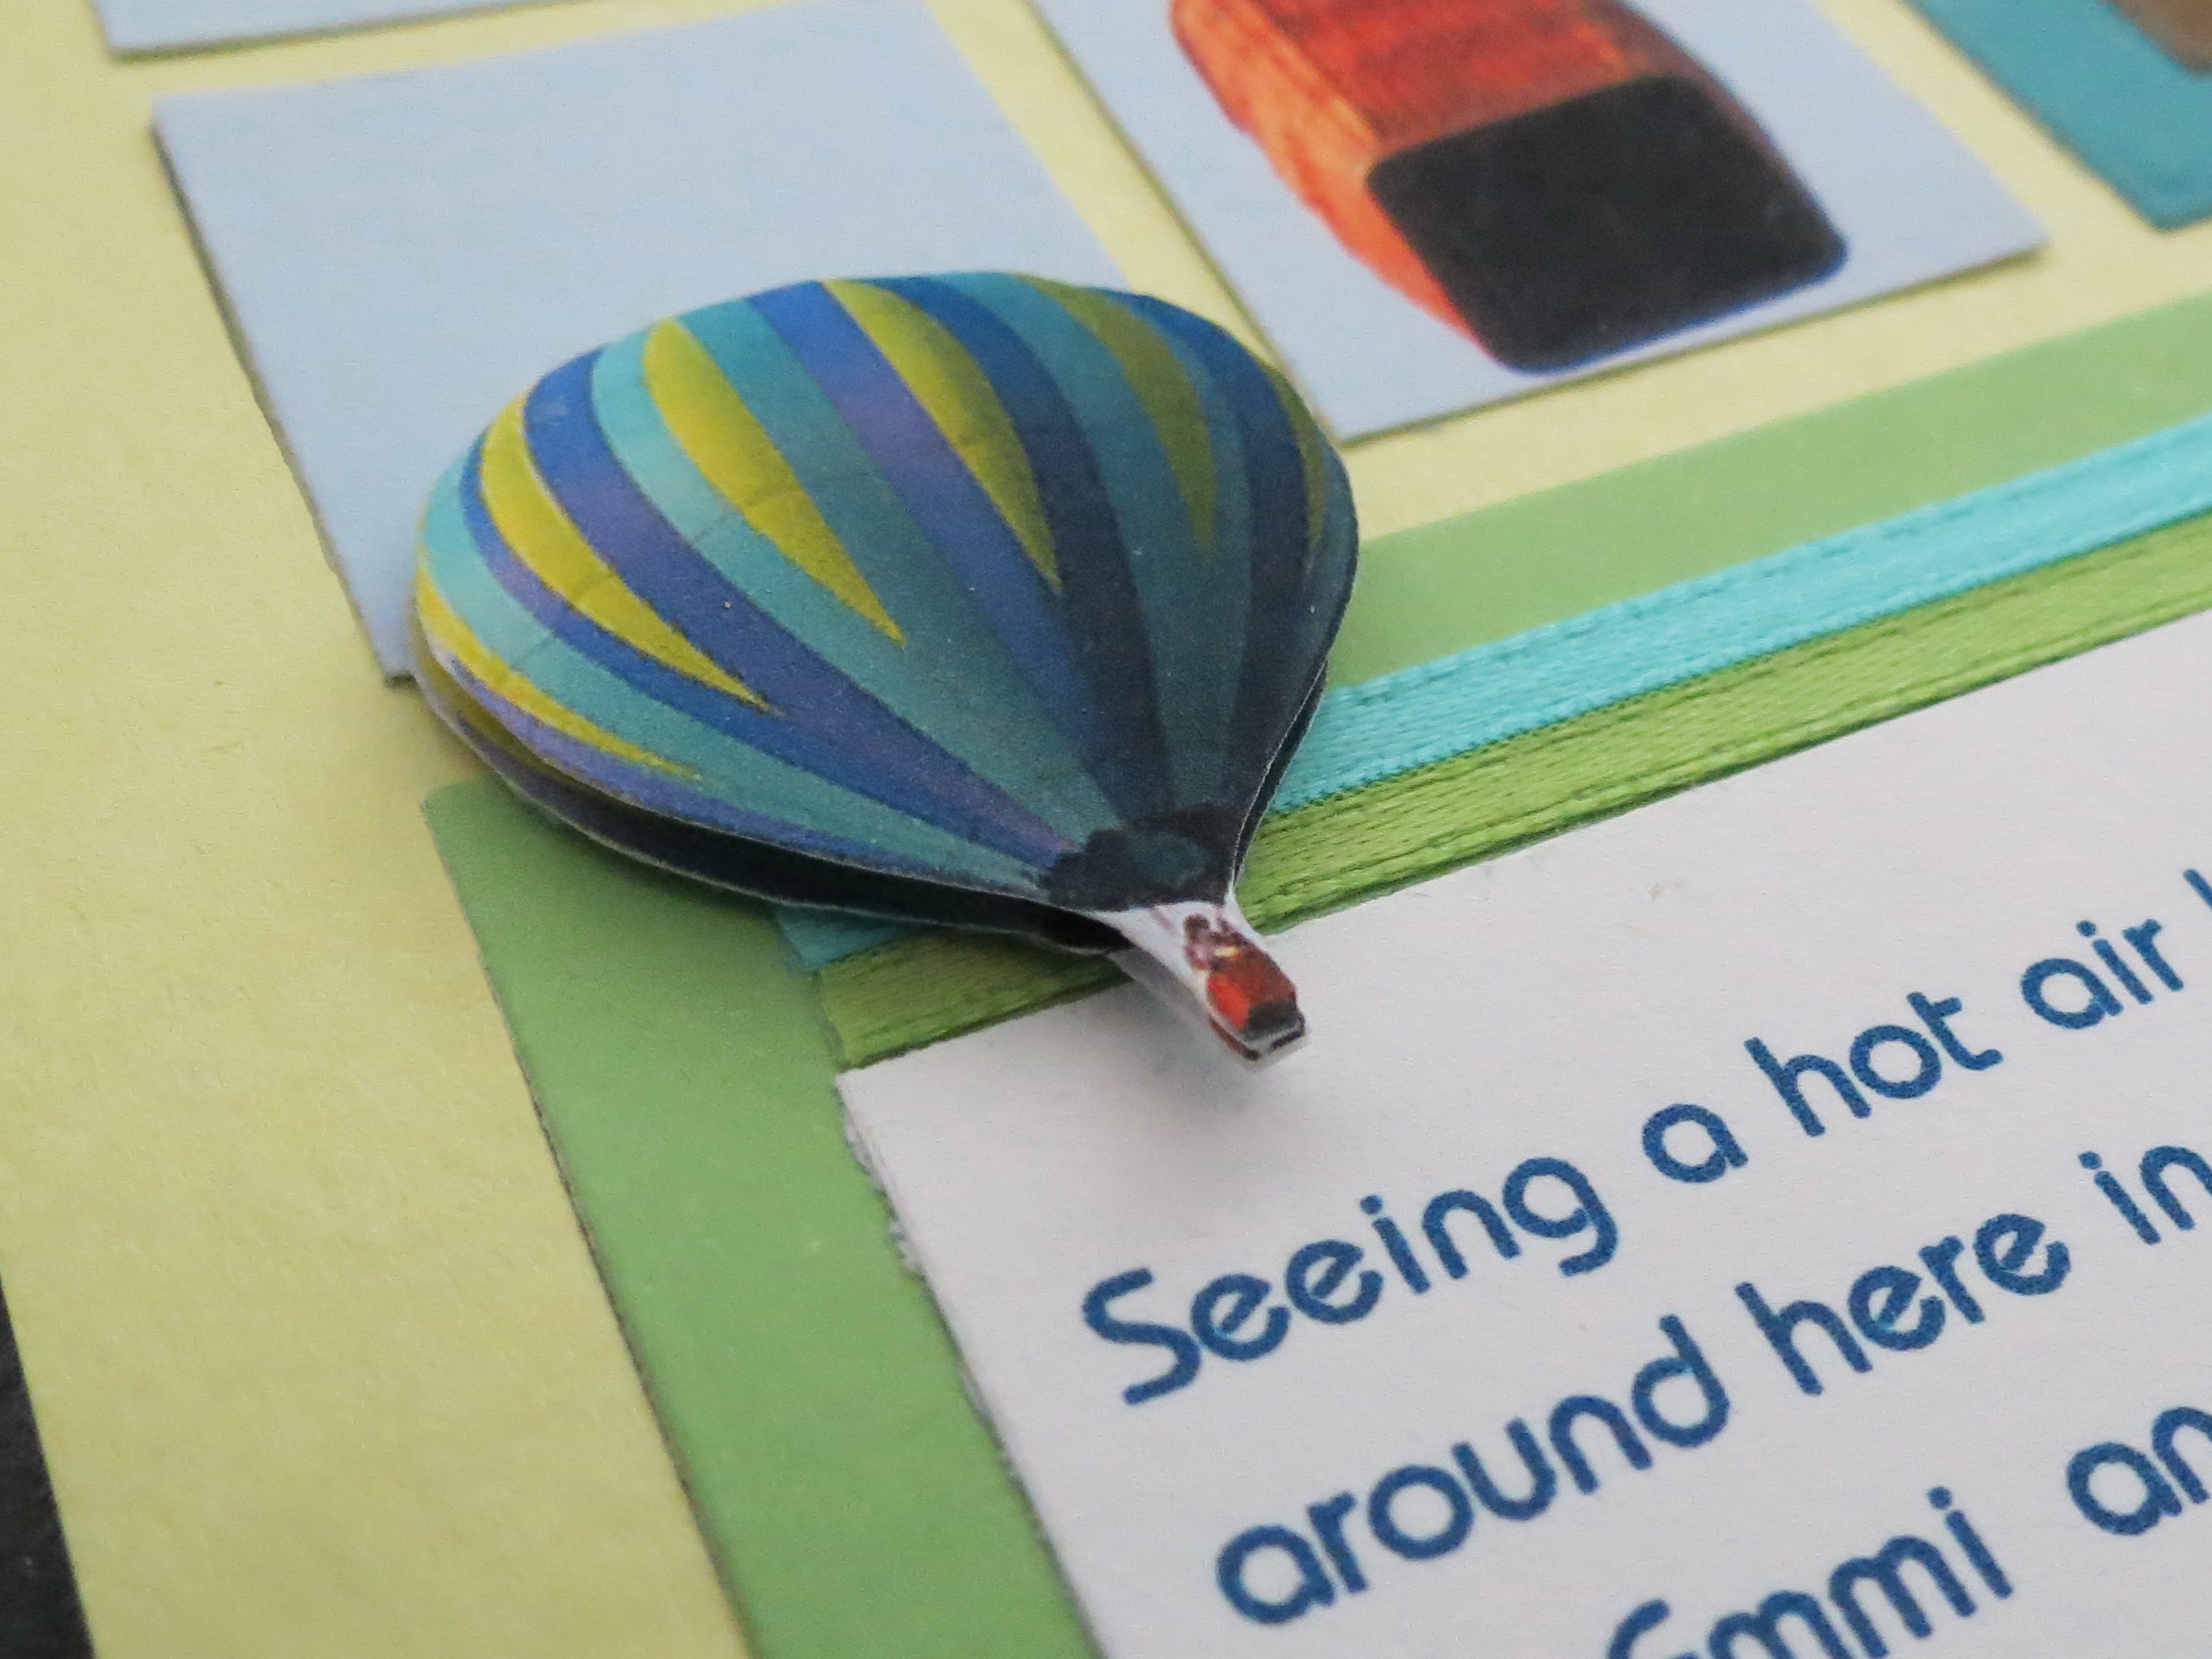
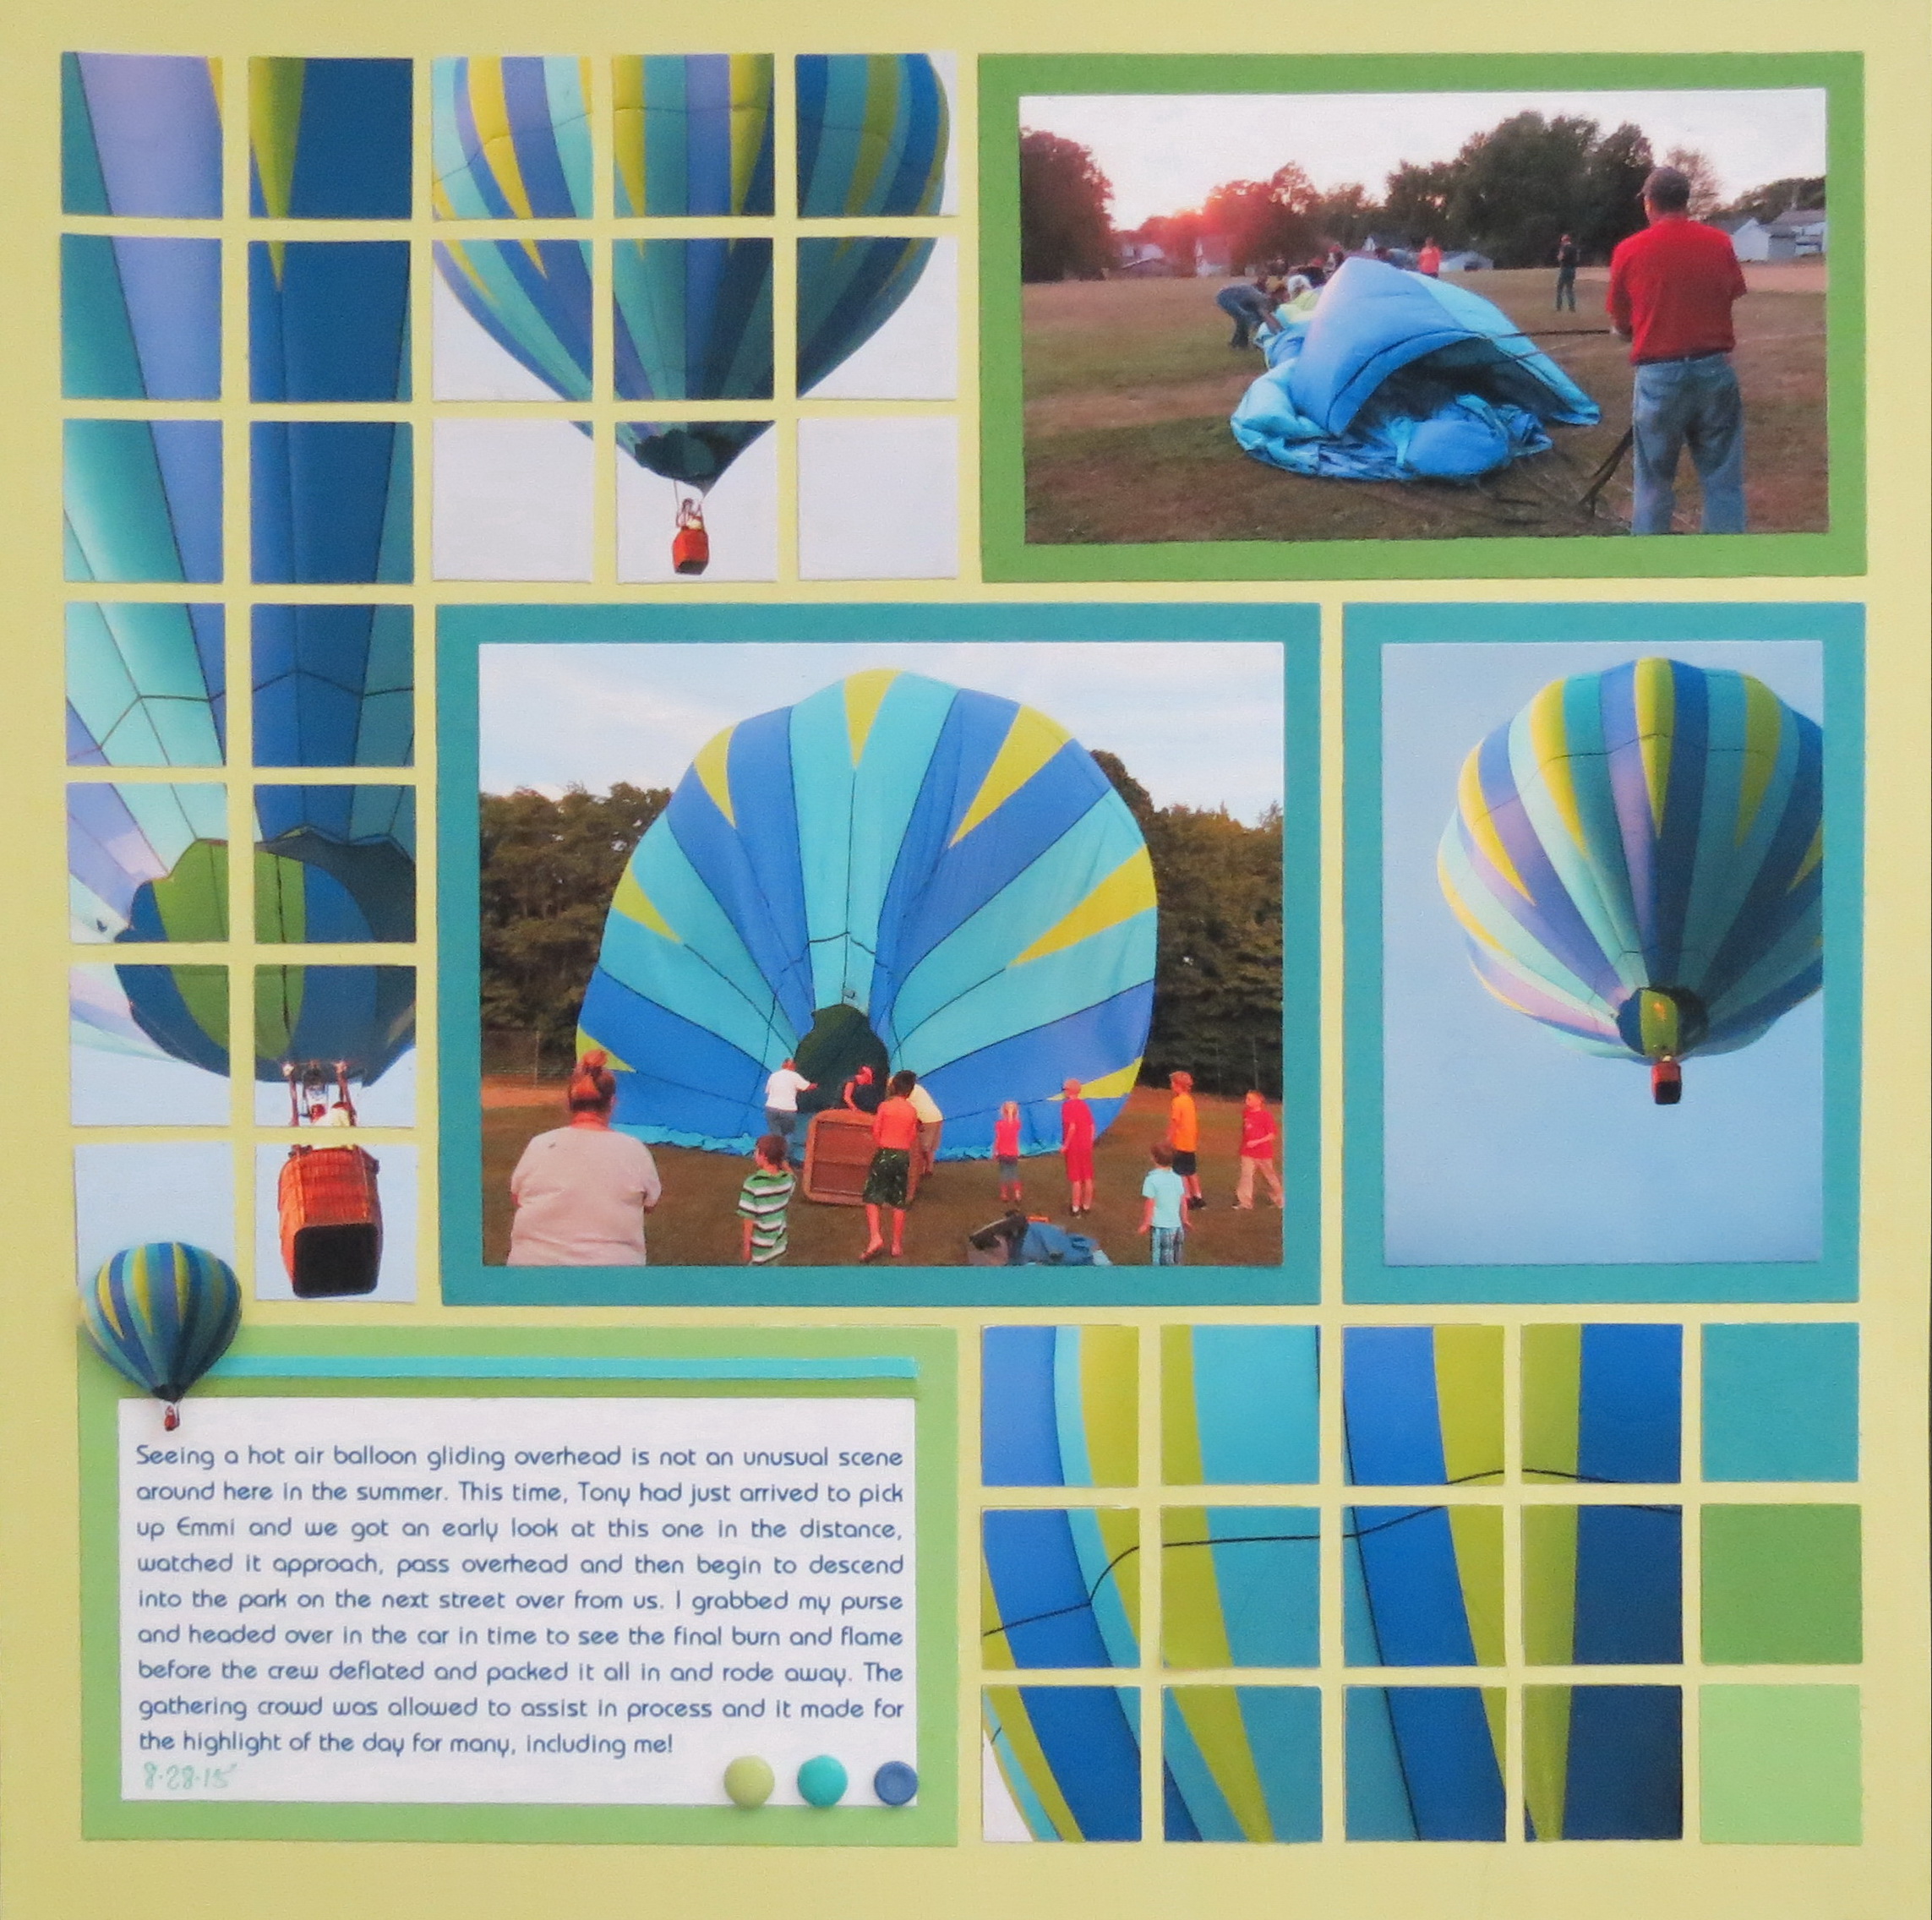
MM Pattern Possibilities photo embellishment
Two copies of the balloon photo are cut and foam mounting tape gives lift. Two strips of narrow 1/8″ ribbons edge the journal block. Three brads repeat the colors in the layout and counter balance the balloon at the top left.
MM Pattern Possibilities journal block with color brad accents, ribbons and balloon embellishment
As you can see, there are so many pattern possibilities depending on how you print and crop your photos and the way you use your pattern. Start exploring the possibilities today!! Don’t forget, we’d like to see what you are doing share your layouts on our Facebook page.
Andrea Fisher
Remember to stop by our Pinterest pin board and share our ideas with your friends!
MM Pattern Possibilities showing one pattern three ways!