
Memorabilia adds something special to your scrapbooking and helps tell the story of your pages.
It adds interest and dimension that's not there when your layout only consists of photos. Plus, these scraps of paper and souvenirs mean something to you and/or remind you of meaningful events, trips, and (especially) people. Many times, they contain useful facts that you want to save - like the who, what, when, and where; maybe even the why!
Despite being graphically pleasing to the eye, these pieces can pose a challenge of how to incorporate them into your scrapbook design.
Scroll down to see the ideas we've gathered to show you how to successfully add them to your Mosaic Moments layouts!
Crop the Program

"Jeremy's White Coat Ceremony" by Jodi Benson - Pattern #383
Programs make excellent pieces of memorabilia to add to a layout!
Many people don't know where to add them on a layout. One simple solution is to add it to a page pattern in the place of a photo. You can easily cut out the important parts you want to save. Jodi cropped the title on the program to fill in the 2x4 space on the left. She then added the general admission ticket on the right side to balance her page.
By using her program, she not only was able to save that important piece of the ceremony but she was able to make an unforgettable Mosaic Moments layout!
This Layout Features: Solid Gold 12x12 Grid Paper, 2x2 No. 4 Dies, Layering Die Bundle, and Basic Die Bundle.
Take a Picture of the Title
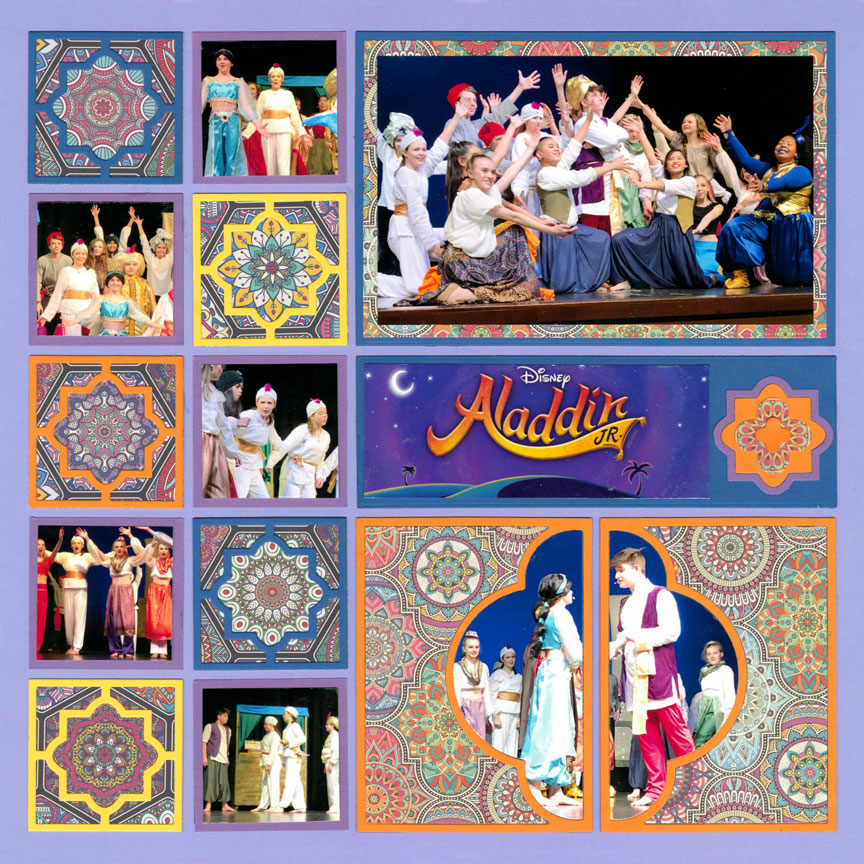
"Aladdin Jr." by Danielle Lawson - Pattern #416
Some places will have posters of the title - be sure to snap a picture!
The Aladdin Jr. title came from this middle school play program. It's the perfect way to get memorabilia on this layout. Danielle cropped the title with a layering die but it did not completely fill in the whole 2x6 mat space. So, she added a decorative die next to it.
The title of the play and the little details Danielle added really make this page special!
(Don't you love how she was able to crop the main actors with the Puff N Stuff Die and still have them looking into each other's eyes?)
This Layout Features: Violet 12x12 Grid Paper, Puff N Stuff Die, Layering Die Bundle, and Basic Die Bundle.
Photograph Your Tickets
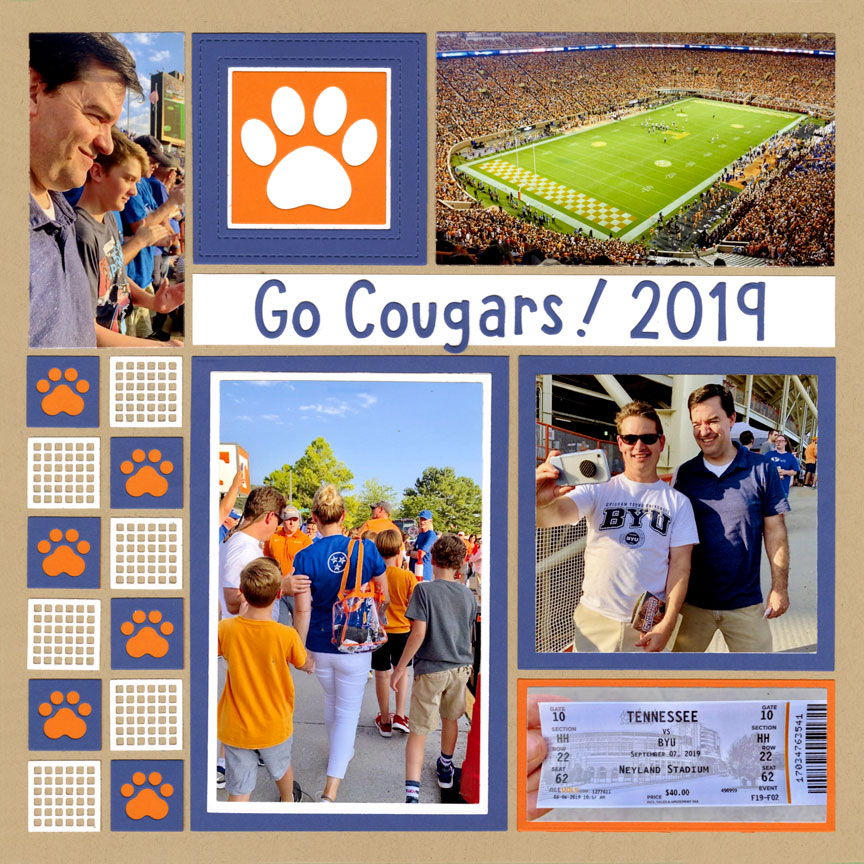
"Go Cougars!" by Jodi Benson
While it's nice to put physical tickets in your scrapbook, it might be a good idea to also take a photo!
These items might get thrown away, bent or torn. So take a quick snapshot of your memorabilia before it gets lost. It also gives your layout a different look when you see the hand holding the tickets.
It's always good to mix things up!
This Layout Features: Fresh Malt 12x12 Grid Paper, Waffles Die, Here Kitty Die Set, Paw & Bone Die Set, Stitches Frame & Border Dies, Alphabet 3 and Numbers 3, Layering Die Bundle, and Basic Die Bundle.
Grab a Selfie With Your Name Tag!
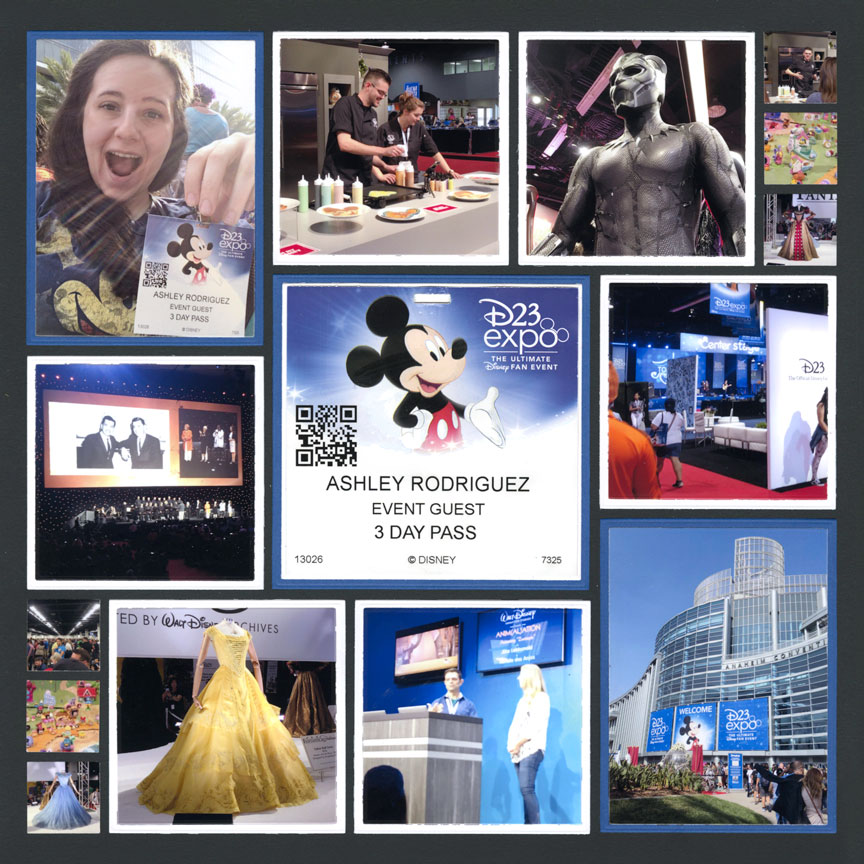
"Day One of D23 Expo" by Paije Potter
Grab a selfie with your tickets or name tags, like Paije did here!
In the center, Paije placed her name tag from an Expo she attended. The photo also shows this tag was on a lanyard, which tells more of the story. Paije will remember all the details of her trip that much better when she thinks about all the places she went and all things she saw with that lanyard on.
Plus, this layout would not be as interesting without Paije's selfie and name tag!
This Layout Features: Black 12x12 Grid Paper, Layering Die Bundle, and Basic Die Bundle.
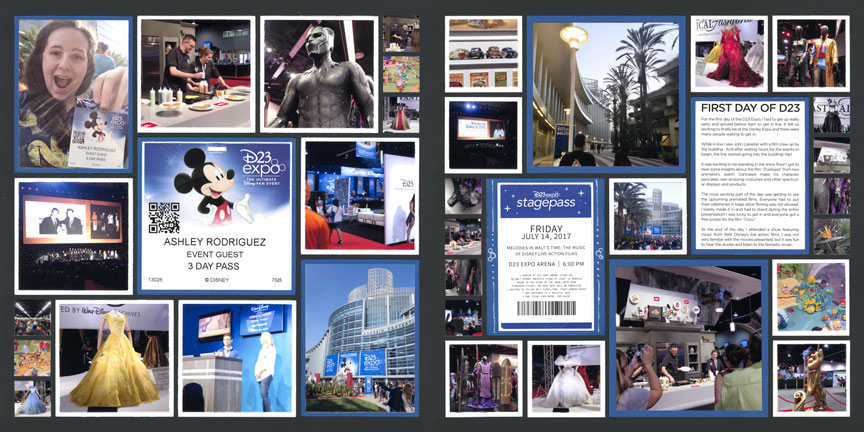
On the right side of this two page spread, Paije also added a ticket for a specific event at the Expo.
The ticket was a little narrow for the 3x4 space, so she added a thin white mat behind the ticket. Plus, she added some fun doodles on each side to better fill the space. To further tell the story and balance the second page, she added journaling. To unify the two pages she has 1x1 photos on each page and used the same color mats. She also used two pinwheel patterns, but they are very different so it's still interesting and doesn't tire your eyes.
On the 2-page layout, Paije's selfie with her name tag is still my favorite photo!
This Layout Features: Black 12x12 Grid Paper, Layering Die Bundle, and Basic Die Bundle.
Use Pockets!
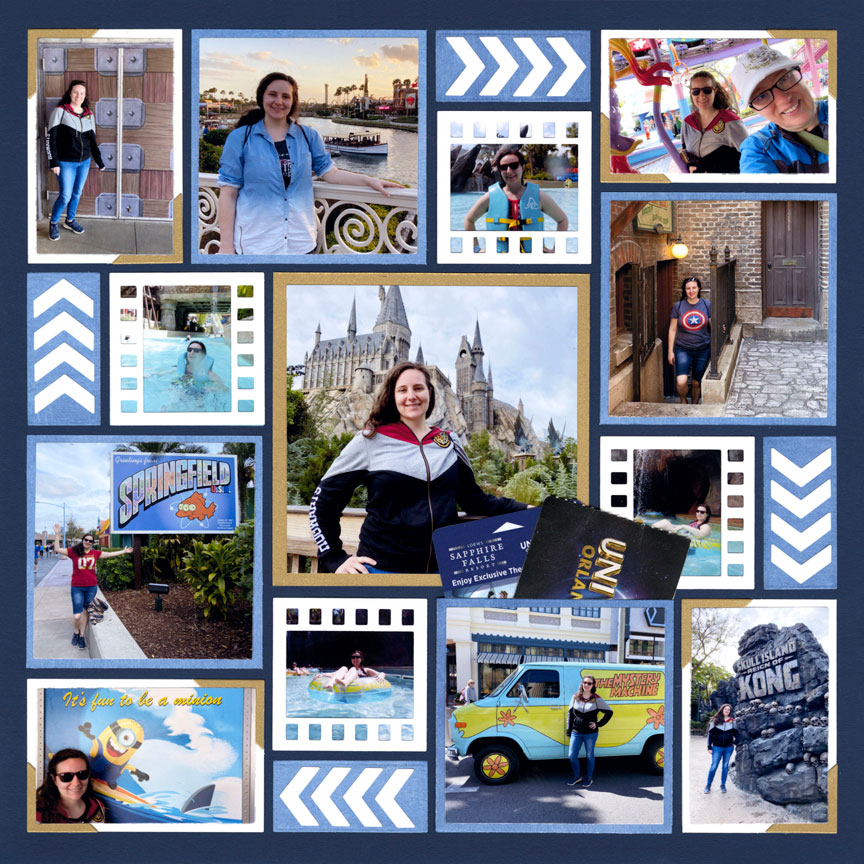
"Universal 2020" by Paije Potter
Sometimes there are so many photos you want to add to a layout and there isn't much room for your Memorabilia.
One idea is to use the Pocket Dies or create your own pocket. Here, Paije placed her park ticket and hotel room card in the pocket. It's a safe place to put these items and the pocket allows you to add another photo --
Paije placed one with herself in front of the Mystery Machine on top of her pocket die cut!
This Layout Features: Sapphire Blue 12x12 Grid paper, Nested Pocket Die Set A, Film Strip 2x2 Die, Action Border Set, Layering Die Bundle, the Basic Die Bundle.
Save the Poster Art!
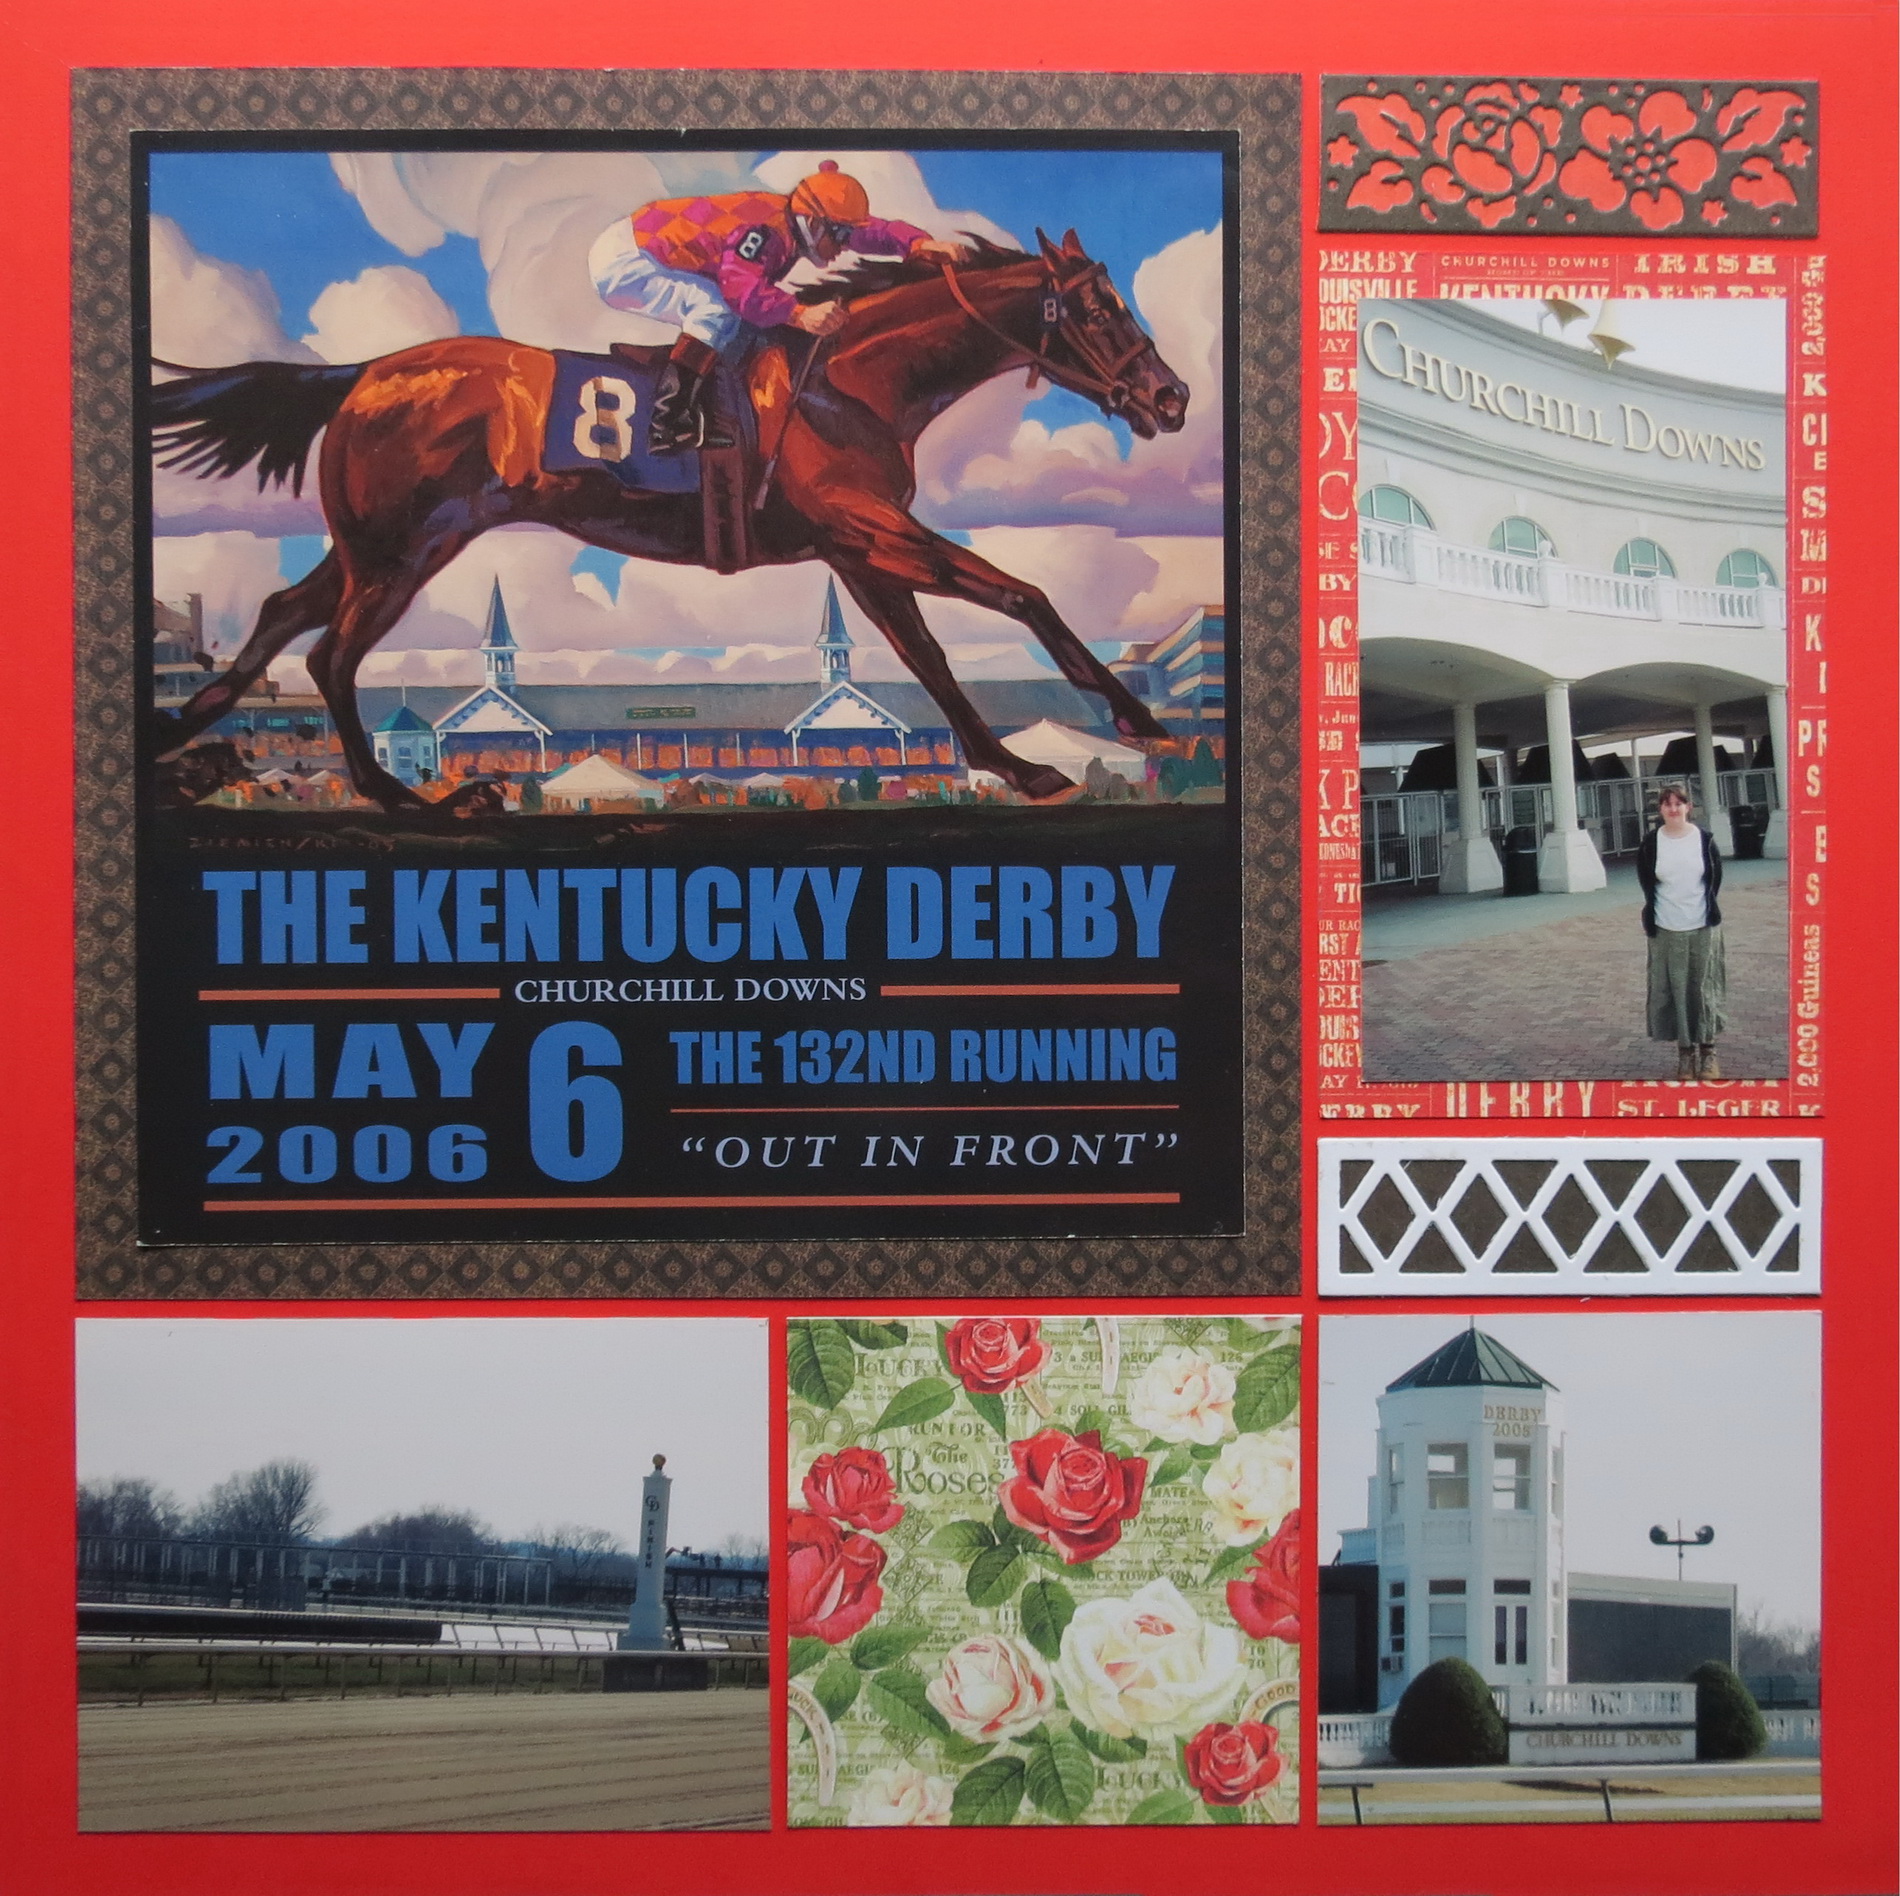
"The Kentucky Derby" by Andrea Fisher
For this layout Andrea had a large 7”square piece of poster art that she wanted to include -- a souvenir of her travels.
It was important to her to have a place to safely save the poster artwork from her trip. It'd been displayed on her board at home, but she wanted a more permanent place and using it in this layout served that purpose. Plus, it adds to the memory and helps tell the story with the place and date in a very creative way.
If you have special memorabilia from travels you’ve taken, give them a prominent place in one of your layouts!
This Layout Features: Scarlet 12x12 Grid Paper, Diamond Borders Set, Garden Path Die, and Basic Die Bundle.
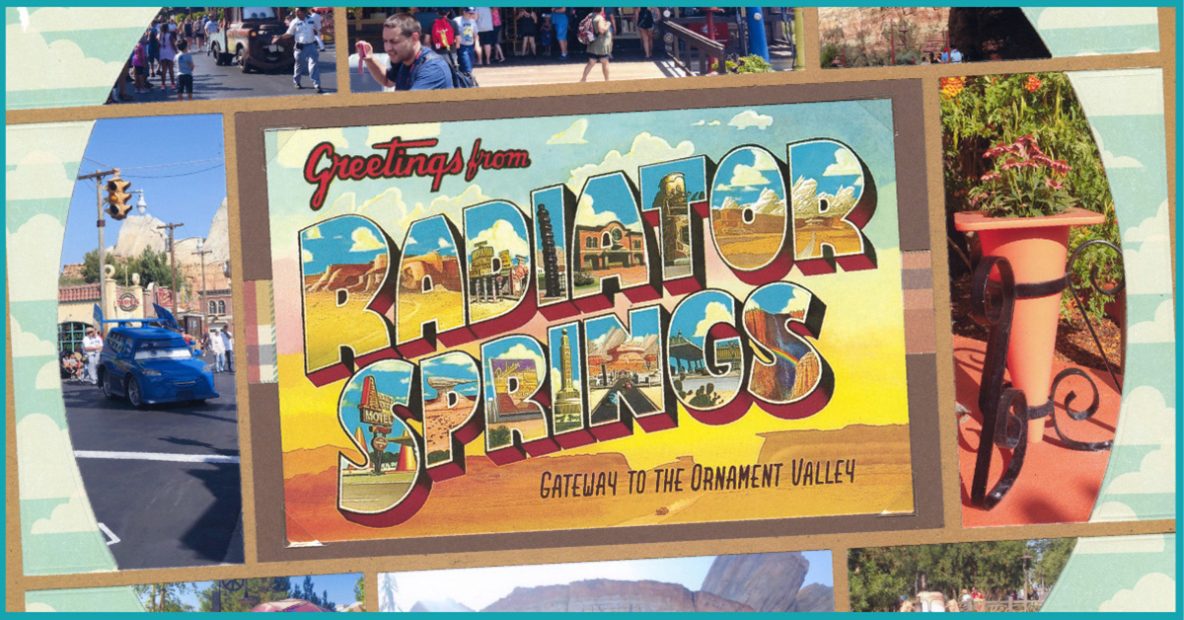
Use Postcards!

"Radiator Springs" by Paije Potter - Pattern #651
Paije added a postcard on this Horizon layout - shown in center as her focal point.
When using memorabilia on a Discover or Adventure level die layout - place it on a spot with a basic shape or layer over your die cuts. this postcard didn't quite fit the 4x6 center so she choose to center it in the space and placed it on a strip of coordinating plaid pattern paper.
Look at how Paije used clear photo corners to keep the front and back of her postcard preserved.
This Layout Features: Fresh Malt 12x12 Grid Paper, Horizon Die Set, Horizon 2x4, and the Basic Die Bundle.
Add the Program, Even if It's Too Big!
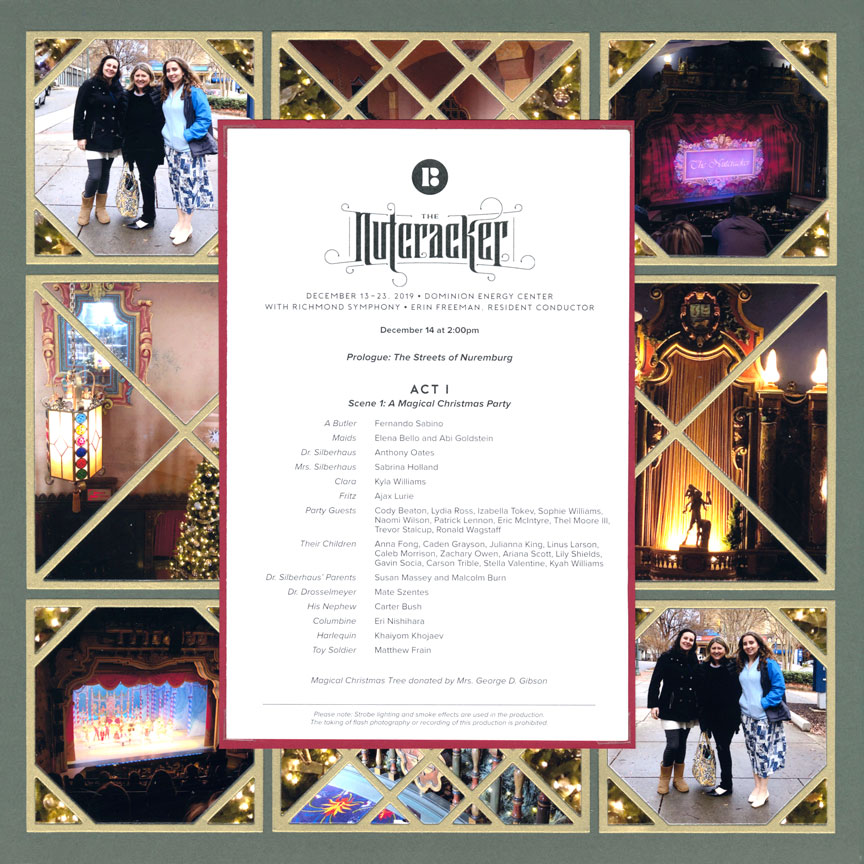
"The Nutcracker" by Paije Potter - Pattern #477
Programs are very large and Paije needed a solution to fit it in!
Memorabilia doesn't just have to be limited to a basic layout design either. Paije solved both problems. She used the X Factor dies in gilded gold to create a decorative border going around the Ballet program.
She also added a red mat to give it weight so that the program still remains the focus of the layout.
This Layout Features: Military Green 12x12 Grid Paper, Double X Factor 2x4 Die, X Factor 3x3 Die Set, X Factor 3x4 Die, and the Basic Die Bundle.
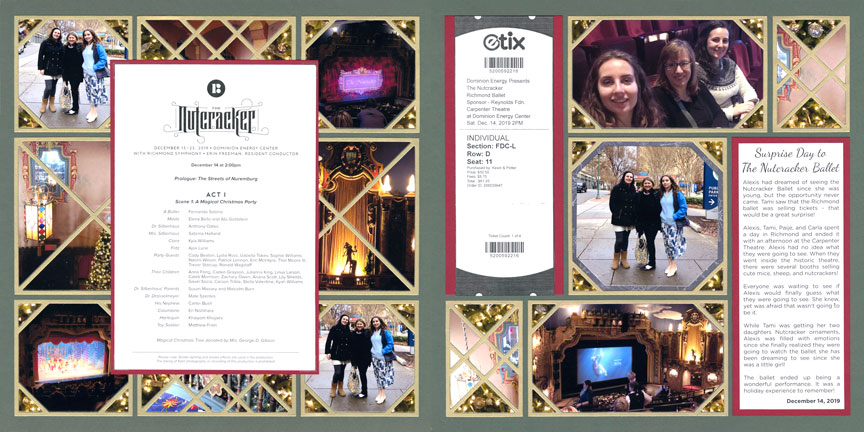
The layout on the right shows the ticket for the ballet.
It was very long and could in no way fit into an Adventure level die (or even a basic die for that matter!) If you find yourself in this dilemma, make room for some basic die cut shapes in your design. Hand cutting mats with the Mosaic Moments double-sided mat, a craft knife, and ruler made all the difference in how this layout turned out. The piece of memorabilia may not fit a pattern but they look professional - straight and even. They fit on the two pages in a harmonious way-- there are three pieces in white, backed with red cardstock, and placed in a triangle across the 2 page layout.
Paije also balanced out the ticket with journaling in the same size and shape on the opposite side--
Making this yet another unforgettable Mosaic Moments layout with memorabilia!
This Layout Features: Military Green 12x12 Grid Paper, Double X Factor 2x4 Die, X Factor 3x3 Die Set, X Factor 3x4 Die, X Factor 3x5 & 2x3 Die Set, X Factor 4x4 Plus Nested Die Set, and the Basic Die Bundle.