

Today we’ll look at one way of designing the unexpected. It is good to think outside of the box, but when you work in squares (boxes) sometimes it’s good to explore the box and see exactly what you can do with what you have!
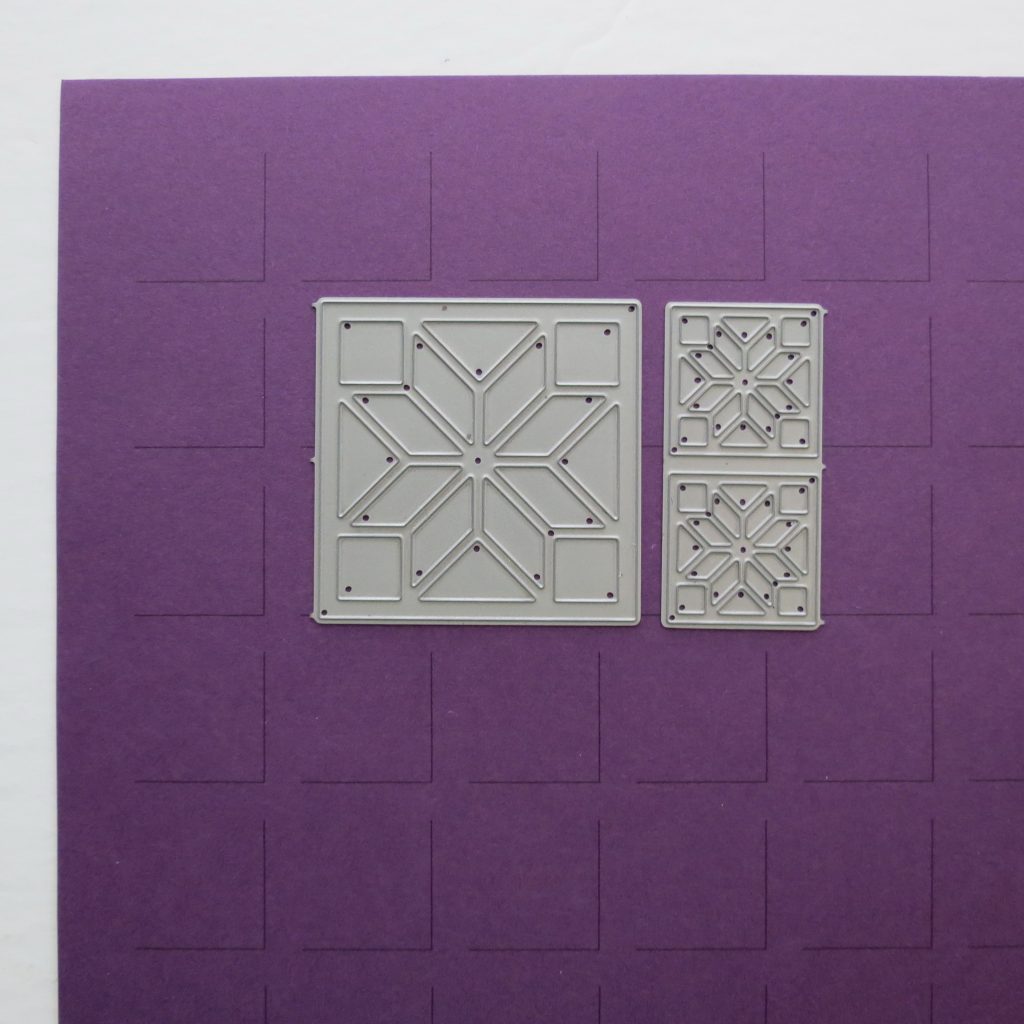
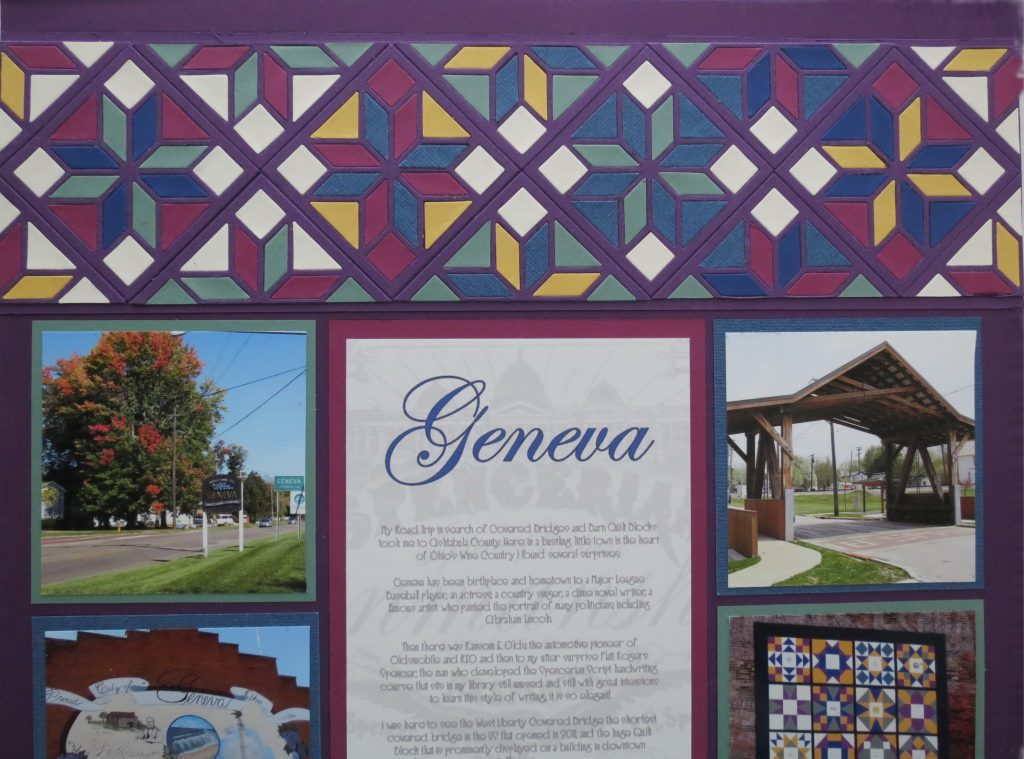
Let’s begin with the Carpenter’s Star Die Set, a Royal Purple Mosaic Moments Grid Paper, several cardstock colors and a photo for inspiration.
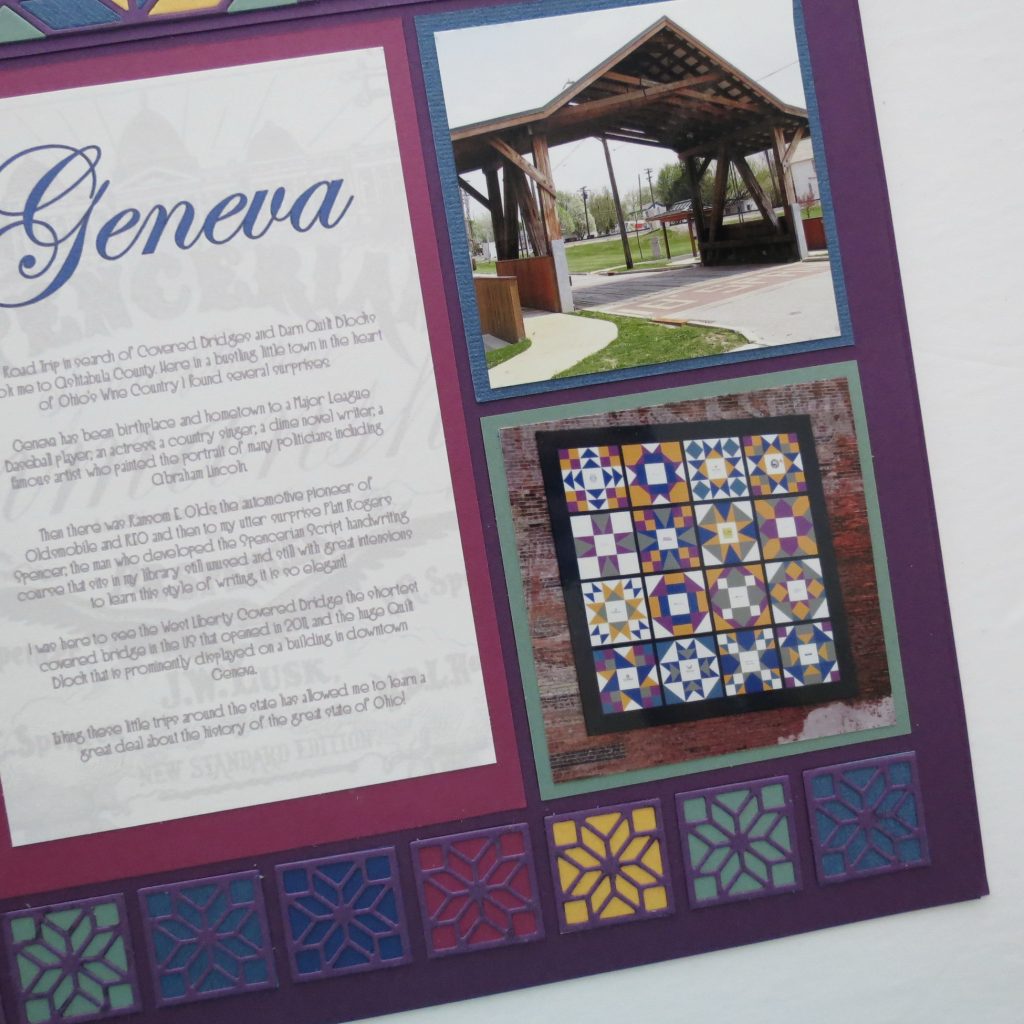
From the photo of this huge quilt block displayed in downtown Geneva, Ohio, I took the colors I wanted to work with. It’s predominately a jewel tone pallet so this will be a bold color choice with which to work.
I decided to set the cornerstone on point and create a full-bleed banner for my page. I cut purple cardstock to 3.25” x 12” and scored 1/8” along each of the long edges and down the center (1 5/8”). (Martha Stewart Scoring Board)
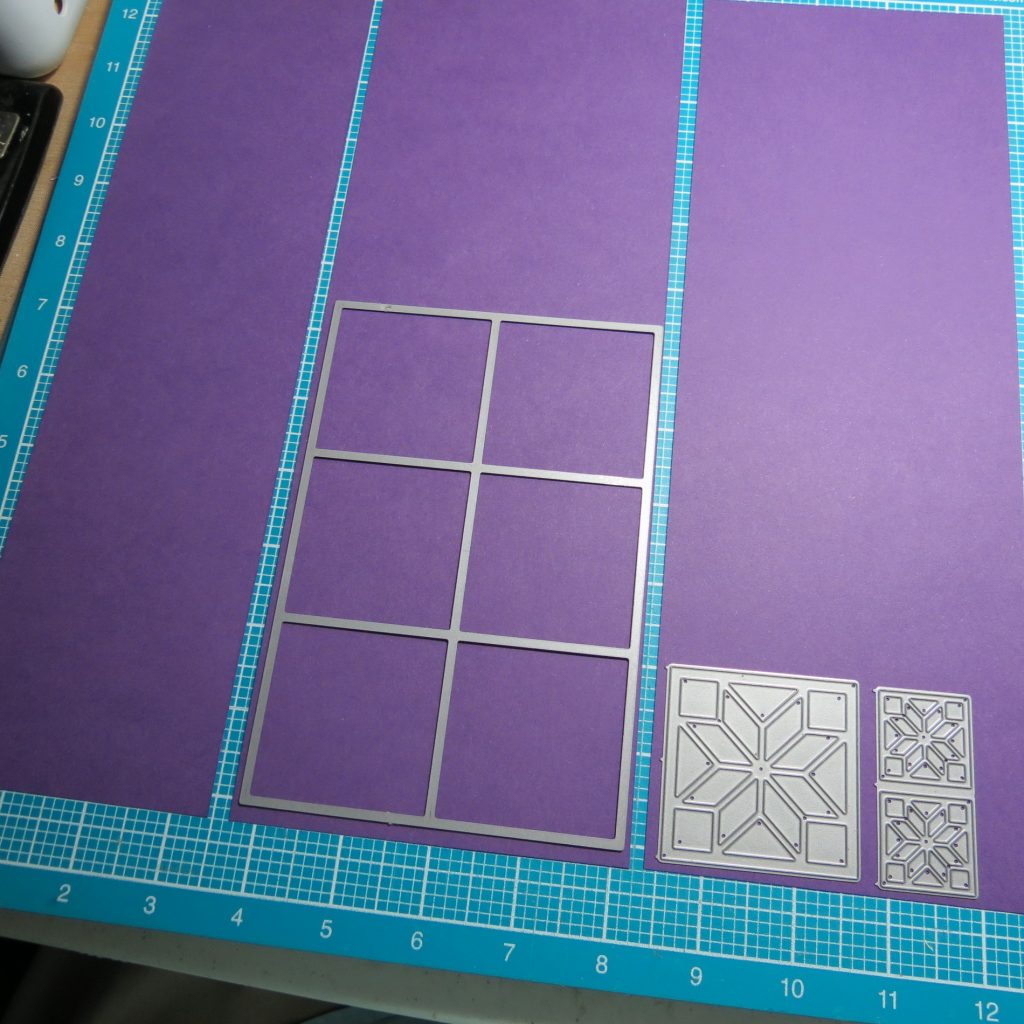
Next, I scored at 1.5”, 4.5”, 7.5”, and 10.5” along the horizontal side.
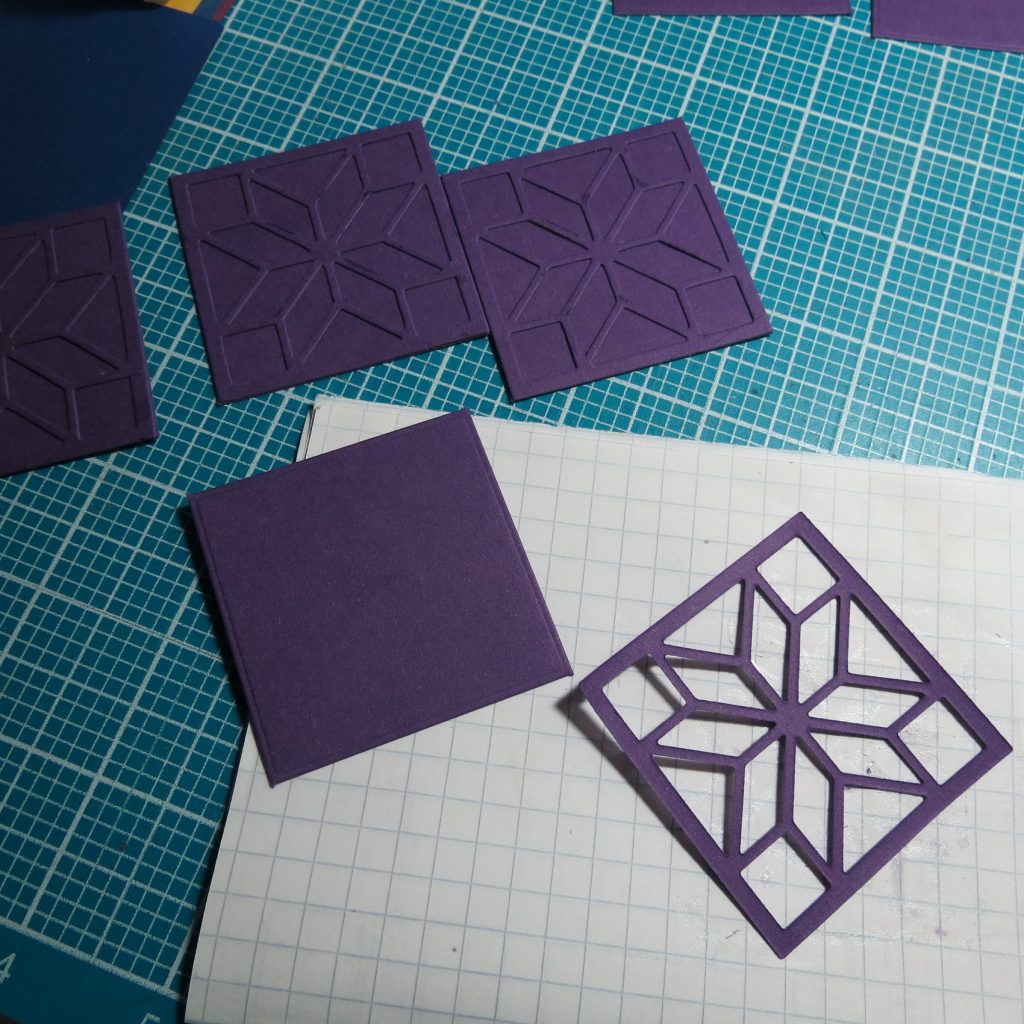
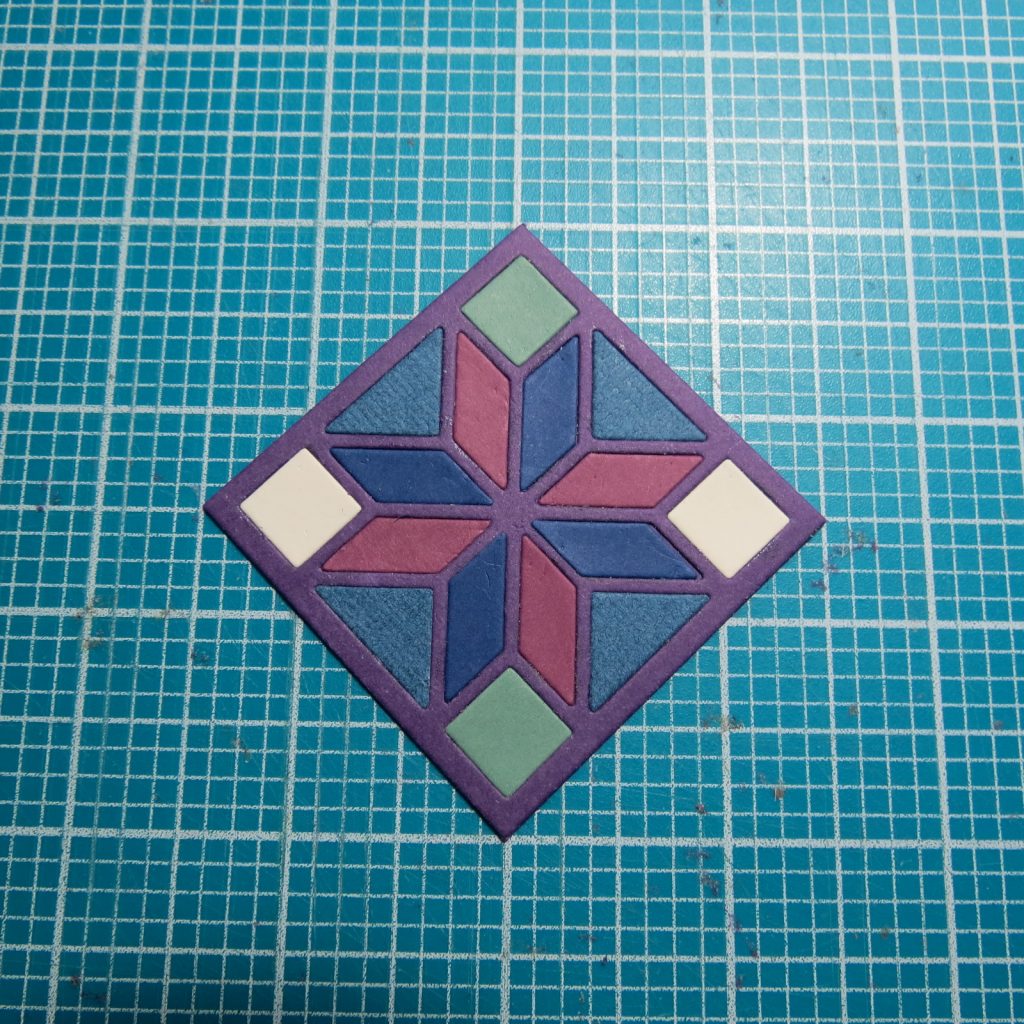
I needed to cut 8 of the Carpenter Stars 2×2 in purple and 10 of the smaller 1” stars also in purple. I also used the 2.125” grid die to cut the 2×2 squares I needed to mount the Carpenter Stars to work out the pattern. Adhere the die-cut to the 2×2 square using a glue pen.
TIP: Place a weight on the tiles as you finish them to give the glue a little extra help in setting up flat.
I had 5 colors ivory, gold, purple cabbage, denim, navy and green and I cut 2 of each color except the ivory I think that was four because I was planning to use more of that in the squares. You can choose the amounts of each that you want to use. Sort the colors to be able to work quickly and easily with them.
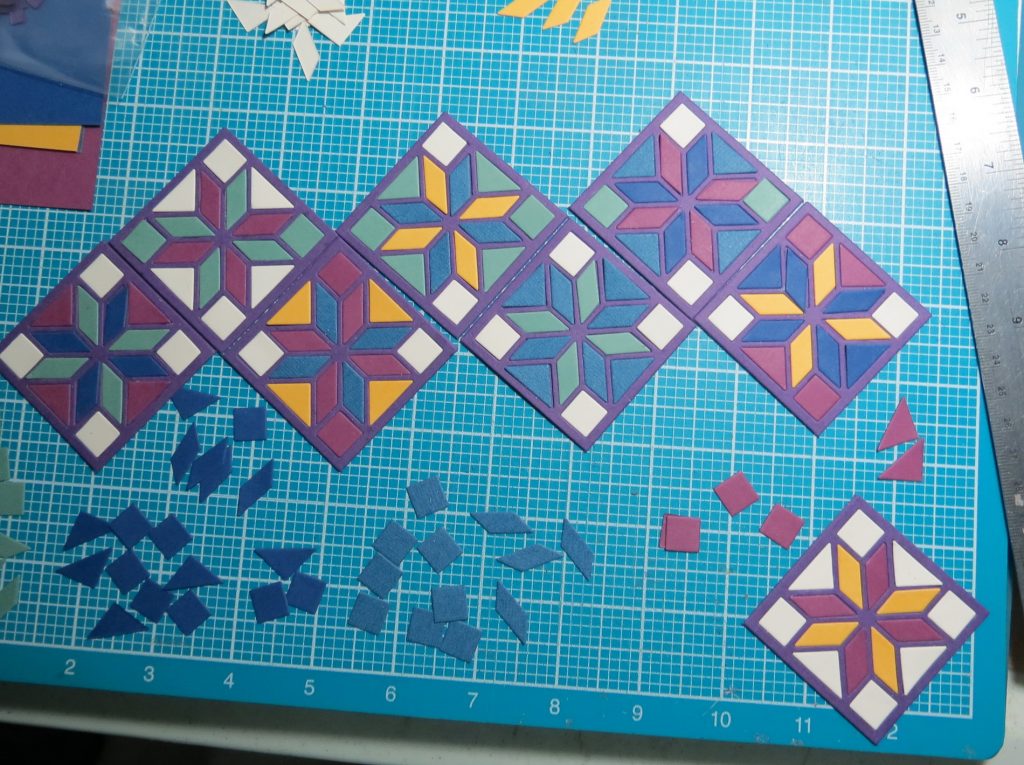
For the 1” squares I cut 2 – 1” squares of each of five colors (but not the ivory). Mount the 1” stars on the color tiles, set aside to attach later.
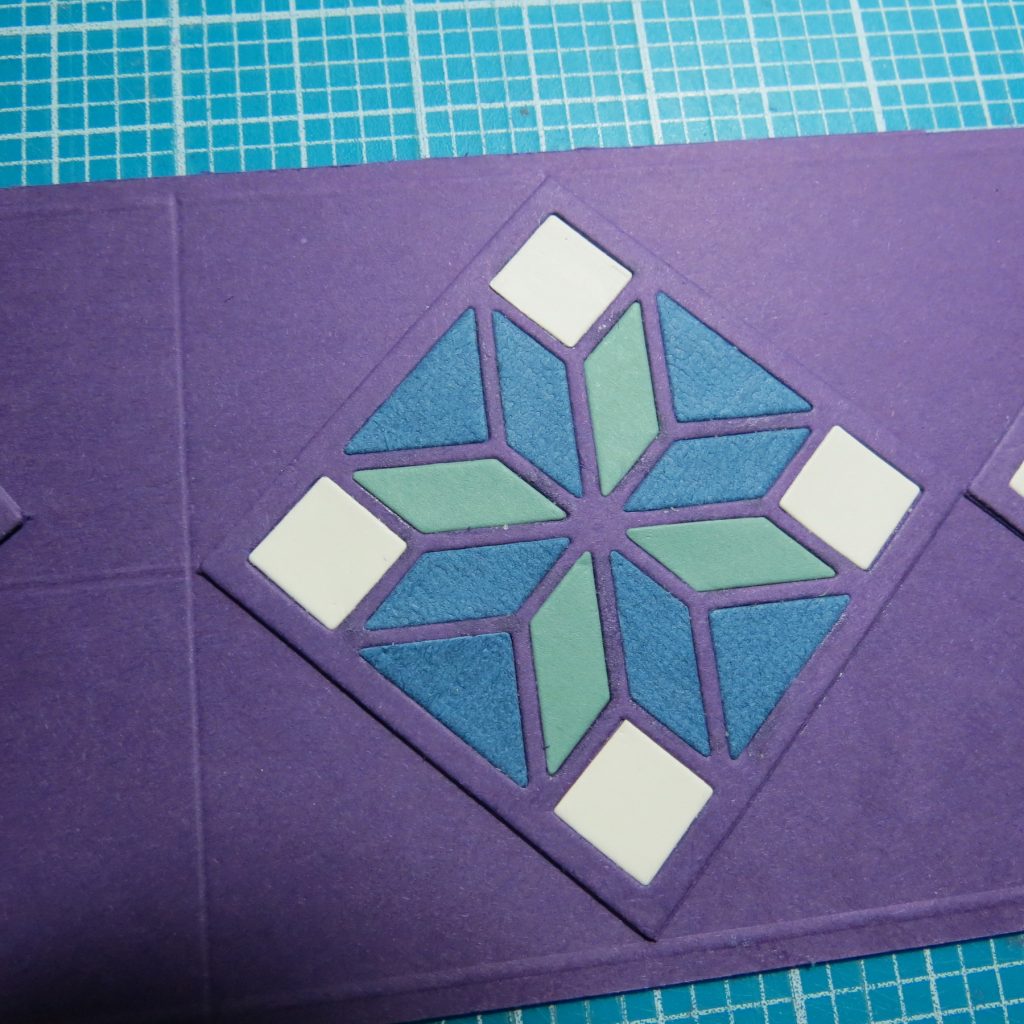
With one tile at a time, begin to fill the spaces in the star pattern. I began by laying in the colors to see how things would look and be able to make changes before I glue them in place. Arrange them to see how they will look together in the full row and then once you have the pattern you are happy with go back and remove the pieces and use you glue pen to “draw” the inside with glue and then drop in the pieces.
TIP: I take photos of the arrangement so I don’t forget where each tile was to go or where the colors in each tile belong, just in case an enthusiastic child disturbs things before I get to them to glue in place!
Once all the pieces are completed give them a little time to set up, set them aside and cut your mats for the photos you will add to your layout. I have 4 – 3×3 for photos and a 4×6 mat to add my journaling.
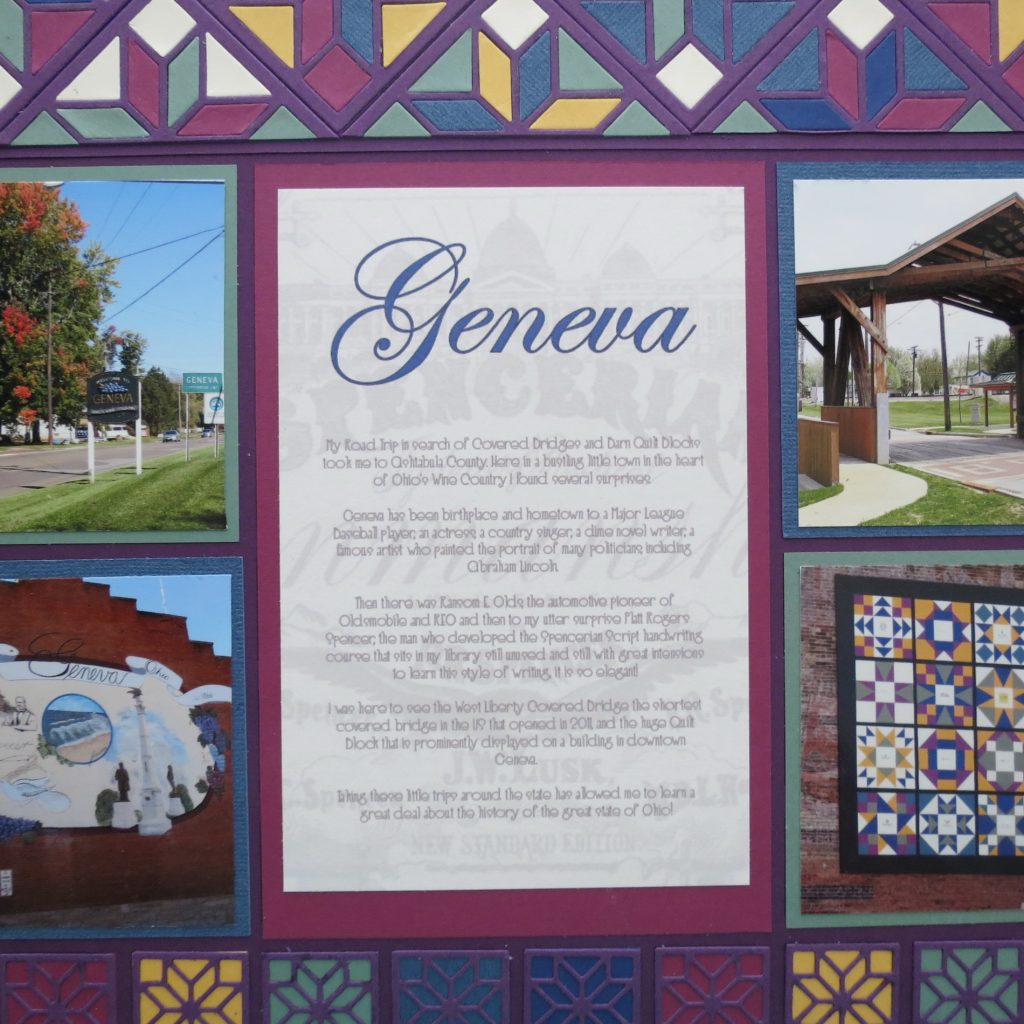
For the journaling, I used a photo of the copybook cover for the Spencerian Script, turned it to Black and White and reduced the opacity to use it as a background for the journaling block. This actually fills the background with a little interest as well as reminds me of my connection to it!
Now back to designing the unexpected and creating this colorful banner!
Take the 3.25”x12” Purple cardstock and lightly tack it to your Mosaic Moments Double-sided Grid Craft Mat so that all the scored lines line up with the grid marks.
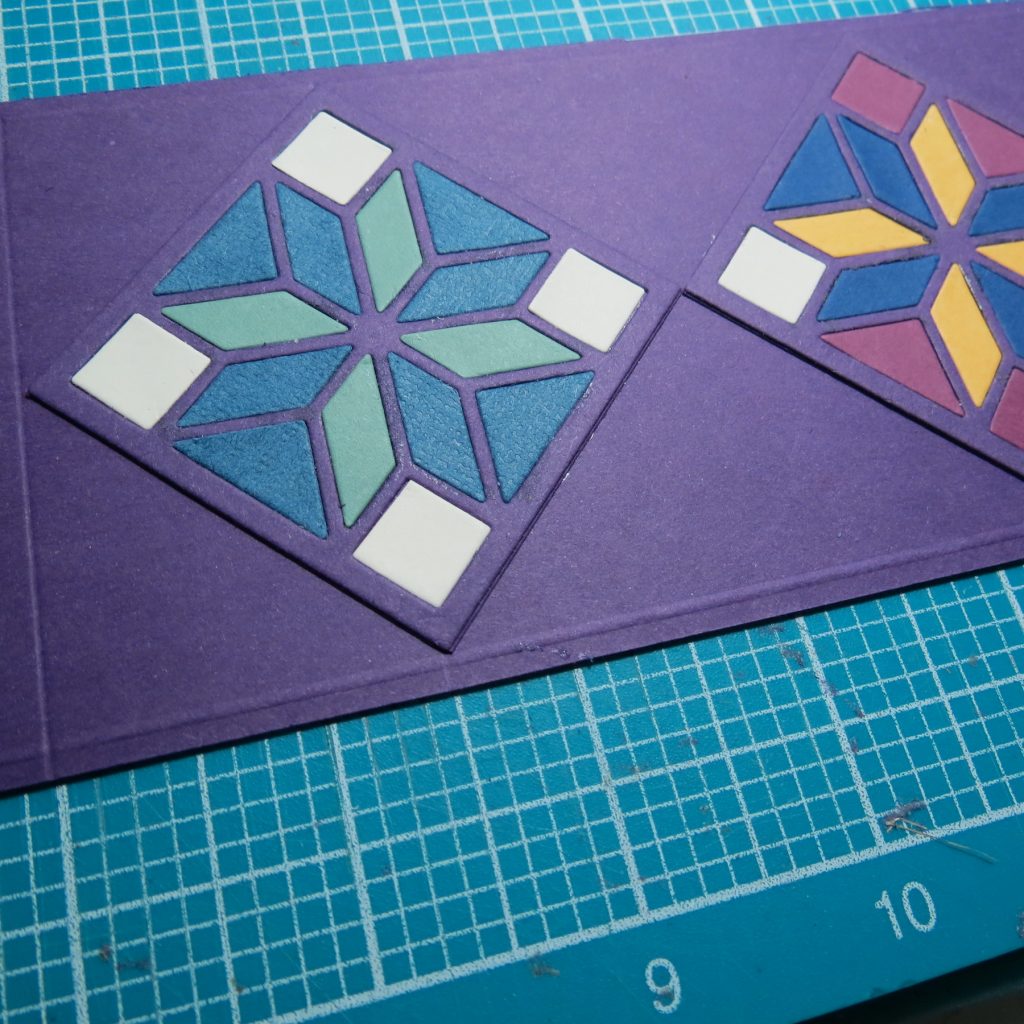
Four Carpenter’s Tiles will fill the center. I began on the right of center and lined up at the center intersection of lines, the top, and bottom score lines and the far-right horizontal line. Adhere. Repeat with the next to the right and then begin in the center-left and work to the left edge.
Now the next step may have you a bit nervous, but it isn’t as hard as you think. Each of the next 3 tiles will get halved horizontally, so determine where each should go before you begin to cut. Lightly tack the back of the tile and match corners with the lines on the grid vertically and horizontally.

Using your cork-backed ruler carefully line your tile with the horizontal cut line going top to bottom. We always cut with a downstroke, not an across stroke; it is safer and more accurate. Carefully draw your X-Acto Knife down, top to bottom. PLEASE work with sharp blades for best results. Don’t rush! I took three times to cut carefully through the layers to be sure I got a clean cut.
Do not worry if your cut through the center of the die doesn’t look perfect, you will not notice this in the final piece.
Attach each section to the top and bottom of the three spots between the center row by butting the edges up to each other, leaving no spaces.
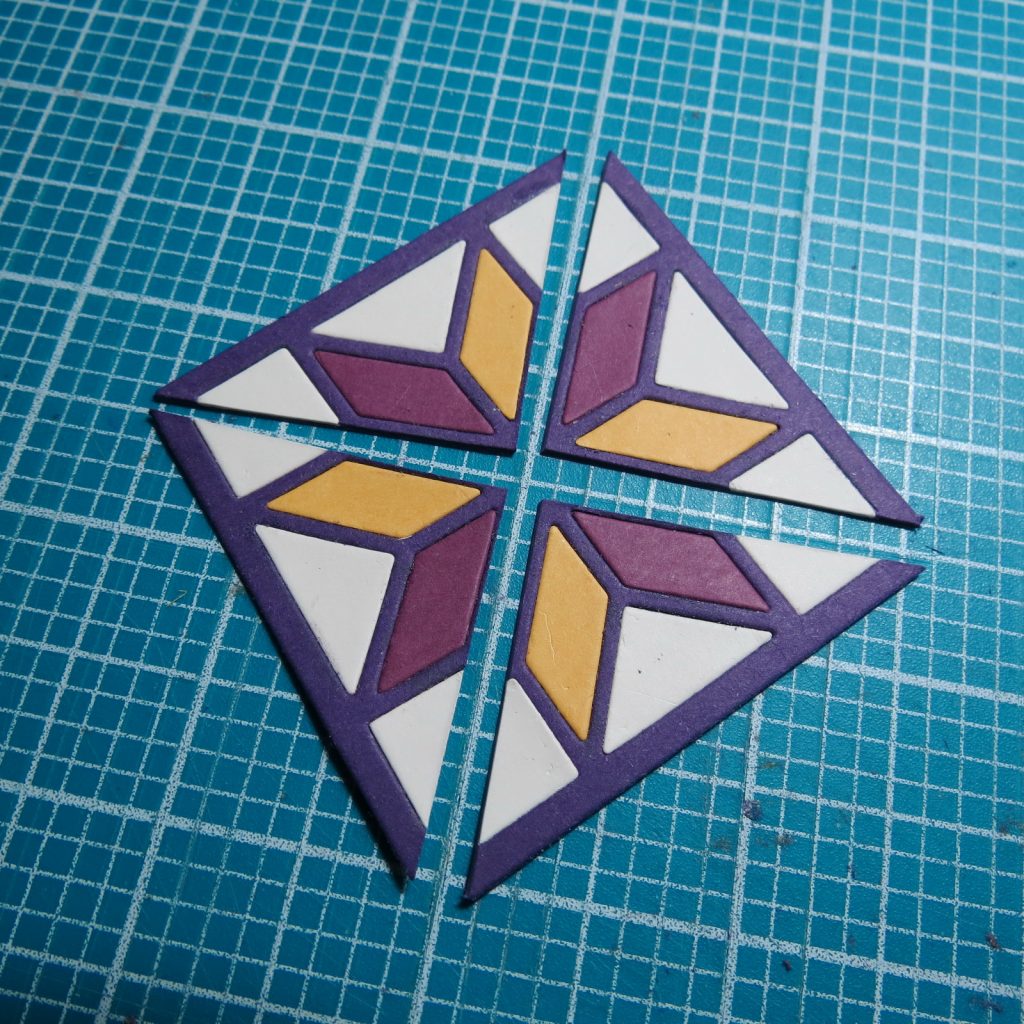
The only thing remaining is to fill in the end bits. Take your remaining Carpenters Star Tile and use a cross of dot glue to anchor the tile to your grid. Repeat the cut you have done with the rest. Then turn your grid a quarter turn and cut again. Now you have four sections to fill in the end sections of this border piece.
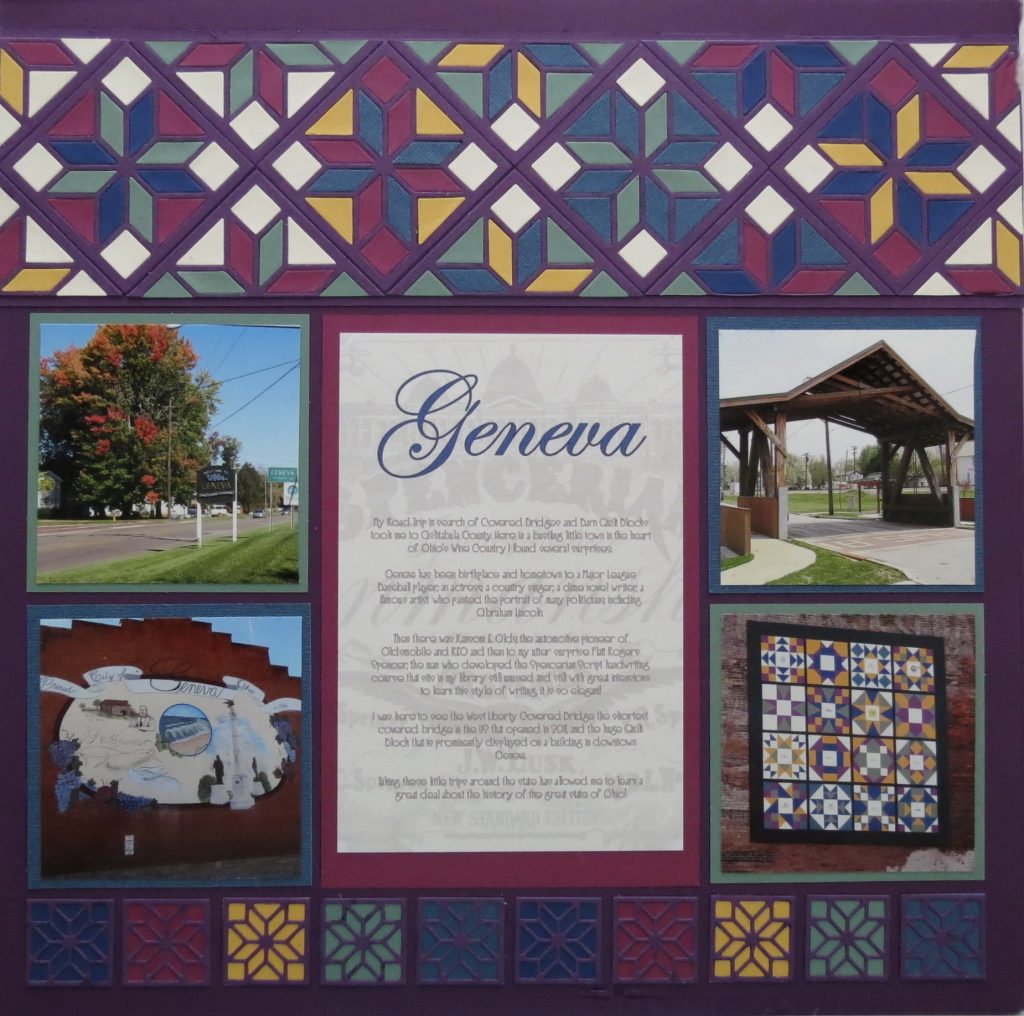
Depending on your preferences this border can go at the top or the bottom of your page. Just align the top edge to the top edge of the grid squares and then fit side to side.

The 1” tile Squares will line the opposite end of the page. Finish the page with 4 – 3×3 mats and 1 – 4×6 mat. I placed my journaling in the center, but another photo could easily be featured here too.
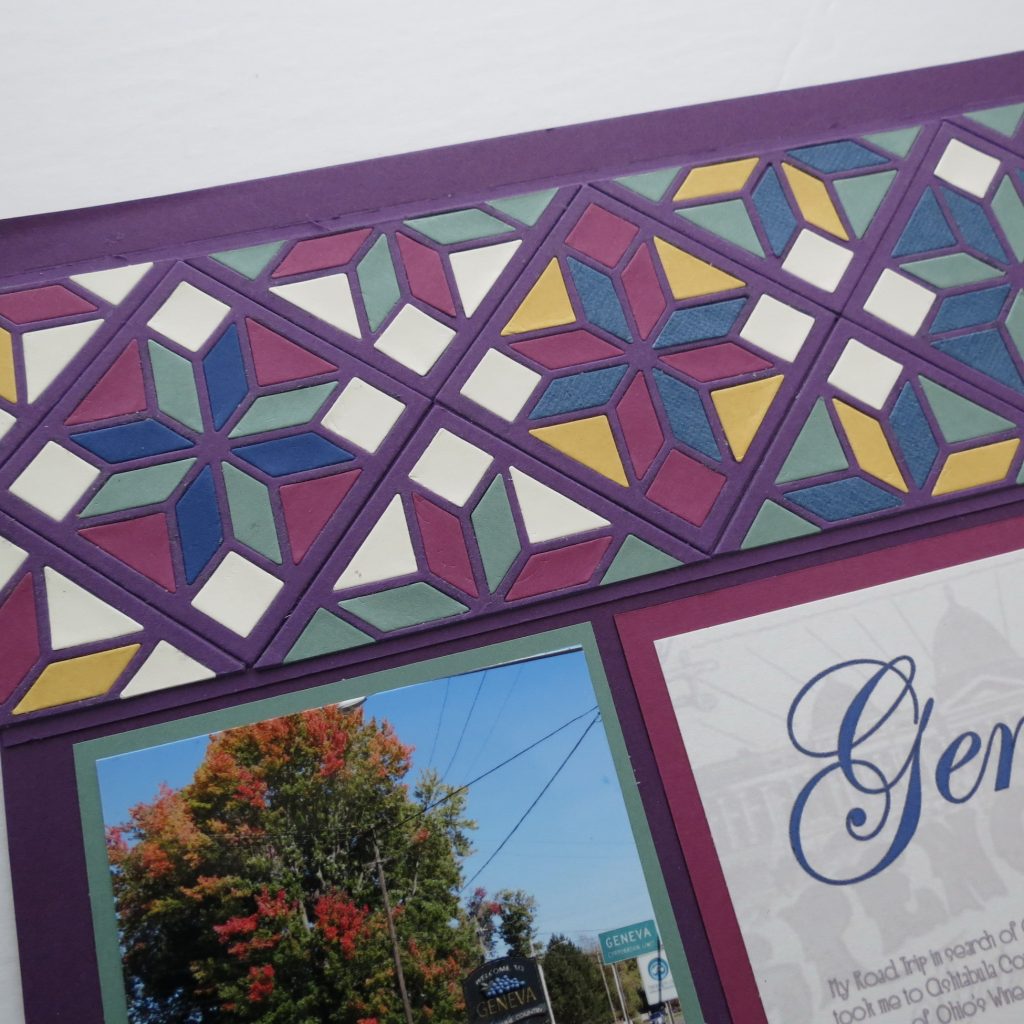
This banner gives you a look of a full mosaic window! Even the edges of the tiles being edge-to-edge create a nice on-point square border. Using the same color cardstock as the Grid Paper lets the design float off of the page. The banner can be a decorative touch as I’ve used it or a backdrop to place a title with any of the Alphabet dies.
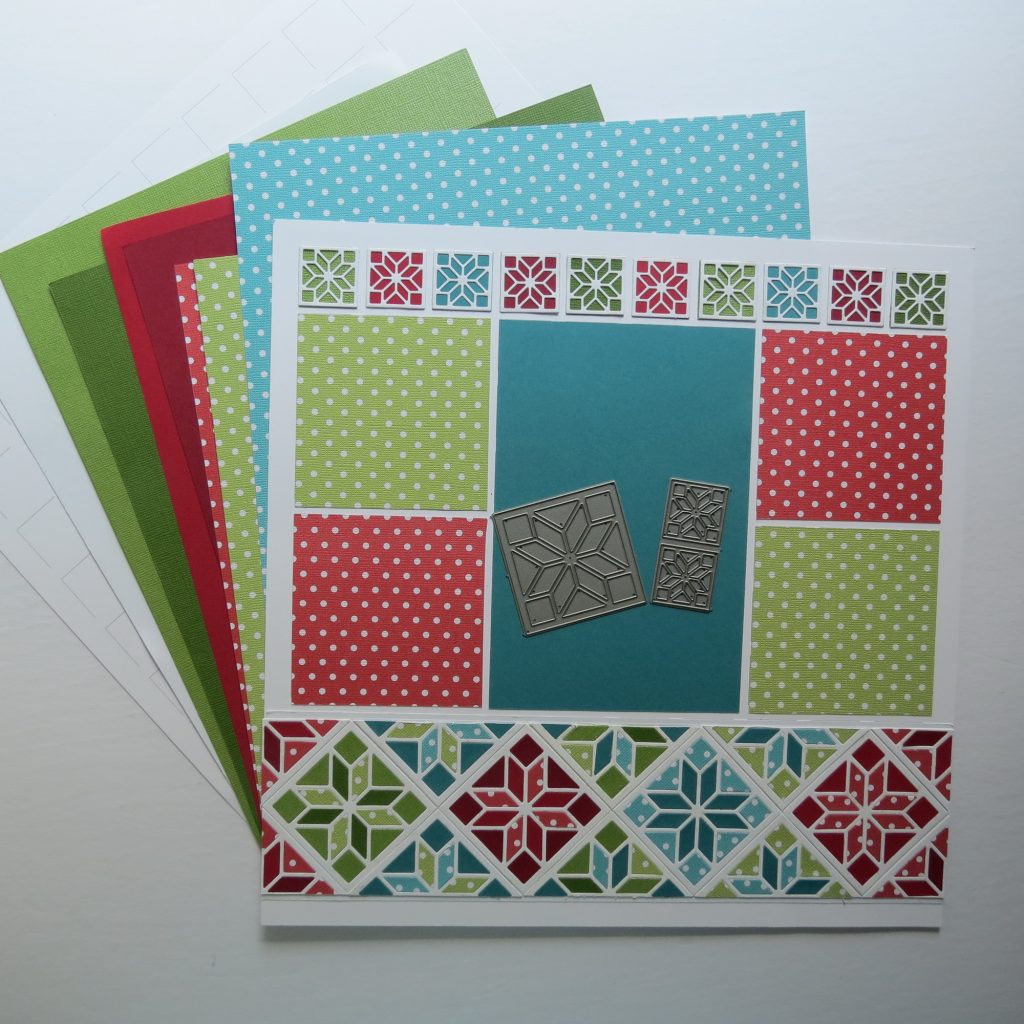
This page was actually my second page using this idea; the first is a Christmas layout I’ve prepared for one of my camp projects. As I was working on it, it occurred to me it would also fit the bill for this week’s post! So here’s a sneak peek at the project to get an idea how another color combo would work!
Get playing around with your dies and see what unexpected designs you come up with for your pages!
Andrea Fisher
Photo Credit: for the West Liberty Covered Bridge Free use granted By Michael A. Orlando, CC BY-SA 3.0,