
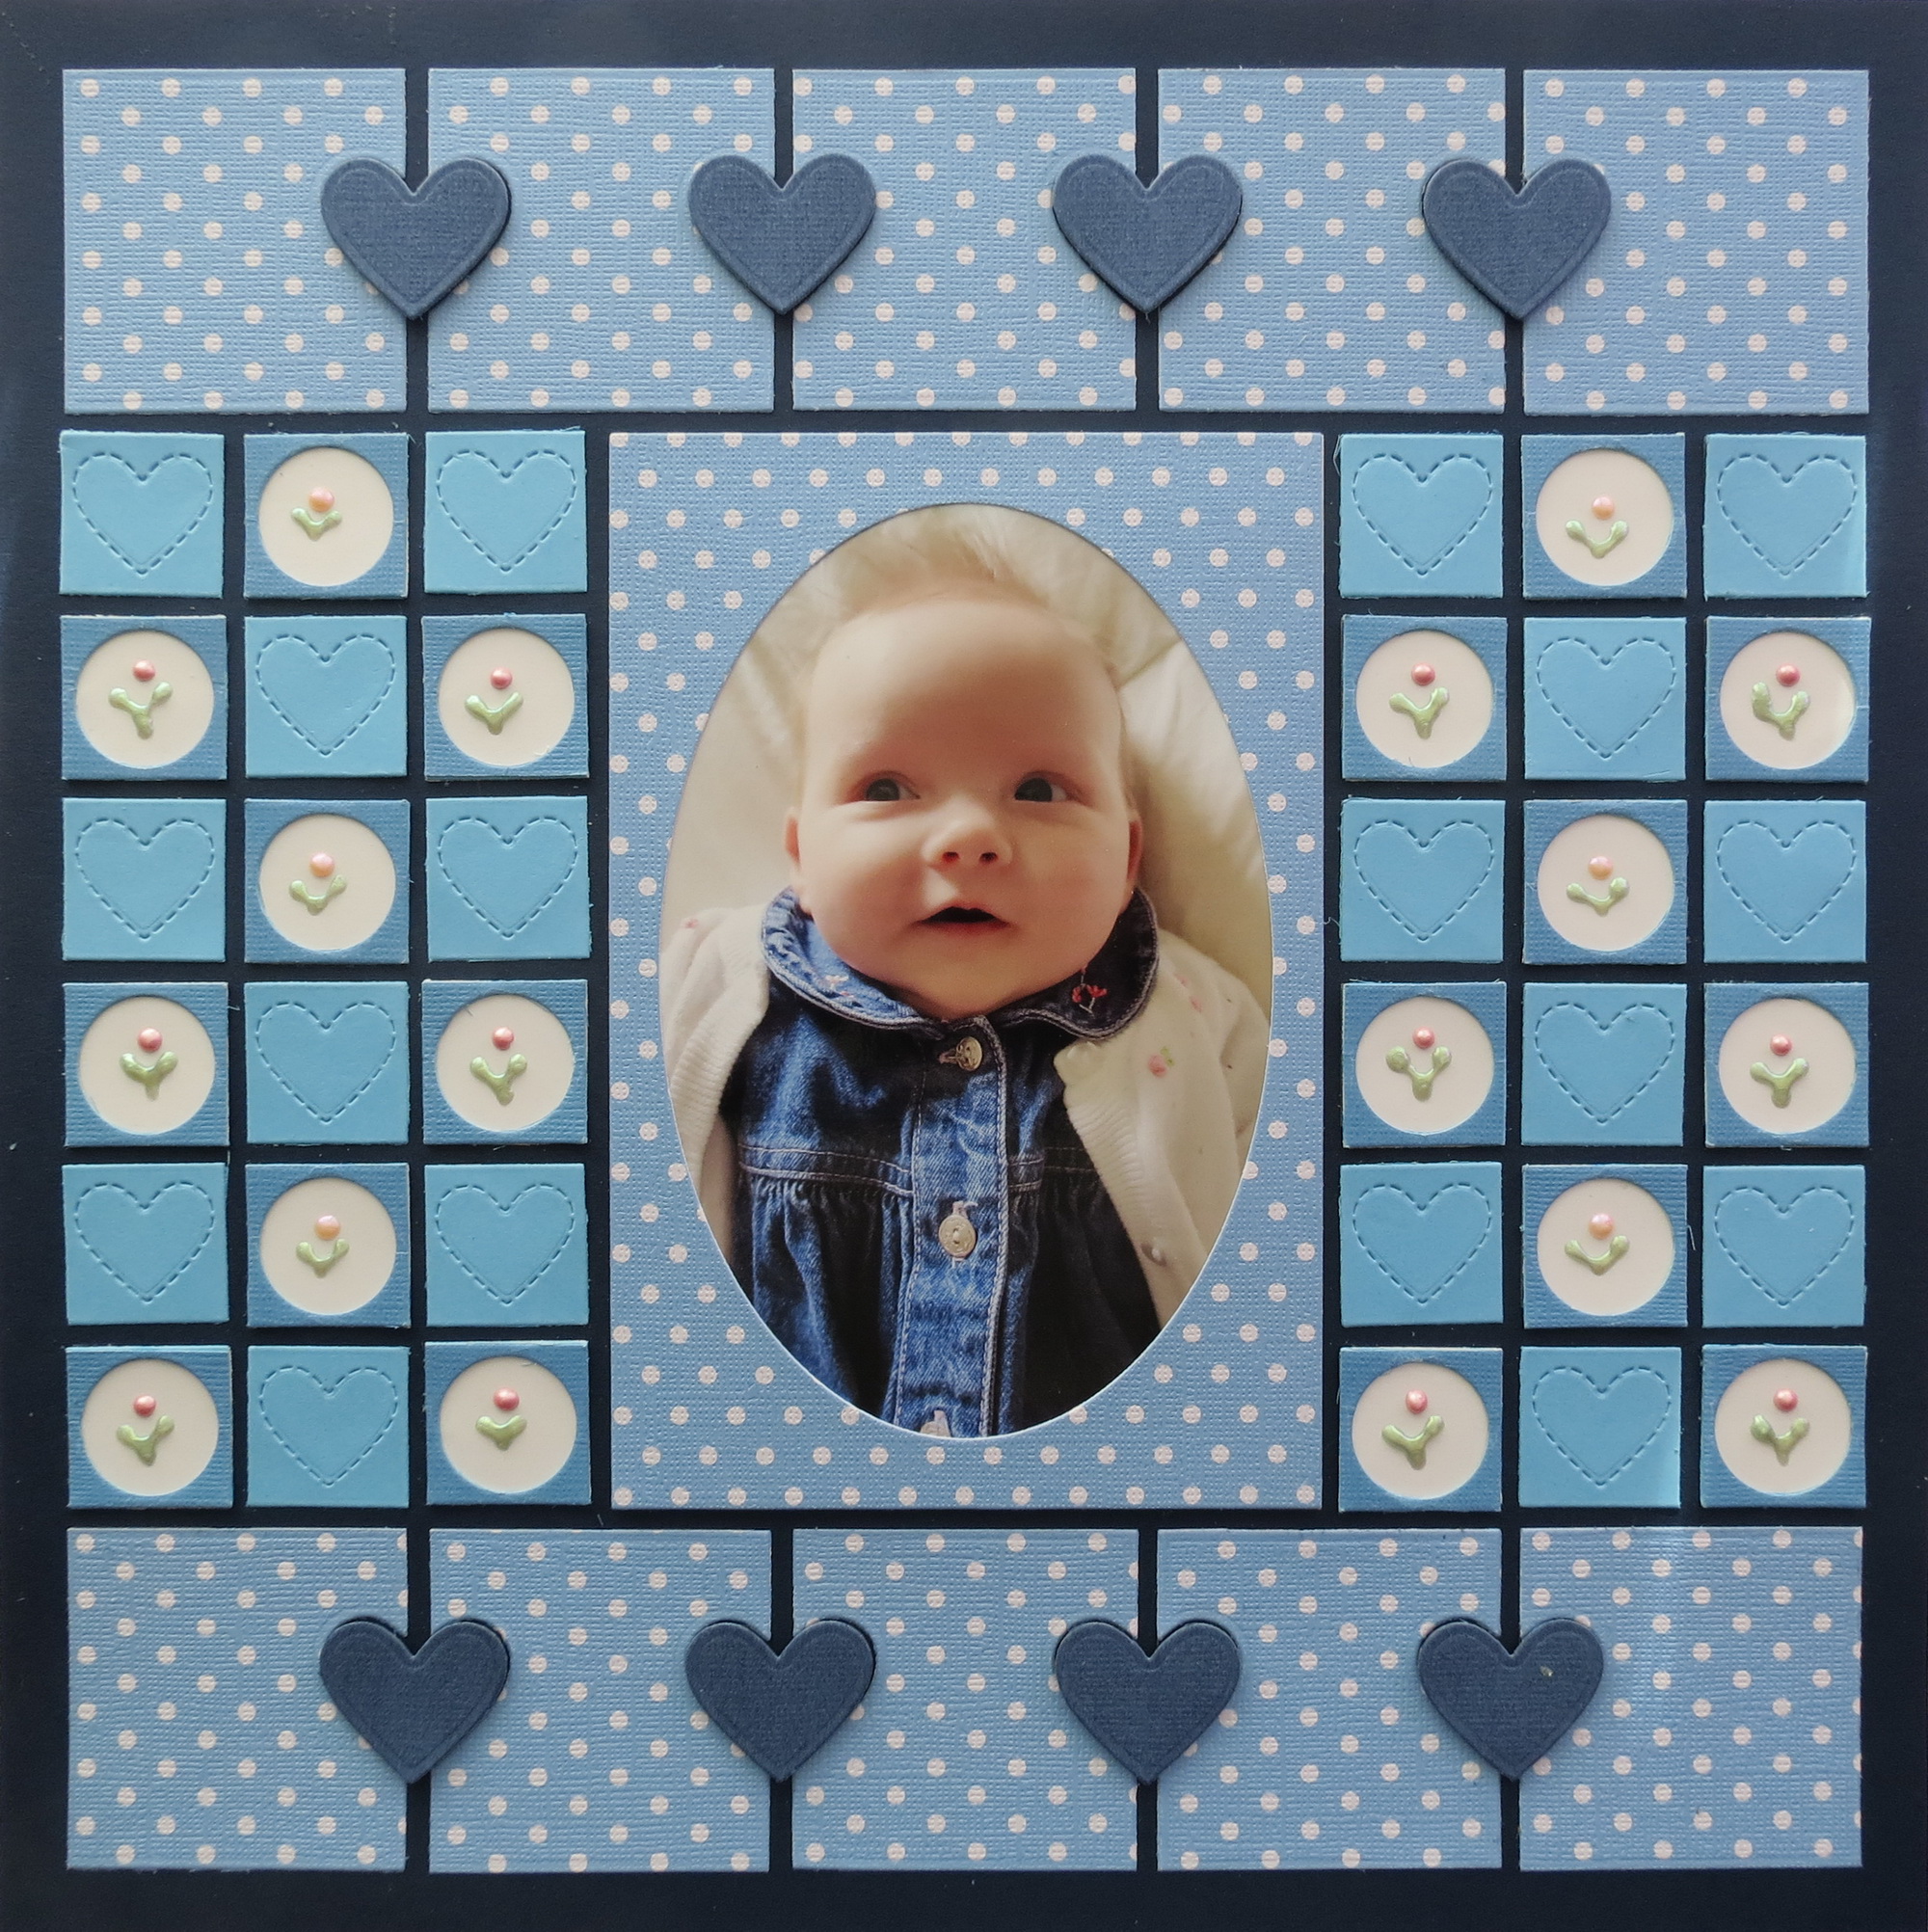
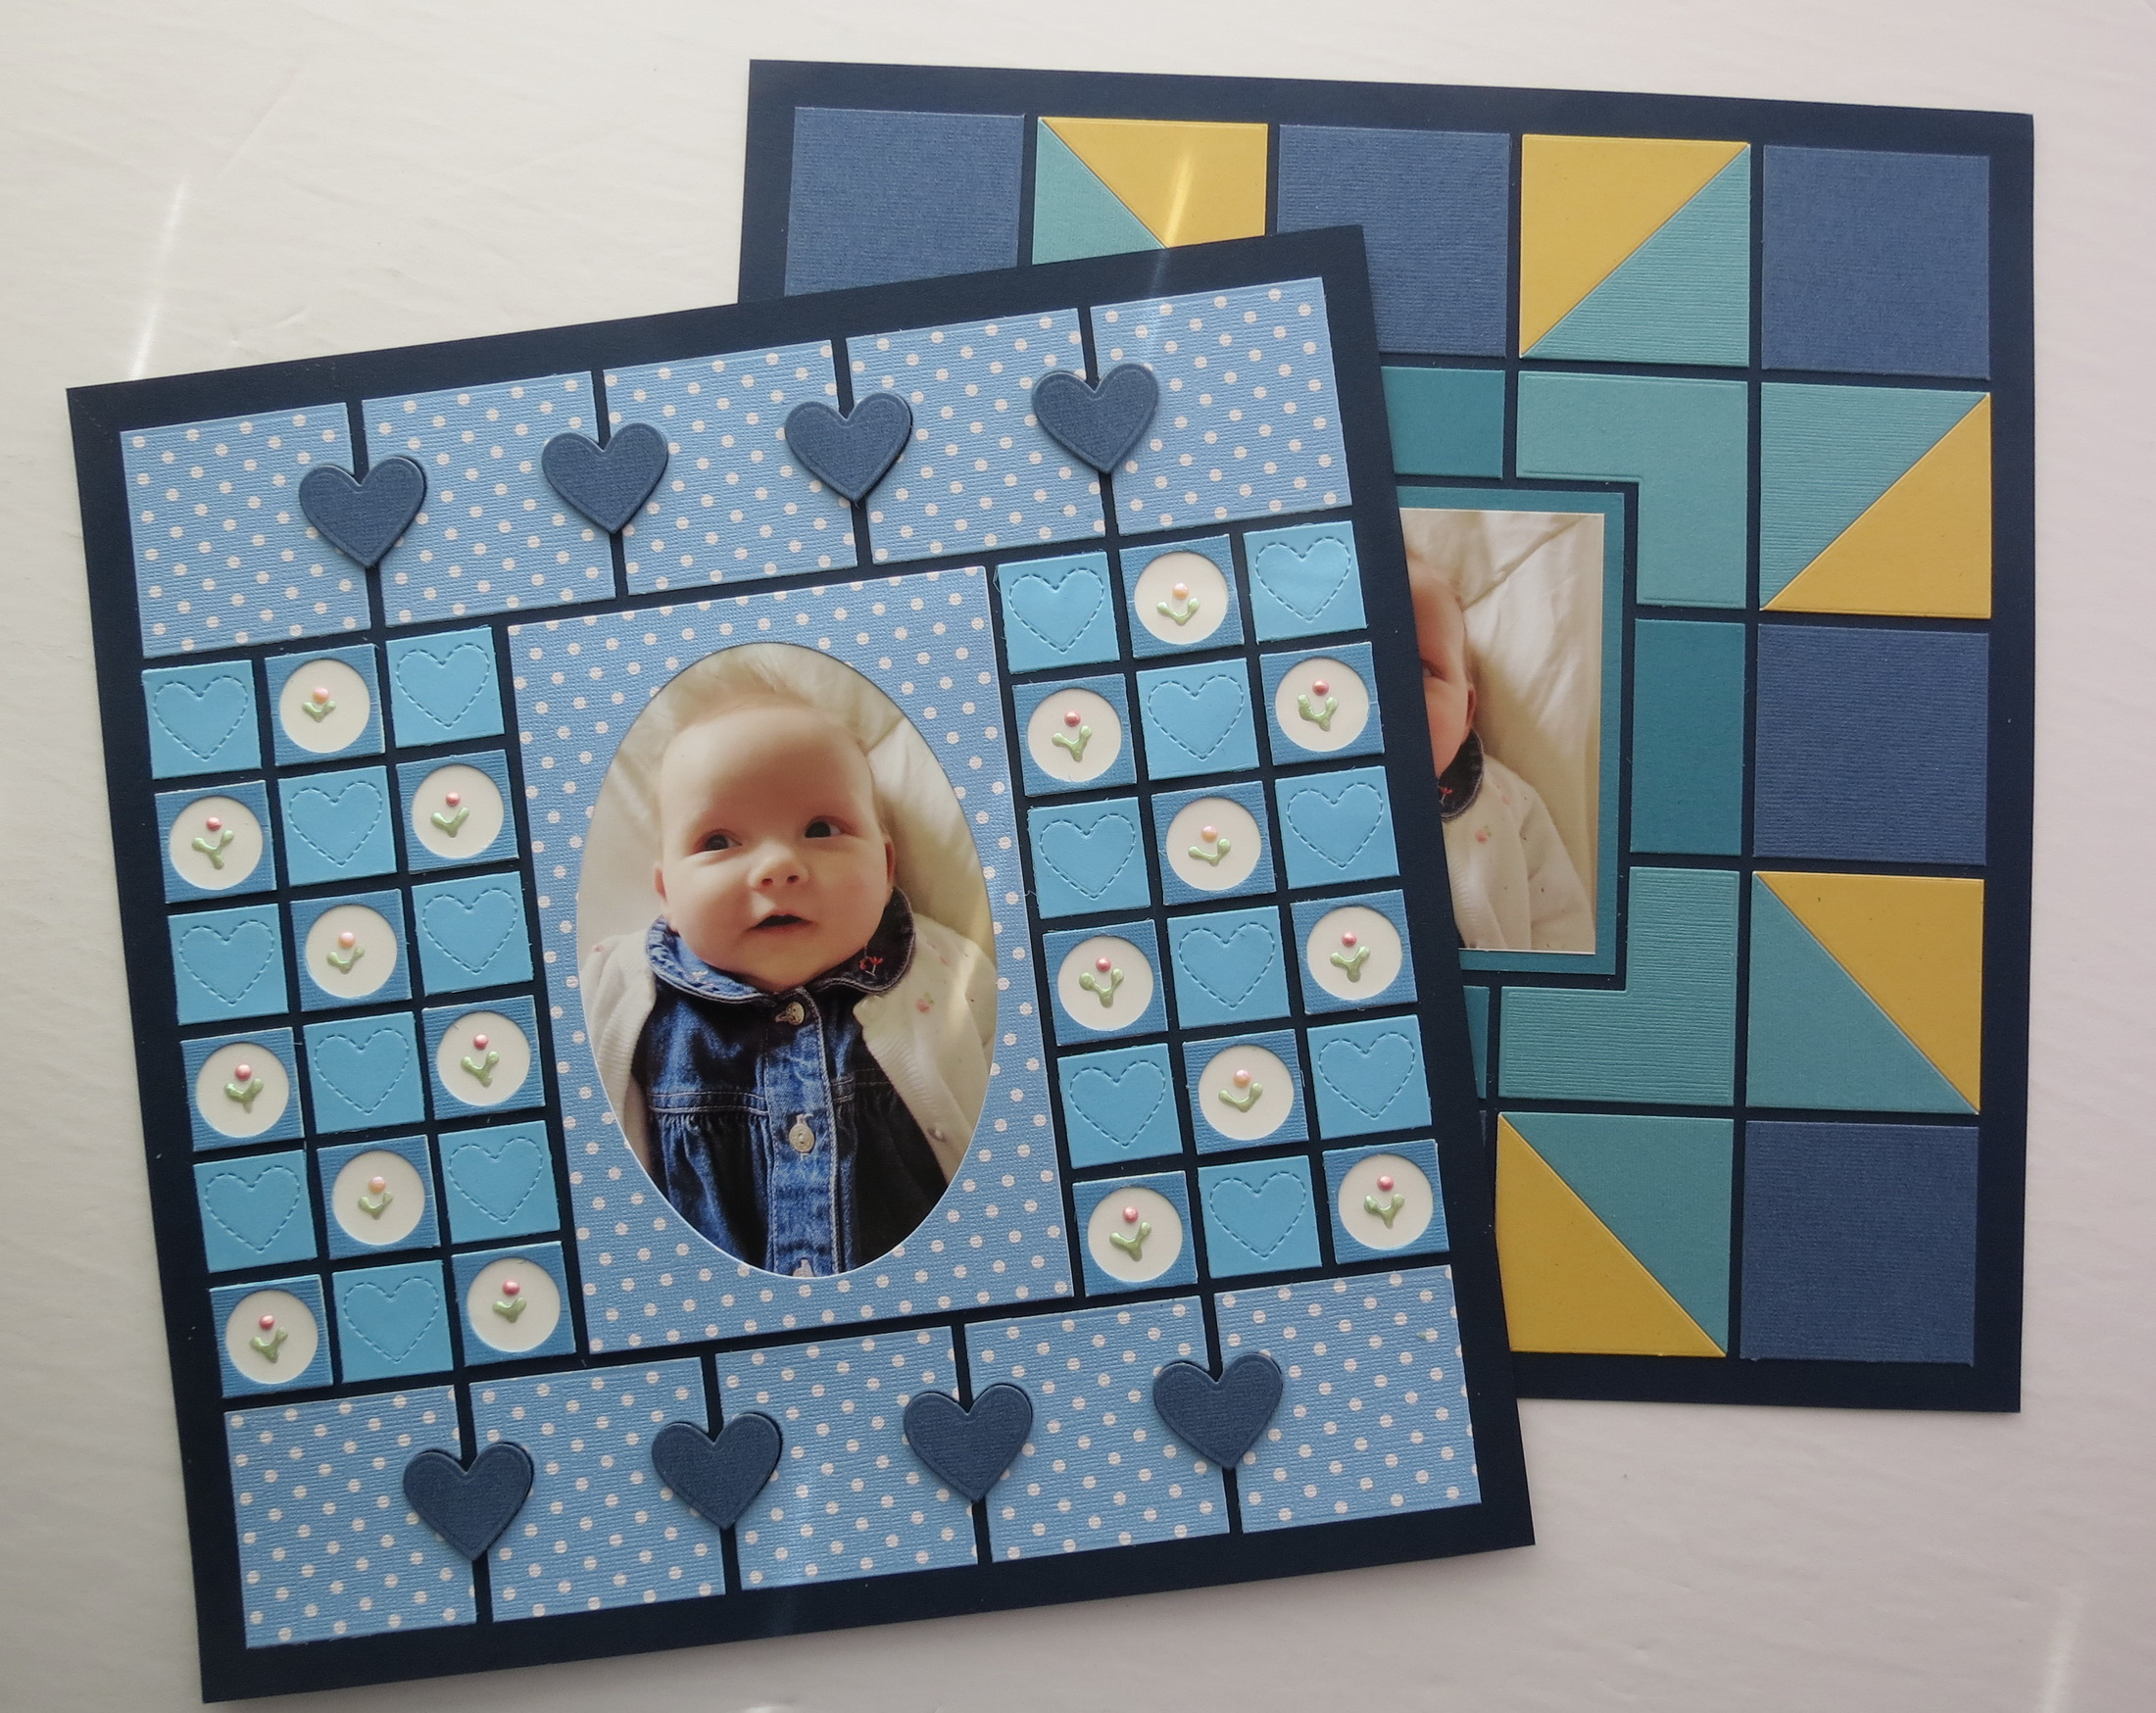
On occasion, featuring a single photo on a grid can give you the opportunity to use some of your specialty die sets to design a frame around the photo. It can also give some of the simpler dies and the collection of time saver dies a chance to shine creating new designs.
Layout 1
I played around with pieces and shapes for quite some time before I settled on the dies I chose to use for the final layout.
In the end, I abandoned the initial dies I was playing with and only kept the colors I was using. I’d chosen a Navy 12×12 Mosaic Moments Grid for my base and three shades of blue cardstocks, light, medium and dark.
A blue swiss dot patterned paper for the oval frame was brought into the mix and eventually, that paper became a bigger part of the design as time passed.
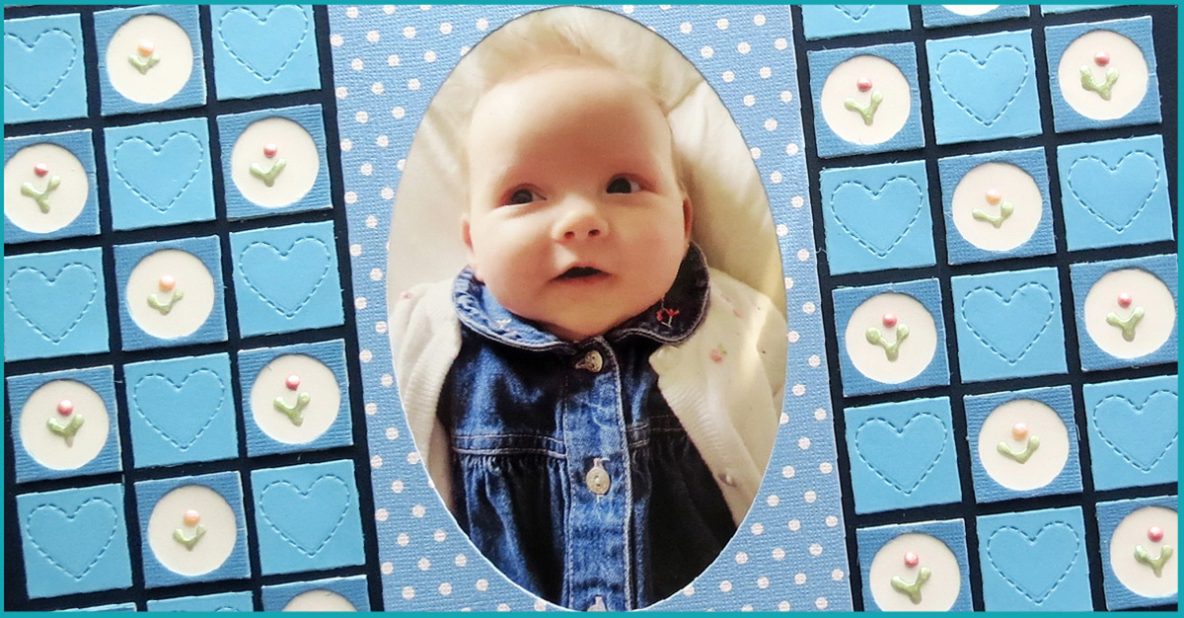
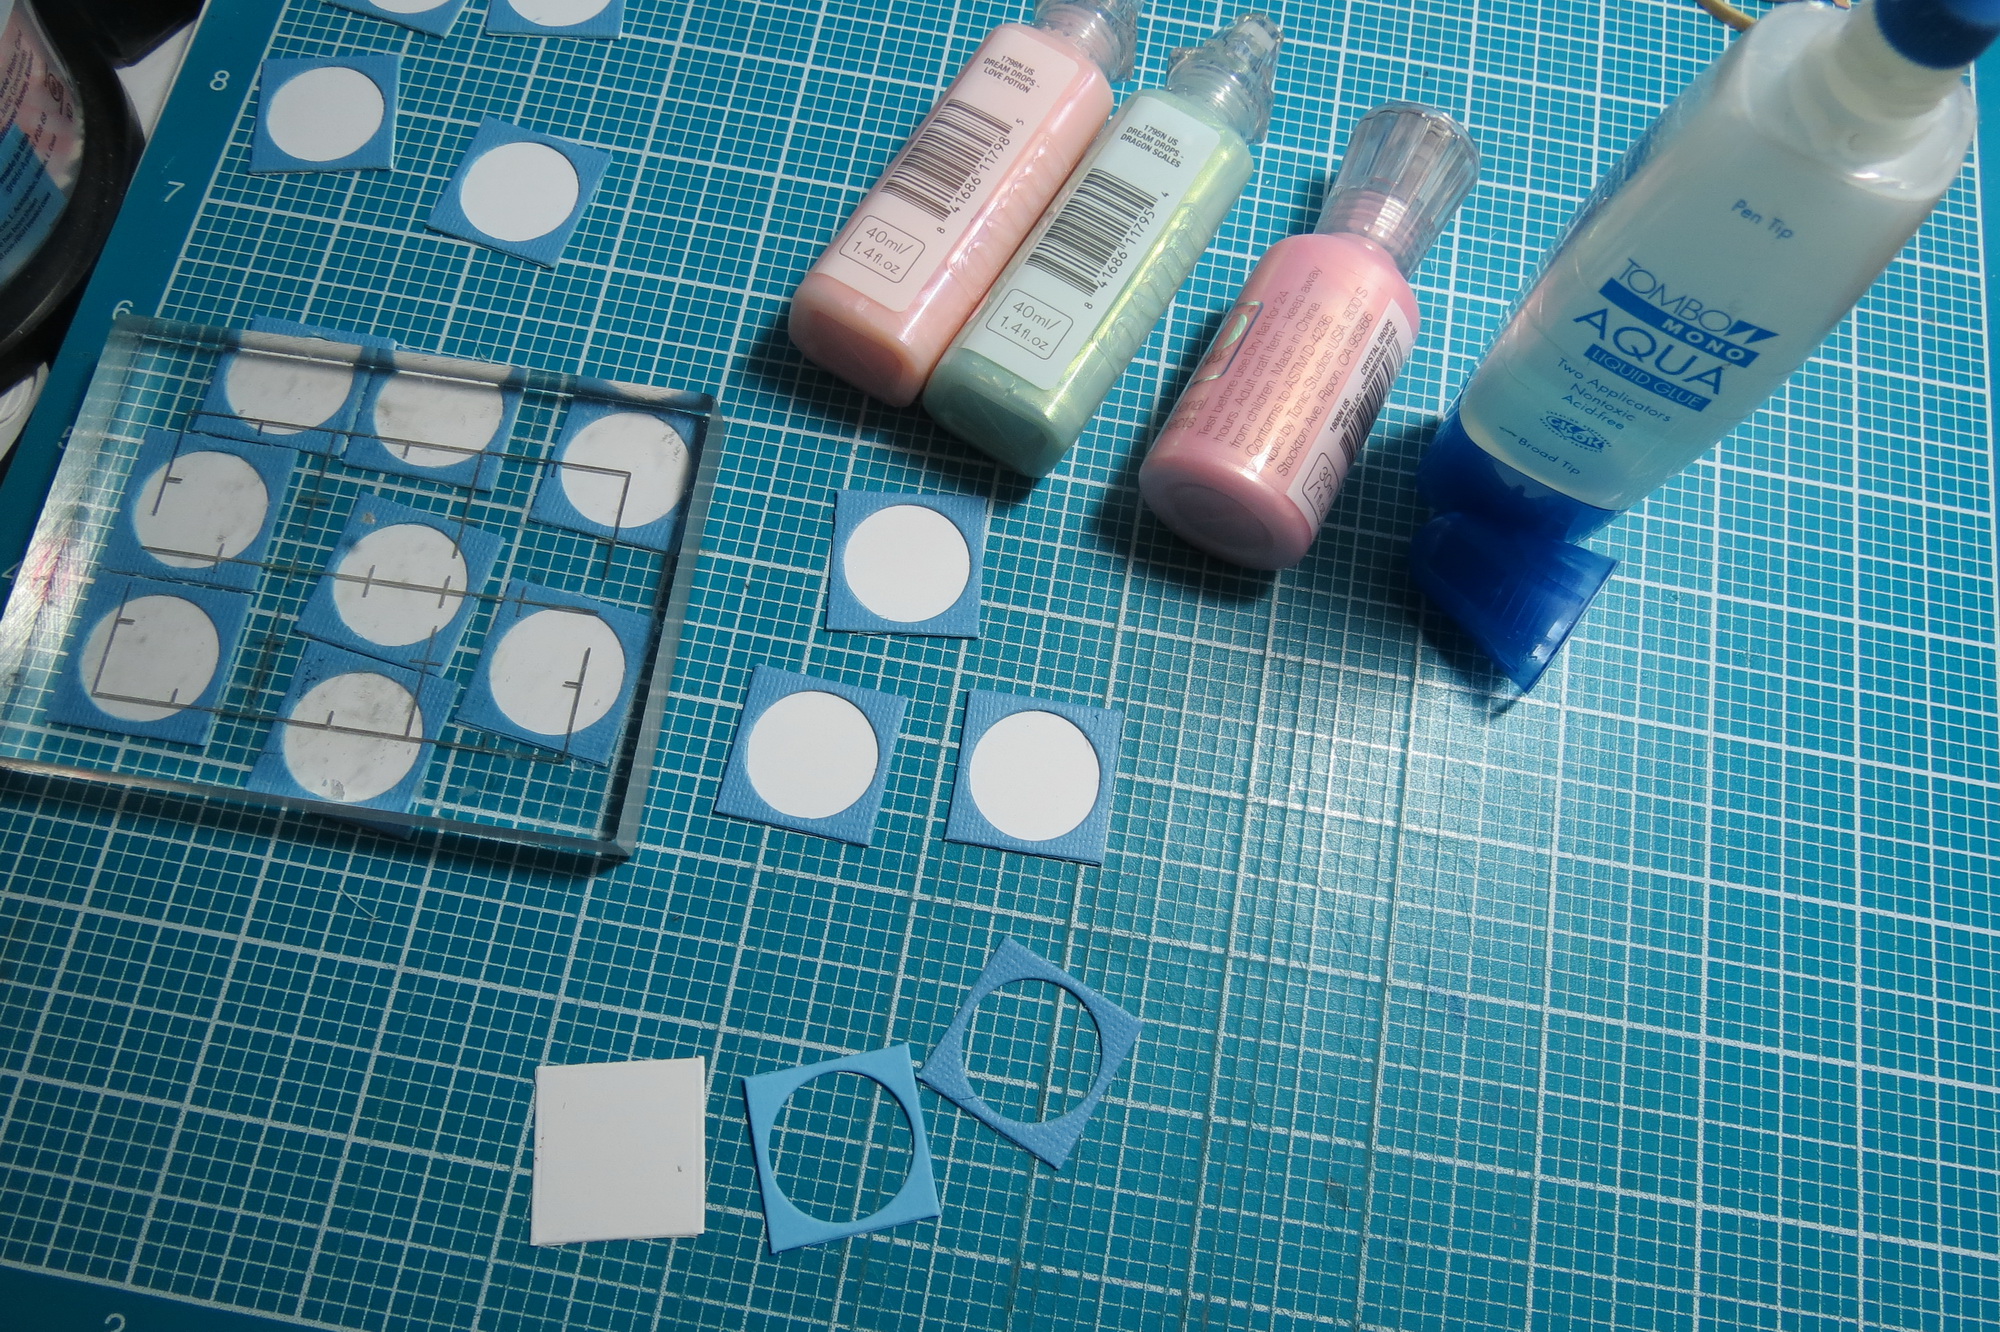
I thought I’d duplicate the dot pattern with the Circle Grid die to fill either side of the main framed photo. To accomplish that the lightest blue for all the squares were cut. White squares cut with the 1” Grid Die were used for the backing.
After cutting the blue squares with the 1” Square Grid, they seemed a bit plain so I decided to add the stitched heart square to each square for more interest and added texture. Then they were added to the page in a checkboard pattern.
There seemed to be too much of the lighter blue on the page now so an additional layer of the medium blue Circle Grid square for a two-layer tile was added and filled the alternating squares.
I wanted to fill these tiles with a tiny flower image to mimic the tiny flowers in her sweater and on her collar. To accomplish this, Tonic Studios Nuvo drops were used to create the tiny flowers.
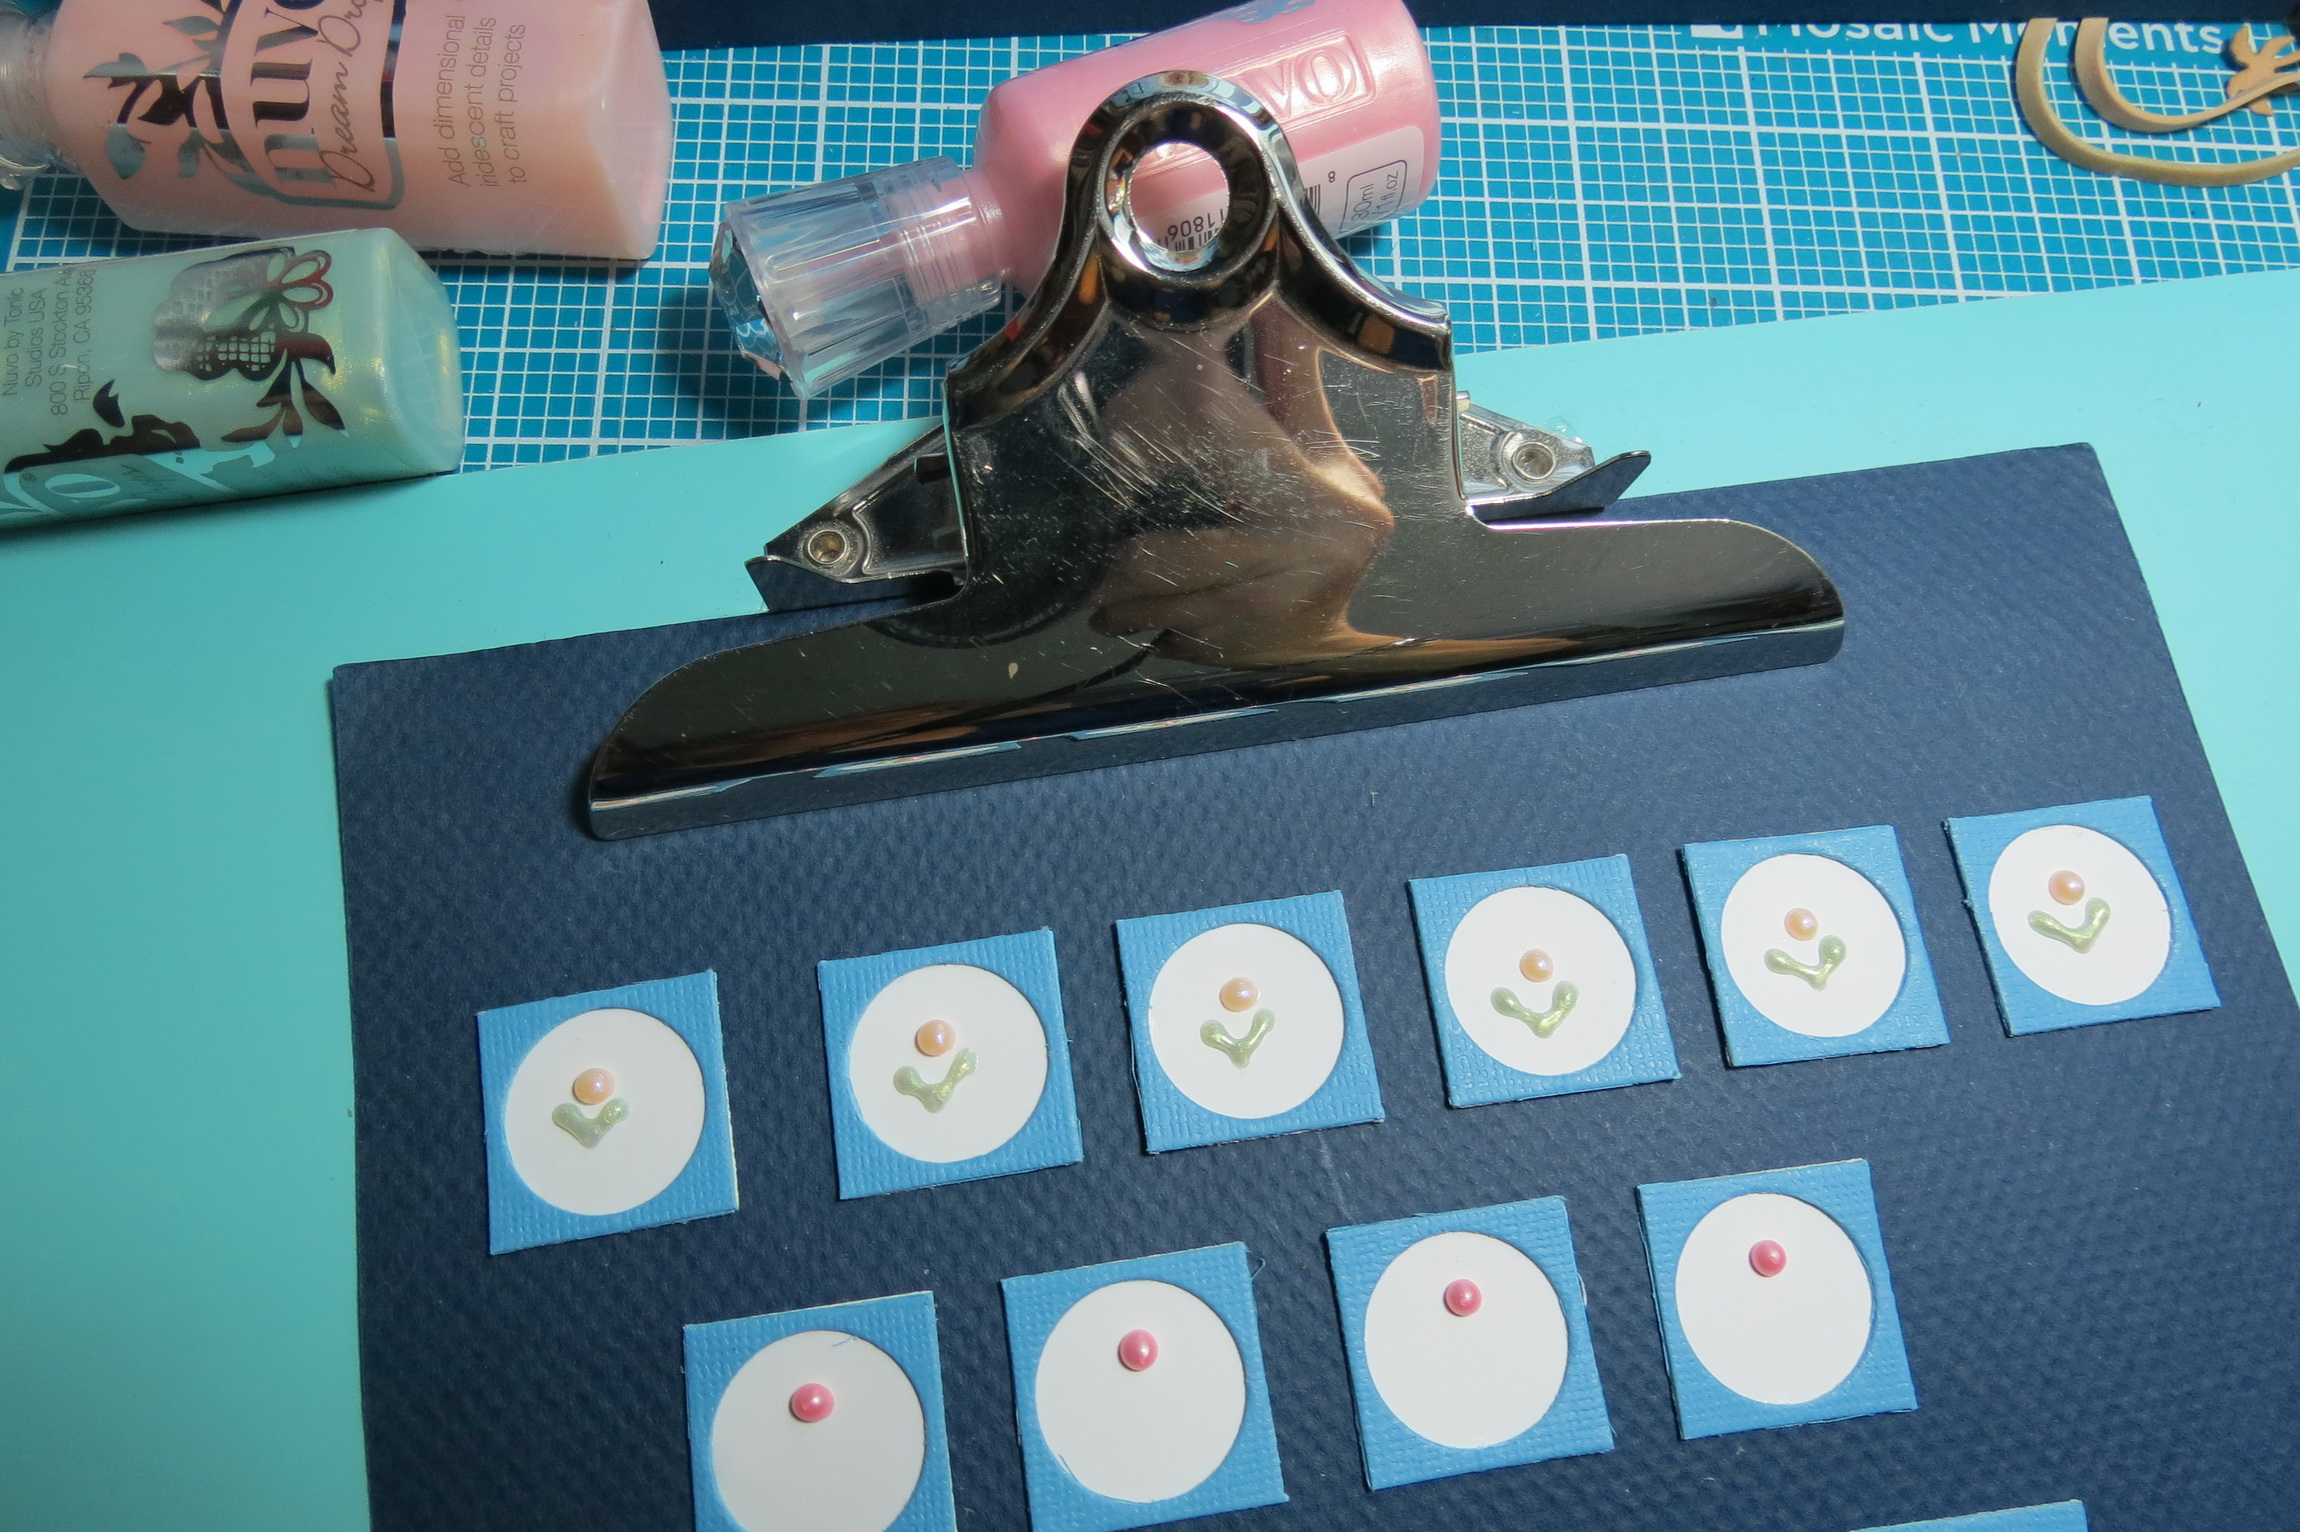
I mounted the 1” tiles onto cardstock mounted on a clip board with a spot of dot adhesive to give me a stable, portable surface to work on with the ability to easily move to a safe place to allow them to dry.
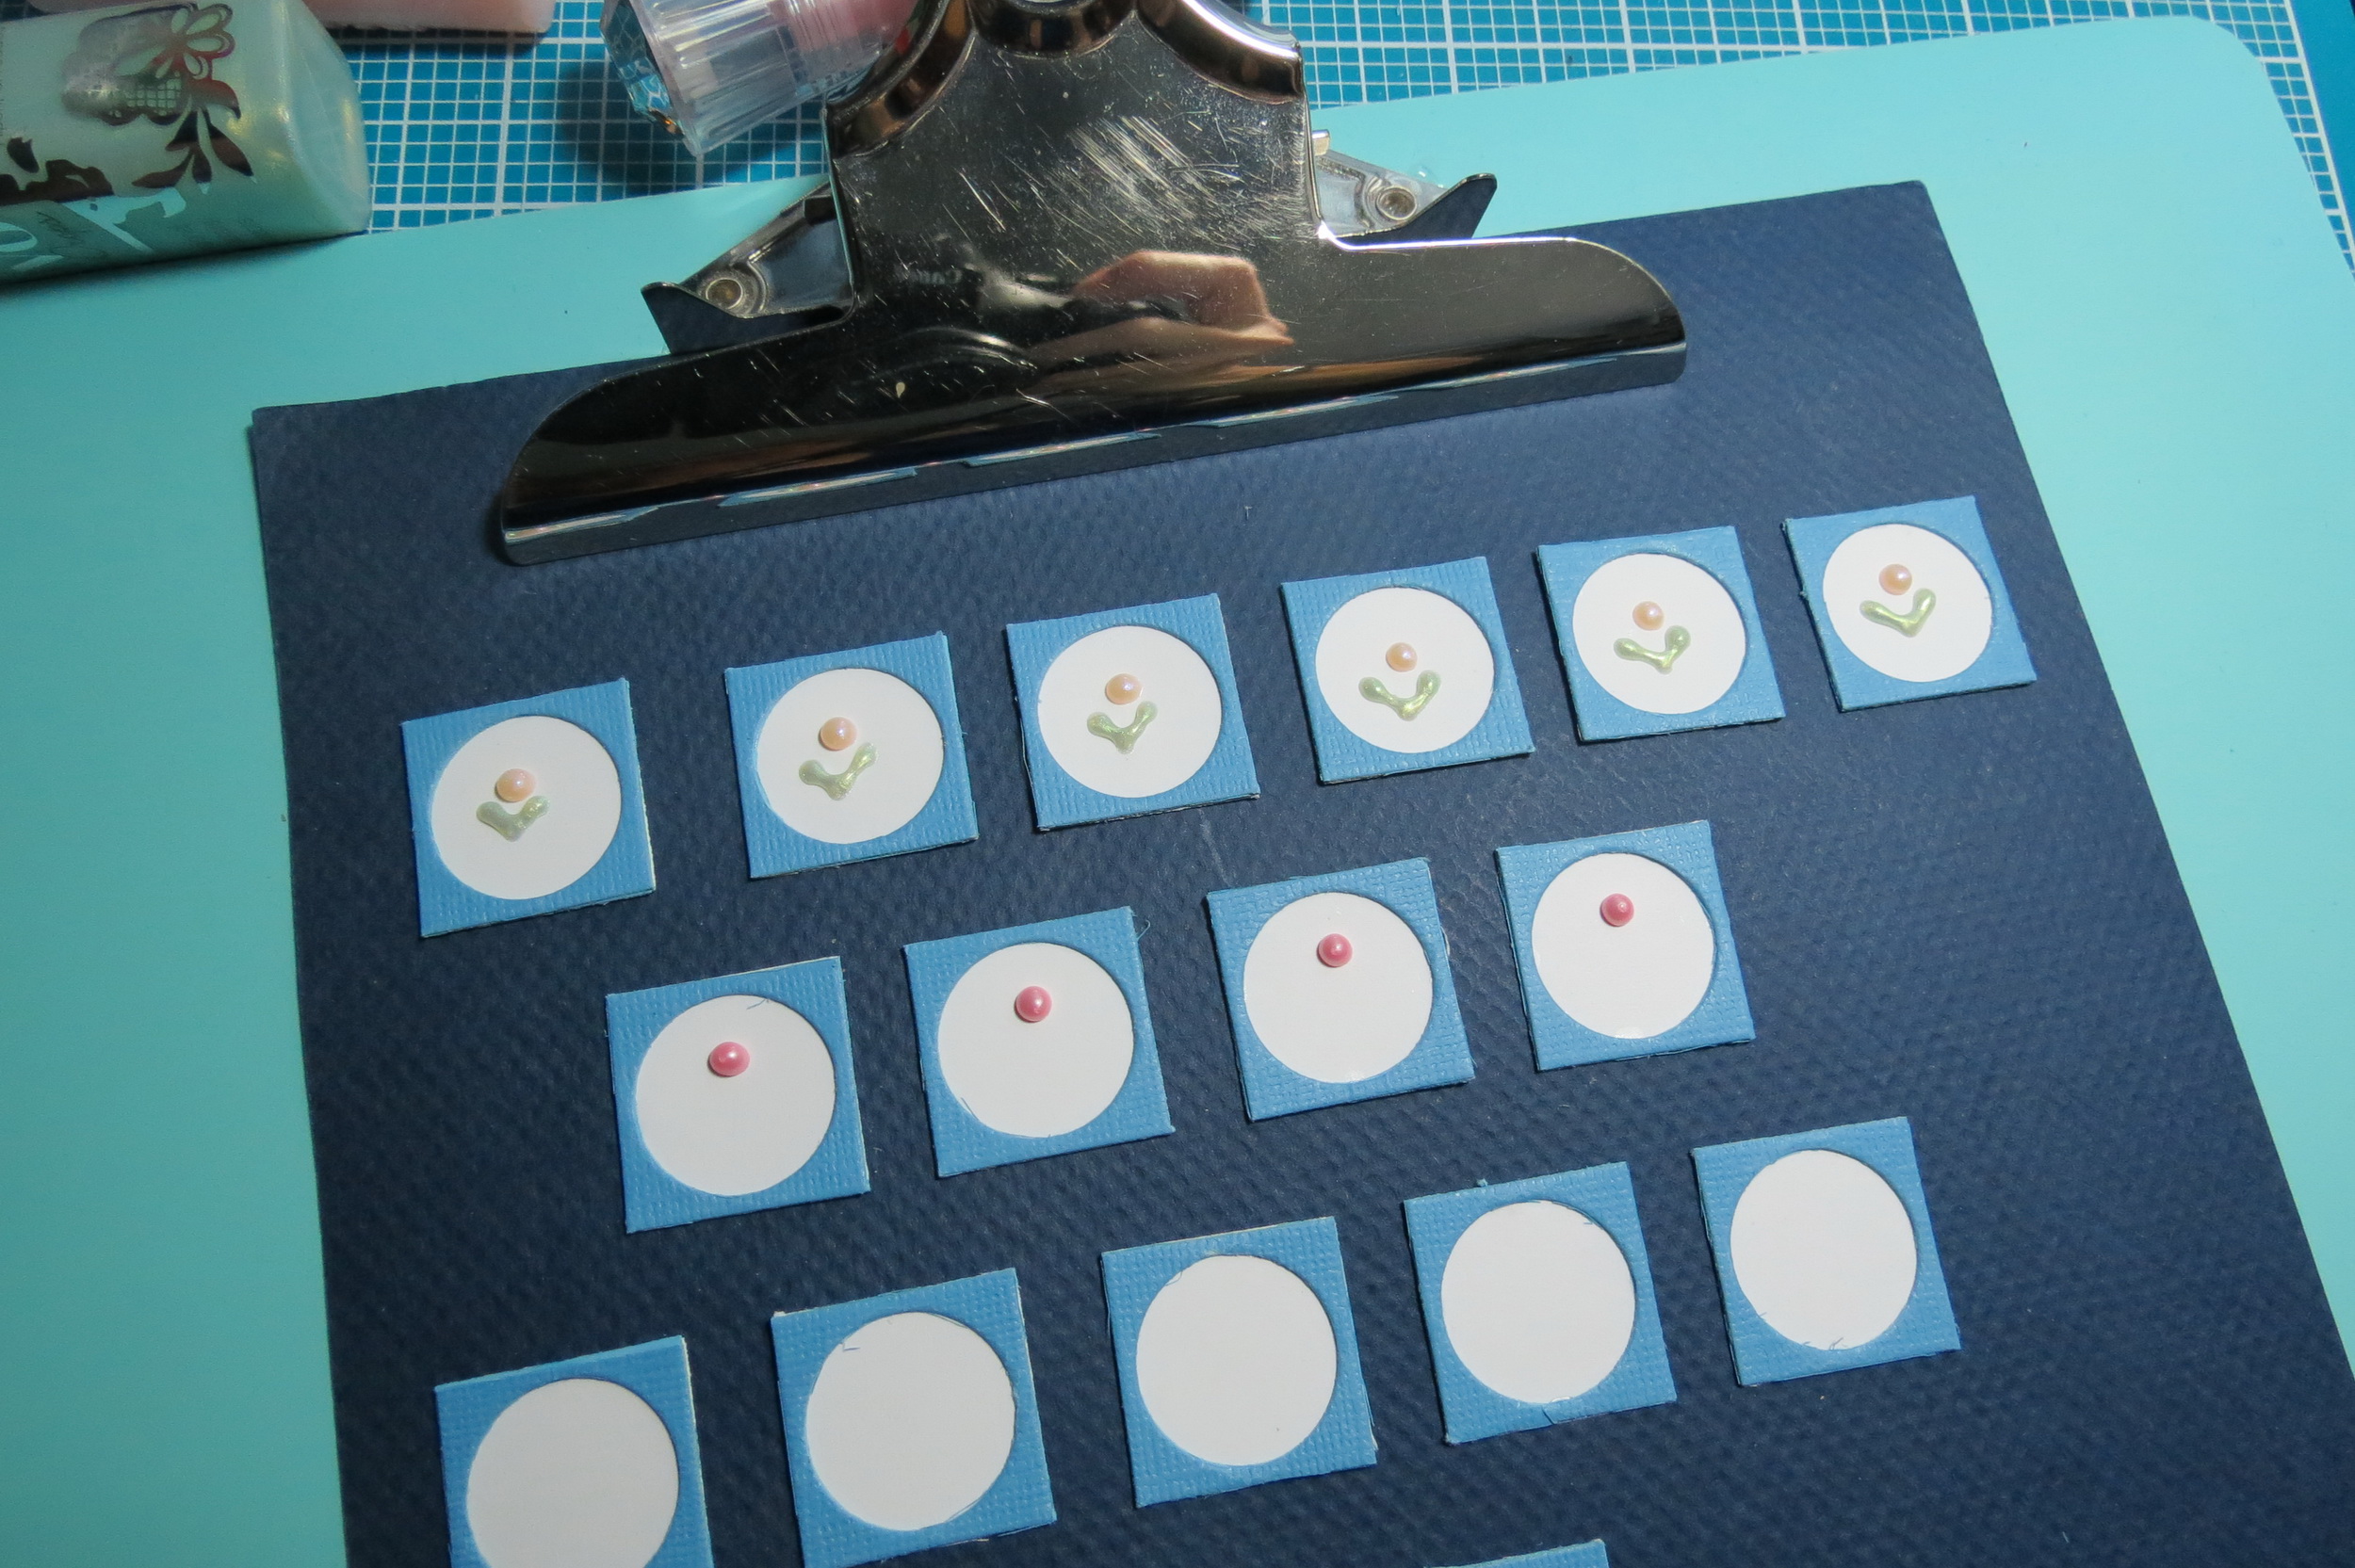
Two colors of pink, Dream Drops Love Potion and Crystal Drops Metallic Shimmering Rose, were used for a large rounded pearl of color and then Dream Drops Dragon Scales to form a “v” to represent the leaves. It takes a while to dry before you can add them into the layout. I put them up out of the way in a safe spot so I didn’t forget and lay something on top squashing them.

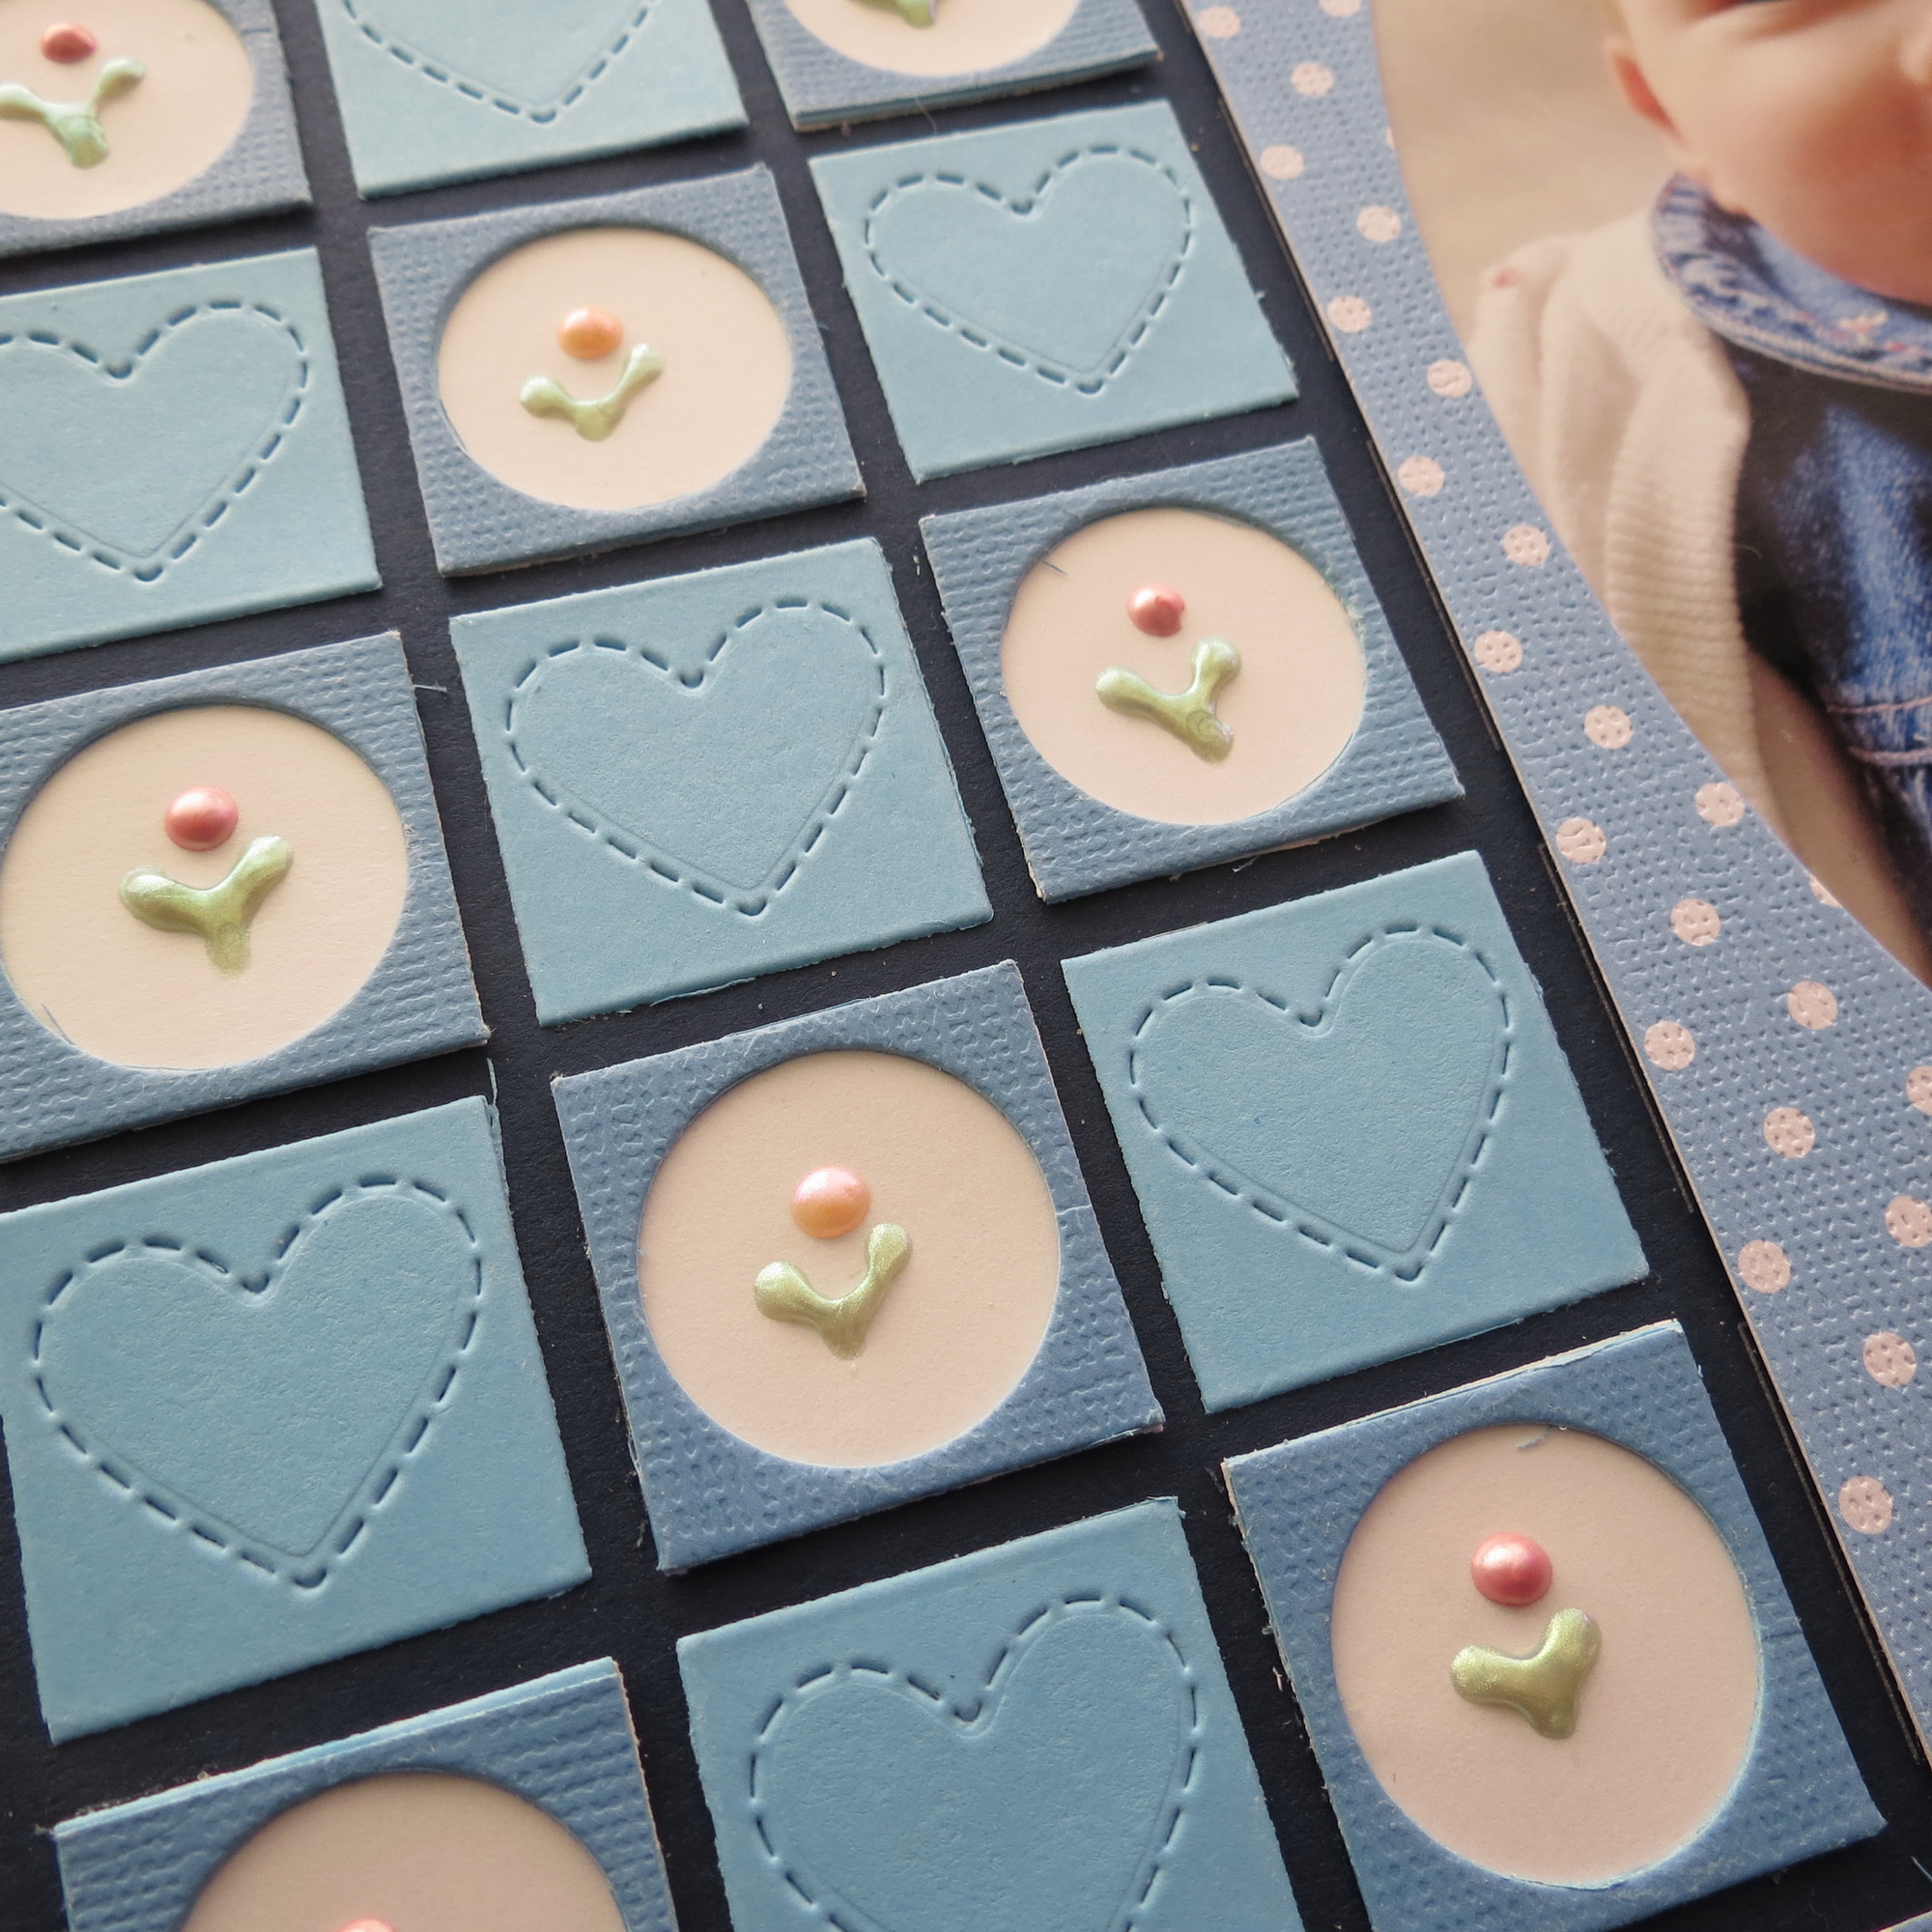

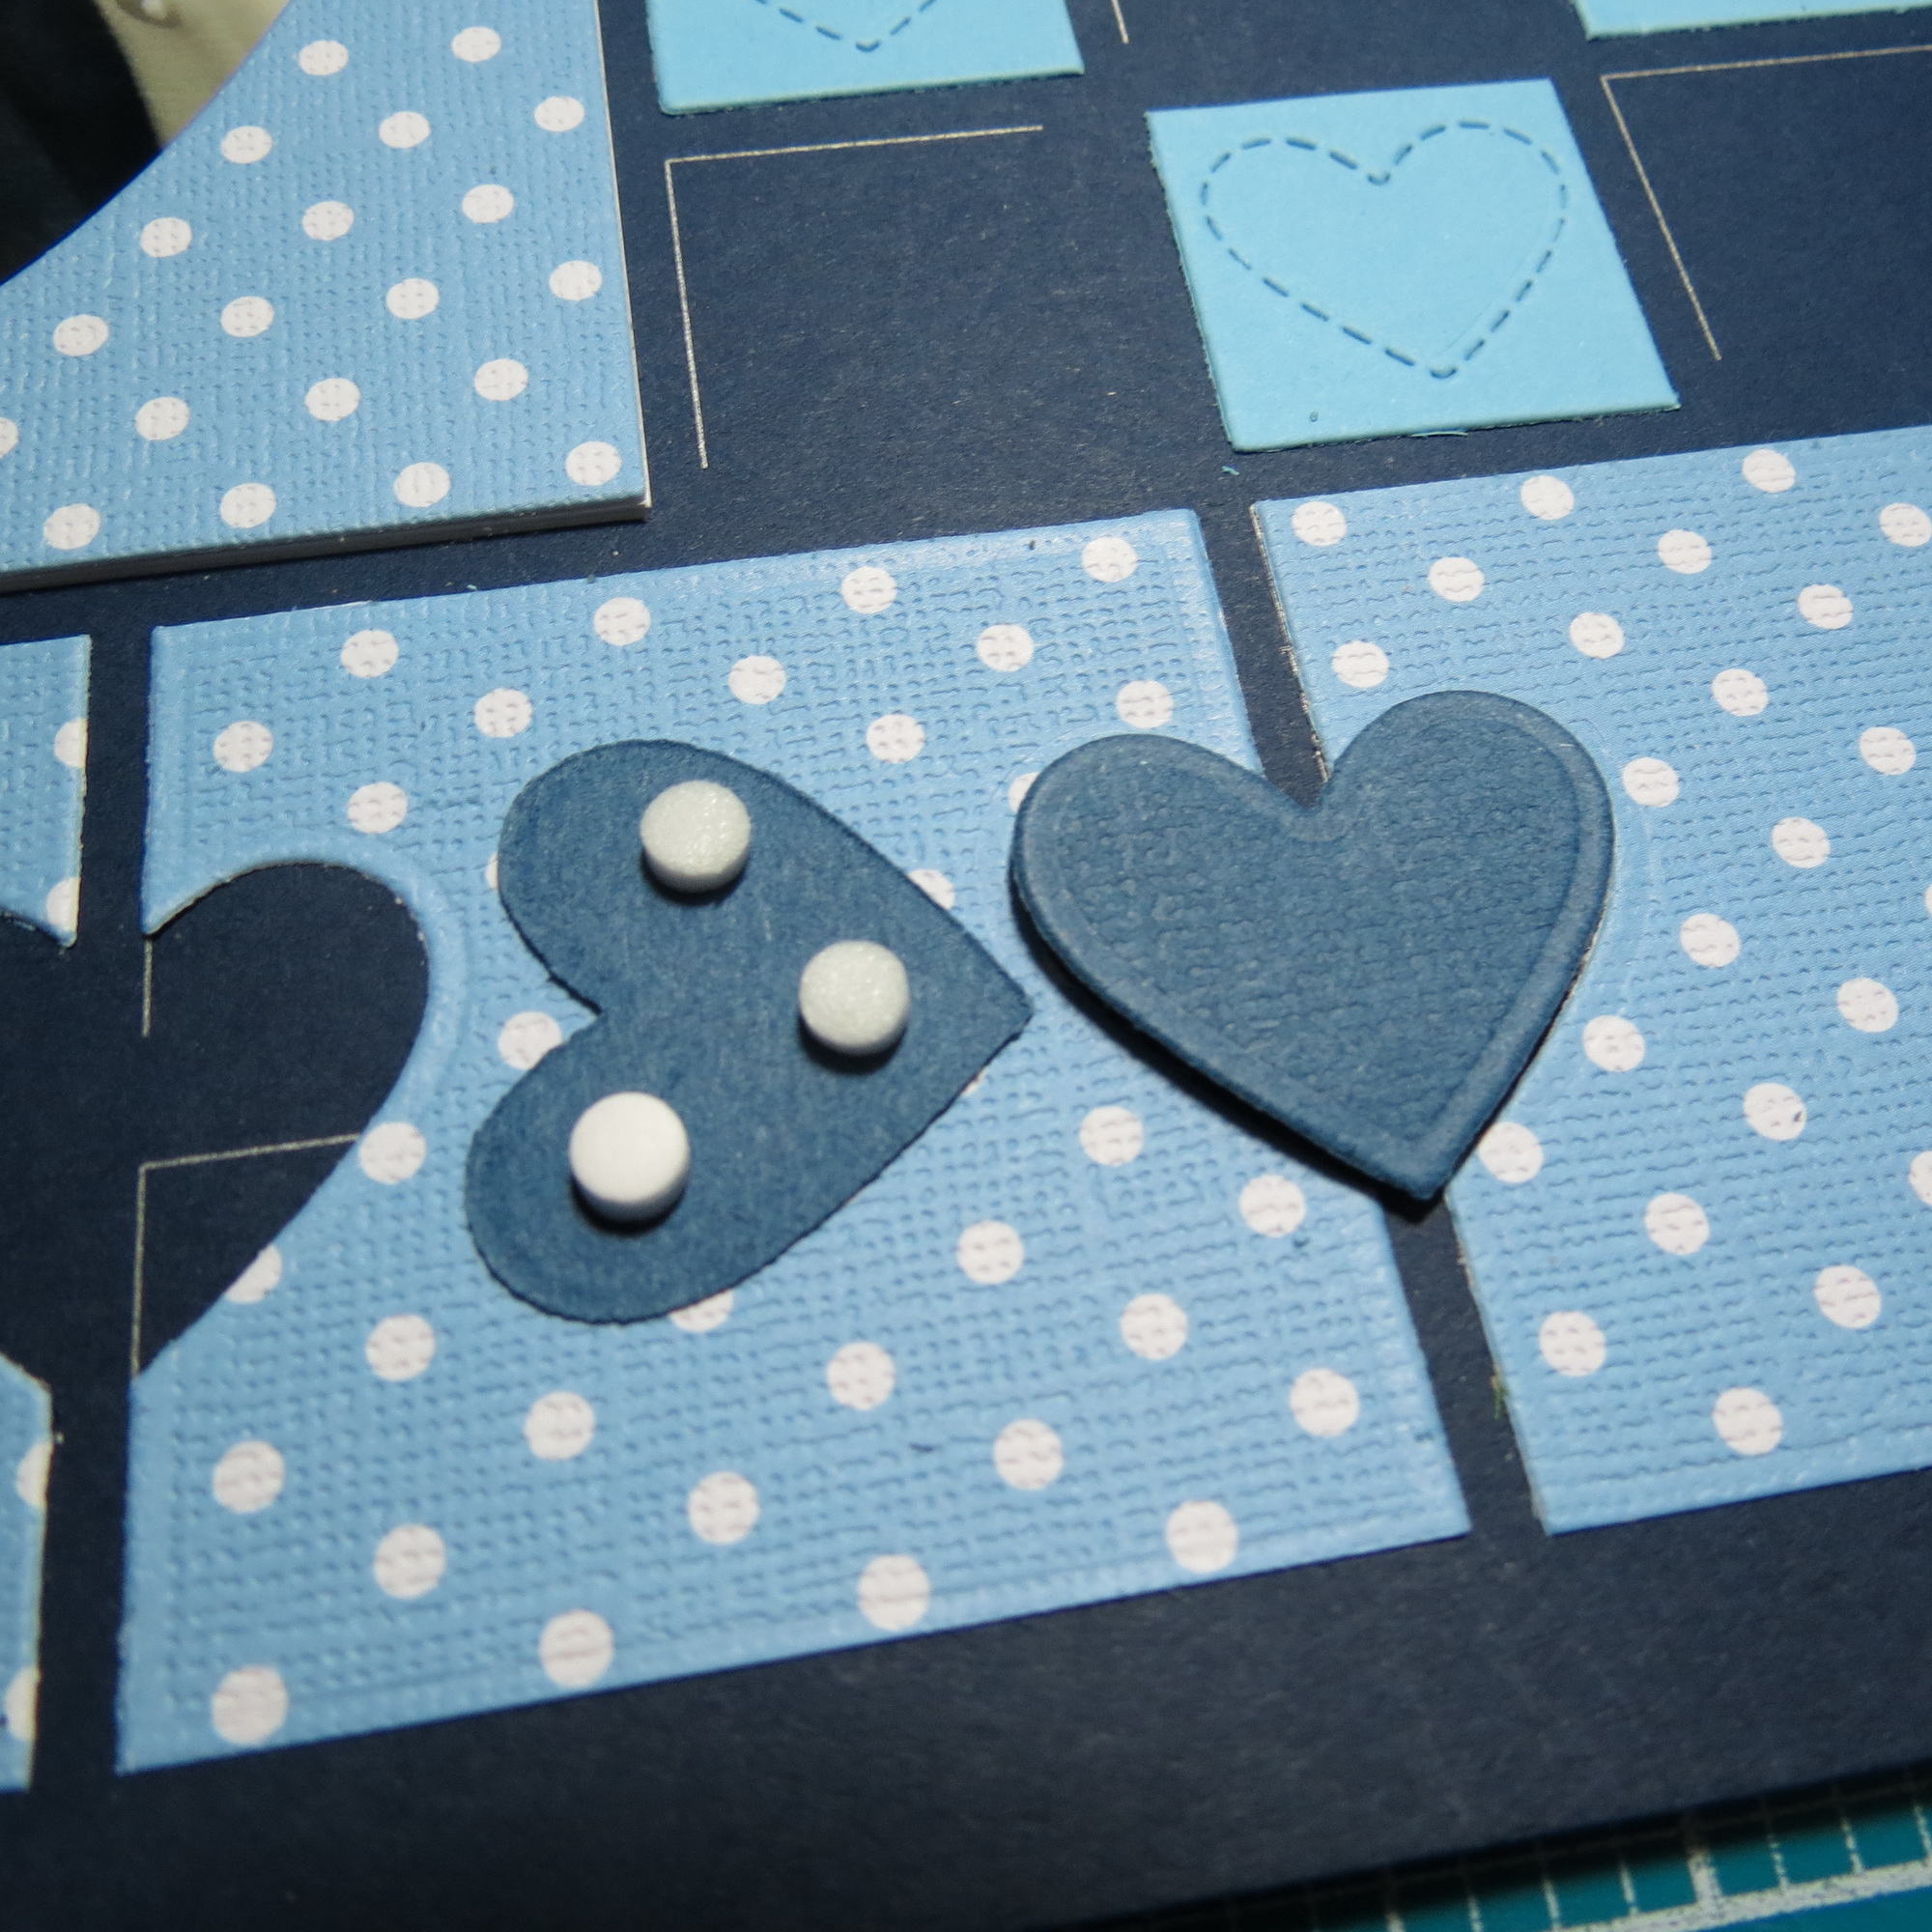
The Between Hearts Dies are cut in the dotted pattern paper and after trying several shades and patterns of pink for the hearts and nothing was working, that’s when I decided to use the darkest blue that I’d started out with to cut the heart dies and then for added dimension, popped the hearts up with tiny foam circles. I love the embossed edge the dies give the hearts. If I had wanted to, I could have added a faux stitching with a white gel pen using the embossed edge as a guide.
At this point all three shades of blue have been used, I’ve added a patterned paper and some pearls for embellishments. My final addition to the page is the 4×6 photo and the 4×6 Oval Frame. Four layers of #65 paper were added under the photo for a slight elevation to the center photo to help separate it visually from the rest of the layout.
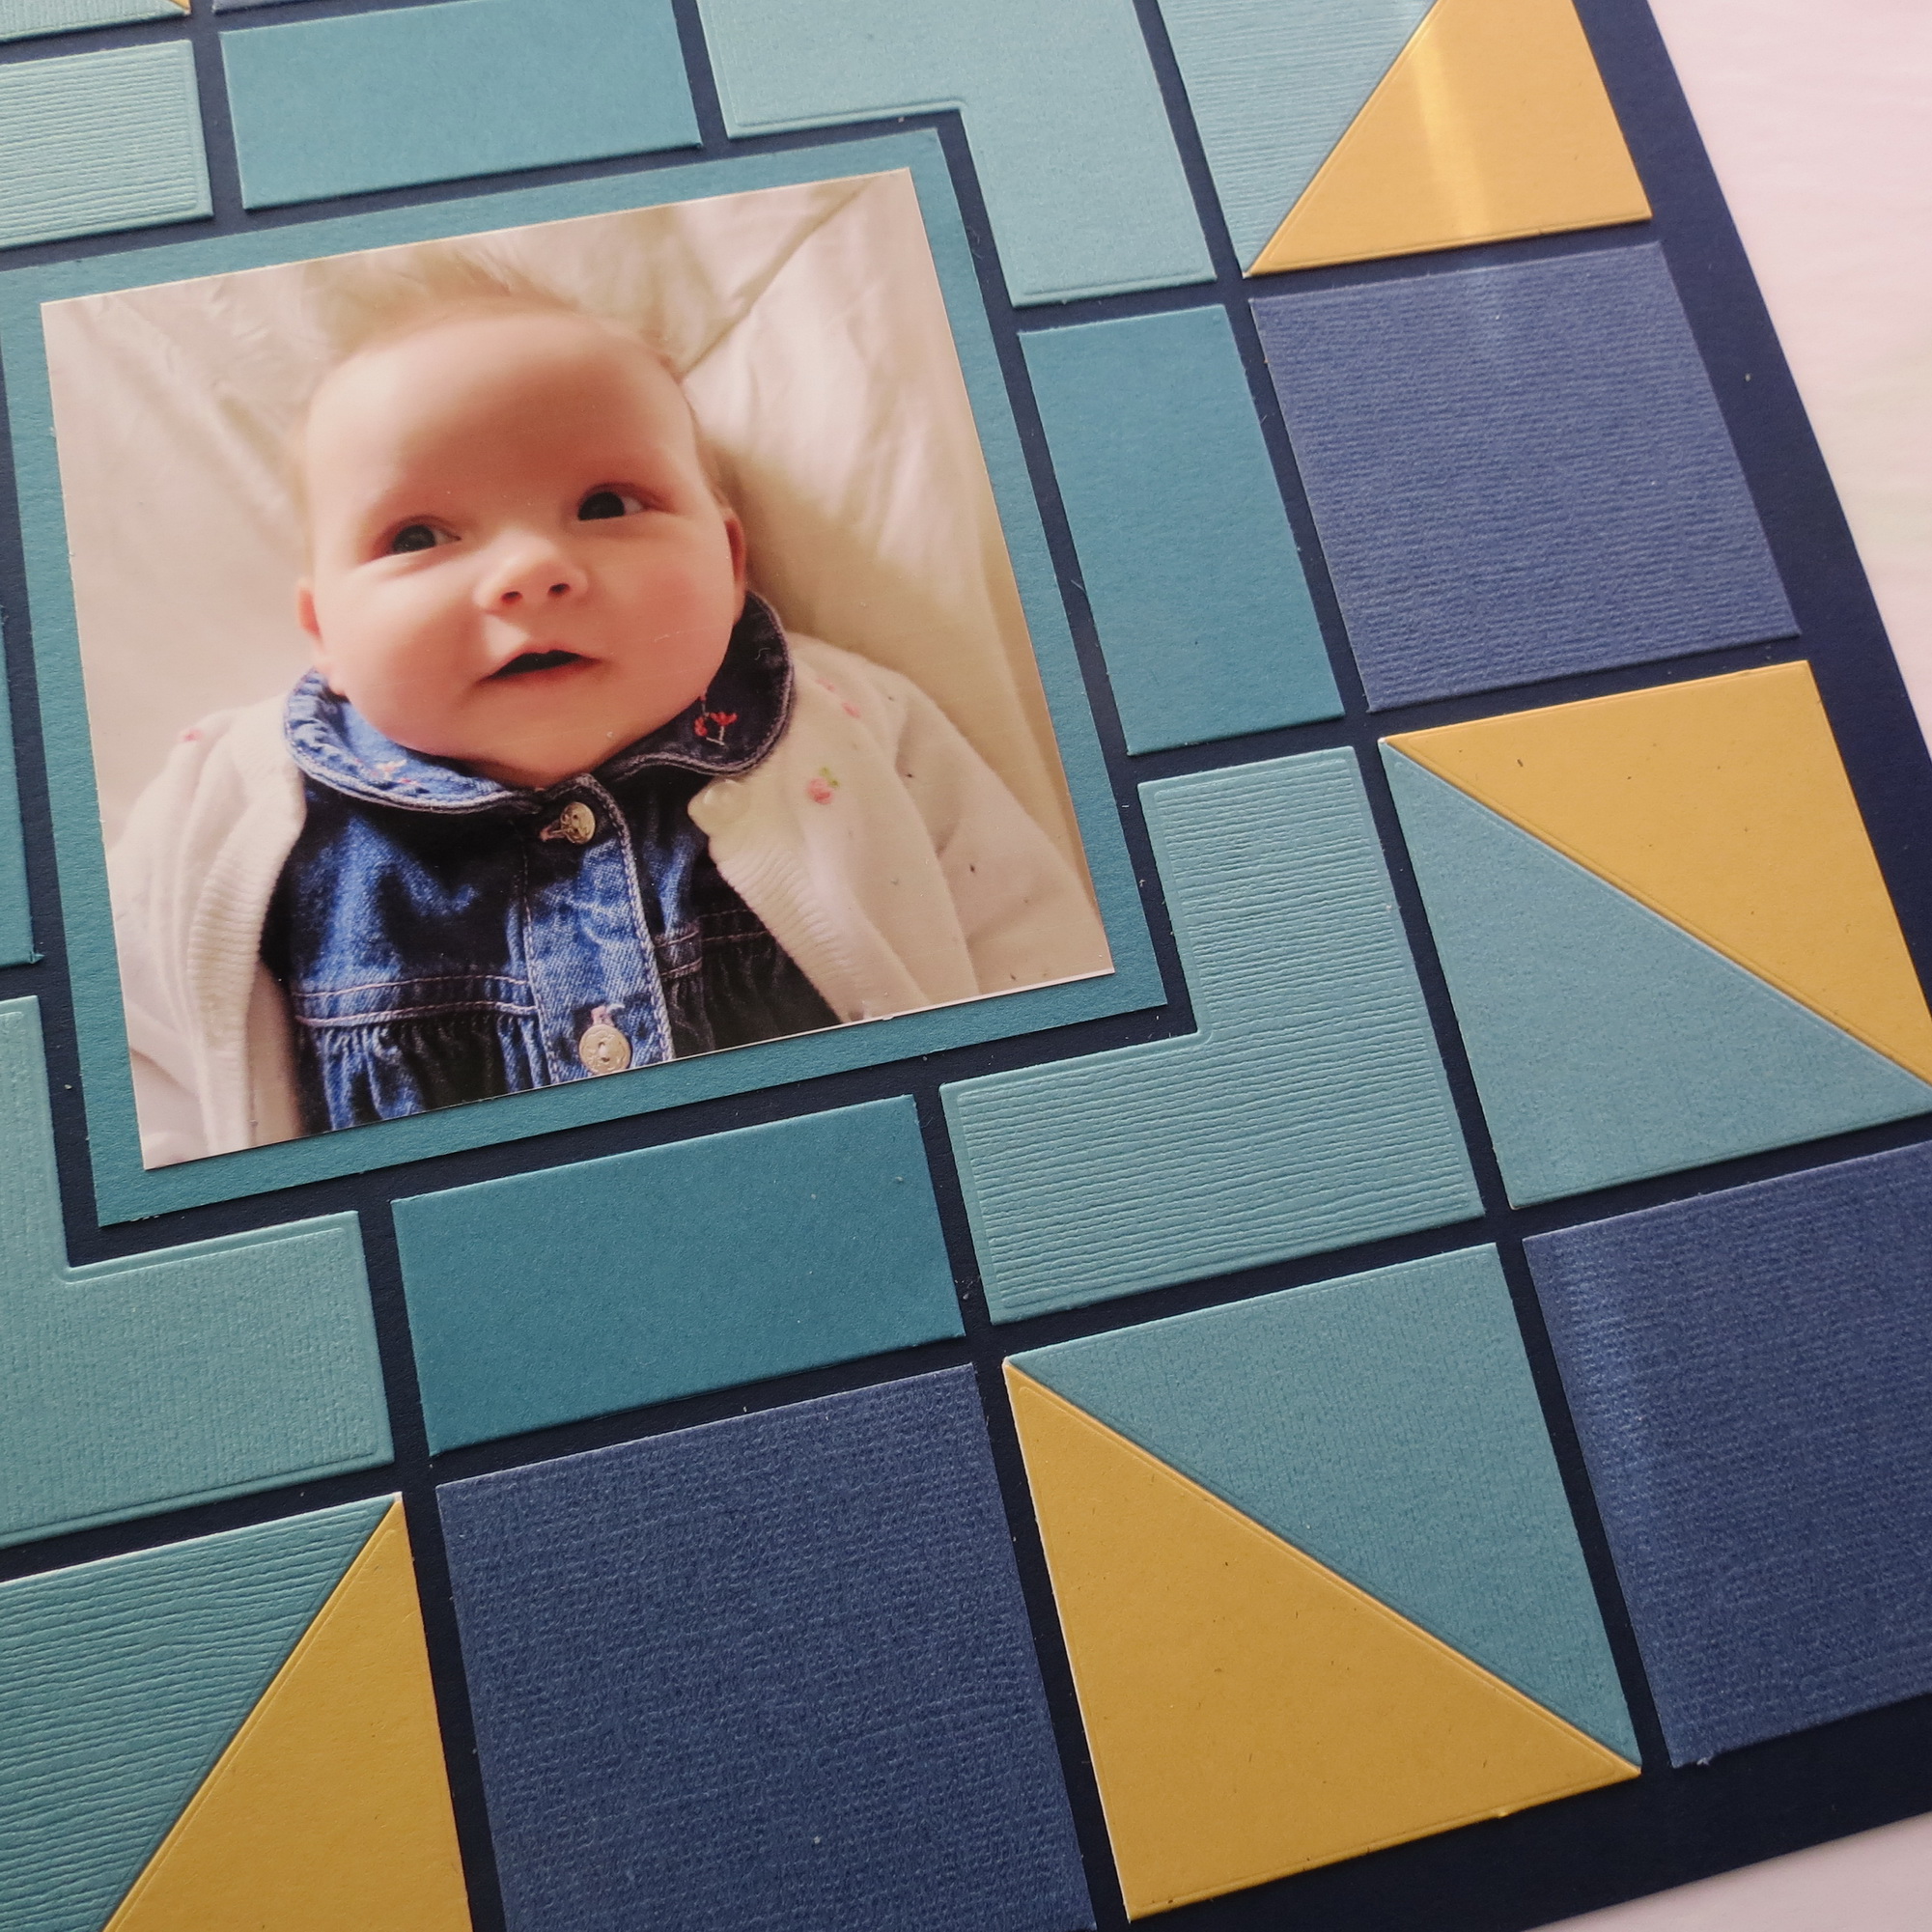
Layout 2
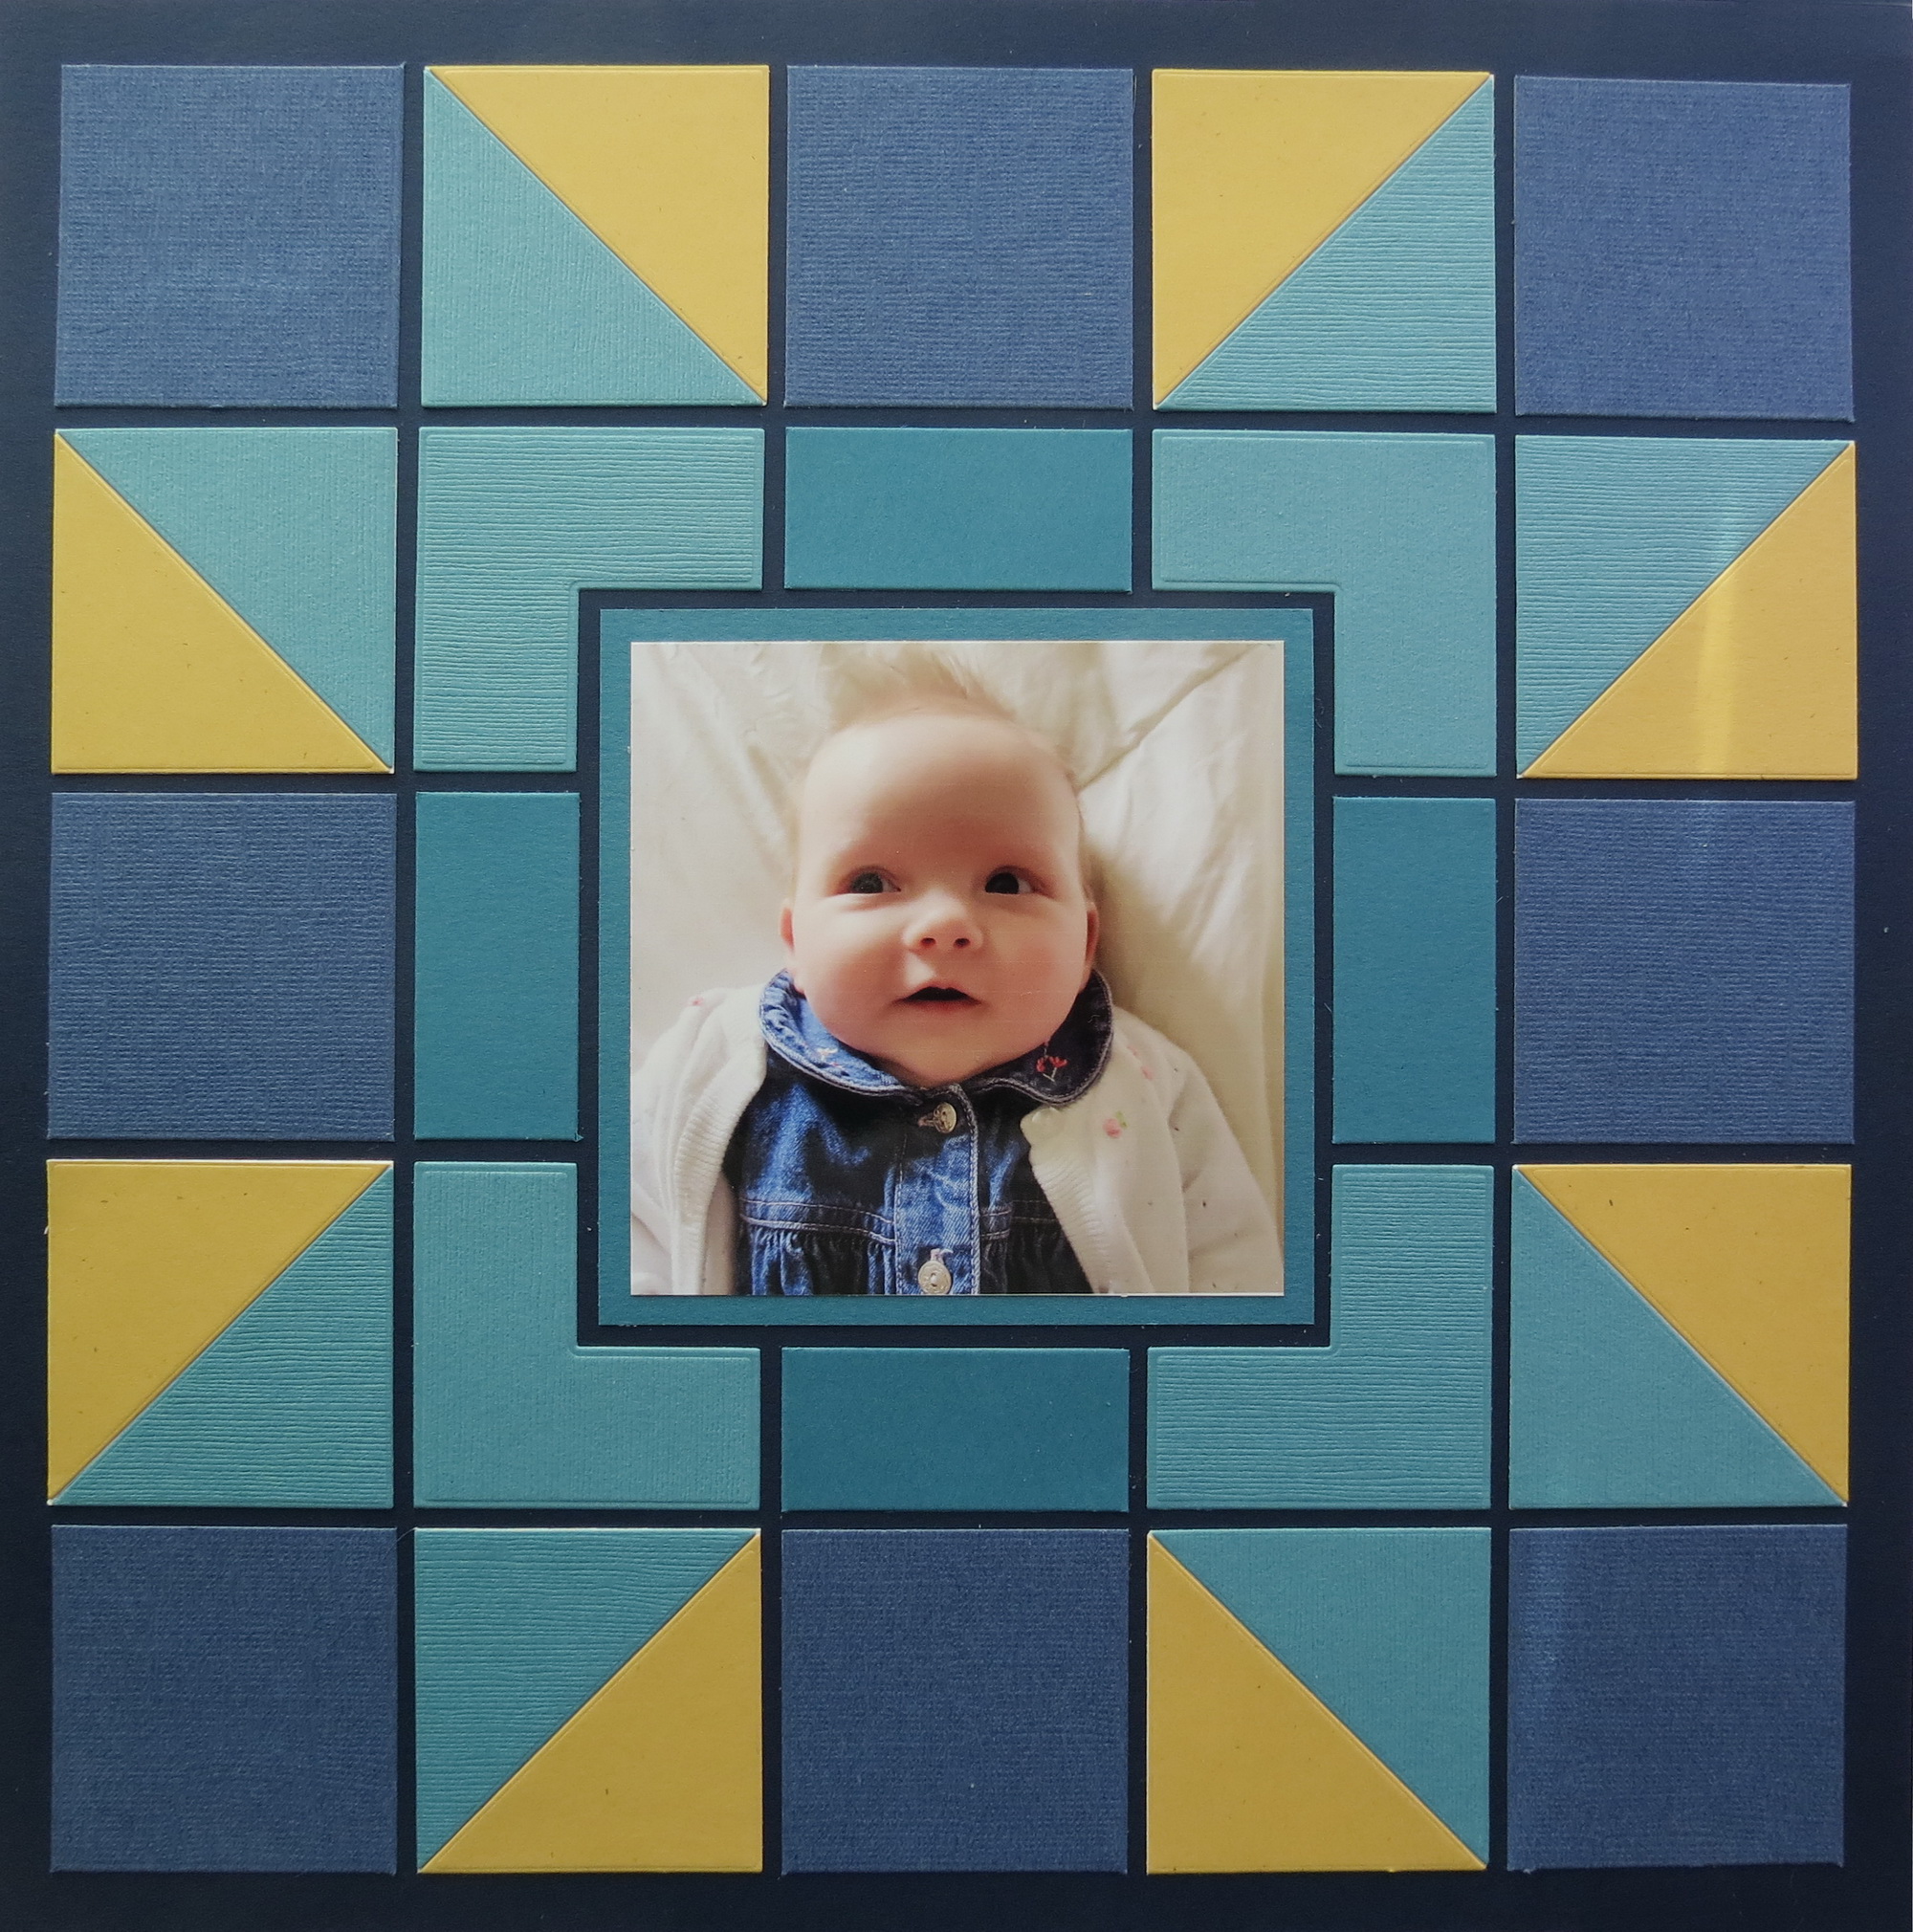
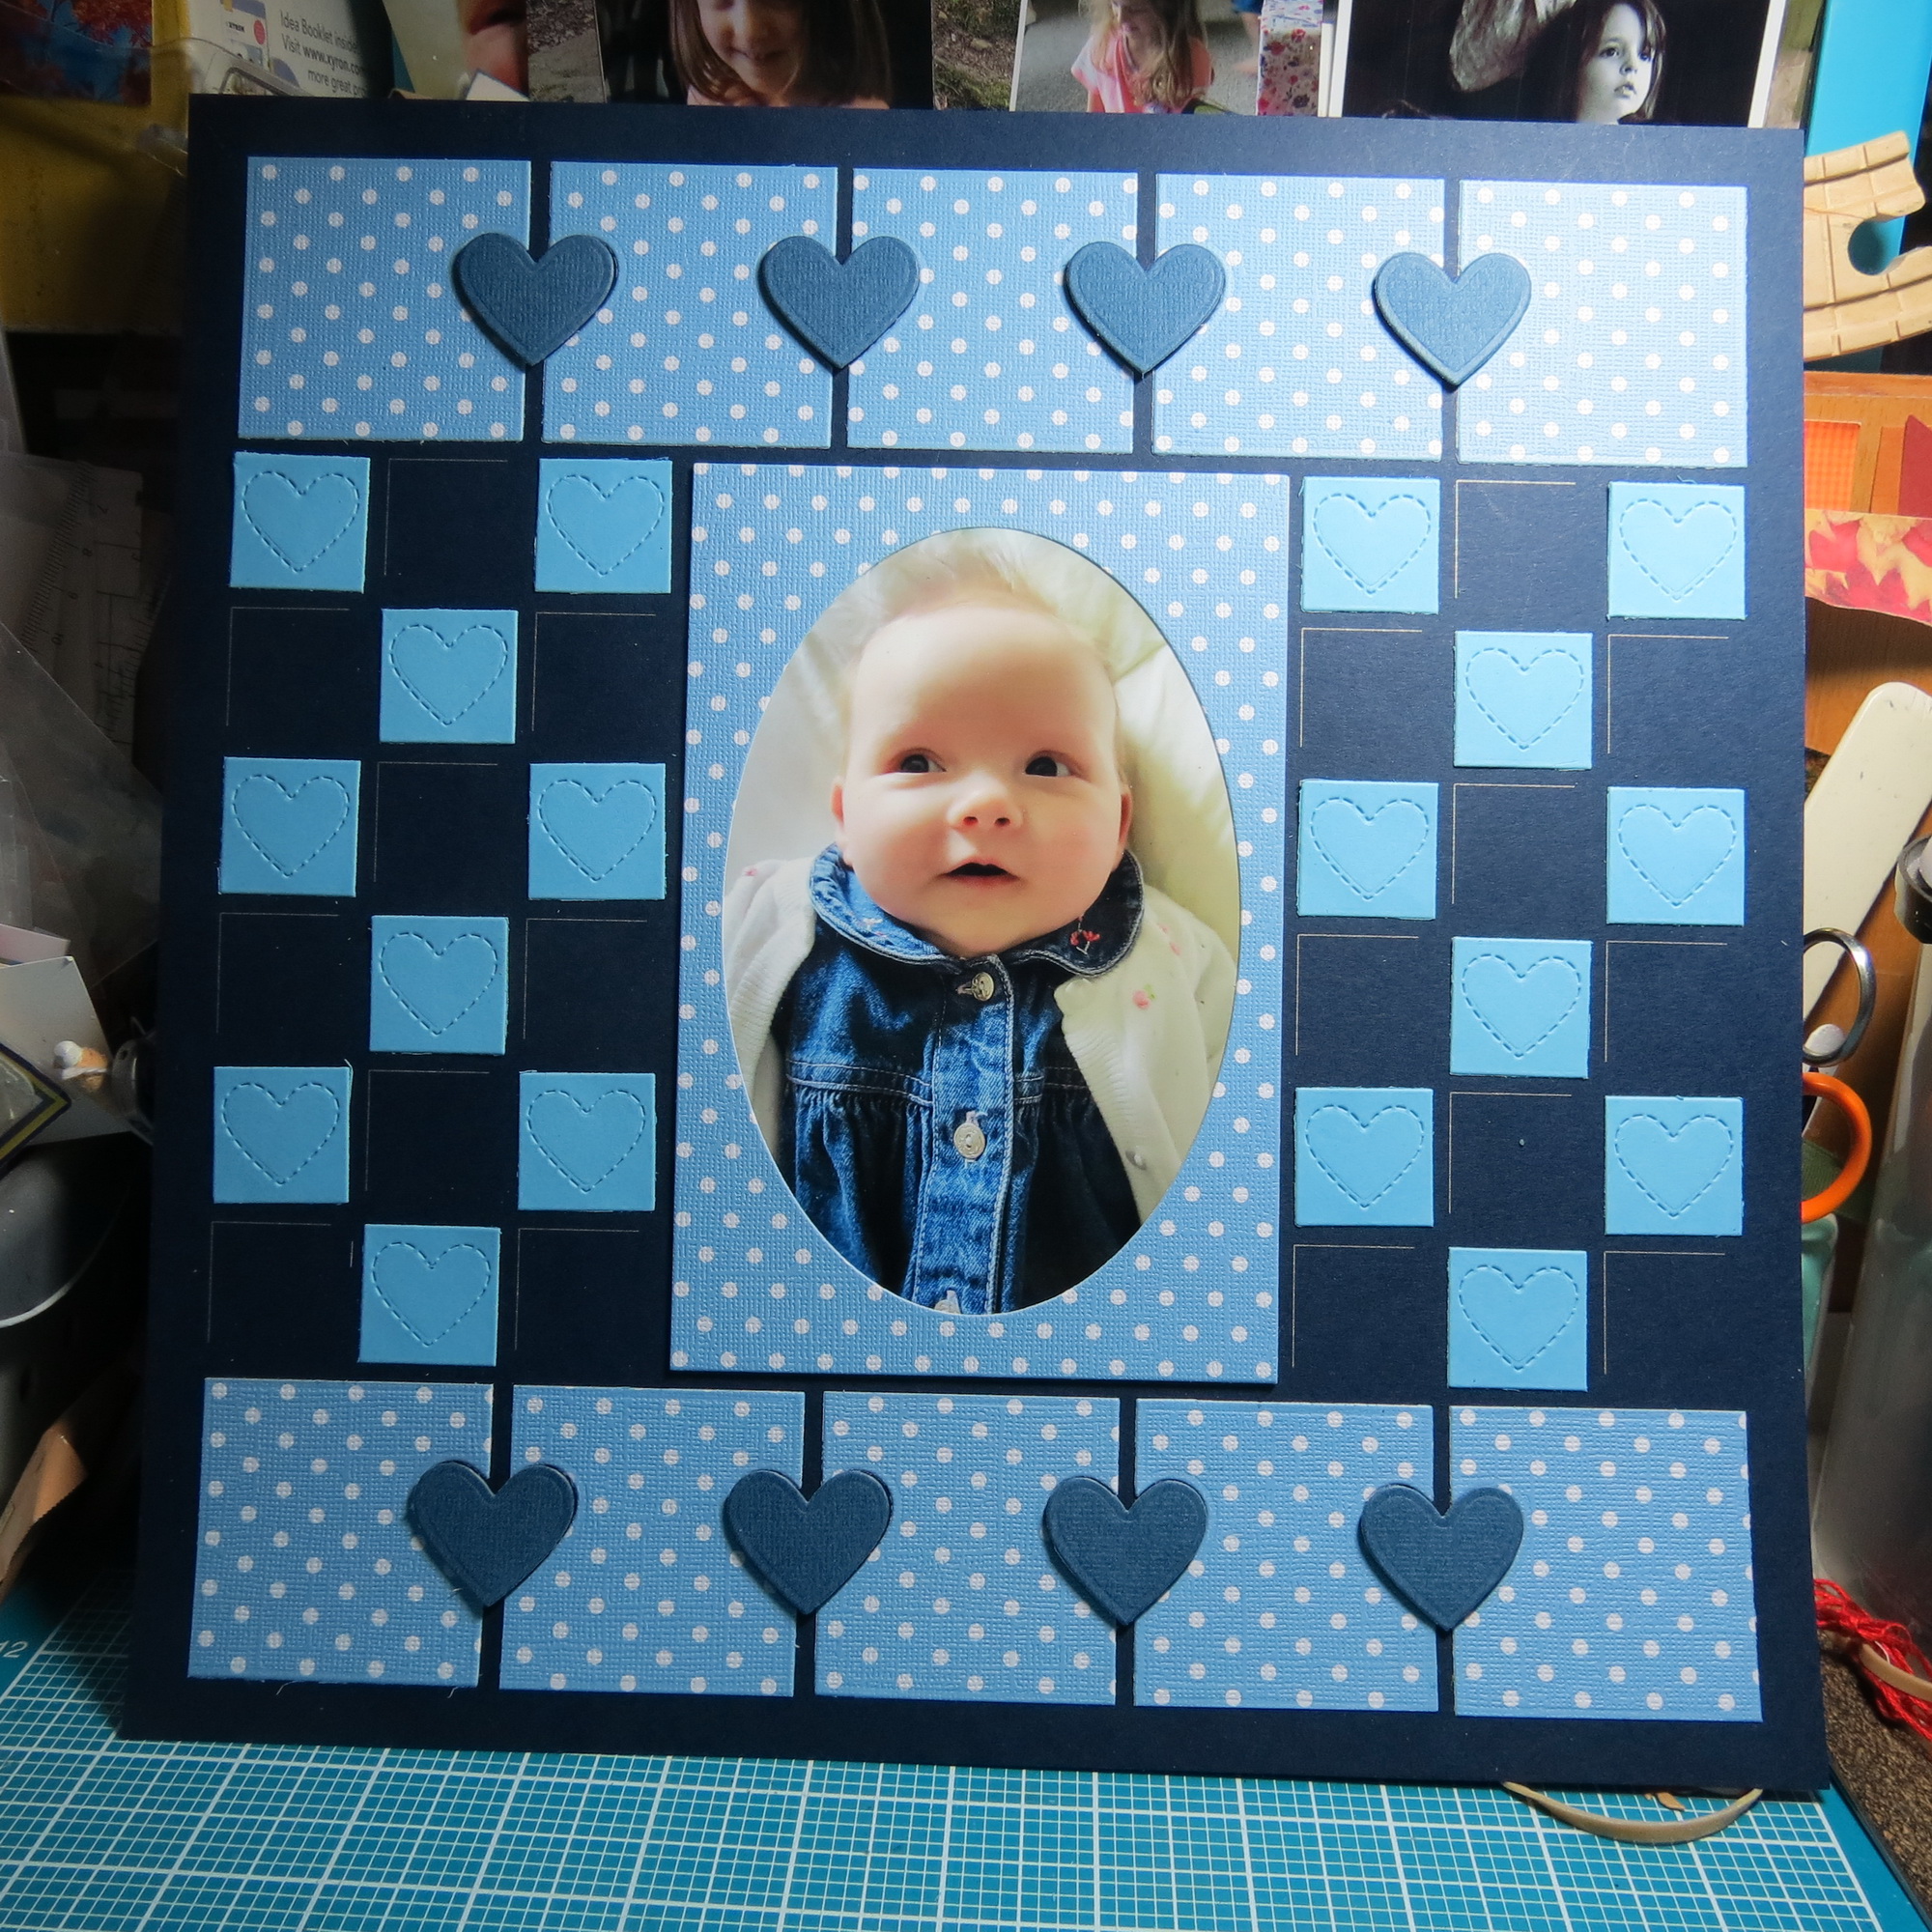
I’m going to use the same photo on this layout only a featured square 4×4 instead of a 4×6 this time. I’ll use a mat instead of a frame and I’m going to create a quilt pattern with our collection of dies that cut multiples to quickly fill the page.
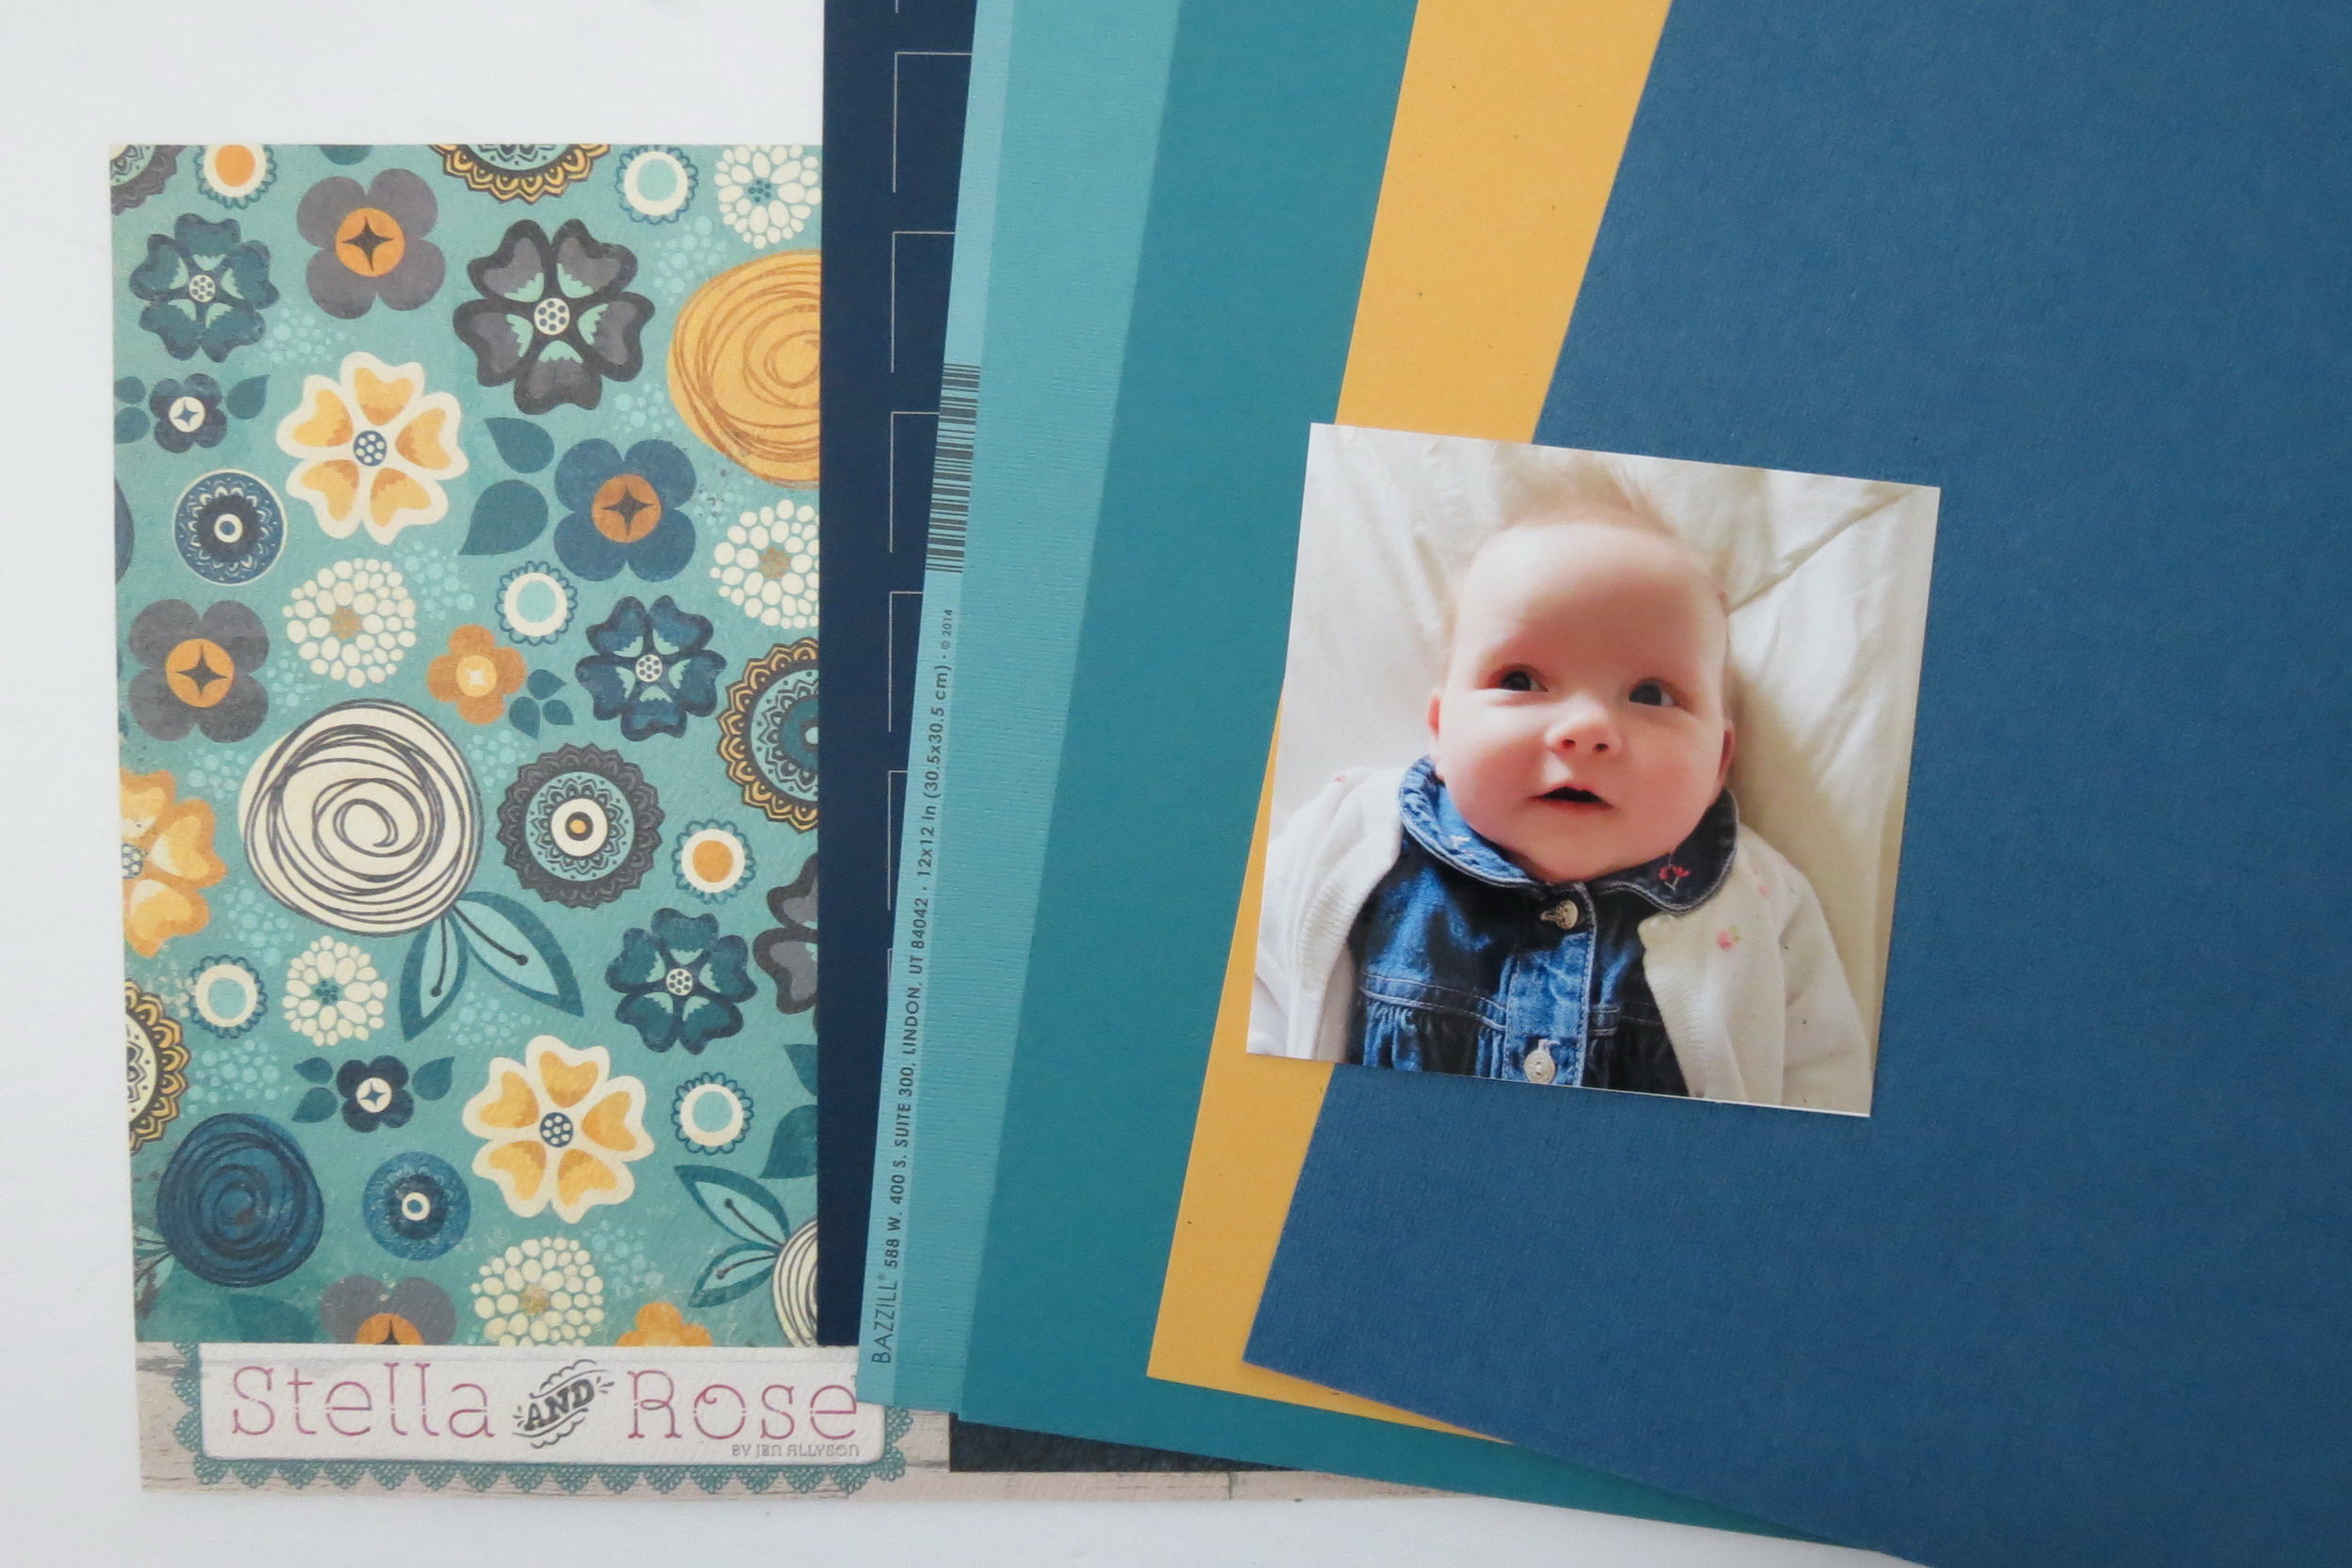
My color Inspiration for this layout came from a piece of patterned paper I’ve had for a while, that I’ve used before and absolutely love! It was the jumping off point for my color selection for this page. Once again, a Navy Grid paper is the base.
The 2.125”x1” Strip die will get the needed Teal pieces, the Jumbo Corner Tiles Die will get the needed pieces in Rain and Marigold, and the Corner Cut-out die will get the smallest section needed in Rain, too. With the 2.125×2.125 Grid Die both blue and cream squares were cut. The cream squares are the bases for the triangle 2.125” squares as I got frustrated trying to match edges and decided to cut and assemble was a better choice and far quicker.
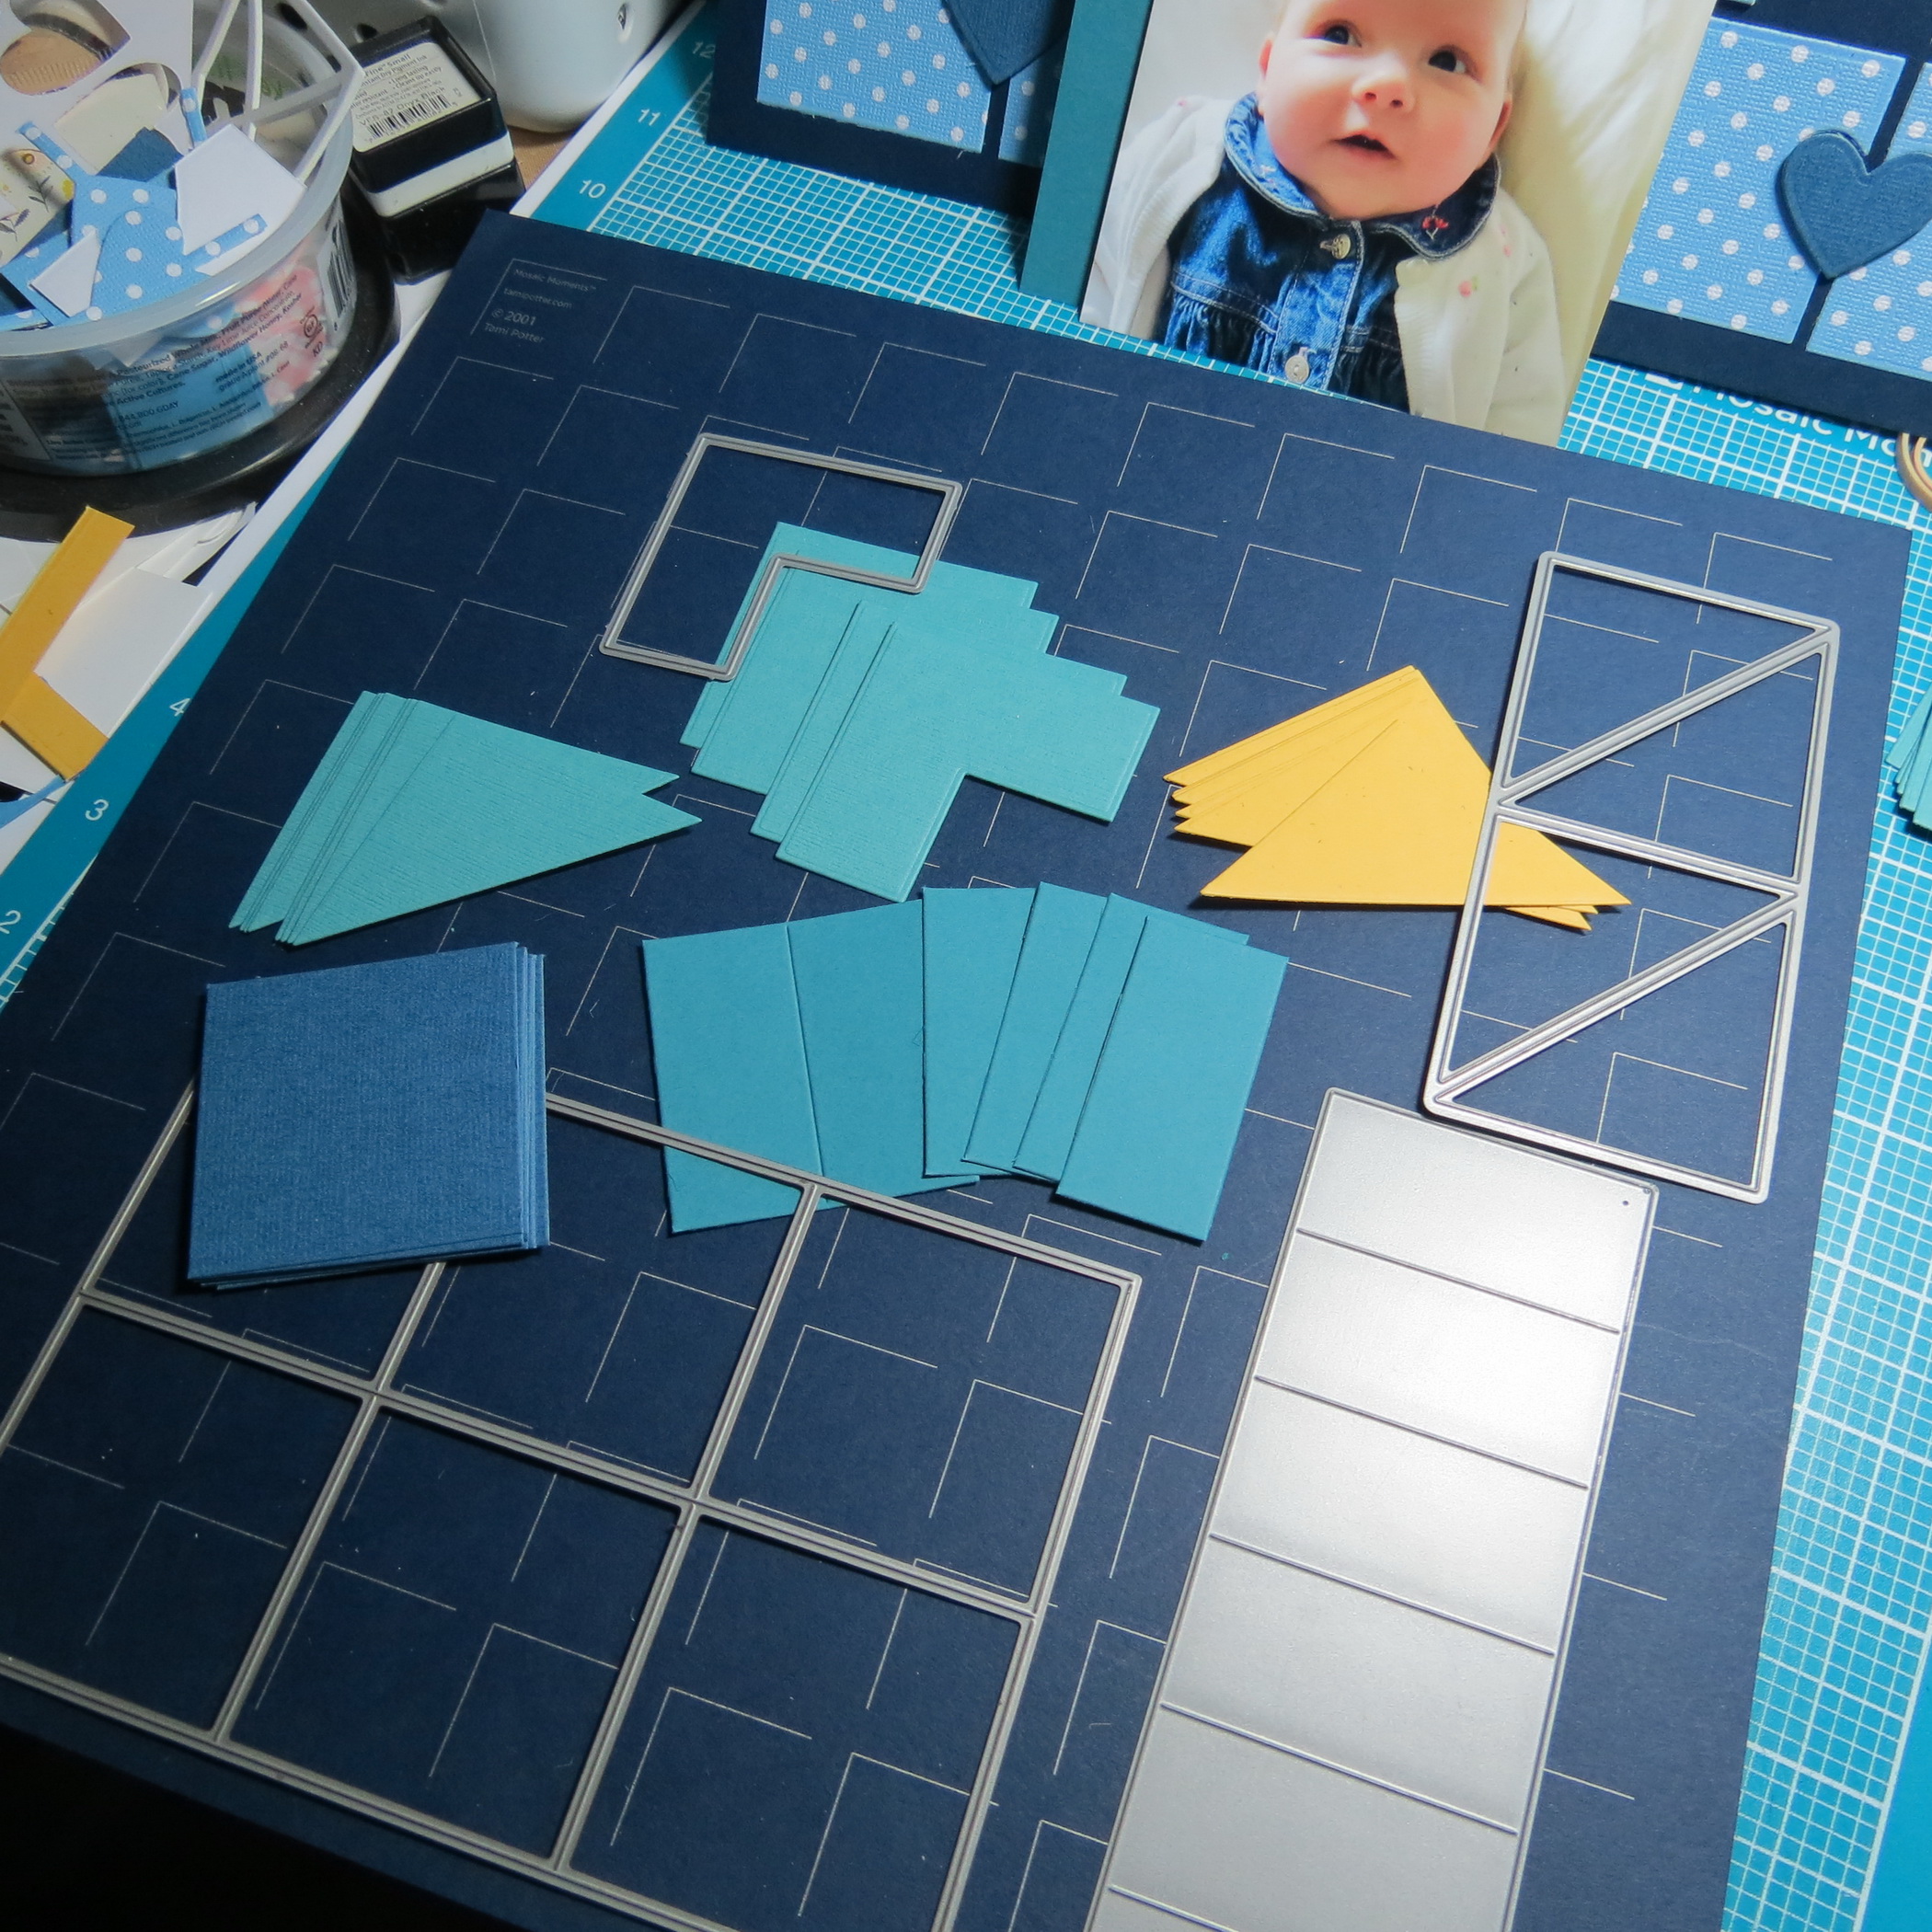
The hardest part of assembling this page is the triangle sections and of course, by cutting a base to mount the piece on it becomes much easier. This is a good quilt pattern to use if you want to create a quick page and the cardstock solids can easily be switched out in favor of patterned papers or including more photos in the 2×2 squares.
If you are looking for a way to use your cardstock paper collection, find a color combination that works for your photos or for your event and then put it together. Each color combination will give you different looks, enjoy exploring the possibilities!
Andrea Fisher