
When working with specialty dies, those that have unique shapes and thin outlines, you need to consider where the journaling will go as you plan your page.
Some of the shapes created using these specialty dies are perfect places to hold your journaling. Check out these ideas ...
Use Alphas & Numbers
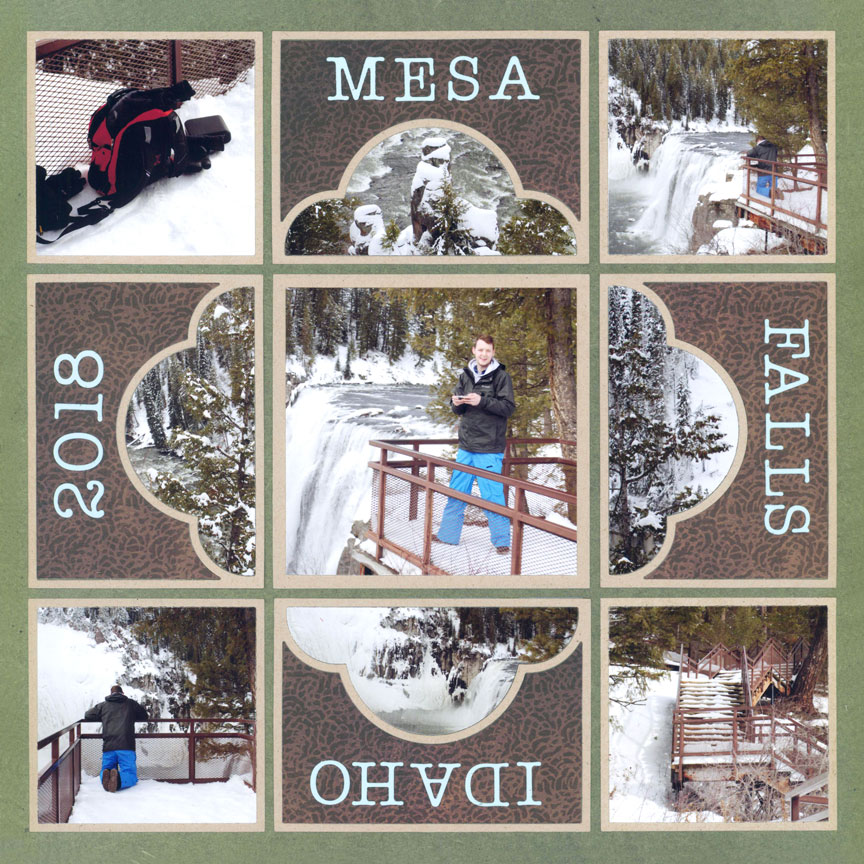
"Mesa Falls" by Paije Potter - Pattern #344
The Puff N Stuff die has just enough space to add words and dates using alphabet and number die sets.
We love how the journaling wraps right around the center photo of this layout.
Set it on Paper
When a lot of words are not needed to tell the story, consider simply cutting out the location or date and including it on the layout.
Using dark paper soley behind the light letters makes this journaling really stand out. The X-Factor Dies offer the perfect space.
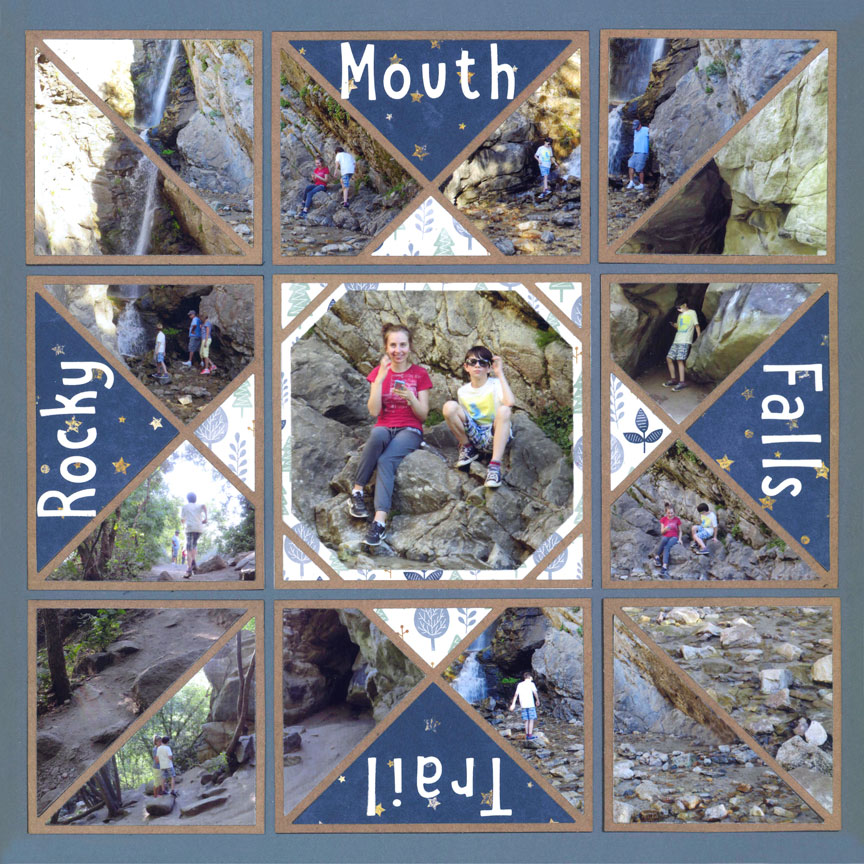
"Rocky Mouth Falls Trail" by Paije Potter - Pattern #344
Use Rub-Ons
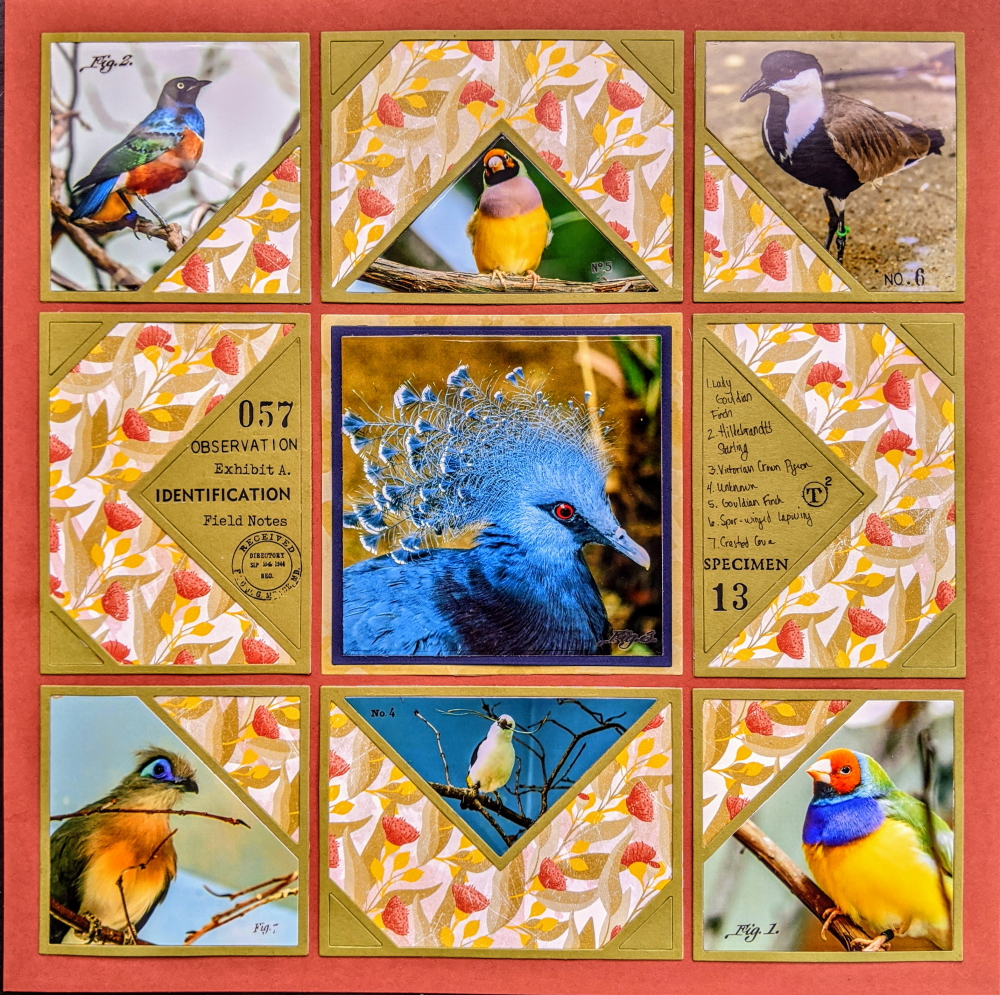
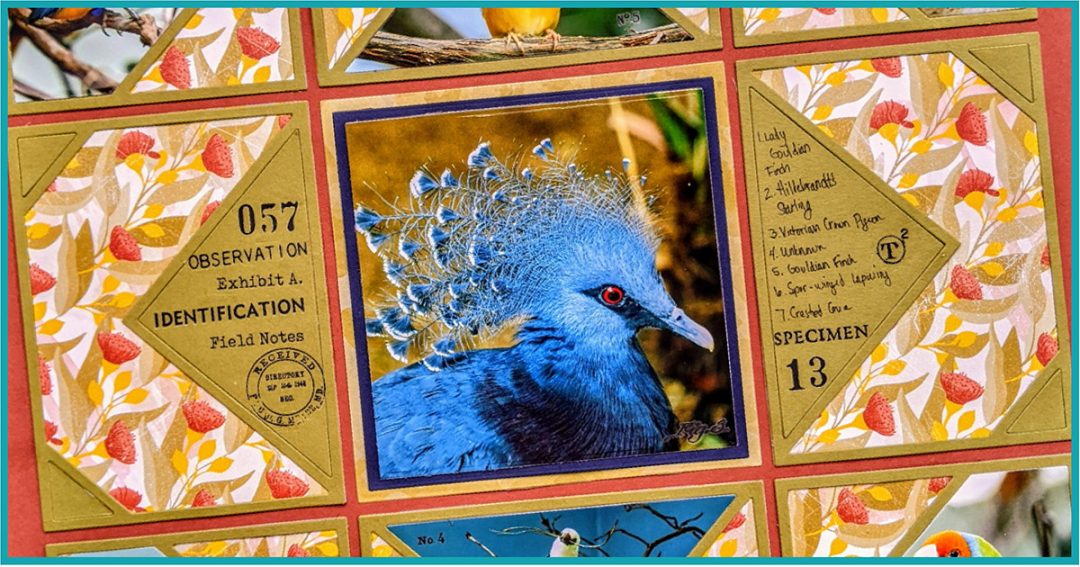
"Toledo Birds" by Candy Spiegel - Pattern #344
Journaling can come preprinted on stickers, cut-aparts, or, in this case, rub-ons.
Here, Candy used rub-ons on each photo to number each of the birds. Then, she hand wrote the identifications in one of the triangles created when using the Diamond Dies.
To balance the space, she used additional random rub-ons directly across the layout.
Tuck It In
Tucking a bit of journaling in the white space around the Charmed Dies keeps it from distracting from the overall design of the layout.
This treatment is ideal when you only need to include a few words.
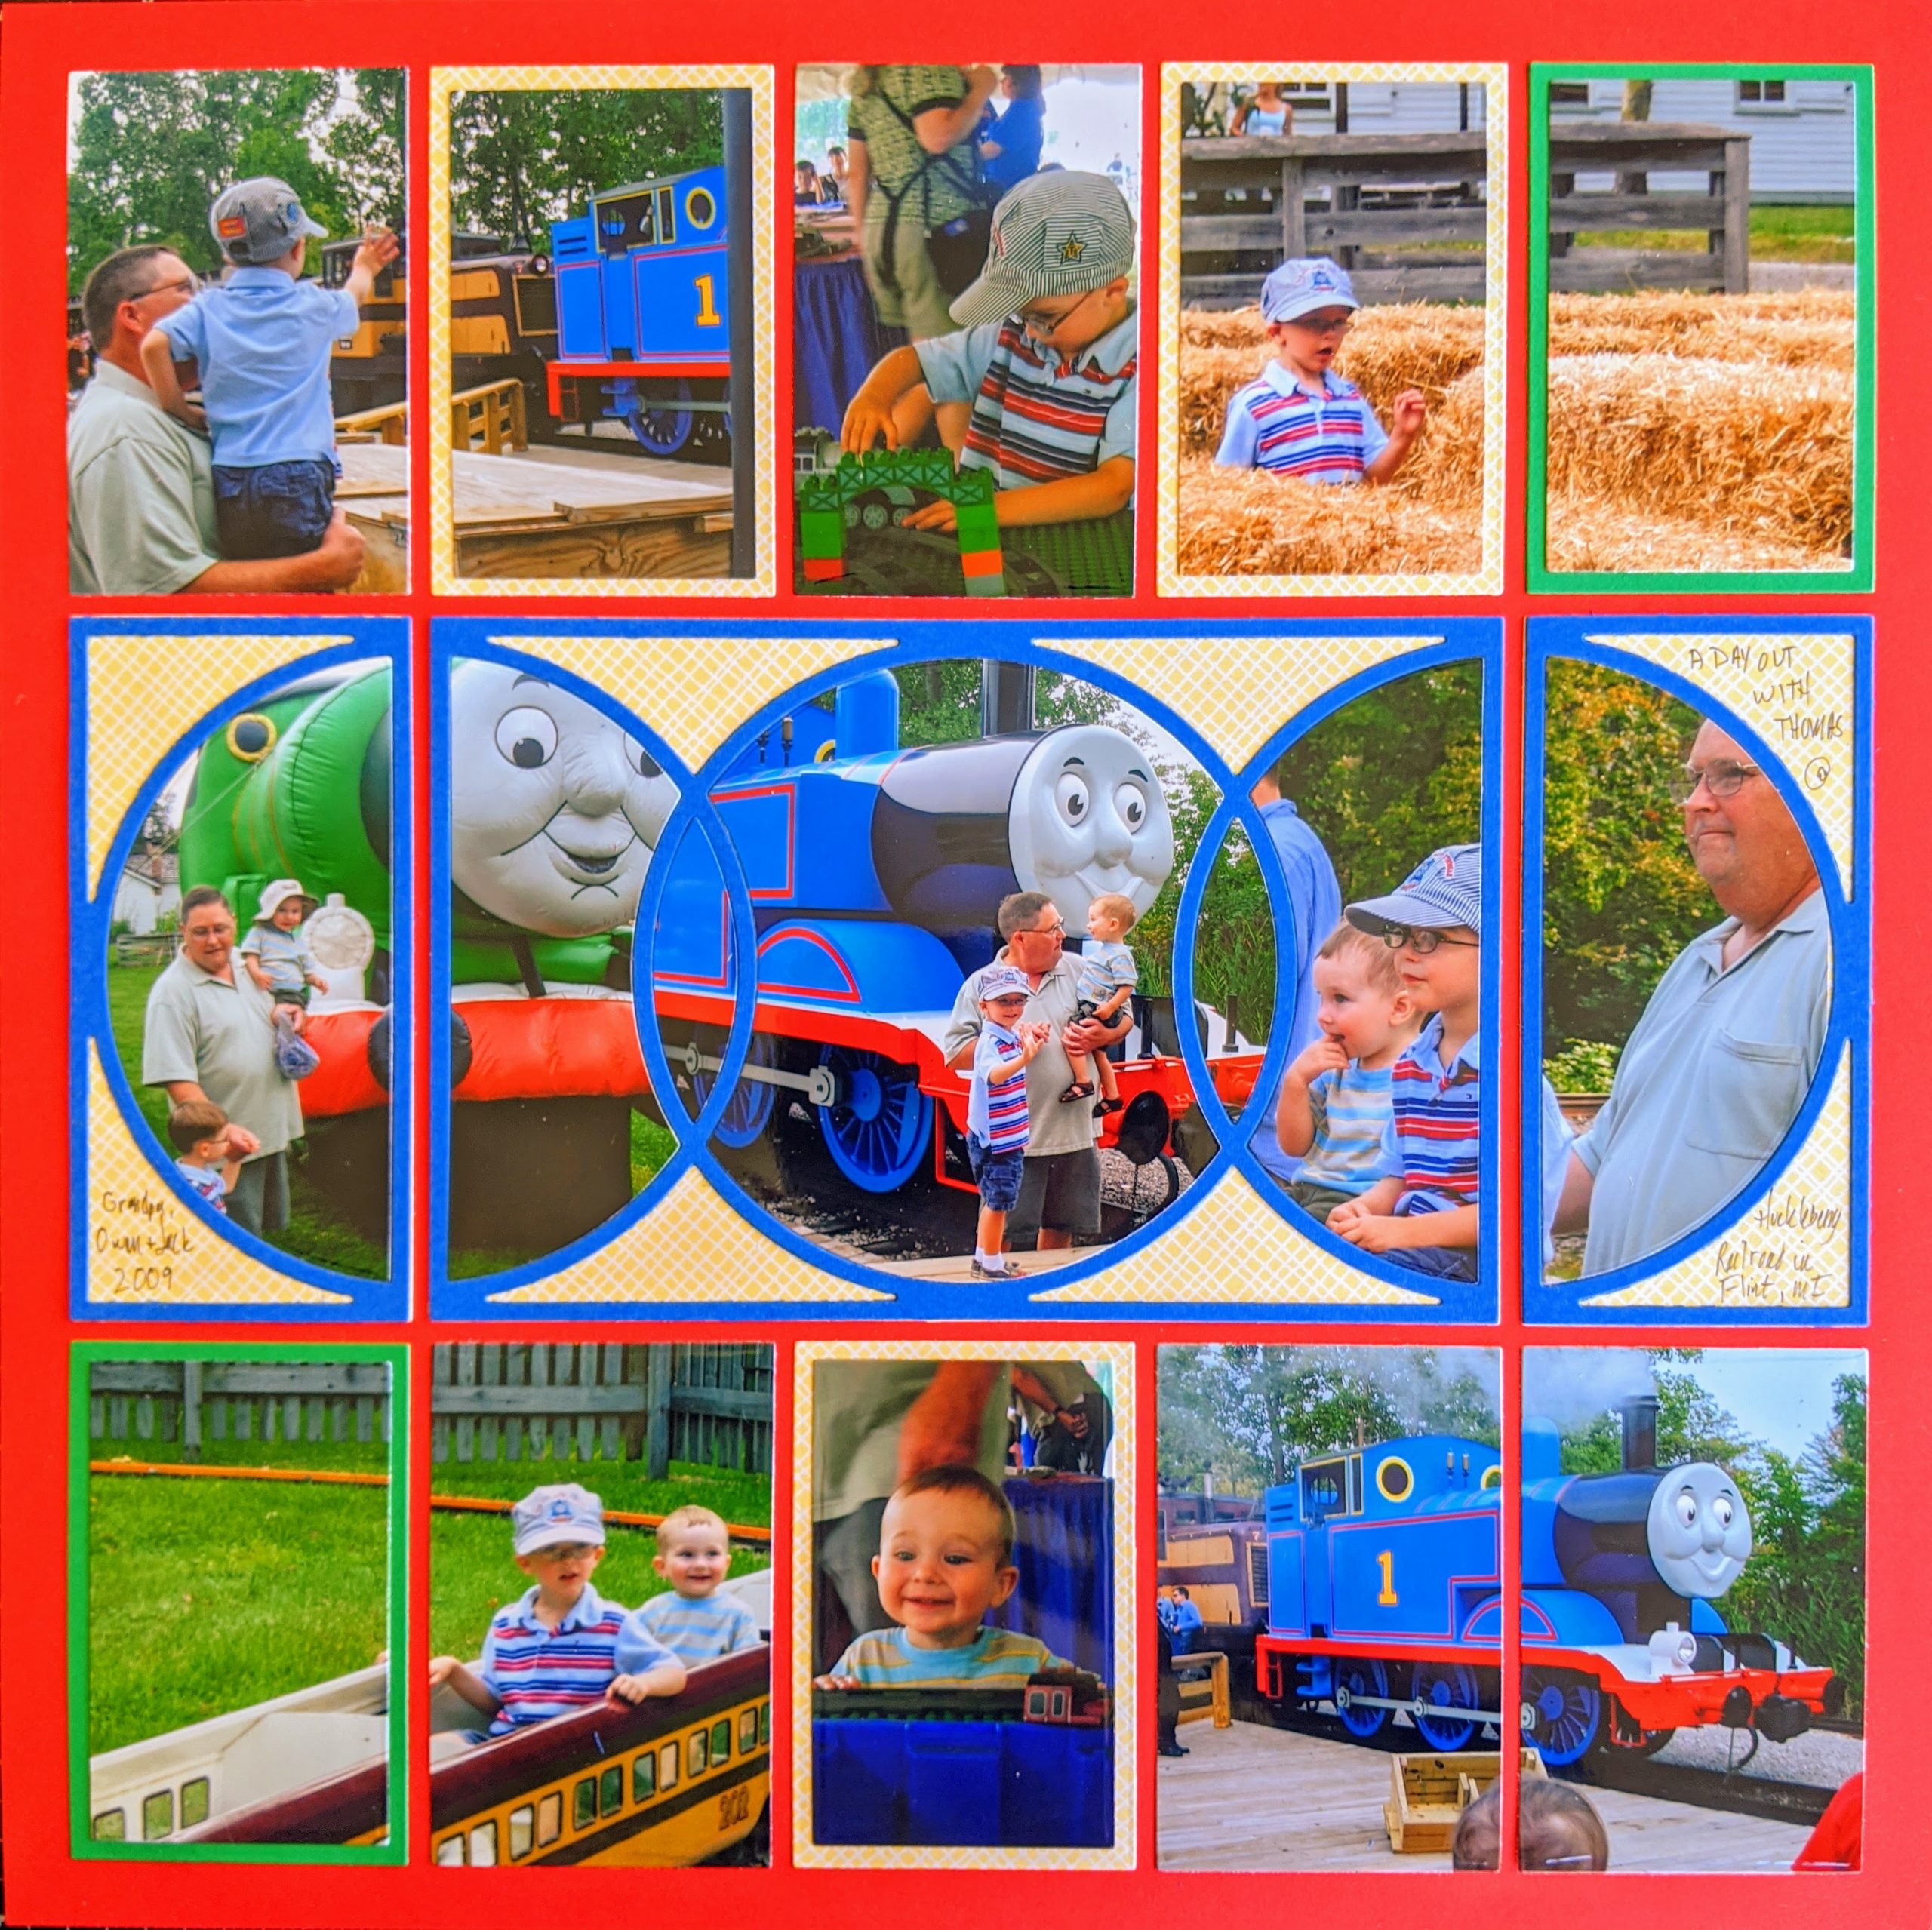
"Day Out with Thomas" by Candy Spiegel - Pattern #475
Replace a Photo
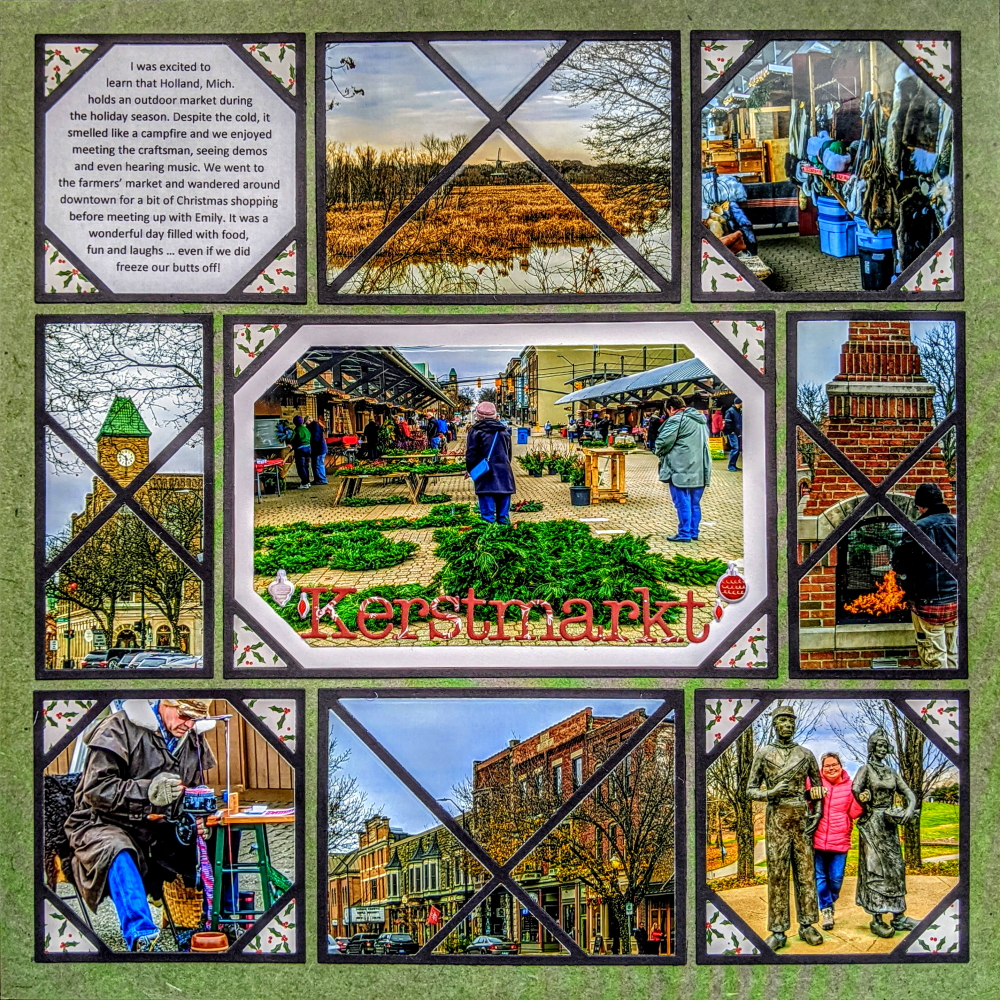
"Kerstmarkt" by Candy Spiegel - Pattern #477 (Flipped)
Many of the X-Factor Dies also offer spaces for large amounts of journaling.
Here, the story behind the photos was printed from the computer and then cut to fit with the die. The journaling block takes the place of one of the four corner photos on this layout.
Make it a Focal Point
When the journaling is crucial to the story, make it really stand out by placing it front and center.
On this layout, Candy used a photo of snow around the journaling with the Dynamic Die Set. In this manner, the journaling becomes the focal point and the most important thing on the layout.
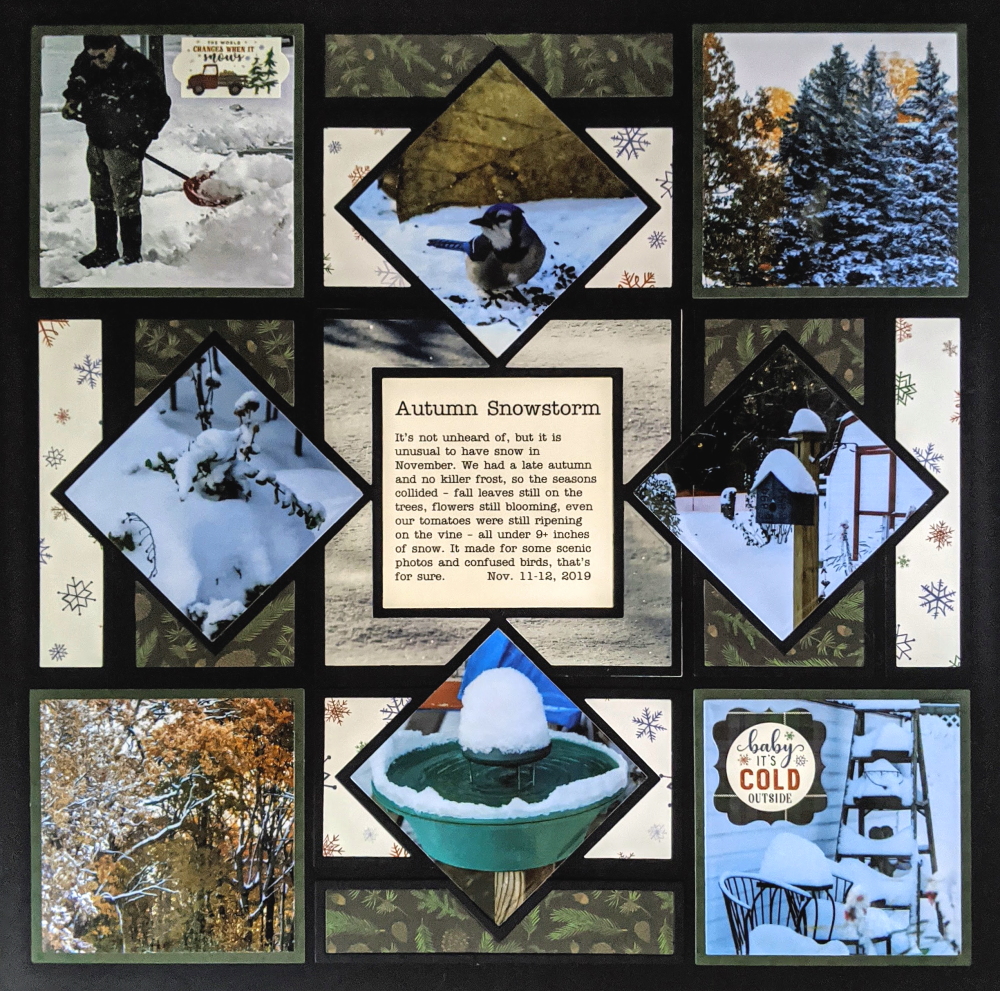
"Autumn Snowstorm" by Candy Spiegel - Pattern #478
Go Beyond the Photos
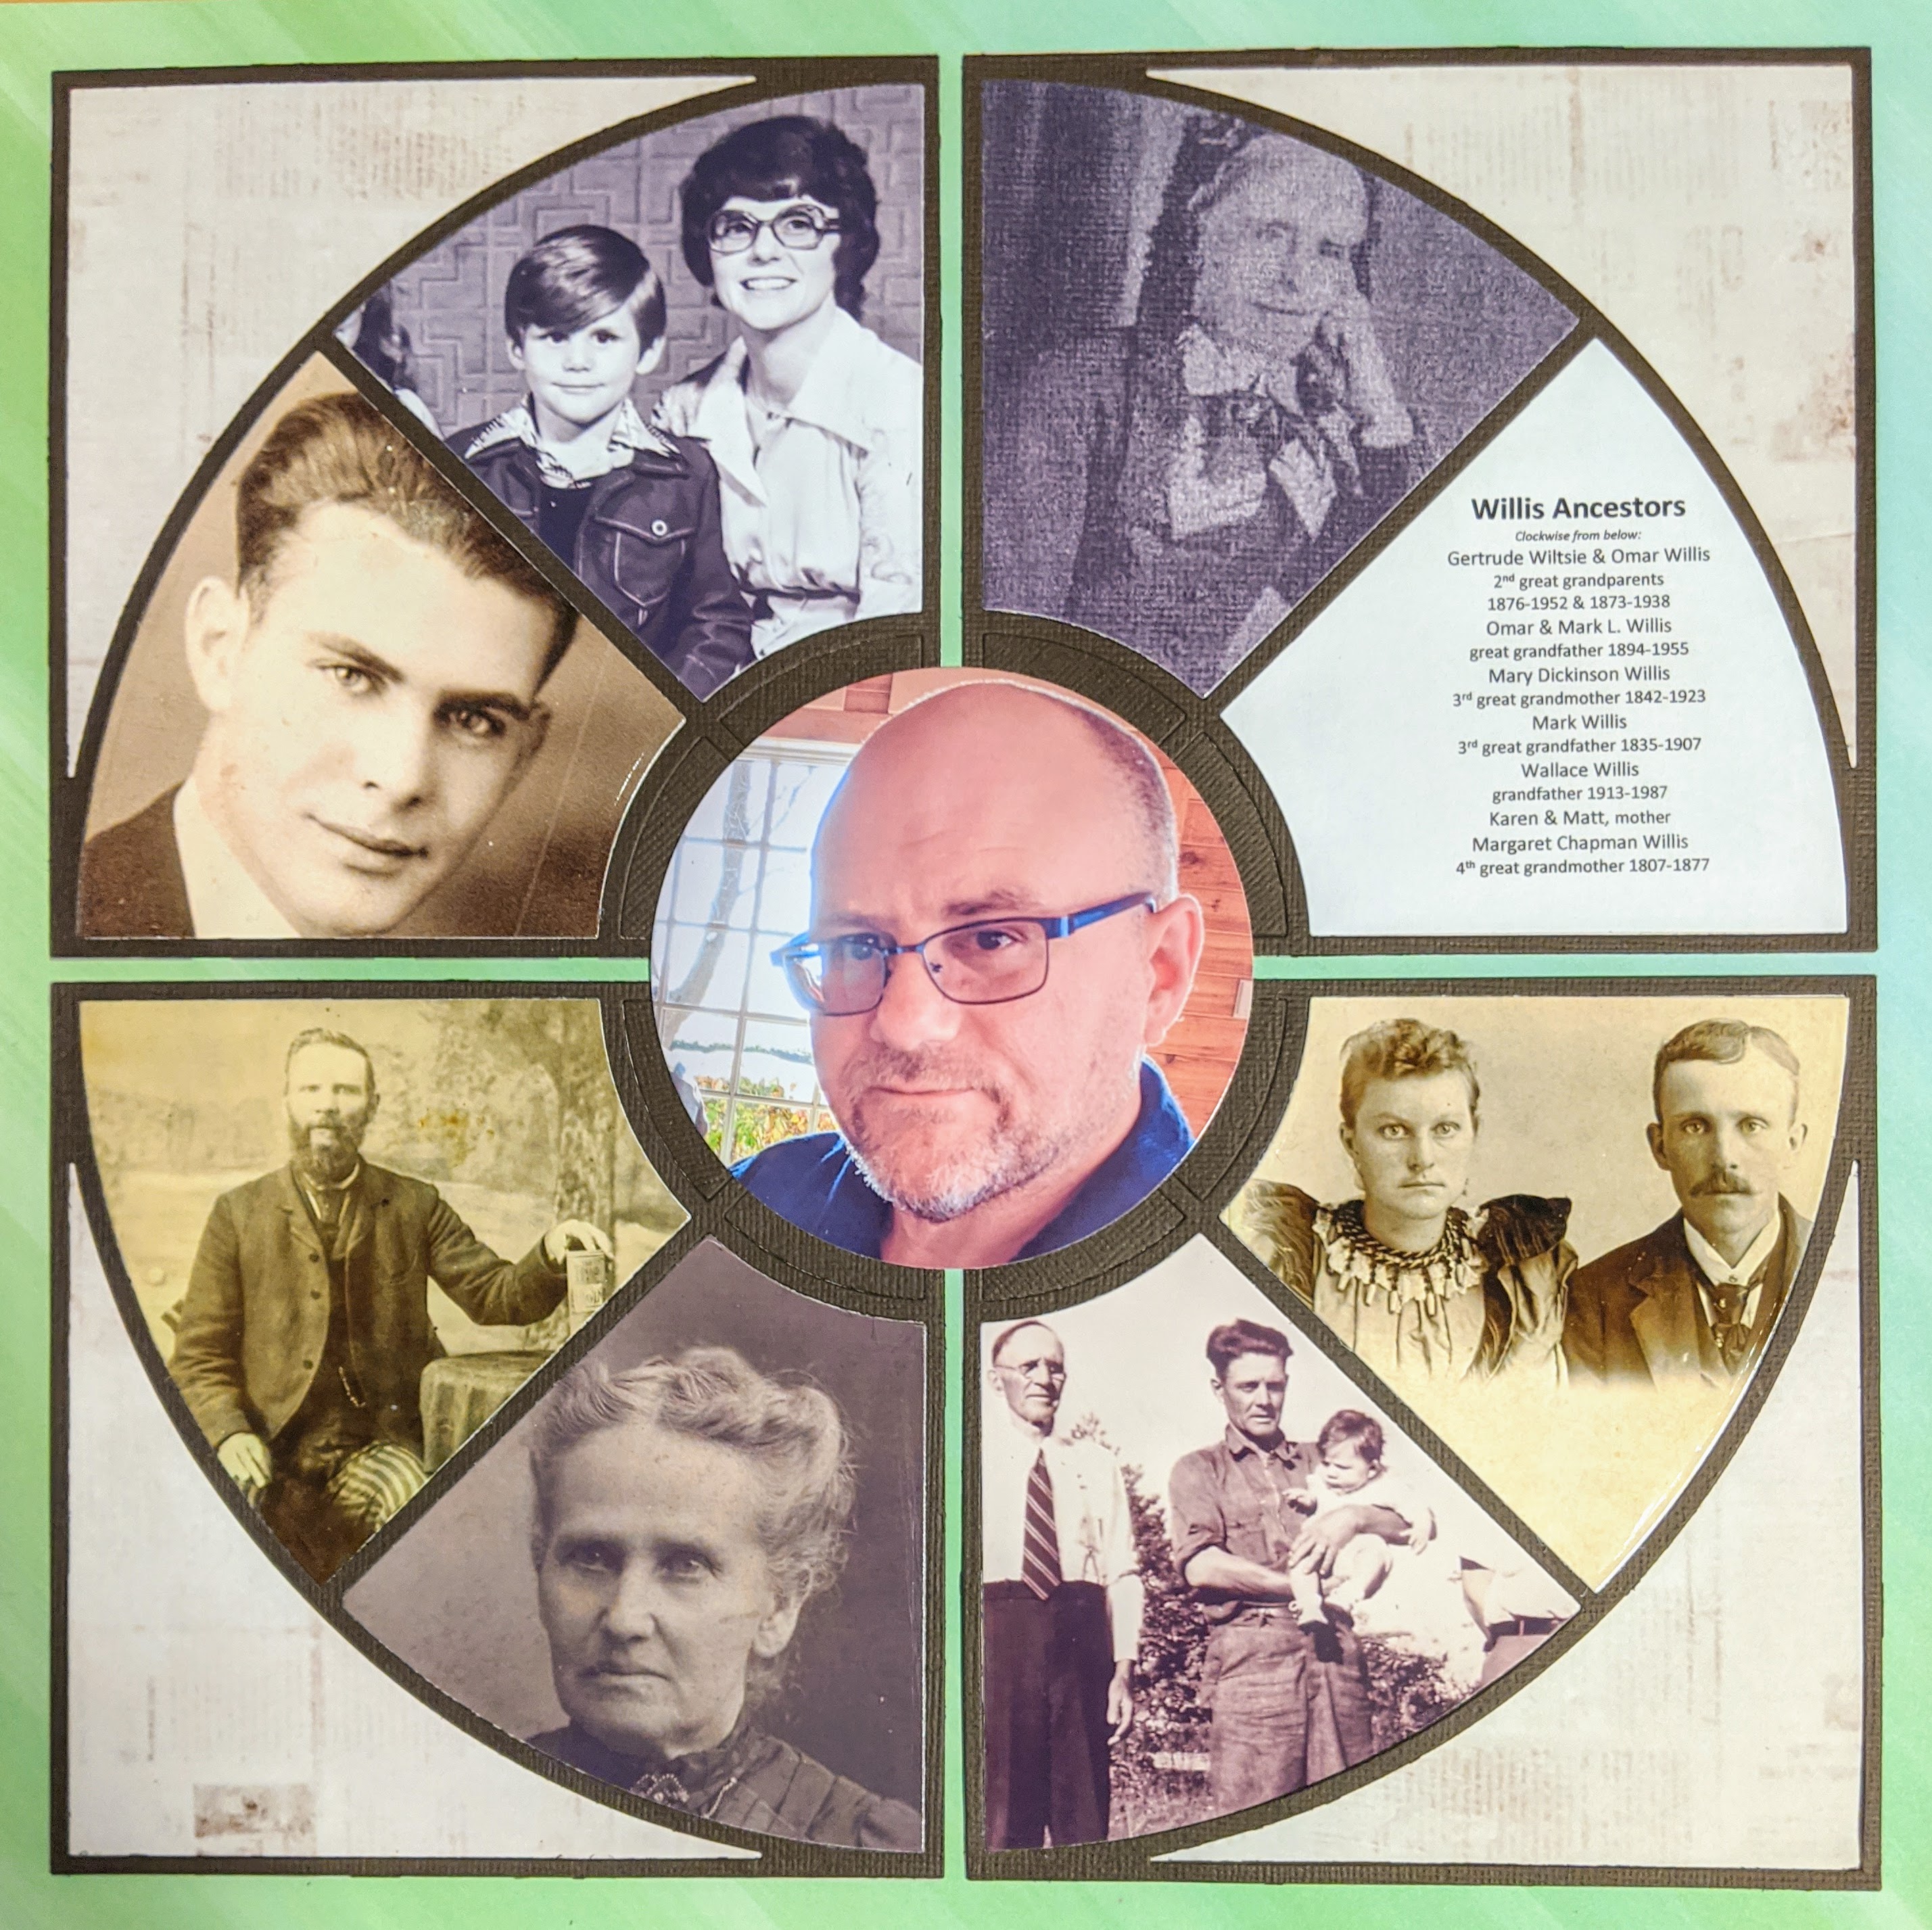
"Willis Ancestors" by Candy Spiegel - Pattern #431
The Dial Die Set is a great option when you want to include a lot of information.
On this layout, Candy used one of the photo spots to record family history. The journaling helps to stop the imaginary spinning on the layout.
If you wanted an unbroken circle, the center space, made with the Circle Tiles and Tab Die Set, would also be an interesting place to record the journaling.
Anchor It
Placing the journaling at the bottom of the layout, like Tami did on this one, helps to anchor the page.
While she could also have placed the story in the center spot, putting it at the bottom immediately tells the viewer to look at the photos above.
Using darker papers in each of the corners helps the Sweetheart Dies to stand out.
