

As we begin a new year, there may be a few of you that are also beginning with a new scrapbook style, the Mosaic Moments Grid System. You may have questions about many aspects of the system, but today let’s get started with a layout and finding one that is easy to start with but also will showcase your photos beautifully.
We have several categories of patterns that can be found in our Pattern Gallery. They include Mostly Squares, Mosaic Style, Columns, Pinwheel, Rows, Strips, Symmetrical and Puzzle now known as Freestyle.
I think Pinwheel patterns are the easiest patterns with which to begin. I’ll show you two that are basically the same with just a slight progression, with a third pattern in that progression.
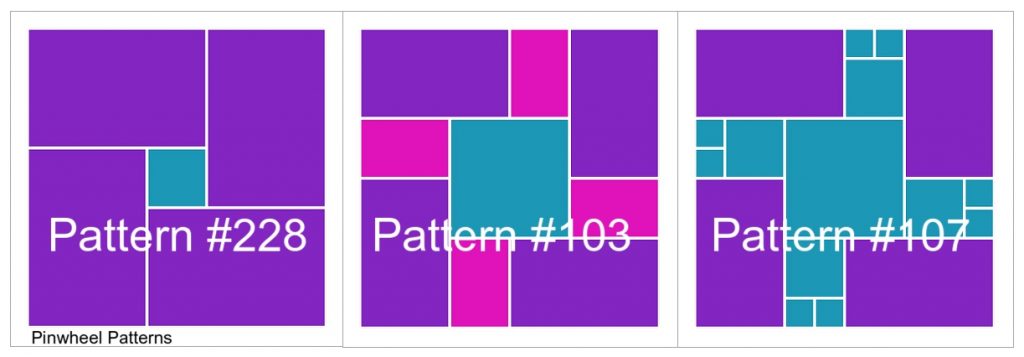
Let’s begin with Pattern #228. There are 4 spots, all 4×6 (4 3/8”x 6 5/8”) and one 2×2 (2.125” square). There are two horizontal and two vertical. A regular 4×6 photo will not ‘fit to the grid’ here, but will need a mat and just a slight trim of the photo to have a nice even border around your photo. To cut those mats you can use the largest die from Die Set B, or use the “B” side of the Double-sided Craft Mat to cut your mats or even quickly with a paper cutter. It’s a great pattern to show off your photos.
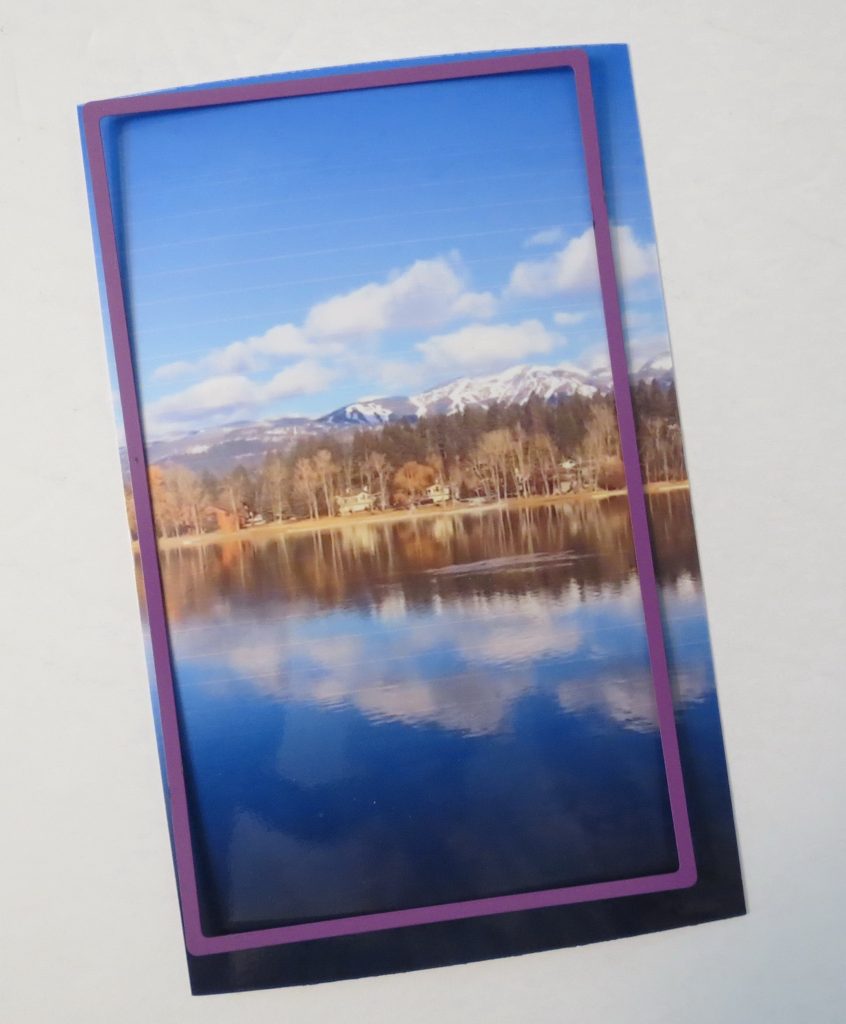
The Grid Paper I have chosen for these layouts is from the Cool Drinks Collection, Coolberry. My mats are in white cardstock.
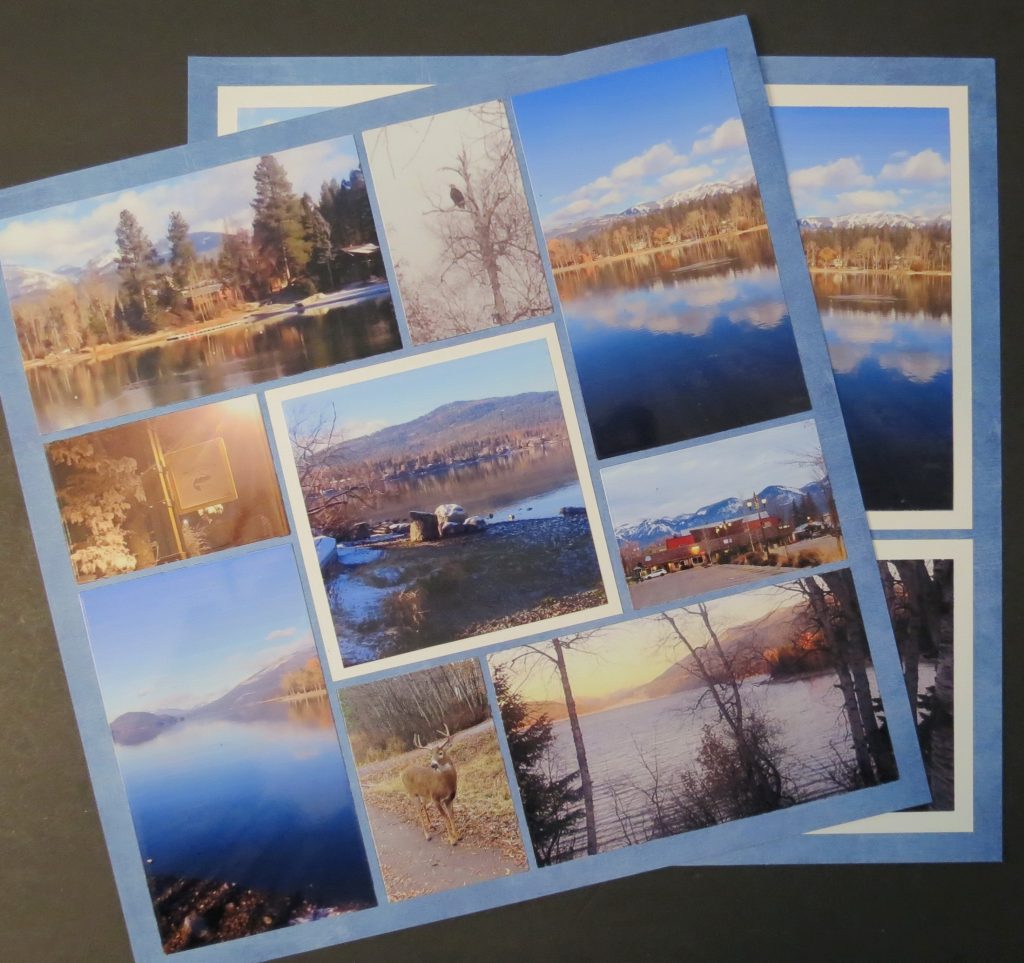
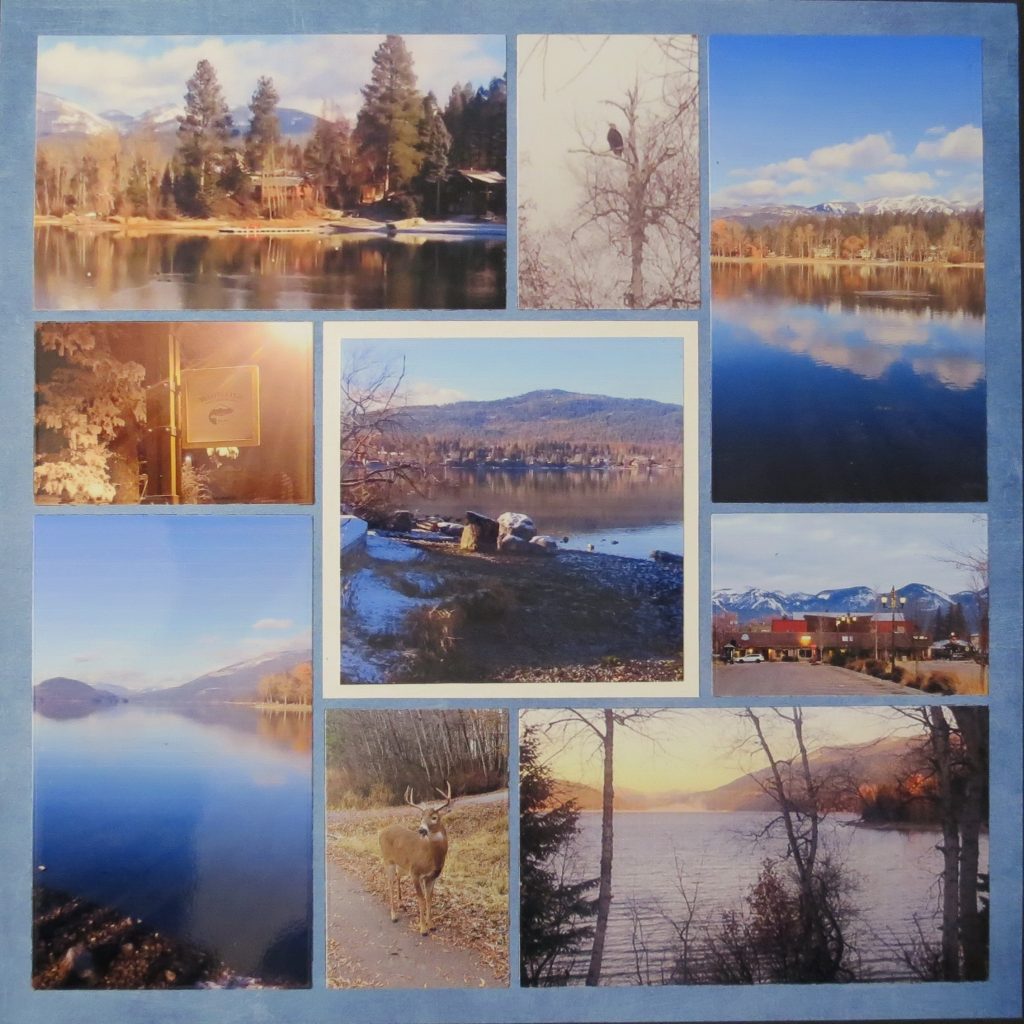
LAYOUT 1
Trimming the photos for an even border is simple to do by removing ¼” from one long side of the photo. Using the Double-sided Craft mat makes that trim quick and easy. Die Set A and the squares you can cut your center 2×2 and use a layering die of your choice to cut your center photo, or use this space to add a date or journal place.
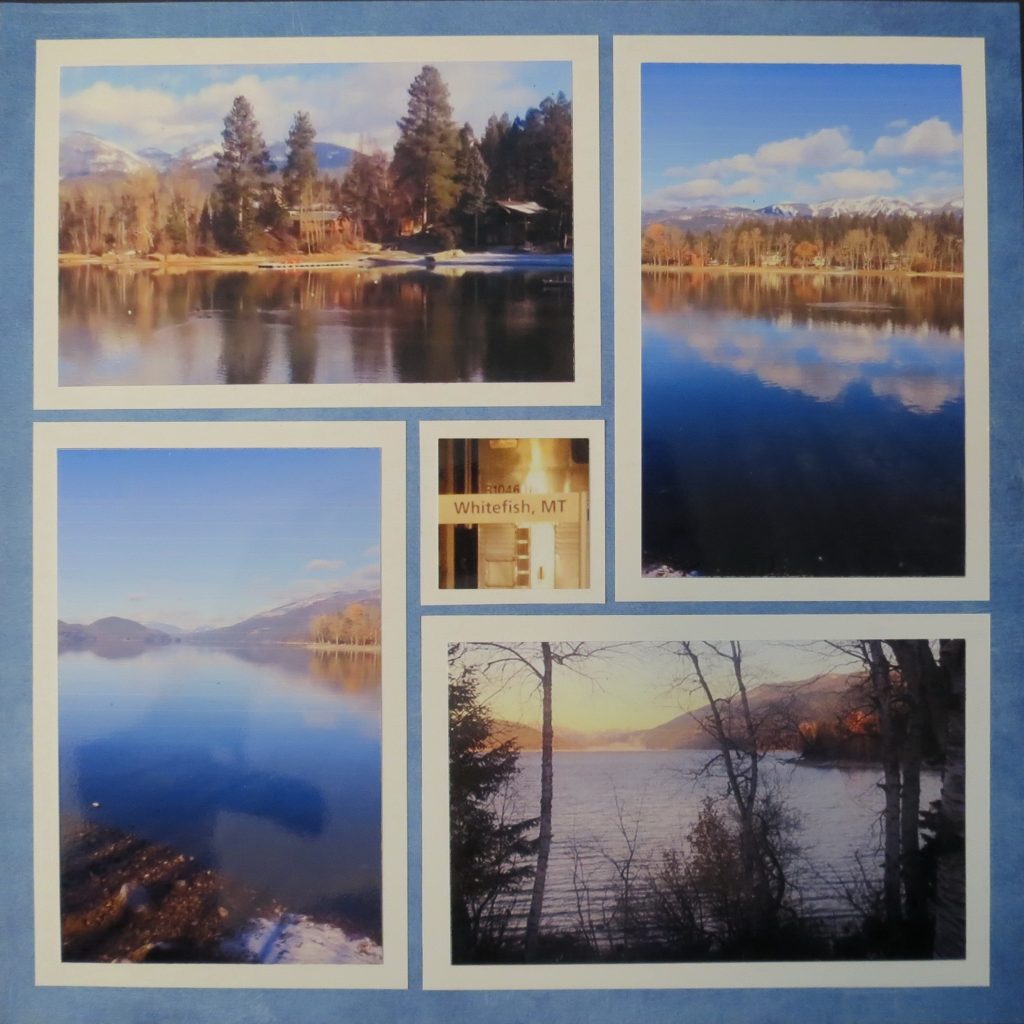
LAYOUT 2
The next Pinwheel pattern #103 is basically the same pattern as #228 with a few variations. This time I will trim the photos using Die Set B to trim the photo to fit into the 3×5 spaces (3.25”x 5.5”). You don’t loose a lot of the photo in this trim, and it also gives you 4 new spaces, 2×3 (2.125”x 3.25”) and an enlarged center photo, 4×4 (4.375” square).
With Die Set A you can cut a mat for your center space and trim your 4×6 photo to 4” square and add to the mat. If you want a different mat size, the layering dies from the set can make your photo cut any size you desire.
From Die Set C the 2×3 space can be filled with a photo cut to fit to the grid or to be layered.
This is a quick and easy layout that can be completed with ease for even those just getting started out with the system. The third pattern in this progression is Pattern #107. Should I have wanted to create a third layout, I could have taken my 2×3’s and turned them into 2x2s, (but I was happy with the sizes of my photos in the 2x3s). That would leave me with two 1” squares to fill with patterned paper or portions of other photos.
If you tackle the pinwheel patterns and the many variations, currently 53 to choose from for now, you can explore some of the other styles. I have other examples of easy layout patterns: symmetrical patterns, column patterns, puzzle/freestyle patterns, strip patterns and row patterns. I’d like to show a few off and offer a few observations.
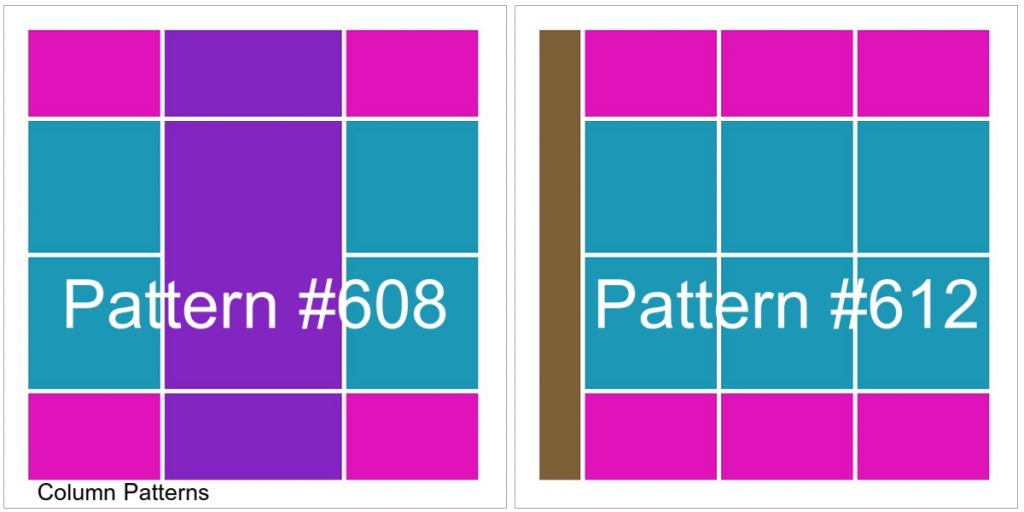
Patterns #608 & #612 The difference in the two are the 1×10 strip along the left-hand side with the rest of the section’s columns of 3x3s to the second pattern two columns of 3x3s and a 4×6. The similarities of the sizes for the photos allows working with the minimum dies, Sets A, B, and C, and specific 2x3s and 3x3s.

Patterns #523 & #316 Both of these patterns begins with a left-hand column of 3×3’s (Die Set A), Then one has a 1×3 strip the other 3-1” squares. That’s an easy pattern modification whatever pattern you are working on. The top portion of both have a 4×5, 2×3 and then 1×2 or 2-1” squares.
The bottom sections are areas that are easy pattern changes to accommodate your photos.
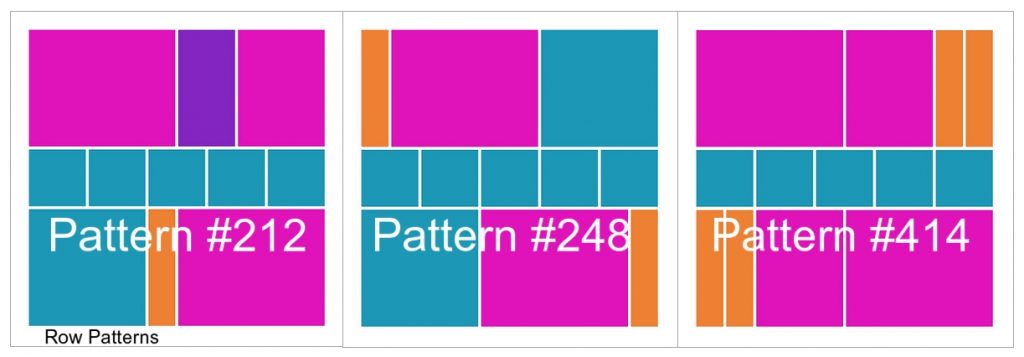
Patterns #212, #248 & #414 These all have a center row of 2x2s. Above and below the spaces though shuffled around are 4x5s, 4x4s and variations of 3x4s 2x4s and 1×4’s.
It’s easy to use a multiple number of photos with the minimum number of dies to cut them to size.
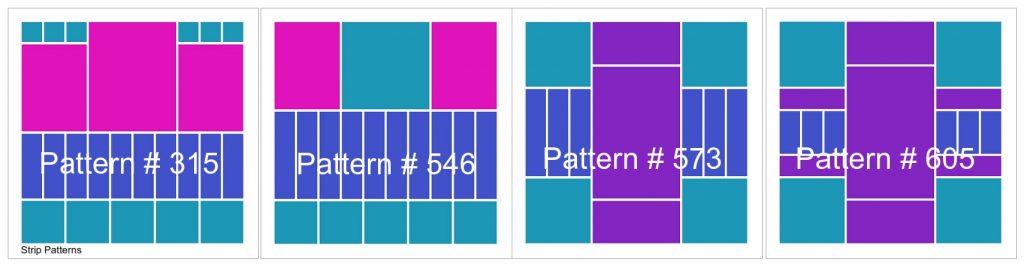
Patterns #315 & #546 and Patterns #573 & #605
You can see the similarities between the photos and by now you can identify the changes that have been made.
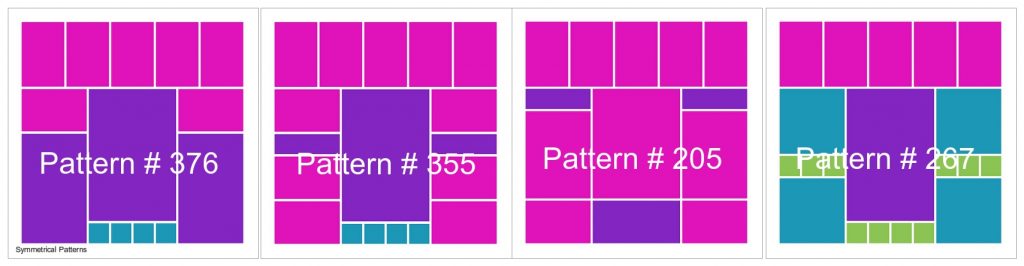
Patterns #376, #355, #205 and #267
The top row in all of these patterns is a series of 2x3s and the bottom portions are divided into 3 columns. With a few shuffles of pieces different sizes of photos will fill the page.
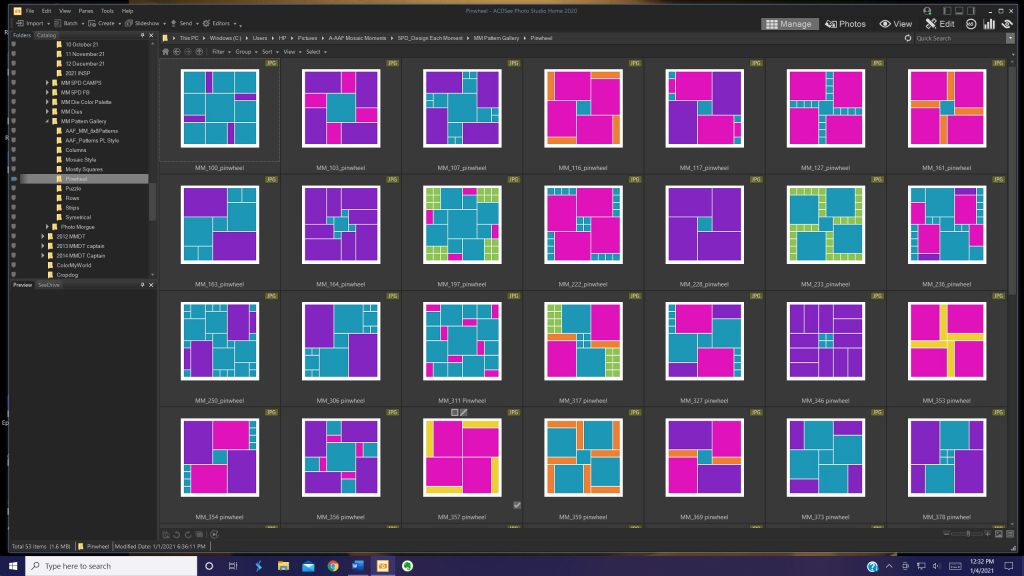
TIP: You may wonder how to easily review a group of patterns and make your choices? Well, I keep a file with digital copies of the patterns so I can easily work on my articles. The main file has all the patterns and examples, then the second is a series of files by pattern type. This view gives me the best view at a glance to see what will work together and see the variations as other sizes of pieces are added in. It helps me to streamline my work, you might find it helpful too. These are the Pinwheel Patterns.
Now it’s time for you to get started on your new beginning!
Andrea Fisher