Blending photos is one of the most fascinating techniques used with the Mosaic Moments™ system. It involves cutting photos into small pieces and then putting them together on grid paper. The result is a bit of Mosaic Magic and a whole lot of WOW!
Check out some of the ways blending was used in the layouts below. Keep in mind that ONLY 4x6 photos were used on the samples. Prepare to be amazed.
Create a Mosaic
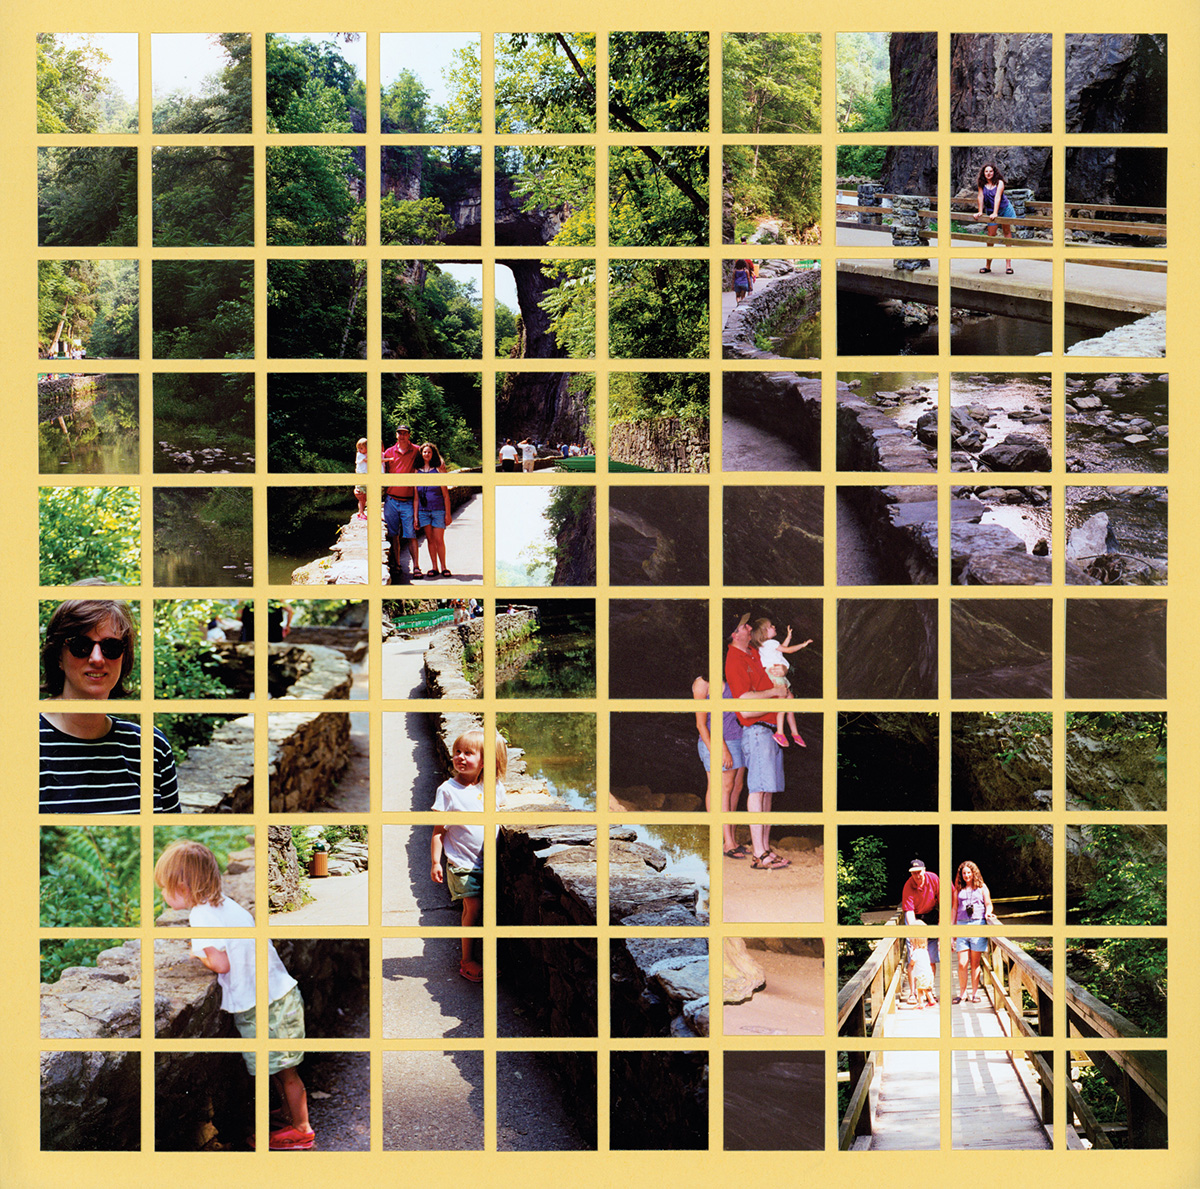
"Natural Bridge" by Tami Potter - Pattern #160
Any photos can be cut into 1-inch squares, but when you blend the photos, magic really happens.
At first glance, this layout looks like one giant picture. But look closely and you will see it is made up of a handful of photos, all carefully blended together.
The secret is to use similar hues next to each other. In other words, the dark areas of one photo are placed next to the dark areas of another photo to create a blend.
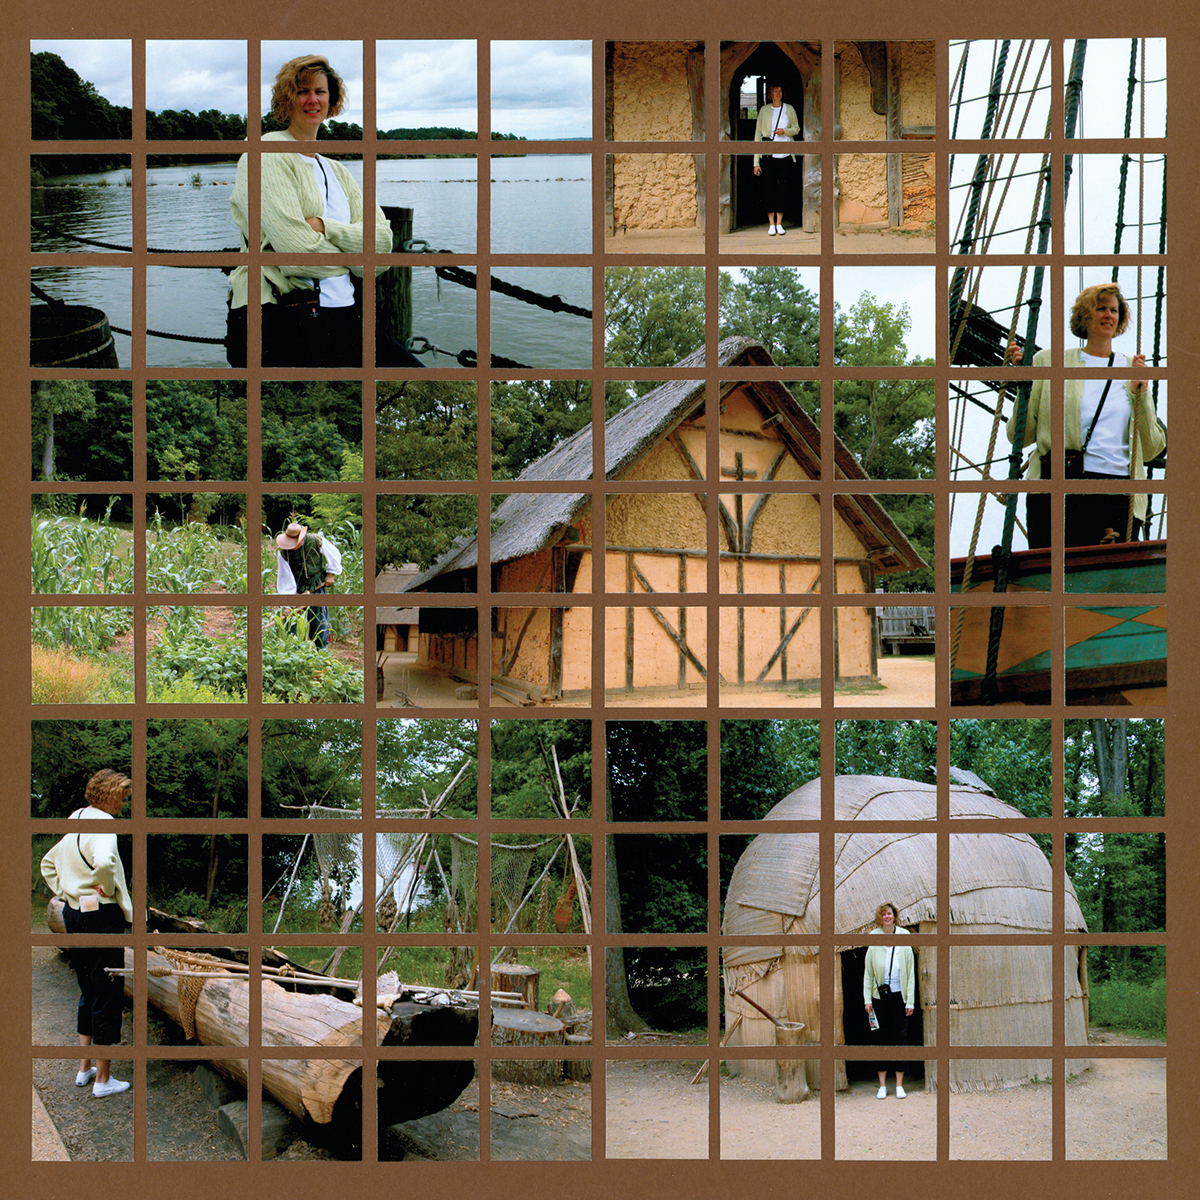
"Jaime at Jamestown" by Tami Potter - Pattern #160
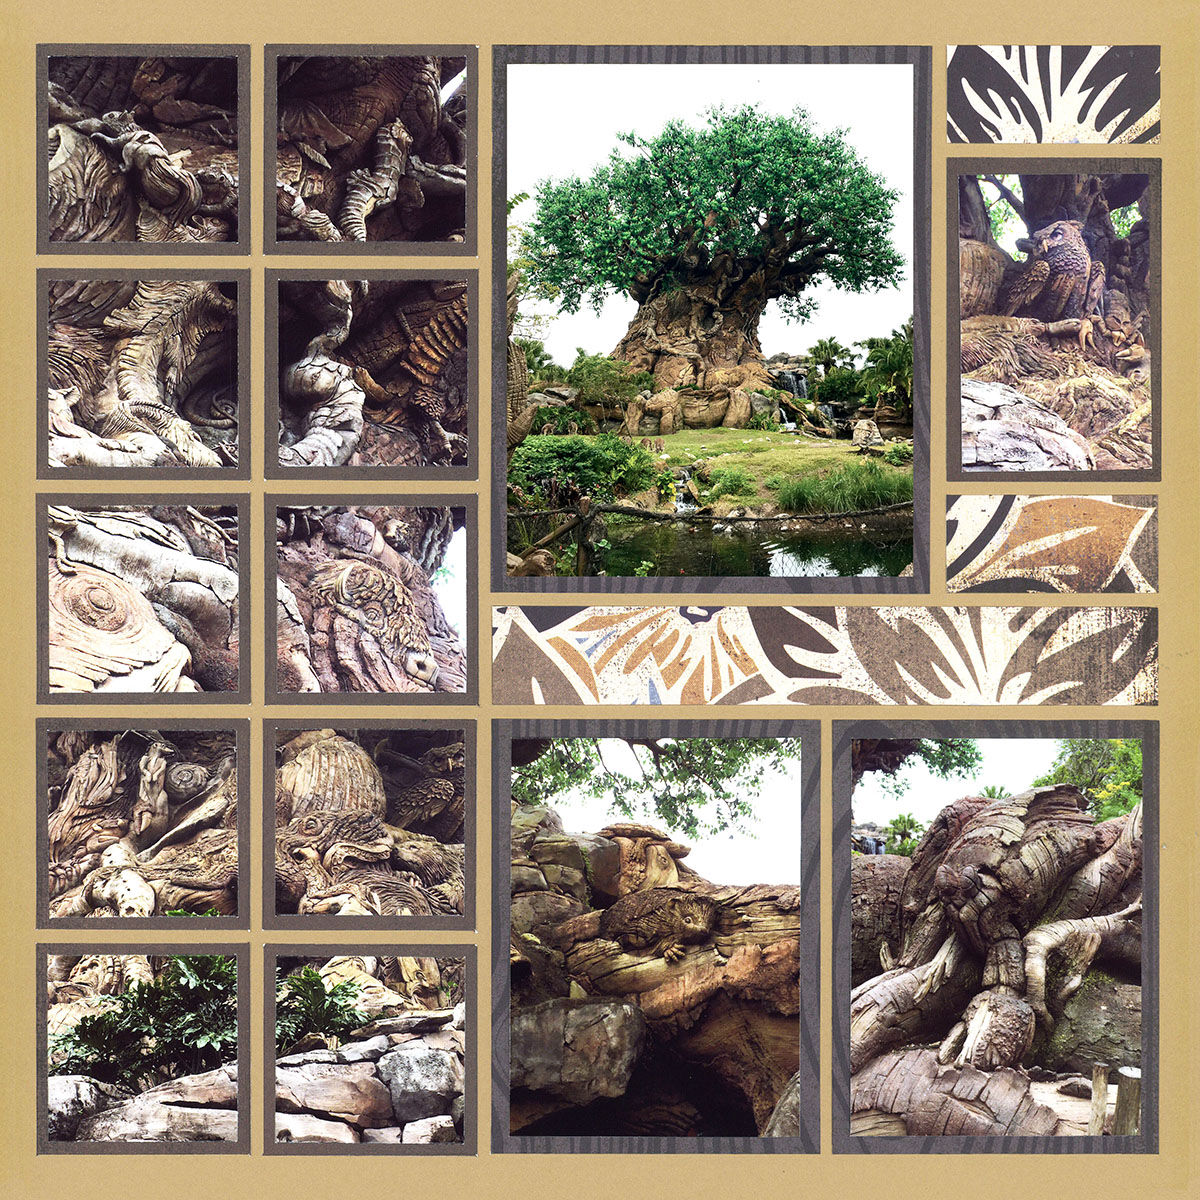
Cut One Photo with Multiple Dies
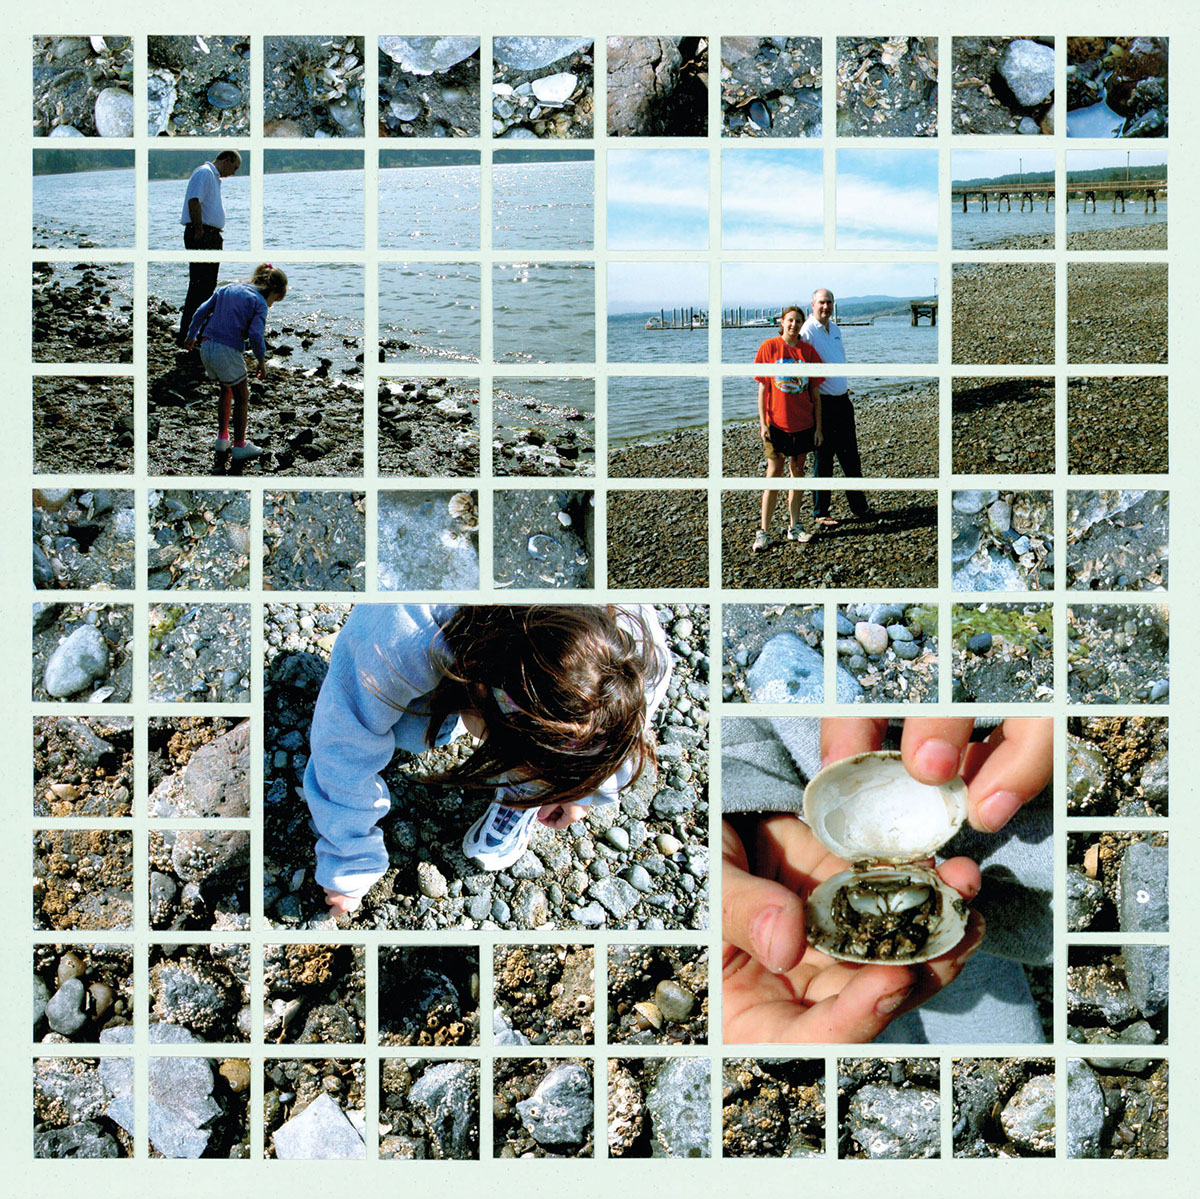
"Rocky Shore" by Tami Potter
Cutting a single photo into multiple sizes is a beautiful way to blend photos.
For this technique, cut the focal point the size desired. Then cut the leftover portions of the photo into smaller pieces and place them around the first portion.
Fill in the rest with leftover pieces or close-up photos.
The same technique was used here with photos that needed to stay whole, like the sign, incorporated.
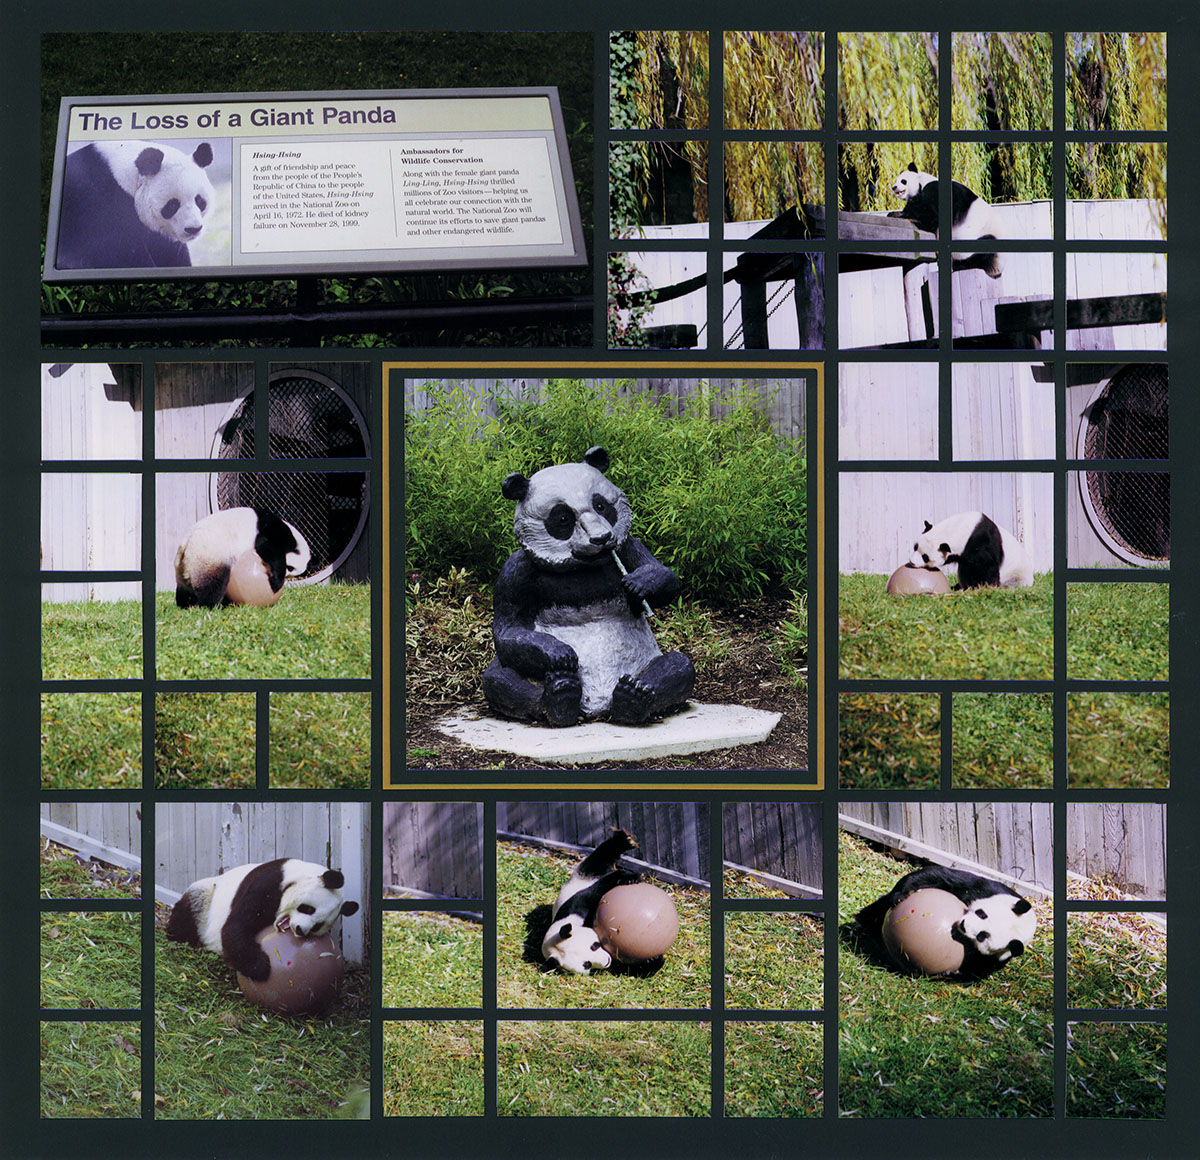
"Pandas of Washington DC" by Tami Potter
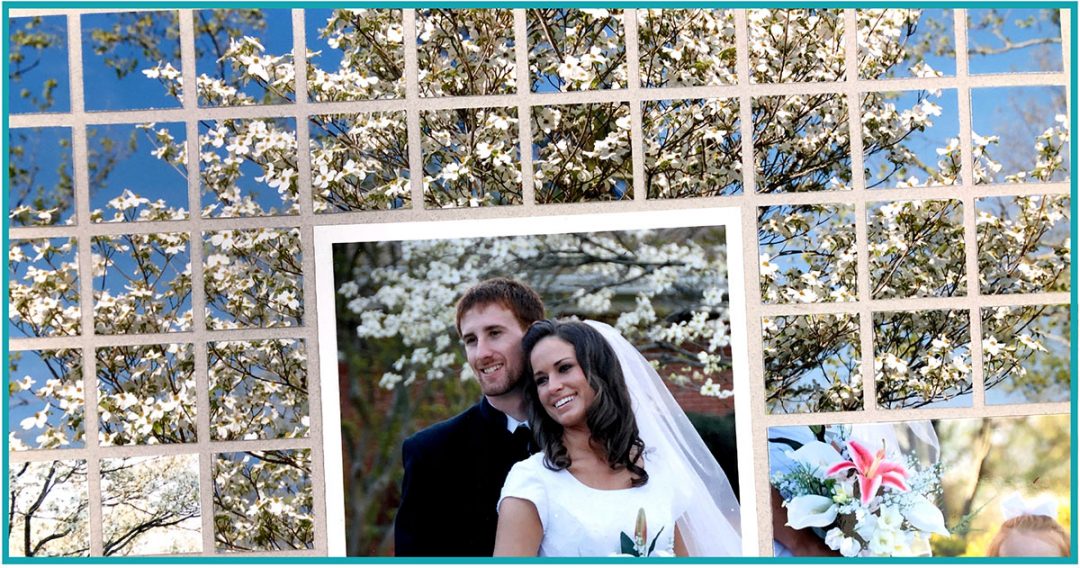
Combine Photos for the Background
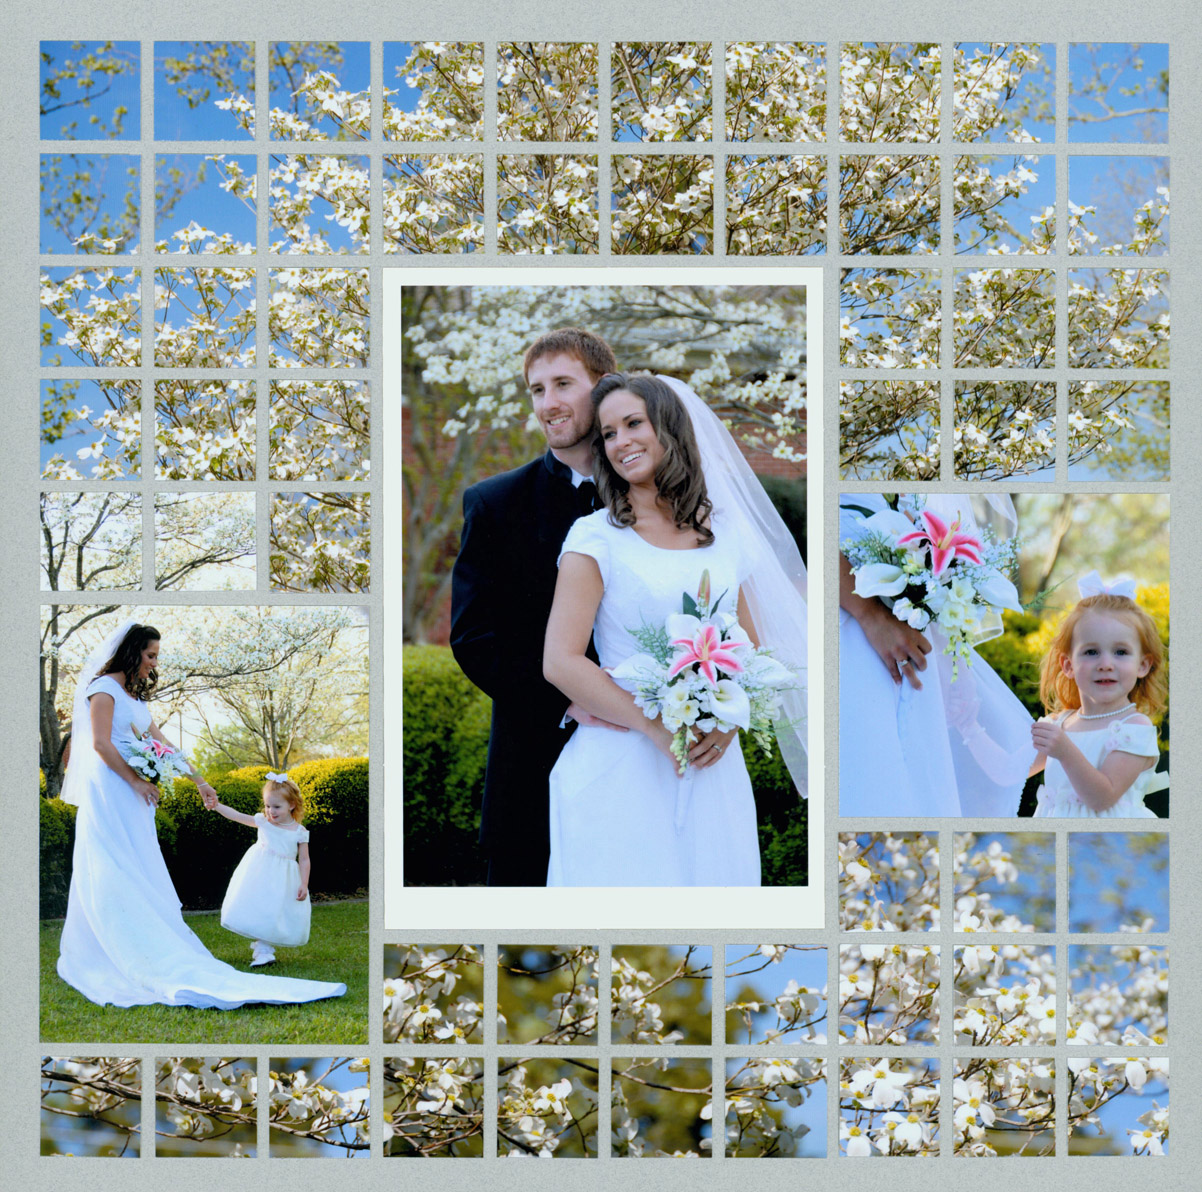
"Spring Wedding" by Tami Potter - Pattern #295
A few photos of trees, flowers or wildflowers can be turned into absolutely amazing backgrounds to highlight the main photos on your layout.
A couple of pictures of the flowering tree here, were blended together to create a giant tree at the top of this layout.
Hint: If you don't get the entire tree photographed, print a couple of extra copies of the mirror image and combine them to make a whole tree.
Again, this design uses several photos of the trees as the background. You could also print the same photo multiple times and get a similar effect.
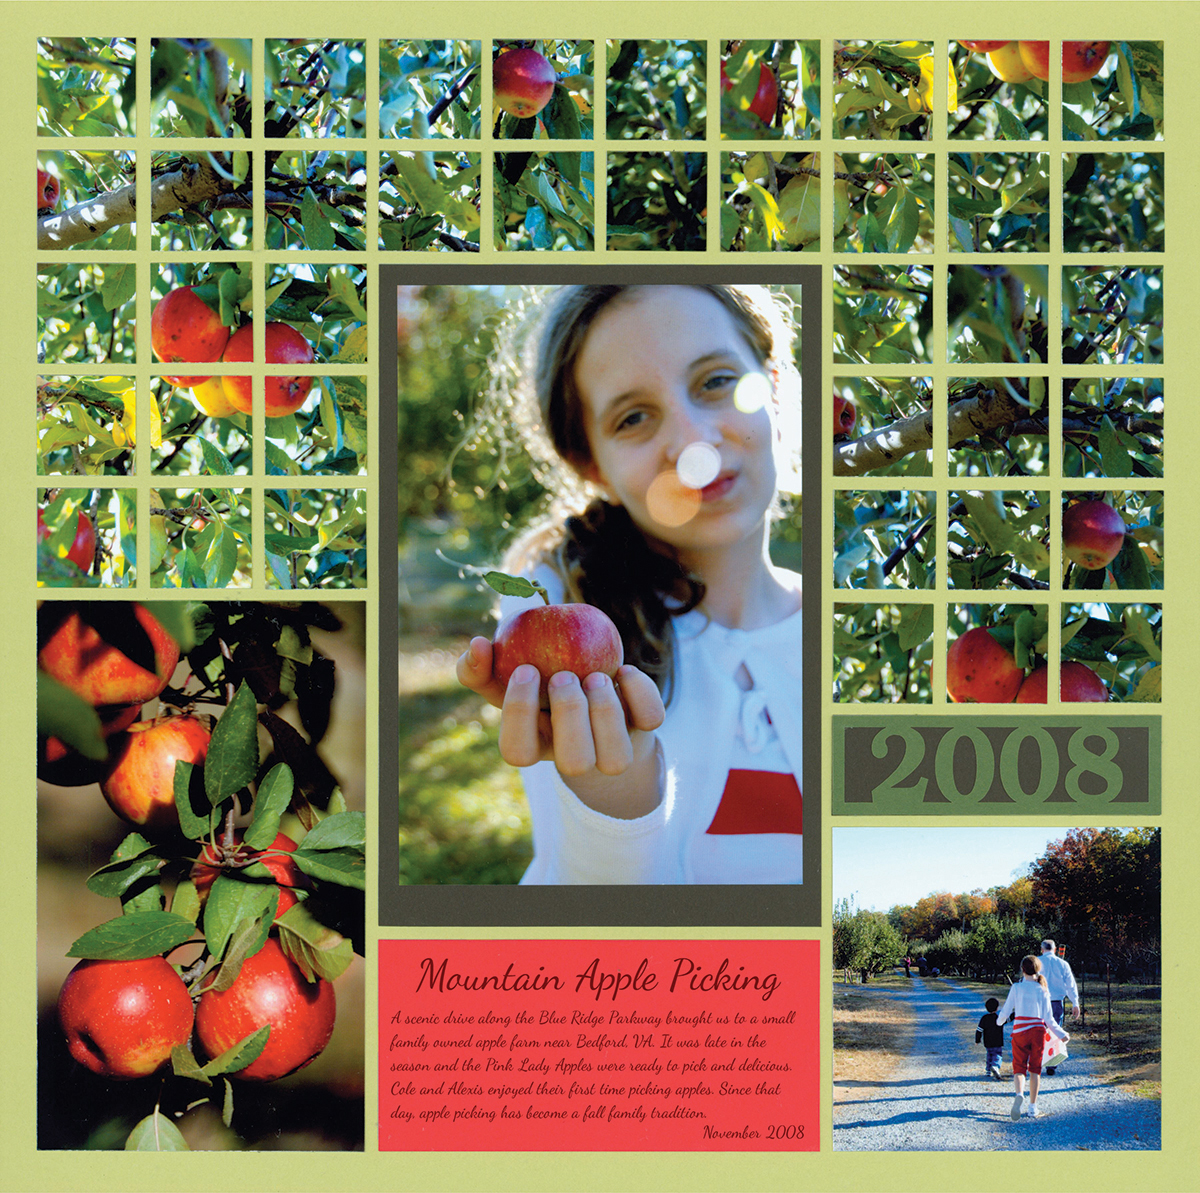
"Apple Picking" by Tami Potter - Pattern #319
Create a Panoramic

"I Love NY" by Paije - Pattern #315
A special panoramic camera is not needed when you have Mosaic Magic!
Here are the steps you need to create beautiful panoramic photos on your layout:
- Take a photo of the far left of your scene.
- Keeping the horizon even, turn slightly to the right and take the next shot.
- Make sure the right edge of the first photo is also the left edge of the second photo.
- Repeat as needed.
- Print the photos.
- Lining up the horizon, place your photos in order. Cut off the overlapping sections.
- Cut the photos into strips and adhere to grid paper. Instant panoramic!
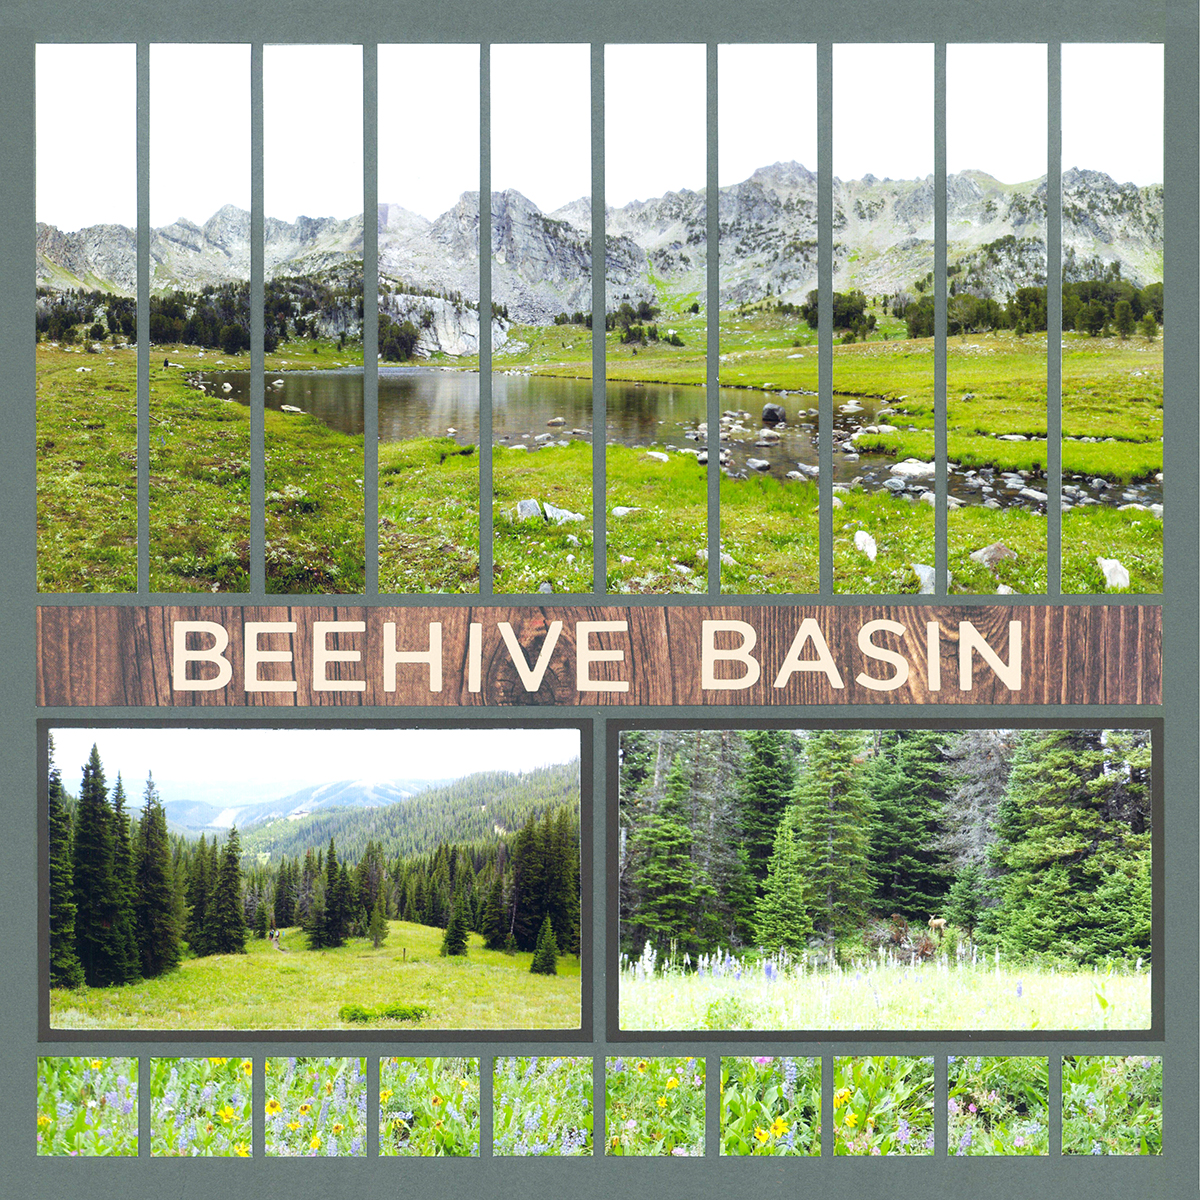
"Beehive Basin" by Paije - Pattern #321
Combine Techniques
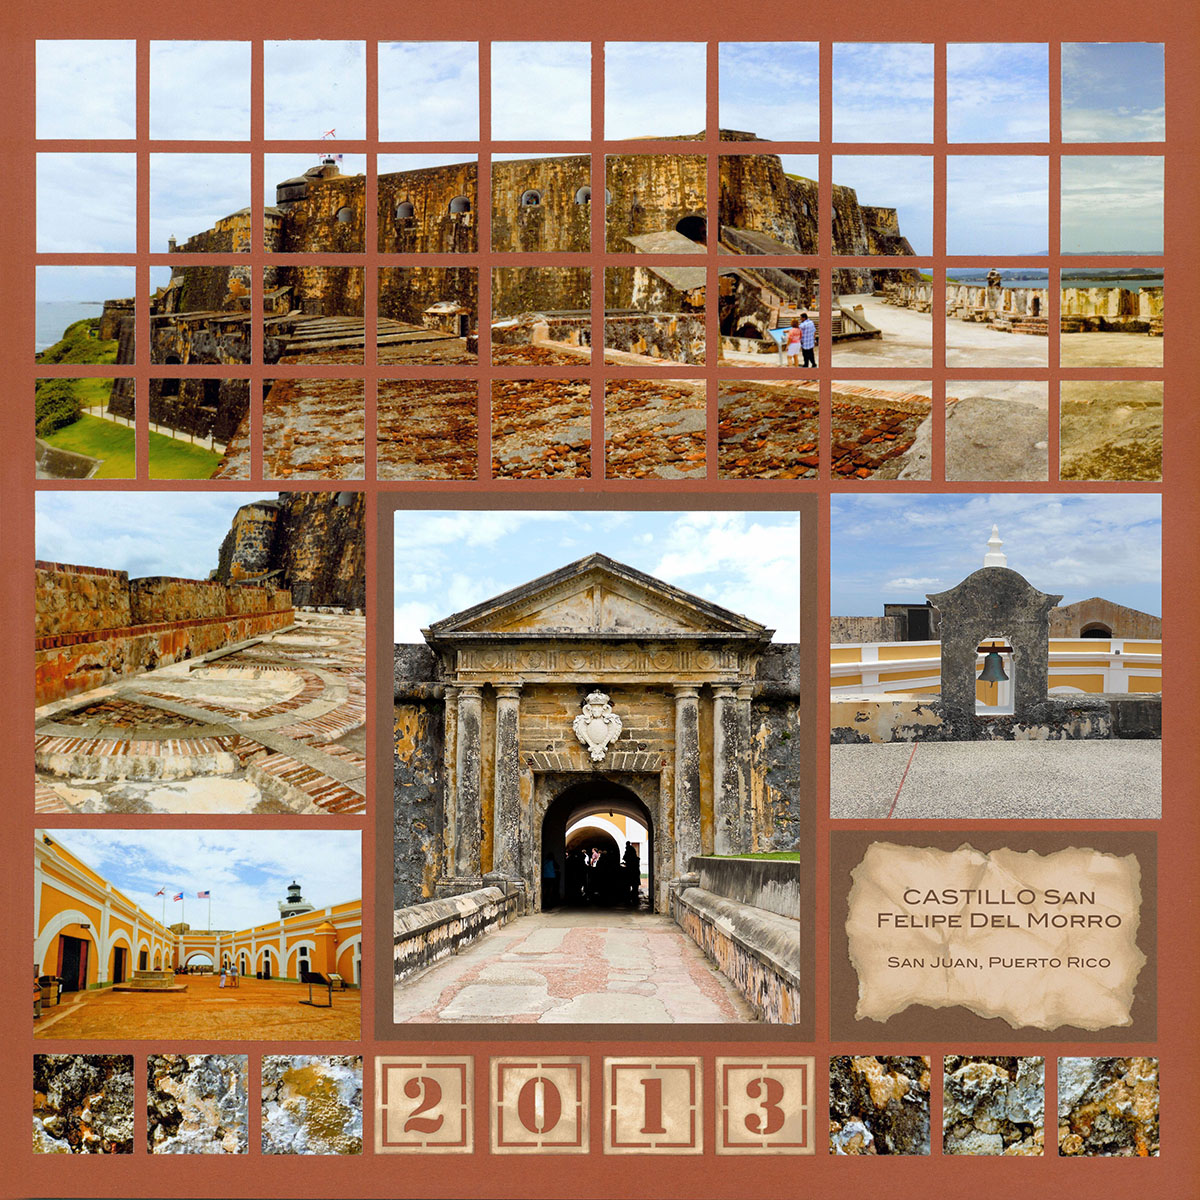
"Old San Juan" by Paije - Pattern #198
By combining the blending mosaic techniques with the panoramic techniques, you can create large mosaics on the page.
Blend for a Faux Panoramic
If you were to quickly glance at this page, you would see one game of volleyball across the top.
By cutting two strips from the edges of each photo, they seem to blend right together. More Mosaic Magic!
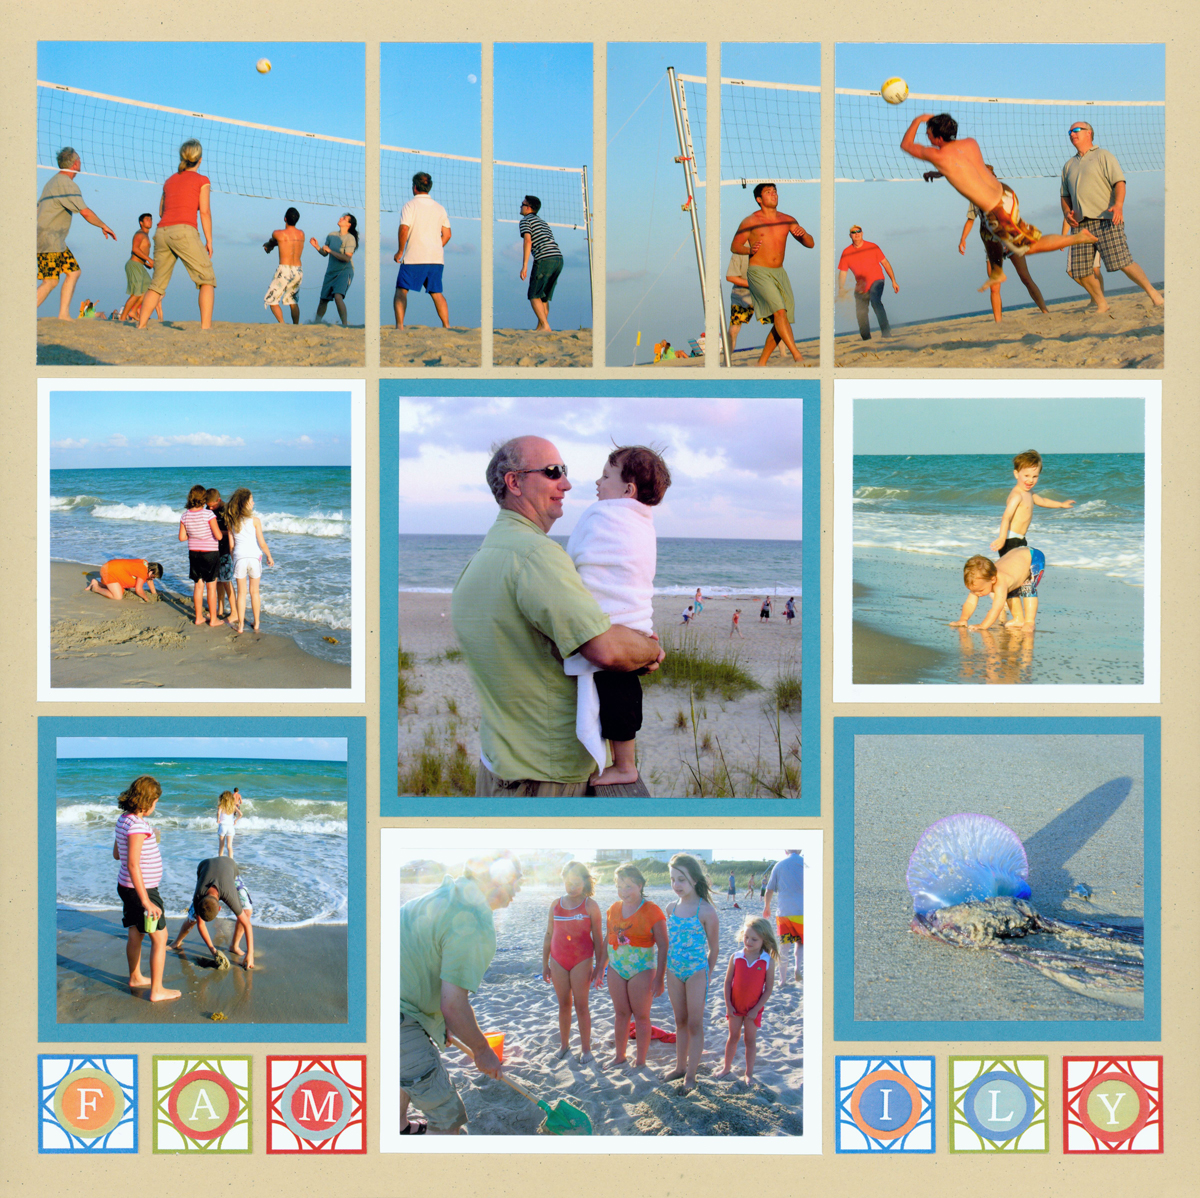
"Family Reunion" by Tami Potter - Pattern #246
Combine the Sky
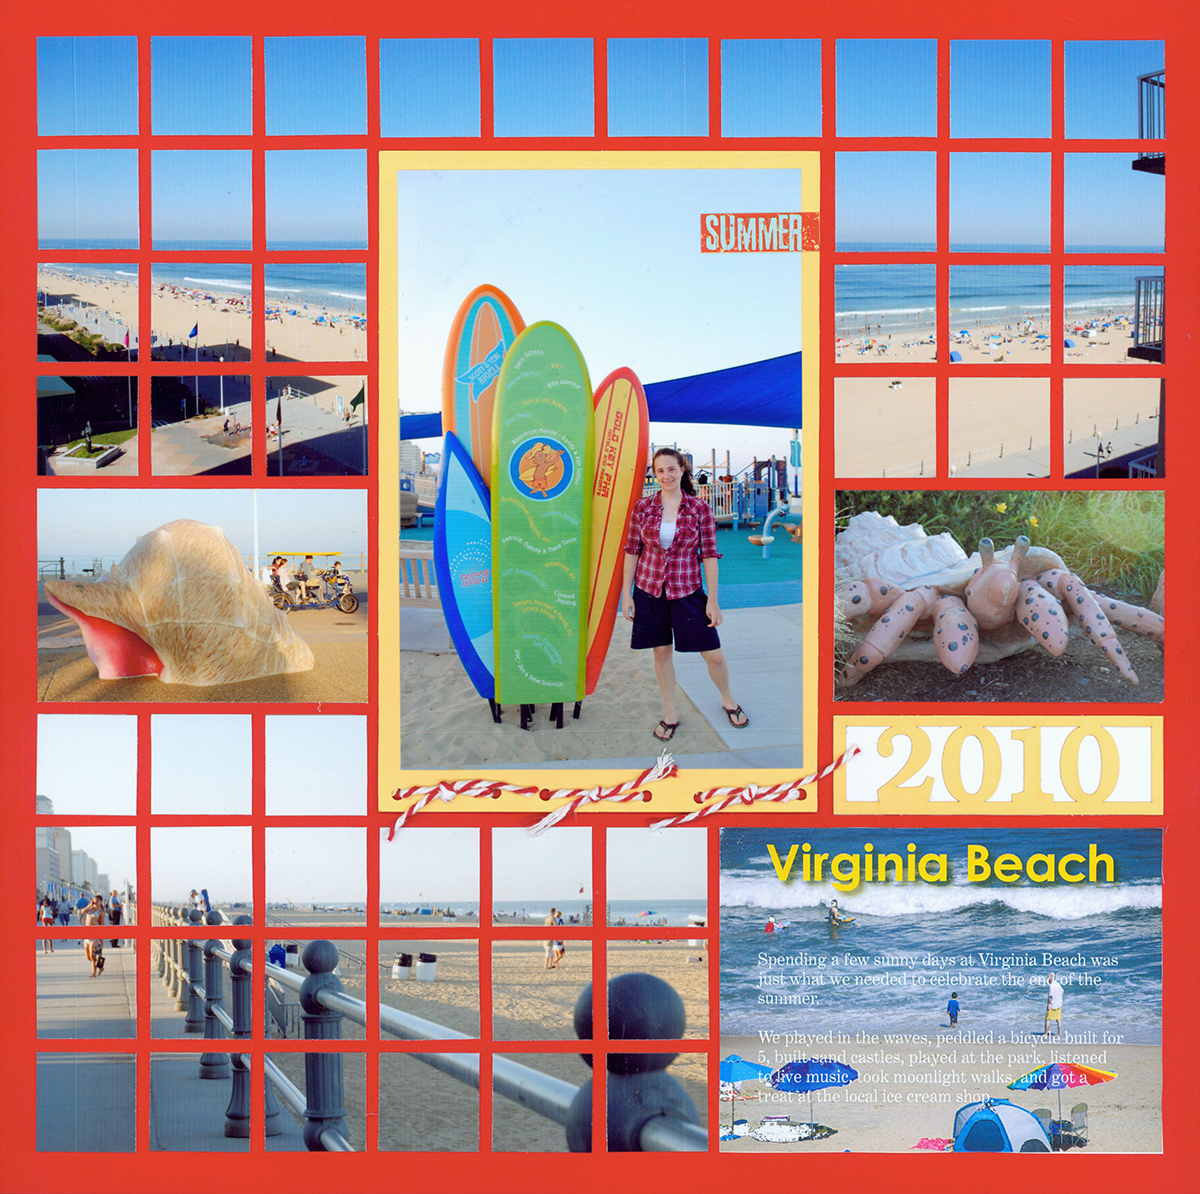
"Virginia Beach" by Tami Potter - Pattern #123
These shoreline photos are not conducive to creating a panoramic because they are shot from different angles.
However, the sky is the same color and can easily blend together across the top of the layout. Adding a large matted photo in the center adds to this magic.
Blend with Mats
Using thin photo mats around each piece of your photos allows you to create Mosaic Magic with photos of the same subject, that aren't necessarily near each other. Pretty cool, eh?