
Are you having trouble fitting your pictures in the layout you want to create? Have you struggled to fill your Mosaic Moments pattern with your pictures? Are your shots just not quite right? Or do you want to take your Mosaic Moments pages up a notch?
Then this article is for you! Here are the four photos habits for creating amazing layouts with Mosaic Moments dies.
#1 - Get up Close, then take several Steps Back
Before you began Mosaic Moments, you probably took many photos where your main subject took up most of the frame of your camera lens.
While these photos are still important to capture, for Mosaic Moments you will also need to take some steps back and take many of your photos further away than you are used to. When you create a layout you will probably need to fill smaller design spots - especially if you are using the speciality dies.
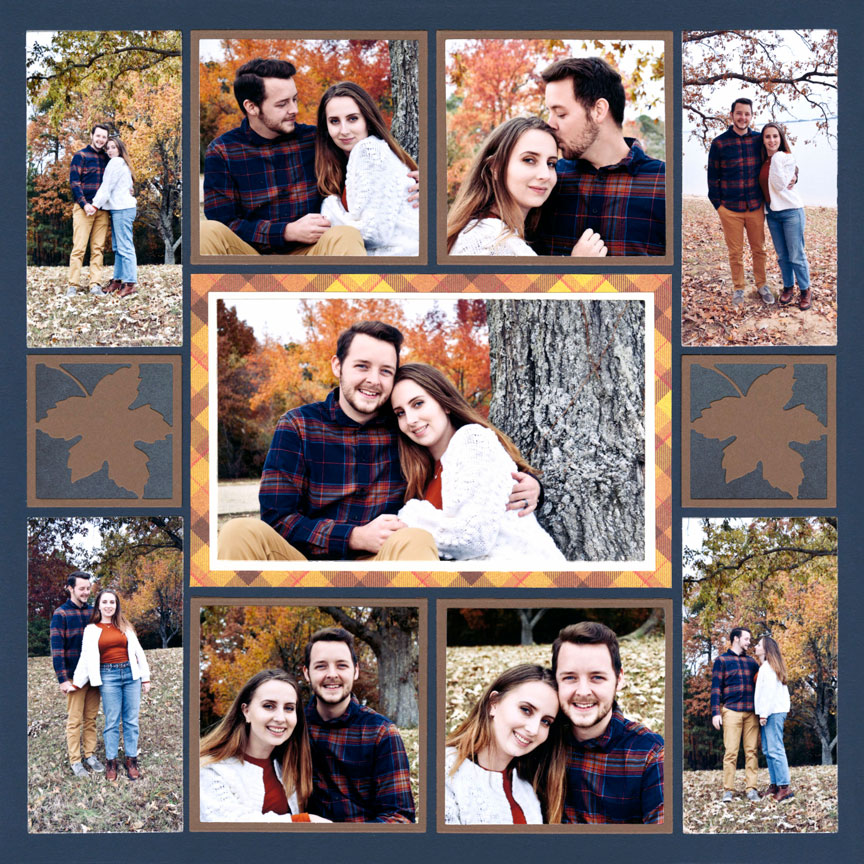
"Fall-ing for You" by Paije Potter - Pattern #565
This page is a great example of using different distances to take your pictures.
The center picture has a close-up photo many usually take with their camera - which makes a great focal point for layouts. She used the Basic Die Bundle and the Layering Die Bundle to enhance her center picture with plaid patterned paper and card stock. But, the photos in the four corners were taken much further back.
Not only do these portraits fit those smaller spaces, but they add interest to the layout.
At the zoo, you can take lots of photos from far away!
Here the tiger is taken from very far away in each shot and she fits perfectly in the center of the 3x4 Strip Frame Dies. The corner pictures are taken from a distance but much closer than the tiger pictures which adds interest to the page.
Paije has three distinct distances of photos and she put them in a balanced way on the layout - Up close in the center, far away on the sides and top, medium distance on the corners.
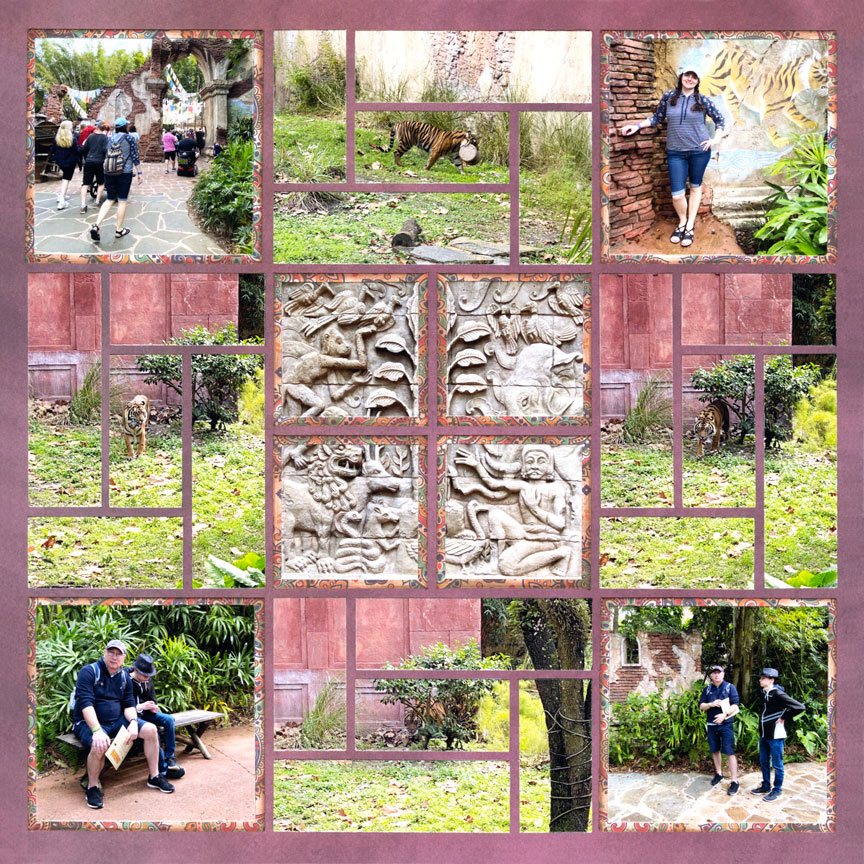
"Tiger Trek" by Paije Potter - Pattern #438
"Best Friends" by Jodi Benson - Pattern #335 (rotated)
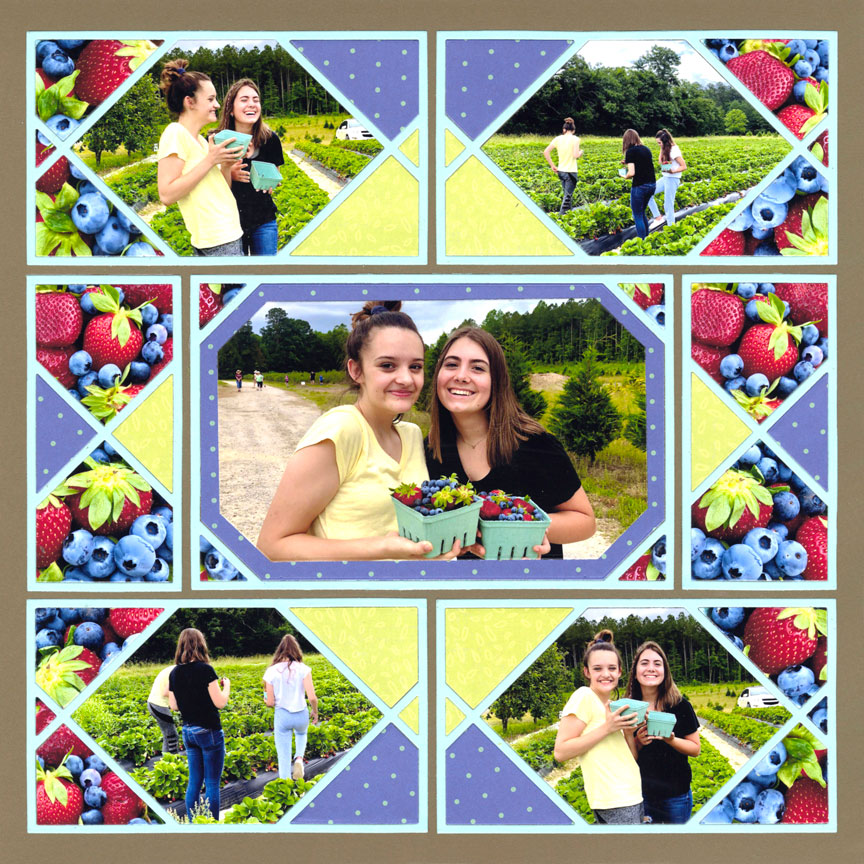
You may have noticed that our Adventure Level Dies have many design spots.
In order to use these dynamic designs you will need to take a few different types of pictures. The X Factor collection comes with a size that is perfect for a close up photo (shown in center, X-Factor 4x6), but to fill in the 3x5 Crisscross dies, Jodi used photos taken further away. For the smaller spaces you will need to adjust your photography.
Look at how Jodi took a very close up picture of the fresh berries to fill the smaller spaces.
Here, sweet BoBerry bunny is up close and personal!
To fill in the little corners of the Horizon dies, Paije was glad she took photos of the rabbit from further away. It's a great way to show him off more! Having different distanced shots not only allows you to fill the small spaces but it creates interest to your page.
It is nice to see the bunny from far away just as it is interesting to see the bunny close up.
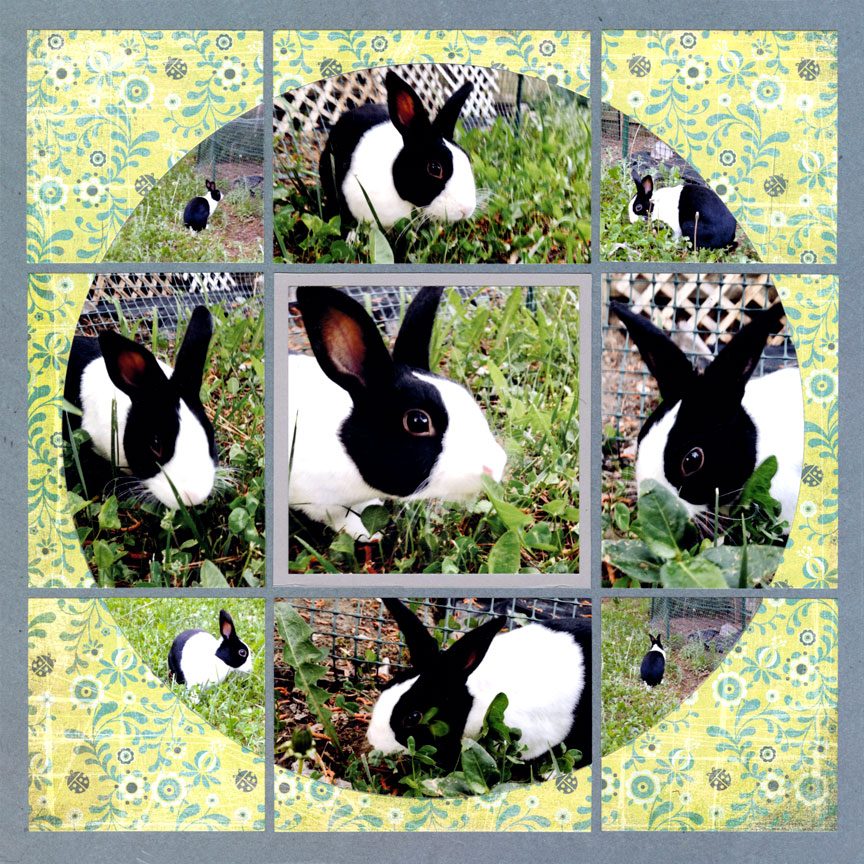
"BoBerry Bunny" by Paije Potter - Pattern #344
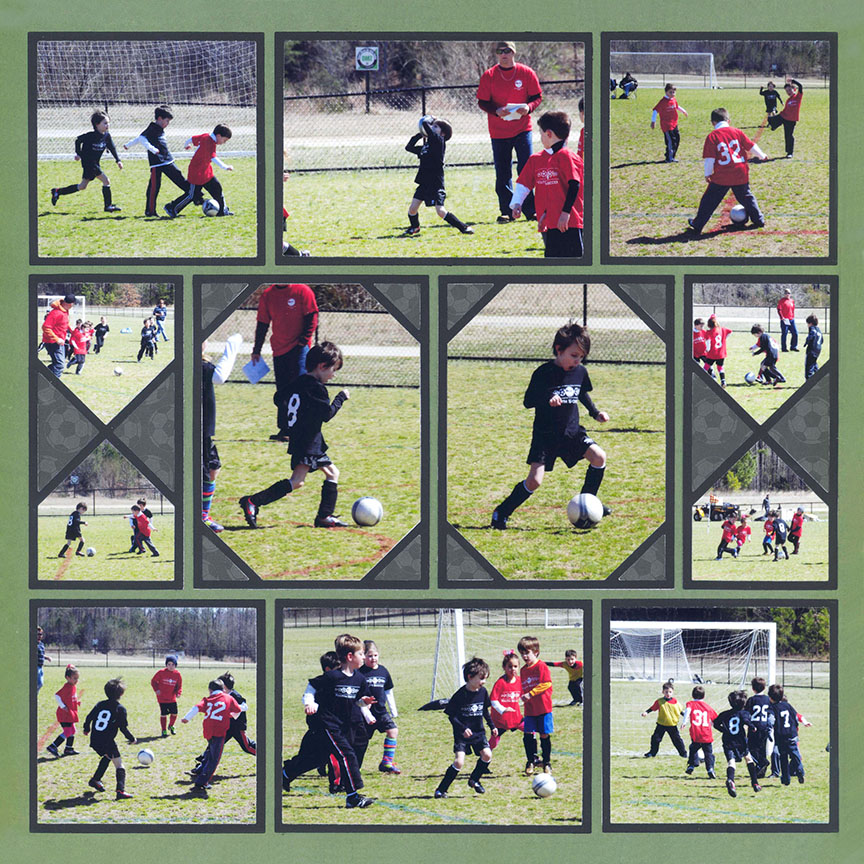
"Soccer" by Paije Potter - Pattern #371
Sporting events are a great opportunity to get distance shots.
And if you are like us, you take a ton of photos where you can barely see your favorite player! Placing the distance shots in small places gives this particular player more attention, plus it creates a great filler.
Even though most of these pictures are from a further distance, Paije still adds variety to the length of the distance.
She used the X Factor 2x4, X Factor 3x4, the Basic Die Bundle, and the Layering Die Bundle.
#2 - Take Vertical and Horizontal Photos
It's important to get in the habit of taking both vertical and horizontal photos.
Most people have a tendency to take their photos one way or the other. Whatever you take photos of, be sure to flip the camera vertically and horizontally. This way you will have a variety of photos to work with when you create your pages.
It only takes a few seconds to take shots both vertically and horizontally and then you will have lots of photos to work with!
Try to get in to this good Mosaic Moments habit. In this digital age having more photos than you need is not a problem. Having a mix of both horizontal and vertical photos mean you have more photos to fit on a layout! You never want to be missing one or the other when crafting your layout.
In “Pop Century”, Tami used two horizontal photos and four vertical photos to make this page.
Numbers Set Die, the Basic Die Bundle, and Layering Die Bundle were used to create this page.
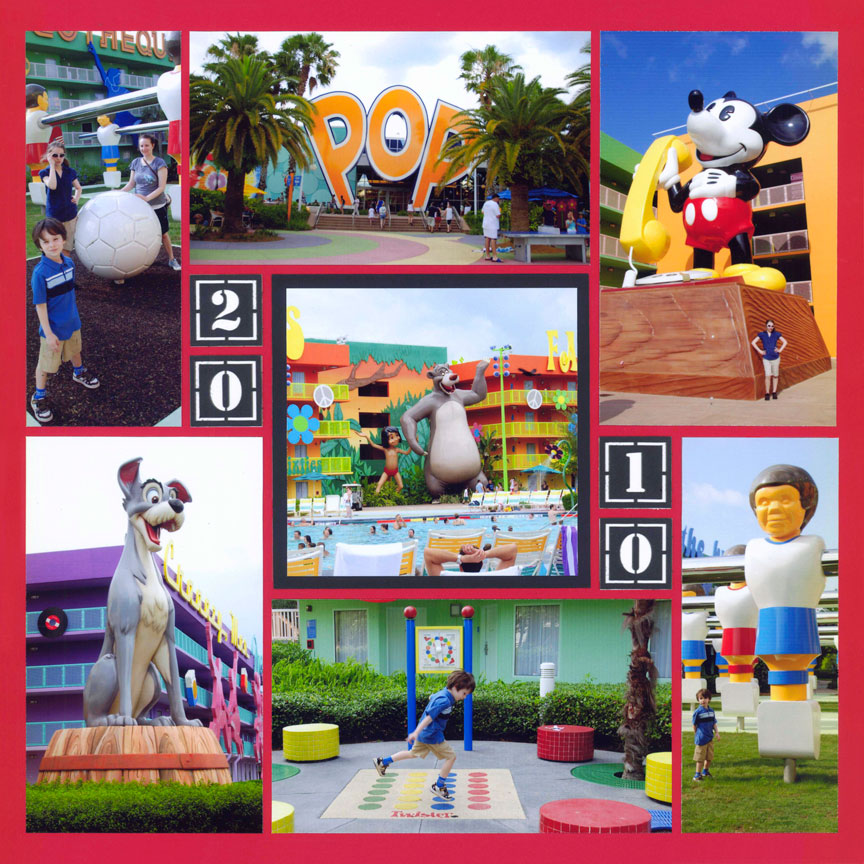
"Pop Century" by Tami Potter - Pattern #143
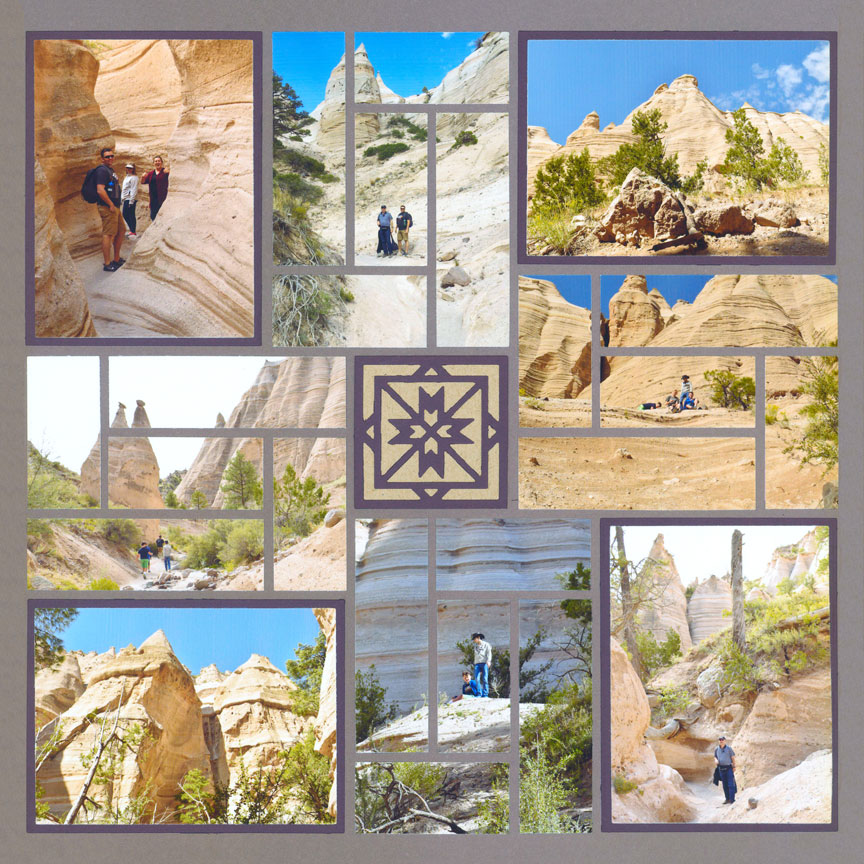
"Hike to Tent Rocks" by Paije Potter - Pattern #434 (slight adjustment)
Look at this example of a Pinwheel Pattern #434.
Pinwheel Patterns are a customer favorite! They usually use horizontal and vertical picture spots. They rotate around the center of the page.
Paije used the Strip Frame 3x4 for her long distance shots of her hike in between her matted pictures.
We all have those special times in our life and we want to use our specialty dies on our pages!
So many of the specialty die page designs have spots that go both horizontally and vertically. You want to have enough photos to fill these spaces. Paije needed both horizontal and vertical shots to make this layout.
She placed her focal shot on top of the Sweetheart 4x4 Die in the center. The result is gorgeous.
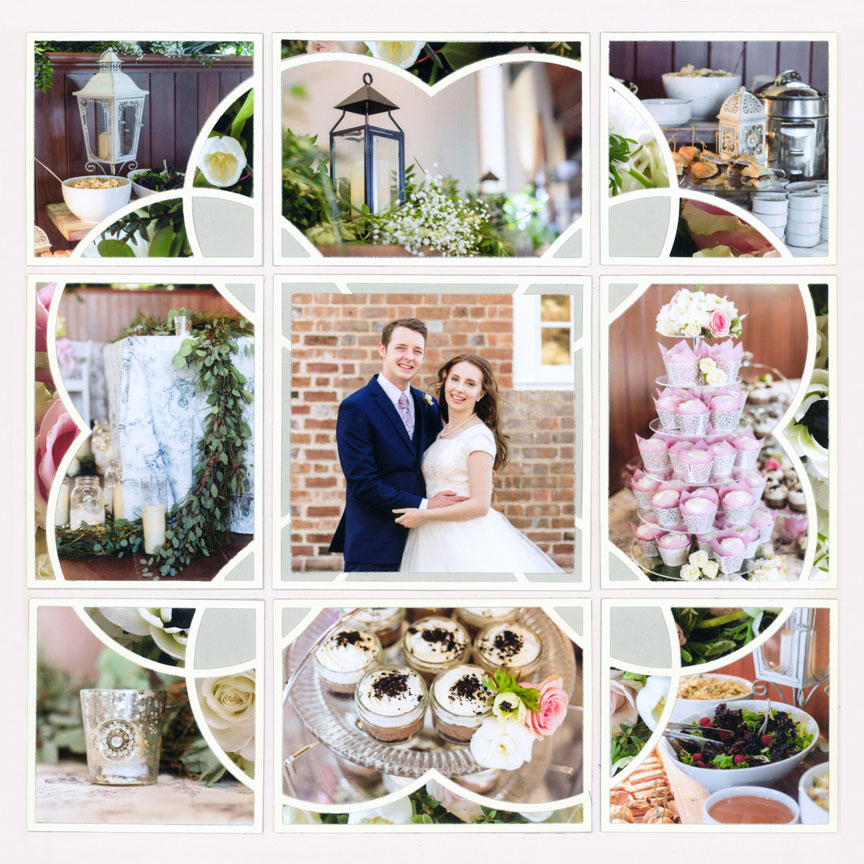
"Reception Details" by Paije Potter - Pattern #344
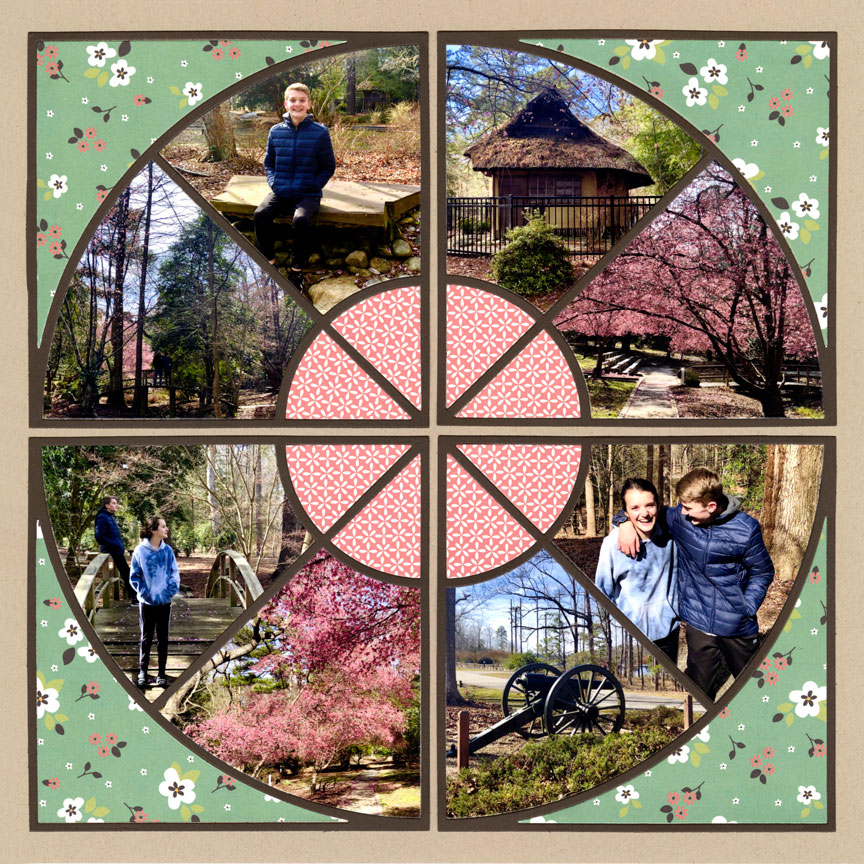
"Newport News Park" by Jodi Benson - Pattern #431
Dial Dies and Pie Dies create one big circle on your paper.
The spaces go all around the layout - therefore it’s best to have a variety of photos to choose from. Take many shots horizontally and vertically as well as from different distances. That is the secret to success when using these dies. Easy as Pie!
Jodi made sure she had both vertical and horizontal shots when making her page, “Newport News Park”.
#3 - Take Panoramic Photos
If you are at a location with wonderful scenery or a cityscape, it is a must to take photos for a panorama! You never know when you will need them to create a stunning layout and you will want to capture those vistas!
Tip: To take panorama shots, first point your camera toward the furthest left side of the scene. After that shot, take a look at the right side of your lens. Now rotate your body so the left side of your lens lines up on the edge of the previous shot. Keep doing this until you get the entire scene.
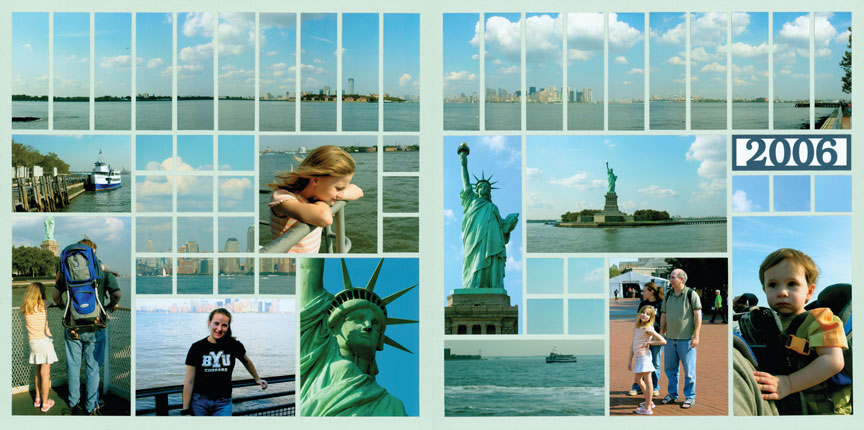
"Liberty Island" by Tami Potter - free-styled design
It would have been very difficult to get this entire New York City scene in just one shot. So, Tami took multiple shots and blended them together on her layout to create this amazing panorama!
This free-styled two page design looks cohesive because of the panorama spanning the top of the pages made with the 1x3 Strips Die. Tami also used the One Inch Grid Die and the Basic Die Bundle.
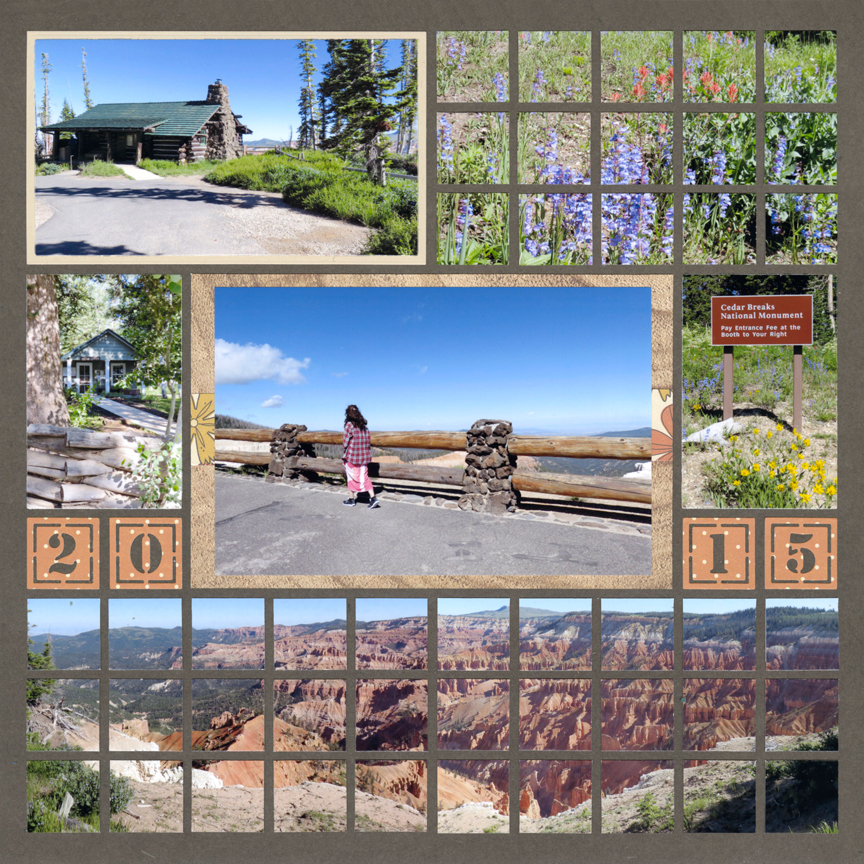
"Cedar Breaks" by Paije Potter - Pattern #286
Isn't the canyon on the bottom of this layout beautiful?
This page would not have the same impact without the panoramic shot. You could have taken this photo in one shot, but Tami took it with two shots to get the panorama look later. Because this was made it into a larger panorama, this scenery has a much bigger impression than if it was just one 4x6 photo.
You can look at this page and feel like you are actually at the canyon!
Don't forget to take panorama shots vertically too for a longer look!
This scene of the double arch gives a huge impression because of the panorama design. This layout might seem overwhelming to make but with the Strips 1x5 Die, Basic Die Bundle, and Corner Tile Die it becomes quite simple.
Try a panorama shot on your pages!
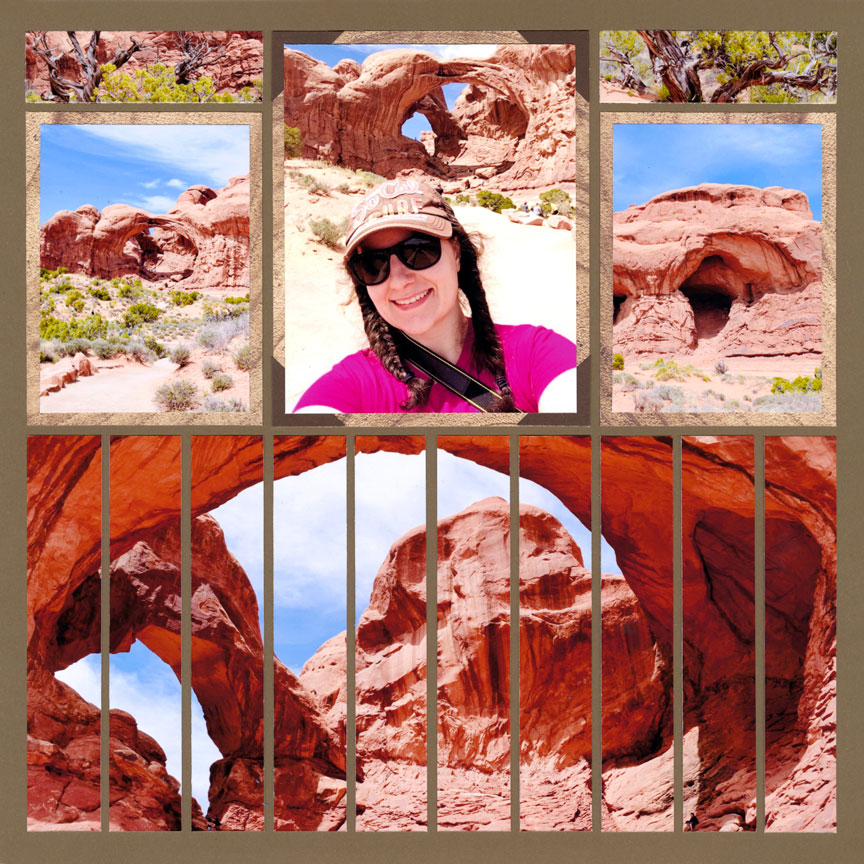
"Double Arch" by Paije Potter - Pattern #588
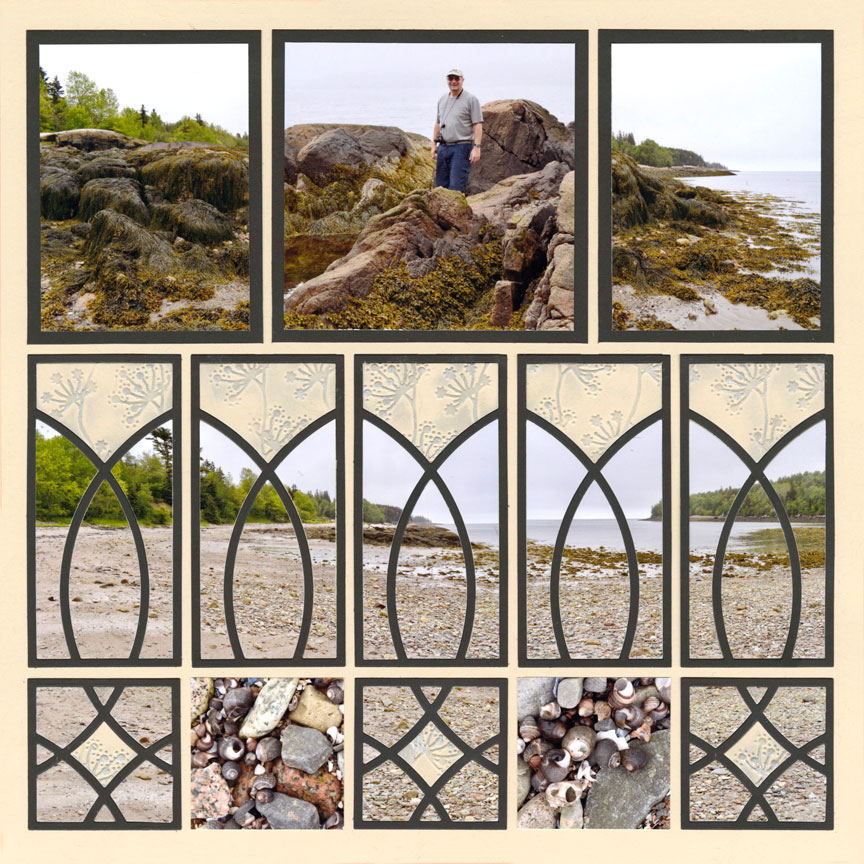
"Maine Landscape" by Tami & Paije Potter - Pattern #472
Panoramas are not just for the strip or mosaic dies.
Here, Tami used the 2x4 and 2x2 Clover Dies. In the top row, she also made a panorama with the Basic Die Bundle! You don't have to leave out your favorite people from your panoramas either. Take some panoramic shots with your subjects in the distance with the sight you are trying to capture.
Don't forget the great close up shots of the terrain - The texture always adds to the story of your page and shows where you are.
Panoramas can also be created with the Dynamic Die Set.
We love how there is room for all of your portrait photos, but you can still fit in the scenery also! Tami used the dies to add a scenery shot and frame her subjects on the water.
She kept the water line in each picture at the same level so it looks like one panoramic picture.
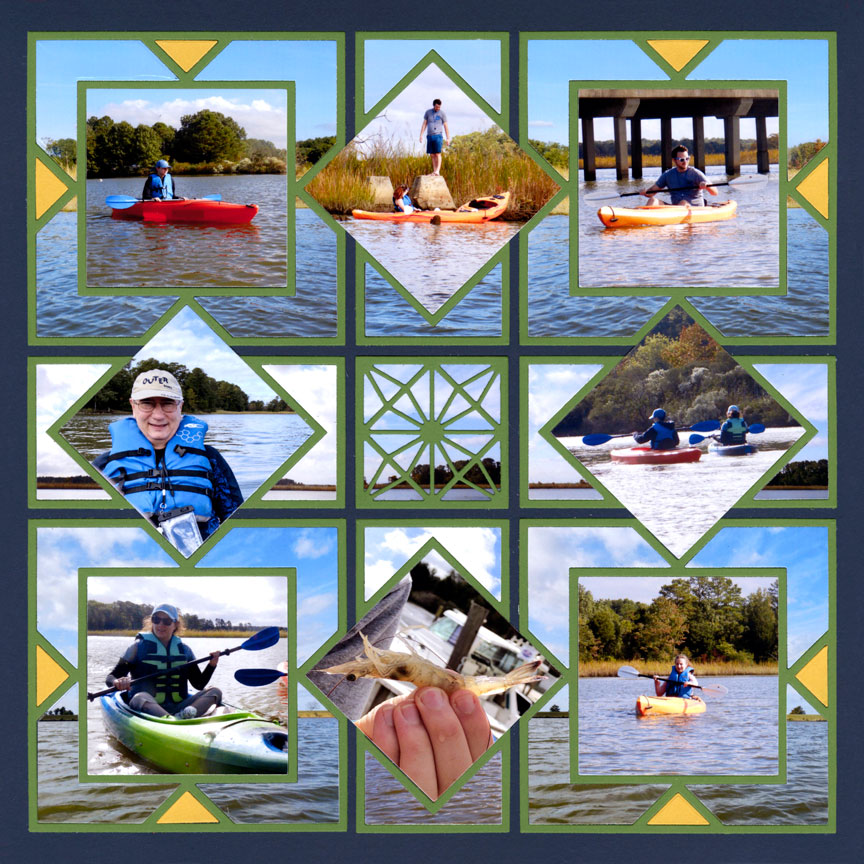
"Fall Kayaking" by Tami Potter - Pattern #368

"Welcome to San Juan" by Paije Potter - Pattern #196
A small panoramic still has a big impact on your pages!
Here Paije used these scenic photos of Puerto Rico to fill in the strip sections. Most of the layout shows details within the city, but Paije also likes to give the big picture of where she was.
We love how she used bright colors to tell the story of her travels. She used the Basic Die Bundle and the Strips Cut 1x3 Die.
#4 - Capture All of the Details!
Do you want to the know the secret to creating amazing Mosaic Moments® layouts?
It's getting photos of all the little details that surround you! Not only do these photos add interest to your layouts, they make great fillers for the little spaces on the specialty dies.
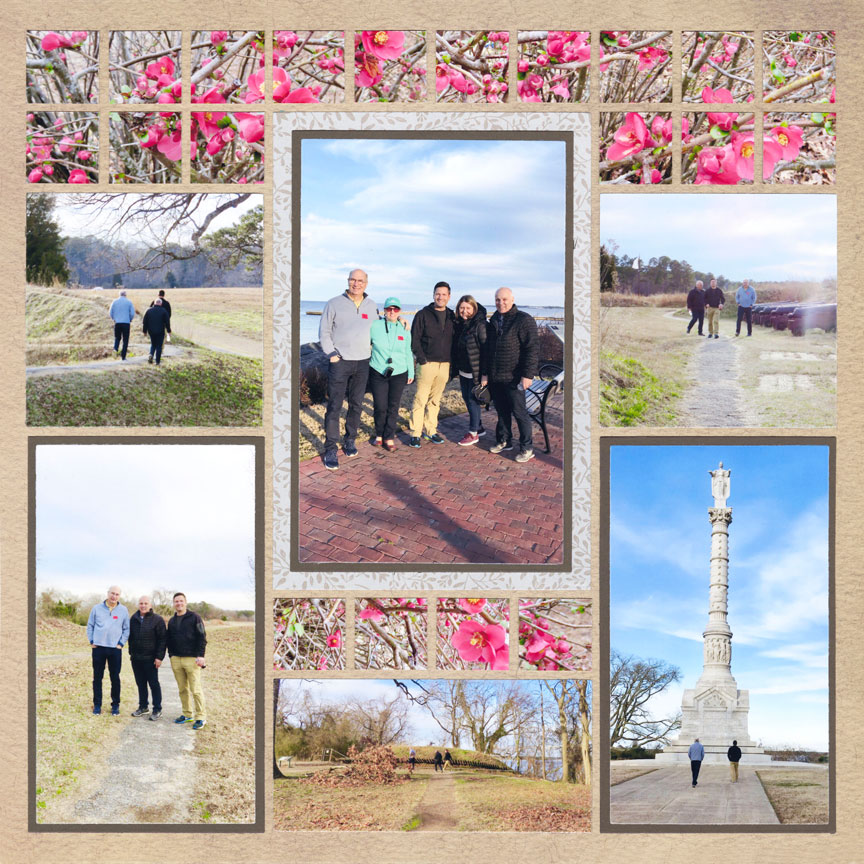
"Visit to Yorktown" by Paije Potter
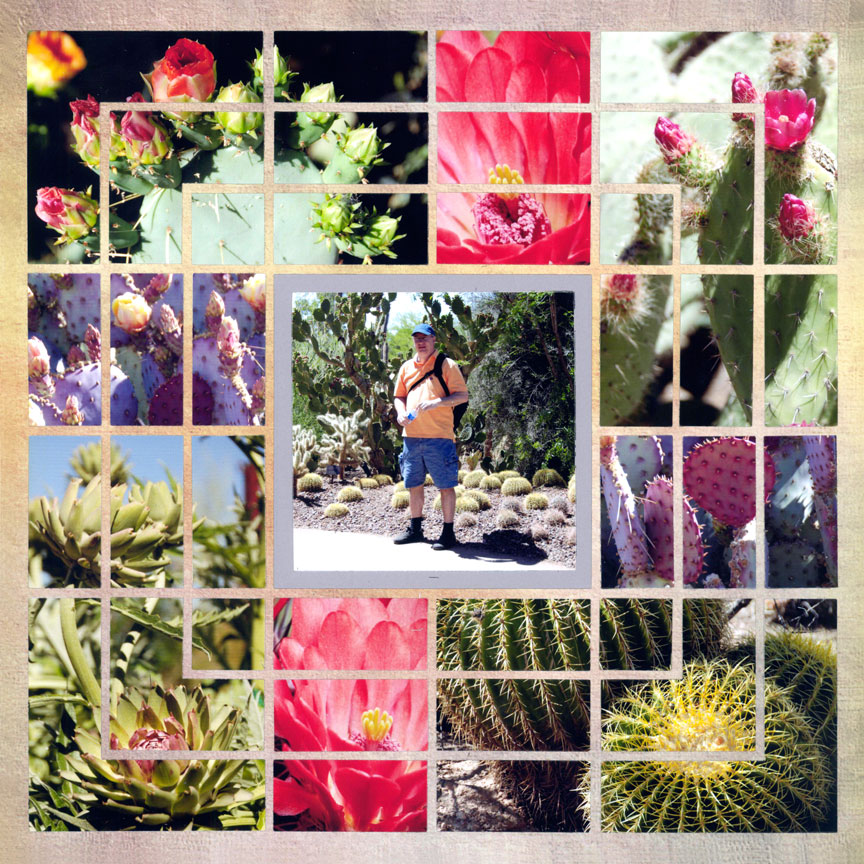
"Cactus Garden" by Paije Potter
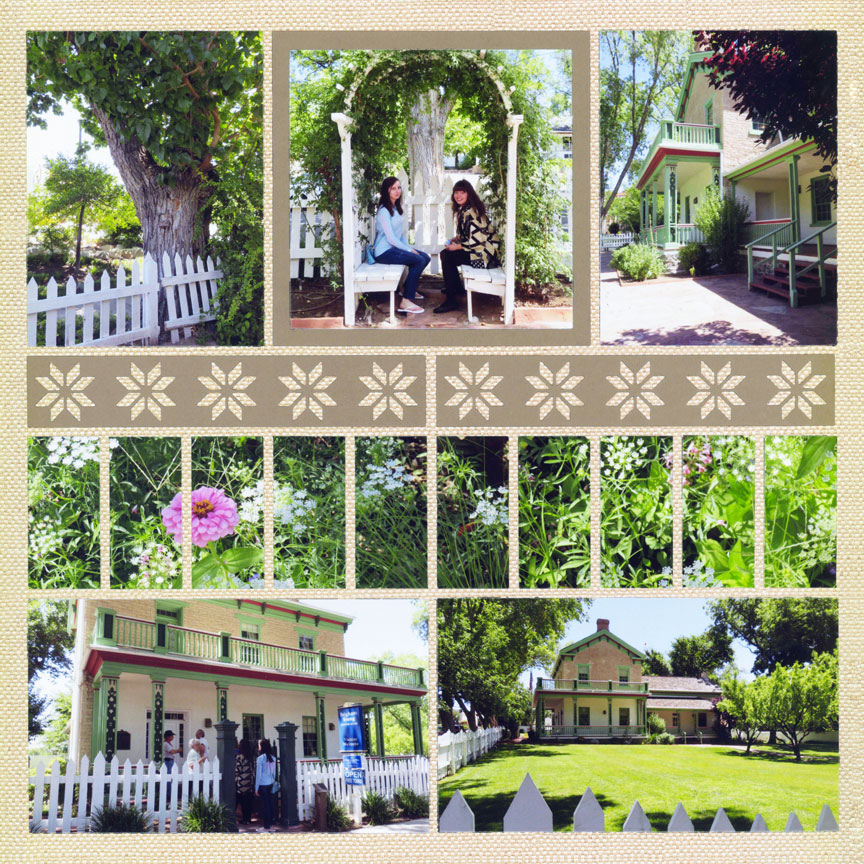
"House Tour" by Tami Potter
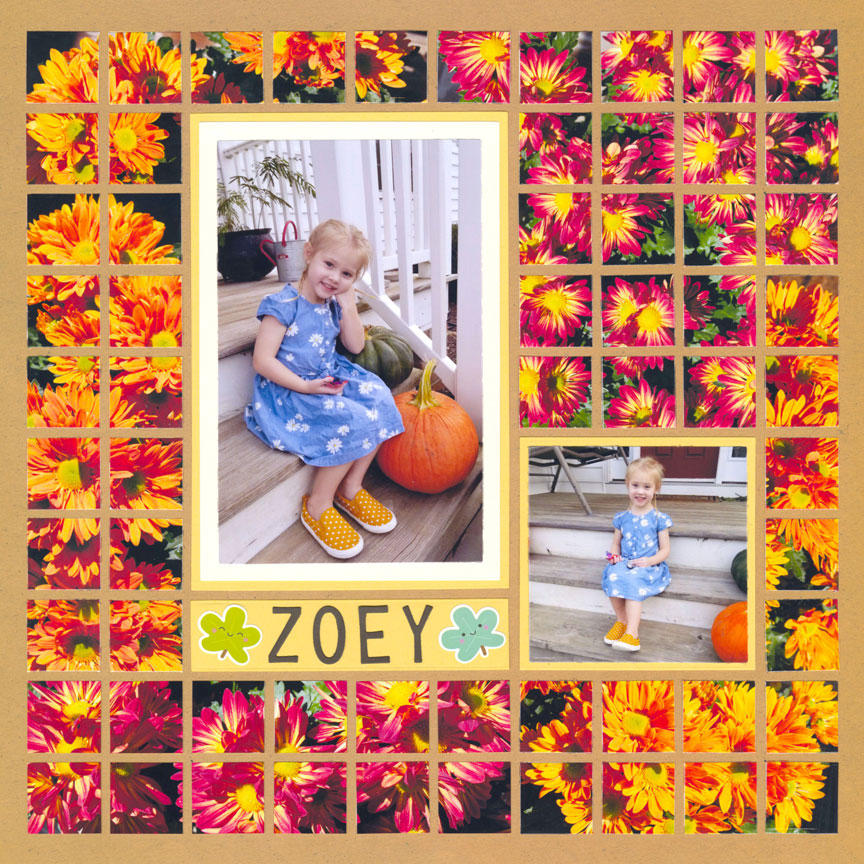
"Fall Flowers" by Lauren Jones
Look up and down!
Many people assume the brick is a pattern paper - but it's actually a photo Tami took in New Orleans. Thankfully she looked down at her feet to get this beautiful shot and it made an excellent mosaic. Walkways, grass, sand, and everything else at your feet can help tell your story and bring texture and dimension to your pages.
Photos taken of the sky and trees can bring interest to your pages as well!
Tami used Numbers Set Die, One Inch Grid Die Set, Basic Die Bundle to make this page.
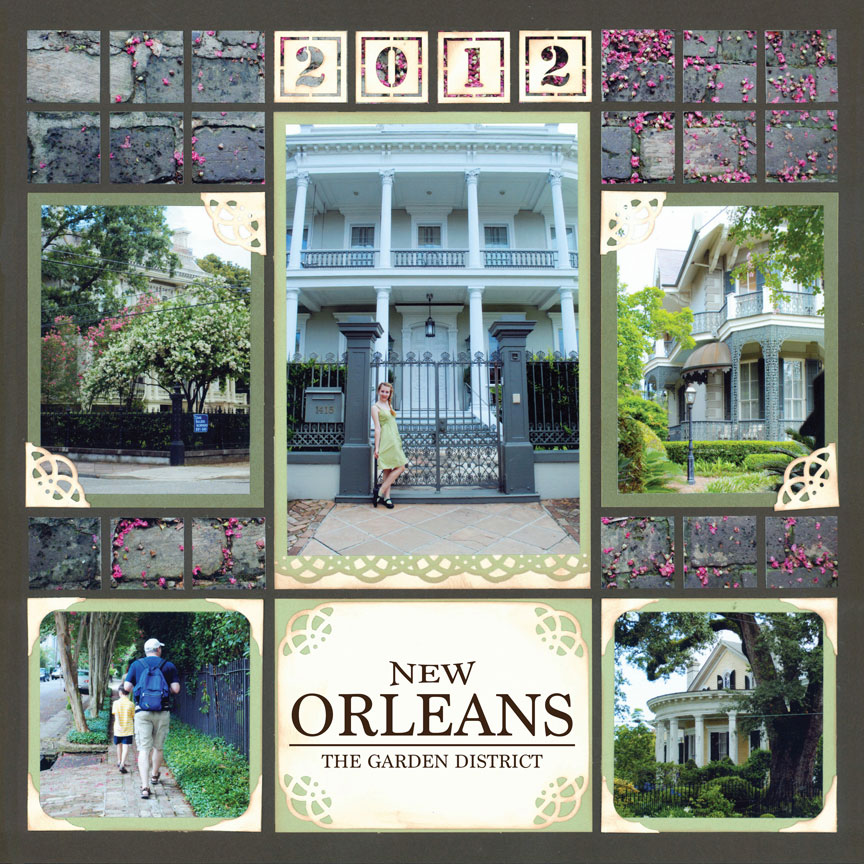
"New Orleans" by Paije Potter - Pattern #118
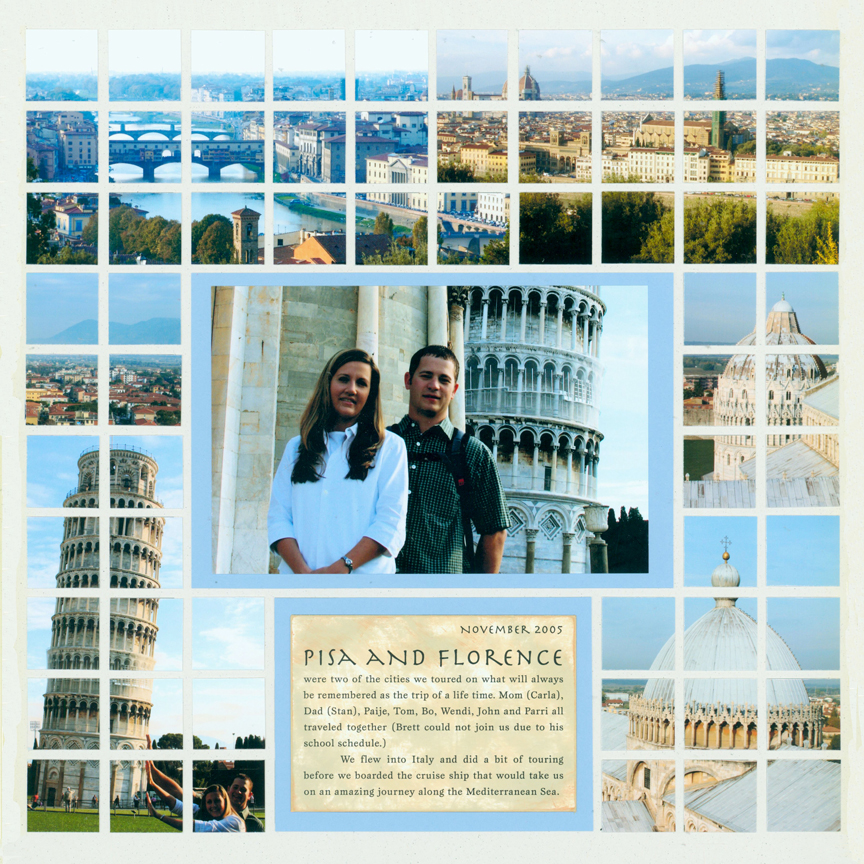
"Pisa & Florence" by Tami Potter - Pattern #232
Architecture is not a little detail, but we wanted to show how wonderful buildings look as mosaics.
Many times these photos are left in storage boxes, but there is room on a Mosaic Moments layout to show more photos from your trip!
Pictures of buildings tell the story of your page. Creating mosaics of these pictures is super easy with the One Inch Grid Die!
Who needs patterned paper when the ground has such treasures?
Look at these photos of pebbles along the shore that frame the layout of this page. It almost looks like tiny sparkly gems framing Paije's Sadie!
Remember to take photos of the ground or walkways on your travels.
Paije used Circle Frame and Flowers Die Set.
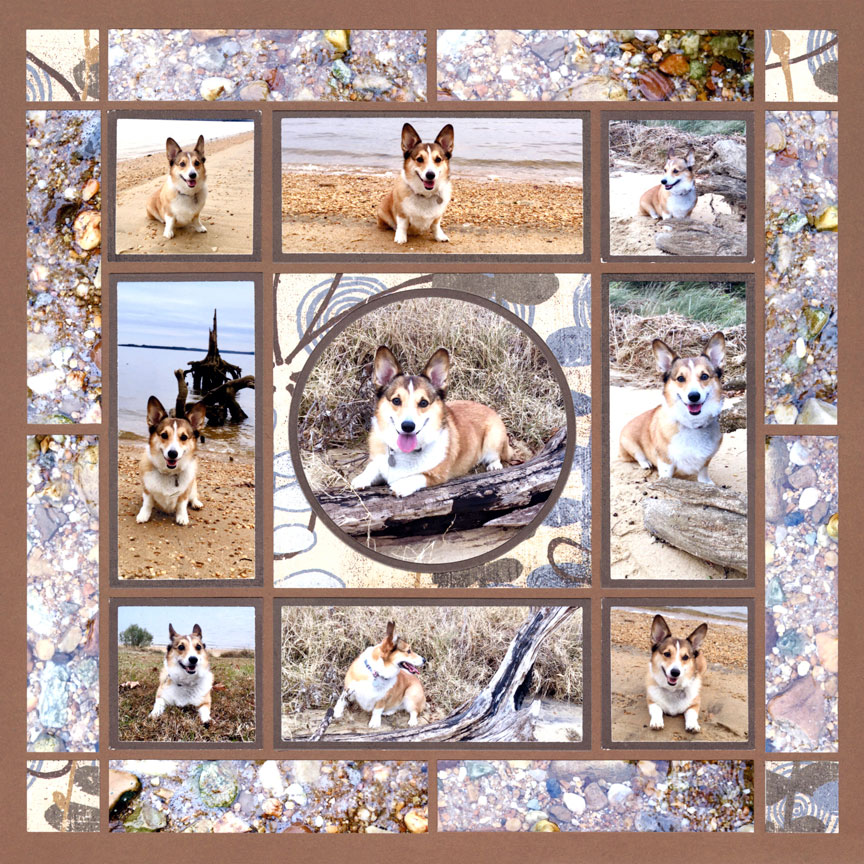
"Happy Sadie" by Paije Potter - Pattern #545
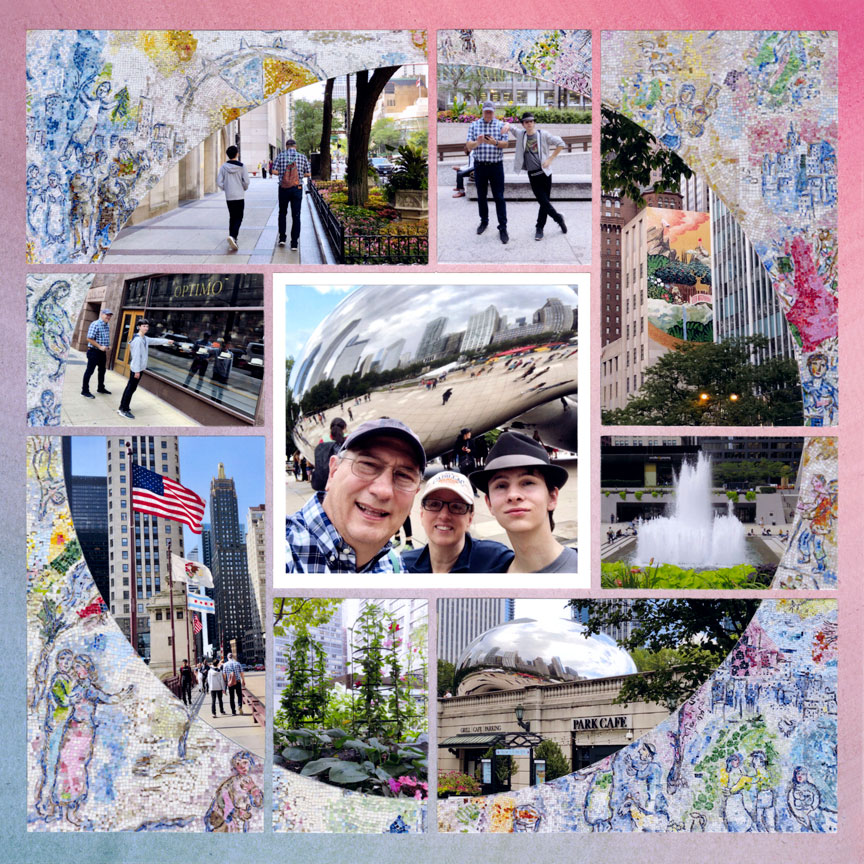
"Chicago Trip" by Tami Potter - Pattern #103
Be fearless and take photos of murals or mosaics found through out cities.
Art on the streets comes in many forms - statues, architecture, murals, mosaics, and even graffiti! There are many hidden treasures around town that add to your pages! They all tell the story and help you record your memories of those amazing trips.
You can use Horizon 3x5 A+B Die Set to make a page like this one.
Close ups of shells are perfect for beach pages!
It is those little details that make you feel like you are at the beach again! This amazing page looks so complex but it is actually simple. It just uses the natural texture found at the beach! Sand, shells, and water are shown to perfection. You can use the same textures on your pages!
Paije used X Factor 4x4, 2x4, Sea Life Die Set 1, and the Beach Comber Border Die Set for the little starfish embellishments to create this layout.
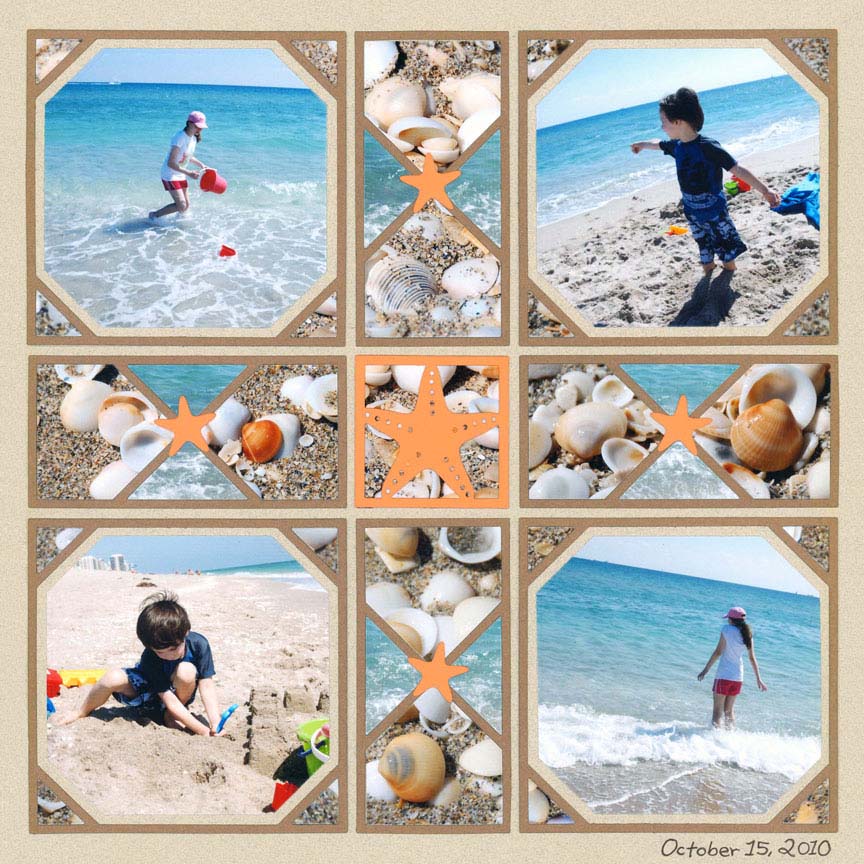
"Fall Beach Trip" by Paije Potter - Pattern #368
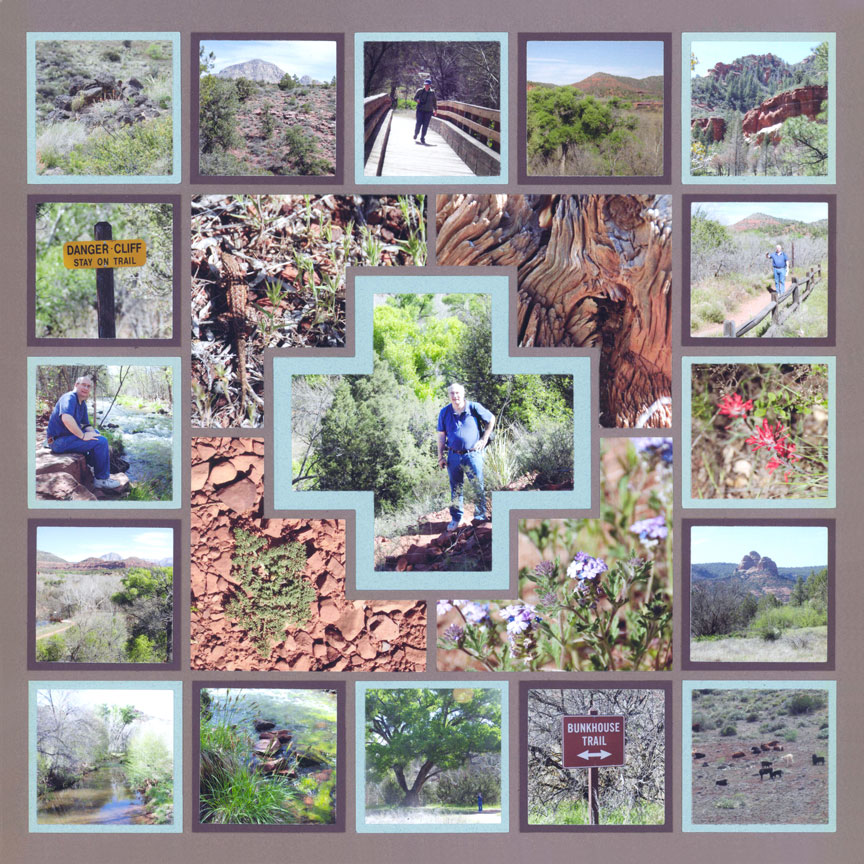
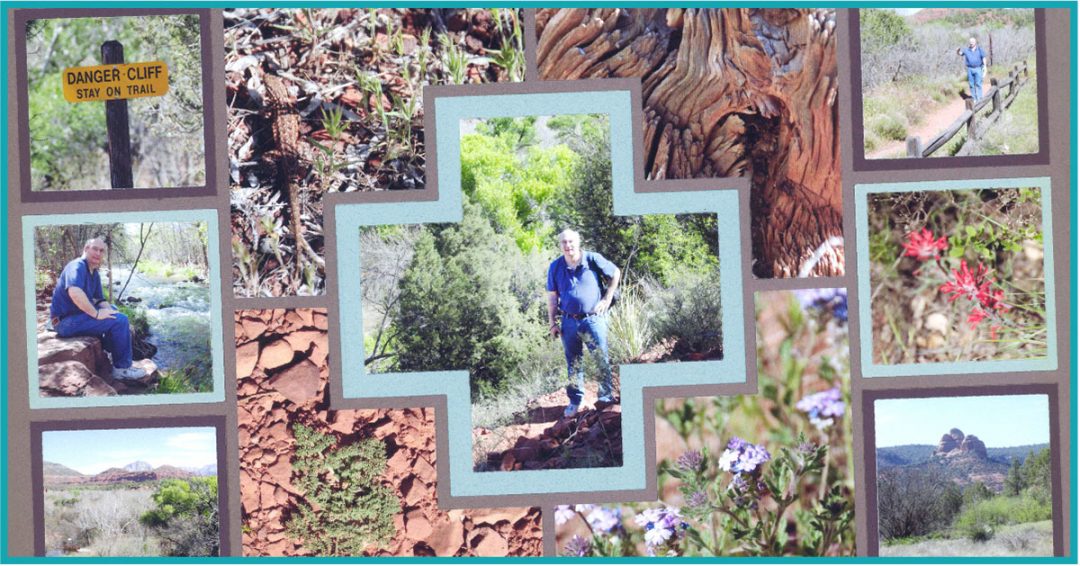
"Arizona Trails" by Paije Potter - Free-styled pattern
Sometimes there are multiple details we need to show!
In the center of this layout, Paije used the Steps dies to show off details from Arizona - tree bark, the desert ground, flowers and even a lizard in the grass! She also has a lot of horizon shots showing the sky and the vegetation. Noticing the details around you on your travels gives you a richer experience as well as richer Mosaic Moments scrapbook pages!
Use Four Corner Cut-Out Die Set, and the Steps Die Set to make a page like this!