

Featuring: the Chevron Die, the Beach Comber Die, the Daisy Row set, Acorn Borders, Mr. Snow and Flakes Die sets and the 2×2 Circle Center die from the Circle Scallop die set
 Tips and Techniques for creating a 2018 Year in Review Layout

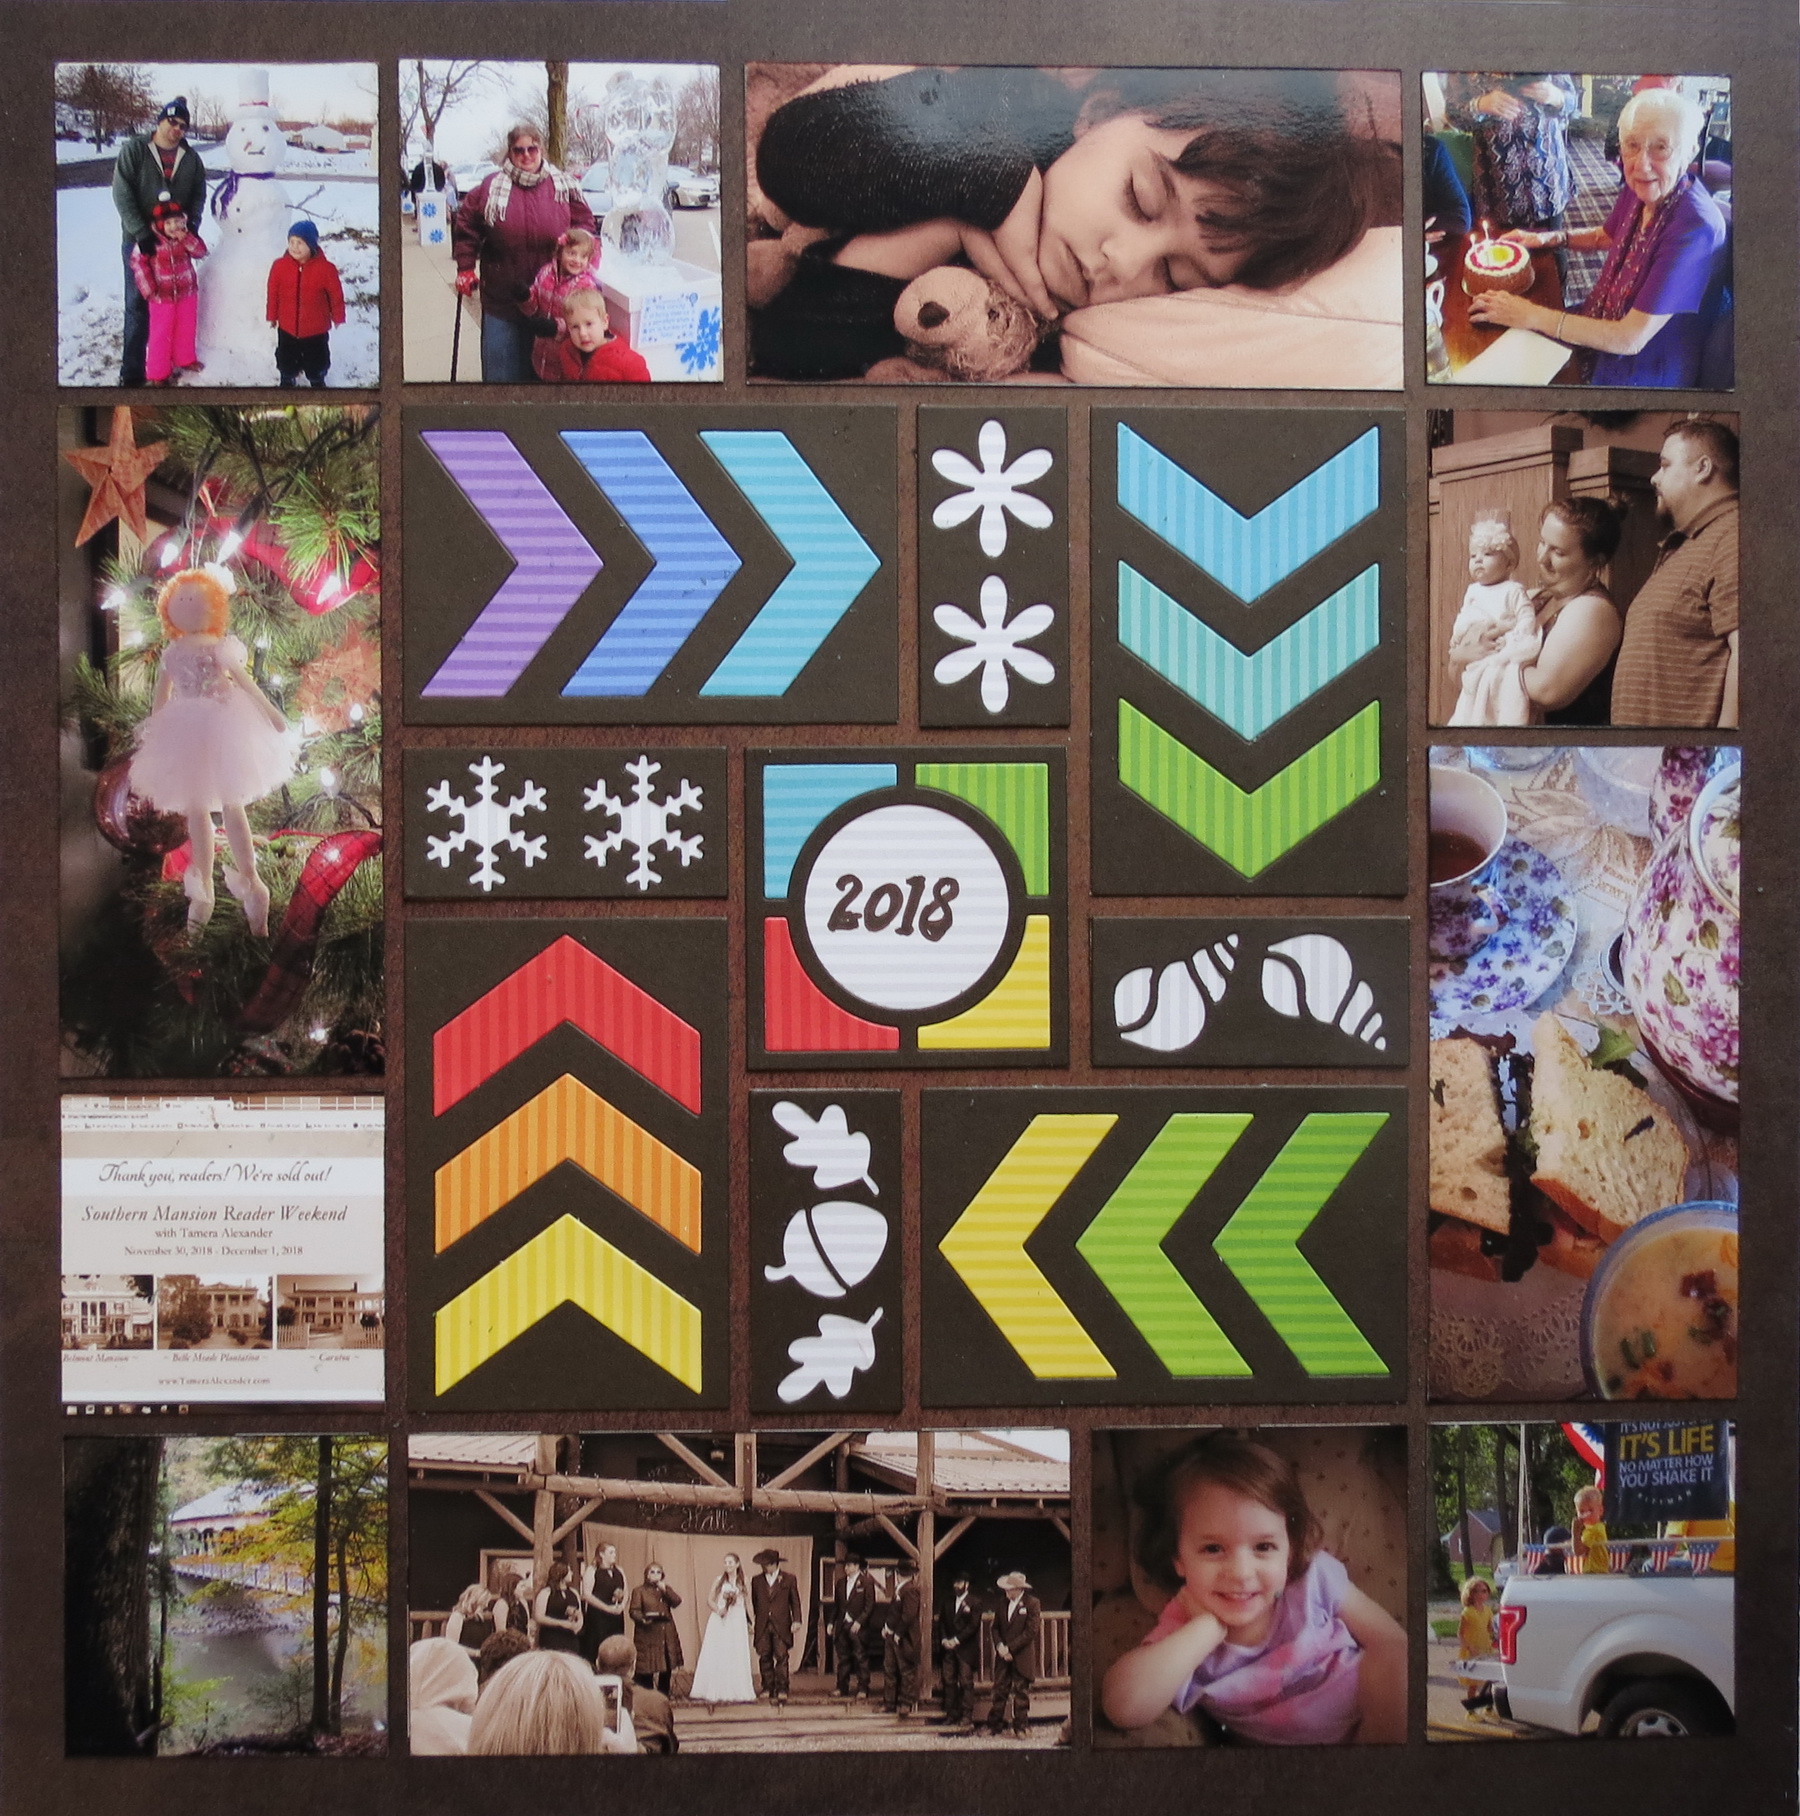
As 2018 comes to a close it’s always good to look back at the year as it has been. If you are up to date on all your scrapbooking for this year you might find this 2018 Year in Review layout a perfect summation of your year or a perfect title page to place at the beginning of your album to introduce the pages to come. Whatever your choice may be, I hope this page might give you a little inspiration for assembling one of your own.
Now, this isn’t the first time I’ve covered this subject but this year I wanted something different. Apart from the date indicating the year, there is no journaling. If you are telling your story through all your other pages from the year, this one really doesn’t need to include it.
Mosaic Moments Photo Tips: 2018 Year in Review
THE PATTERN
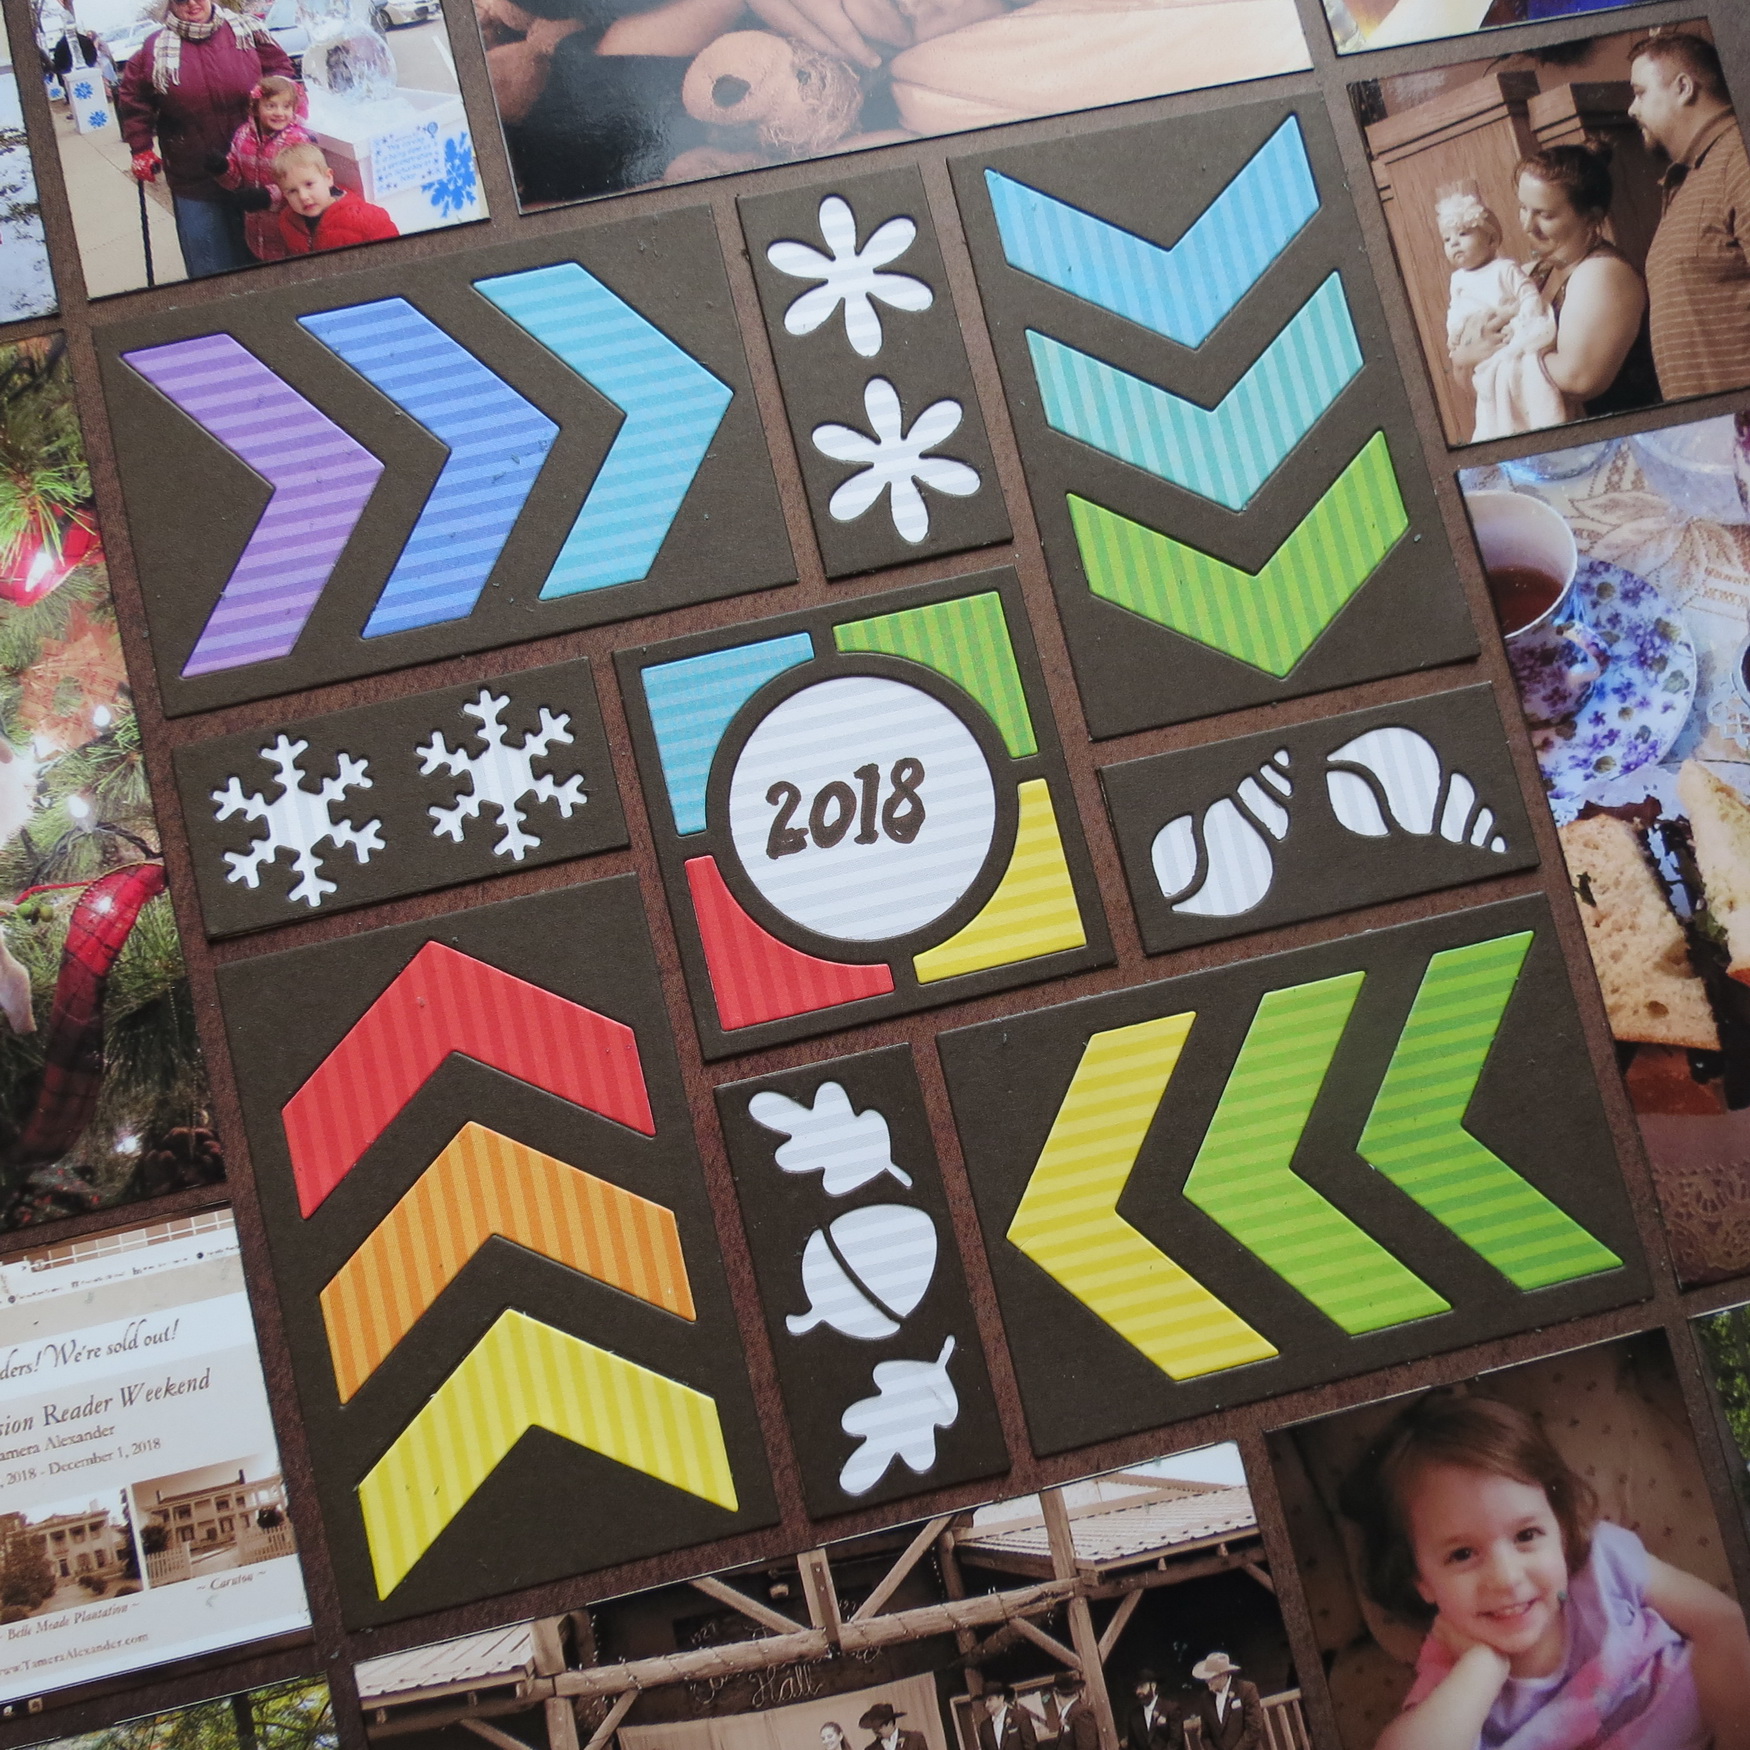
I found what I think is the perfect pattern for a 12-month review it’s from the Pattern Gallery, Pattern #429 a pinwheel pattern. There are 12 border spots, just right for one picture a month, plus a center area for something more. I began with January in the top left and worked around clockwise. Most are 2×2’s but each side also has a 2×4 spot.

Mosaic Moments Pattern #429 a pinwheel pattern
TIP:
I also chose to turn one photo on each side into a sepia version to help cover up some uneven color tones I couldn’t edit out.
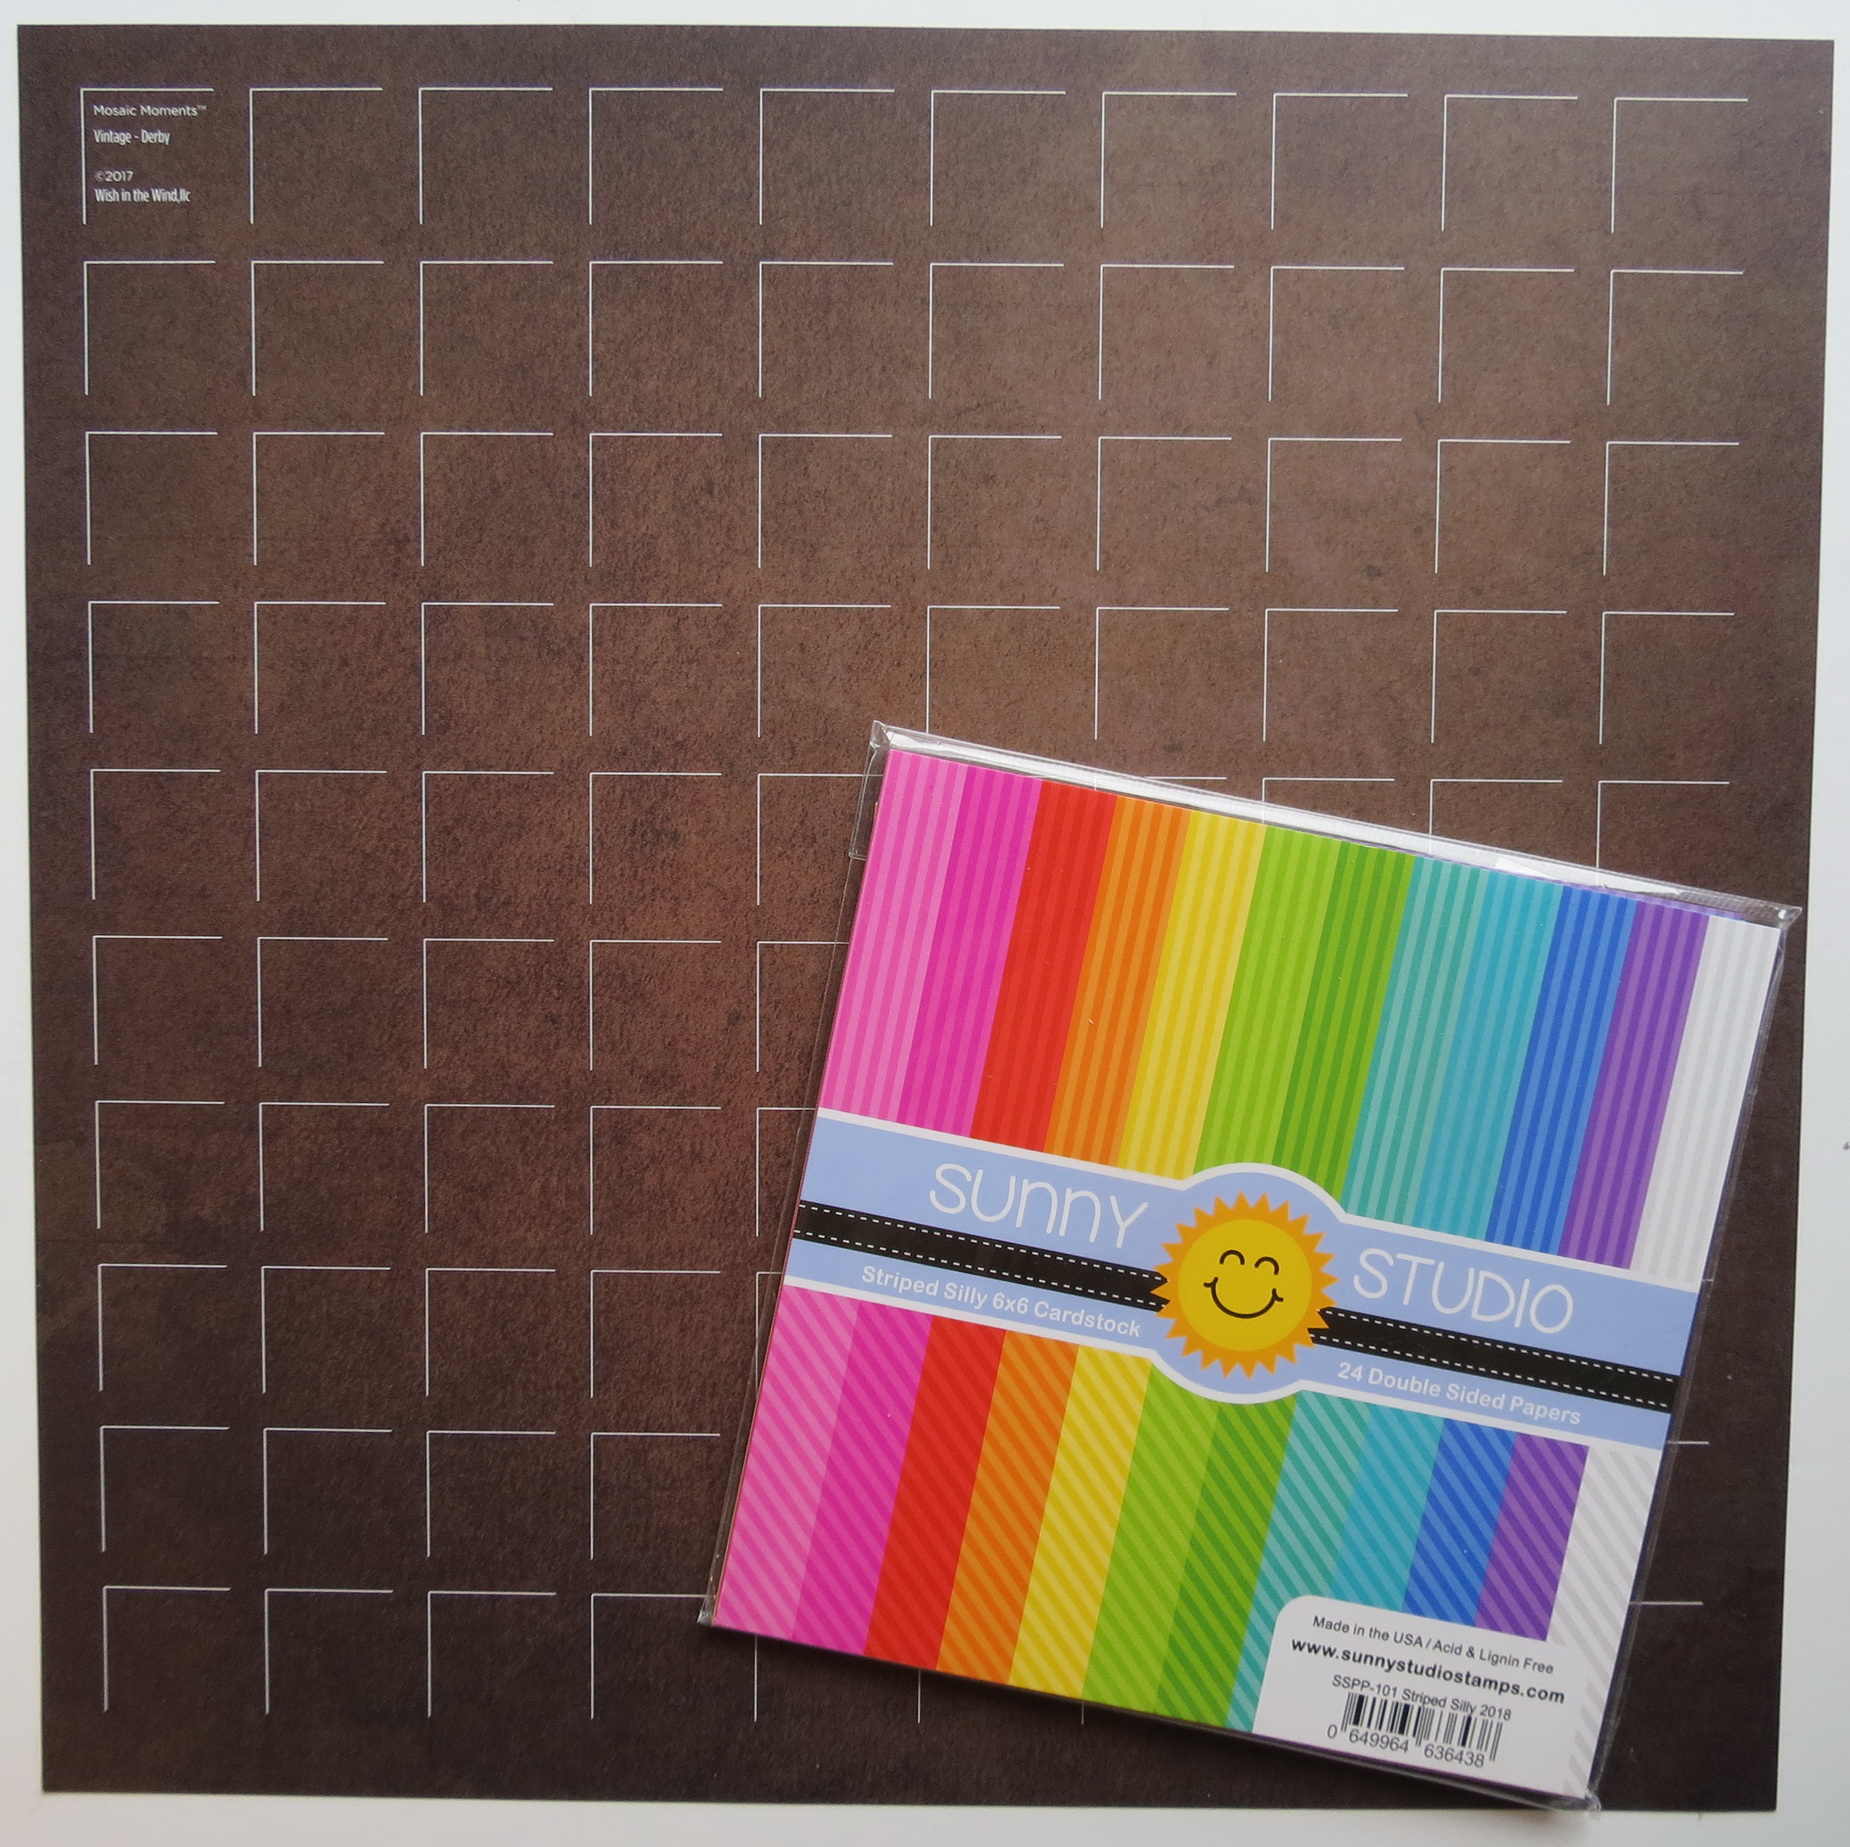
Using a sepia filter also added a level of drama to each of these special photos. In the end, including sepia tones helped me to choose the Derby Grid from the Renaissance Collection of Mosaic Moments Grid Paper a deep, rich brown grid.
Mosaic Moments Photo Tips: Sepia tones for drama and to fix colors you can’t edit SPRING
Mosaic Moments Photo Tips: Sepia tones for drama FALL

Mosaic Moments Photo Tips: 2018 Year in Review SUMMER
Mosaic Moments Photo Tips: 2018 Year in Review WINTER
THE DIES
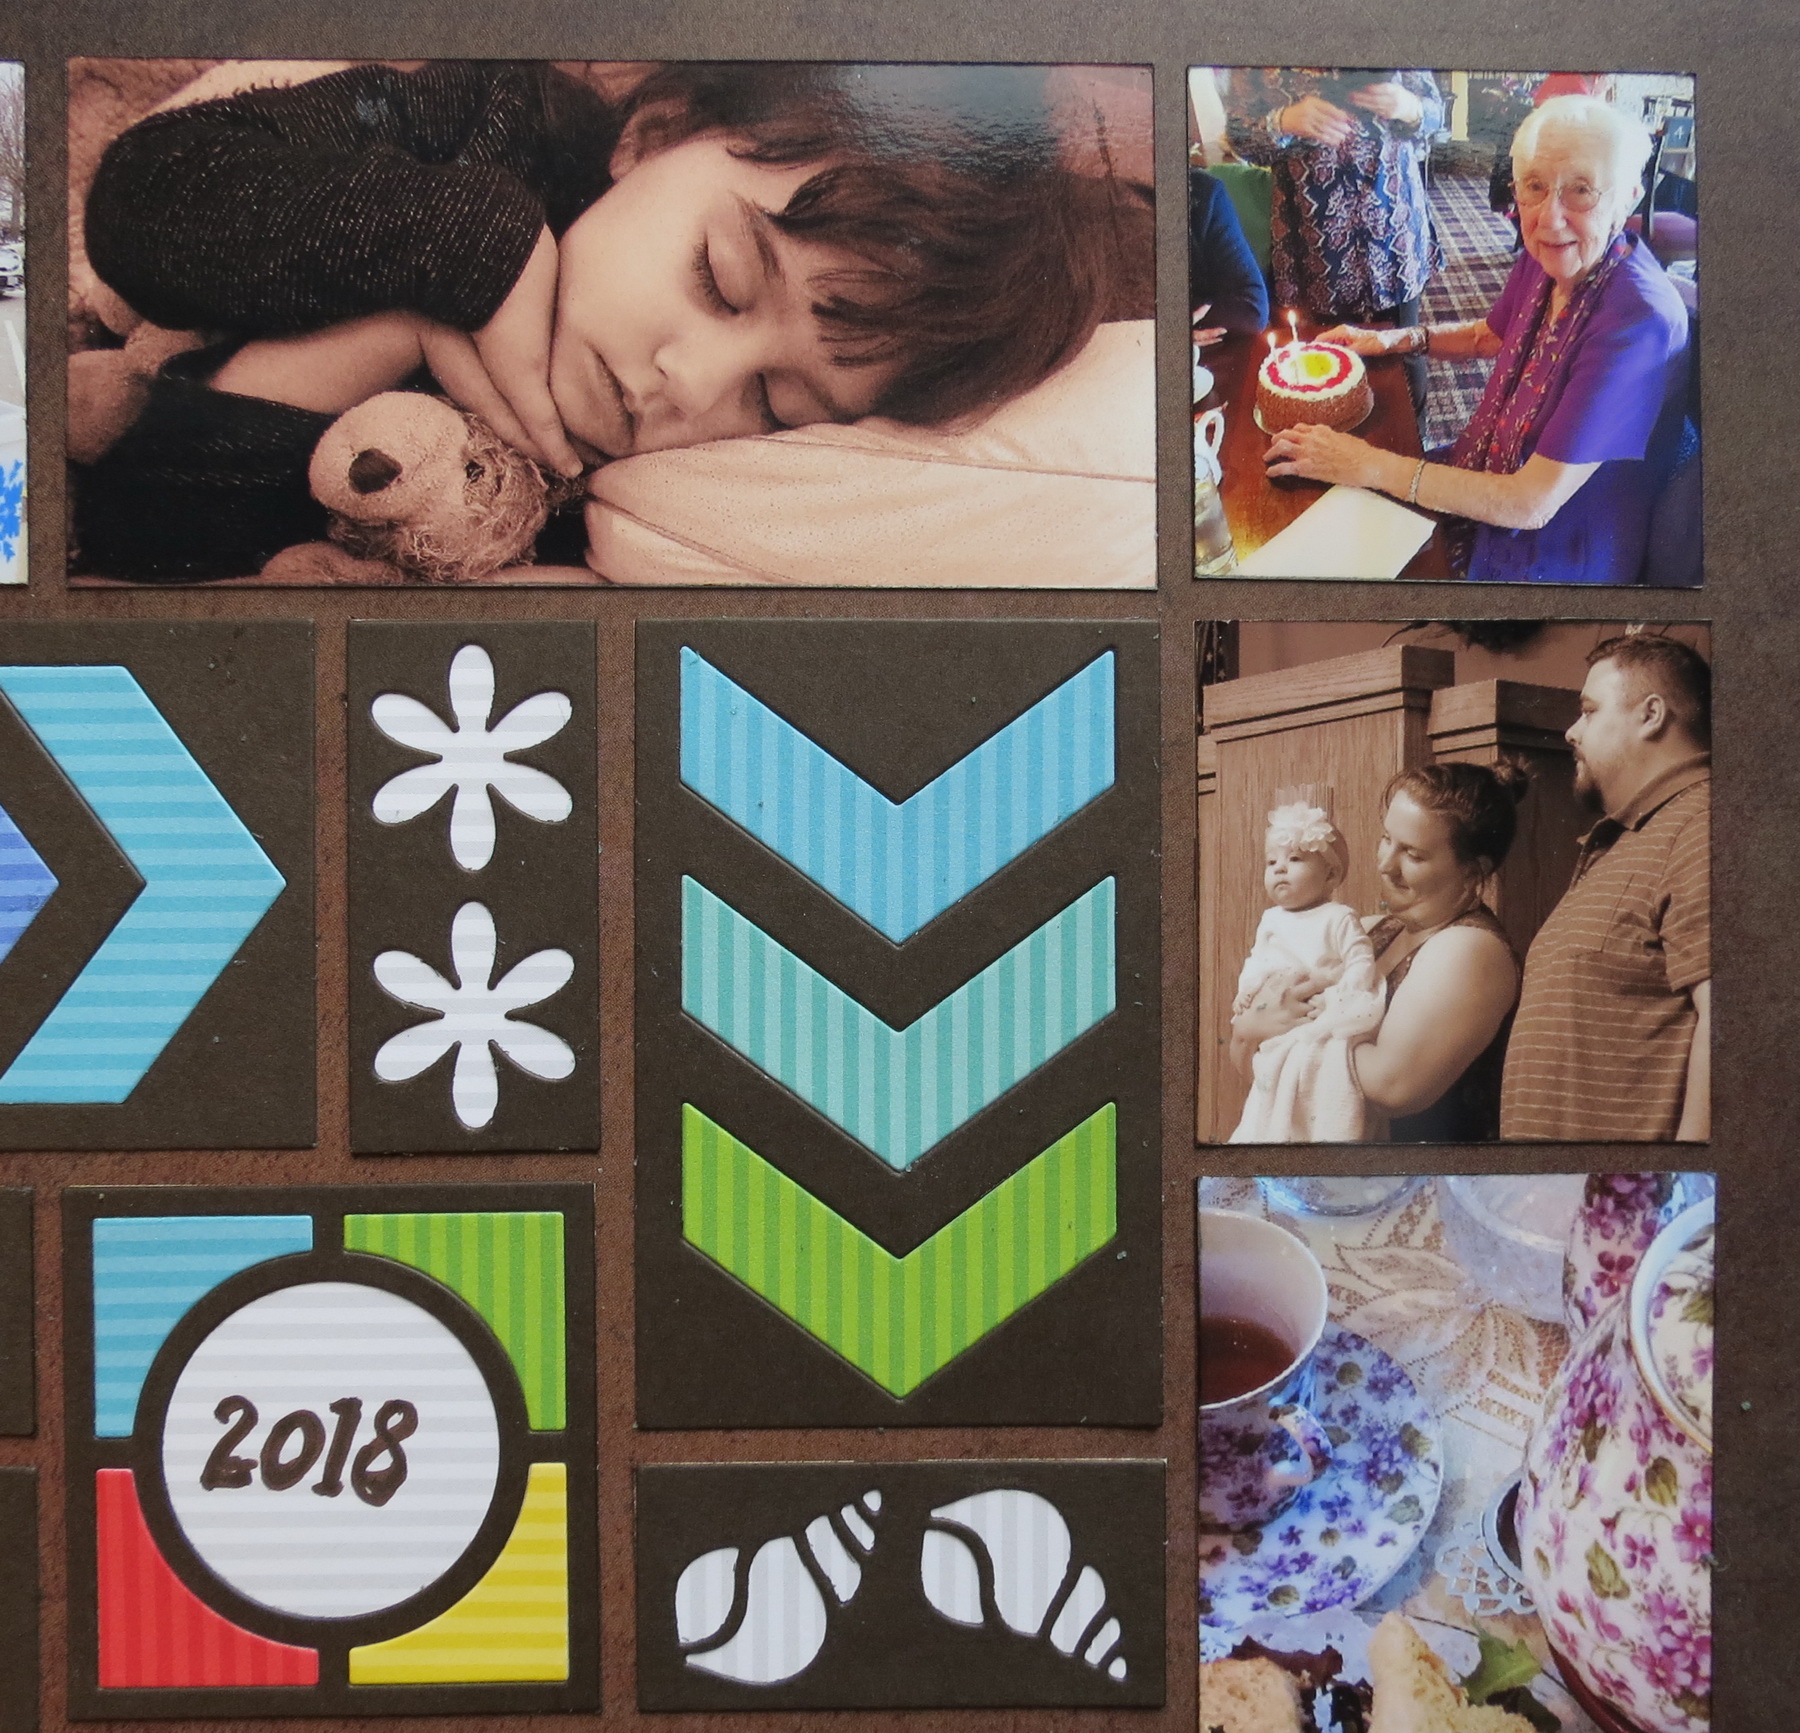
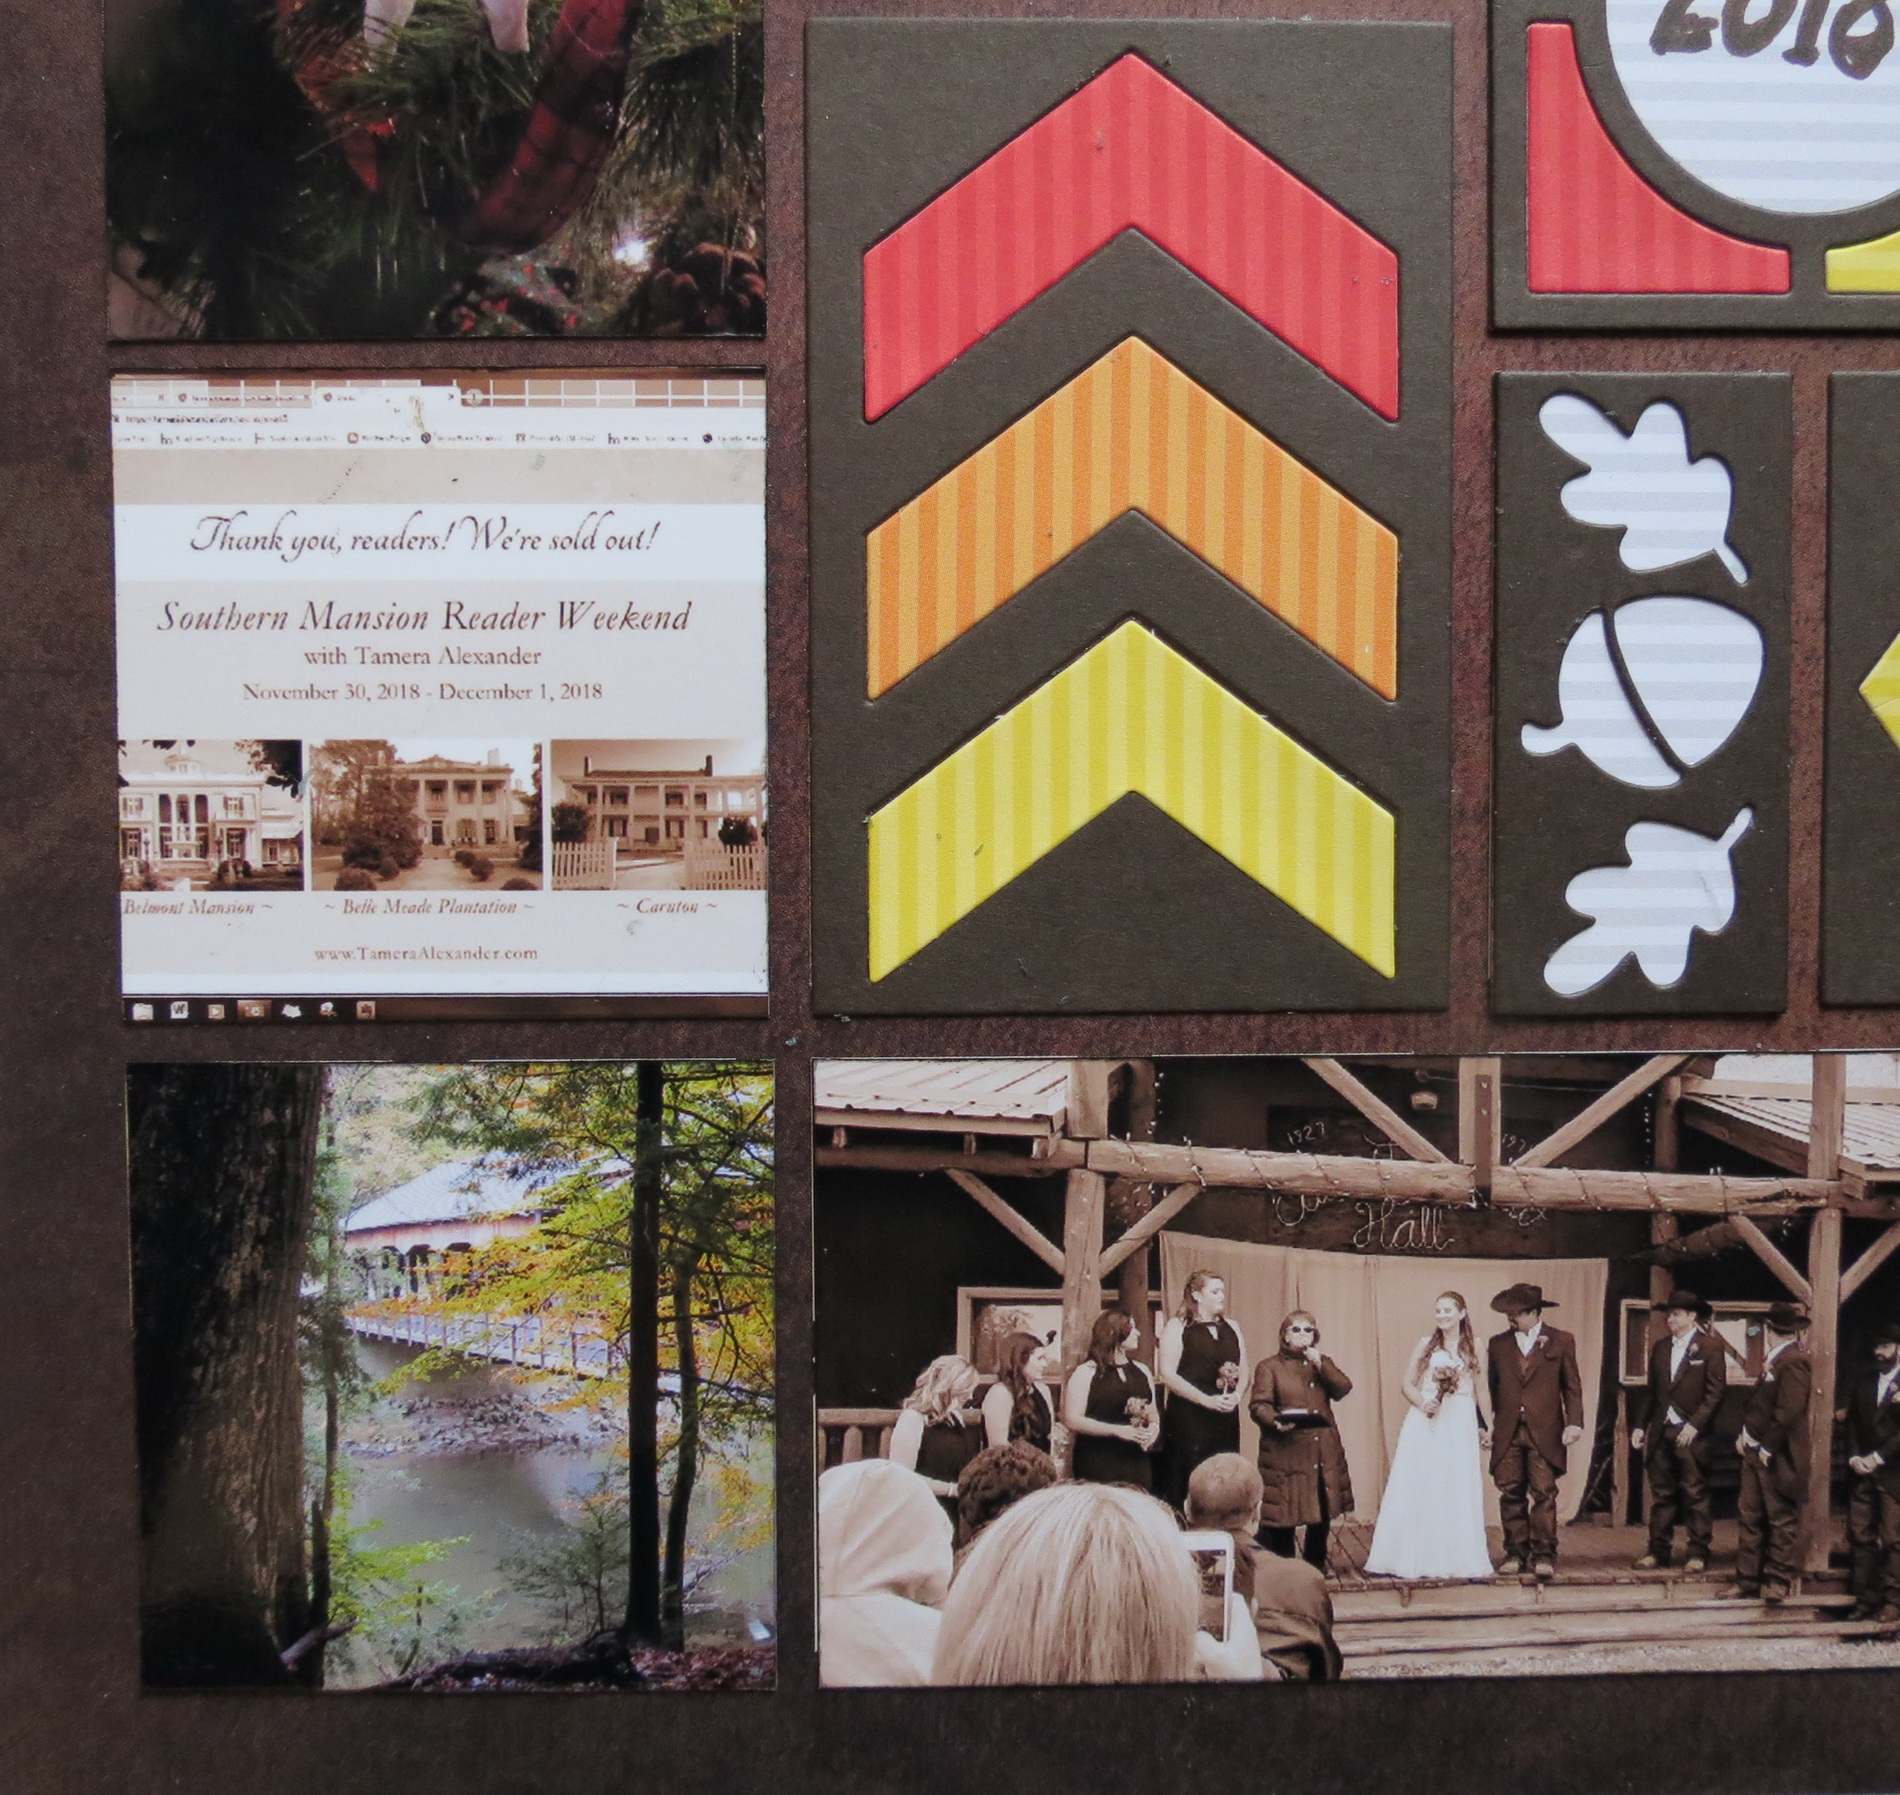
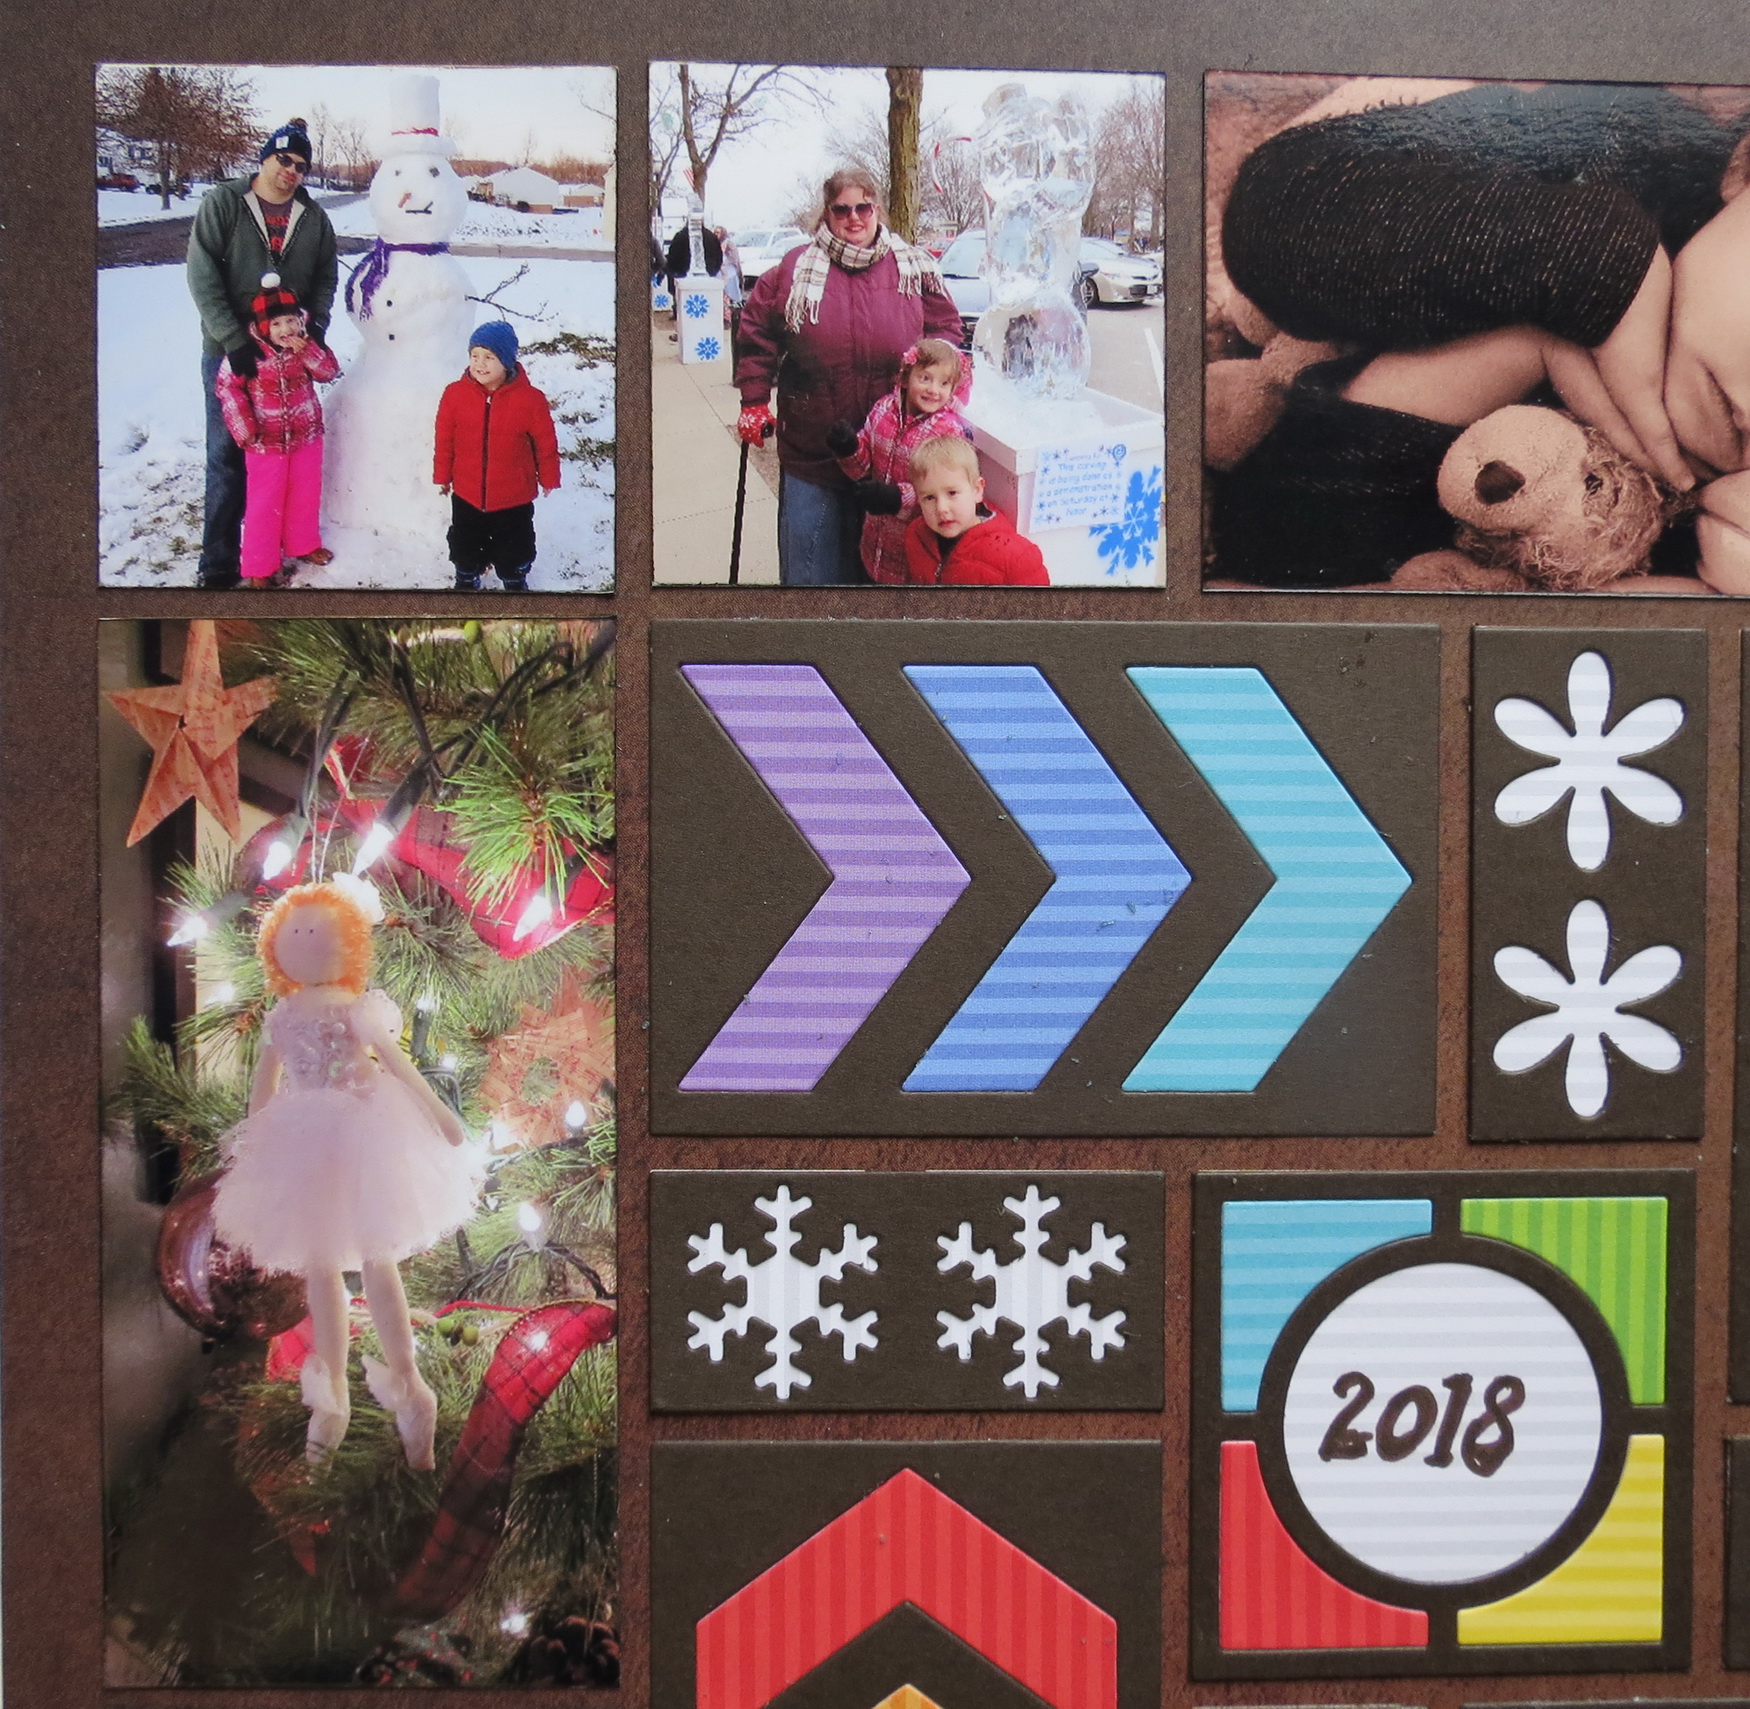
For the center section of the pattern, the series of 2×3 and 1×2 in a pinwheel pattern around the center 2×2 allowed a chance to reiterate the movement clockwise around the paper. I tried a few ideas like the Arrow Die, but in the end, it was the Chevron Die that let me include lots of colors to match with the seasons.
Mosaic Moments Photo Tips
The 1×2’s were perfect for winter snowflakes, spring flowers, summer sea shells and fall leaves.
• Mr. Snow and Flakes Die set
• Daisy Row Die set
• Beach Comber Die set
• Acorn Borders Die set
The 2×2 Circle Center Die from the Circle Scallop die set is used in the center of the pattern. The cut-out sections are filled with a color from the chevron section nearest to it.

Mosaic Moments Photo Tips: 2018 Year in Review Seasonal Dies Mr. Snow & Flakes

Mosaic Moments Photo Tips: 2018 Year in Review Seasonal Dies Daisy Border

Mosaic Moments Photo Tips: 2018 Year in Review Seasonal Dies Beach Comber Die set

Mosaic Moments Photo Tips: 2018 Year in Review Seasonal Dies Acorn Border Set
Chevron Die 2×3

Mosaic Moments Photo Tips: 2018 Year in Review
THE PAPERS
I’ve used a solid dark brown cardstock to cut each of the die cuts. This helps to blend into the Derby grid paper and really gives a rich brown to show off the colors. The center 2×2 and the 1×2’s are all backed with the white stripe from the Sunny Studio pack of paper, Striped Silly.
The Chevron die cuts were cut in each of the colors I chose and spread the sections out around the page in a seasonal color progression.
Mosaic Moments Photo Tips: 2018 Year in Review
TECHNIQUE:
THE INK
I know some people always ink the edges of their photos before putting them on the grid. I’m not one of those people; I generally need a good reason or desire a particular “look”.
This time I have a reason and that is the whiteness of the cut photo edges against the rich brown of the grid, and I had a desired look. I wanted a nice blend in look and the white edges really stood out, so my handy-dandy Tim Holtz Walnut Stain distress ink helped immensely. I hit just the edges, tried hard to keep it off of the photo. Voila! A real finished look.
THE CHALLENGE
Sort through your photos from this year and pick your favorite from each month, maybe one you’ve already used in a layout or one you didn’t have room for and put together your own 2018 Year in Review on a Mosaic Moments Grid of your choice. Look at some of the dies you’ve had for a while that will add to your design and get a good start to the new year with a look back at 2018.
Wishing you all a very Merry Christmas and Happy New Year
Andrea Fisher