Adventure Dies only look difficult.
In reality, they are more time consuming and use a bit more paper, but the results are incredible.
Adventure Level Dies are those with thin outlines on the dies. So, you need to cut each die at least twice for your layout ... once for the outline and once for the inner part (or more if you want to have multiple patterns, colors or photos). But the extra effort pays off with phenomenal layouts that often create new shapes across the page.
The best way to understand is to see it for yourself. So, scroll through here to see some of the Adventure Dies and the amazing layouts they help create.
Frame it in Angles
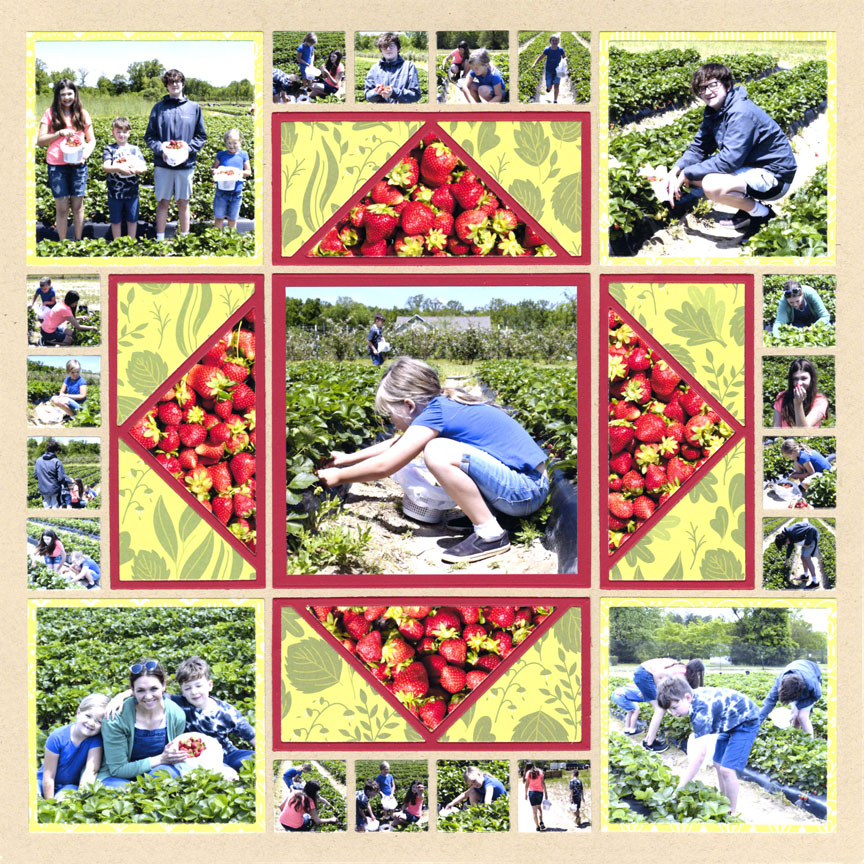
"Strawberry Picking" by Danielle Lawson - Pattern #478 (Slightly Adjusted)
The 2x4 Angles Die, used on this layout, is an easy die to start with. You simply cut the die four times, rotating it each time, and then place it around the 4x4 square in the middle.
Danielle filled the triangle sections in with patterned paper and a close-up photo of strawberries.
We love how this technique creates an amazing focal point on the layout.
Note: There is also a 2x6 Angles Die for more adventurous fun.
Add a Puffy Frame
Similar to the layout above, the Puff N Stuff Die is simply repeated four times around the focal point. It's super easy, but it looks fabulous!
Note: Page Pattern #344 is the one used most frequently for Adventure Level Dies. You may wish to print it out for reference.
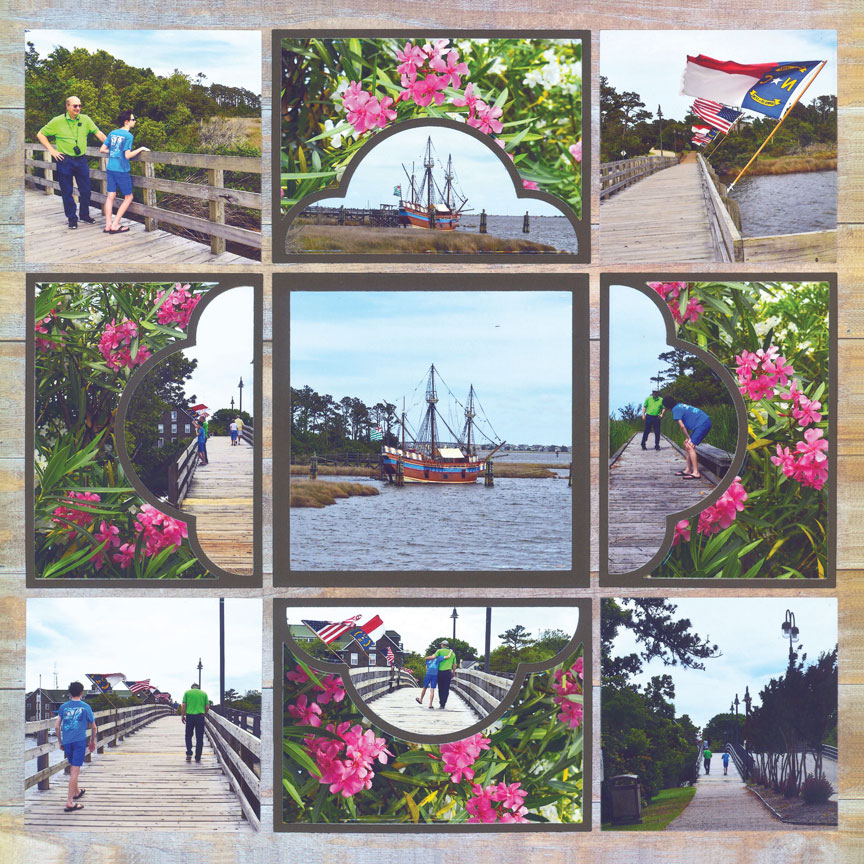
"Roanoke Island" by Paije Potter - Pattern #344
Add a Charm

"Together at Busch Gardens" by Paije Potter - Pattern #581
The Charmed Dies are also an easier die to use. There are only two dies, the large center linked circles, and the one that accompanies it. When combined, like the layout shown here, it can go either vertically or horizontally across the page.
Keep it simple by filling each section with a different photo.
Turn Up the Dial
If you love circle designs, Dial Die is a great choice. The large sections are very easy to use. The die comes with additional dies to cut out the inside sections, so you save paper, too.
Make it simple by filling the smaller sections with pattern paper.
Note: Check out the Pie Die when you are ready for a new challenge!
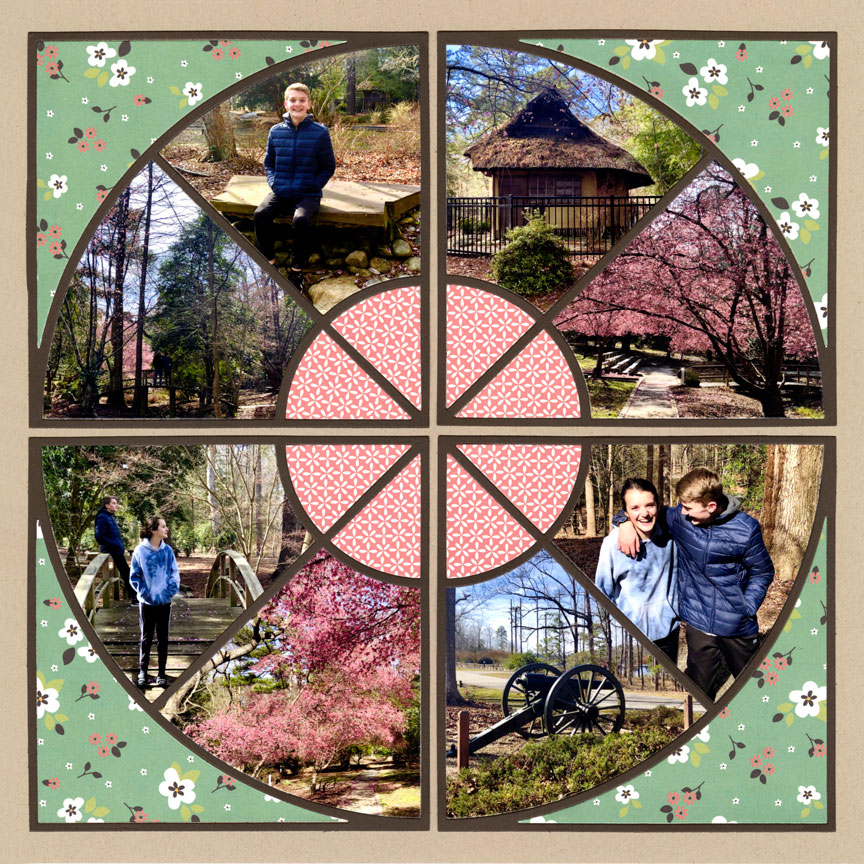
"Newport News Park" by Jodi Benson - Pattern #431
Grab Four Photos
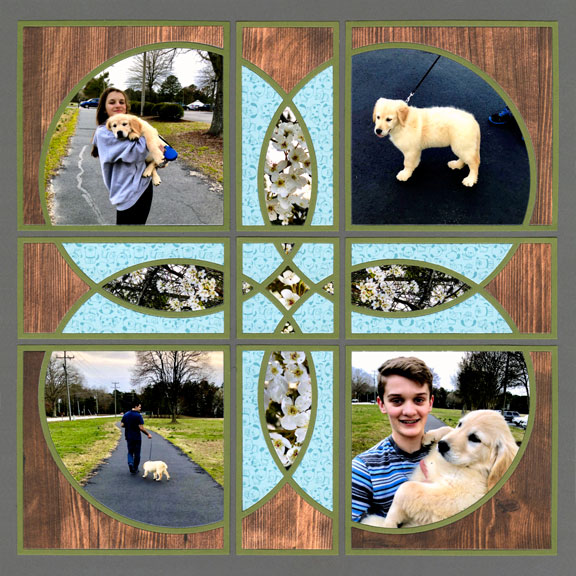
"New Puppy" by Jodi Benson - Pattern #368
The Clover Die is super simple since you only need four main photos and then either patterned paper, or smaller photos to fill in the pieces.
The space is larger than most other Adventure Level Dies, so if you tend to zoom in on your photos, this is the set for you.
Try the Crisscross
Crisscross is the first collection die we recommend when you are ready to create amazing designs. These dies, when placed side-by-side, create additional shapes while leading the eye from one photo to another.
And, we love how it naturally creates a focal point in the center of the layout.
The Crisscross has wider spacing than other dies, such as X Factor or Diamond Mine, so it's easier to crop photos.
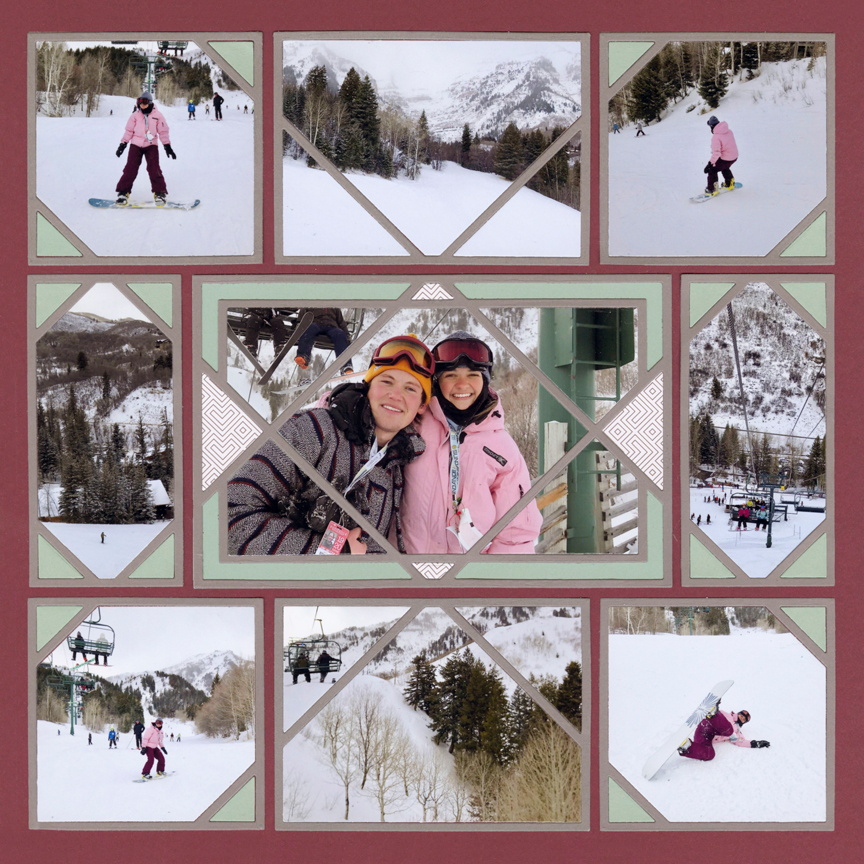
"Snowboarding at Sundace" by Jodi Benson - Pattern #477 (rotated)
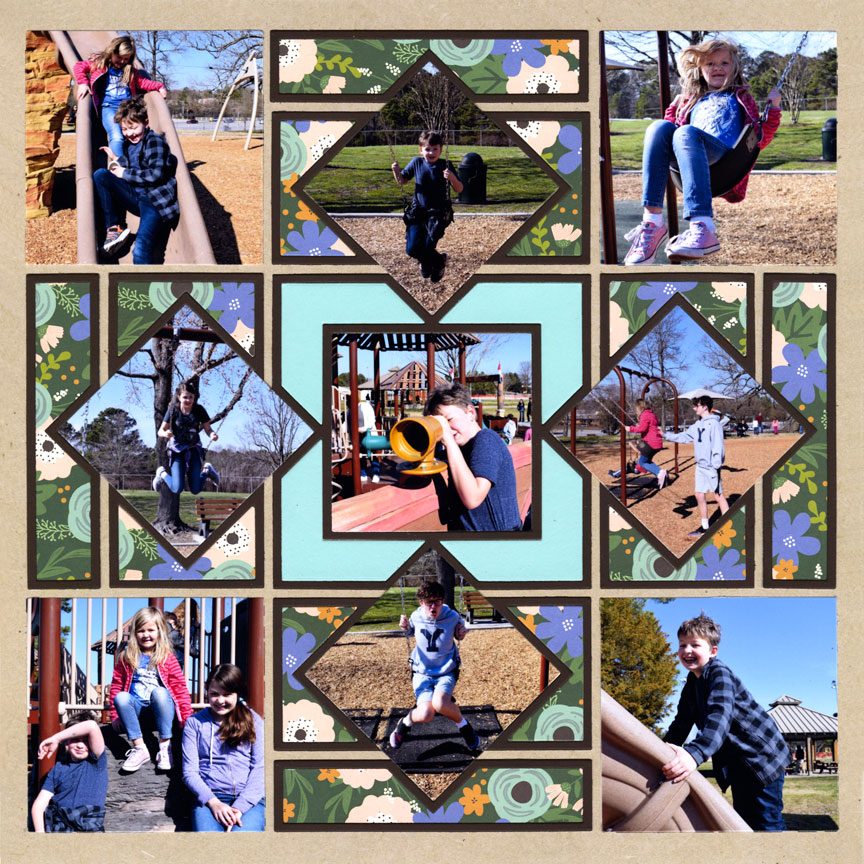
Make a Wow with X-Factor
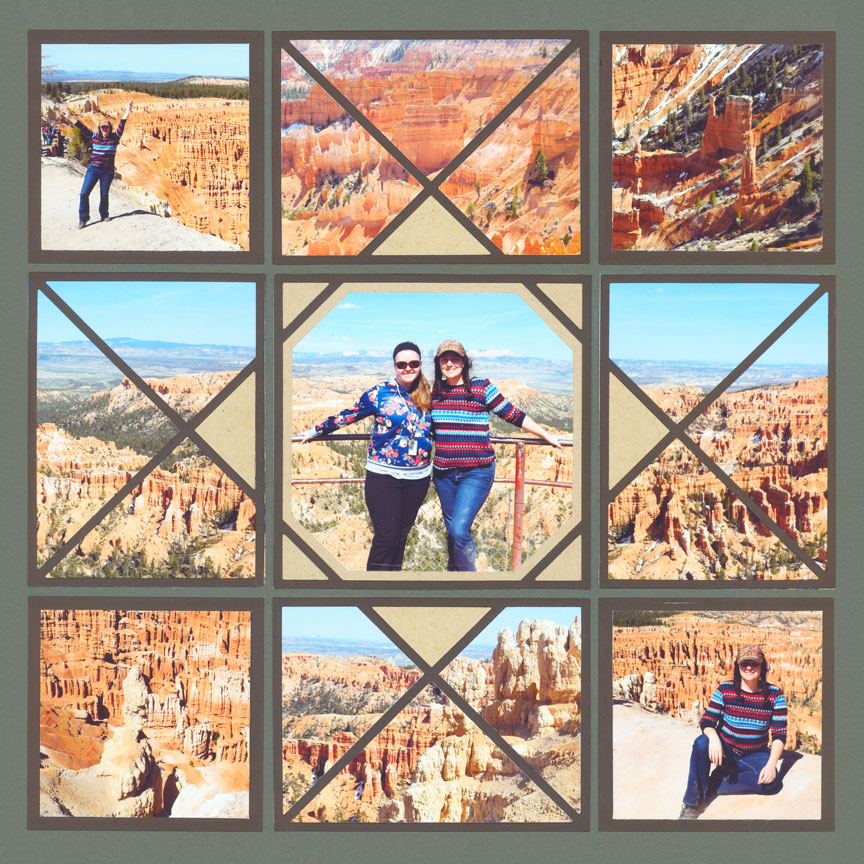
"Bryce Canyon" by Paije Potter - Pattern #344
When you are ready to try the X-Factor, start with the 4x4, 2x4 and 3x4 dies. With those three, you can make this layout and many others. Then, add to the collection as you wish.
This layout was kept simple by only using two colors of cardstock -- one for the outline and one for the fillers -- and using larger photos inside the x. Of course, you could put a different photo in each space, if desired.
Create a Large Diamond
The Diamond Mine Dies can be used together to create a giant diamond across the page.
This set is ideal when the subjects are farther away.
The tiniest triangles (alongside the patterned paper in this layout) do not show the grid lines, so Paije left them empty to allow the grid paper to show through.
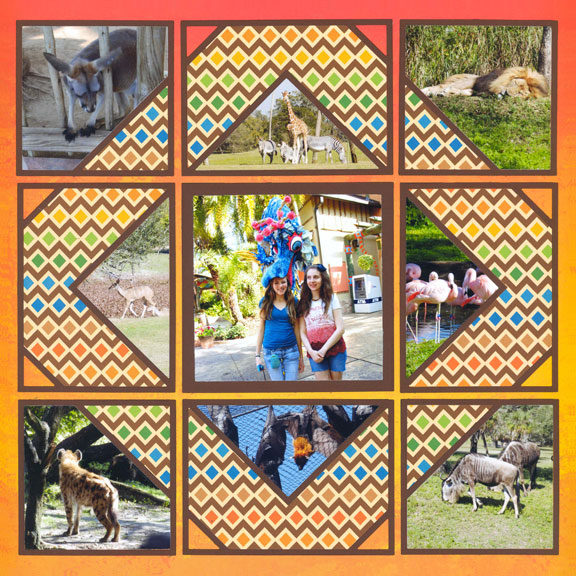
"Tampa Trip" by Paije Potter - Pattern #344
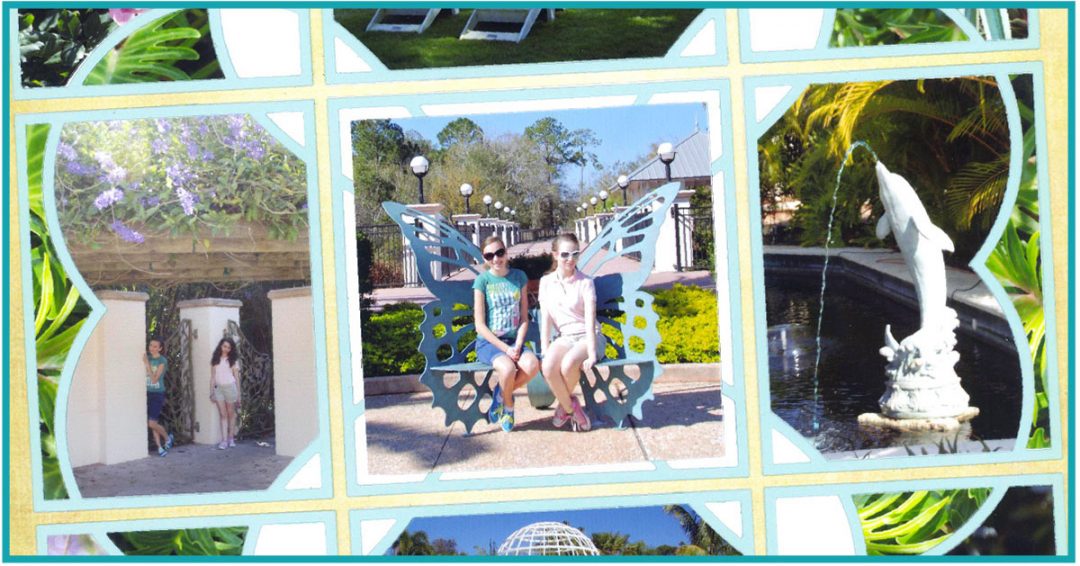
Make it Sweet
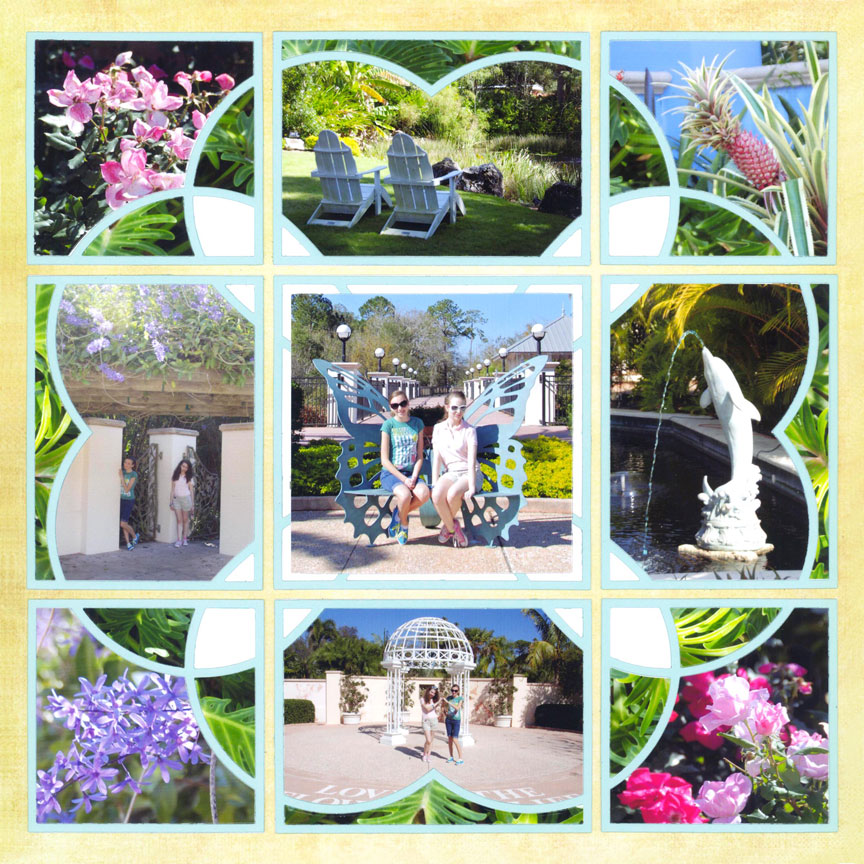
"Florida Botanical Gardens" by Paije Potter - Pattern #344
When you love something, or someone, you can make it obvious by using the Sweetheart Collection.
Because of the way the die must be rotated, this set is a little more challenging to use. Paije suggests using foliage, flowers, or even patterned paper for some of the smaller space when just starting out. This will make cutting much easier.
Tip: The 4x4 Sweetheart has very small spaces, so we recommend using a 4x4 square photo over the top of the Sweetheart Die Cut, like Paije did on this layout.
Create a Dynamic Design
The Dynamic Set "connects" with diamonds. Then, you can cut a photo into a diamond shape and lay over the top. It creates a layout that is truly unique from all of the others.
This set includes extra dies that cut some of the inside pieces, like the corners, so you do not have to cut the entire outline each time.
Tip: To make it easier to line up on the grid, use the Basic Die Bundle to cut the pattern paper the overall shape of each die, first. Then, cut the outline die and adhere it on top. Then, it is much easier to line it up on the grid paper.