
The holidays are just around the corner! Today we are giving you step by step instructions to create a vintage Christmas banner. This can be a lovely decoration in your home or you make it a gift for a friend or teacher. Check out Sandi’s instructions below to get started.
Items You Need:
To create this Mosaic Moments™ Banner, you will need a few items:
- A pencil
- Ruler
- A Cutting Mat
- Mosaic Moments Grid Paper (any Color)
- Your choice of embellishments, photos, and/or pattern paper
Sandi created her banners with:
- 12×12 Tropical Grid Paper (This color is no longer available, but we have several green shades to choose from)
- BasicGrey™ Pattern Paper – Dasher Collection
Step By Step Instructions to Create a Vintage Christmas Banner
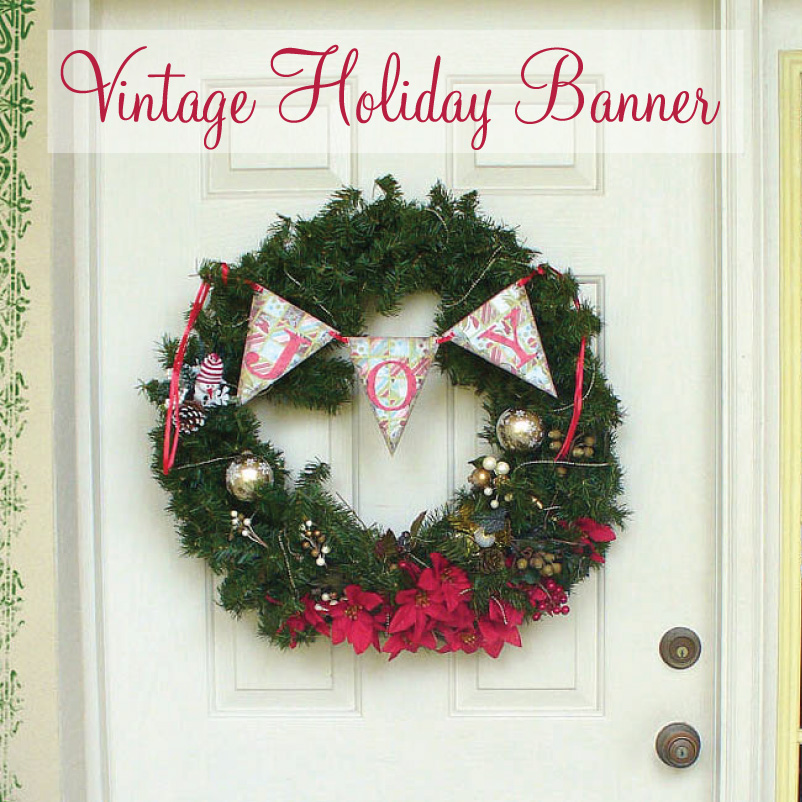
I love banners. I have one on my studio door that says “Create” and a Christmas one that says “Be Merry”. My sister, Steffani, suggested I do a mosaic banner. Hey, great idea! I wanted to make it simple to reproduce so I did all the math for you. It is very easy and festive.
Gather a piece of mosaic grid paper. I really like Tropical for Christmas. It goes great with Basic Grey, Cosmo Cricket and others. Now choose 3 patterned papers that make you happy and coordinate. Set them aside for a minute while we make a template.
Cut a rectangle 5 4/8″ x 6 5/8″ out of cardstock. We need to mark the center of the top for the point of the triangle. Measure in 2 6/8″ and make a large dot. All math and measuring are done. Told ya it was easy.
Draw a straight line from the bottom corner to the dot as pictured. Now the other side. Cut on the lines you drew and you have your template.
Hang onto this template when you are finished for future banners. Or make more banners as gifts! Use your scrap paper and we are talking super economical.
Now, back to our grid paper. We are going to use 6 rows of the paper to create our triangles. This picture stinks but I think you get the idea.
These are three papers that spoke to me. Basic Grey Dasher.
We need a total of 60 1″ squares. I did 20 of each paper. I cut a 2″ x 12″ strip off each paper and cut it into 1″ squares. That gives you 24 squares to choose 20 from. Put them on randomly. (Unless you are like me and can’t do random to save your life in which case do your best or ask a child to help choose the next space.)
Repeat with second paper.
And the third. Looking good!
Now place your template onto the left hand corner of the grid paper lining up the top of the triangle and the top of the patterned paper as pictured.
Cut out the triangle by either tracing the template and cutting with scissors or use your metal ruler as a straight edge along the edge of the template and cut with your exacto knife. It will take two passes with the exacto to cut through both layers so cut, don’t move ruler and cut again.
Move template over to right corner and repeat.
Move to the center section which is just slightly too big. Cut.
Now you have your three triangles.
For letters I typed up giant letters in MS Word, printed them off, used that as a template on patterned paper and cut them out with scissors. You could use chipboard, monogram stickers, stamp letters or whatever you like.
“A project without flourishes and inking is like cake without frosting.” Embellish as you choose.
I joined my letters with red ribbon and staples. (I doubled the ribbon because that made me happy.) I think eyelets would be a good option. Sewing would be good too.
Choose a Spot to hang Your Banner
Now comes the hard part. Decide where to put it. As soon as you put it in one spot, you will think, “Wait! How about over here? Oh no! That looks great too. But that door could use something. Oh, if I had a mantle…” Consider yourself warned.
And finally you will decide on a spot and start thinking about making “just one more!”
Happy Crafting!
Sandi Keene