
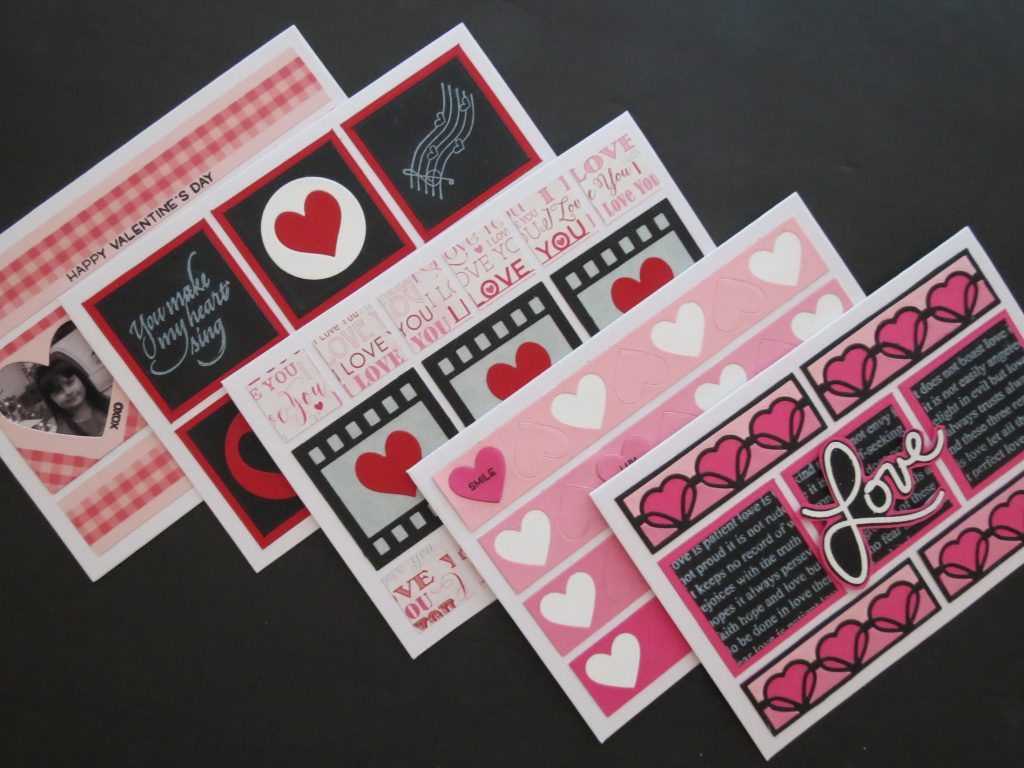
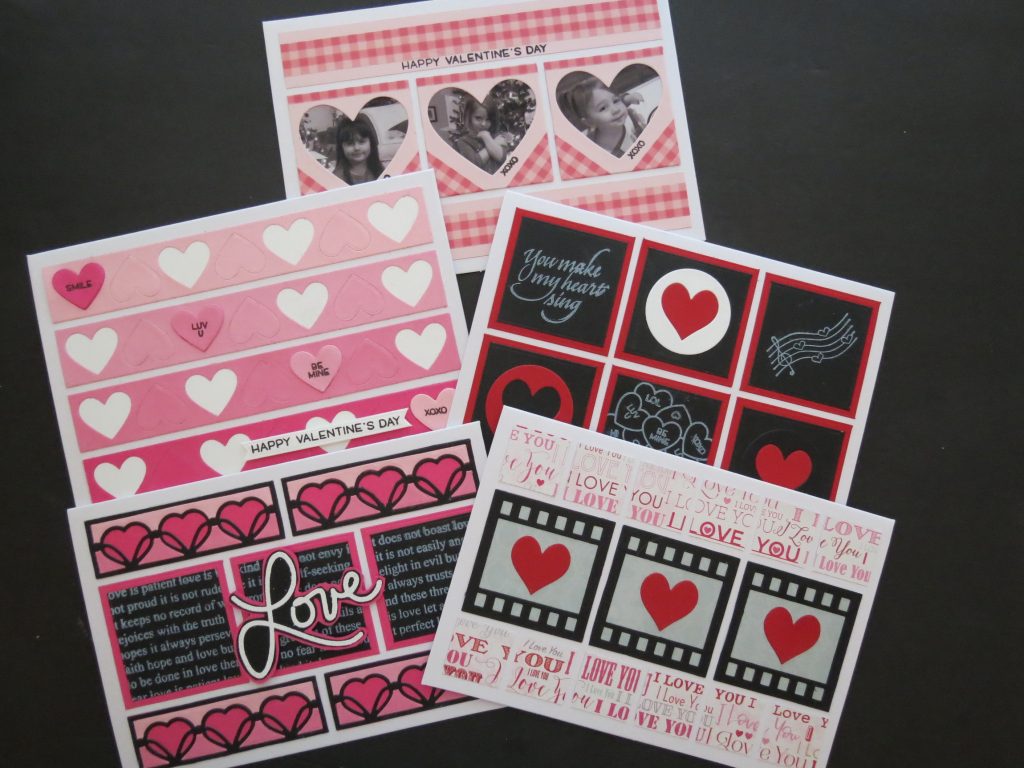
Six ways you can use Mosaic Moments Grid Cards and create a Valentine for the love of your life.
ONE:
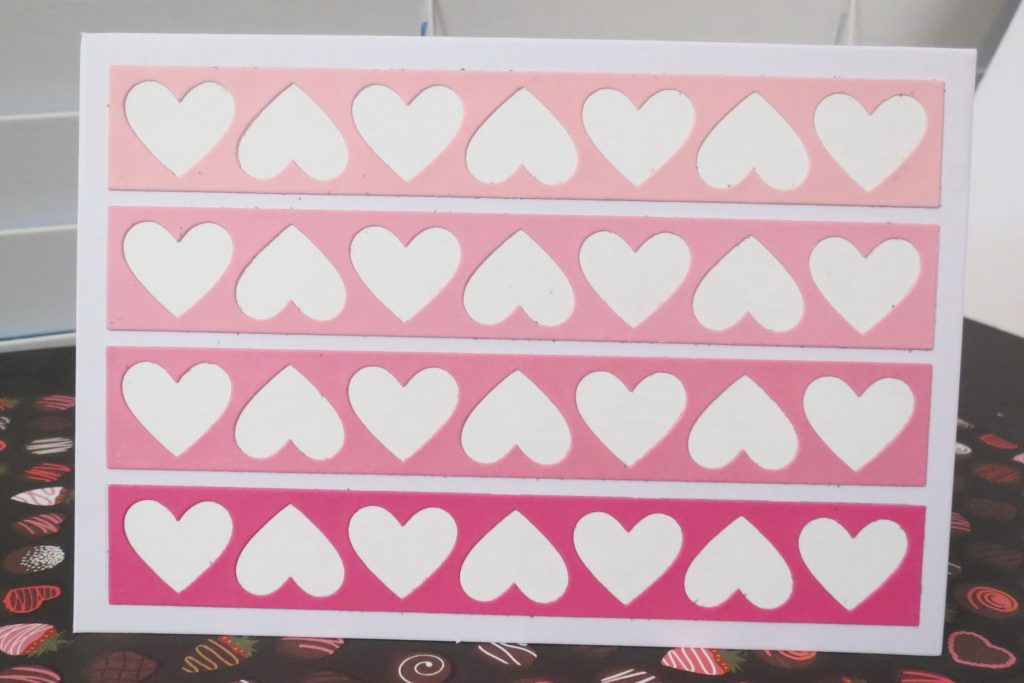
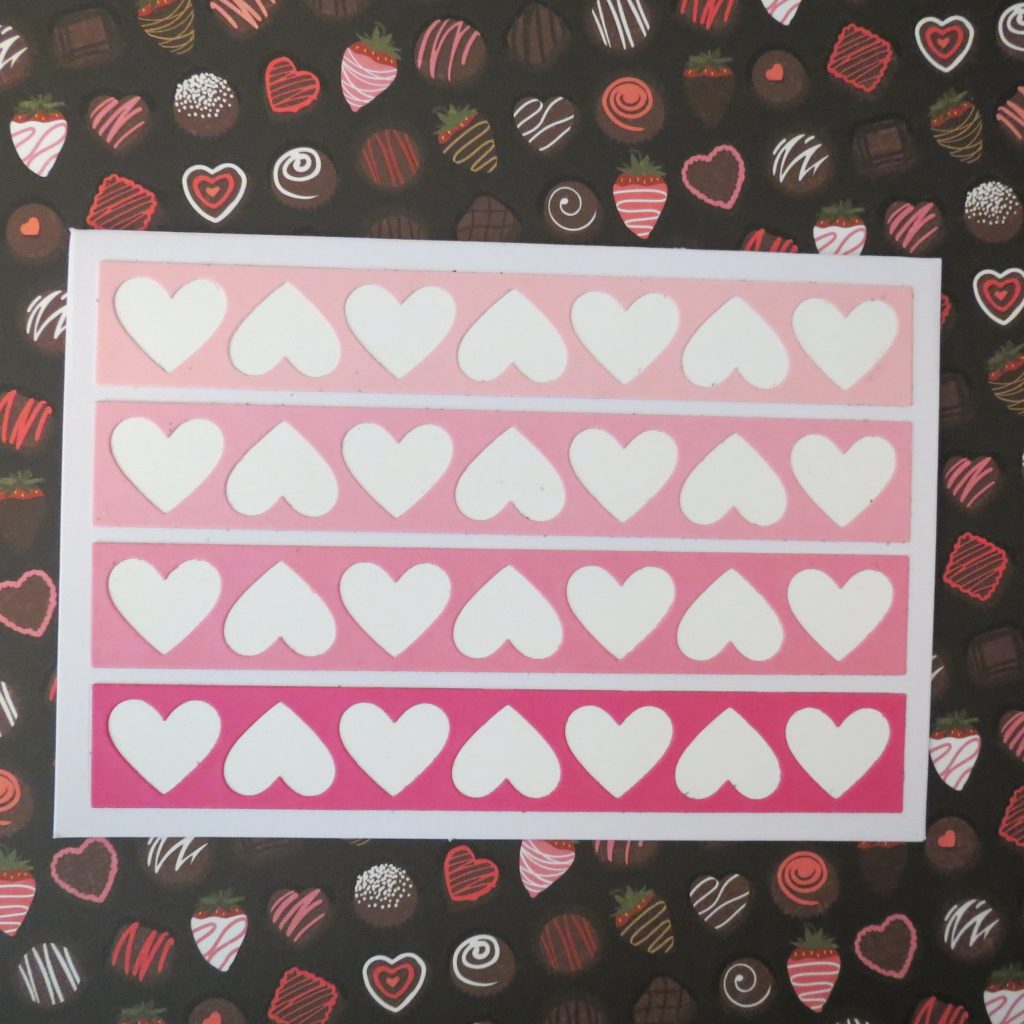
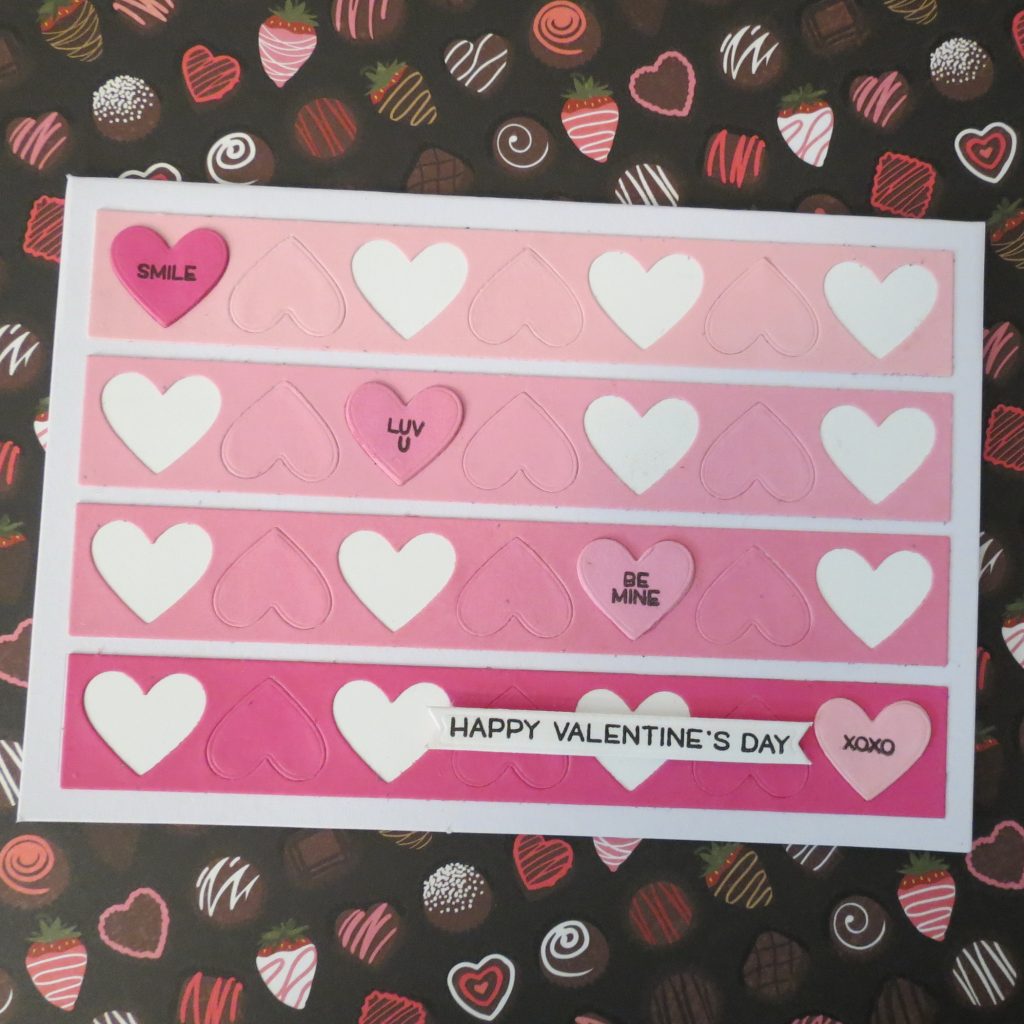
This first Valentine card is one of the simplest to complete. Cut 4 strips of white cardstock 1x 6 5/8” to back each of the pink strips. For each of the rows, you will use the Row of Hearts Border Die, you will need to cut four shades of pink cardstock for an Ombre look. This 1×6 die will fill the four rows of squares on the grid card. Arrange according to color, light to dark!
TWO:
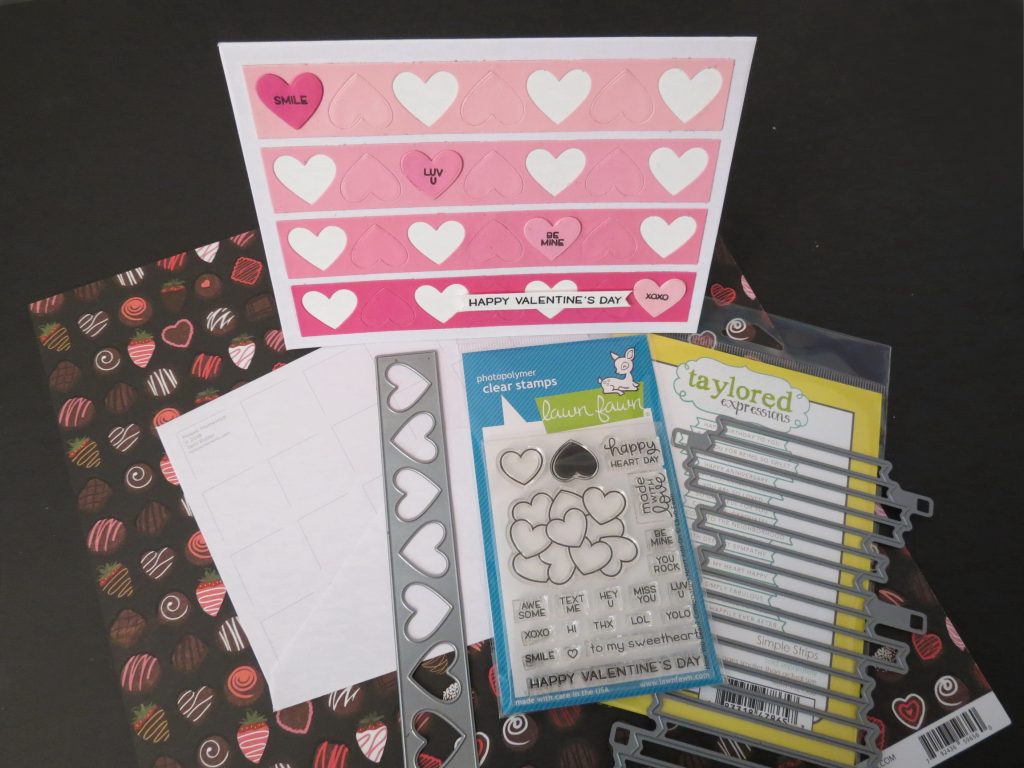
For a bit of a step up, start with card one and replace all the upside-down hearts. Take the remaining hearts and stack them together, liquid glue works nicely and add a bit of stiffening. Stamp a greeting on each and place them into the spaces on a diagonal in the opposite colors. I added a sentiment to a tag and then mounted on the card bottom with foam mounting tape.
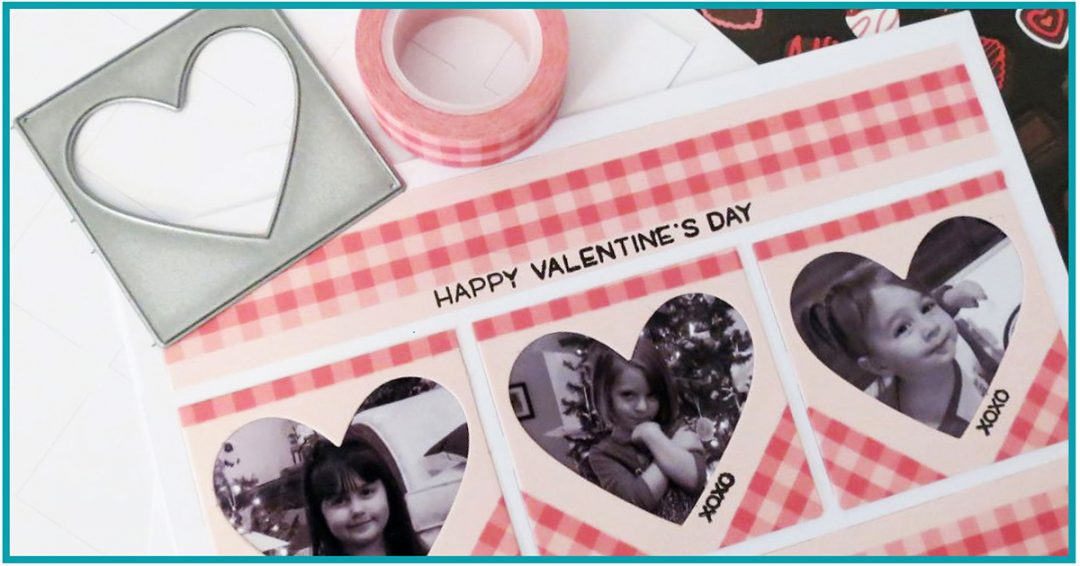
THREE:
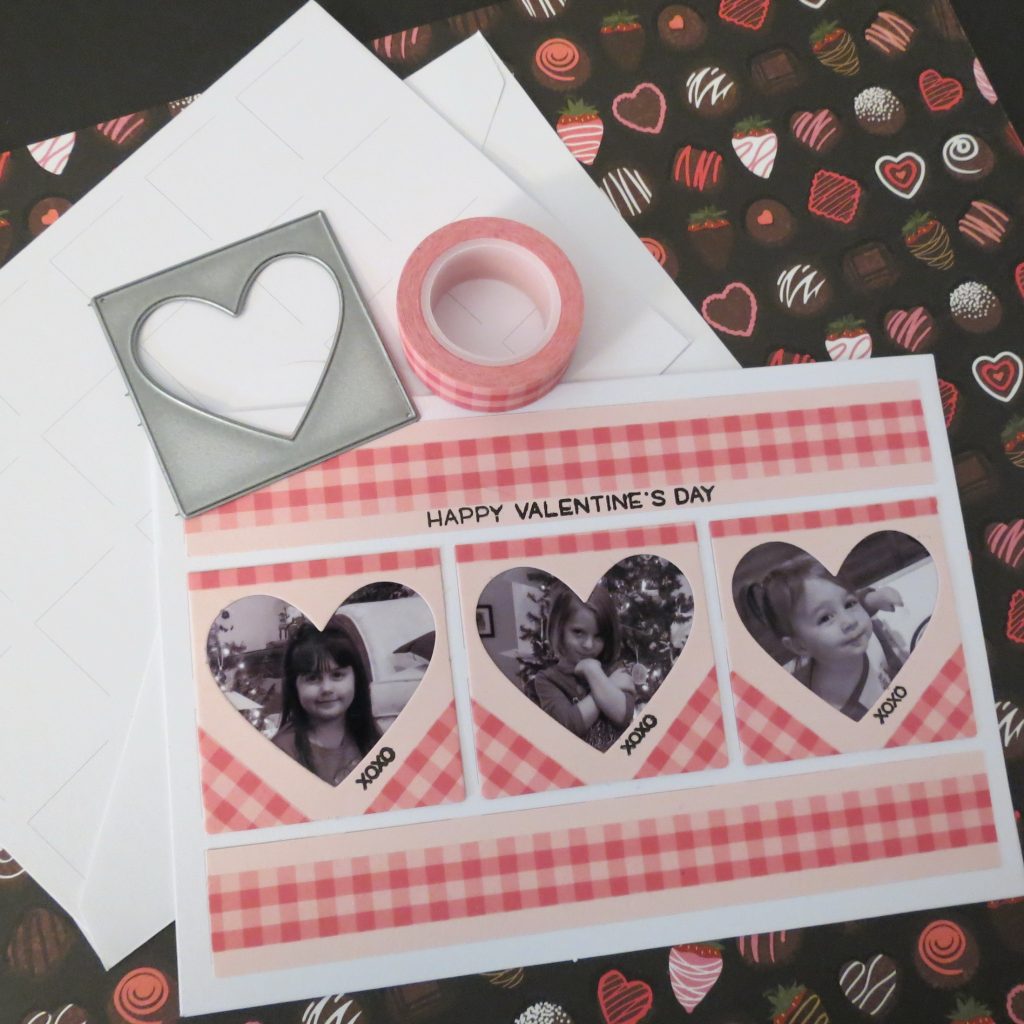
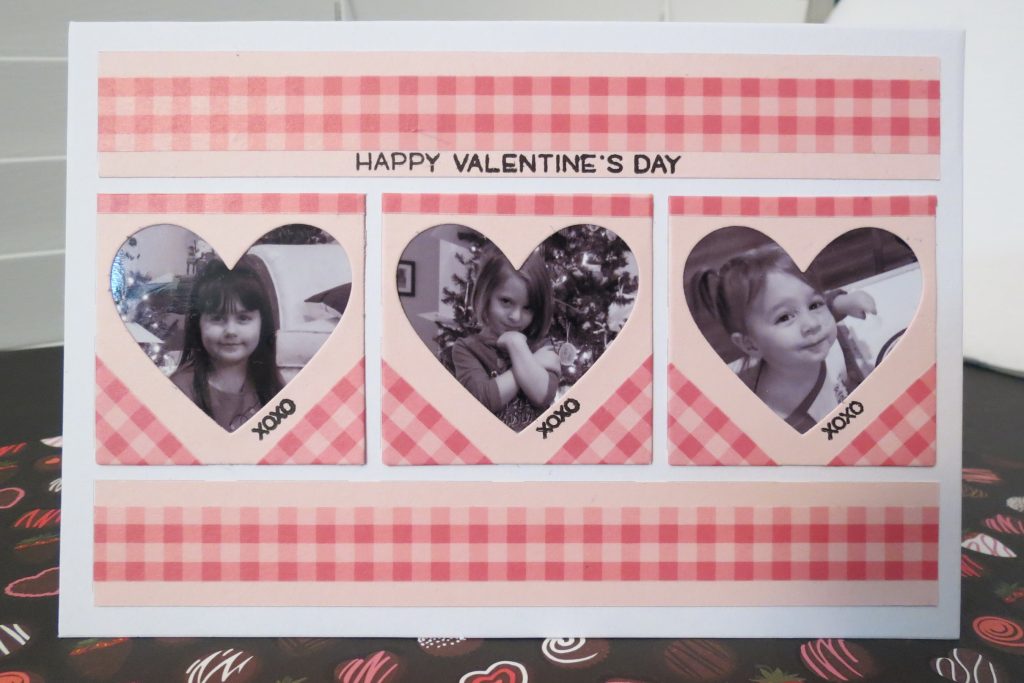
This card uses the 2×2 heart die cut three times and two strips 1x 6 5/8”. I added strips of Washi tape to the center of each of these strips. Then I added washi to the corners of each square and along the top. While I could have done this by layering patterned paper, I’ve got plenty of washi options to dress up plain cardstock. I added photos of each of the girls and stamped a sentiment and xoxo’s so it’s all ready for them to give to their mum on Valentine’s Day.
FOUR:

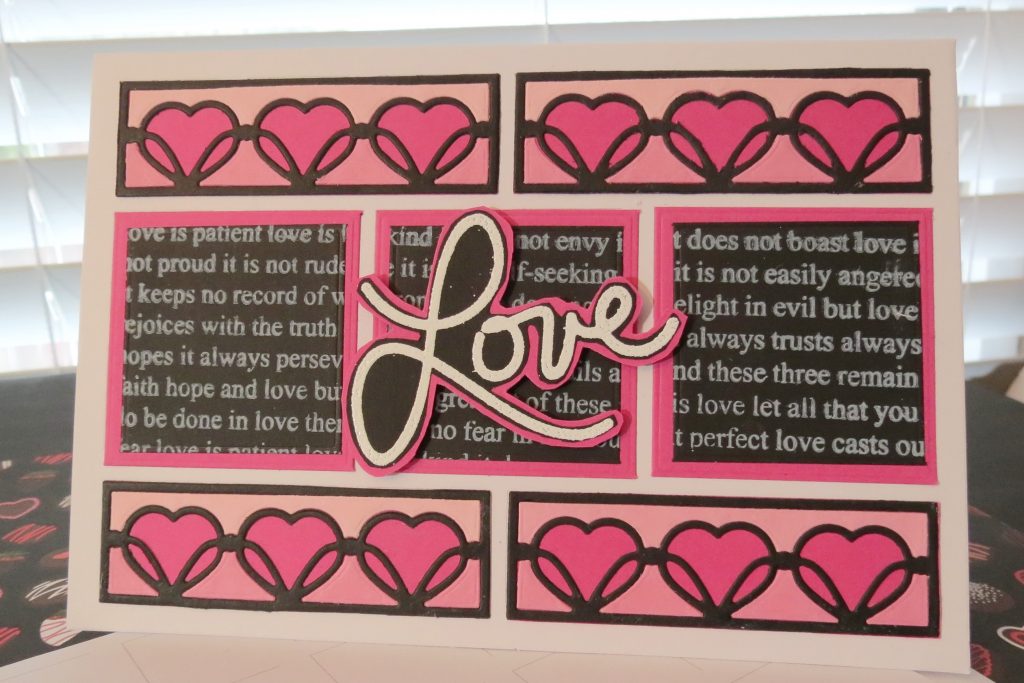
If you are not just a scrapper but a stamper too, you may have Valentine stamps you might like to include in your creating process. I’ve used a background stamp in white on black to cut into layering squares to mount on top of the pink bases. Cut four of the Sweetheart Border Die (1×3) in black, mount on dark pink. Then cut four each in a mid-tone and lighter pinks and layer into the spaces on the die-cut. This will give you that Ombre look with your colors.
I stamped the word Love in white on black and embossed in white. I trimmed
around the outside edge and mounted it on pink and hand-trimmed again. It is adhered
to the card using foam mounting tape.
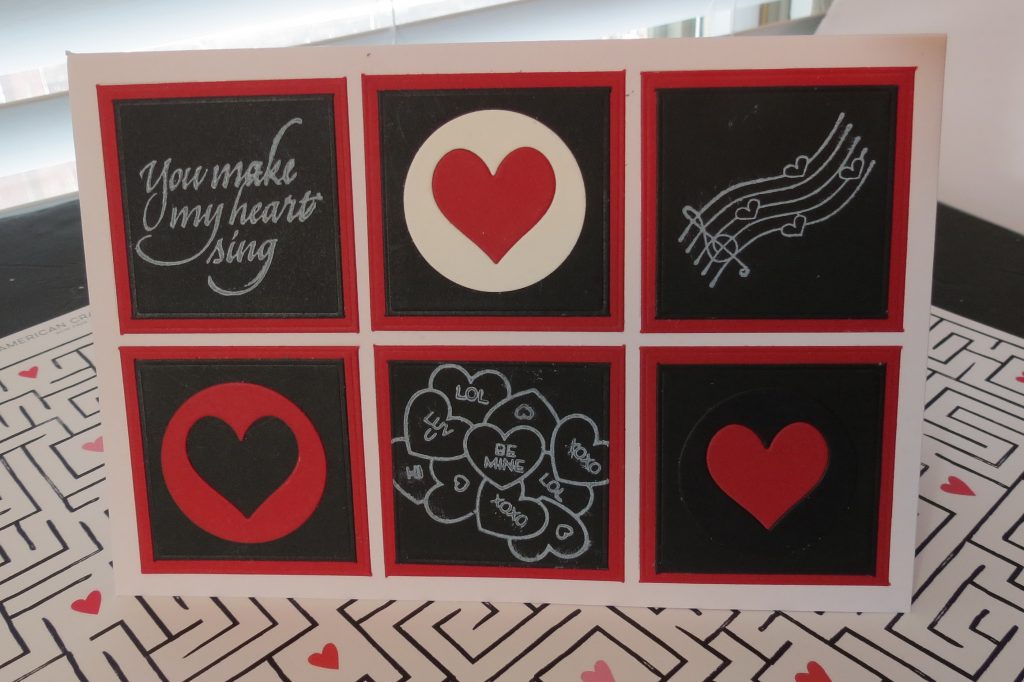
FIVE:
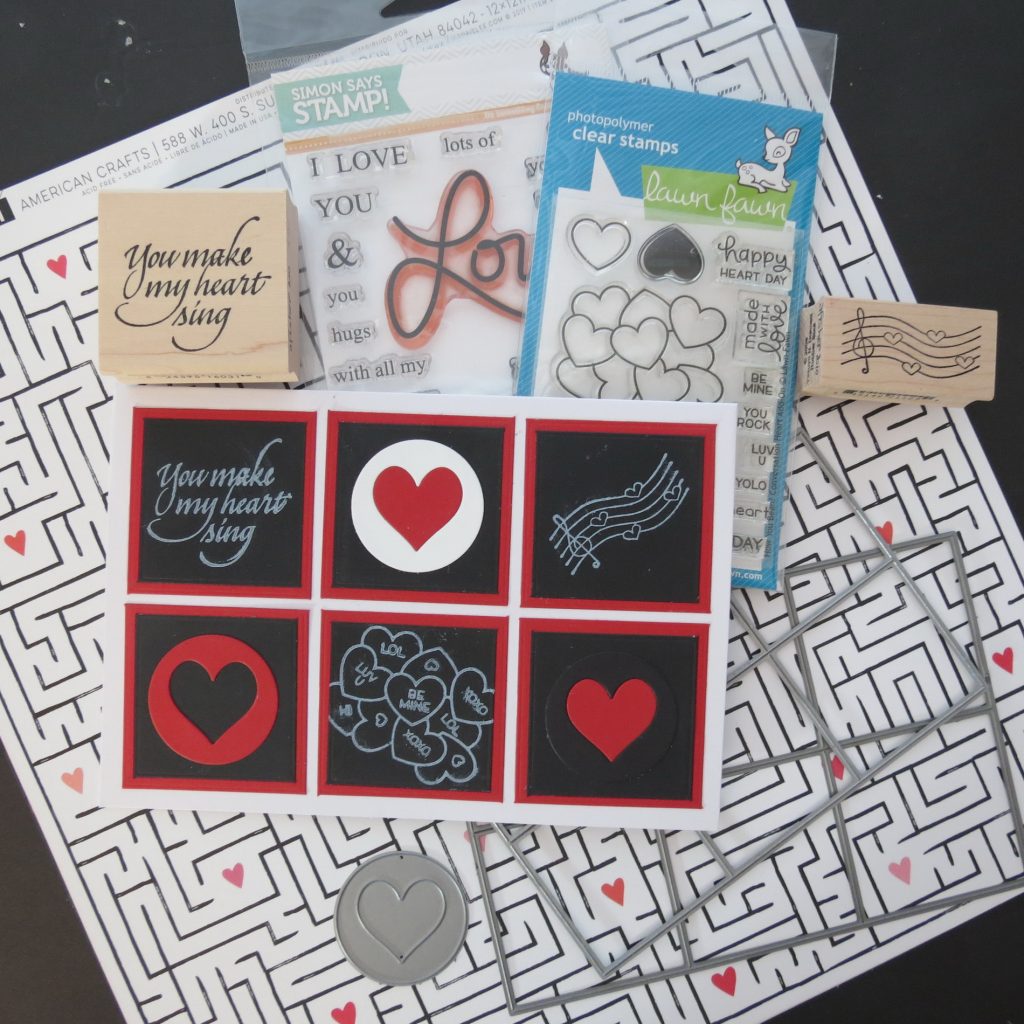
This card will use both of the grid squares dies to cover six sections on the grid card. Red squares cut with the 2.125” square grid and black squares to layer and using the circle-heart die from the now-retired Smile for the Camera Die to cut in white, red and black to layer on top. Three squares were stamped on in white.
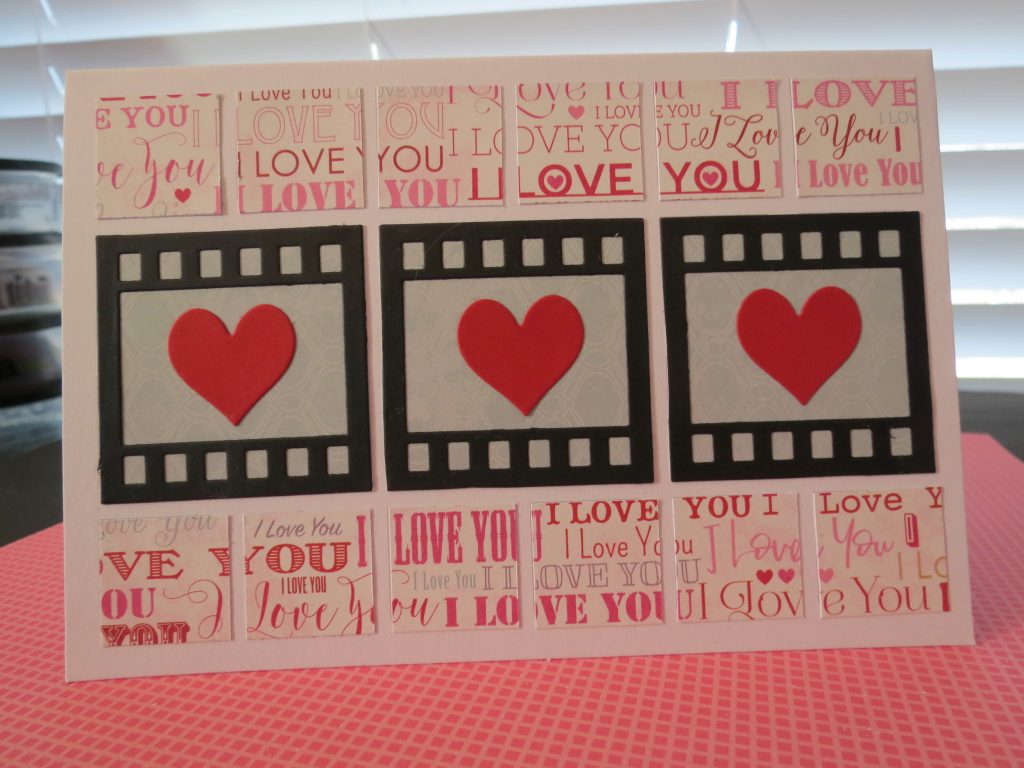
SIX:
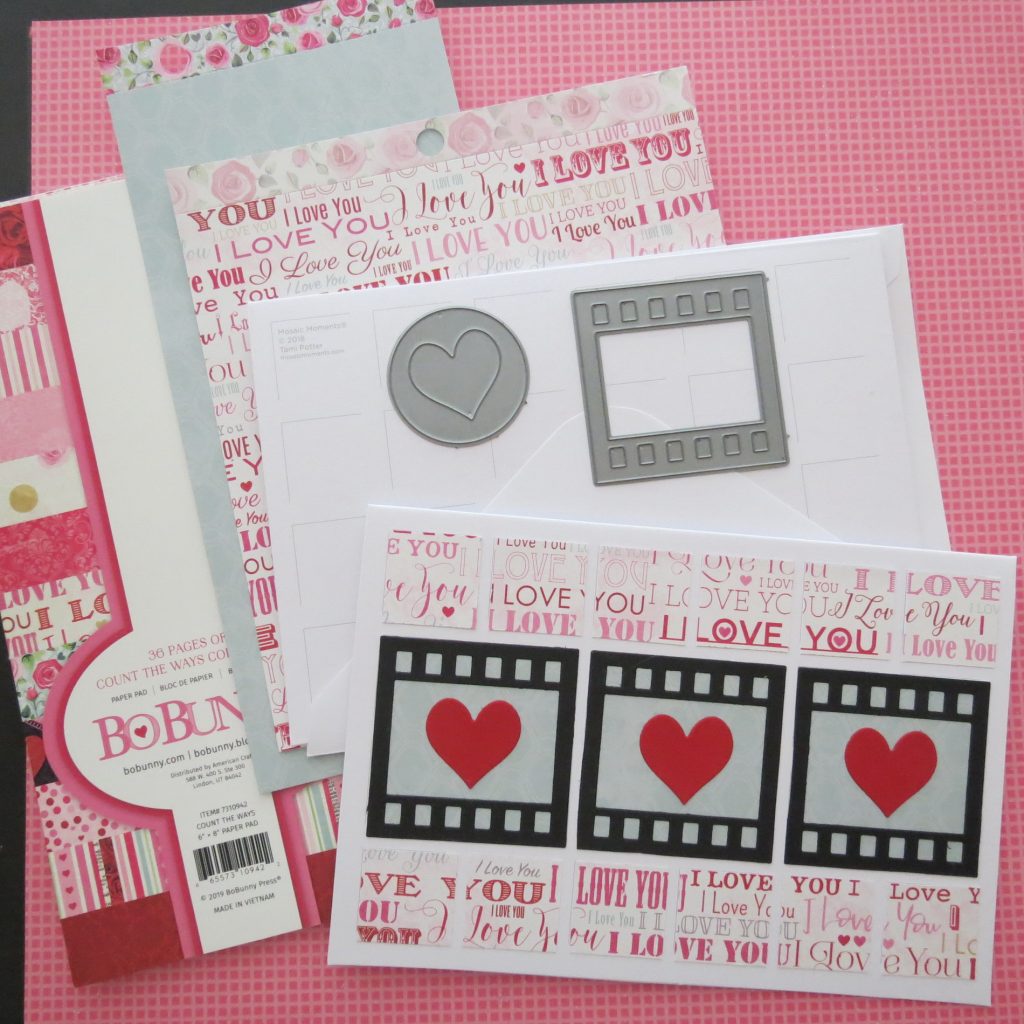
This final card uses patterned paper in 1” squares in the top and bottom rows. The center section of 3 squares is where I cut three 2×2 Filmstrip Dies and used the blue patterned paper as the backing. Red hearts are cut and placed in the centers of each section.
Supplies:
- Mosaic Moments Grid Cards
- Mosaic Moments Dies: Row of Hearts Die, Heart Set (2×2 + 1” squares), 1.875” Sq Layering Grid Die, 2.125”sq Grid Die, Filmstrip 2×2 die, circle center heart die from the Smile for the Camera Die Set (retired), Sweetheart Border
- Stamps: Lawn Fawn, Taylored Expressions, Simon Says Stamp, Wordsmith, Rubber Soul
- Washi Tape from Echo Park – Salon – Pink Washi Tape
- Patterned Papers from BoBunny – Count the Ways Collection
There you have it! Simple ways using a variety of Mosaic Moments Dies to complete these six cards for your favorite Valentine or for the special people in your life this year. Have fun!
Andrea Fisher