
Honor Your Mother
Tell Your Story with an Ancestry Vintage Theme
This week I’d like to show one way of preserving ancestral stories with the Sweetheart Die sets. I’ve also included the new Persimmon Grid paper and beautiful patterned papers that bring a warm, vintage feel to this layout about my great-granny.
I saw a quote on Ancestry.com recently that summed up things I’ve been saying in my blog posts and in my classes for some time.
“A life that is not documented is a life that within a generation or two will largely be lost to memory. What a tragedy this can be in the history of a family. Knowledge of our ancestors shapes us and instills within us values that give direction and meaning to our lives.”
Unless you have stories that have passed down from generation to generation you probably are missing pieces about many of your ancestors.
I’ve been the curious type all my life. I grew up thousands of miles away from most of my family and never got to know many of them until I was an adult. There always seemed to be more stories than people were willing to share. I wanted to get to the bottom of things and get answers.
When I delved into the records for births, deaths and marriages and eventually the census records I began to pick up more clues. I had an idea of what questions I needed to ask, and where I could possibly find some answers.
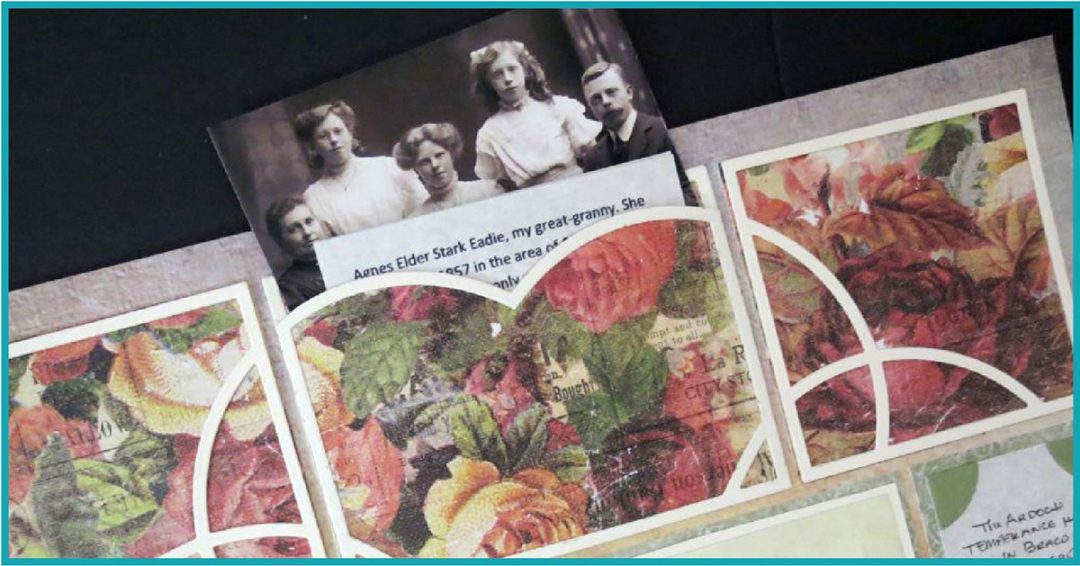
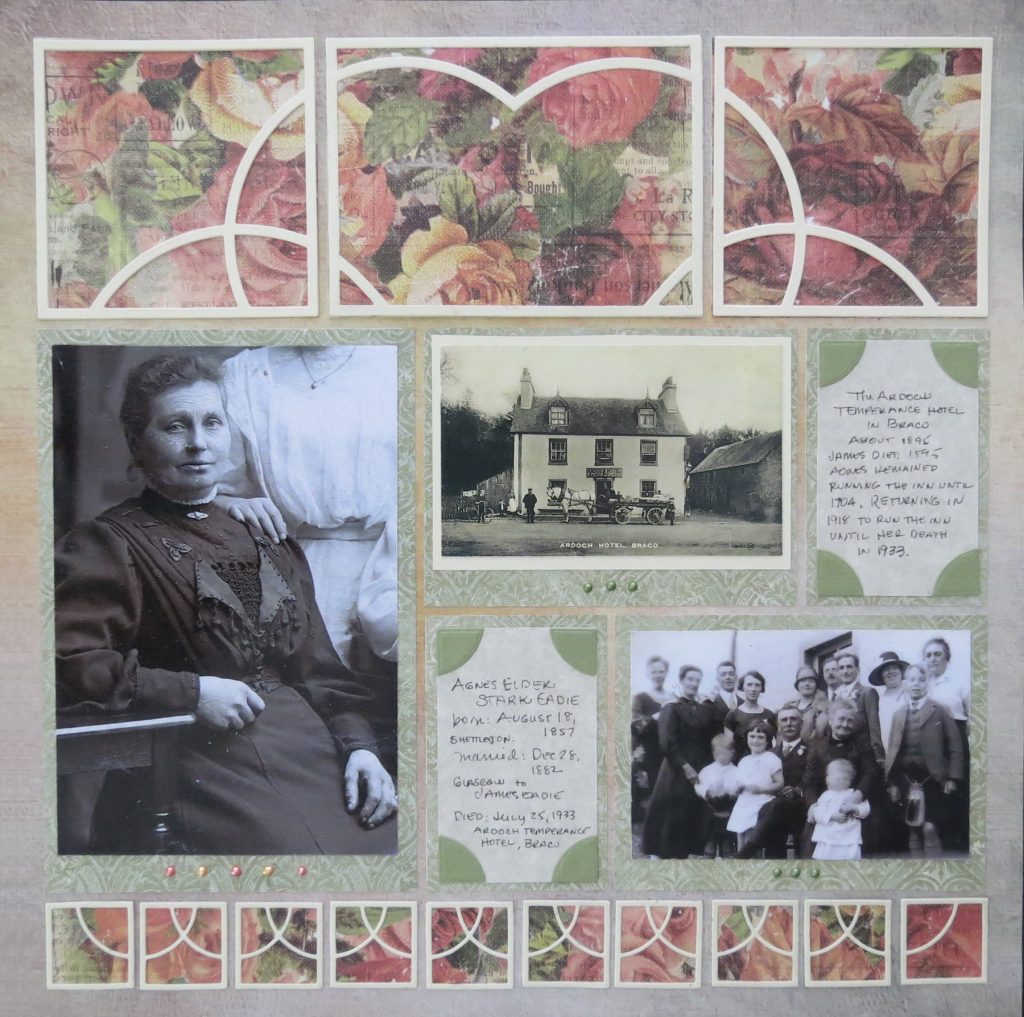
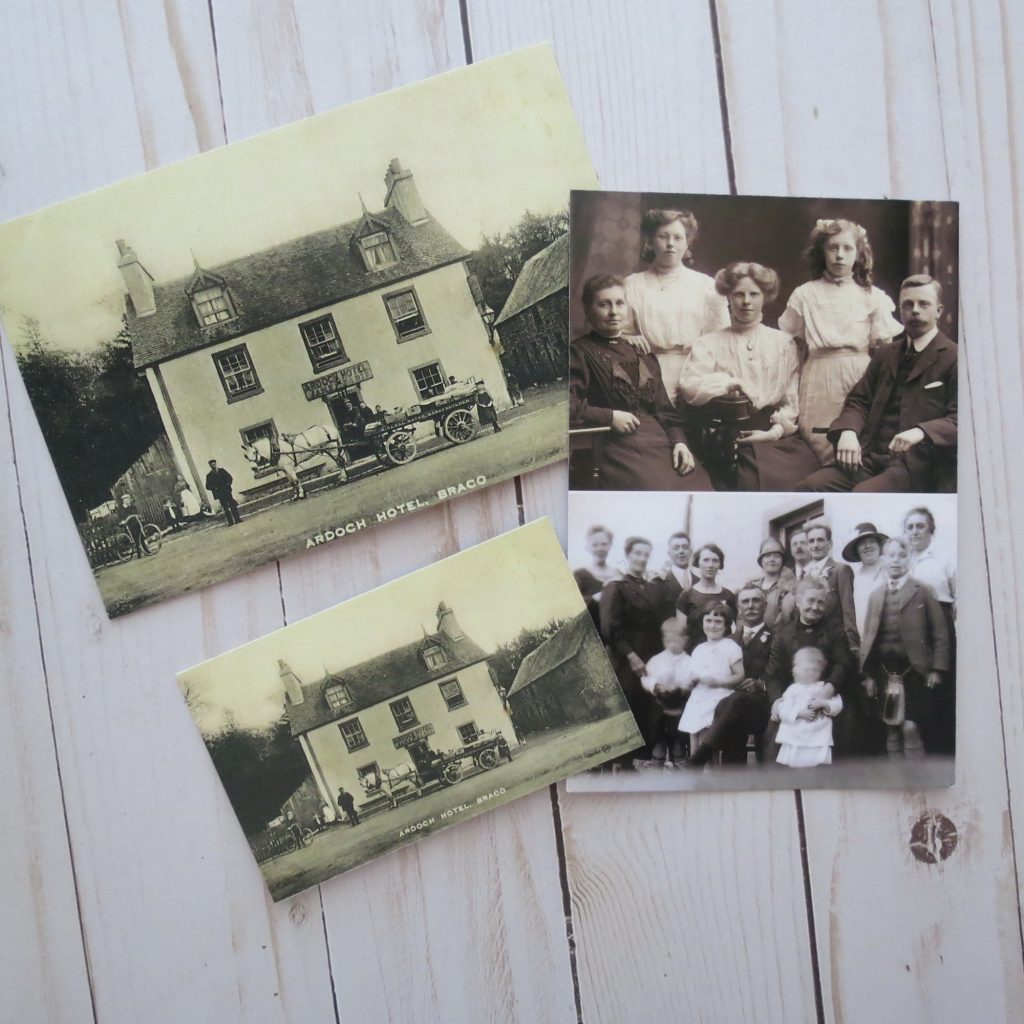
In the end I found a fantastic story of a few of the women in my family tree that I could look up to and be encouraged by their life. This layout is dedicated to one of them, my great-granny, and I’ve included her story for generations to come in a hidden pocket in the layout.
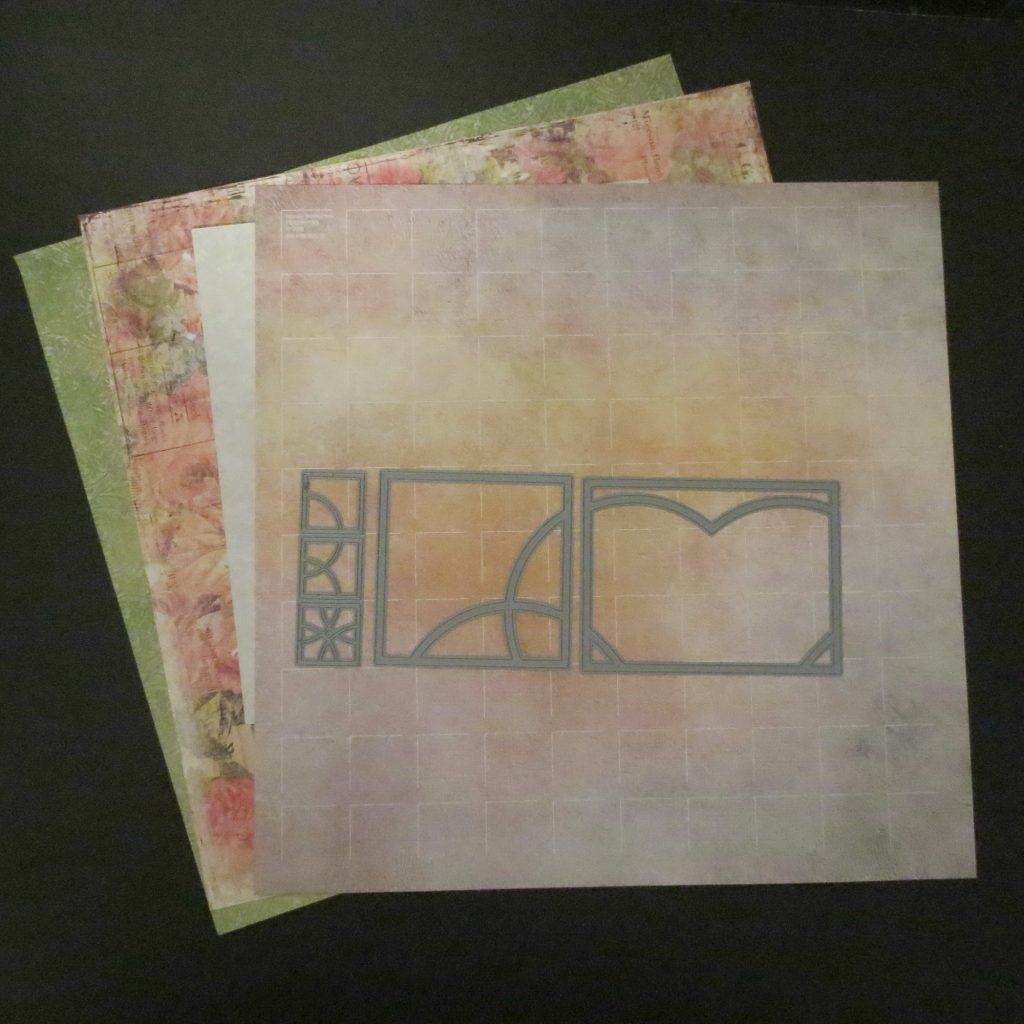
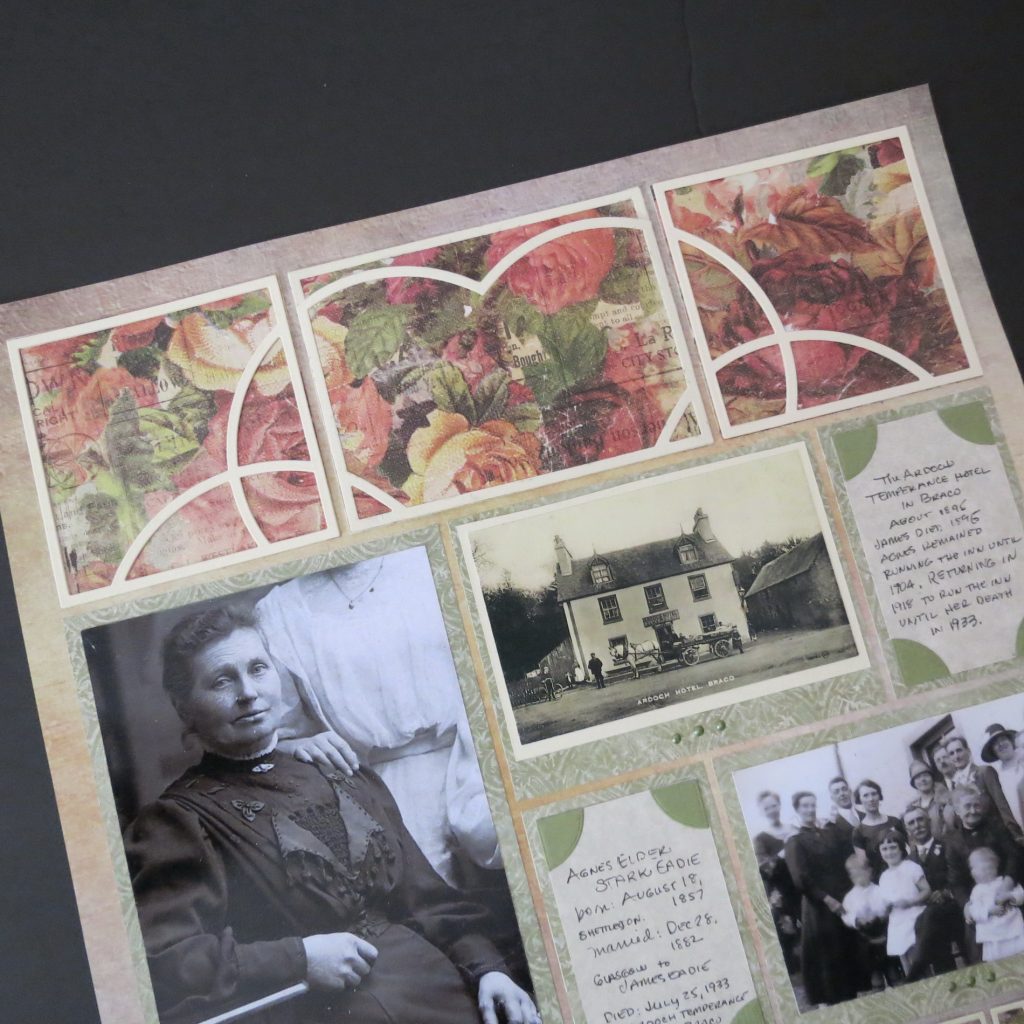
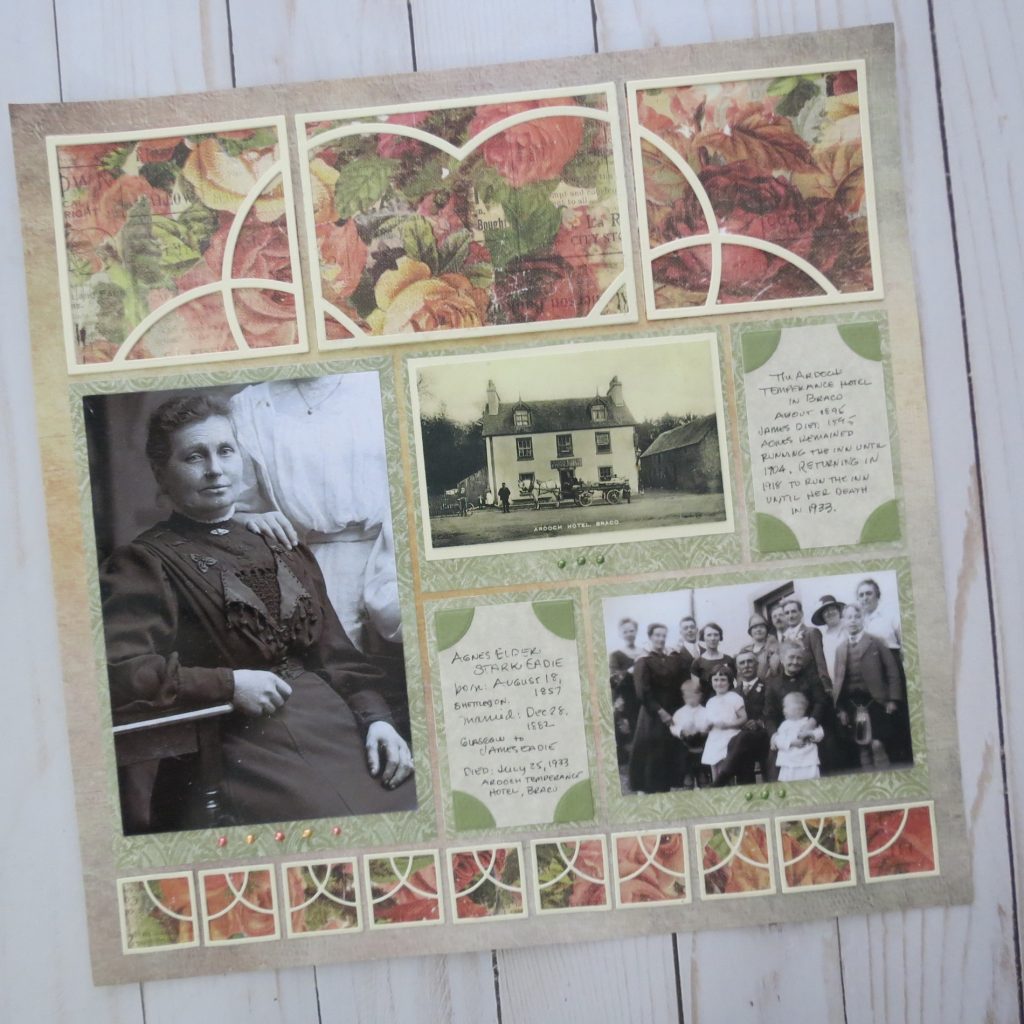
When the new Fresh–n–Fruity Grid Collection was released I knew the Persimmon Grid would make a great base for a vintage looking page. I have added from Prima a beautiful floral print and a green patterned paper.
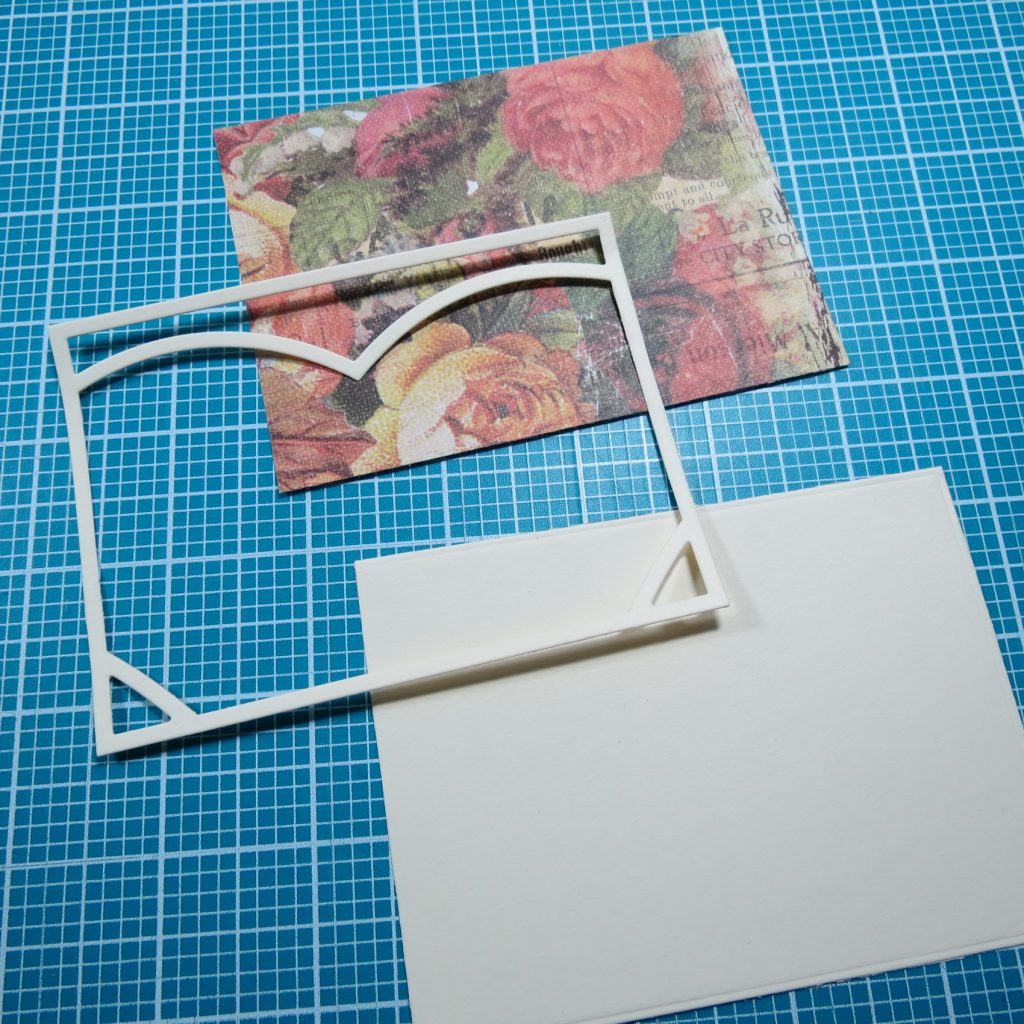
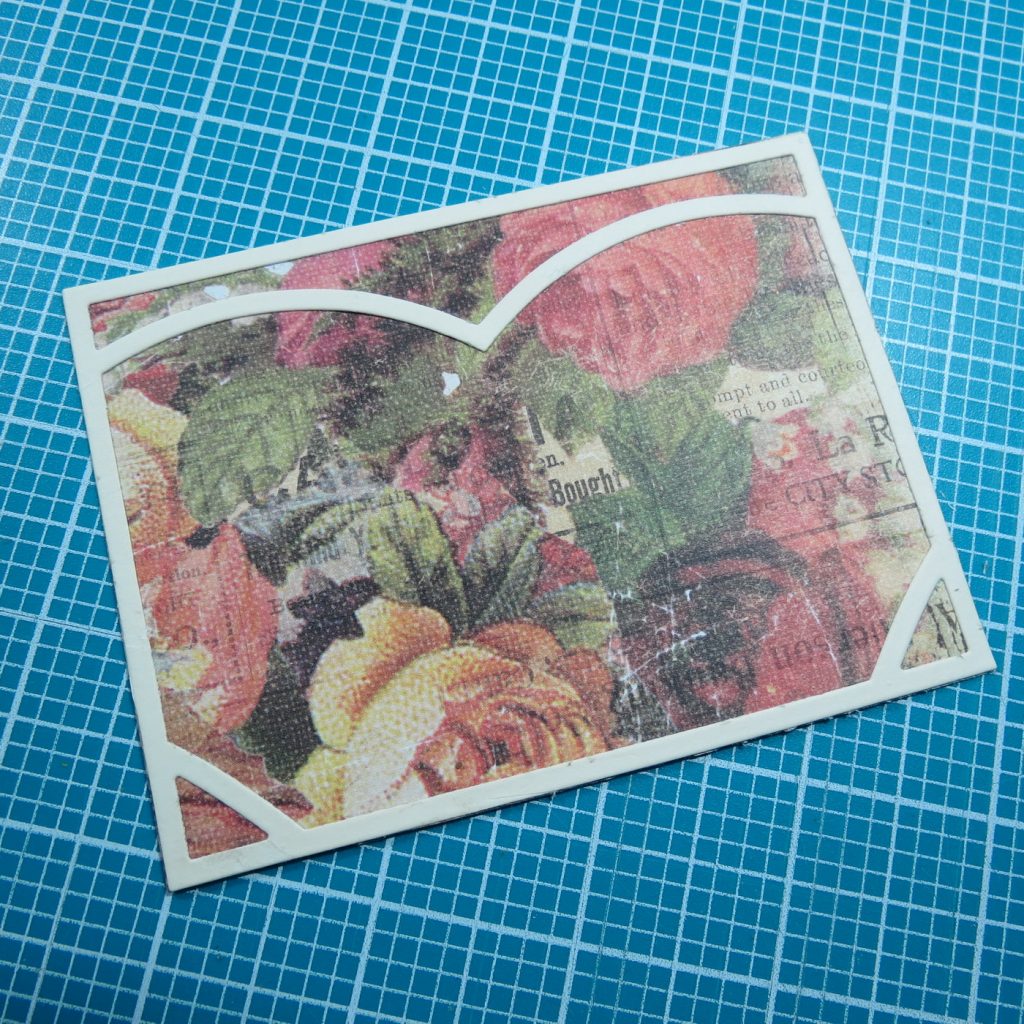
I’m using green and cream colored cardstock for my die pieces and some of the mats. I have cut 6 of the 3×3 sweetheart square and have layered three together for a beefed up corner piece. One of the 3×4 sweetheart sections is also cut.

Using the Mini Loop 1×3 die I’ve cut 8 of the mini-sweetheart and 2 of the quarter circle corners to place on the bottom row of 1” squares cut from the floral paper. I’ve placed the loopy side to hang from the bottom. Now my floral paper and loopy die sections frame my page top and bottom. I have also taken the quarter circle leftover cut in green to use as a photo corner for my journal spots.
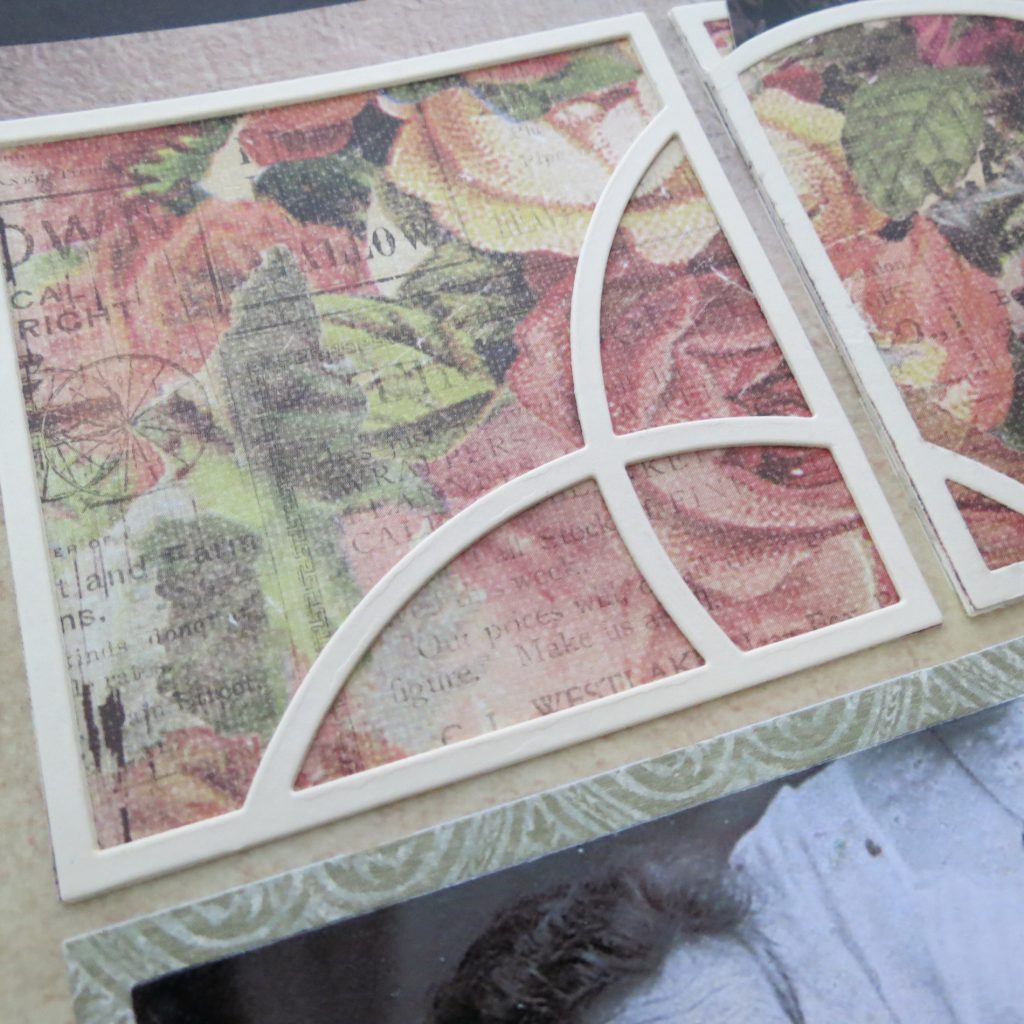
I’ve done something special to the 3×4 sweetheart die piece; I’ve constructed a pocket to hold my full story. Let’s take a closer look at the process.
Once the pieces are set, using an X-Acto knife trim carefully around the curve of the die piece creating two separated pieces.
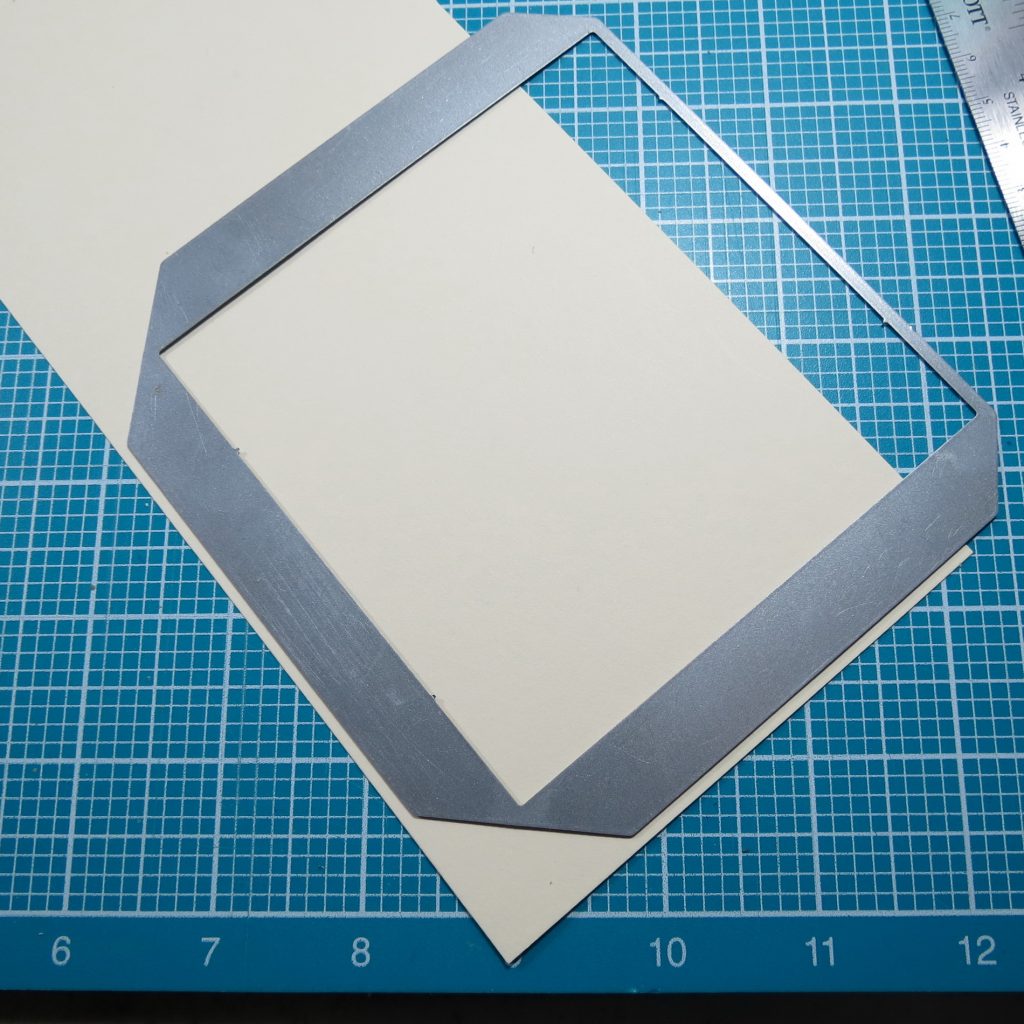
Cut a large pocket section and then trim the pocket to match the 3×4 die sections. The die gives you the width, but is higher than you need. Measure from the folded bottom edge and measure to 3.25” and cut.
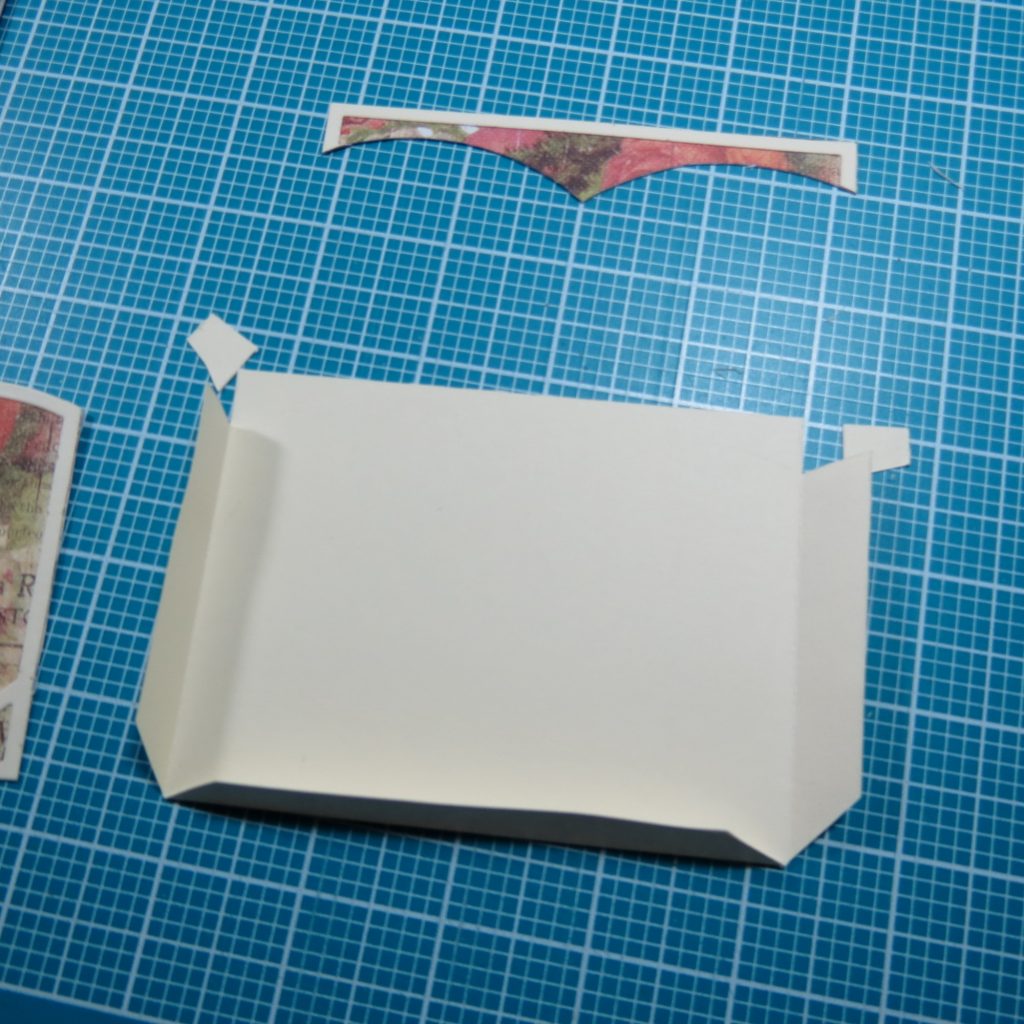
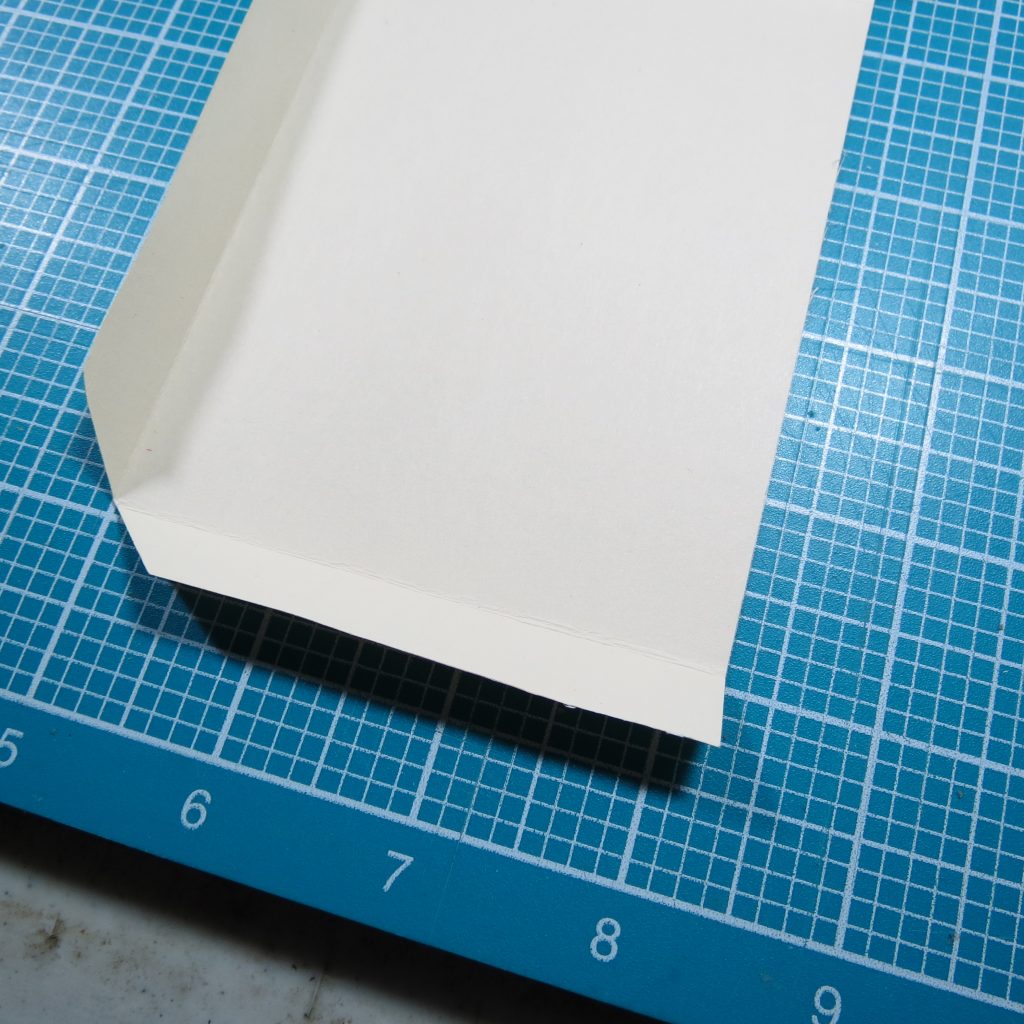
A small portion must be trimmed from the side flaps. I just lined the top section to easily mark and then cut.
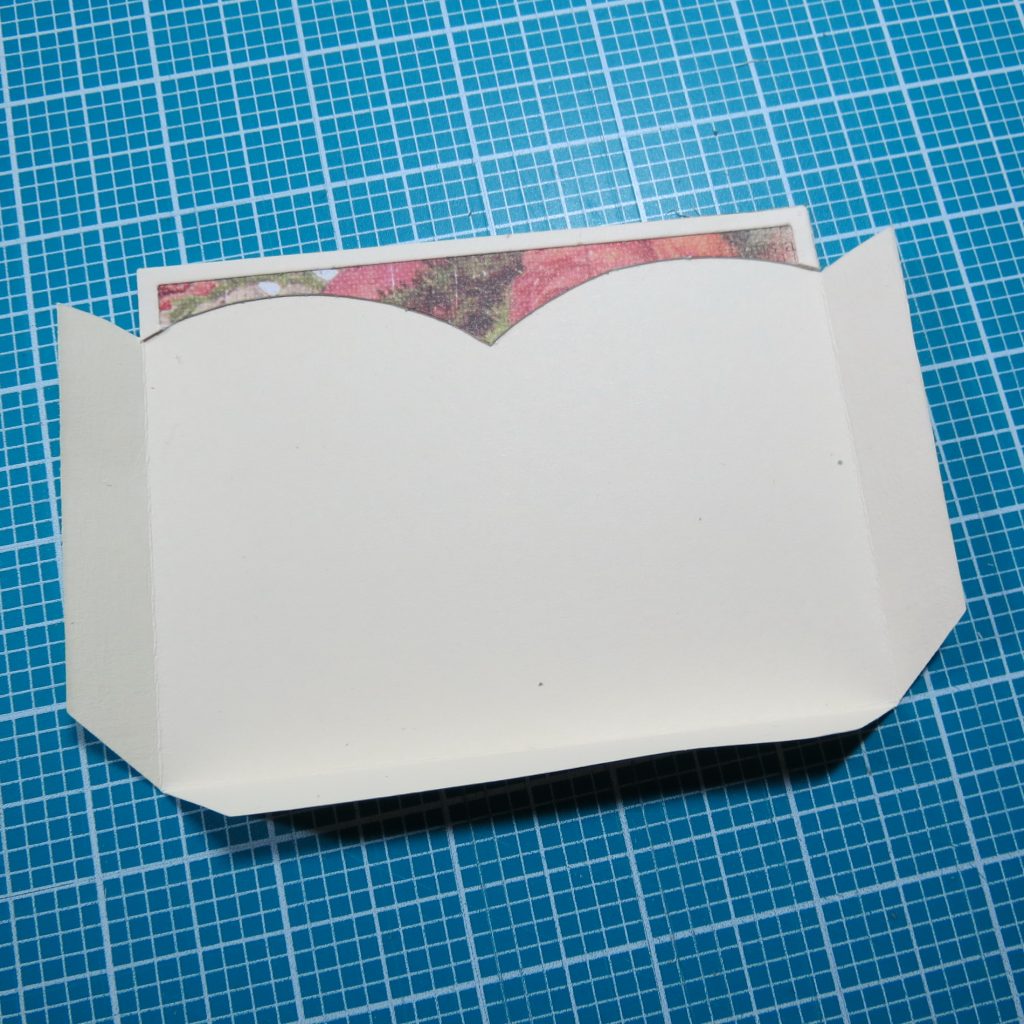
I took the trimmed section and adhered to the pocket inside back.
Then, I attached the remaining section to the front flaps using Scor-Tape for a secure hold.
Because this will hold a lot, I used a strong holding tape, Scor-Tape to apply it to the grid.
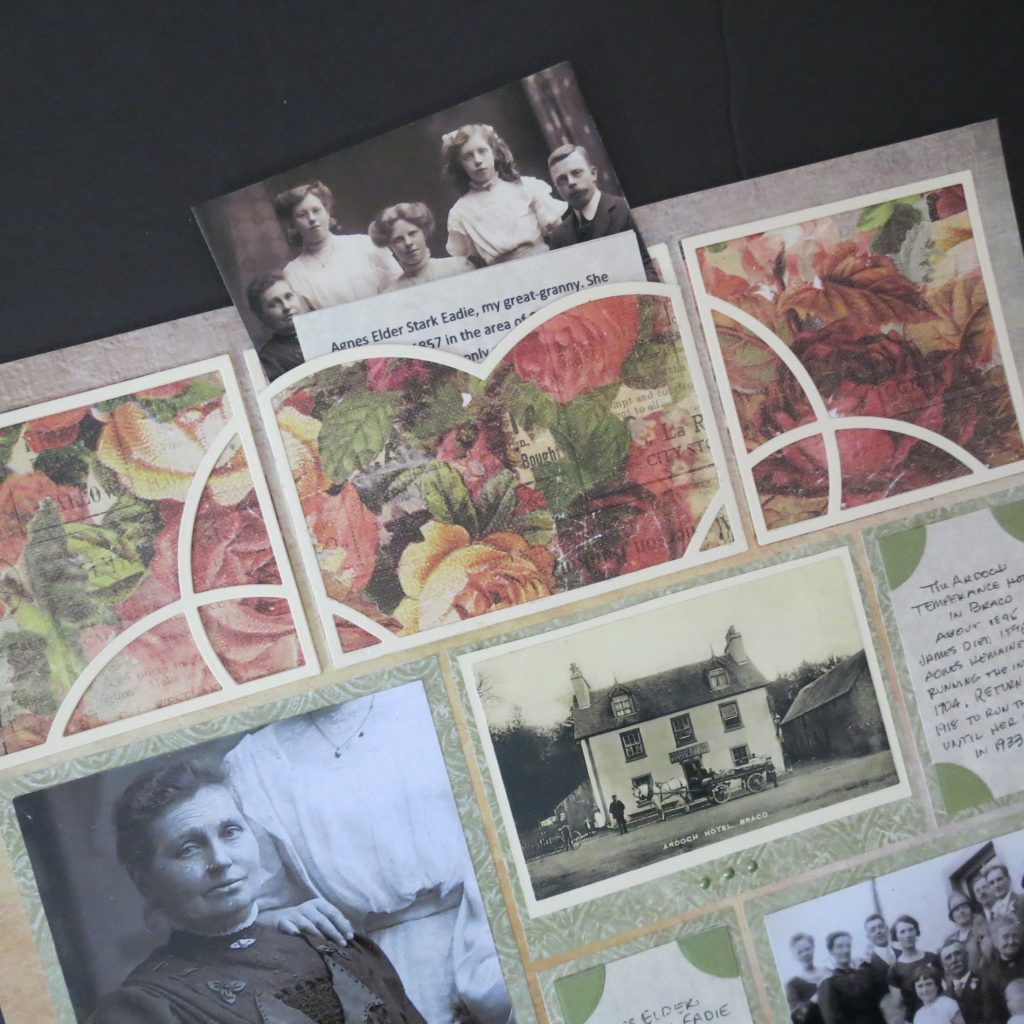
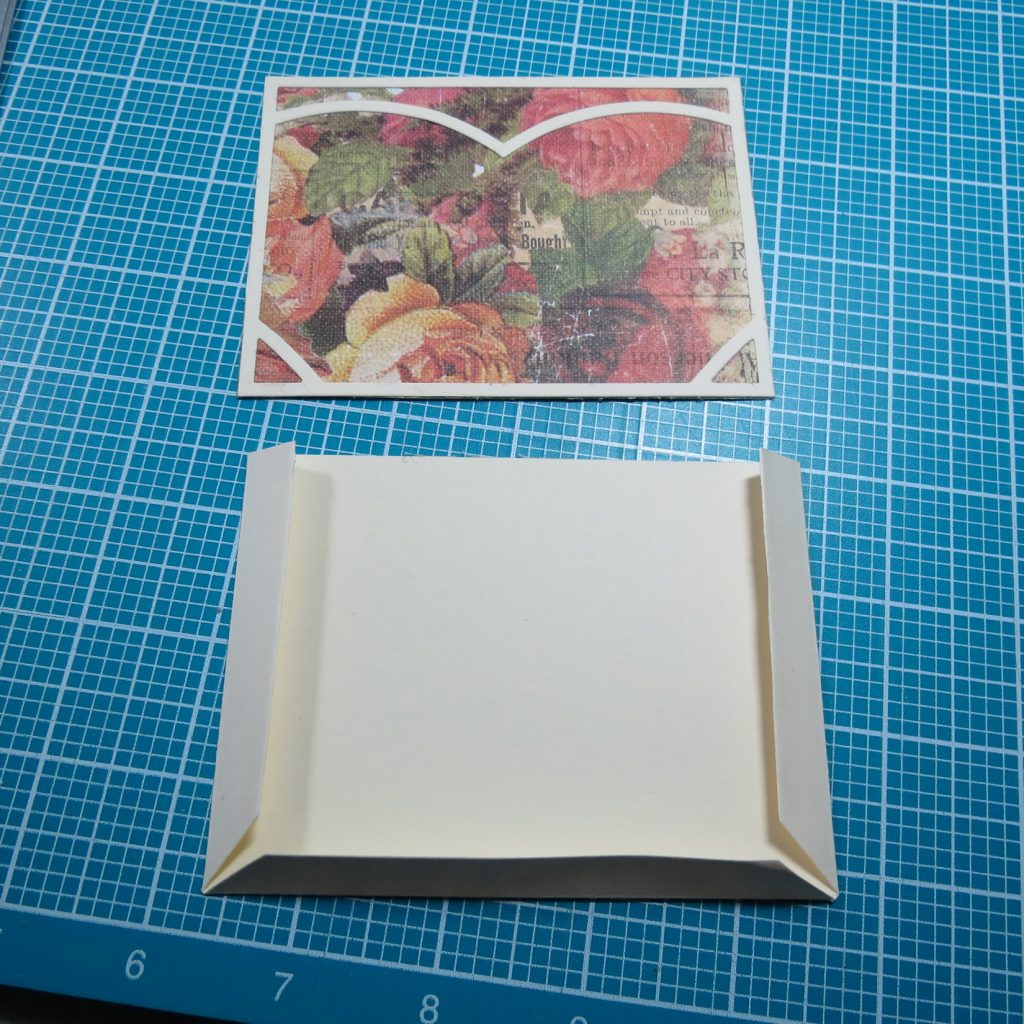
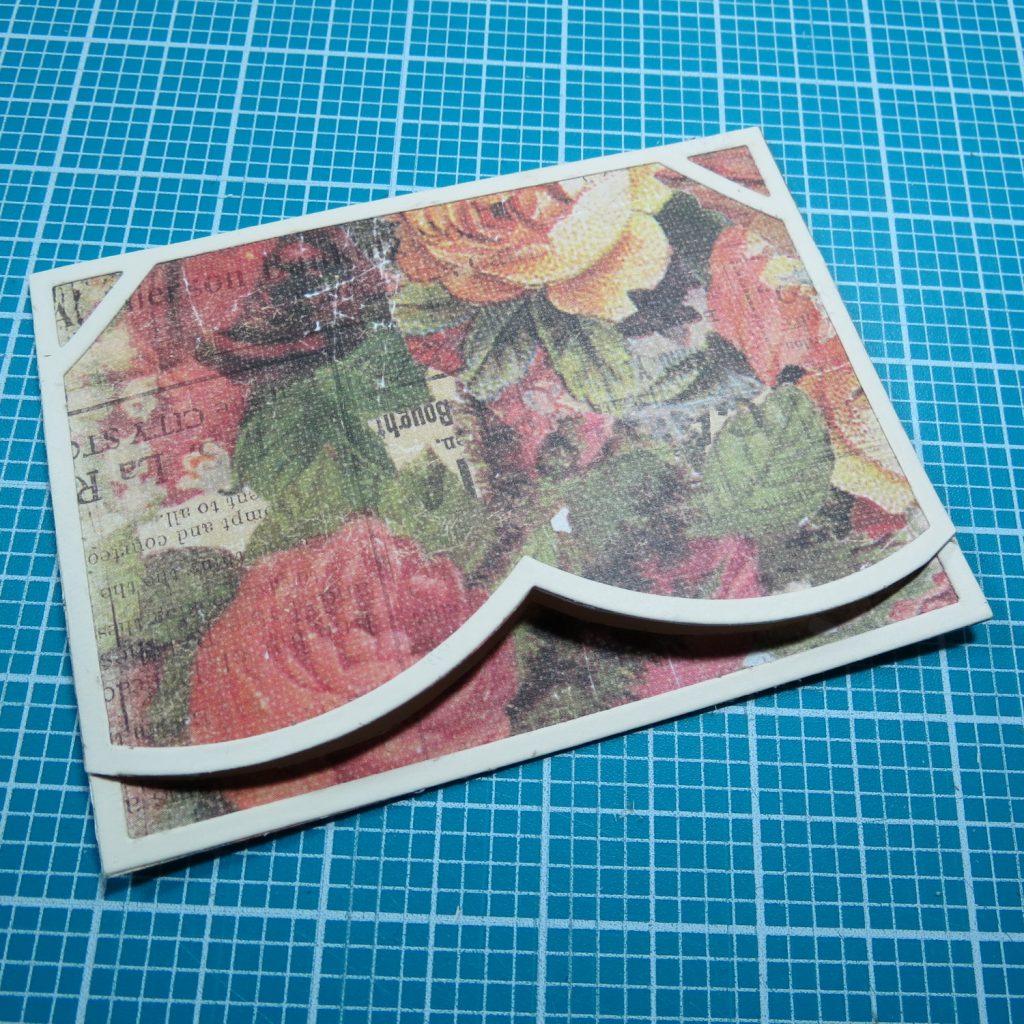
I’ve printed my story on parchment paper and formatted it to fit into the pocket printing on both sides, folding it and then tucking it into the pocket.
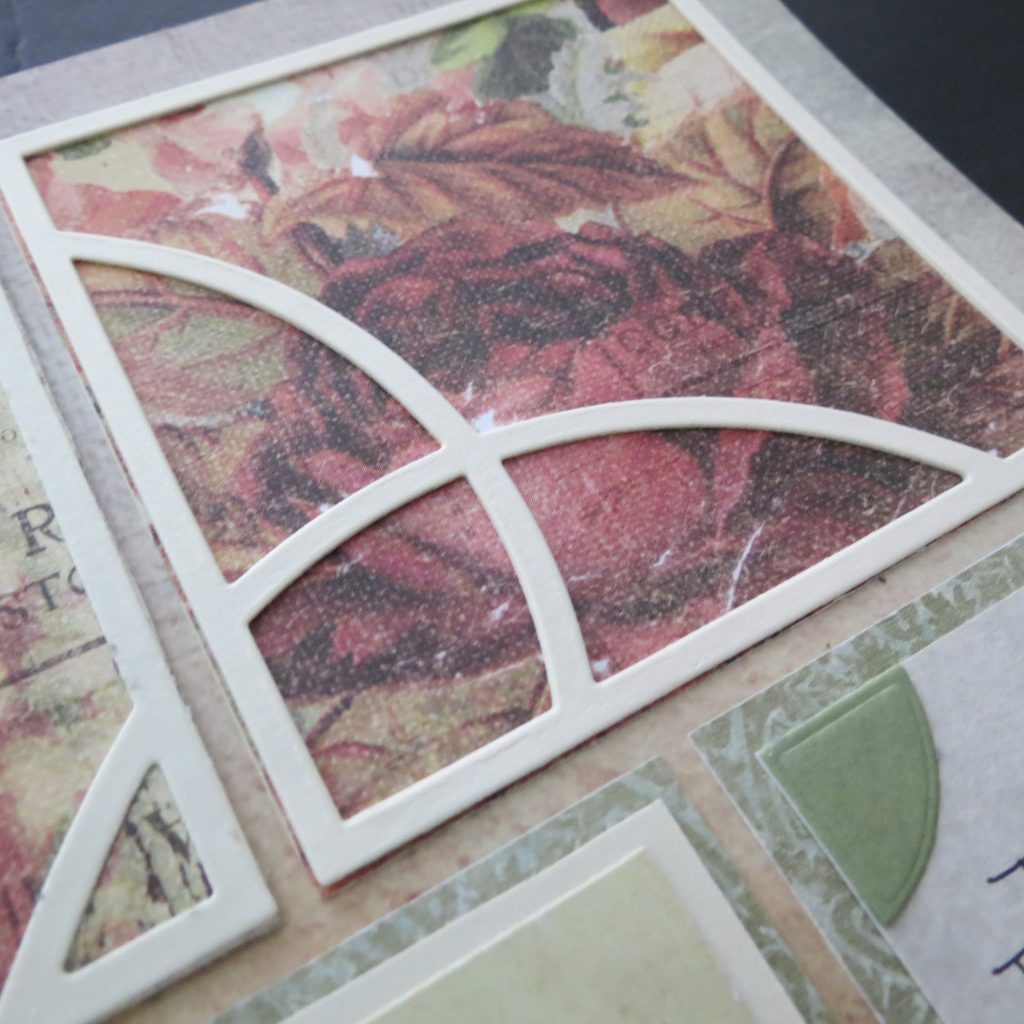
I wanted to have the 3×3 sweetheart squares prominent and so layering three together gives them just the right thickness. This die set reminds me of Battenberg Lace and lends itself so nicely to achieving a vintage feel of lace.
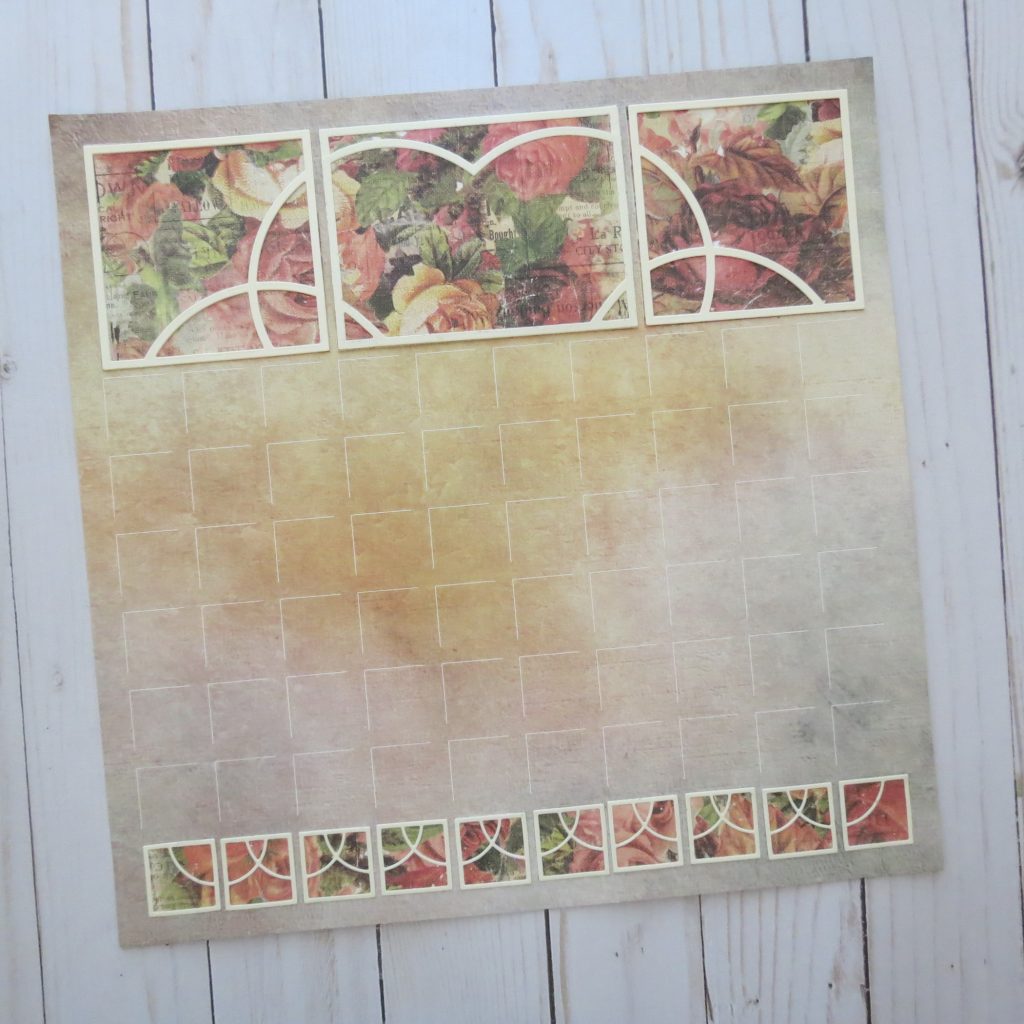
Persimmon Grid Paper, Sweetheart 3×3 and 3×4 Dies
No doubt you’ve noticed that I haven’t listed a page pattern yet. I have pulled parts of several patterns together for this one. The top and the bottom allow for a great deal of variety in what I would set up for the middle section. I had several photos that I wanted to include, but I wanted one of them to remain as a 4×6, the others were resized to allow a bit more info to be included.
Once I have placed the 4×6 to the far left side of this section what remains is a square space that I arrange my photos and journal spots in a pinwheel pattern.

The three additional photos I wanted to use on this page were not going to fit easily into my space, so resizing all by printing 2 each on a 4×6 gave me a workable size to include two with some journaling, while the third is tucked into the pocket with my story. This photo appears other places in my heritage albums so it didn’t need a prominent place. It is also the original that I cropped to get my great-granny’s 4×6 portrait.
For all the mats for the photos and journal spots in this large center section I’ve used my green print patterned paper. It unifies the section and lets me have any number of photo arrangements. It also lends itself to making this a two page layout if you desire and carrying the same design to page two.
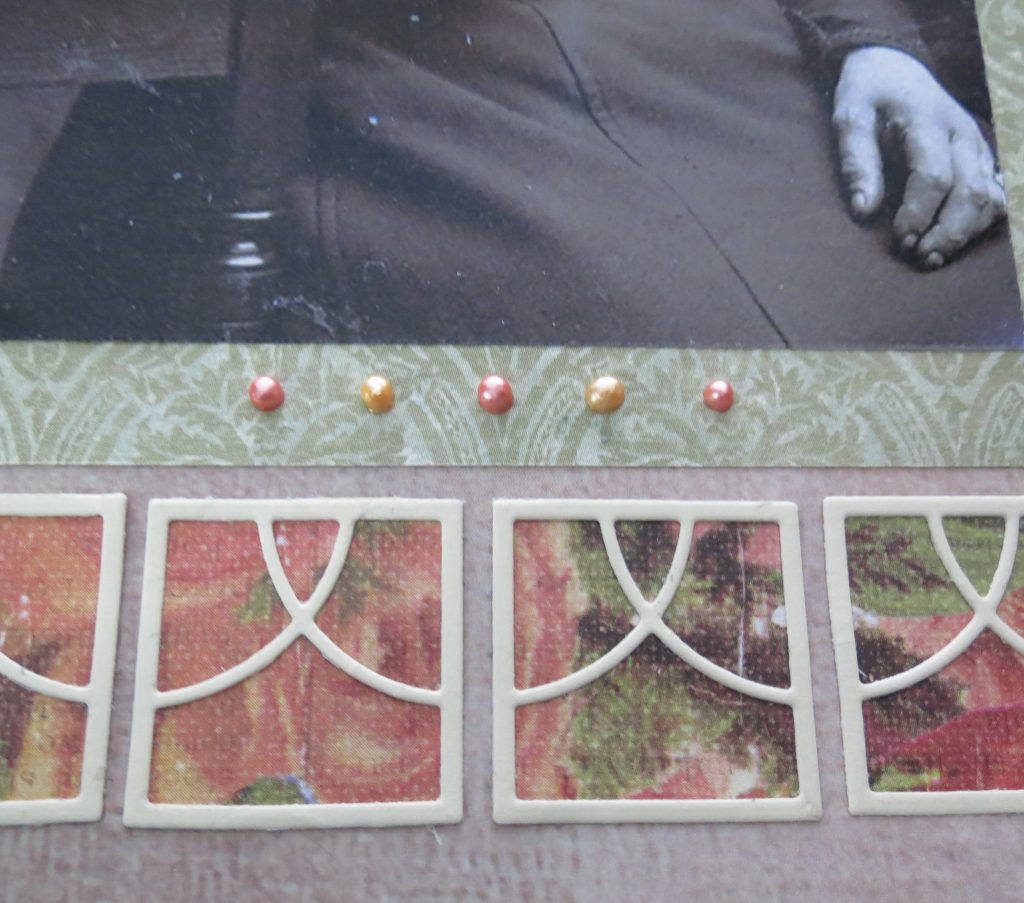
My journaling is completed on parchment and by hand. In the wider border areas I’ve used Liquid Pearls and Nuvo Drops to add a little color, texture, and interest. What would a vintage page be without a few pearls?
A Card Fitting for Mother
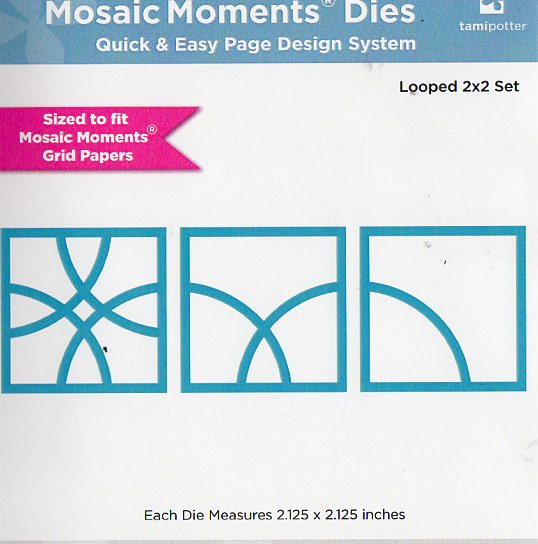
Have you tried out our new Mosaic Moments Grid Cards?
I’m going to show two versions using the papers from the Ancestry Layout and the 2×2 Loop dies and the mini-loop die set. One is fairly simple and the second a bit more labor intense, but both with very rewarding results.
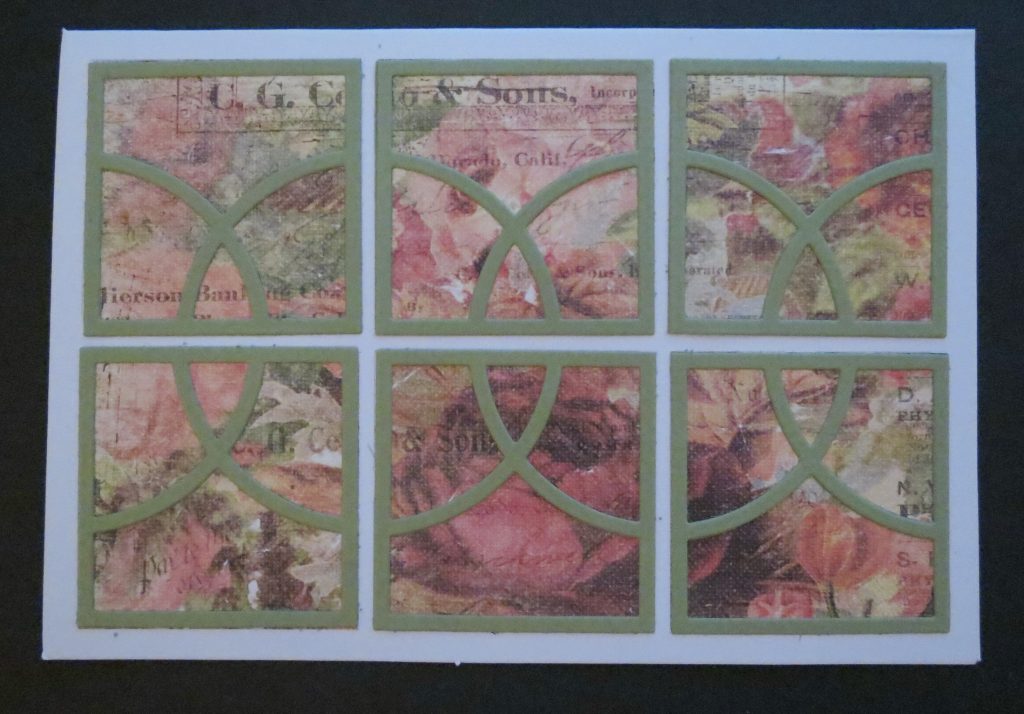
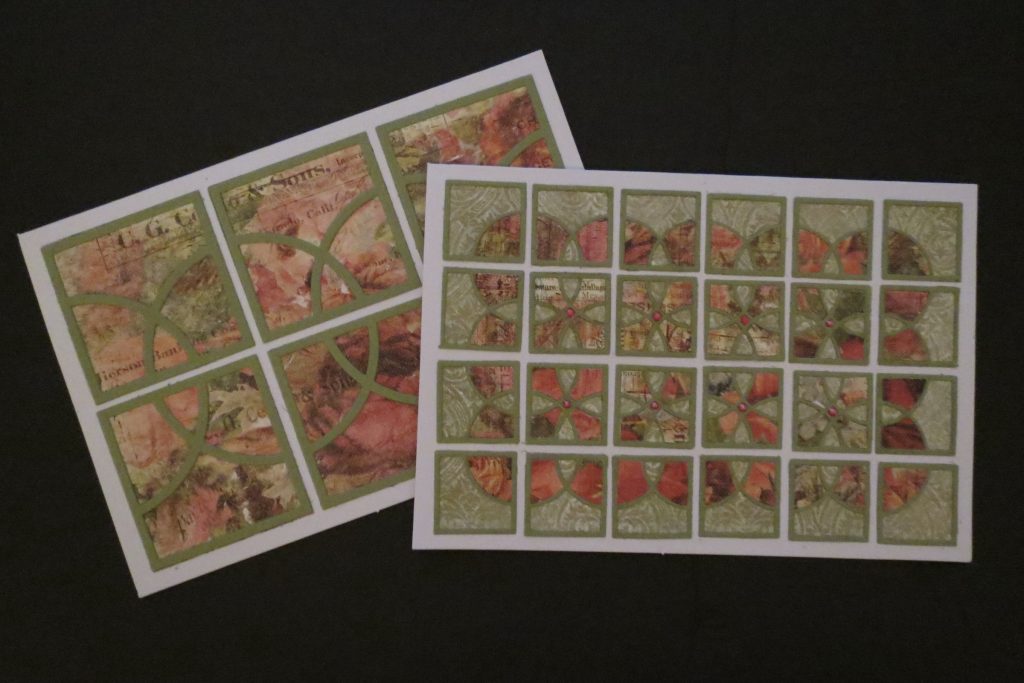
The first card I used the 2.125” grid to cut my six 2×2 squares from the floral print. Additionally, I cut six of the 2×2 sweetheart loop from the 2×2 Looped set in green. I chose green instead of the cream I previously used because our card is a white base and the green works well with the print and the base card. The pieces are arranged to complete intersecting circles. You could add a stamped sentiment on a separate cardstock if you wanted. I thought the patterned paper had a lot of interest and really wanted the die cuts to stand out.
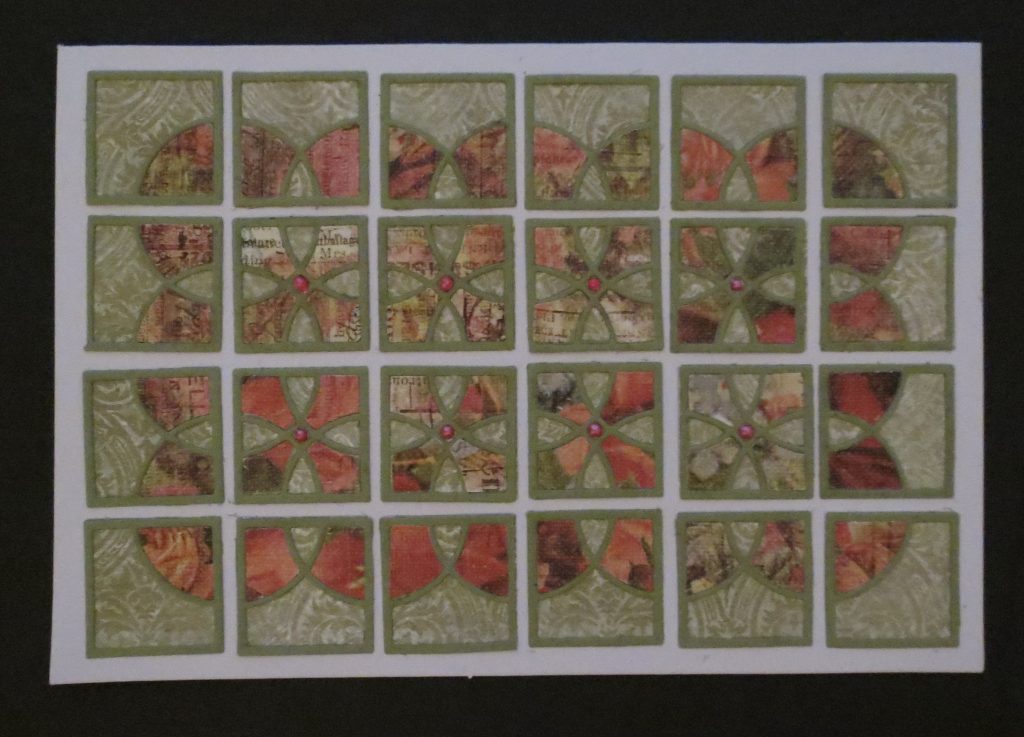
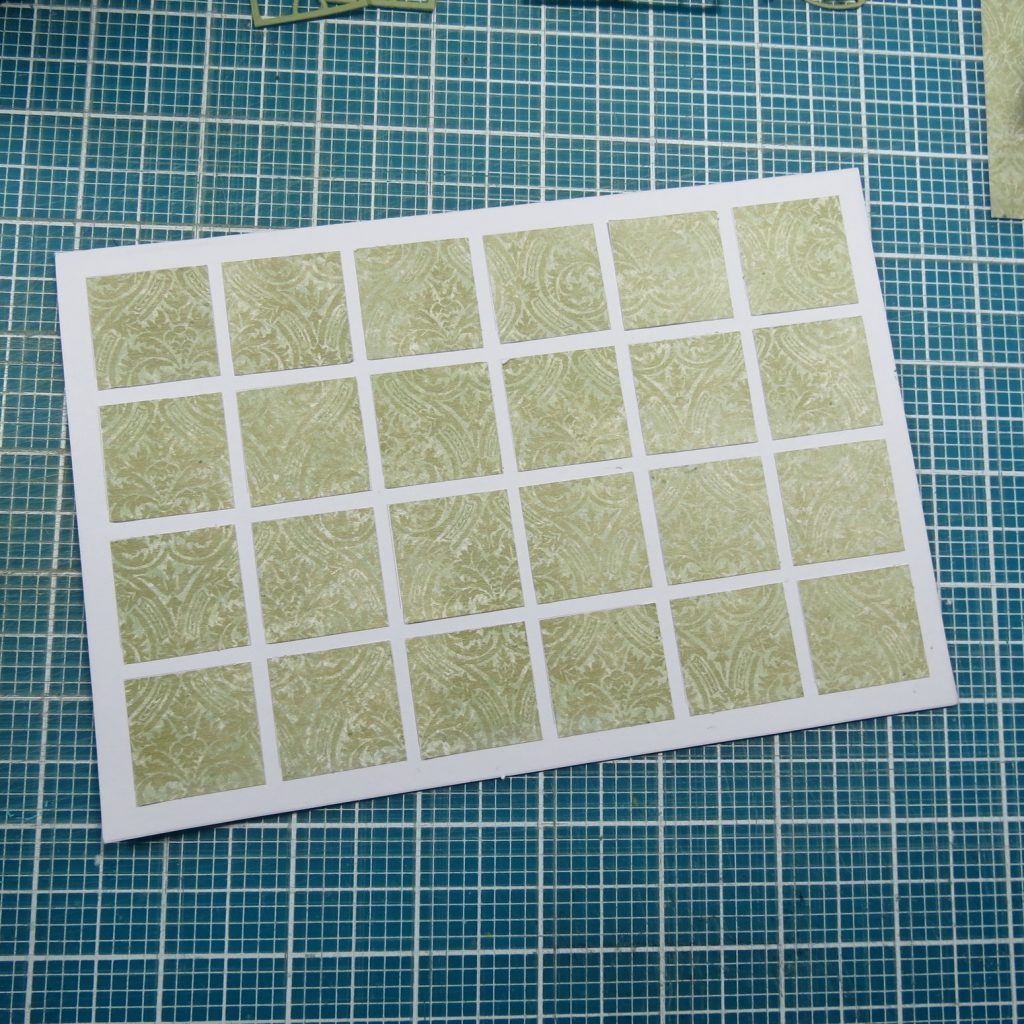
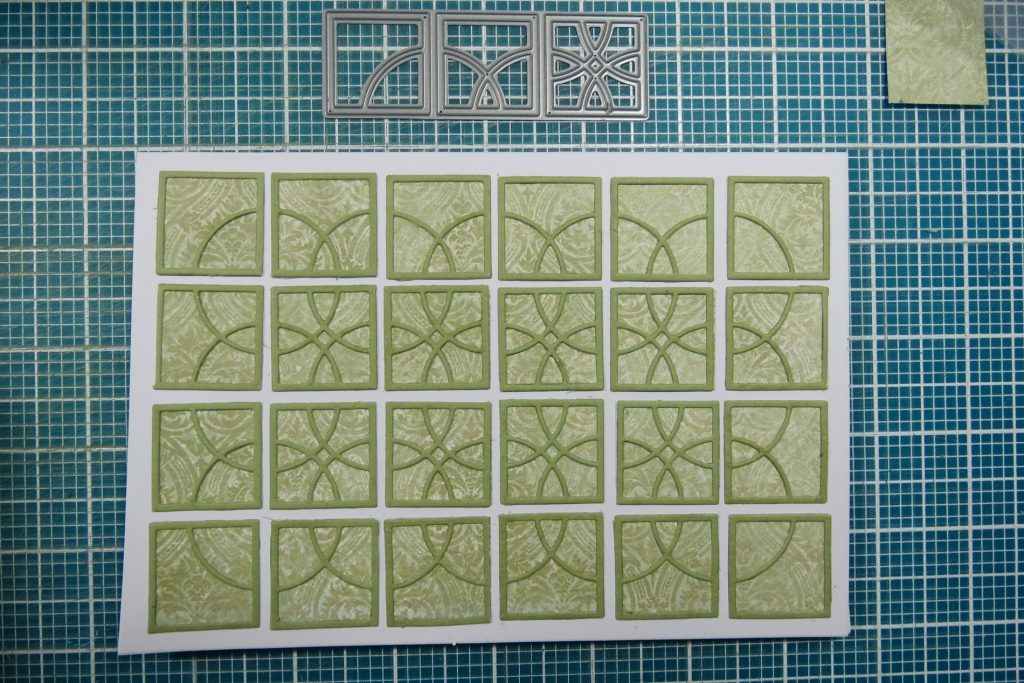
The second card is a bit more complicated but not as much as it may appear at first. Using the 4×6 1” grid die I cut the green patterned paper into 24 – 1” squares. Keep them in order if it’s a pattern and adhere. Then with the 1×3 mini-loop border dies cut 4 – quarter corners, 8 – of the cross sections, 12 – sweetheart-loops in green cardstock and adhere.
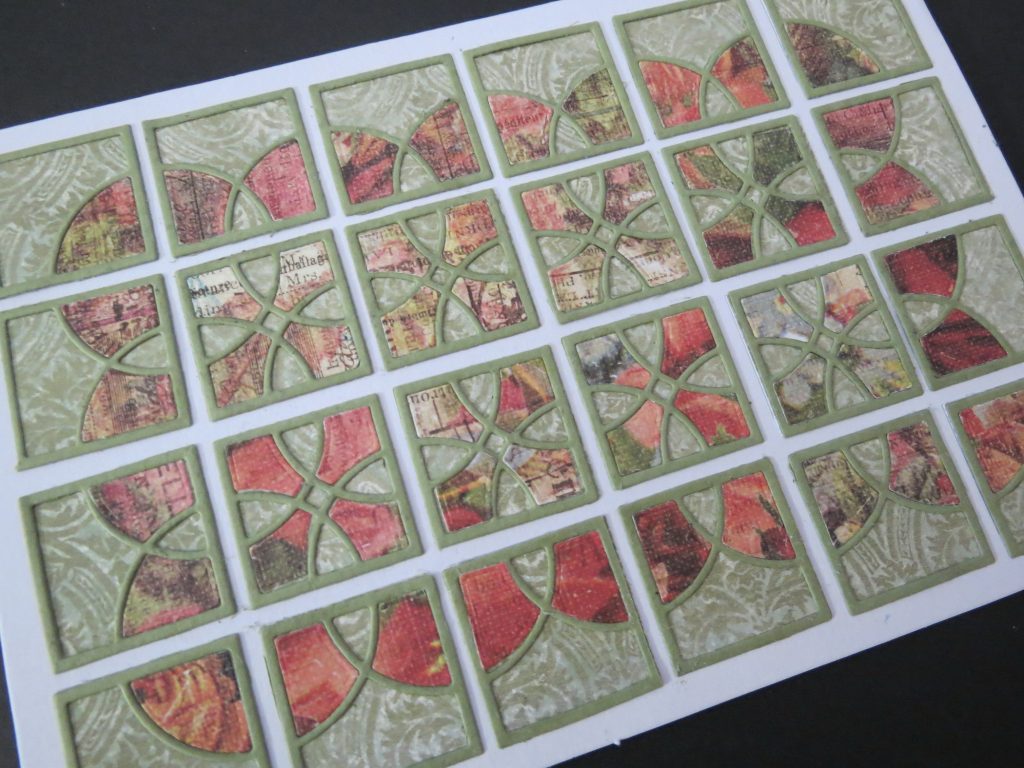
Repeating those cuts with the floral print you will take and fill in any random fashion that you want. I wasn’t too particular as the paper is very random and I think lends itself to the mosaic pattern, if your paper is a solid it won’t really matter, you will have a different look.
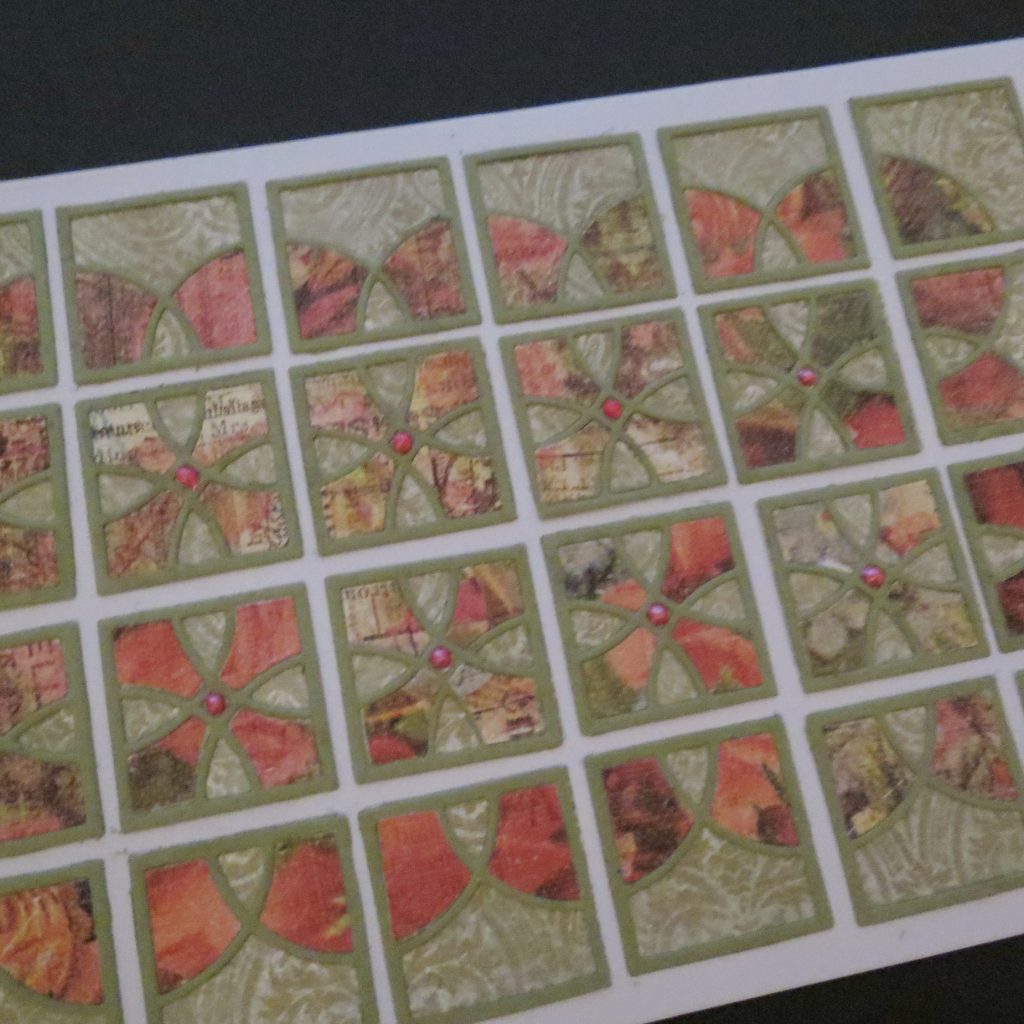
To finish this card off I decided to use Liquid Pearls in the center of each of the cross sections
Experiment a bit and see what you can come up with for this design. All the sentiments can go inside the card so it doesn’t distract from the design.
So whether you are looking for a special Mother’s Day card or something special for another occasion you will have many options with the change of pattern papers and cardstocks and how you use them on your card. See how many variations you can create!
Andrea Fisher