
Can you guess the hardest part of making a photo mosaic? How to begin! Many of you have expressed that it’s difficult to start making a page. Sometimes you come up with a layout idea instantly. But, that isn’t always the case.
The biggest question is – Where do you place the photos? The answer is to use a pattern as your guide!
One of the best things that we came out with is the Page Pattern Gallery. Now you don’t have to worry about designing your layout. You just need to pick the best ones for your photos – But how do you choose? Below I show my step-by-step process to help you decide.
[/vc_column][/vc_row][vc_row no_margin=”true” padding_top=”0px” padding_bottom=”0px” border=”none”][vc_column fade_animation_offset=”45px” width=”1/1″][/vc_column][/vc_row][vc_row no_margin=”true” padding_top=”0px” padding_bottom=”0px” border=”none”][vc_column fade_animation_offset=”45px” width=”1/1″]
1. Choose A Collage or Mosaic Style Layout
The first question you need to ask is if you want some, or even most, of your photos to be cut into mosaics? Or do you want to keep most of your photos larger for a collage look? See examples below:
[/vc_column][/vc_row][vc_row no_margin=”true” padding_top=”0px” padding_bottom=”0px” border=”none”][vc_column fade_animation_offset=”45px” width=”1/1″][/vc_column][/vc_row][vc_row no_margin=”true” padding_top=”0px” padding_bottom=”0px” border=”none”][vc_column fade_animation_offset=”45px” width=”1/3″]

Pattern #255
Collage Style – Very little or No mosaic elements
[/vc_column][vc_column fade_animation_offset=”45px” width=”1/3″]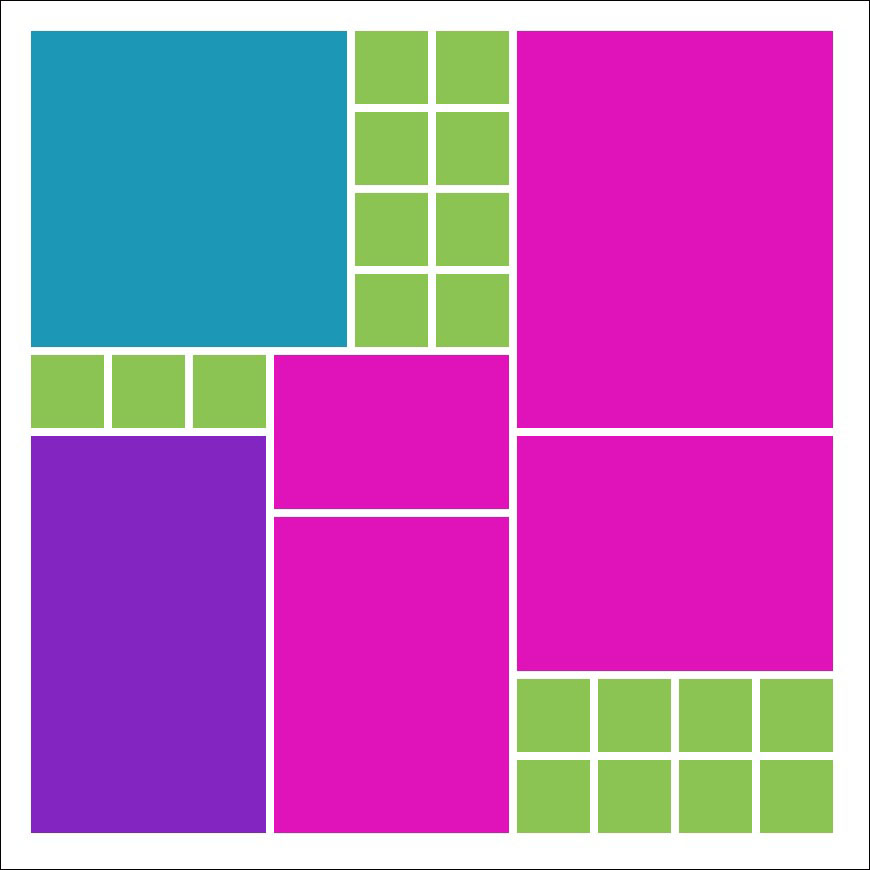
Pattern #263
Mix of mosaic elements with large design spots
[/vc_column][vc_column fade_animation_offset=”45px” width=”1/3″]
Pattern #198
Mosaic Style – Large portion is made of 1 in. squares
[/vc_column][/vc_row][vc_row no_margin=”true” padding_top=”0px” padding_bottom=”0px” border=”none”][vc_column fade_animation_offset=”45px” width=”1/1″][/vc_column][/vc_row][vc_row padding_top=”0px” padding_bottom=”0px” border=”none”][vc_column fade_animation_offset=”45px” width=”1/2″]
 [/vc_column][vc_column fade_animation_offset=”45px” width=”1/2″]
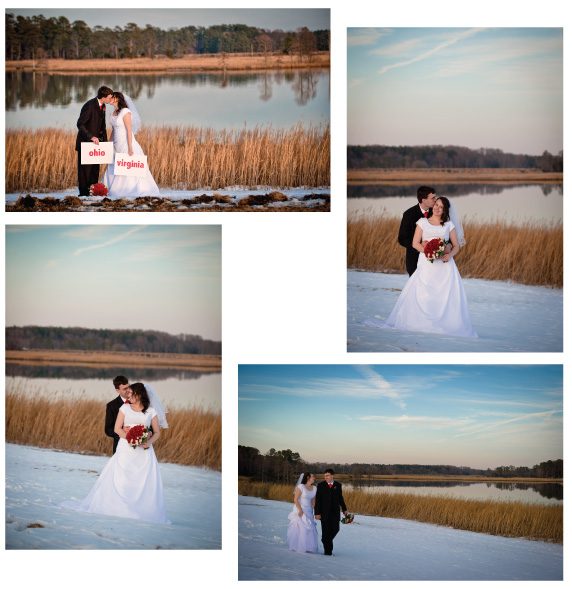
Example: These are 4×6 pictures I want to use on a photo mosaic layout. All of them are portraits, so I do not want to cut them into a mosaic style. Plus I want to have the scenery in the photos show – so I will need a pattern with large design spots.
I believe the best option would be to pick a collage style pattern for my chosen photos.
[/vc_column][/vc_row][vc_row no_margin=”true” padding_top=”0px” padding_bottom=”0px” border=”none”][vc_column fade_animation_offset=”45px” width=”1/1″][/vc_column][/vc_row][vc_row padding_top=”0px” padding_bottom=”0px” border=”none”][vc_column fade_animation_offset=”45px” width=”1/1″]
2. Choose a Pattern based on the Following Criteria
- Number of Photos & Embellishments – Look through the categories with the number of design spots you need to fit everything. For my example, I am using four photos and a little patterned paper. So, I will be searching through patterns in the 1-9 image spots and possibly the 10-19 image spots categories.
- Type of Cut: Mosaic, Cropped, or Full Image? – You need to figure out which photos you would like to cut into mosaics, which photos you will need to keep full size, and any you might be able to crop smaller. I want to keep my photos larger, so I will look for patterns with several large design spots. (Tip: Generally, The more design spots a layout has, the smaller the design spots will be.)
- Vertical, Horizontal, or Square? – Look for a pattern that fits the orientation of your photos. I have two vertical photos and two horizontal photos. I would like to find a pattern that will fit both orientations, such as a pinwheel pattern. Or I could use patterns with square designs and trim my photos.
[/vc_column][/vc_row][vc_row no_margin=”true” padding_top=”0px” padding_bottom=”0px” border=”none”][vc_column fade_animation_offset=”45px” width=”1/1″]
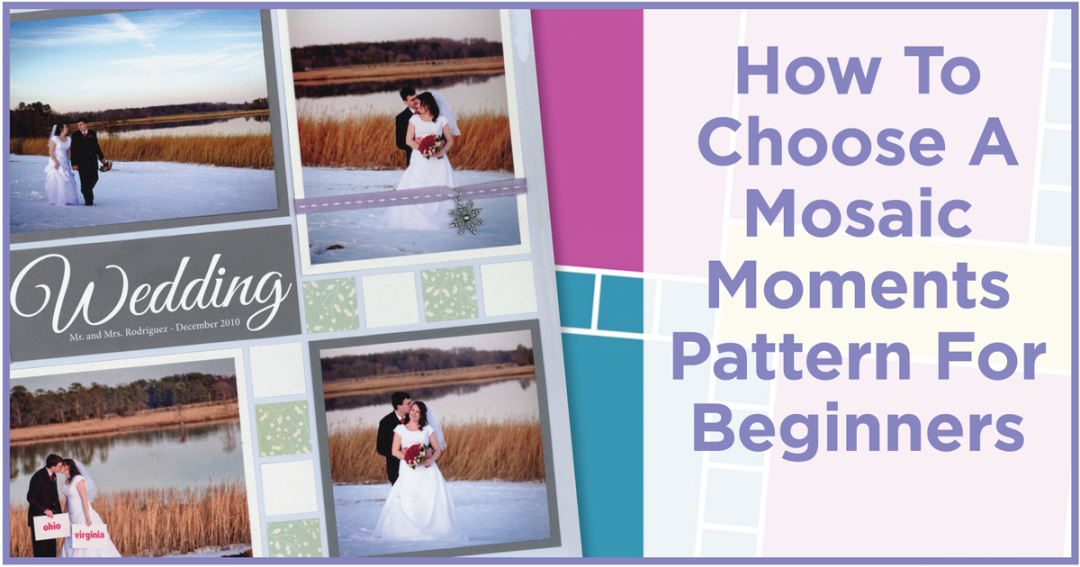
Final Result for My Photo Mosaic:
[/vc_column][/vc_row][vc_row no_margin=”true” padding_top=”0px” padding_bottom=”0px” border=”none”][vc_column fade_animation_offset=”45px” width=”1/1″][/vc_column][/vc_row][vc_row no_margin=”true” padding_top=”0px” padding_bottom=”0px” border=”none”][vc_column fade_animation_offset=”45px” width=”1/2″]
 [/vc_column][vc_column fade_animation_offset=”45px” width=”1/2″]
 [/vc_column][/vc_row][vc_row no_margin=”true” padding_top=”0px” padding_bottom=”0px” border=”none”][vc_column fade_animation_offset=”45px” width=”1/1″]
[/vc_column][/vc_row][vc_row no_margin=”true” padding_top=”0px” padding_bottom=”0px” border=”none”][vc_column fade_animation_offset=”45px” width=”1/1″]
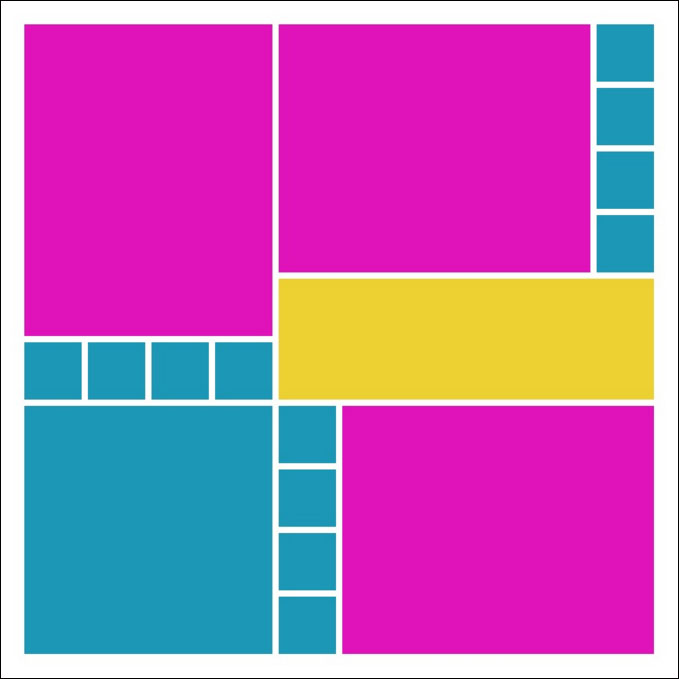
Why I chose Pattern #129 (*note that I mirrored the pattern to fit with my photos better):
- Fits 4 Photos and has extra space for some patterned paper
- The Design spots are larger, so my 4×6 photos could stay nearly full size.
- Design spots fit both horizontal and vertical photographs. Plus I could trim one into a 4×4 square.
Note: In some cases you may need to add or take away something you originally planned for. For my page, I didn’t have paper or photos to fit the yellow space. My Solution? Place a Fancy Title!
Are you ready to start creating photo mosaics? I hope finding the right pattern will help the process become faster!
Happy Scrapping!
[/vc_column][/vc_row]