
I love cards that have multiple folds, pop-ups and other working parts. They are perfect for special occasions and Valentine’s Day is one of those occasions.
Like many of you, I find inspiration, patterns and ideas on Pinterest. This card idea began with something I first saw there and thought would be a perfect use of our RTC Grid paper! So let me show you this Twist!
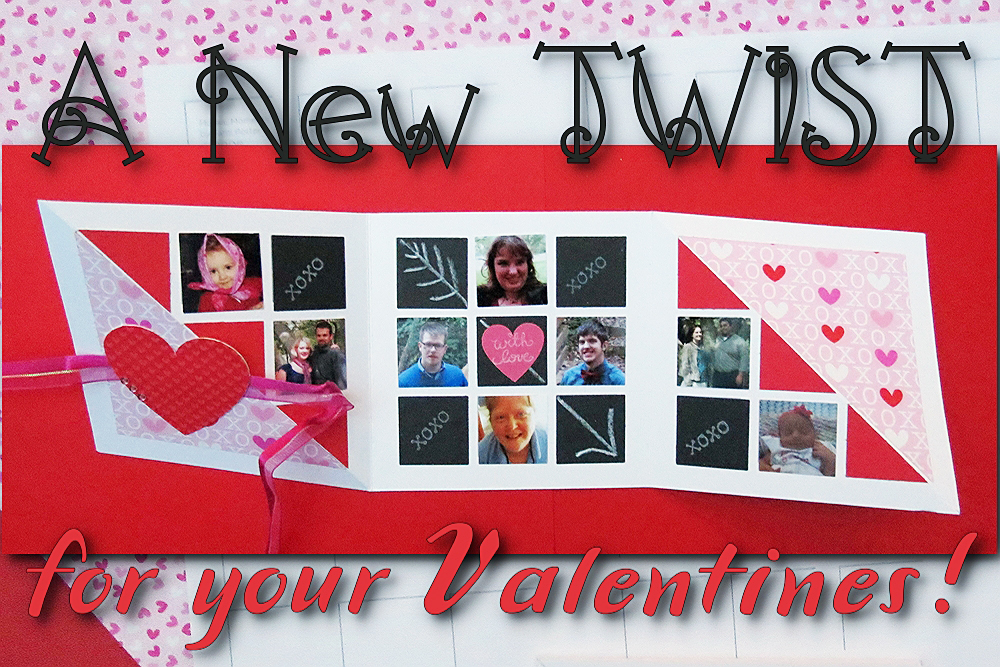
I began with one 4″ x 12″ section of the RTC grid paper. At 4″ intervals I scored the strip. Then in each end section I scored the page diagonally top left to bottom right intersecting each of the squares in the path at their corners. Fold each end in towards the middle and fold the triangles so that the fold peak is up. The twist comes as you open the card by holding the corners and pulling outward the card opens into a three section.
I chose a heart patterned paper to use on the cover, cut it to 3.25″ and diagonally cut it and applied it to the card face.
Opening it up, on the remaining triangle on each side, I used our new Corner Tiles in red along the fold for a chevron/step like pattern. A black 1″ tile was used in the corner of each of these outside sections and 1″ photos to fill in the other two.
In the middle section I created a tic-tac-toe type pattern in black 1″ tiles. This could be done in chalkboard tiles, but the cardstock worked just as well with the China Marker. (see previous post:Chalk it Up!) I drew an arrow across three tiles. In the center section a heart from the new Heart Frames became the perfect spot for my stamped message. The remaining black tiles were stamped with x’ and o’s. (Stamps are from DeNami Designs)
The photos used were of my family, I thought it would make a nice card for my Mum for Valentine’s Day. Each photo was cropped into a square before printing on a 4″ x 6″ then an 1″ punch was used to cut them out.
To finish the card off, it needed a pretty ribbon to tie it together and another heart from the Heart Frames was covered in patterned paper and then a few crystal gems for a bit of bling to finish it off. I placed my adhesive under the ribbon and behind the heart to hold it all securely together. Be careful to leave the top right edge of the heart free to move as you open and close the card. I centered the heart on the tile it would open to to determine where it should be adhered on the front.
This is a quick project to put together and can be adapted with as many or as few photos in the 1″ squares inside that you decide how to decorate using the chalkboard areas.
Have fun creating something special for that special someone in your life!
Happy Valentine’s Day!!
andrea