
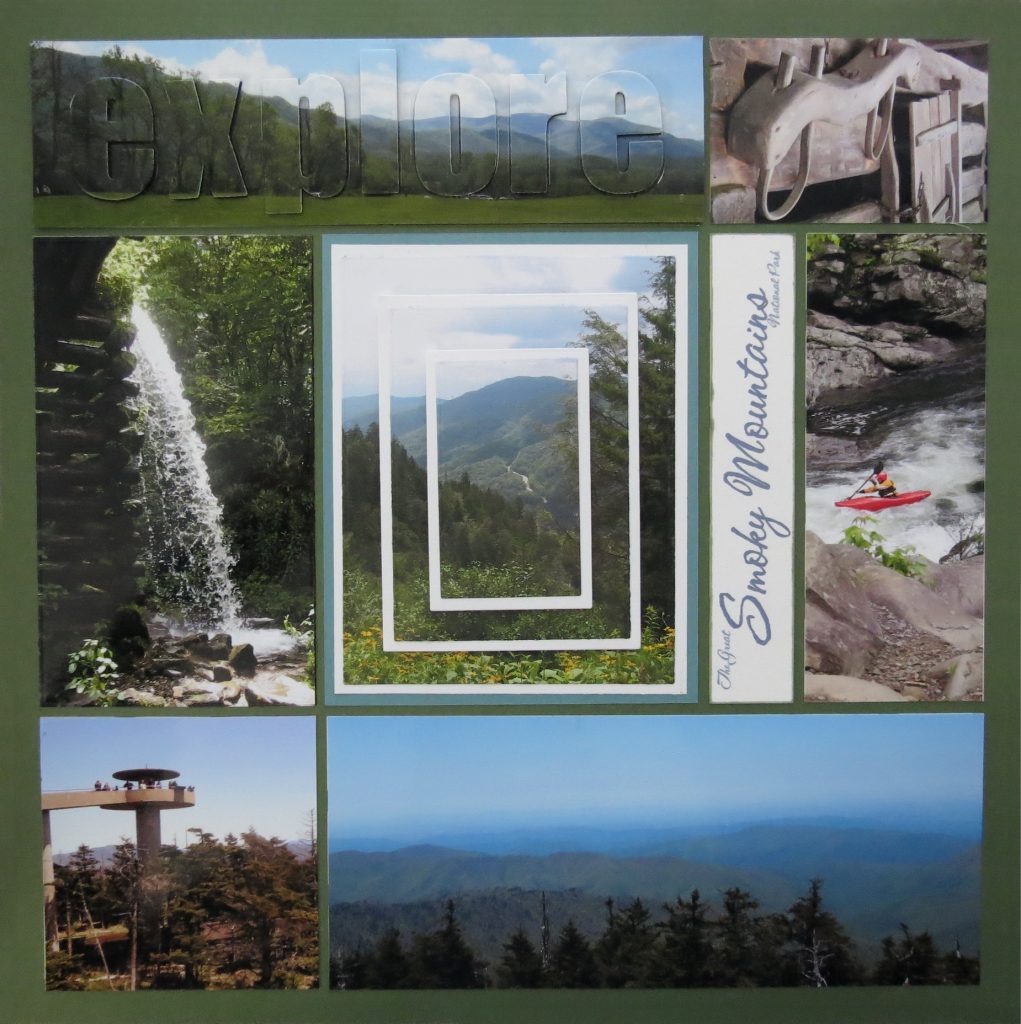
Explore the Great Smoky Mountains National Park
The Basic Dies and the Layering Dies are wonderful, but sometimes getting creative with what you can do with them will add a bit of punch to your pages. We’ll try two layering techniques one with Mosaic Moments dies and one without.
Tennessee has been a frequent destination for my family over many years and each time we are near the mountains I take tons of photos of the breathtaking beauty of the Smokies.
This group of photos has a little bit of everything you will find if you take some time to explore this great National Park. I’ve chosen Pattern #230, a row pattern, and Mosaic Moments Cedar Grid Paper from the Trailblazer Collection of 12 x 12 grid papers for this layout.

My narrow 1×5 title was printed using CAC Shishoni Brush and the edges are inked with Tim Holtz Distress Ink Peeled Paint.

Now let’s get to the first technique!
Technique 1
Triple Layering Technique using the Basic and Layering Die Sets
I was inspired to try this on a scrapbook page when I saw it being done for greeting cards. I’ve had the idea tucked away for a while and I thought it would be a grand way to try using multiple layering dies at one time.
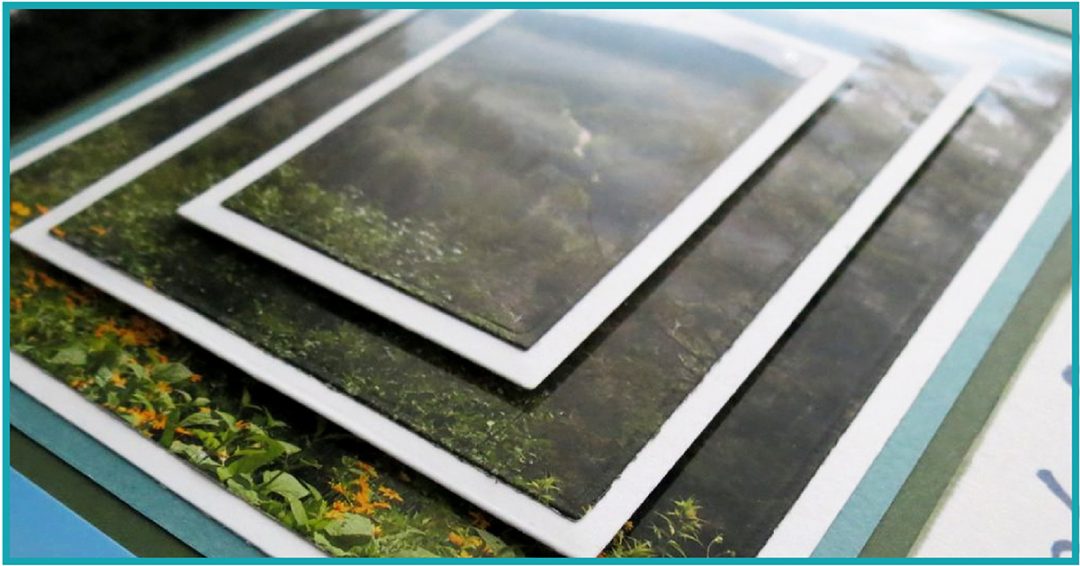
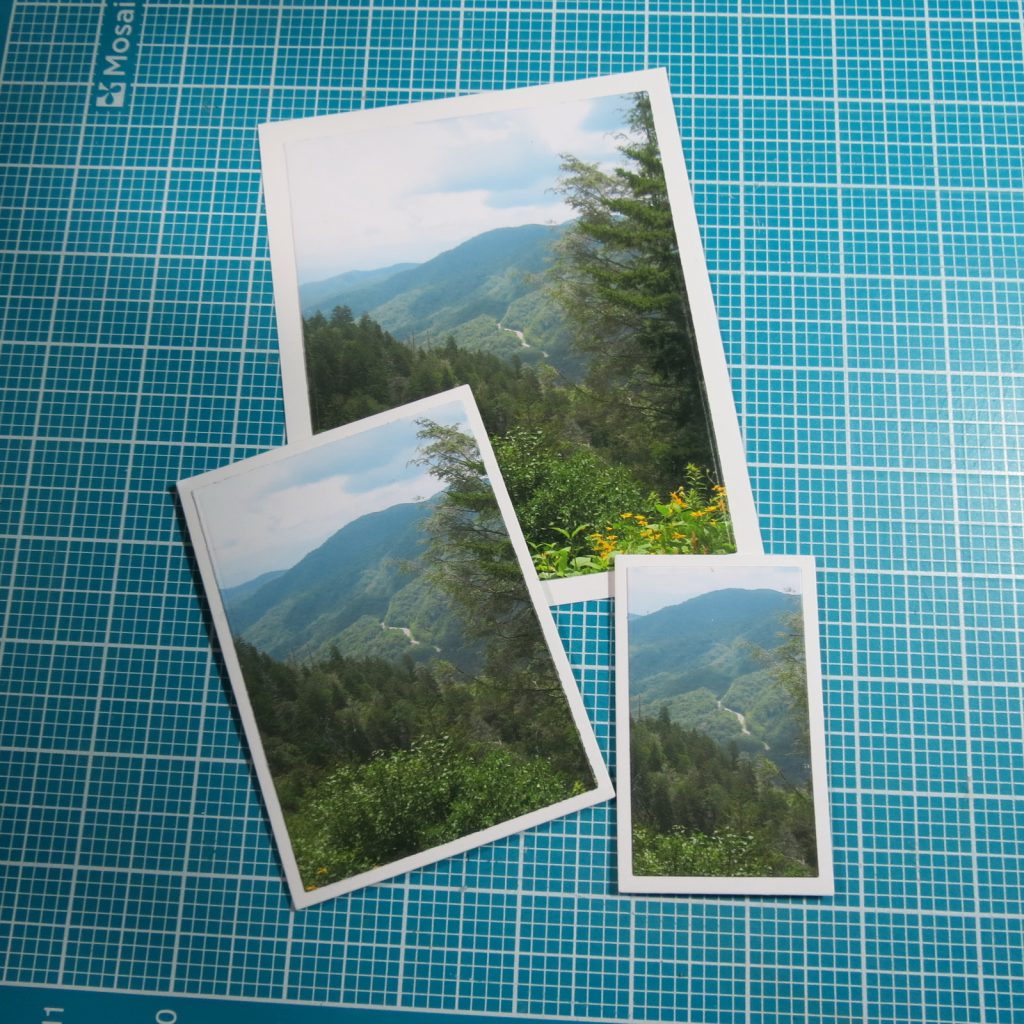
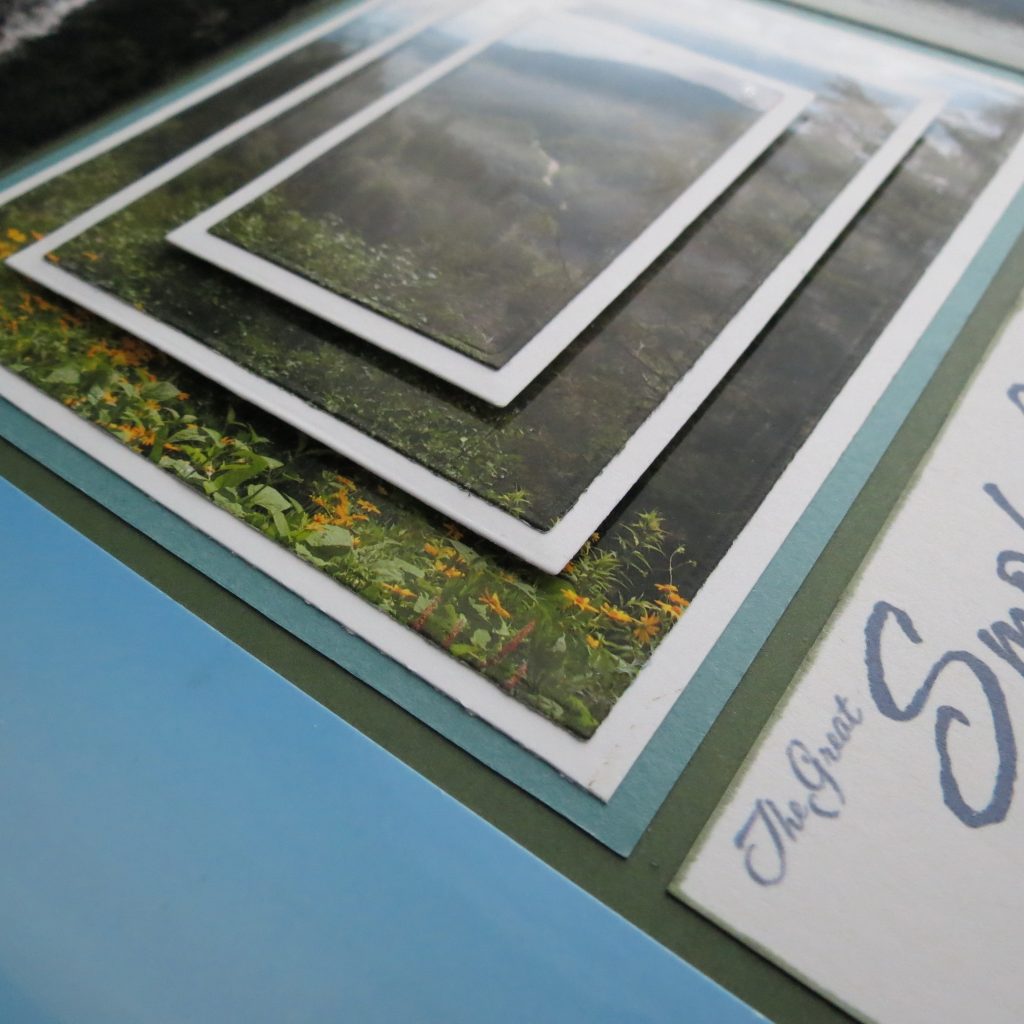
1. I began by printing one photo 3 times. I chose one with a focal point in the distance so your eye would be continually drawn inward on the photo.
2. My pattern calls for a 4×5 spot, so my base is cut to fit that space with Die Set C.
I had begun with a blue mat because of the grid I had planned to work with, but switched to white and then eventually narrowed the white base and added a subdued blue for the narrow 1/8” base when I changed the grid I was going to use. In the end, I thought the 1/8” borders were a better base look.
3. Then using the layering die from the Basic Set C I trimmed each of the photos to the same size by layering all three together. While it didn’t cut all the way through I did get an impression and then cut each individually with the die.
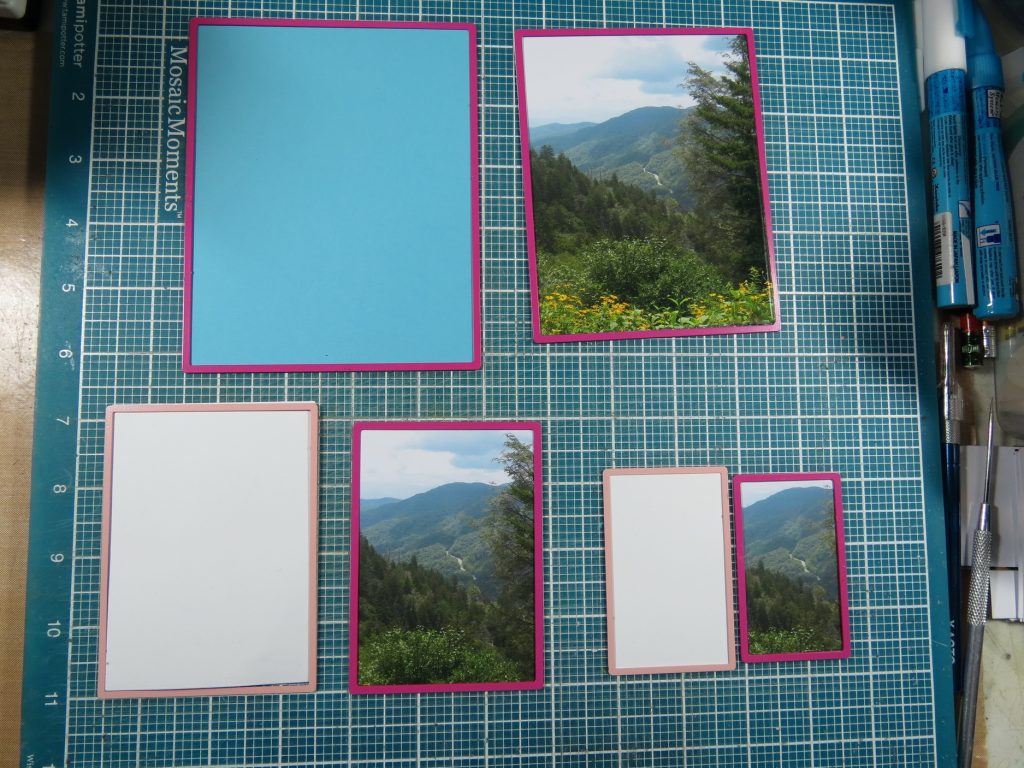

4. Next each mat was cut.
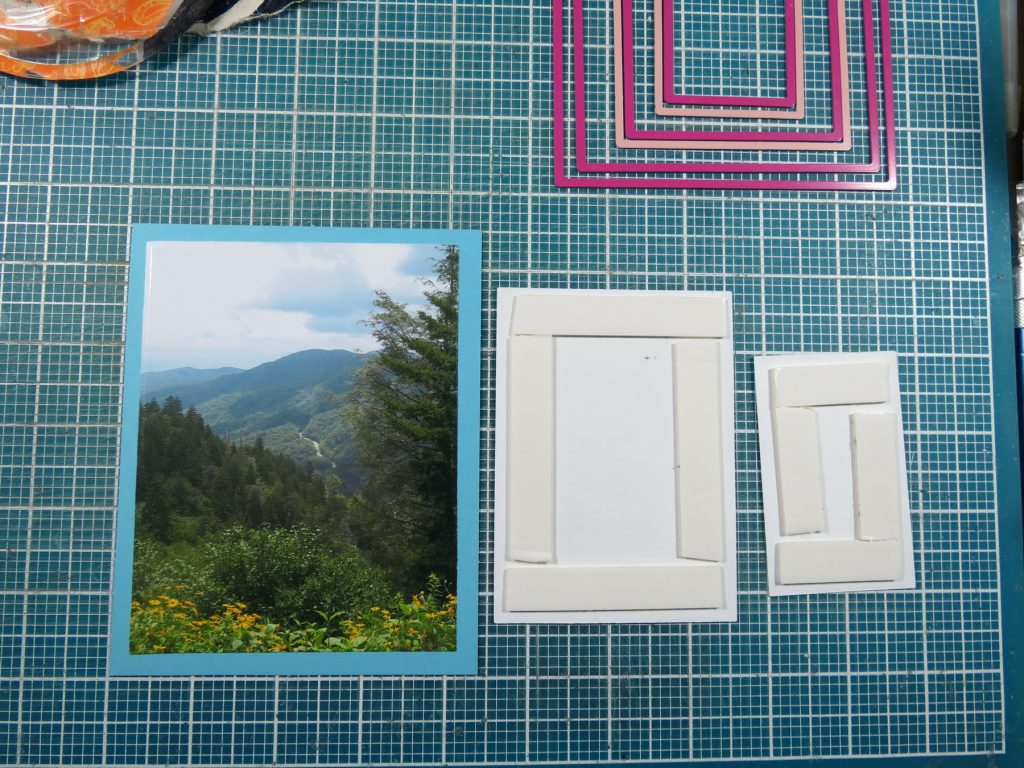
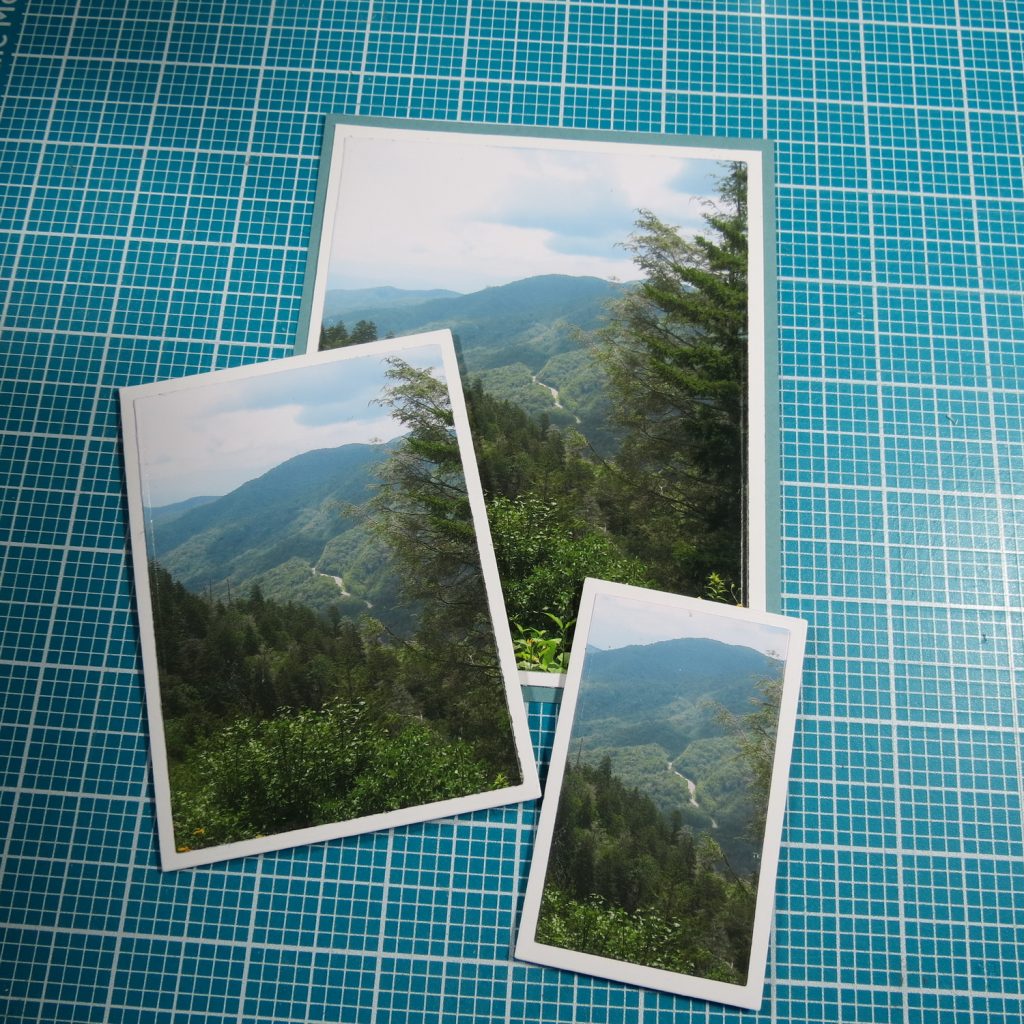
5. Assemble the sections lining up the image on each layer with the one below and mount with foam mounting tape.
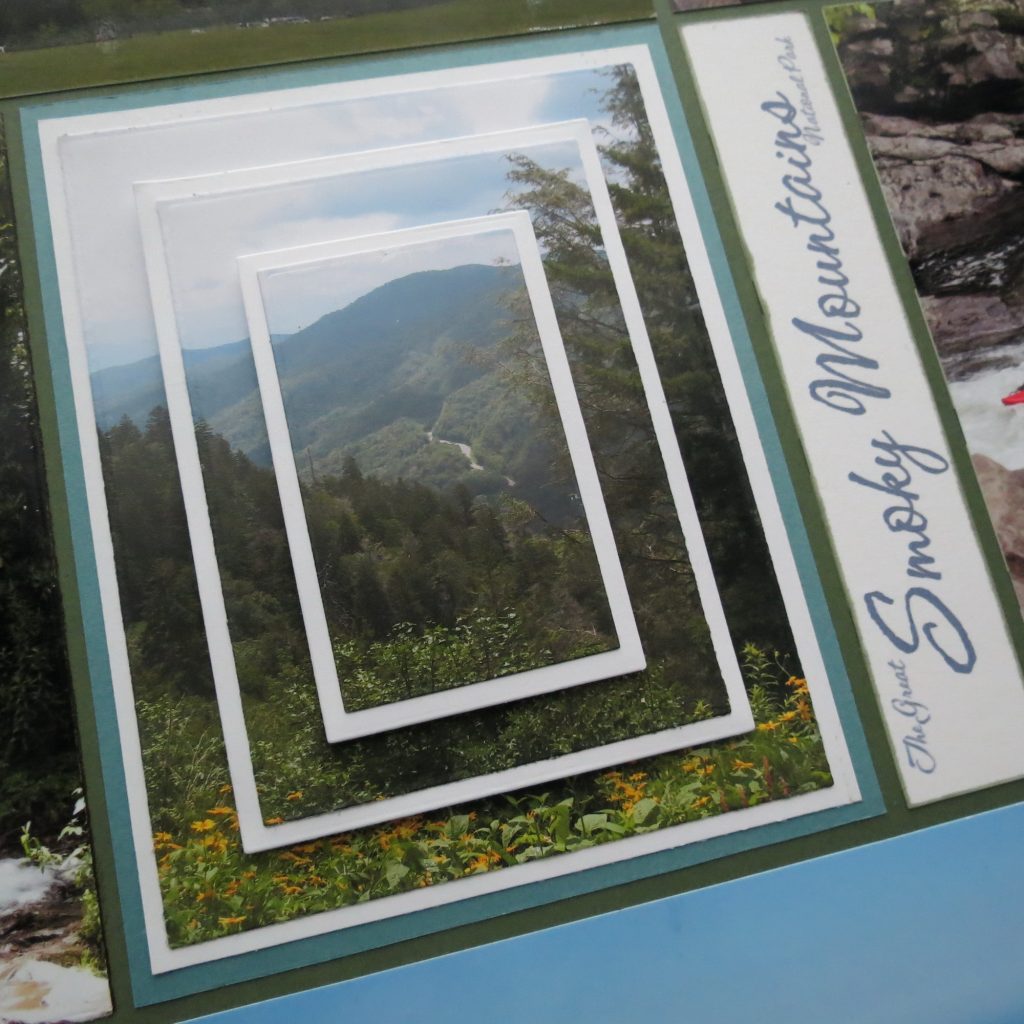
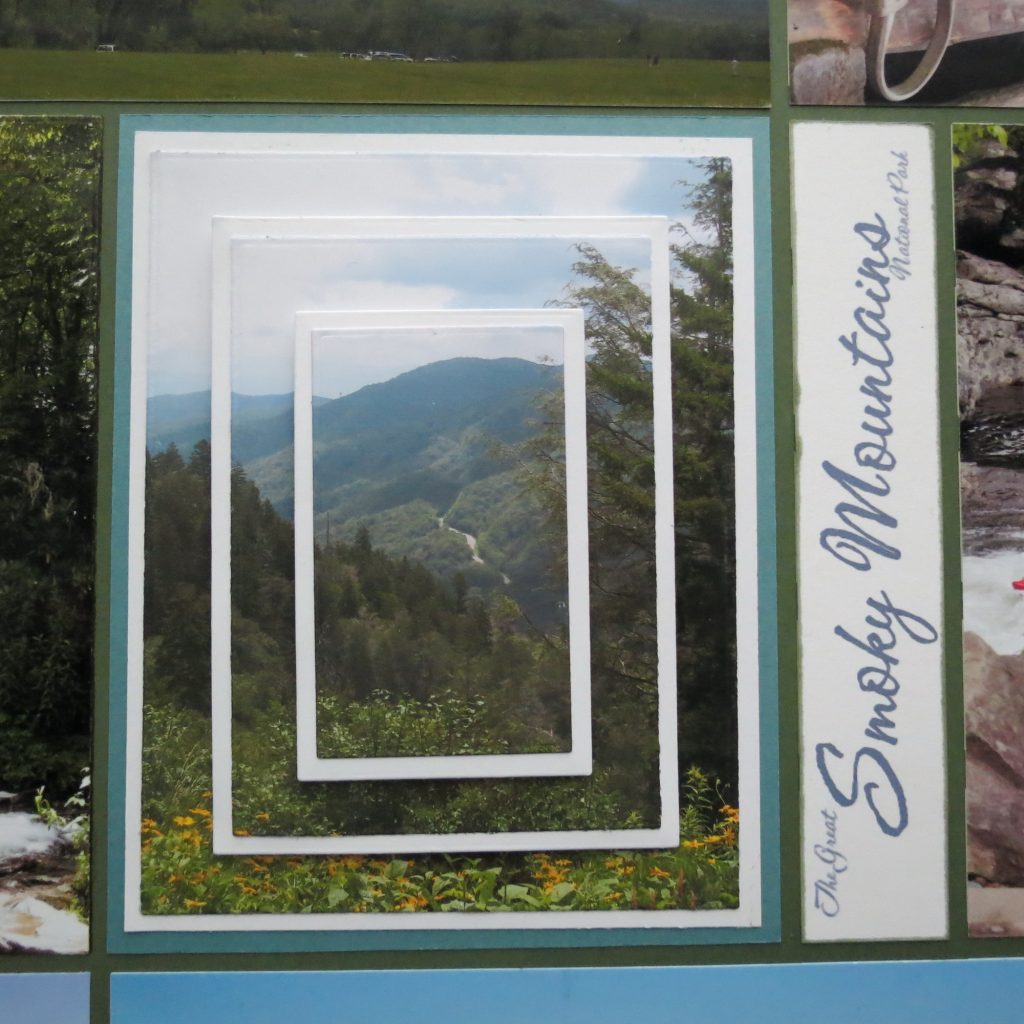
6. Finally add to the layout.
Now for the second technique!
Technique 2
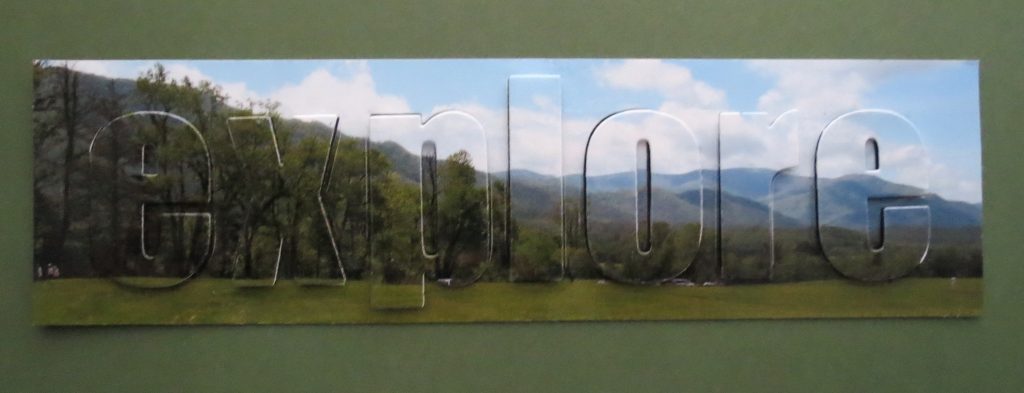
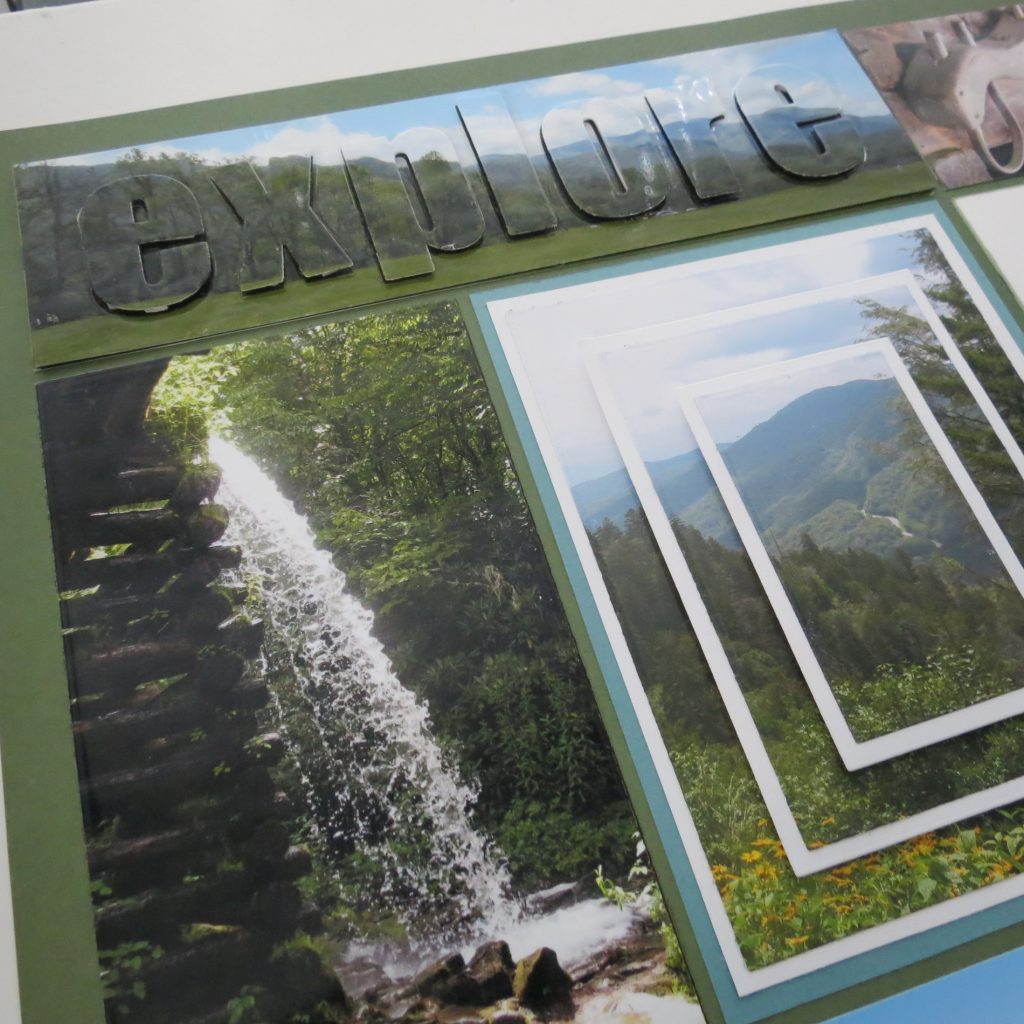
Layering Technique with letters
I first saw this idea used with greeting cards and tried to think up ways to incorporate it into a scrapbook page. I have always liked those vintage postcards where the name of the place is spelled out in large letters with images of the state or town names. I thought I might try that for a title idea, then decided to take one of these larger photos and try this out instead.
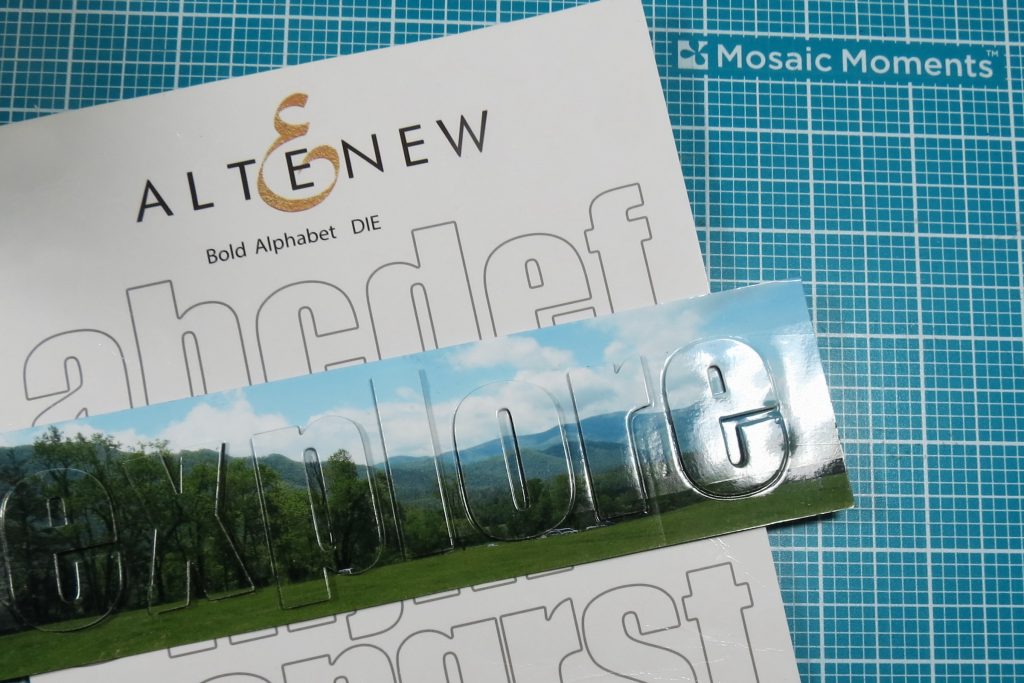
Bold Alphabet Die by Altenew
Both of the larger photos for this layout were cropped to approximate size before printing on an 8.5”x11” paper in a contact sheet format.
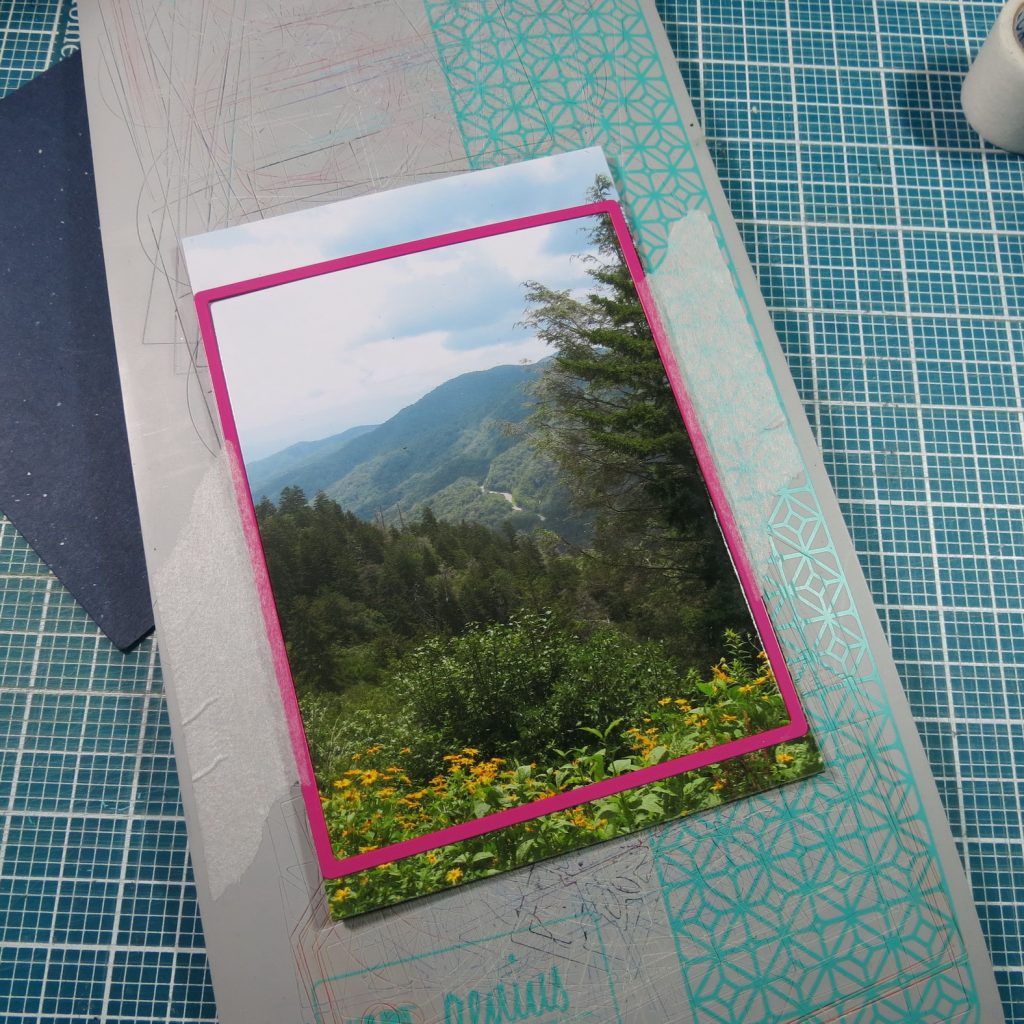
1. My photo is hand trimmed to size for the 2×7 area in the pattern. Some things just can’t be accomplished with the dies and that’s when the MM Double Sided Craft Mat, Cork-backed metal ruler and an X-Acto knife make the process quick and easy.
2. Then I lined up the letter dies along one of the grid lines on my MM Double-Sided Craft Mat. I spaced them 1/8” apart cut. Remember to spell your word backward so when you flip it over to cut your word is what you want! (I used a 1×2 extra leftover as a place holder, the second “e” would have to be done after the first cutting.)
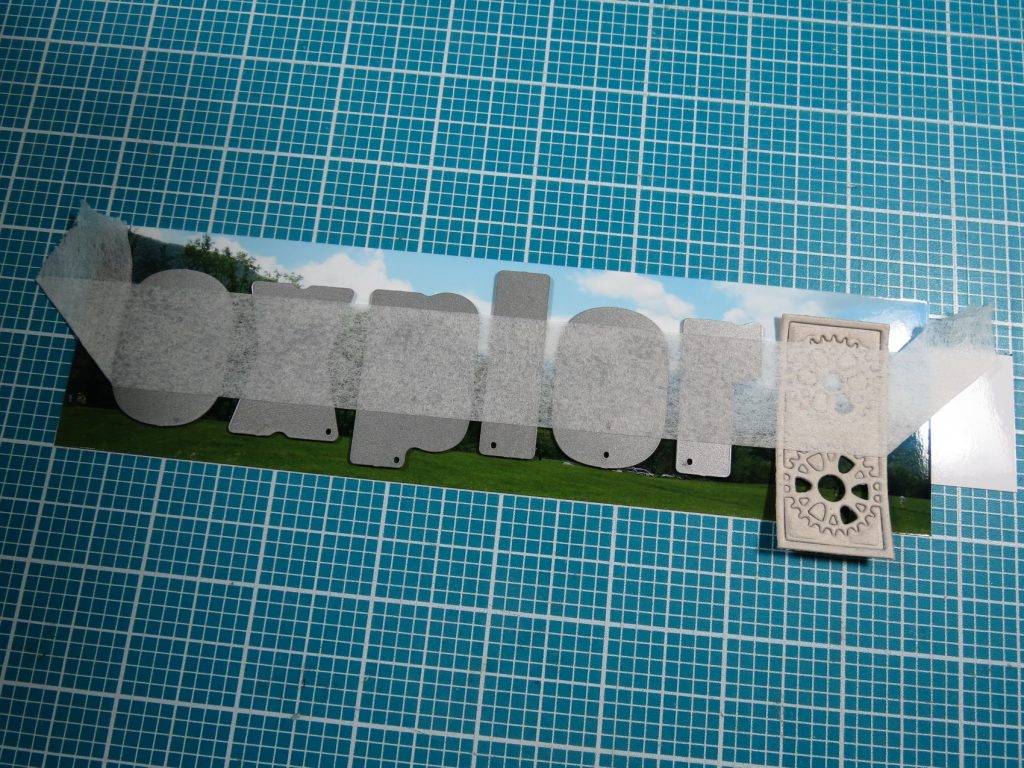
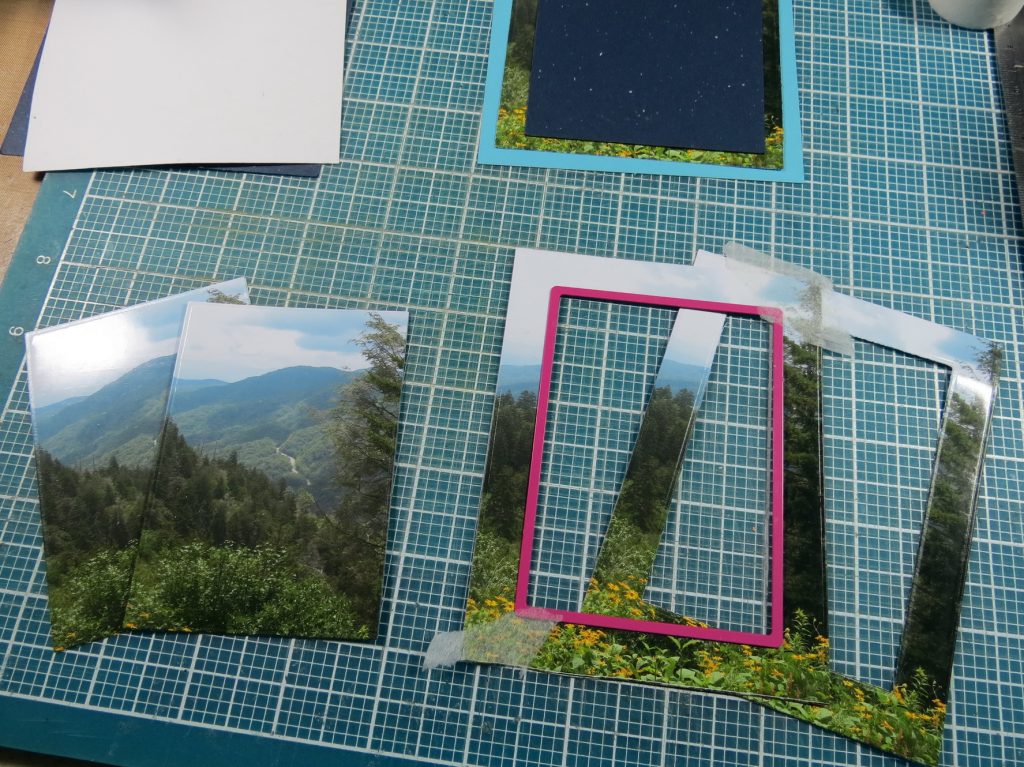
3. I then took a long strip of paper tape (the kind you use for bandages) along the center of the dies, cutting side up, catching each one securely. Then I flipped this over, took a second strip to the backside of the dies and removed the other strip from the other side.
TIP: Watch your tape! If you are using washi, not all release easily, be sure it comes off of your photos without lifting the ink from the photo. Try it on a leftover scrap to see how it will be before you lay it down. You can always make the in-between spaces not tacky before you add the letters to the photo to cut.
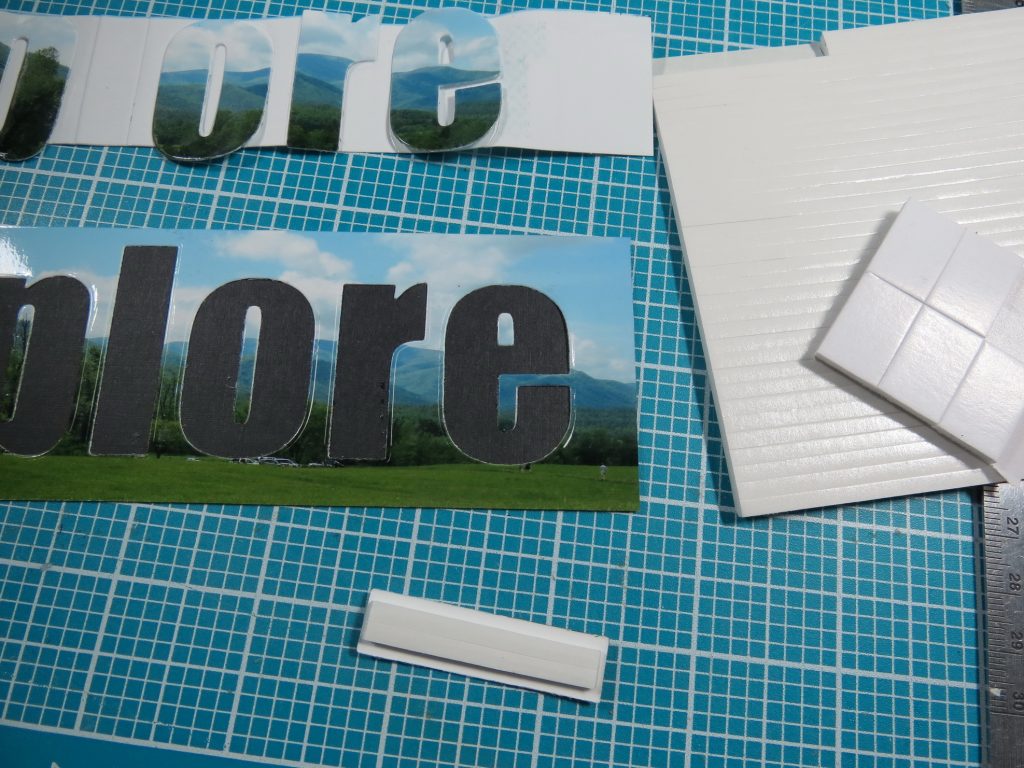
4. Now place your photo on your cutting platform and center the letters. Cut.

5. Carefully remove the outside of the photo leaving the letters behind for the moment. Place this photo ‘remnant’ on the base cardstock sized to match the photo. I used black to add to that shadow effect.
6. Before adding the letters I took the centers from the ‘O’, ‘P’ and ‘E’s’ and attached them by carefully using the letters lined up, centers added and letters remove again.
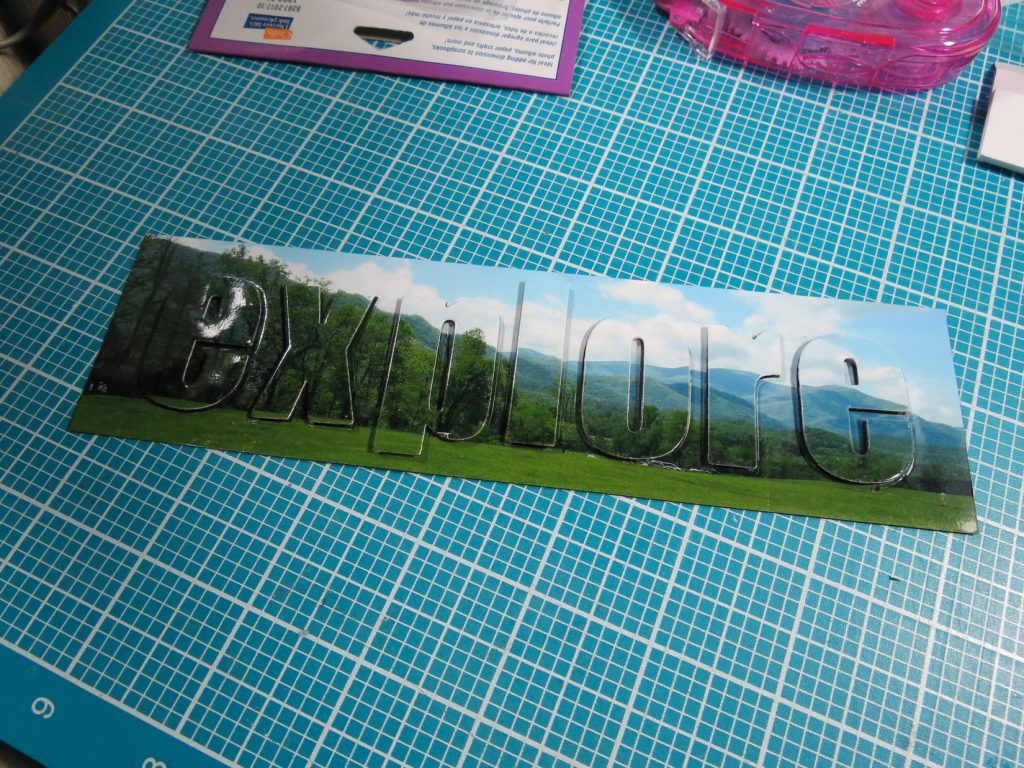
7. Then each letter was mounted in its own space with foam mounting tape and Voila, it’s finished.
I hope you might be feeling a bit adventurous and want to take these ideas or maybe you’ve been inspired to try some of your own and find more ways to use your Basic and Layering Dies from Mosaic Moments. Happy Scrapping!

Andrea Fisher