
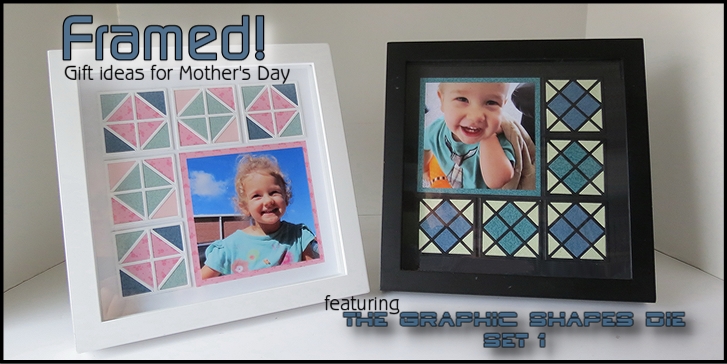
Framed! Gift Ideas for Mother’s Day
Featuring…The Graphic Shapes Die Set 1
This set contains these three dies.
![]()
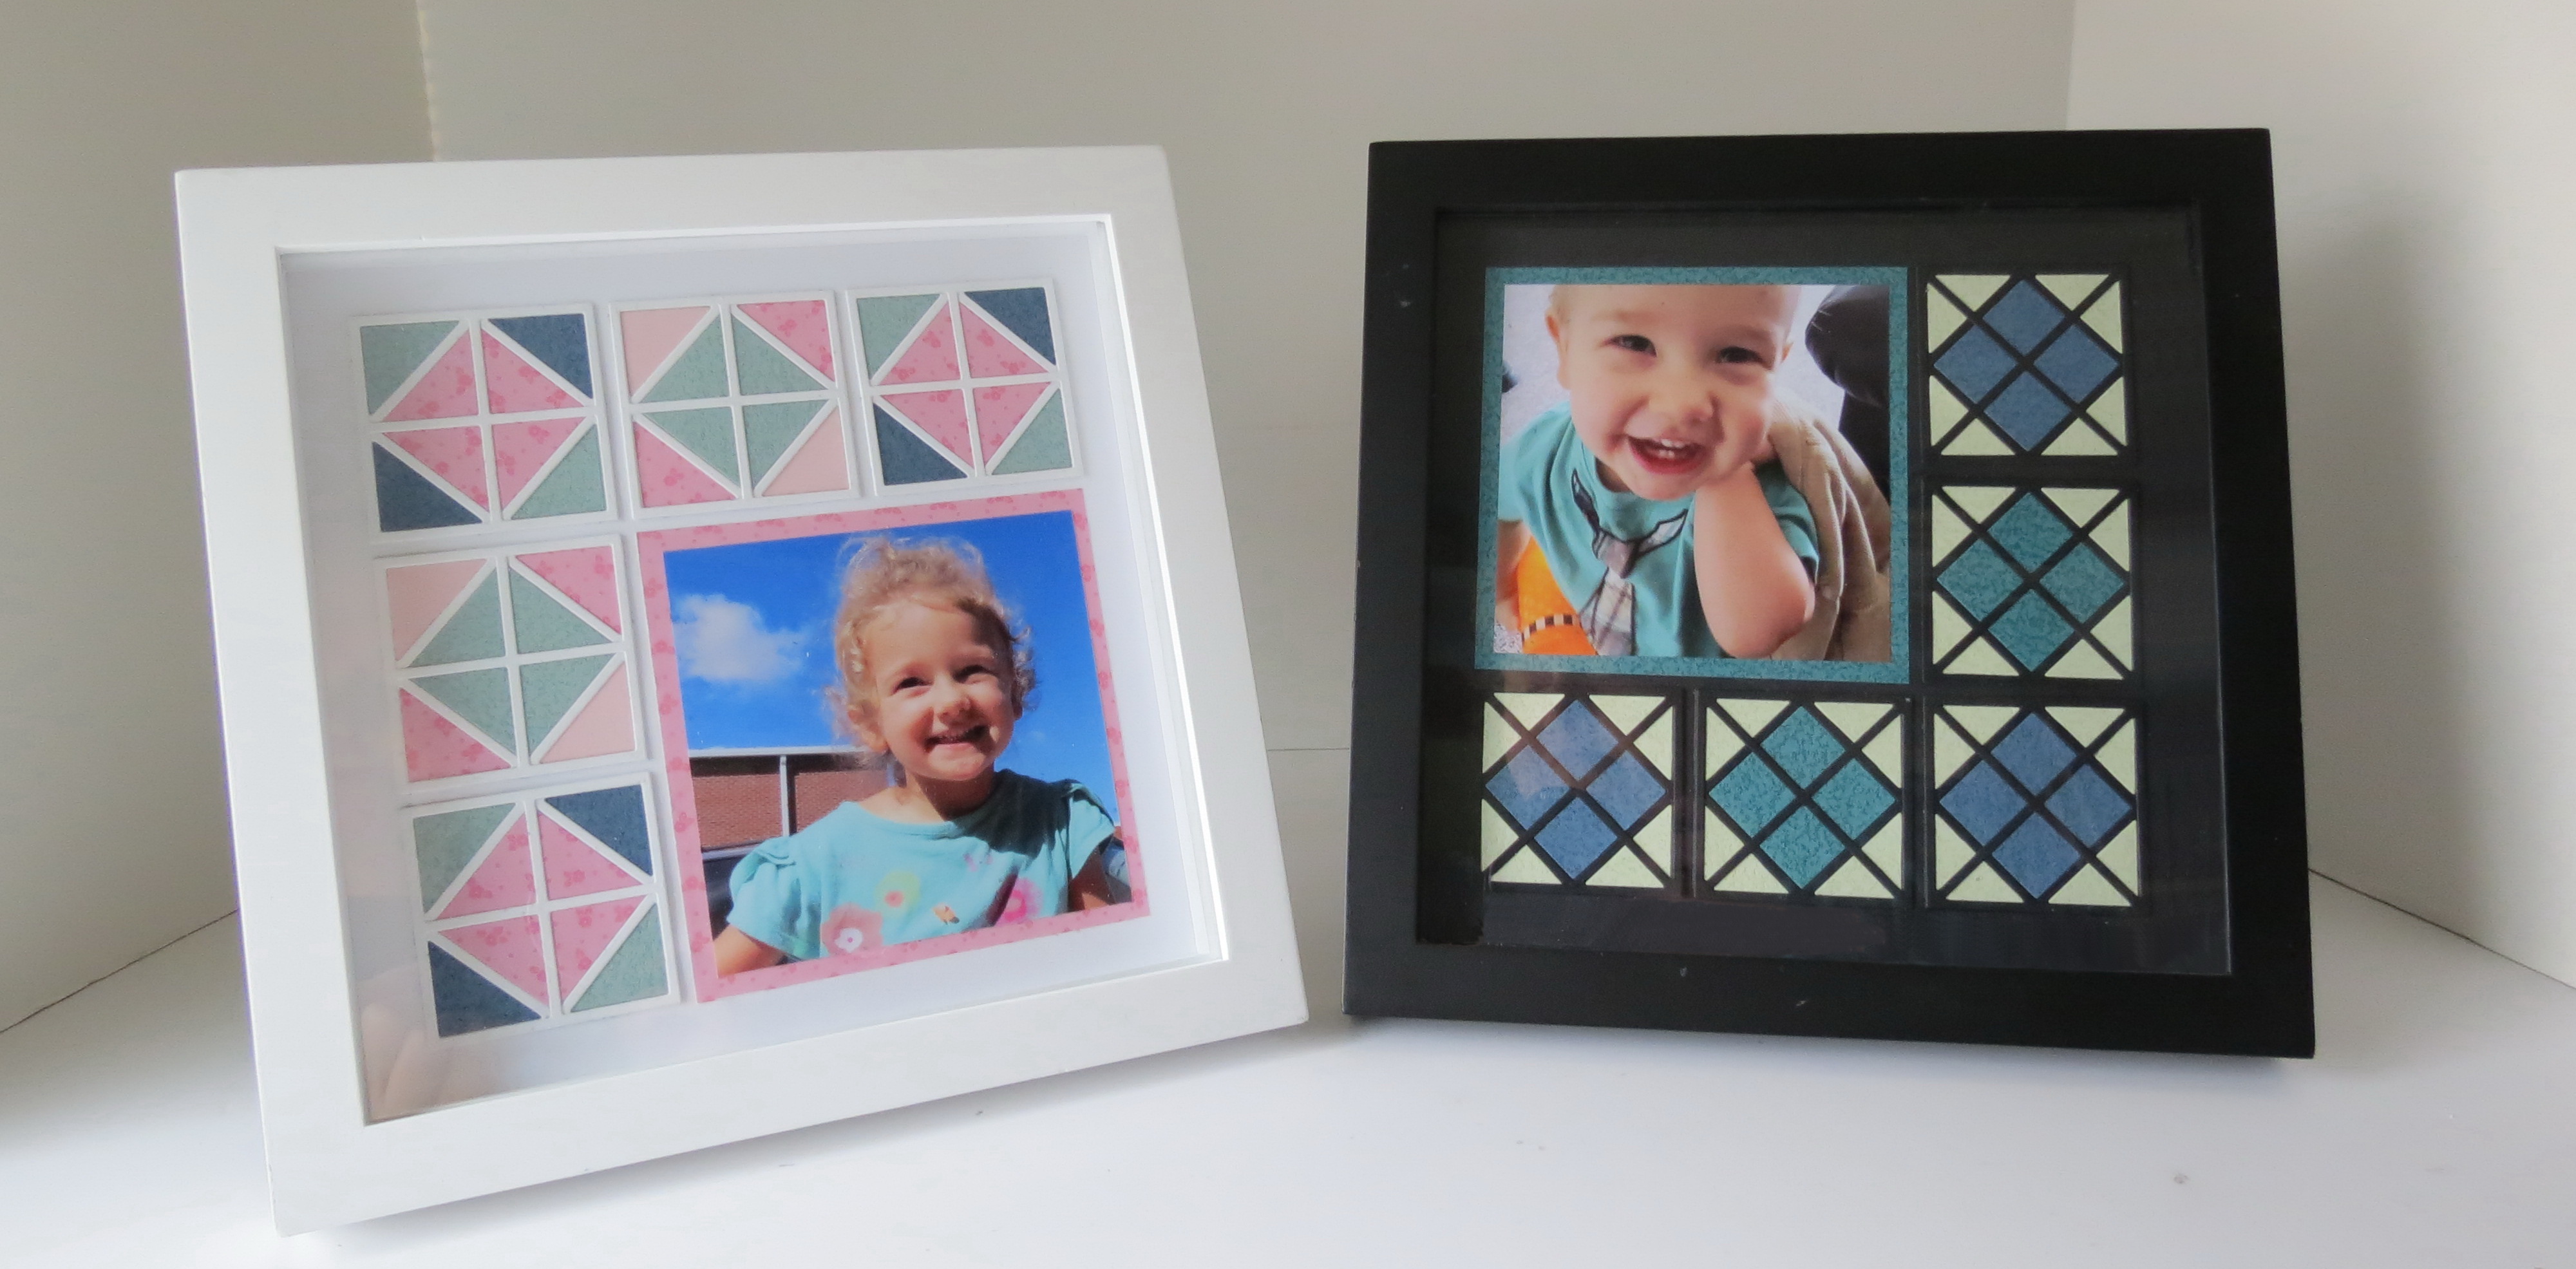
Today I’ll use all three between these two layouts on Mosaic Moments 8”x 8” Grids one each in Black and White. I love this size for featuring a single photo and having room to play with some design elements too.
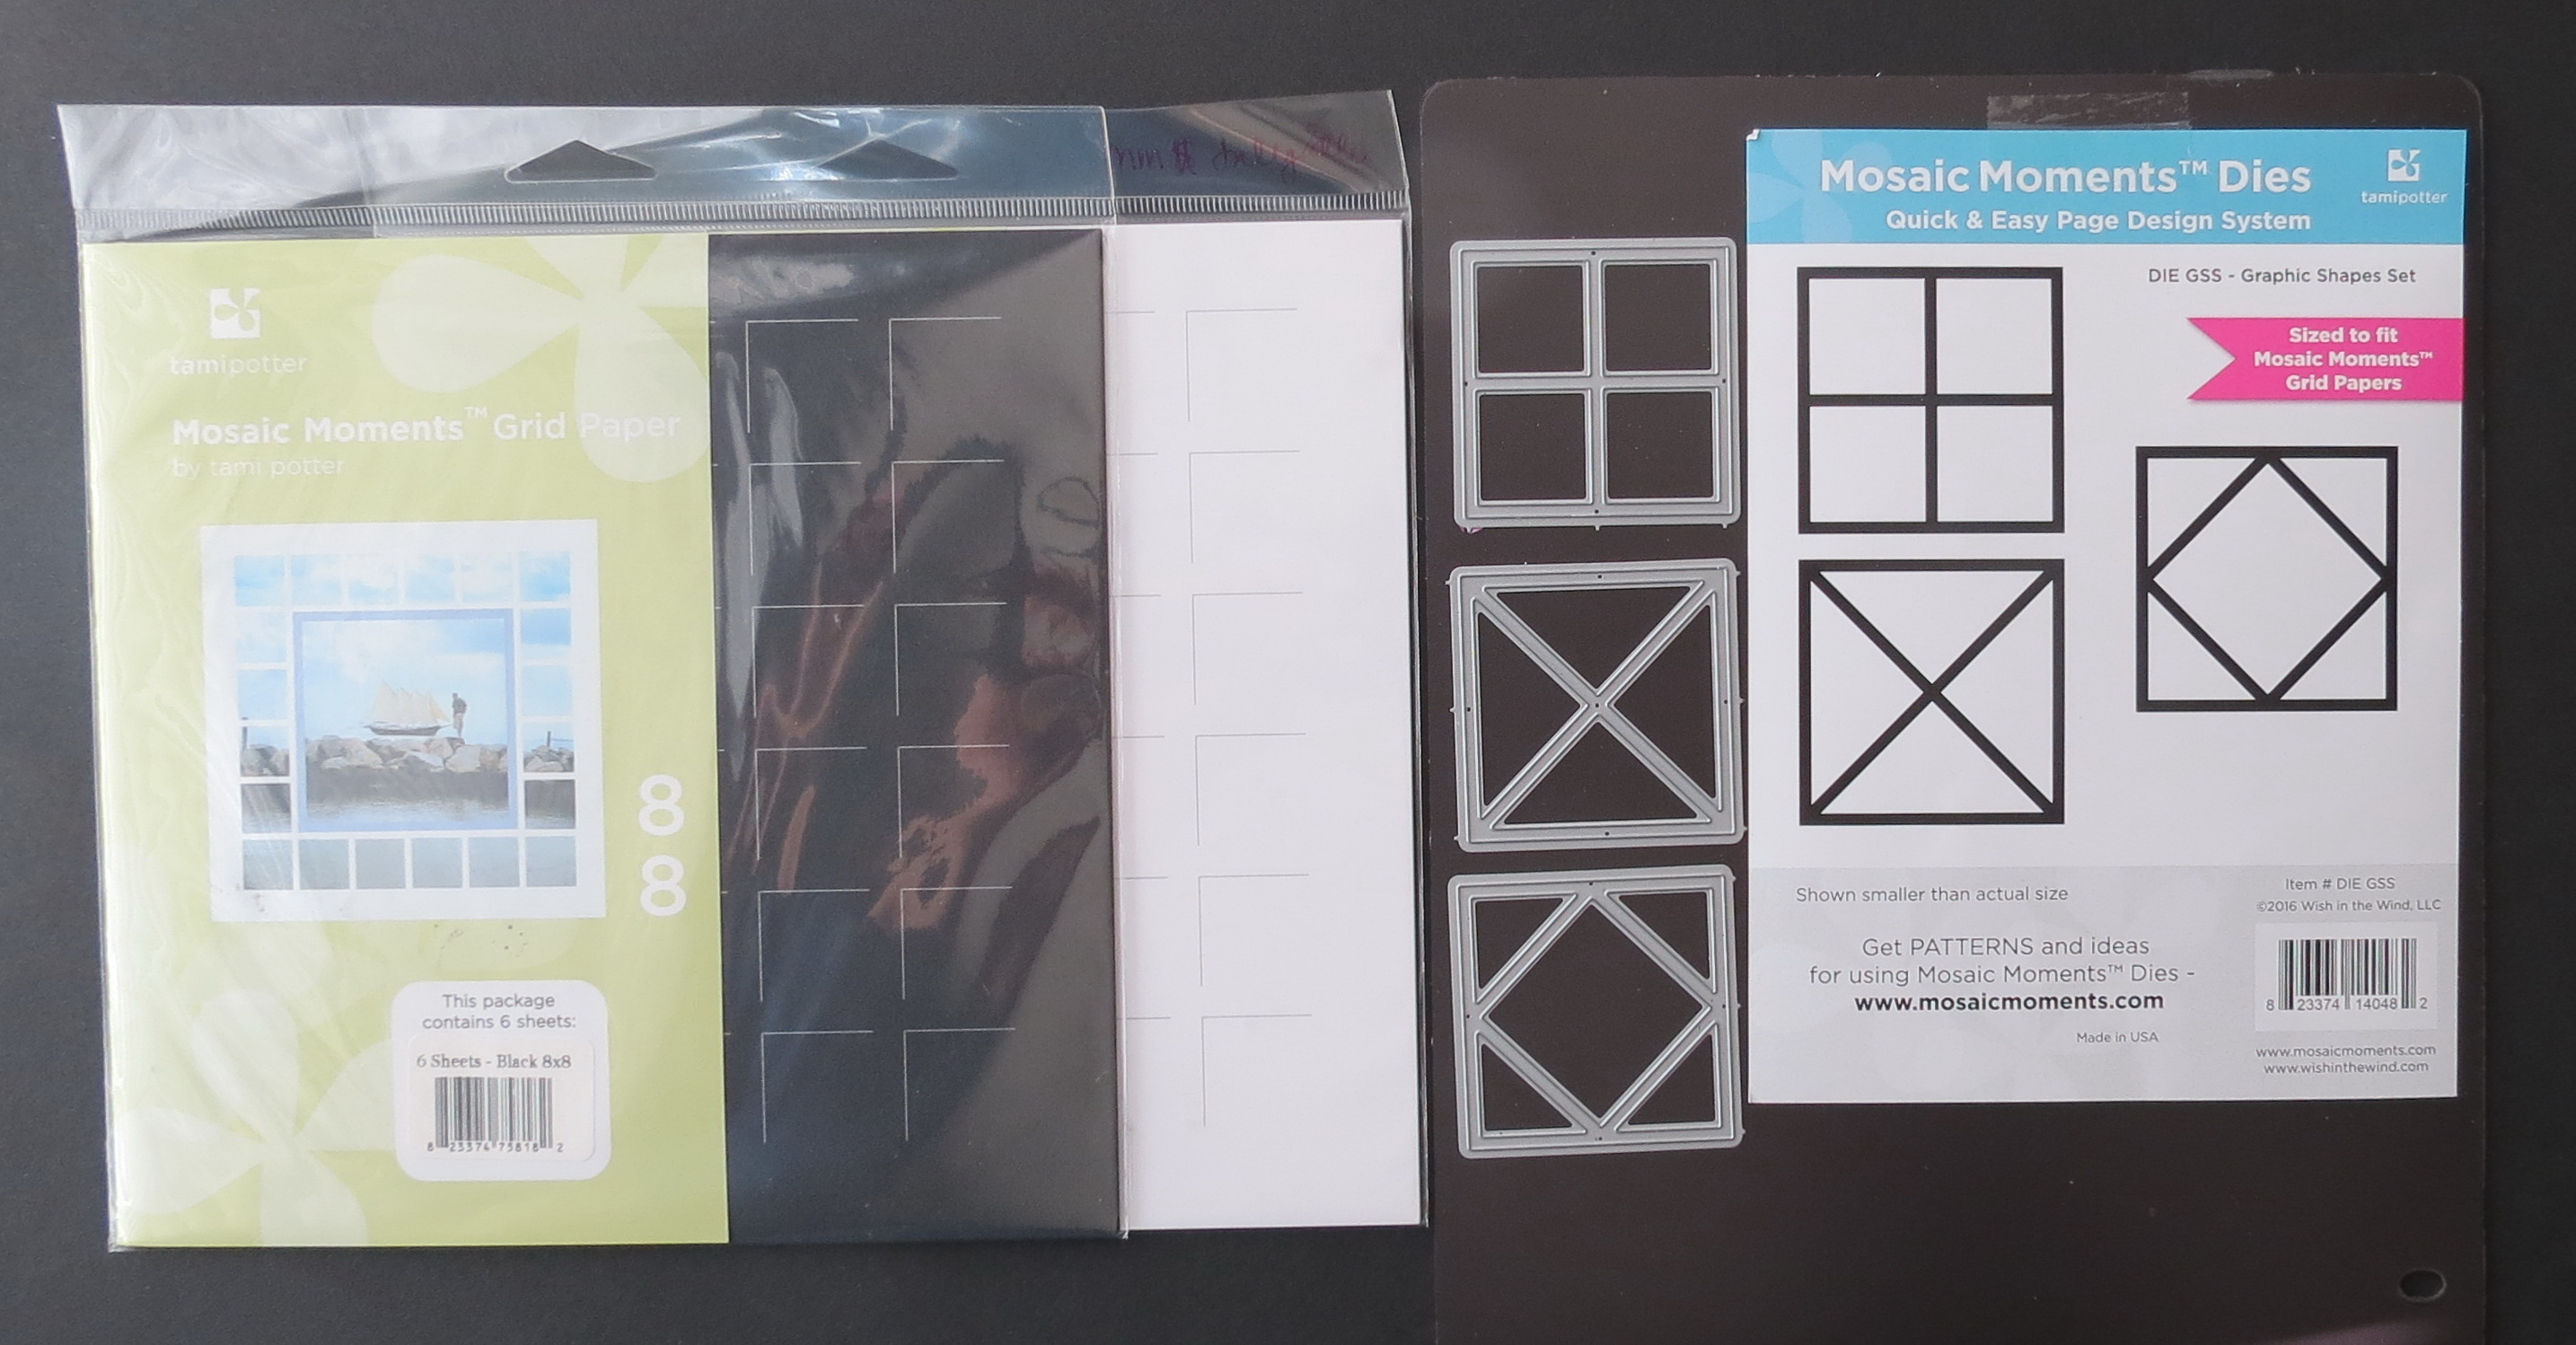
MM Graphic Shapes Dies Framed!
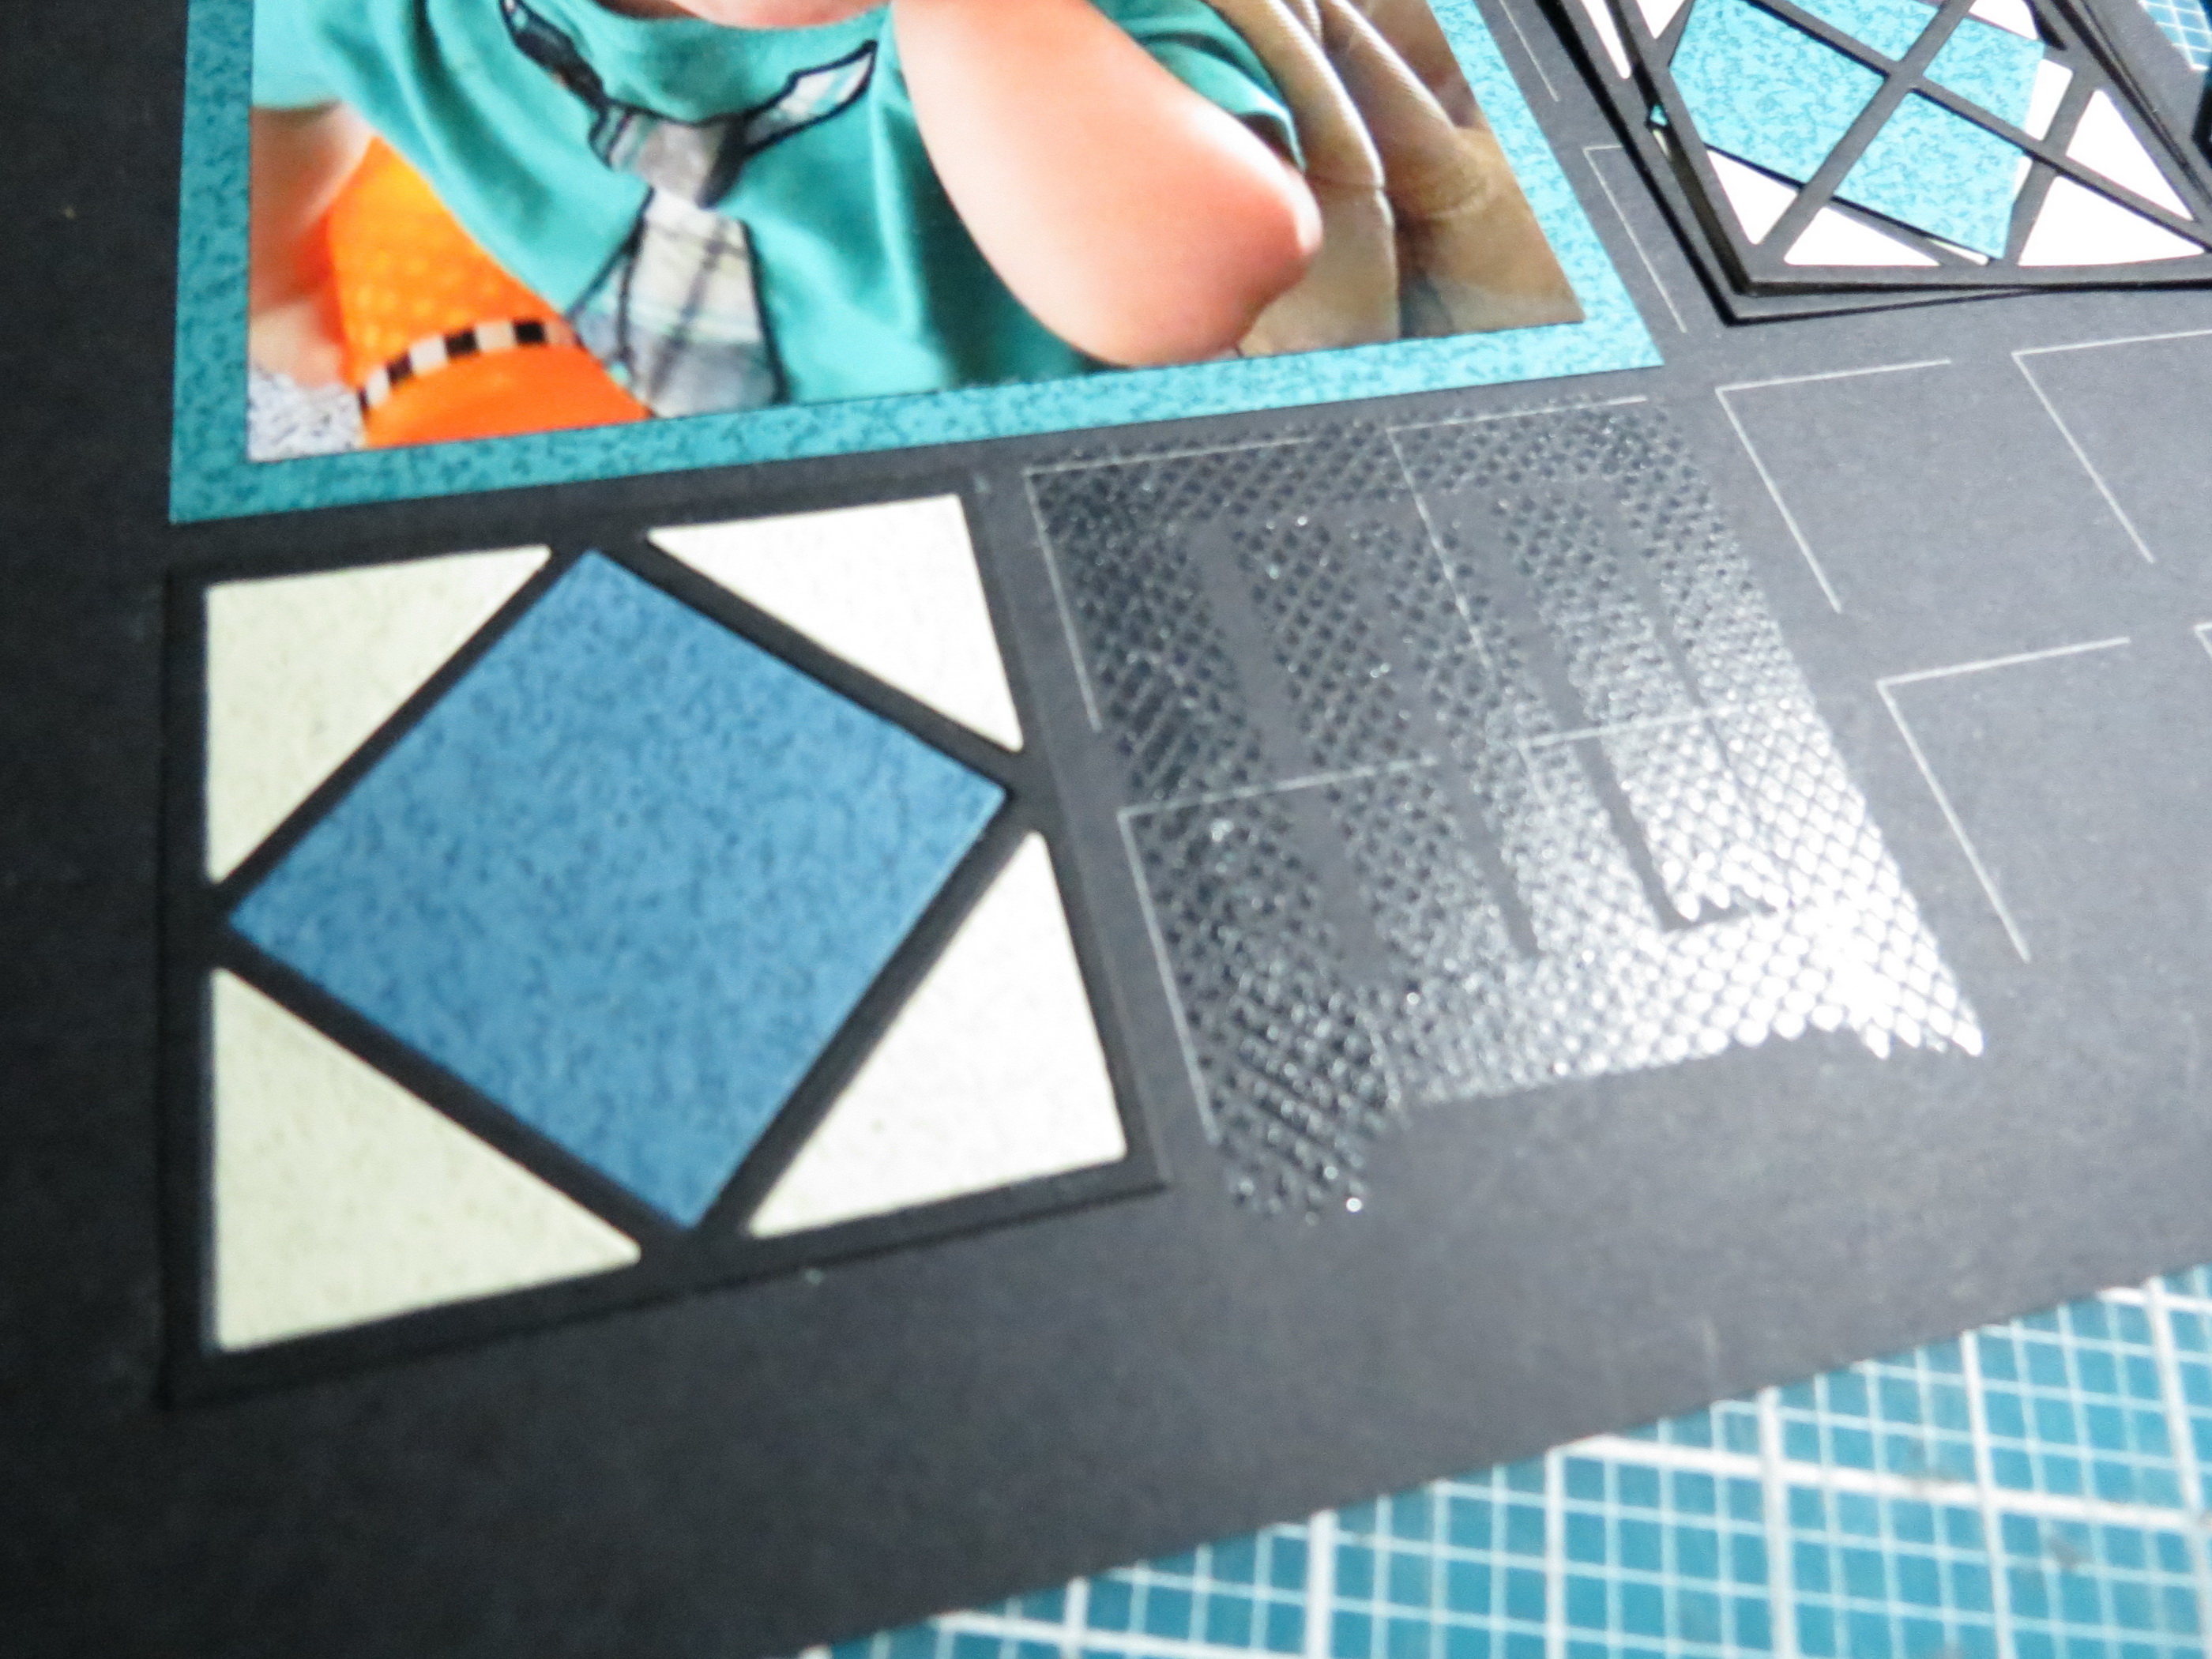
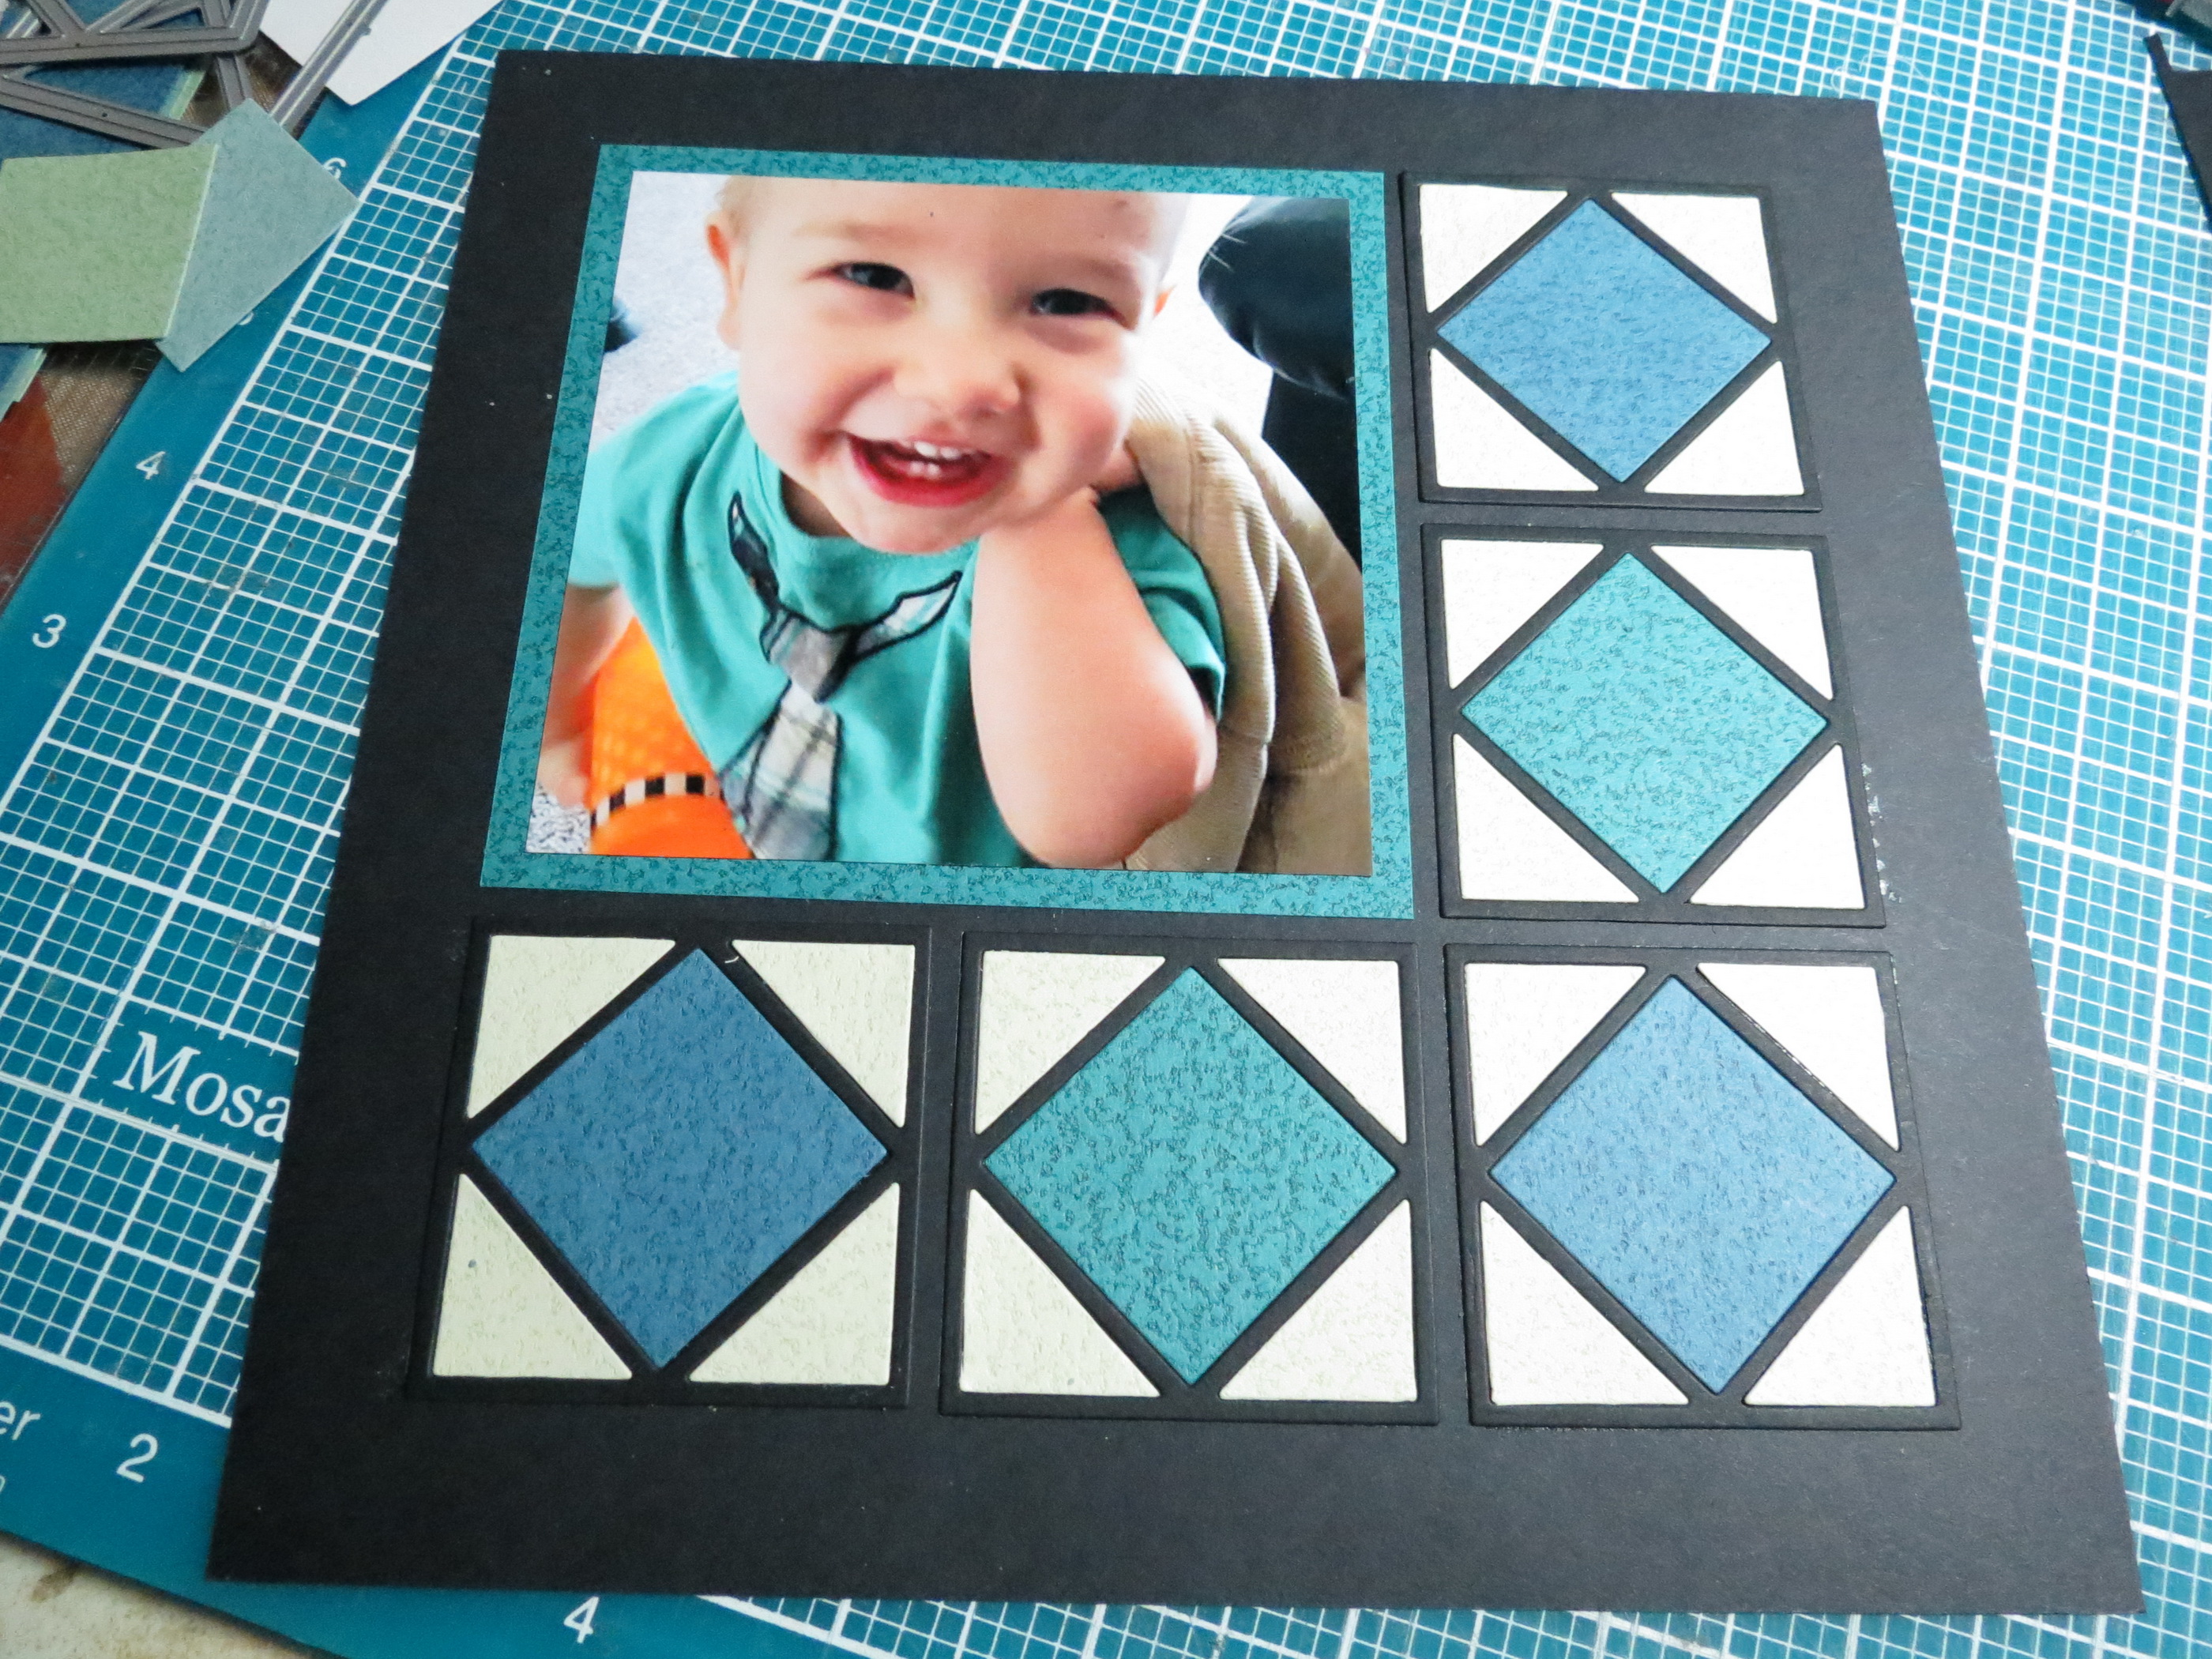
I used one large photo on each page trimmed to 4”x 4” and matted it on top of a 4×4 grid tile in colors to match each of the designs.

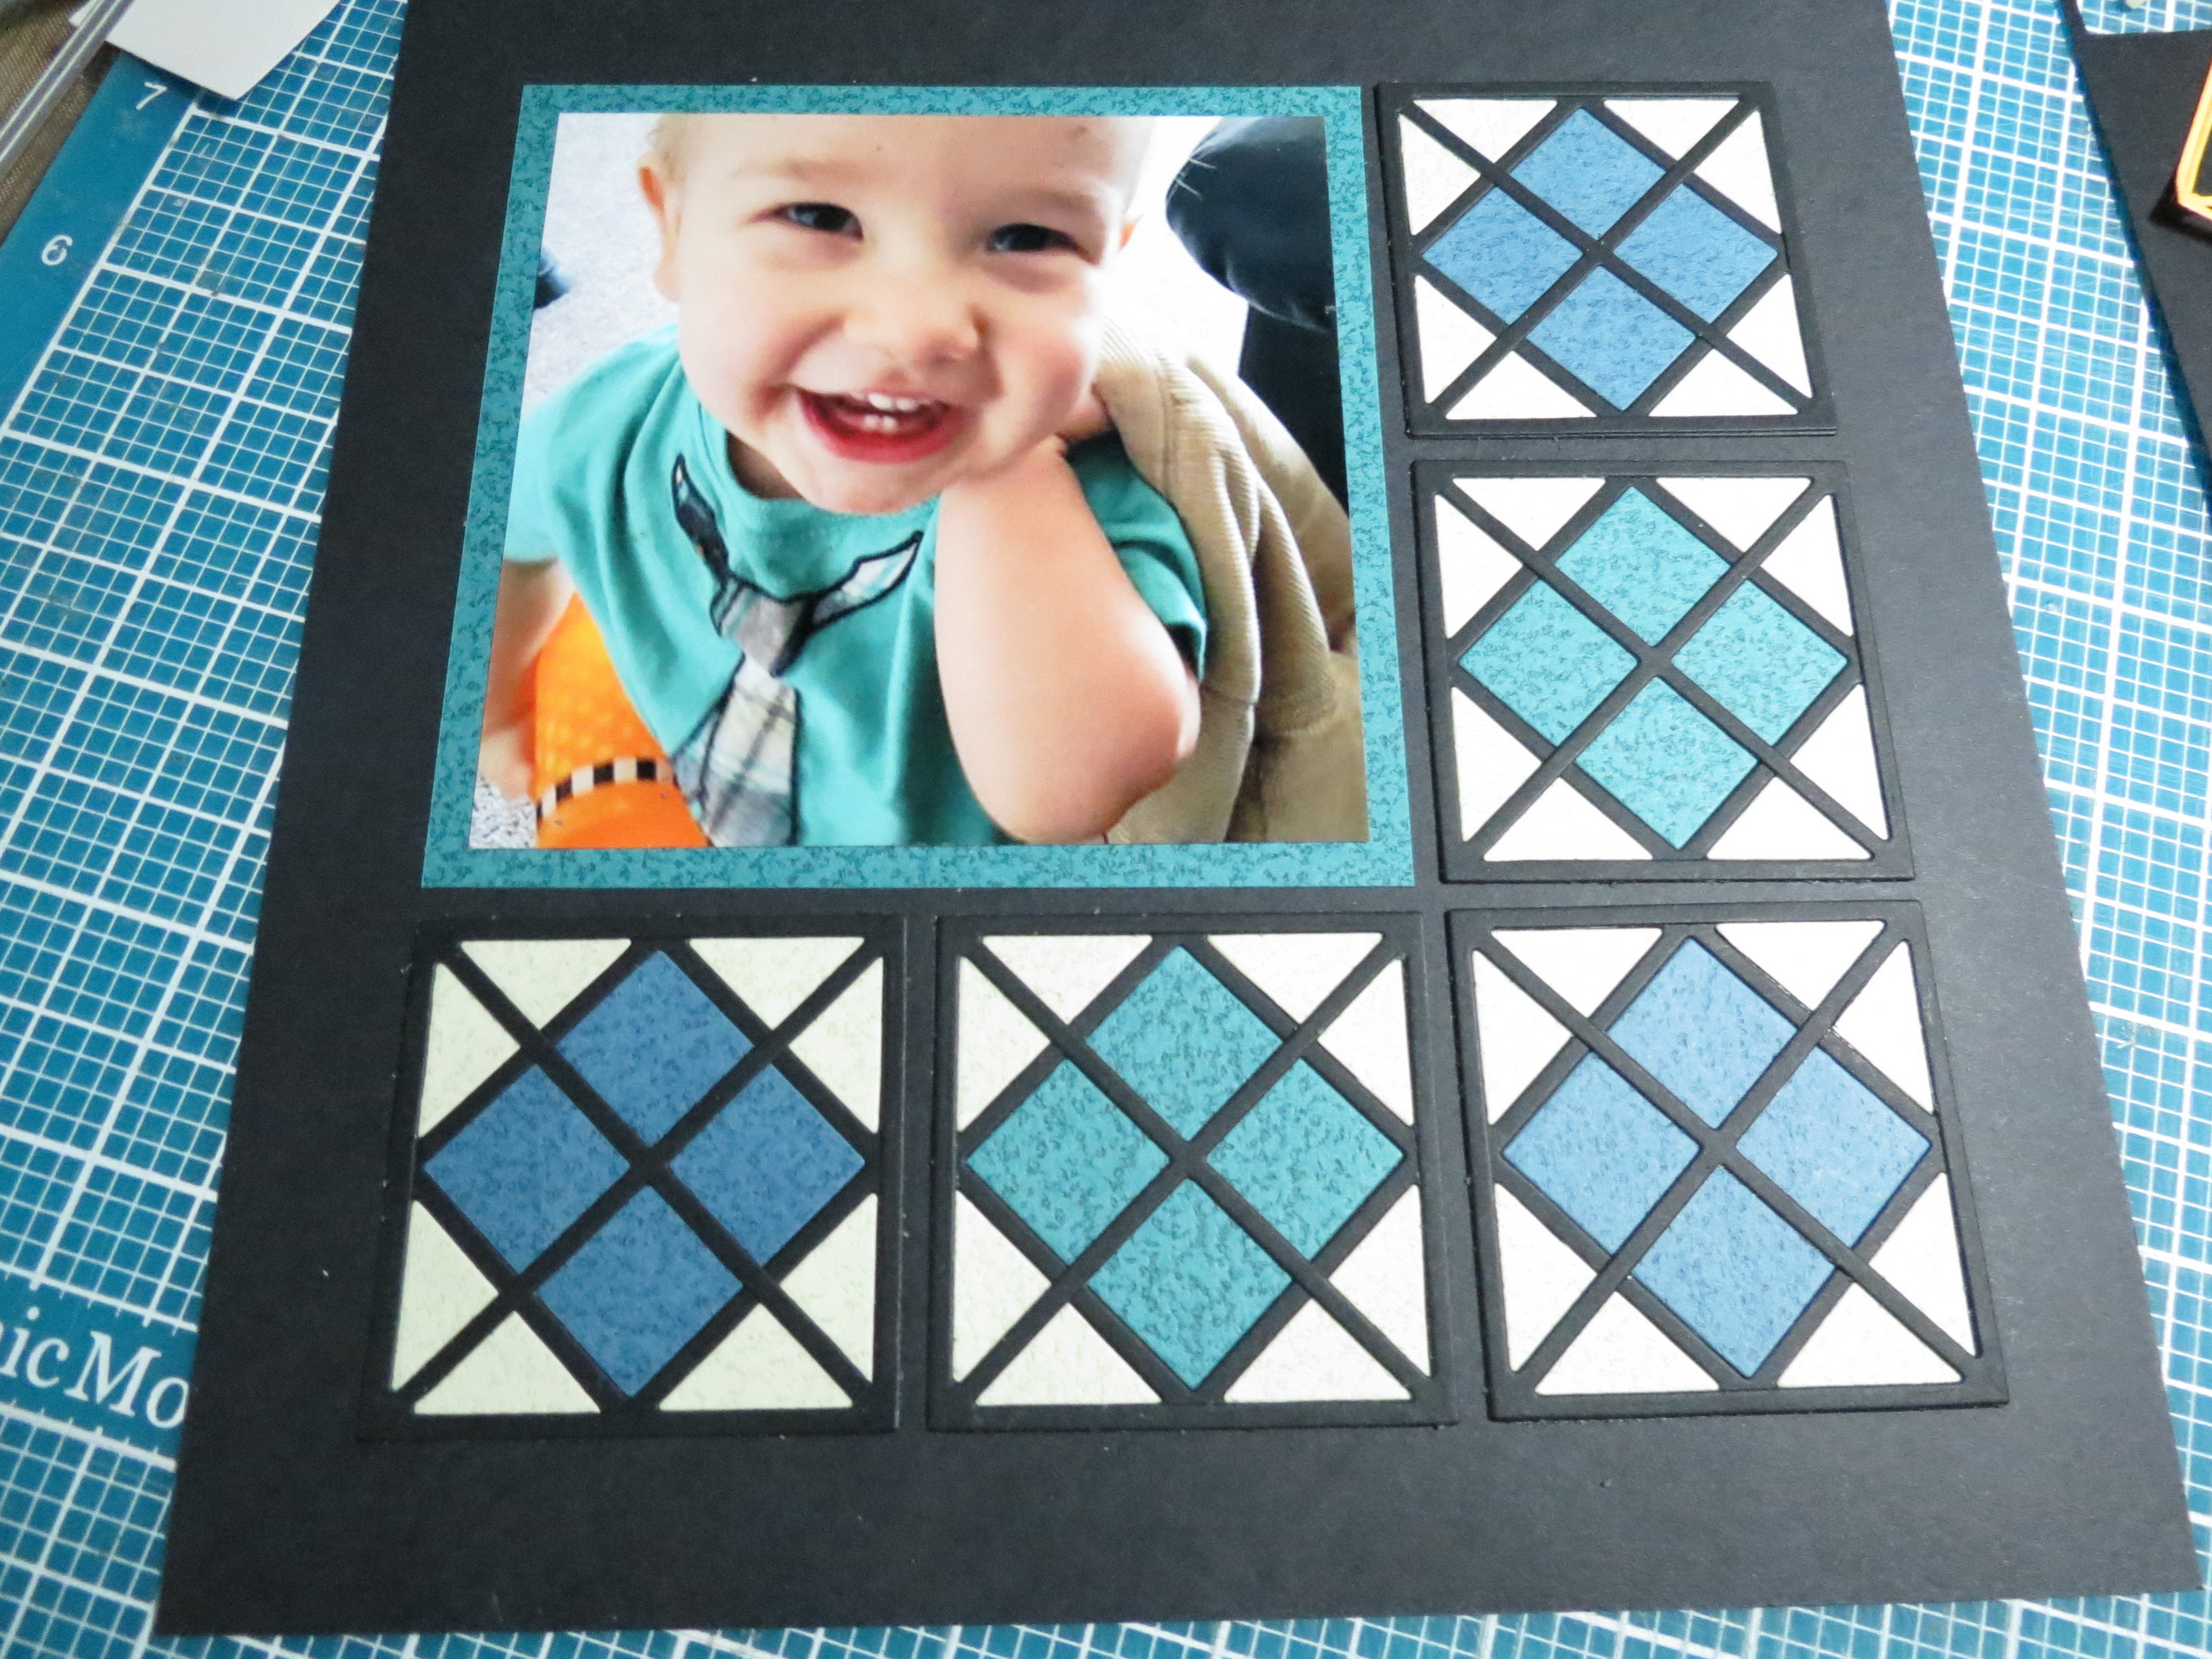
MM Graphic Shapes Dies Framed! Argyle Layout
ARGYLE
I began with an Argyle look on black with EK Success Color Sense System cardstock in Waterfall Tonal CS and black cardstock for cutting the dies.
You will need five pairs of the Cross and Square Dies for this pattern.
Tip: I thought I’d try something different for attaching all the pieces this time. I covered the space on the grid where I’d be placing everything with dot adhesive. I began by attaching the Square Die tile and then inlaid the center square and triangles. This made it easy and fairly clean with only a little excess at the edges needing to be wiped away.
MM Graphic Shapes Dies Framed! Tip to attach inlaid design with ease.
MM Graphic Shapes Dies Framed! Step one complete.
Alternate the inlaid square colors while keeping the triangles all the same color to create that look of an Argyle pattern.
MM Graphic Shapes Dies Framed! Finish with Cross tile section.
The next step was to add the Cross Die section on top. Clean up. Done.
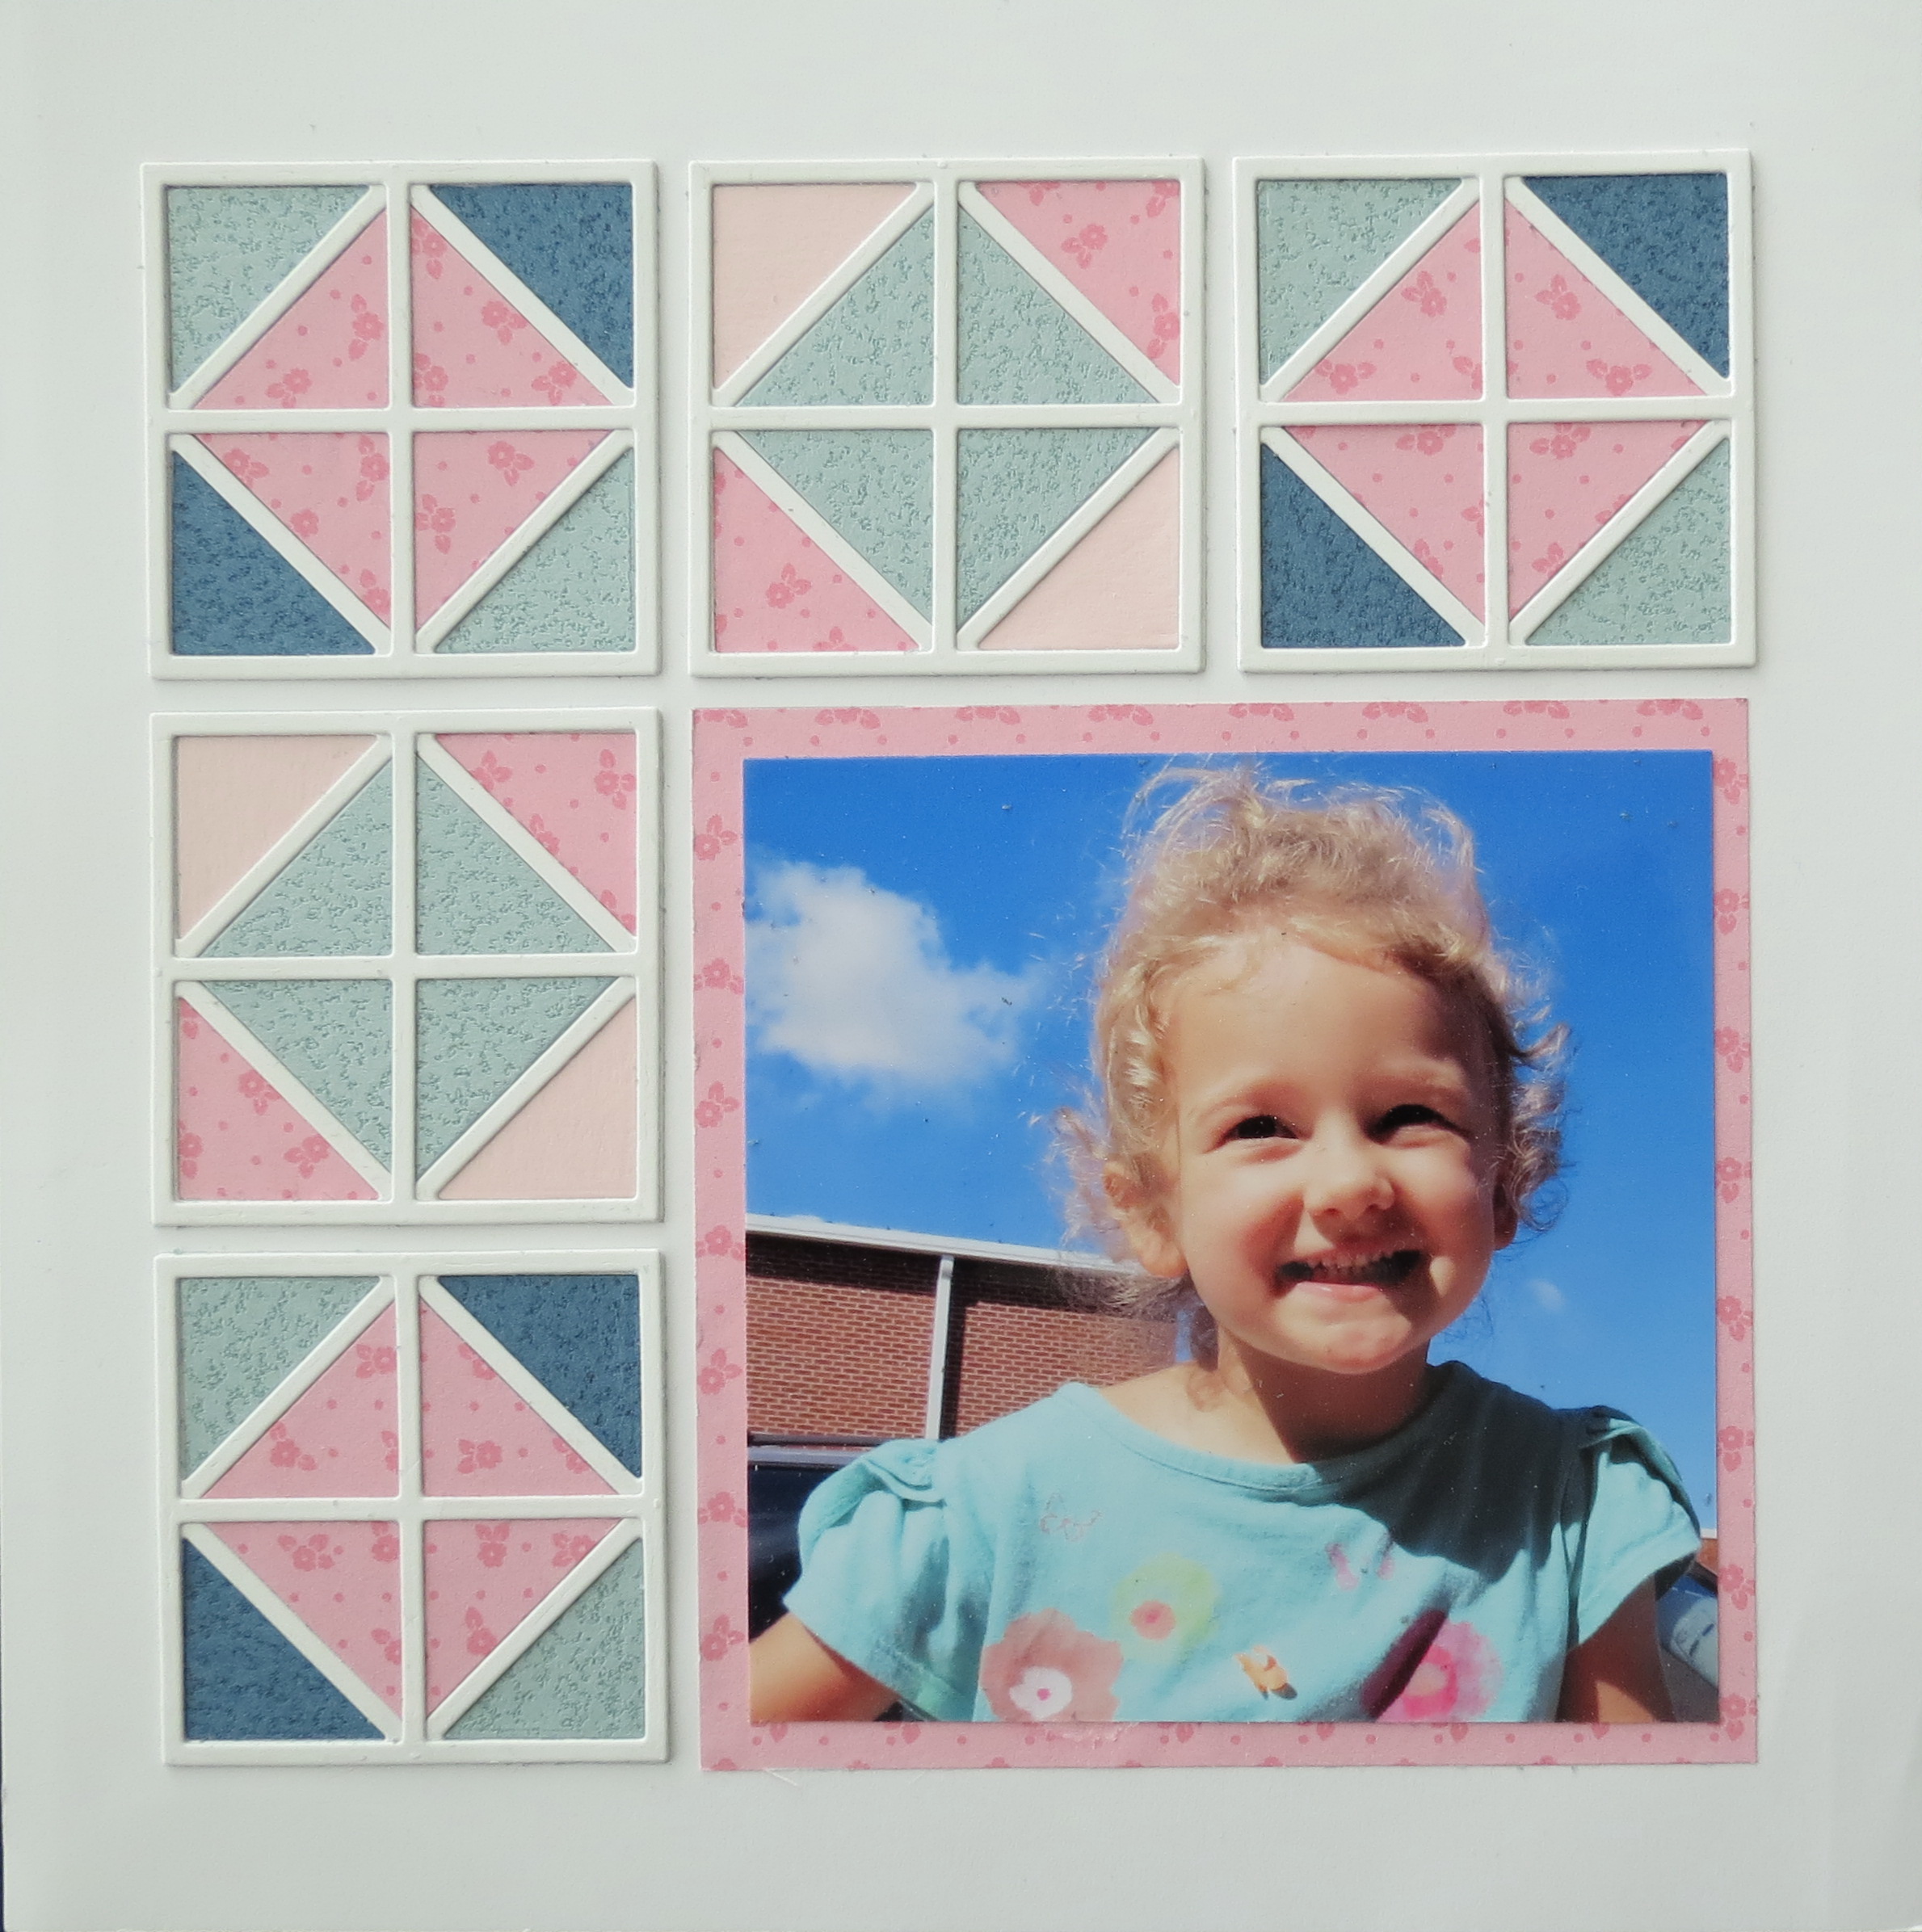
MM Graphic Shapes Dies Framed! Quilt Version
QUILT
On the second layout I’ve gone for a quilt look with a medium petite floral pattern, light pink solid cardstock and medium and dark cardstock leftover pieces from the previous layout, tying the two layouts together by color, all on a white 8”x 8” Mosaic Grid.
Once again we will need five pairs of the Square and 4-Square Dies this time cut in white cardstock.
Tip: As in quilting I chose light, medium and dark colors for contrast, a pattern paper for interest and the darker shades from the previous layout, this time, I flipped the green to the backside for the lighter version while keeping the blue as is.
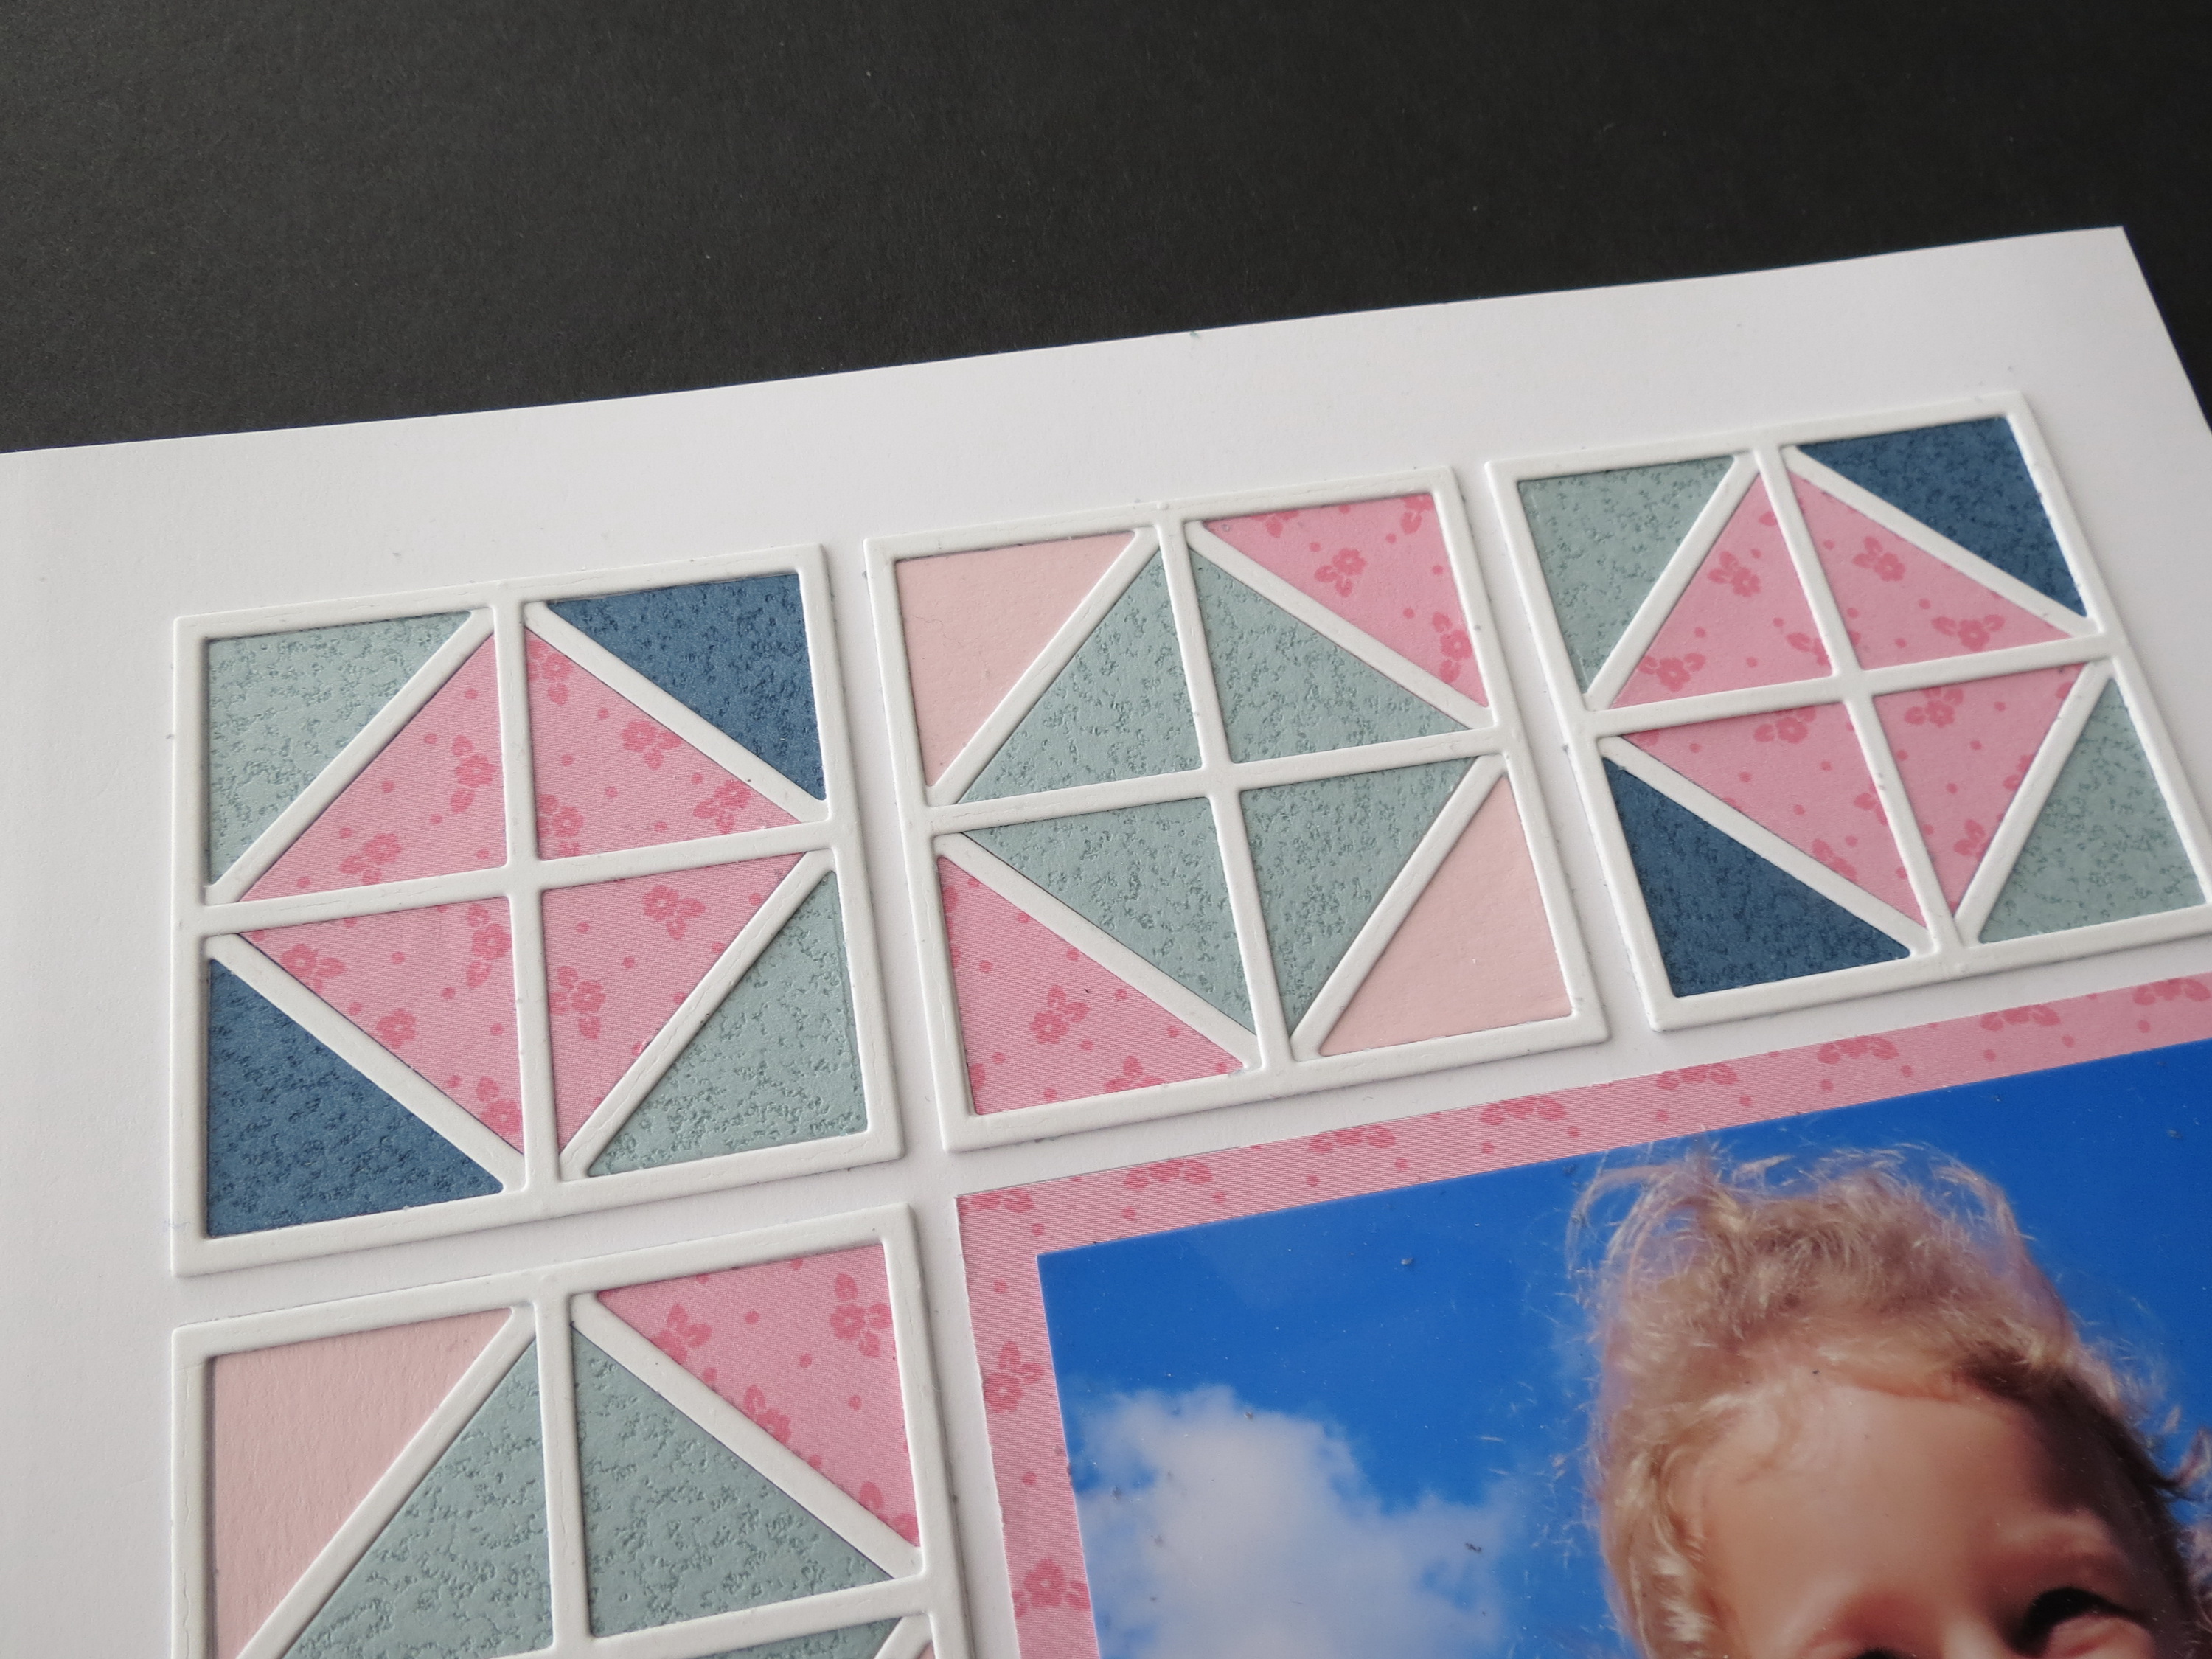
MM Graphic Shapes Dies Framed! detail of colors/pattern
For this design I alternated the colors of the center squares and triangles as you would in quilting. Once the tile sections have been filled add the top 4-Square Die to finish things off. If you’d like, you can use a white gel pen to add top stitches for more of a quilty look to your design.
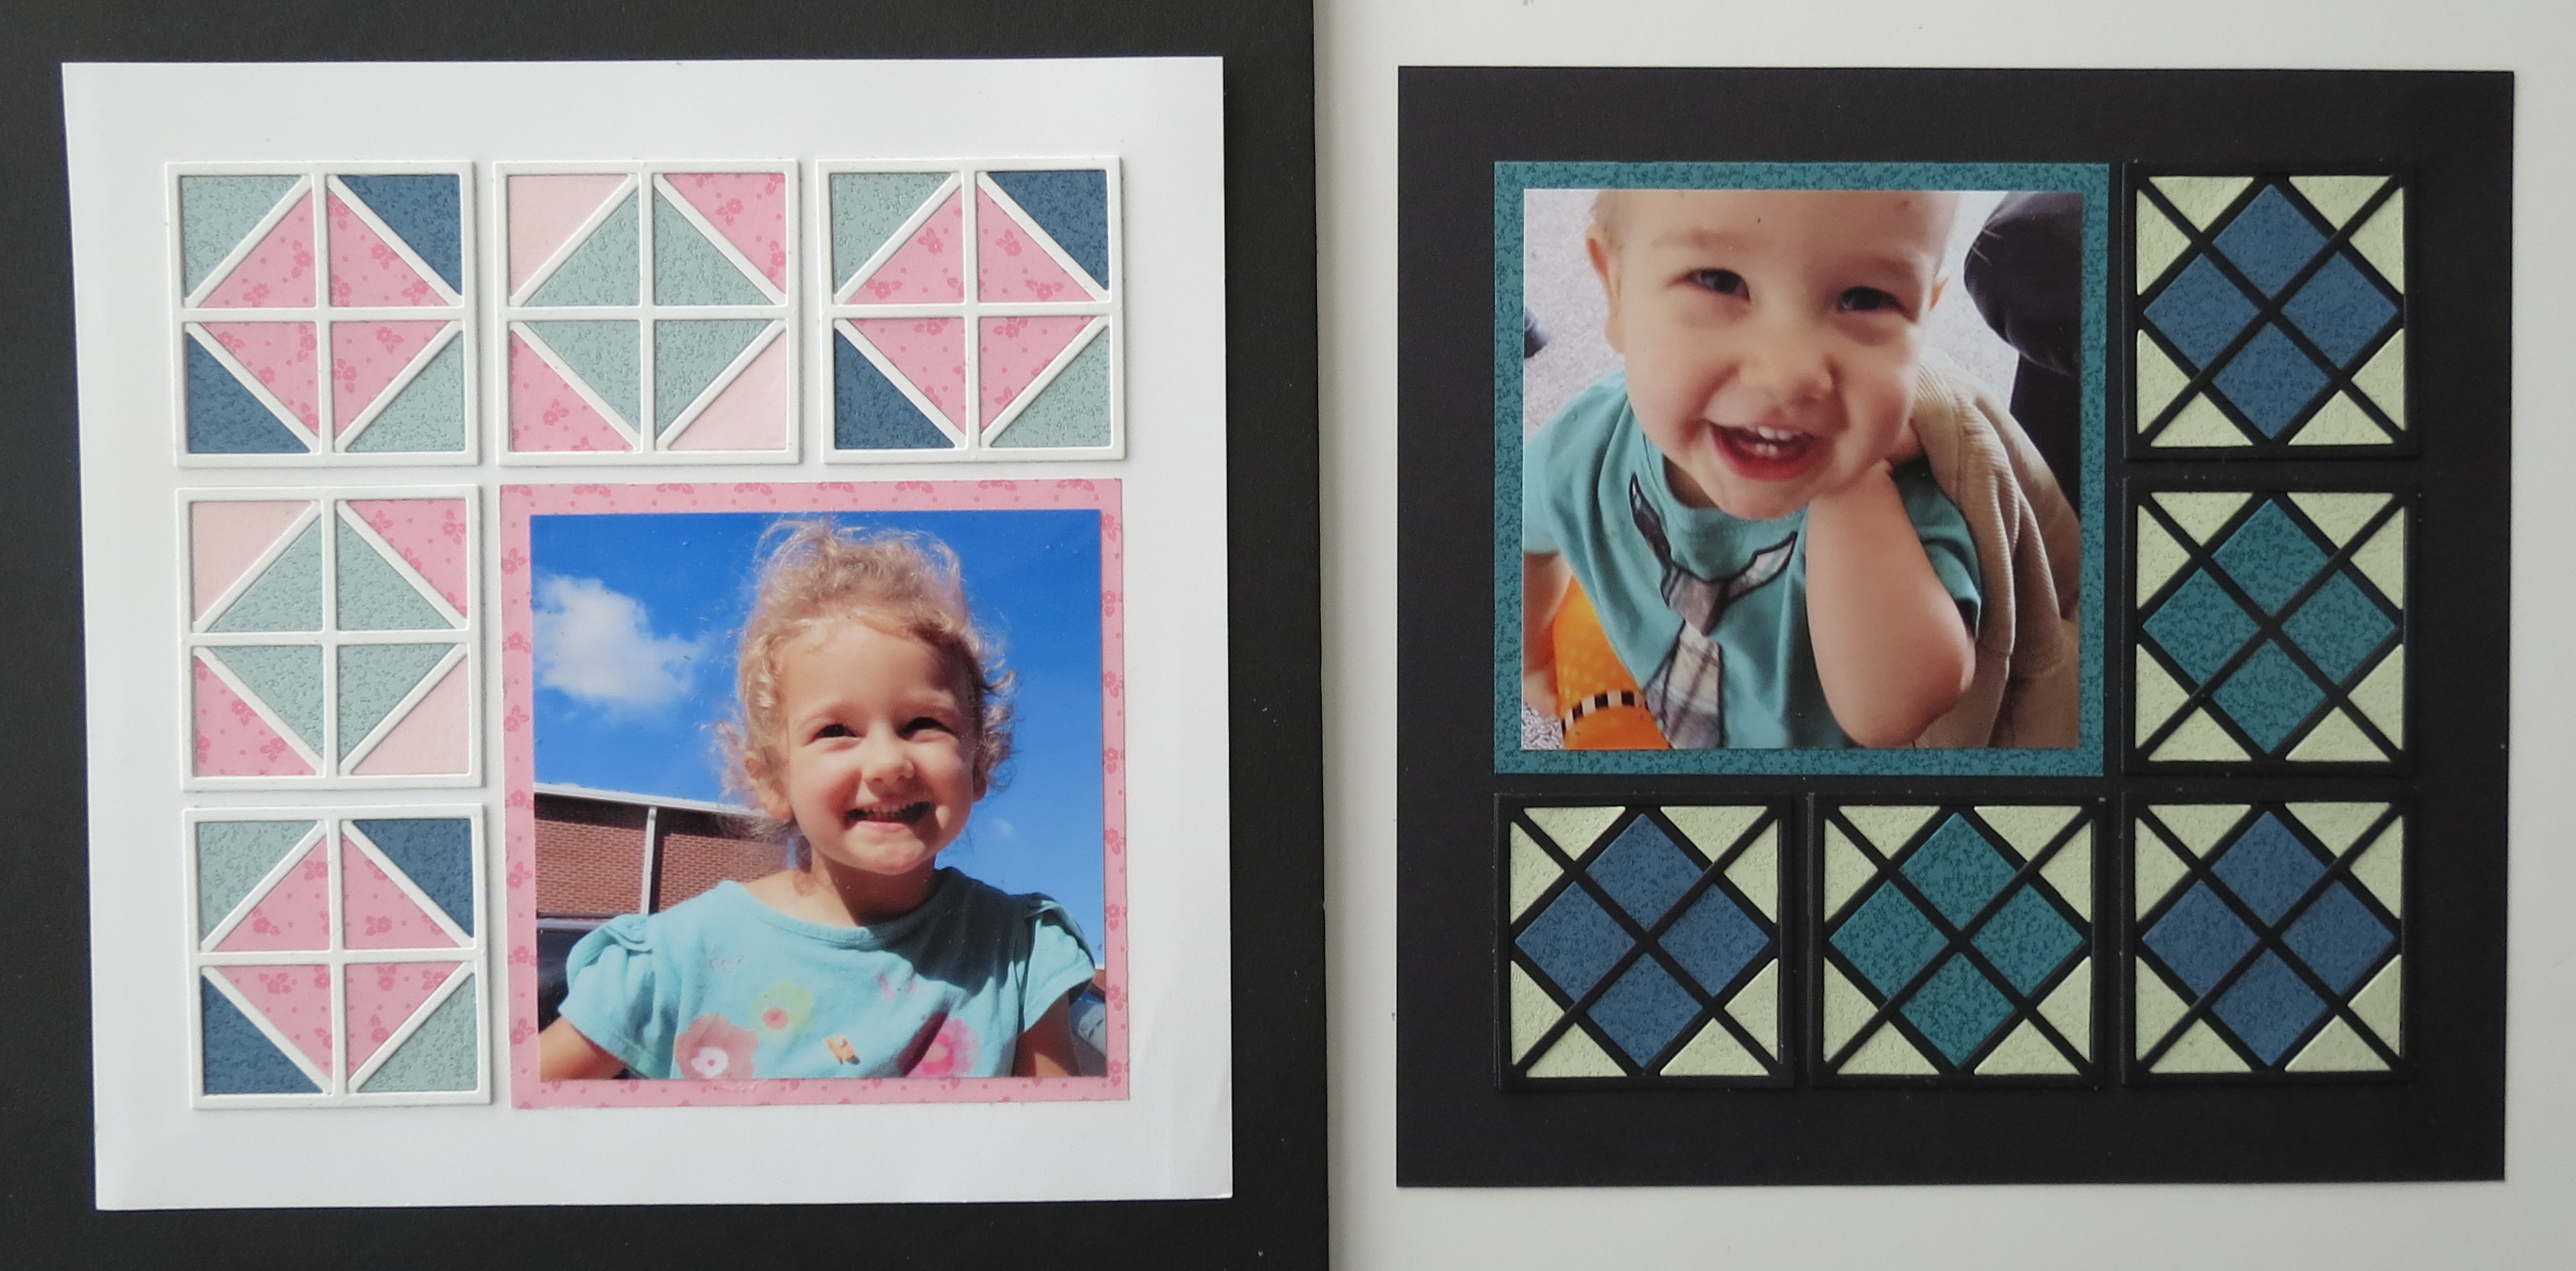
These are two quick layouts featuring a single 4” photo that comes together quickly once you have all your tiles cut. There are so many combinations and colors you can use, the possibilities are endless!
Pop them into an 8”x 8” Memory Frame (I got mine in Hobby Lobby, watch for sales or use your coupons!) and you have a nice Mother’s Day gift for Mum, or Gran. One of each grandchild will create a wonderful mantle display that is coordinated! Have fun getting framed!
MM Graphic Shapes Die Set 1
Be sure to stop in to our Pinterest Boards for more ideas for all things Mosaic.
Andrea Fisher
MM Graphic Shapes Dies Framed! Two styles Argyle and Quilt using three graphic shapes dies to create these designs.