
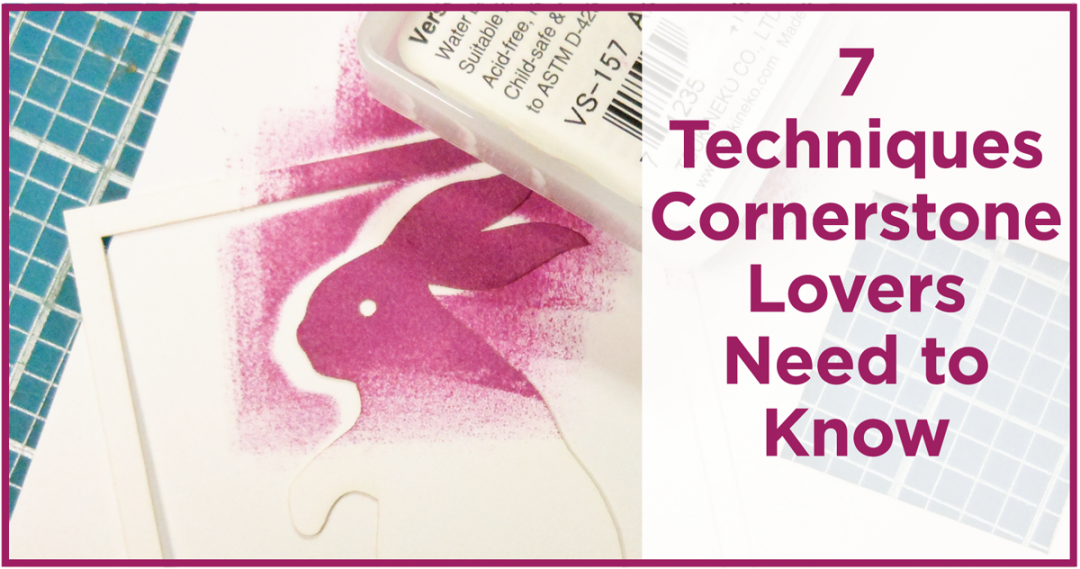
We LOVE Cornerstones! You LOVE Cornerstones! And you will fall in love with them again when you learn these techniques! It’s time to jazz up your pages by turning a plain Cornerstone to a unique embellishment that represents you. You can also put your own spin on Cornerstones that come with a Page Kit. I had so much fun getting this post together, and some of the Cornerstones inspired me to create awesome pages in the future 😉 . I hope this post helps you get some new Scrapbook Page Ideas!
Here is our list of 7 Cornerstone Techniques YOU Need to know:
[/vc_column][/vc_row][vc_row no_margin=”true” padding_top=”0px” padding_bottom=”0px” border=”none”][vc_column width=”1/1″]1. Change Up the Background
[/vc_column][/vc_row][vc_row no_margin=”true” padding_top=”0px” padding_bottom=”0px” border=”none”][vc_column width=”1/1″]Have you thought about changing the background? Most of our Cornerstones come with a plain white background, which may look bland on your page. Or it just doesn’t work with your colors. This is a very simple way to change up the look! You can simply change to a different color Paper Tile or card-stock. But, have you thought about using pattern paper or a photo behind your Cornerstone?
[/vc_column][/vc_row][vc_row no_margin=”true” padding_top=”0px” padding_bottom=”0px” border=”none”][vc_column width=”1/1″][/vc_column][/vc_row][vc_row no_margin=”true” padding_top=”0px” padding_bottom=”0px” border=”none”][vc_column width=”1/2″]
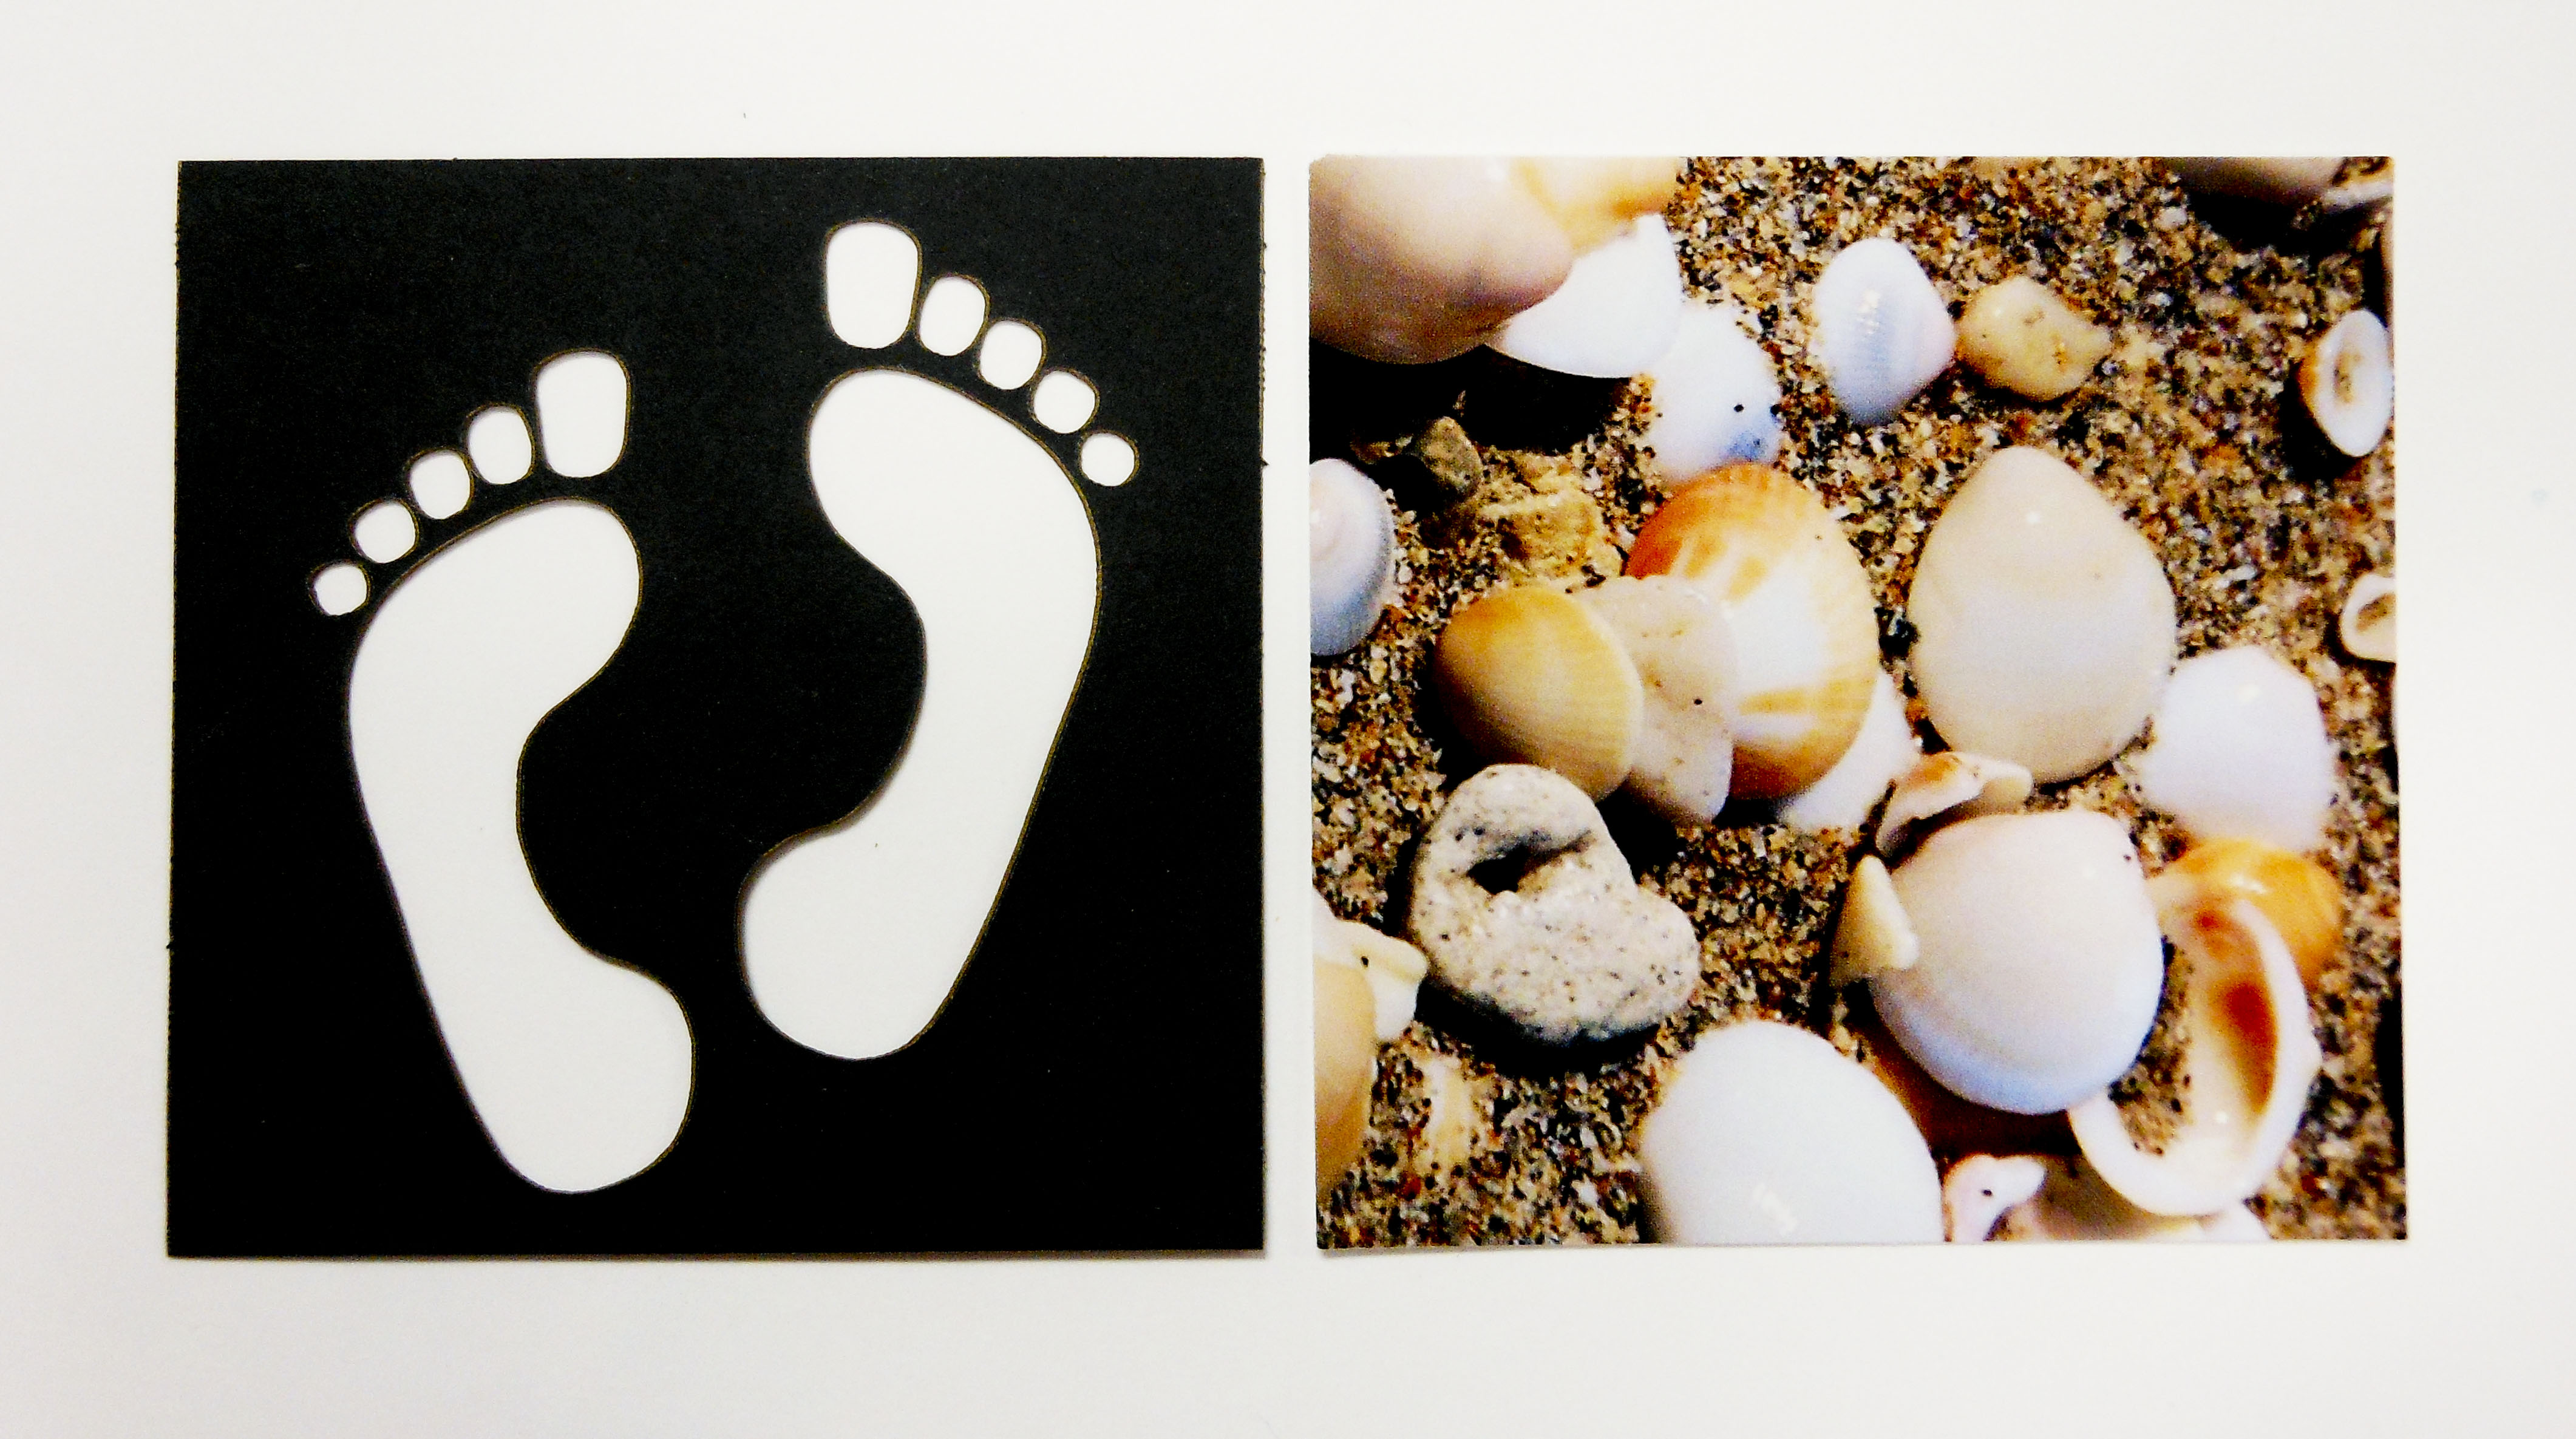
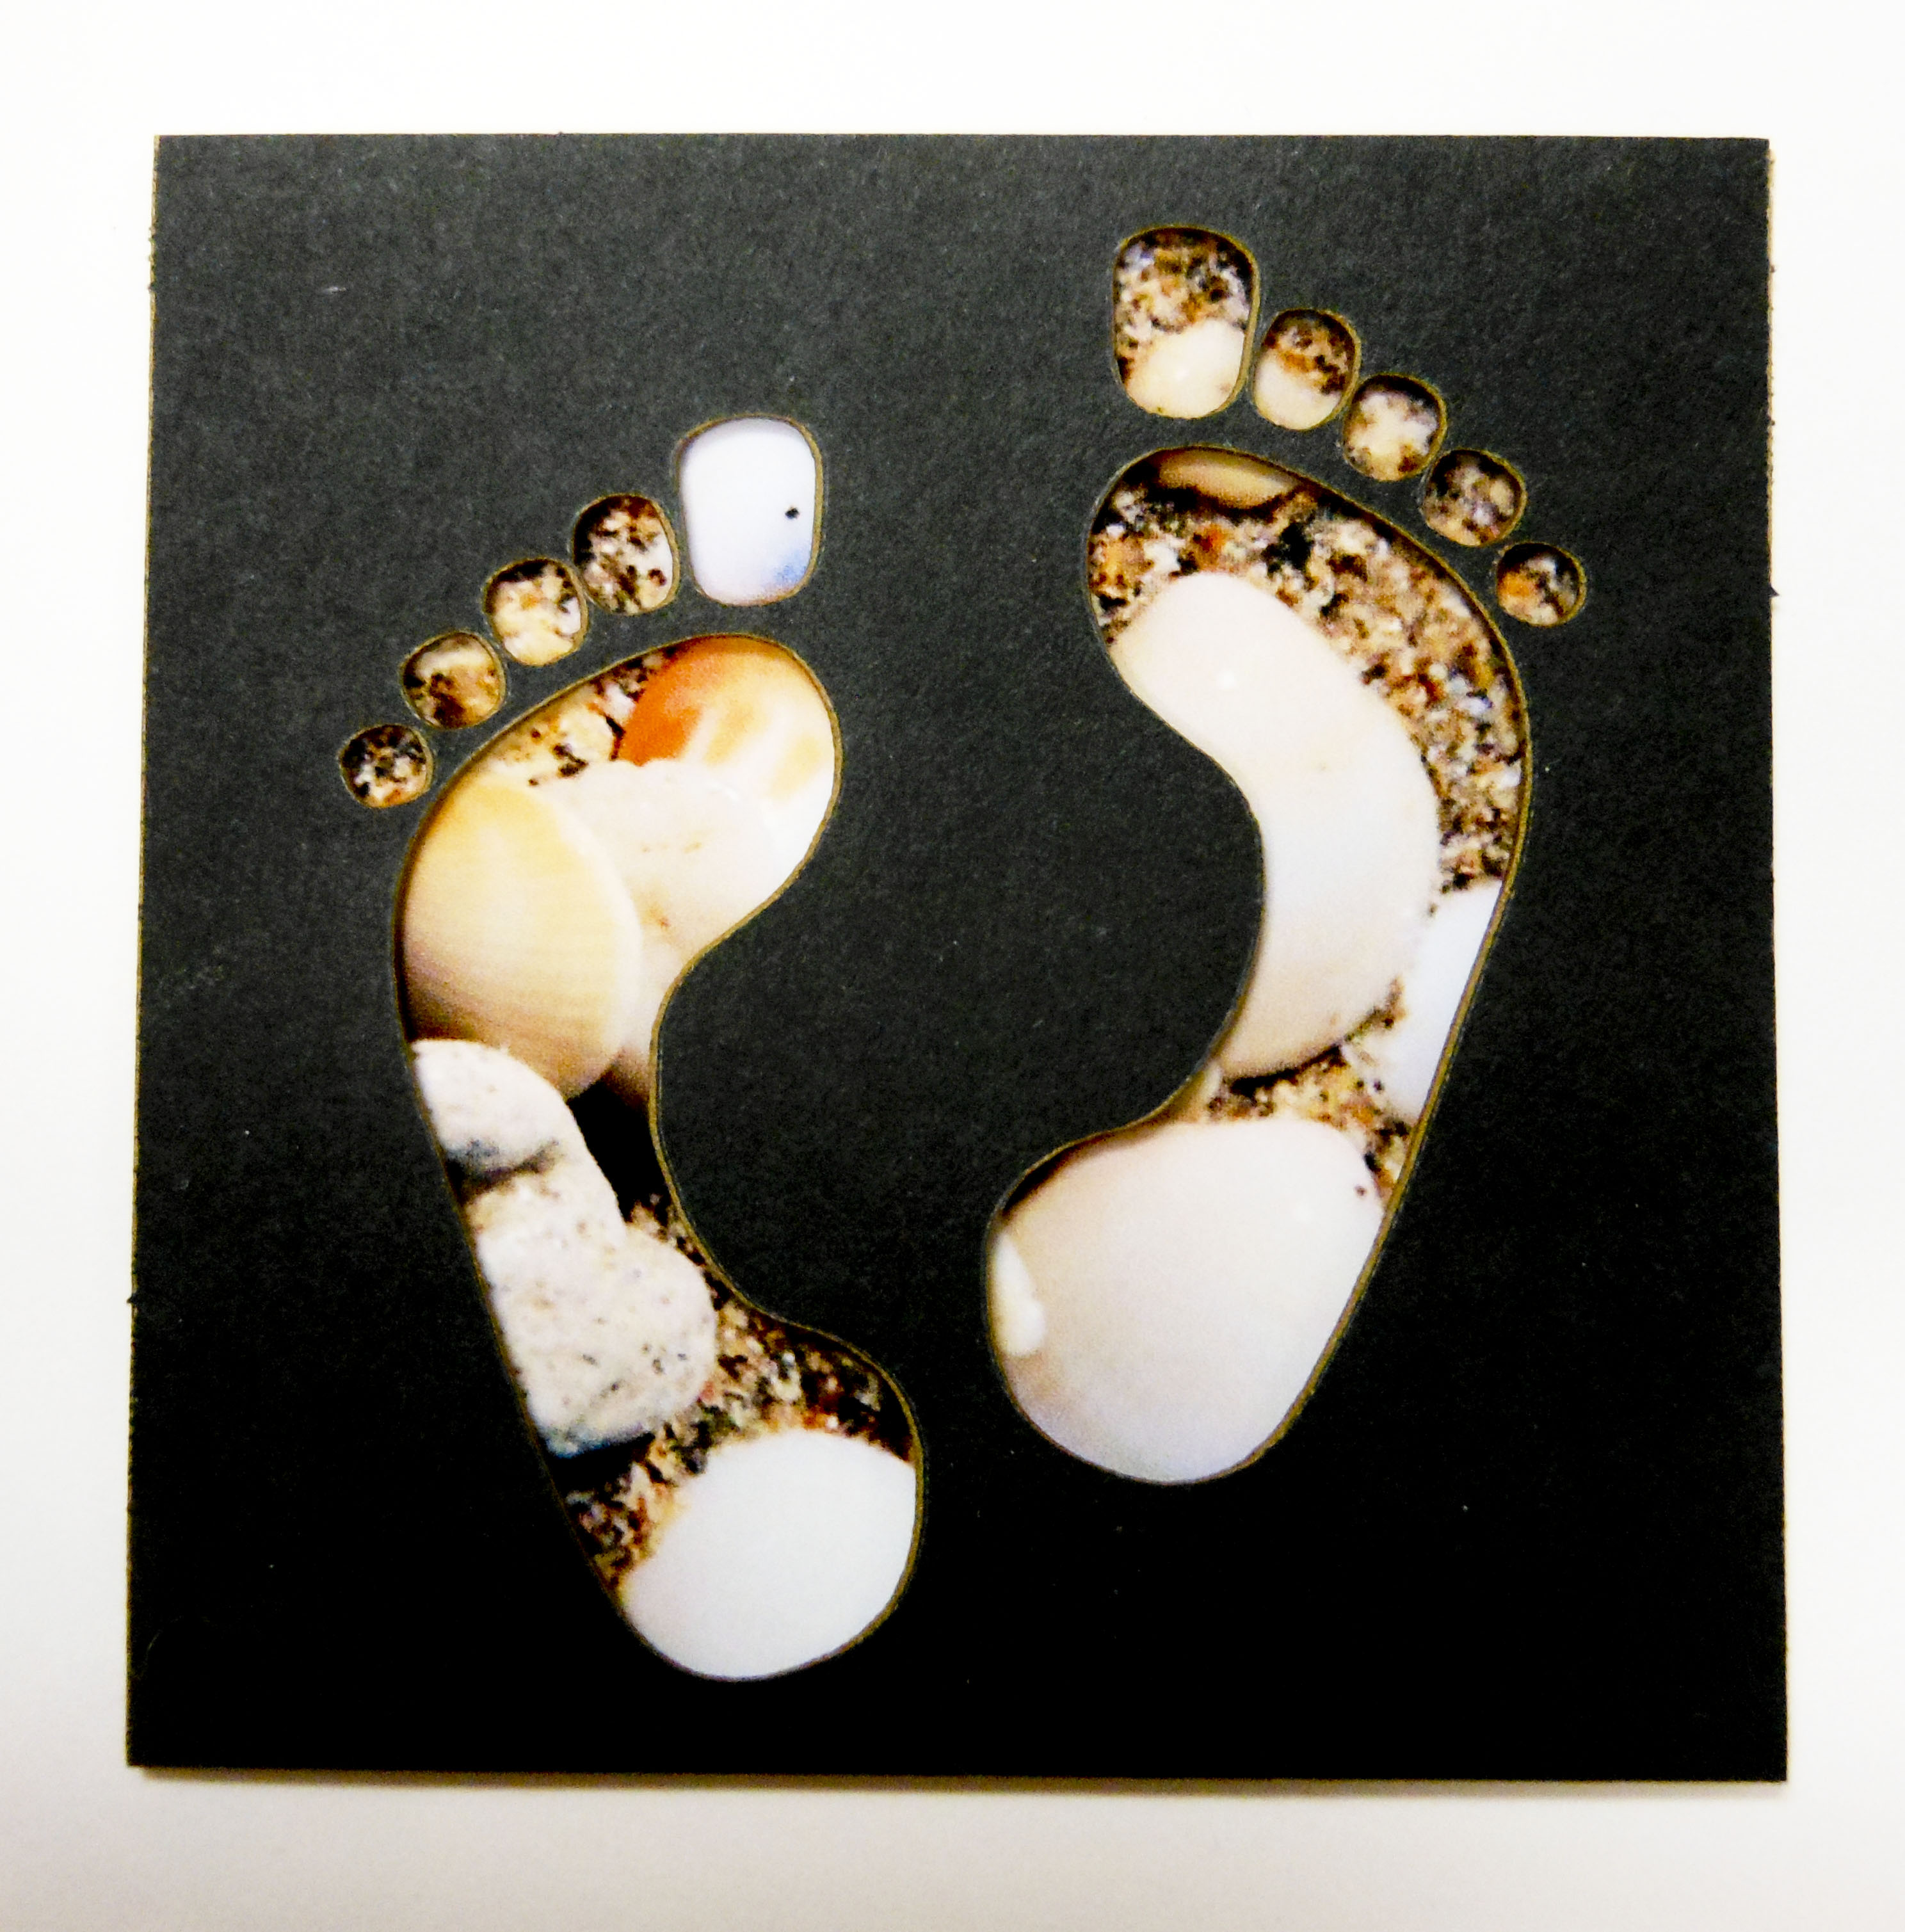
Here I took a Black Barefootin’ Cornerstone over a photograph of sand and seashells. I love this since it shows what your feet were stepping over at the beach. Make sure there is a big contrast between the Cornerstone and the photo or else you will not see the background very well.
[/vc_column][vc_column width=”1/2″]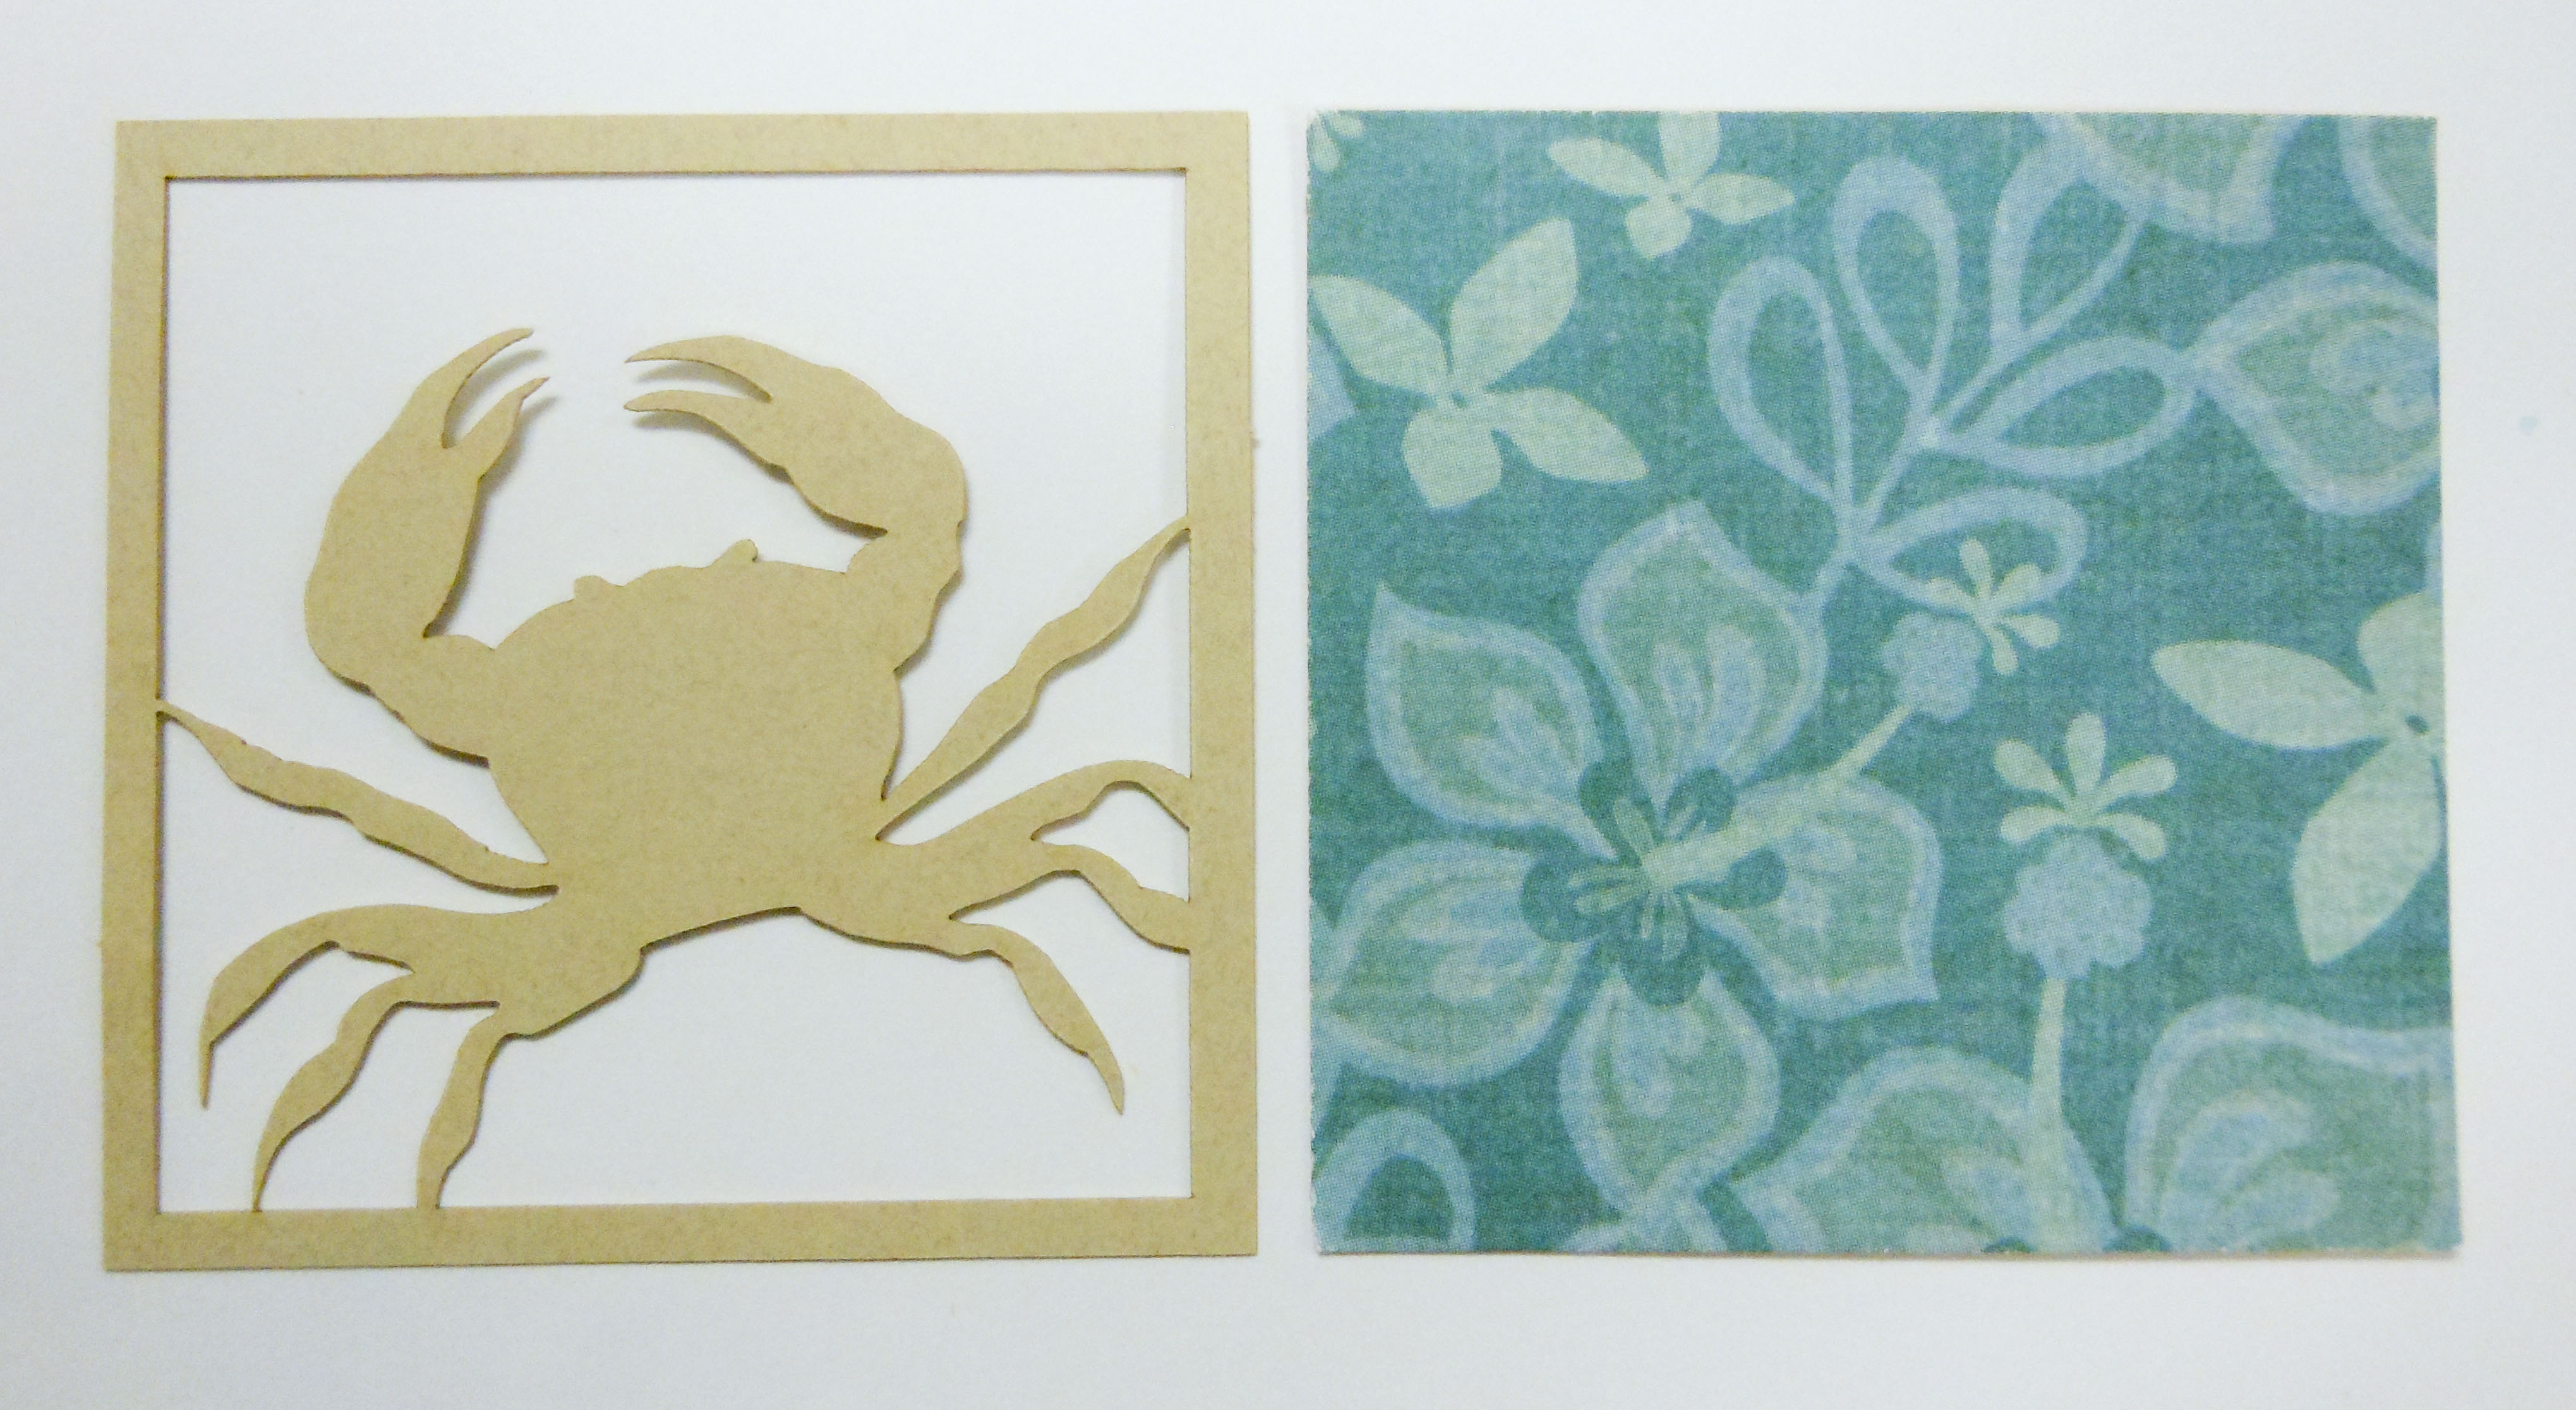
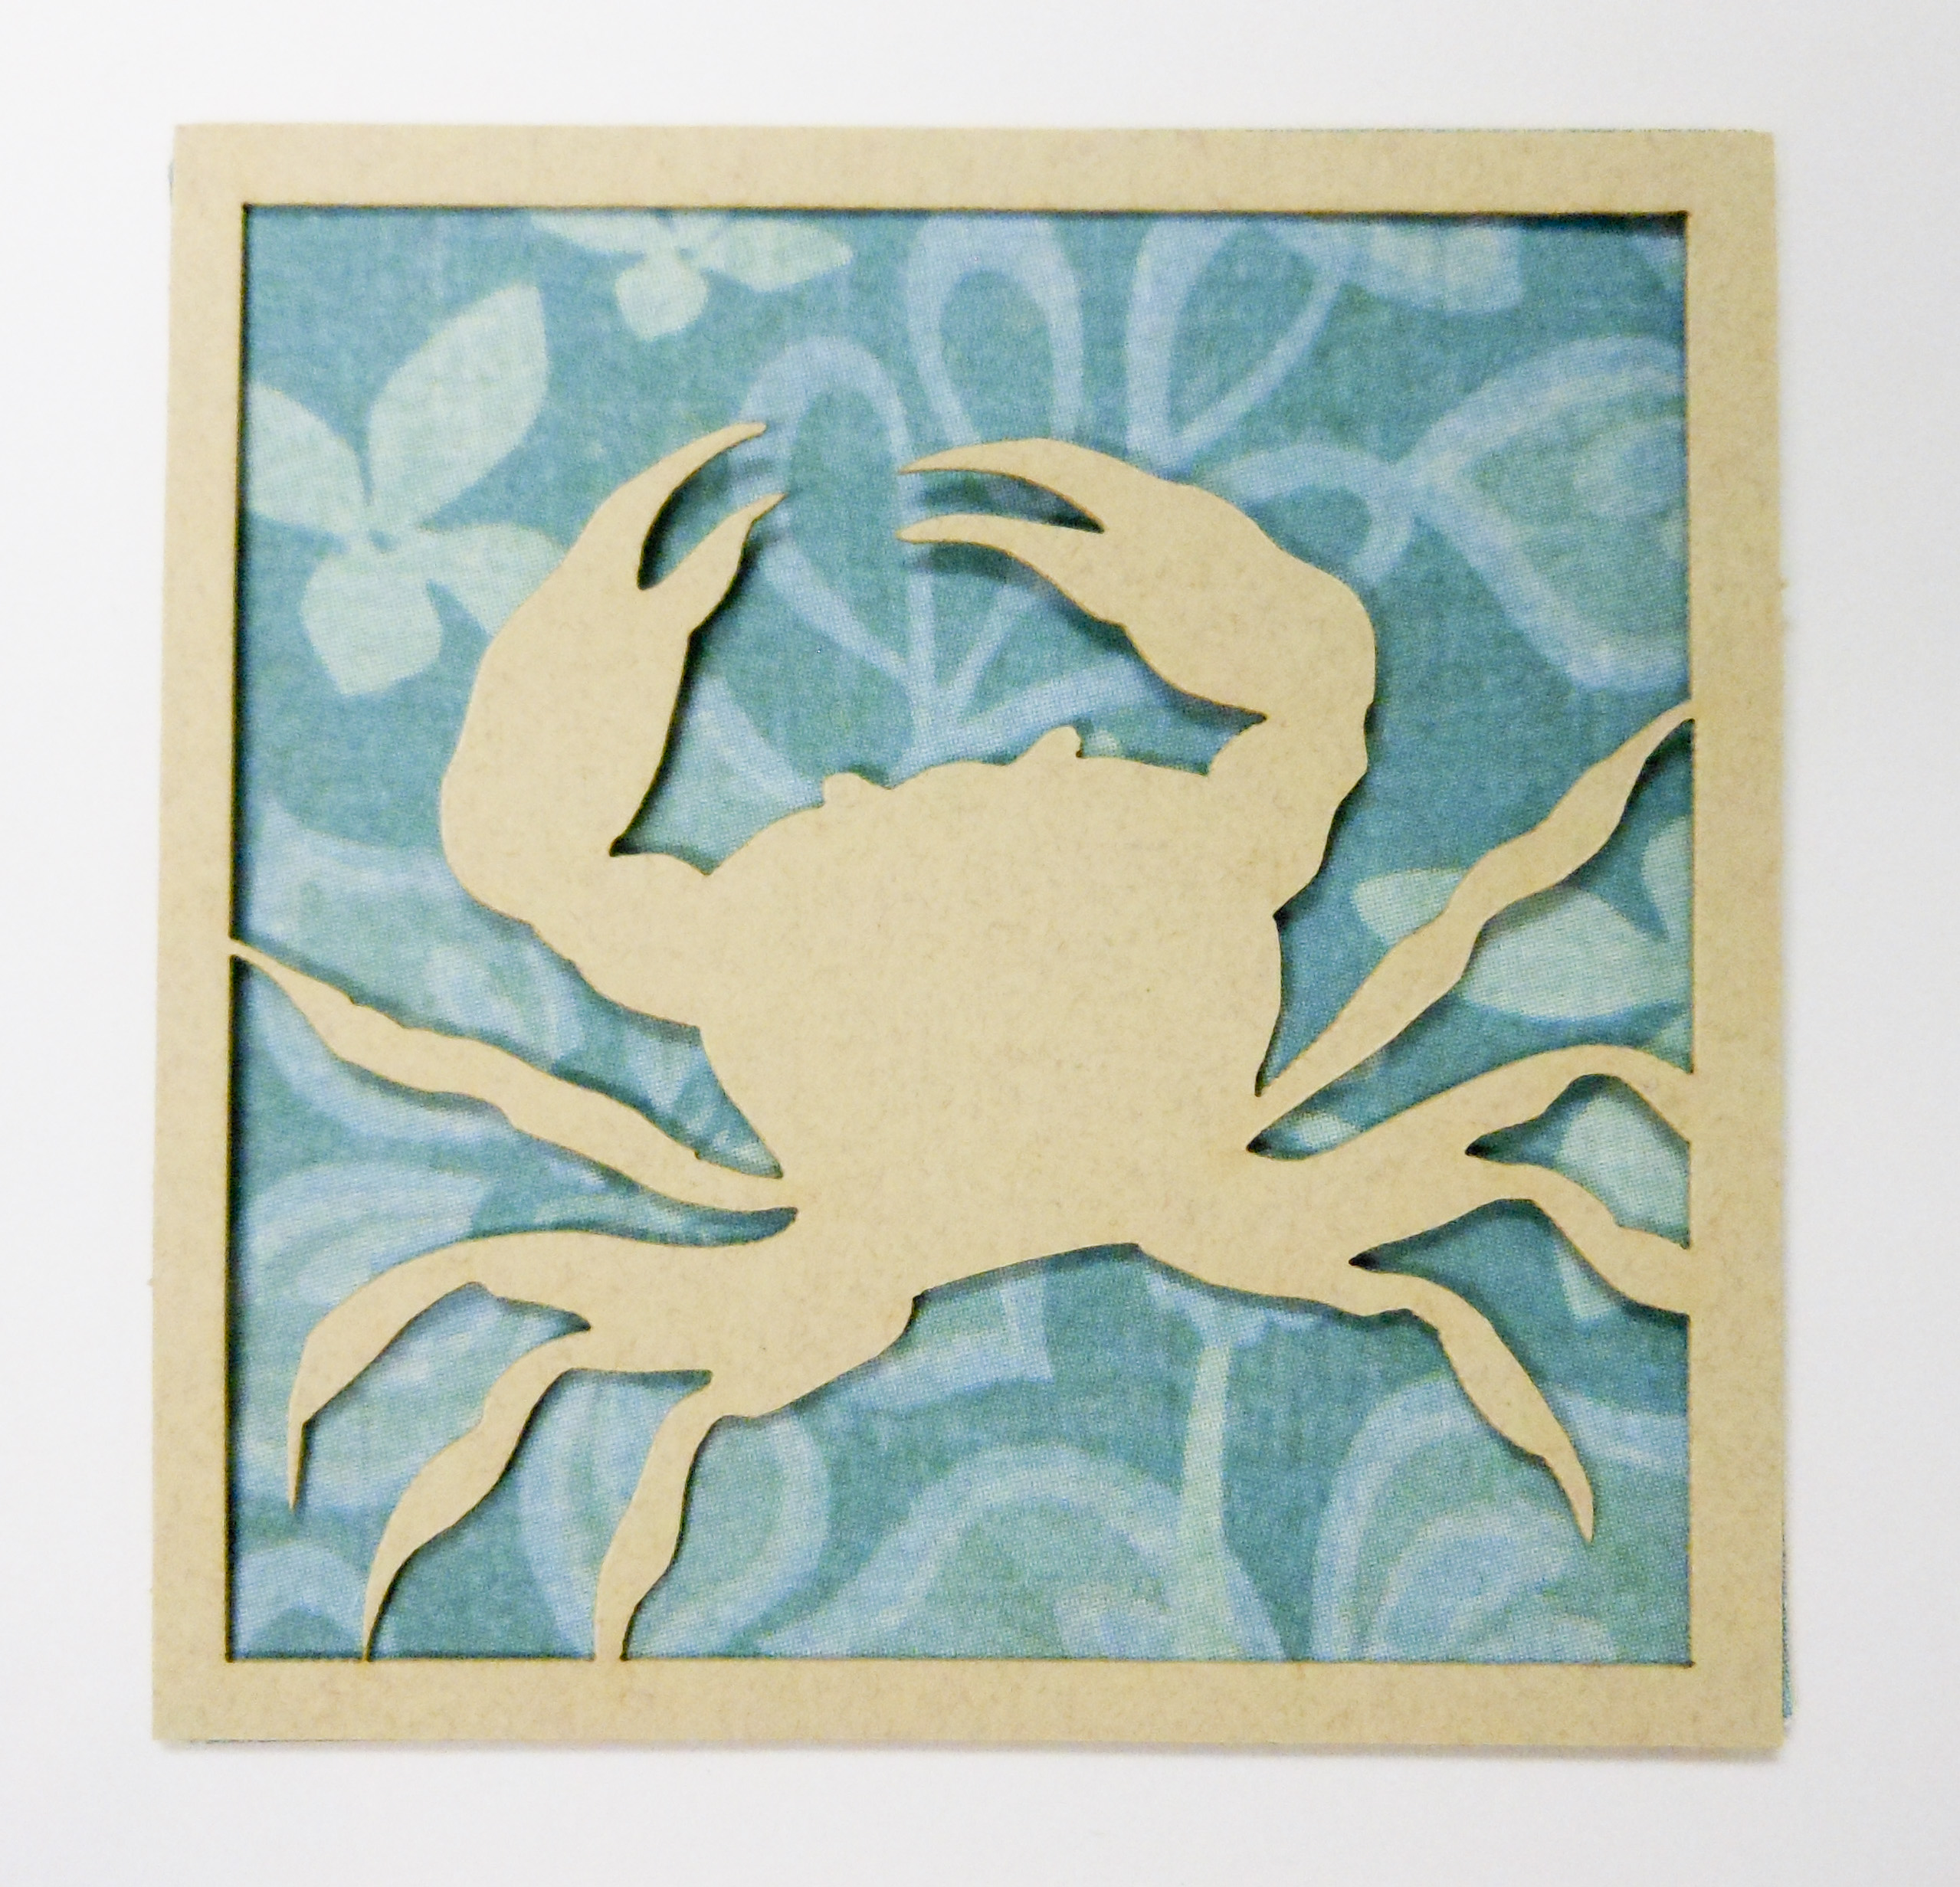
I really like the sand colored crab over the tropical paper. It adds an element of fun and color! Make sure the pattern you choose doesn’t have large images. This will be too hard to see behind your Cornerstone.
[/vc_column][/vc_row][vc_row padding_top=”0px” padding_bottom=”0px” border=”none”][vc_column width=”1/1″][/vc_column][/vc_row][vc_row no_margin=”true” padding_top=”0px” padding_bottom=”0px” border=”none”][vc_column width=”1/1″]
2. Stamp it!
[/vc_column][/vc_row][vc_row no_margin=”true” padding_top=”0px” padding_bottom=”0px” border=”none”][vc_column width=”1/1″]If you love stamps, you need to try this out! Stamping is a great way to add texture, color, and interest to the Cornerstone. So get your favorite stamps out and show your unique style!
[/vc_column][/vc_row][vc_row no_margin=”true” padding_top=”0px” padding_bottom=”0px” border=”none”][vc_column width=”1/1″][/vc_column][/vc_row][vc_row no_margin=”true” padding_top=”0px” padding_bottom=”0px” border=”none”][vc_column width=”1/3″]
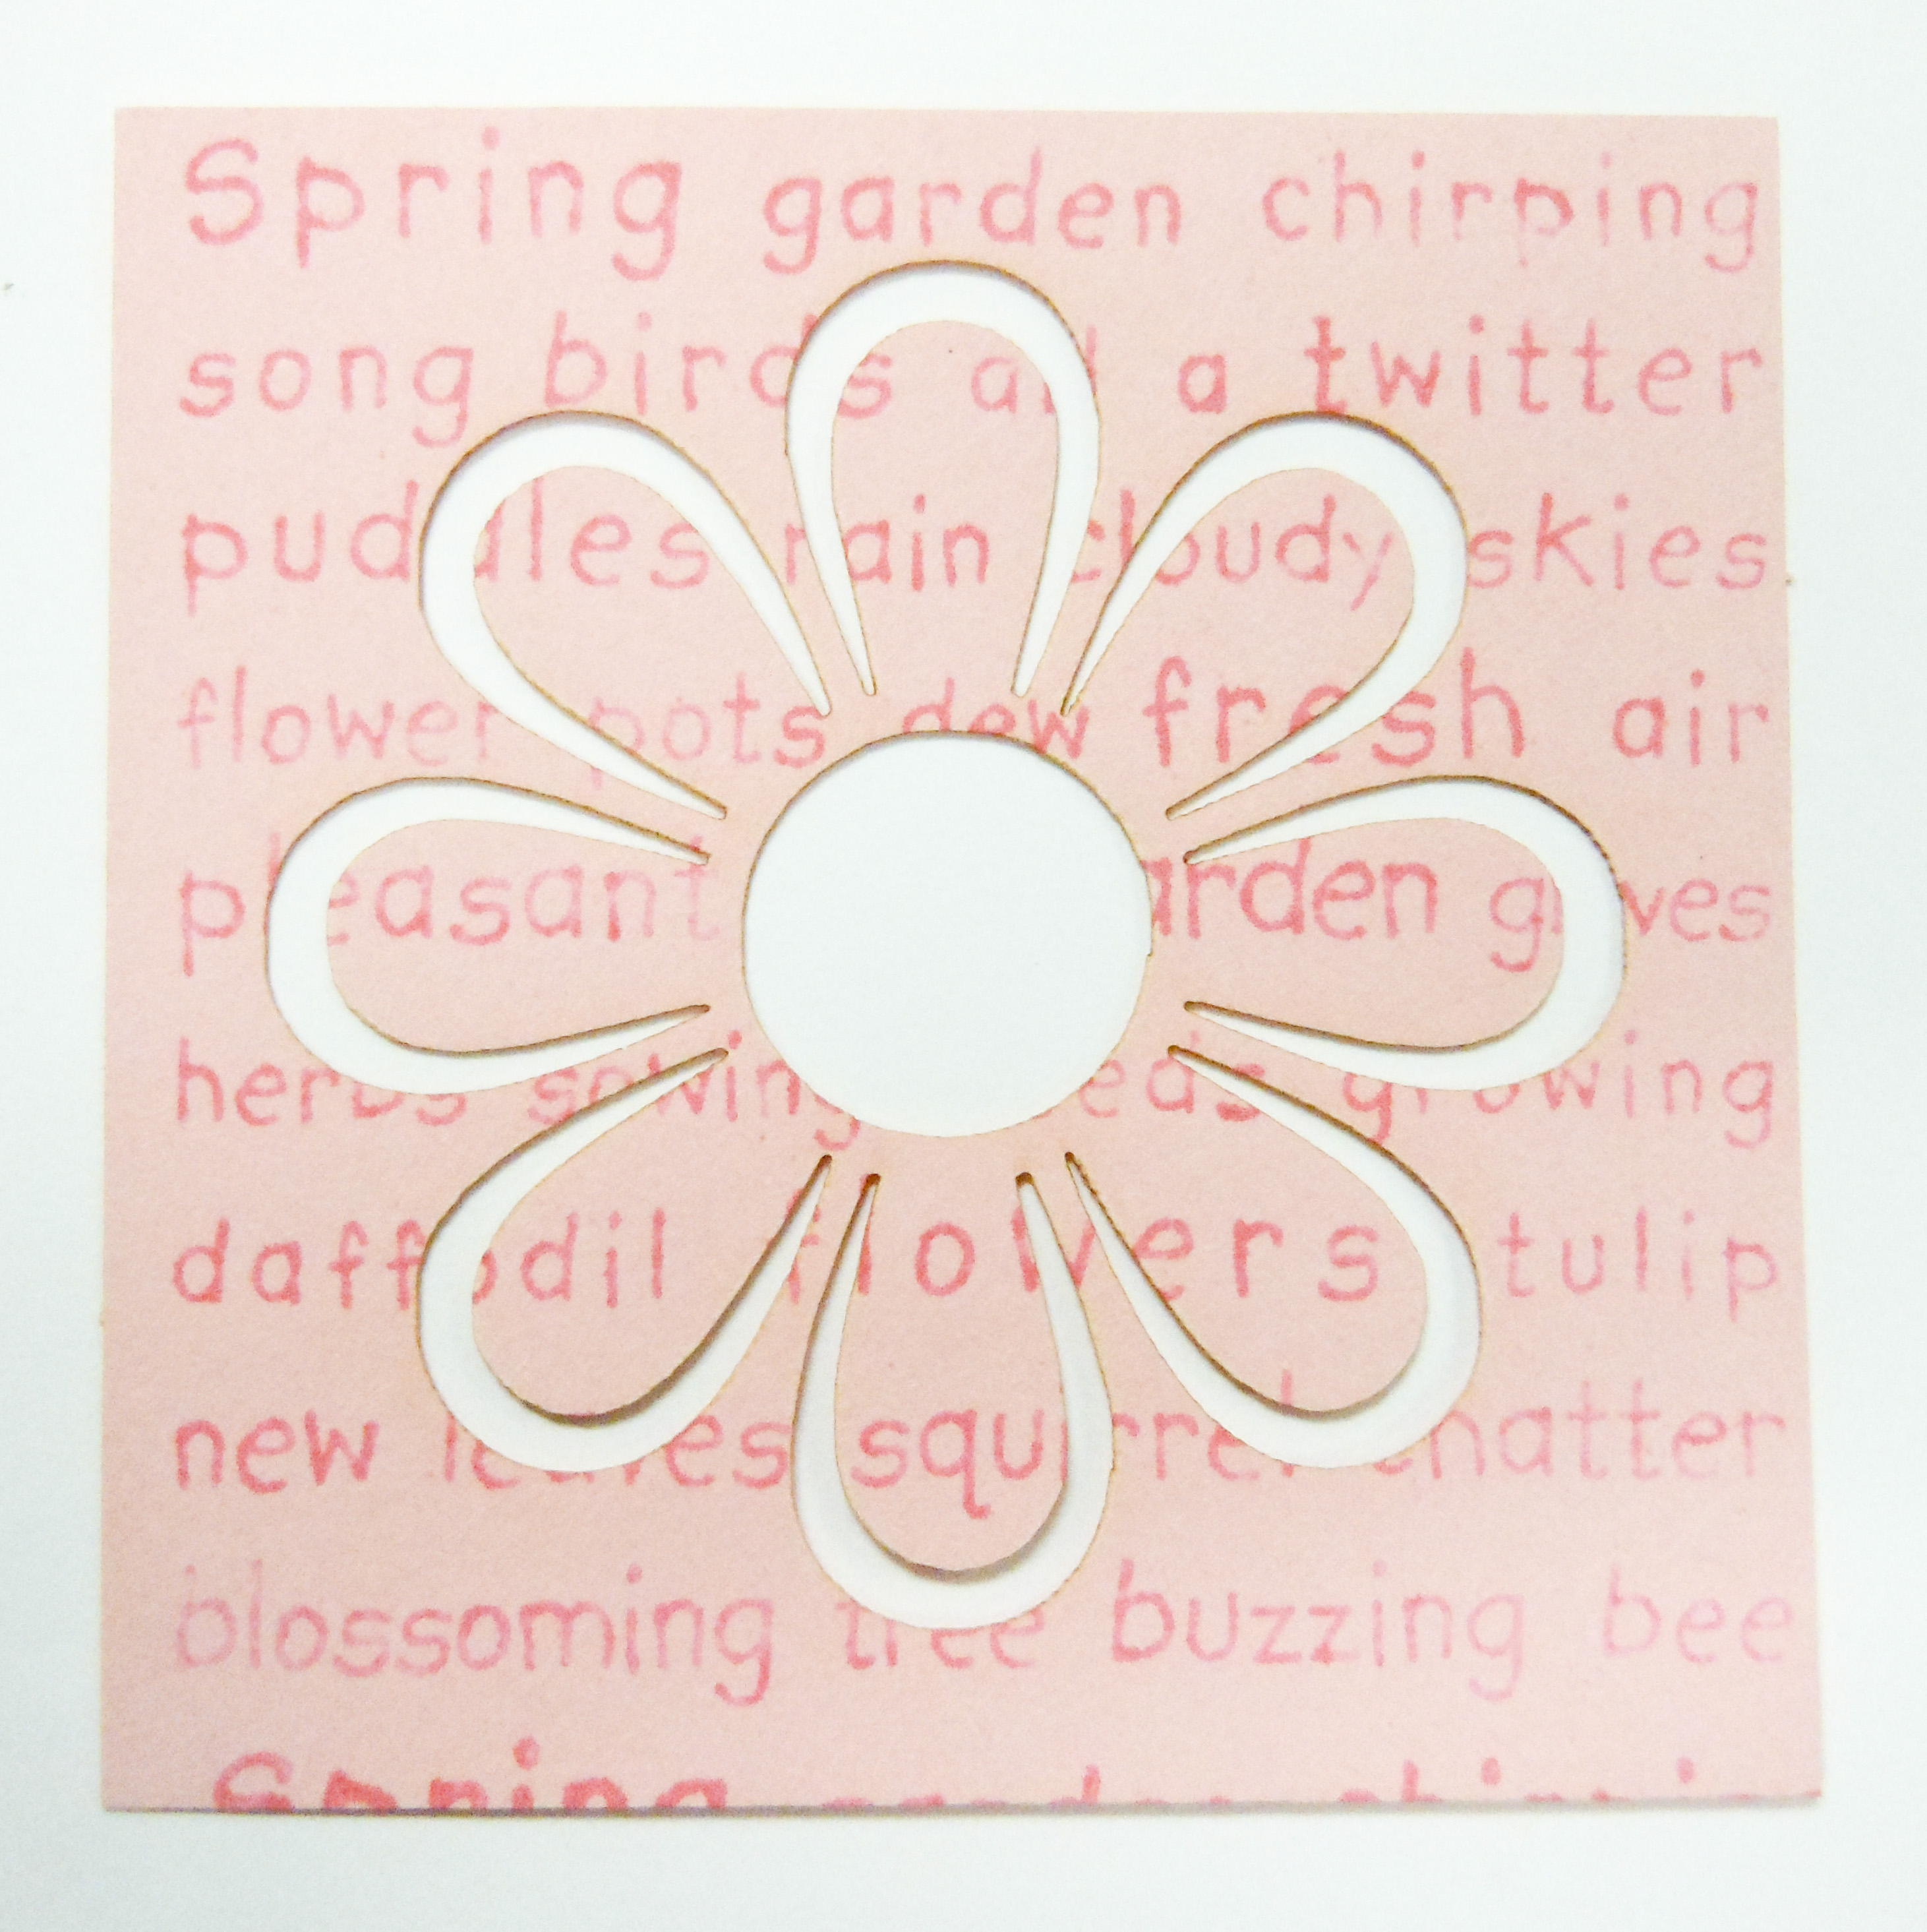
Here, I added some words over a Medium Pink Pop-A-Daisy Cornerstone (Did you know you can pop up the petals for a 3D look?) I used one of the stamps from the Clearly Spring stamp pack. This stamp has many words that relate to spring, which works well with a flower Cornerstone.
[/vc_column][vc_column width=”1/3″]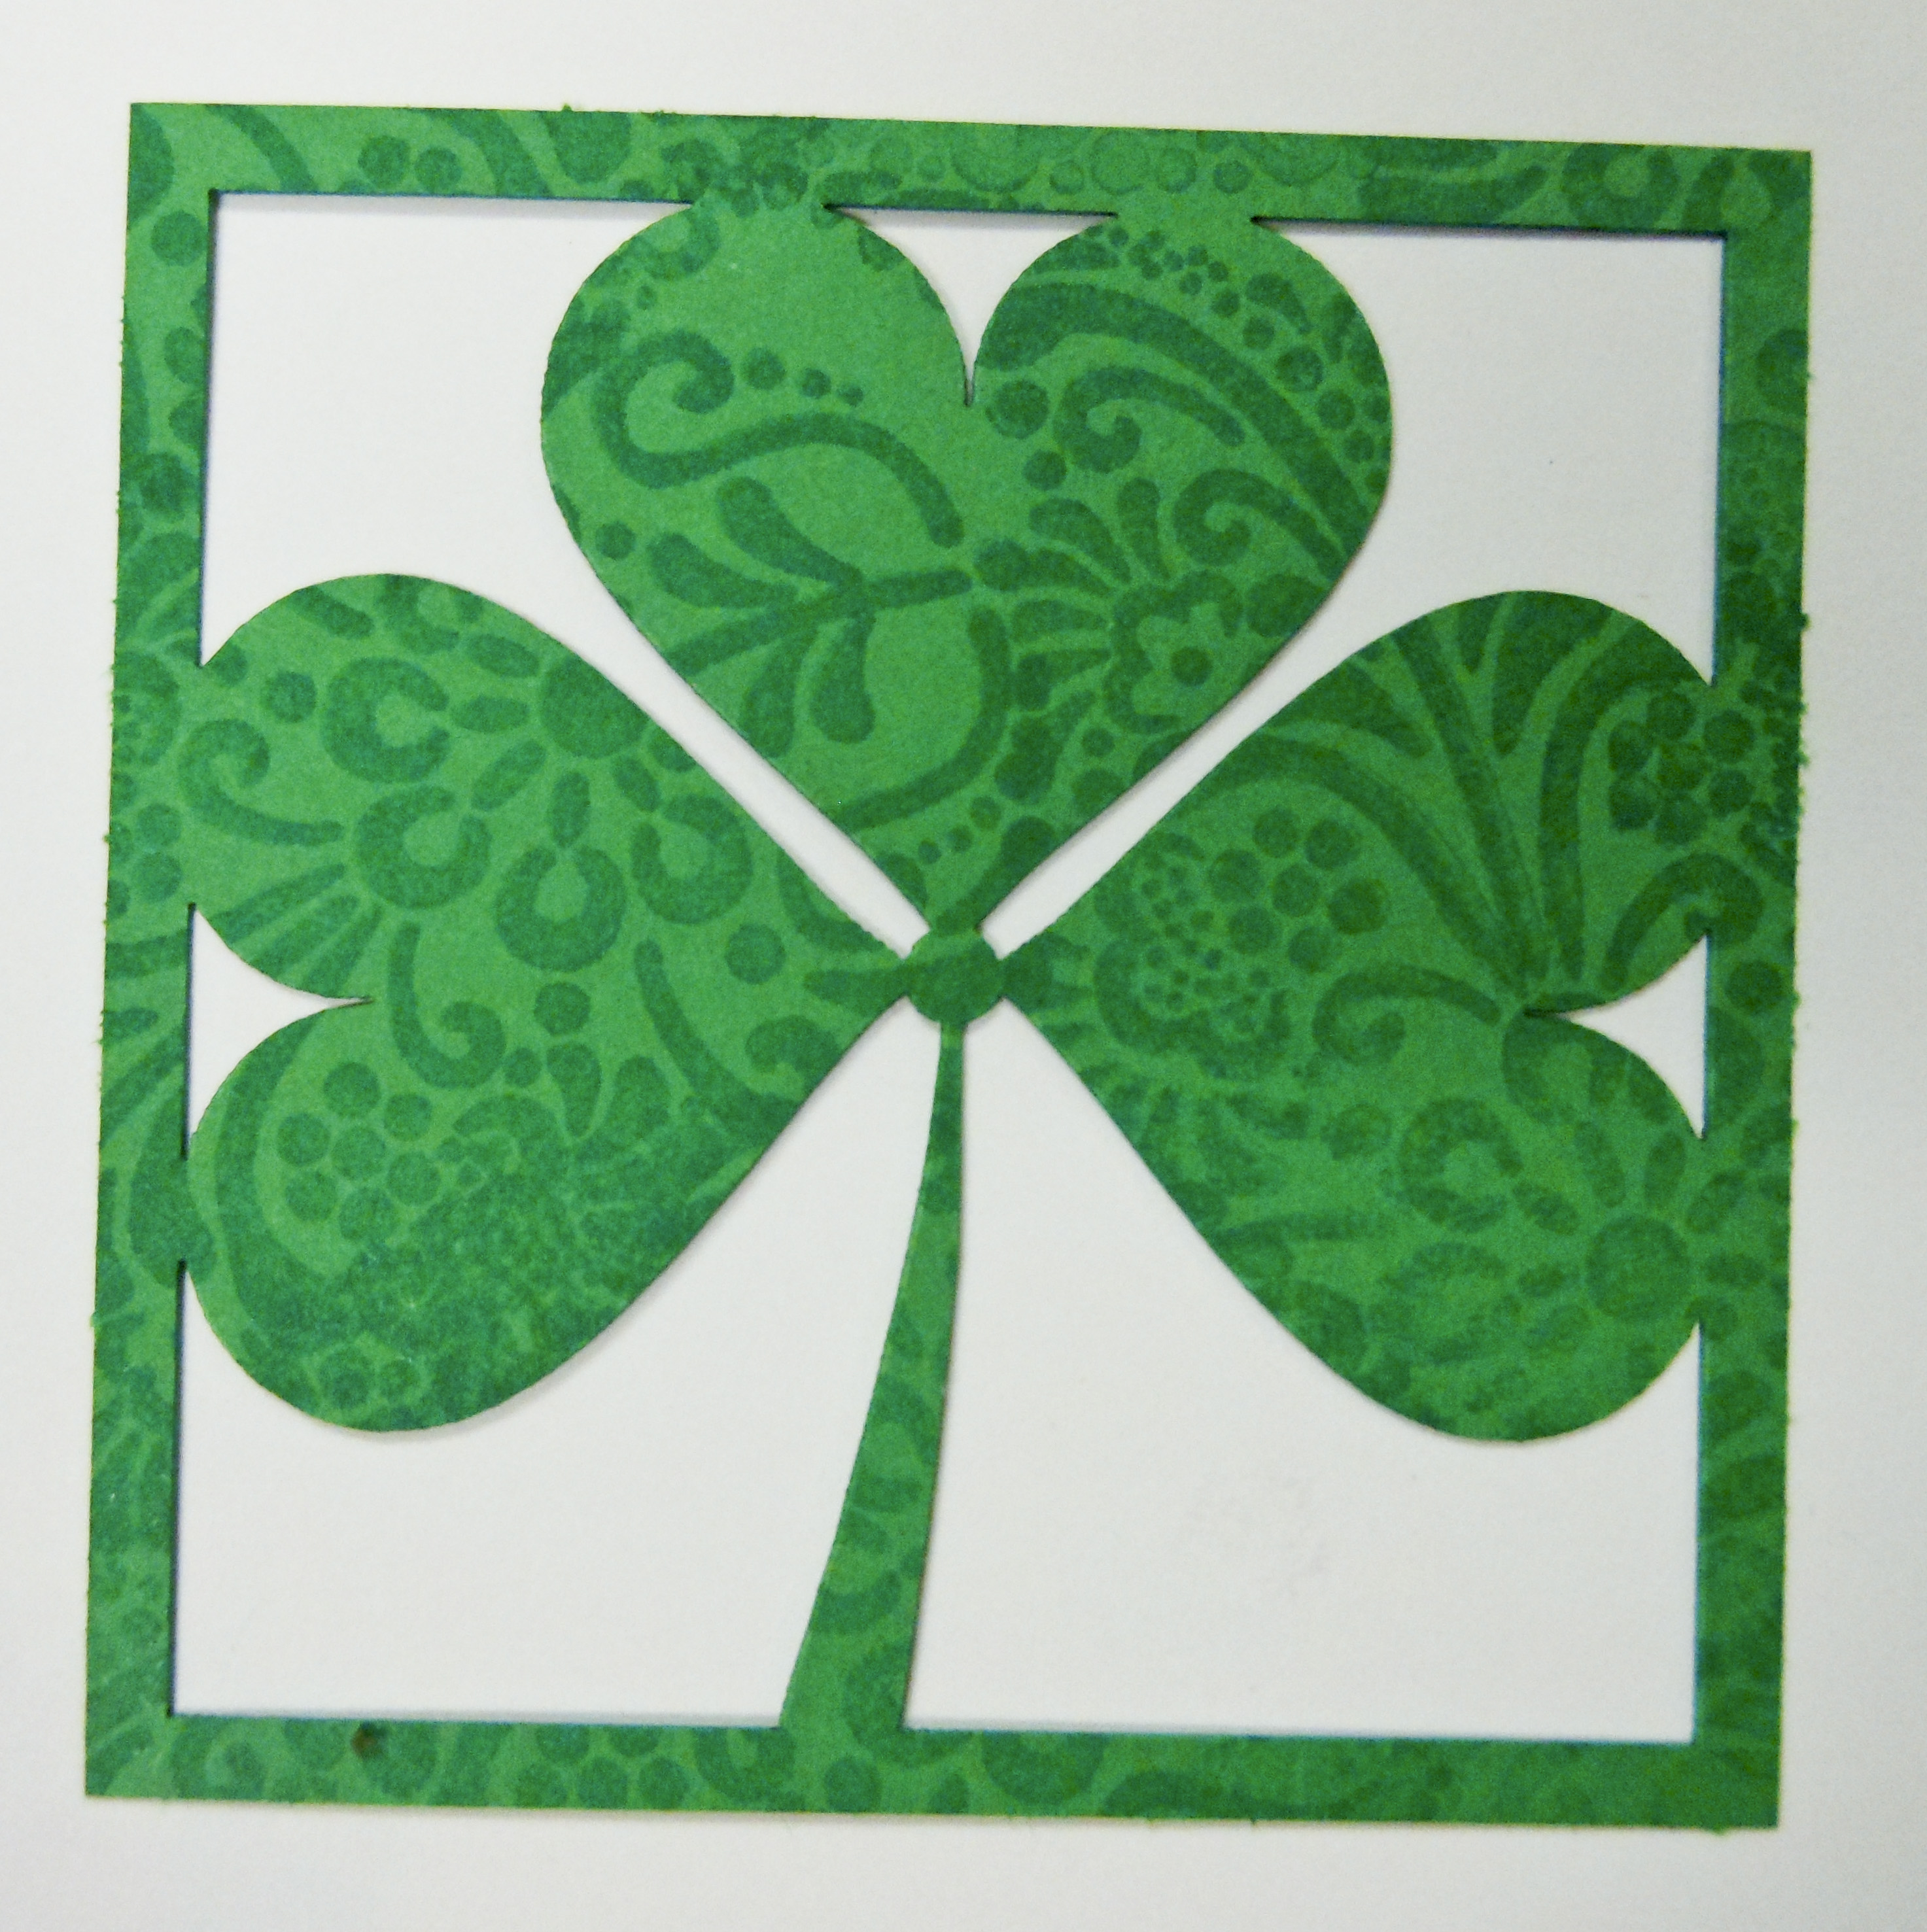
So I will admit this is my favorite Cornerstones on this post! I have a paisley clear stamp with a cute pattern and thought it would look good with this Green Clover. I love it! I love the texture, and I really like having the darker markings. I plan to use this on a future page, so keep an eye out for it!
[/vc_column][vc_column width=”1/3″]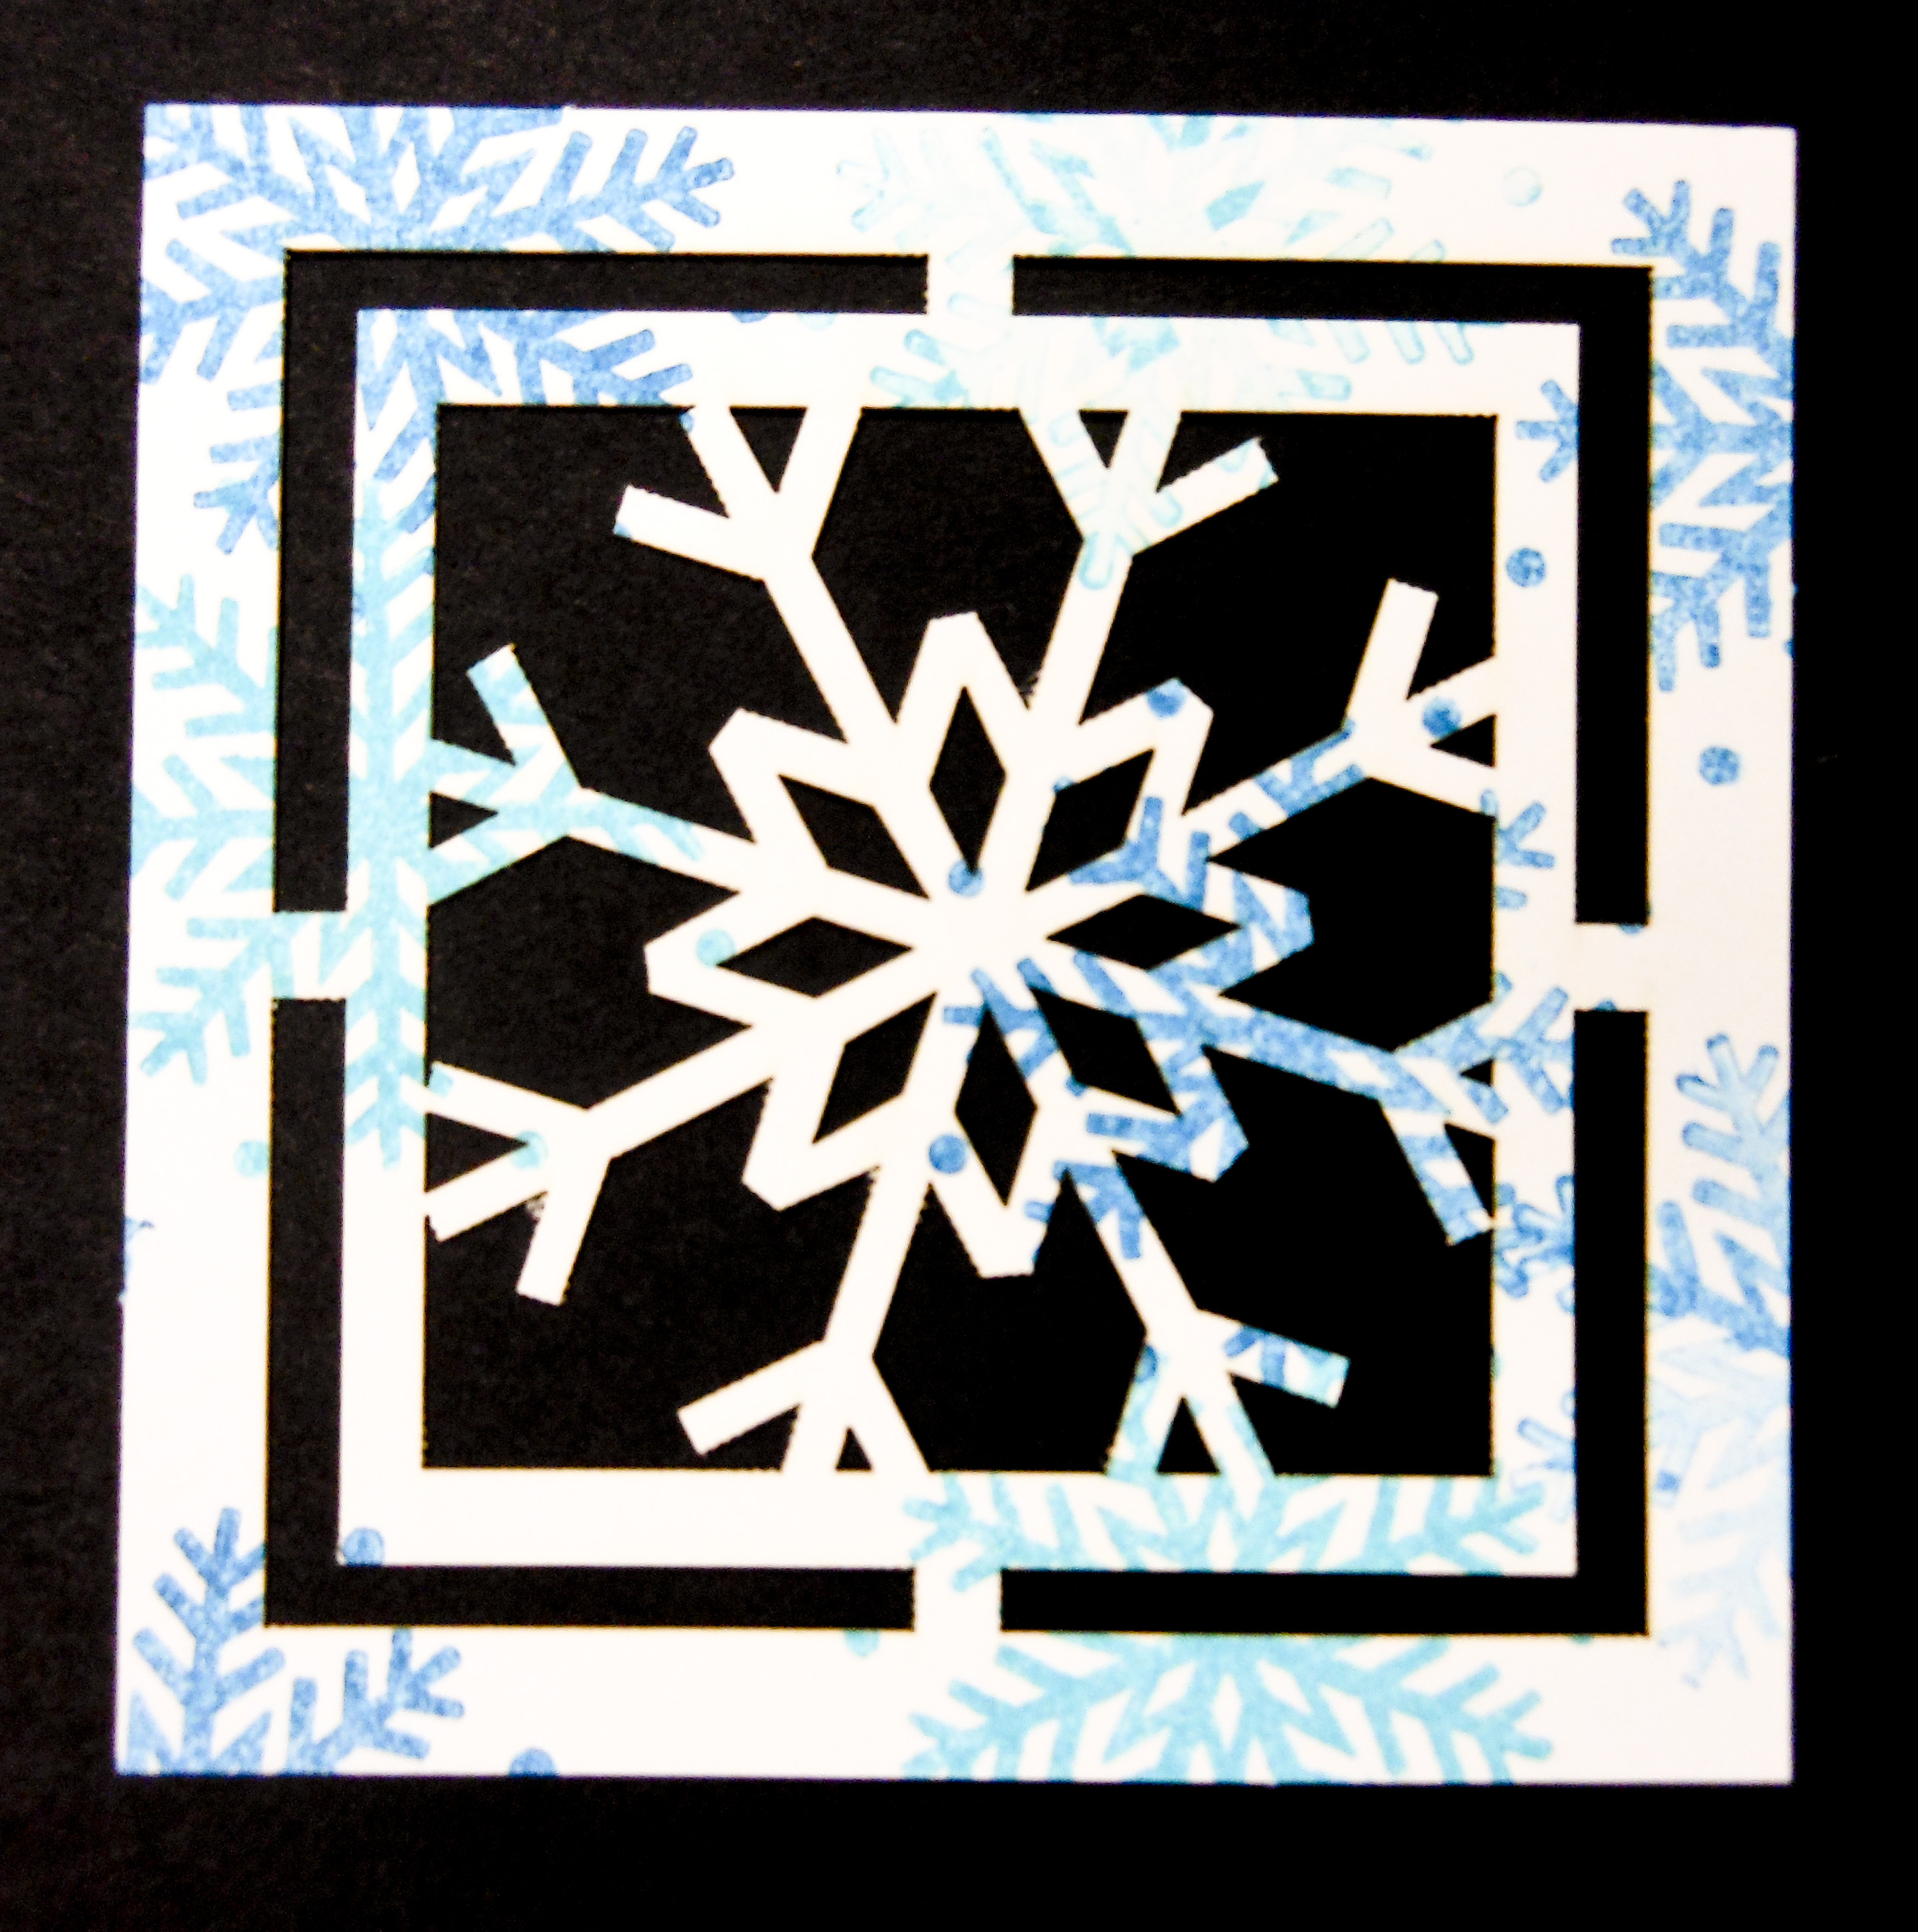
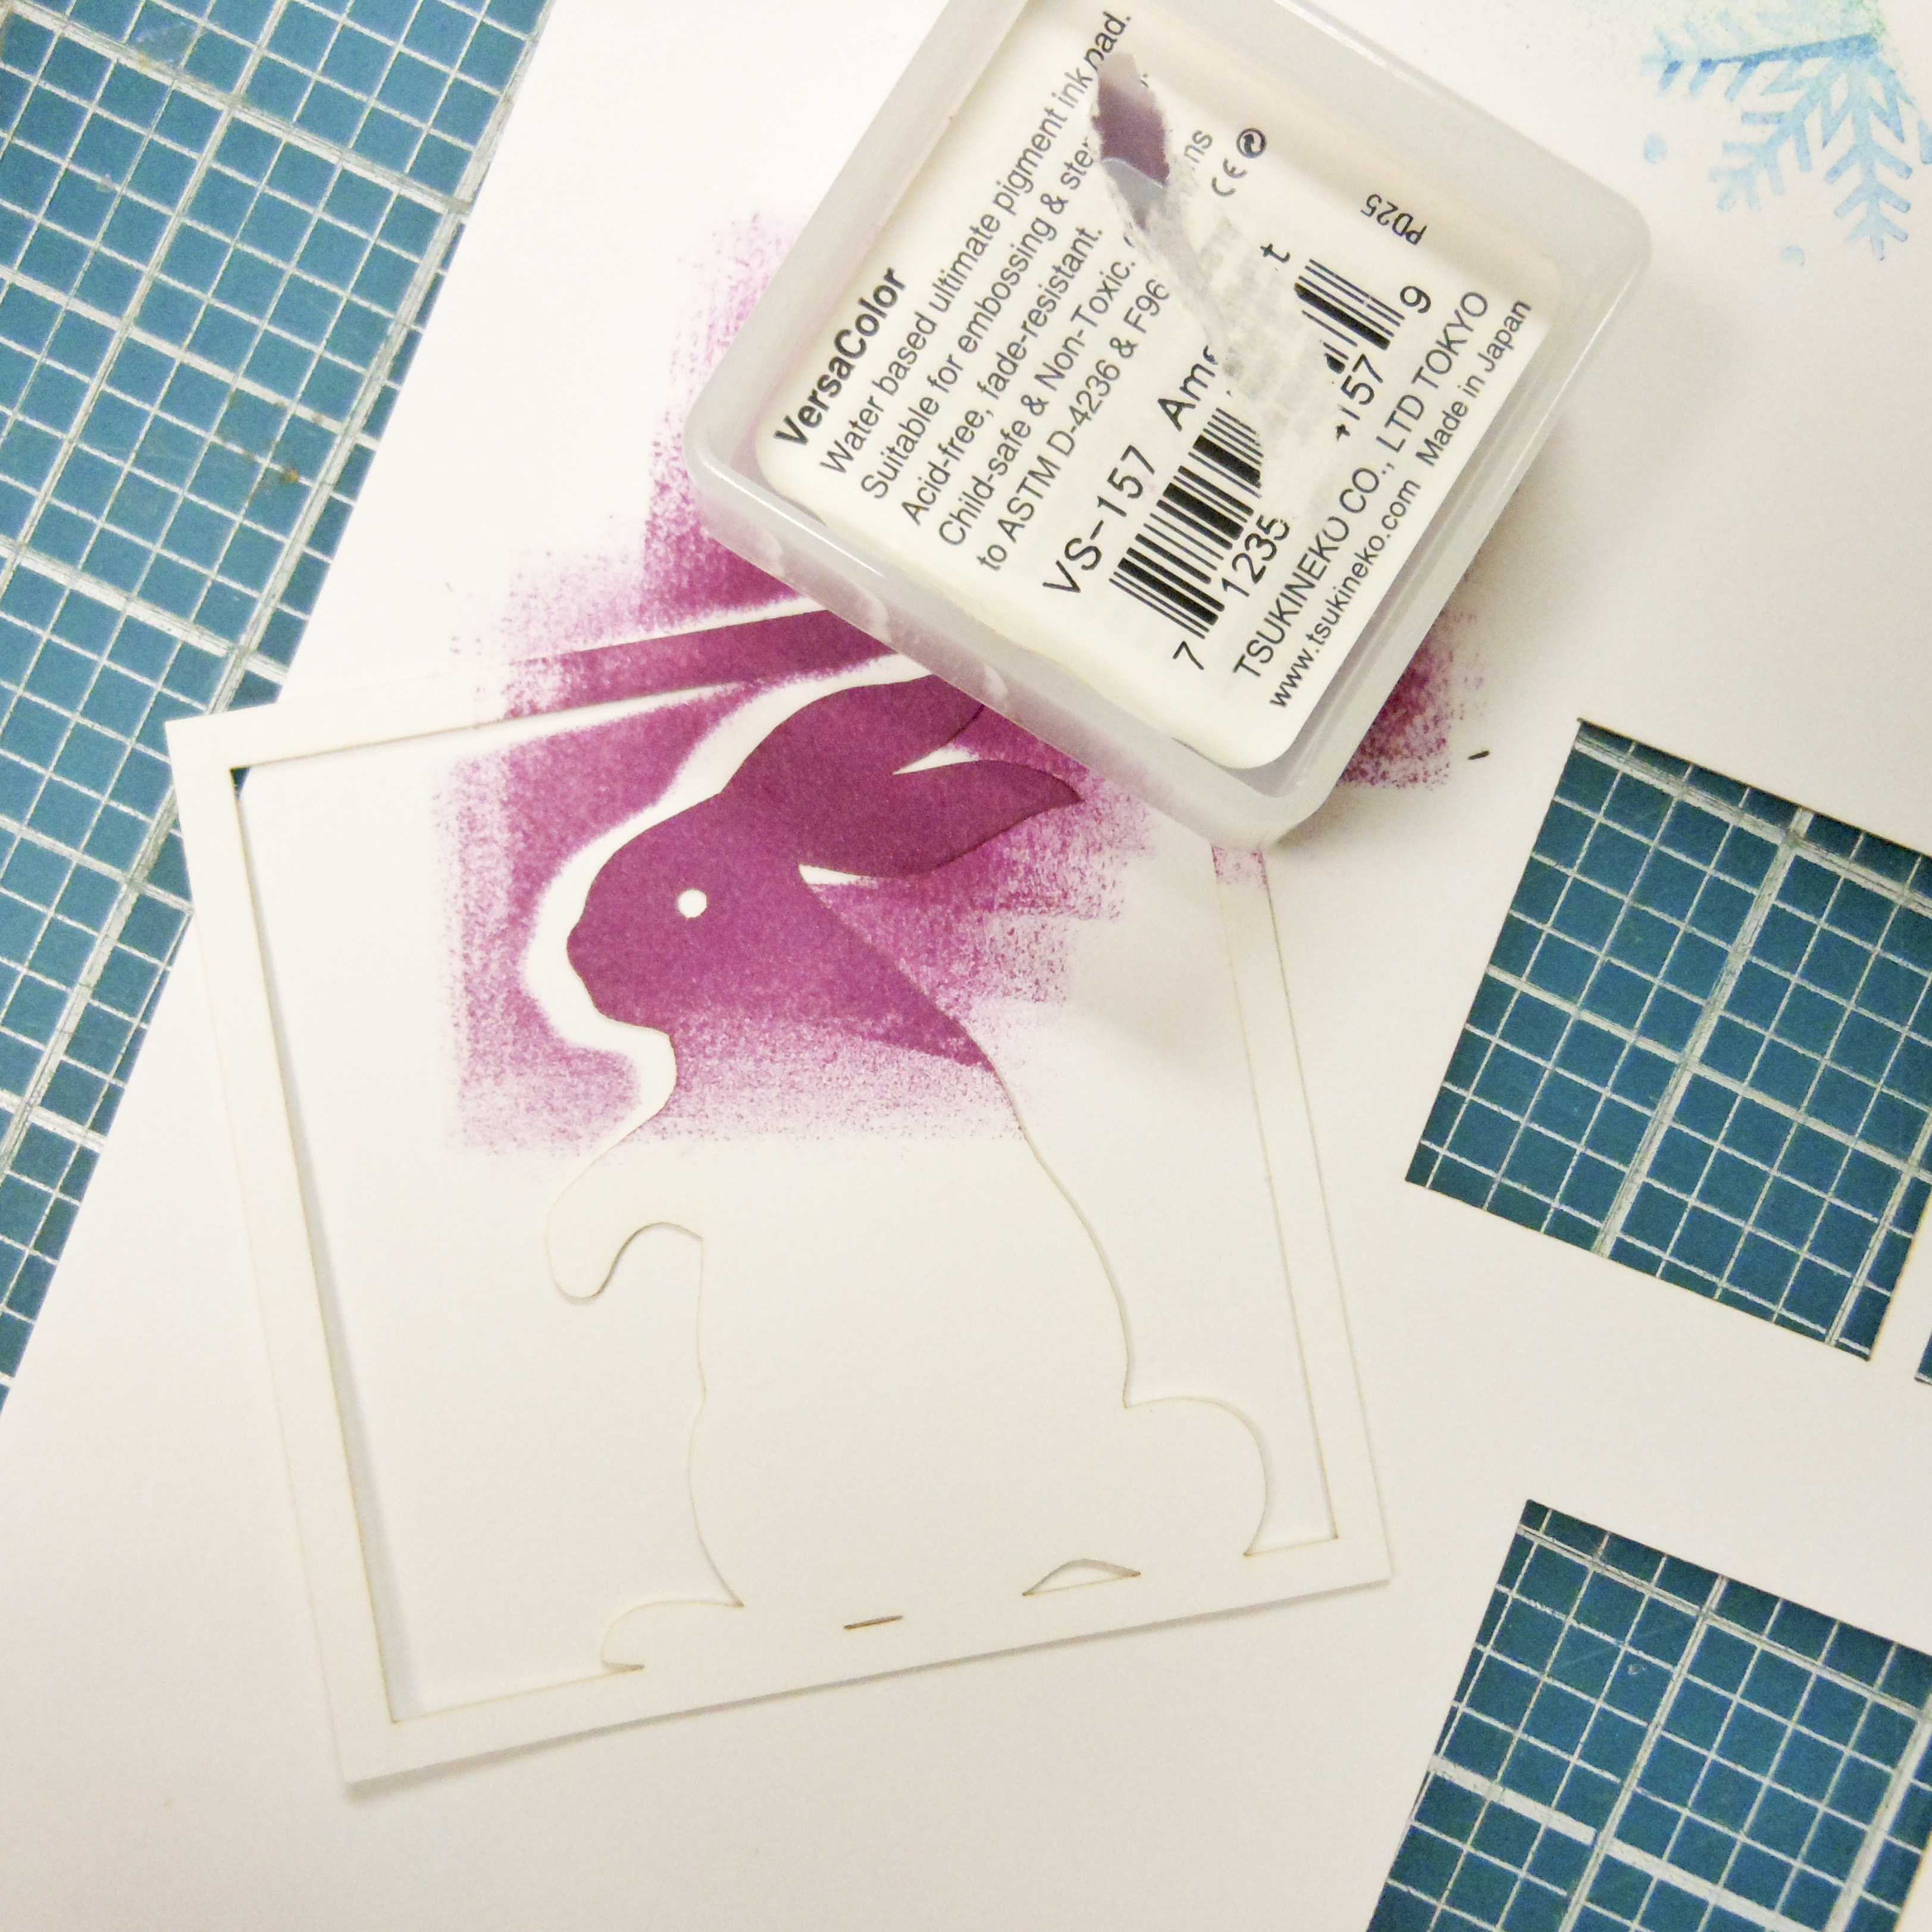
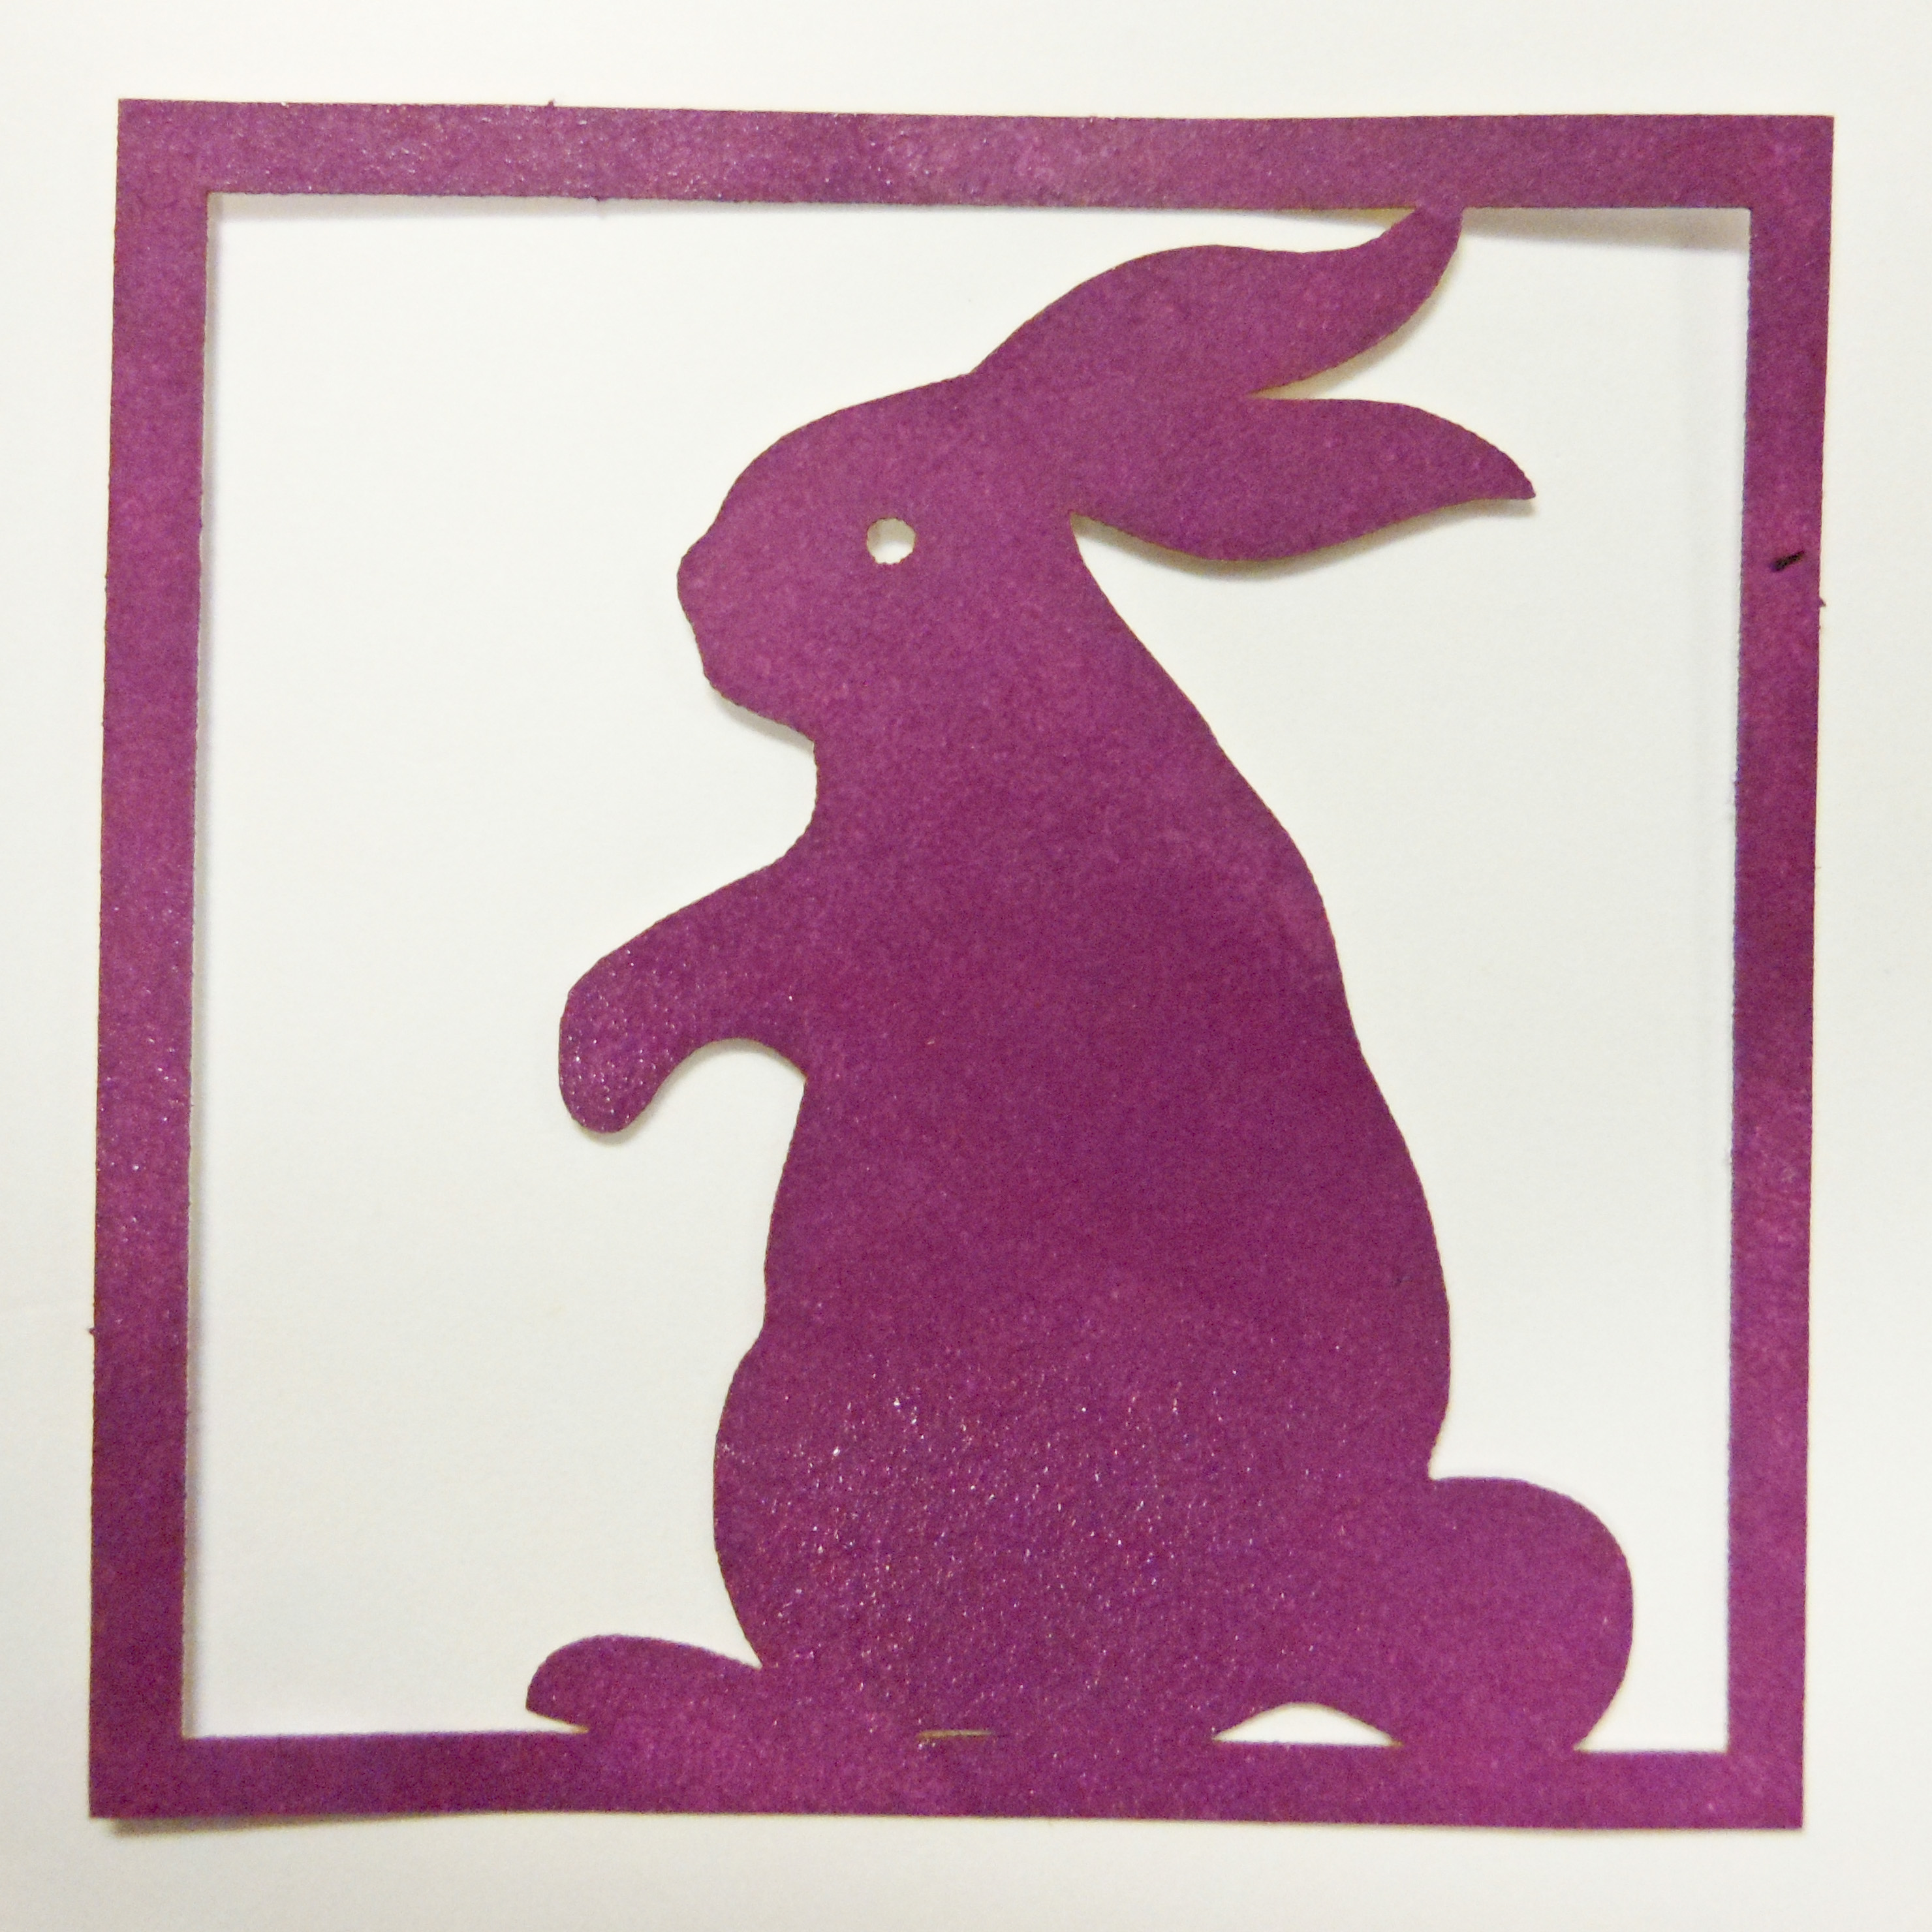
You can also use a smaller stamp multiple times on a Cornerstone. For my White Snowflake Cornerstone I put two different shades of blue on it. So when you start Stamping consider if you want one color or multiple colors. Since the Cornerstones are small, I recommend only using 1-2 colors.
[/vc_column][/vc_row][vc_row padding_top=”0px” padding_bottom=”0px” border=”none”][vc_column width=”1/1″][/vc_column][/vc_row][vc_row no_margin=”true” padding_top=”0px” padding_bottom=”0px” border=”none”][vc_column width=”1/1″]
3. Give It a New Color
[/vc_column][/vc_row][vc_row no_margin=”true” padding_top=”0px” padding_bottom=”0px” border=”none”][vc_column width=”1/1″]Sometimes you may see a Cornerstone you like, but it’s not the color you need! Luckily, most of our Cornerstones come in White. Consider collecting White Cornerstones in case you need to make them a different color. There are multiple coloring options.
Here is one example: If you are creating a page about a child, use a crayon (You can even have the kids color them!). You can also use pastels, chalk, or whatever works for your page! Below I show two different ways to color:
[/vc_column][/vc_row][vc_row no_margin=”true” padding_top=”0px” padding_bottom=”0px” border=”none”][vc_column width=”1/1″][/vc_column][/vc_row][vc_row no_margin=”true” padding_top=”0px” padding_bottom=”0px” border=”none”][vc_column width=”1/2″]
I highly recommend chalk-ink if you want your color to be even. Now You really need to Pay Attention: DO NOT spread the Chalk ink! This will make the color inconsistent. Now sometimes I want to do this on purpose to get a more distressed look. BUT if you want the color to be even you need to PAT It against the paper.
If the color is not going on well, you may need to pat it more firmly. You will need to pat it in the same spot a few times before the area is completely covered. Be Careful to not over do it since it might warp the paper. You also want it to dry for awhile before sticking it on your page.
[/vc_column][vc_column width=”1/2″]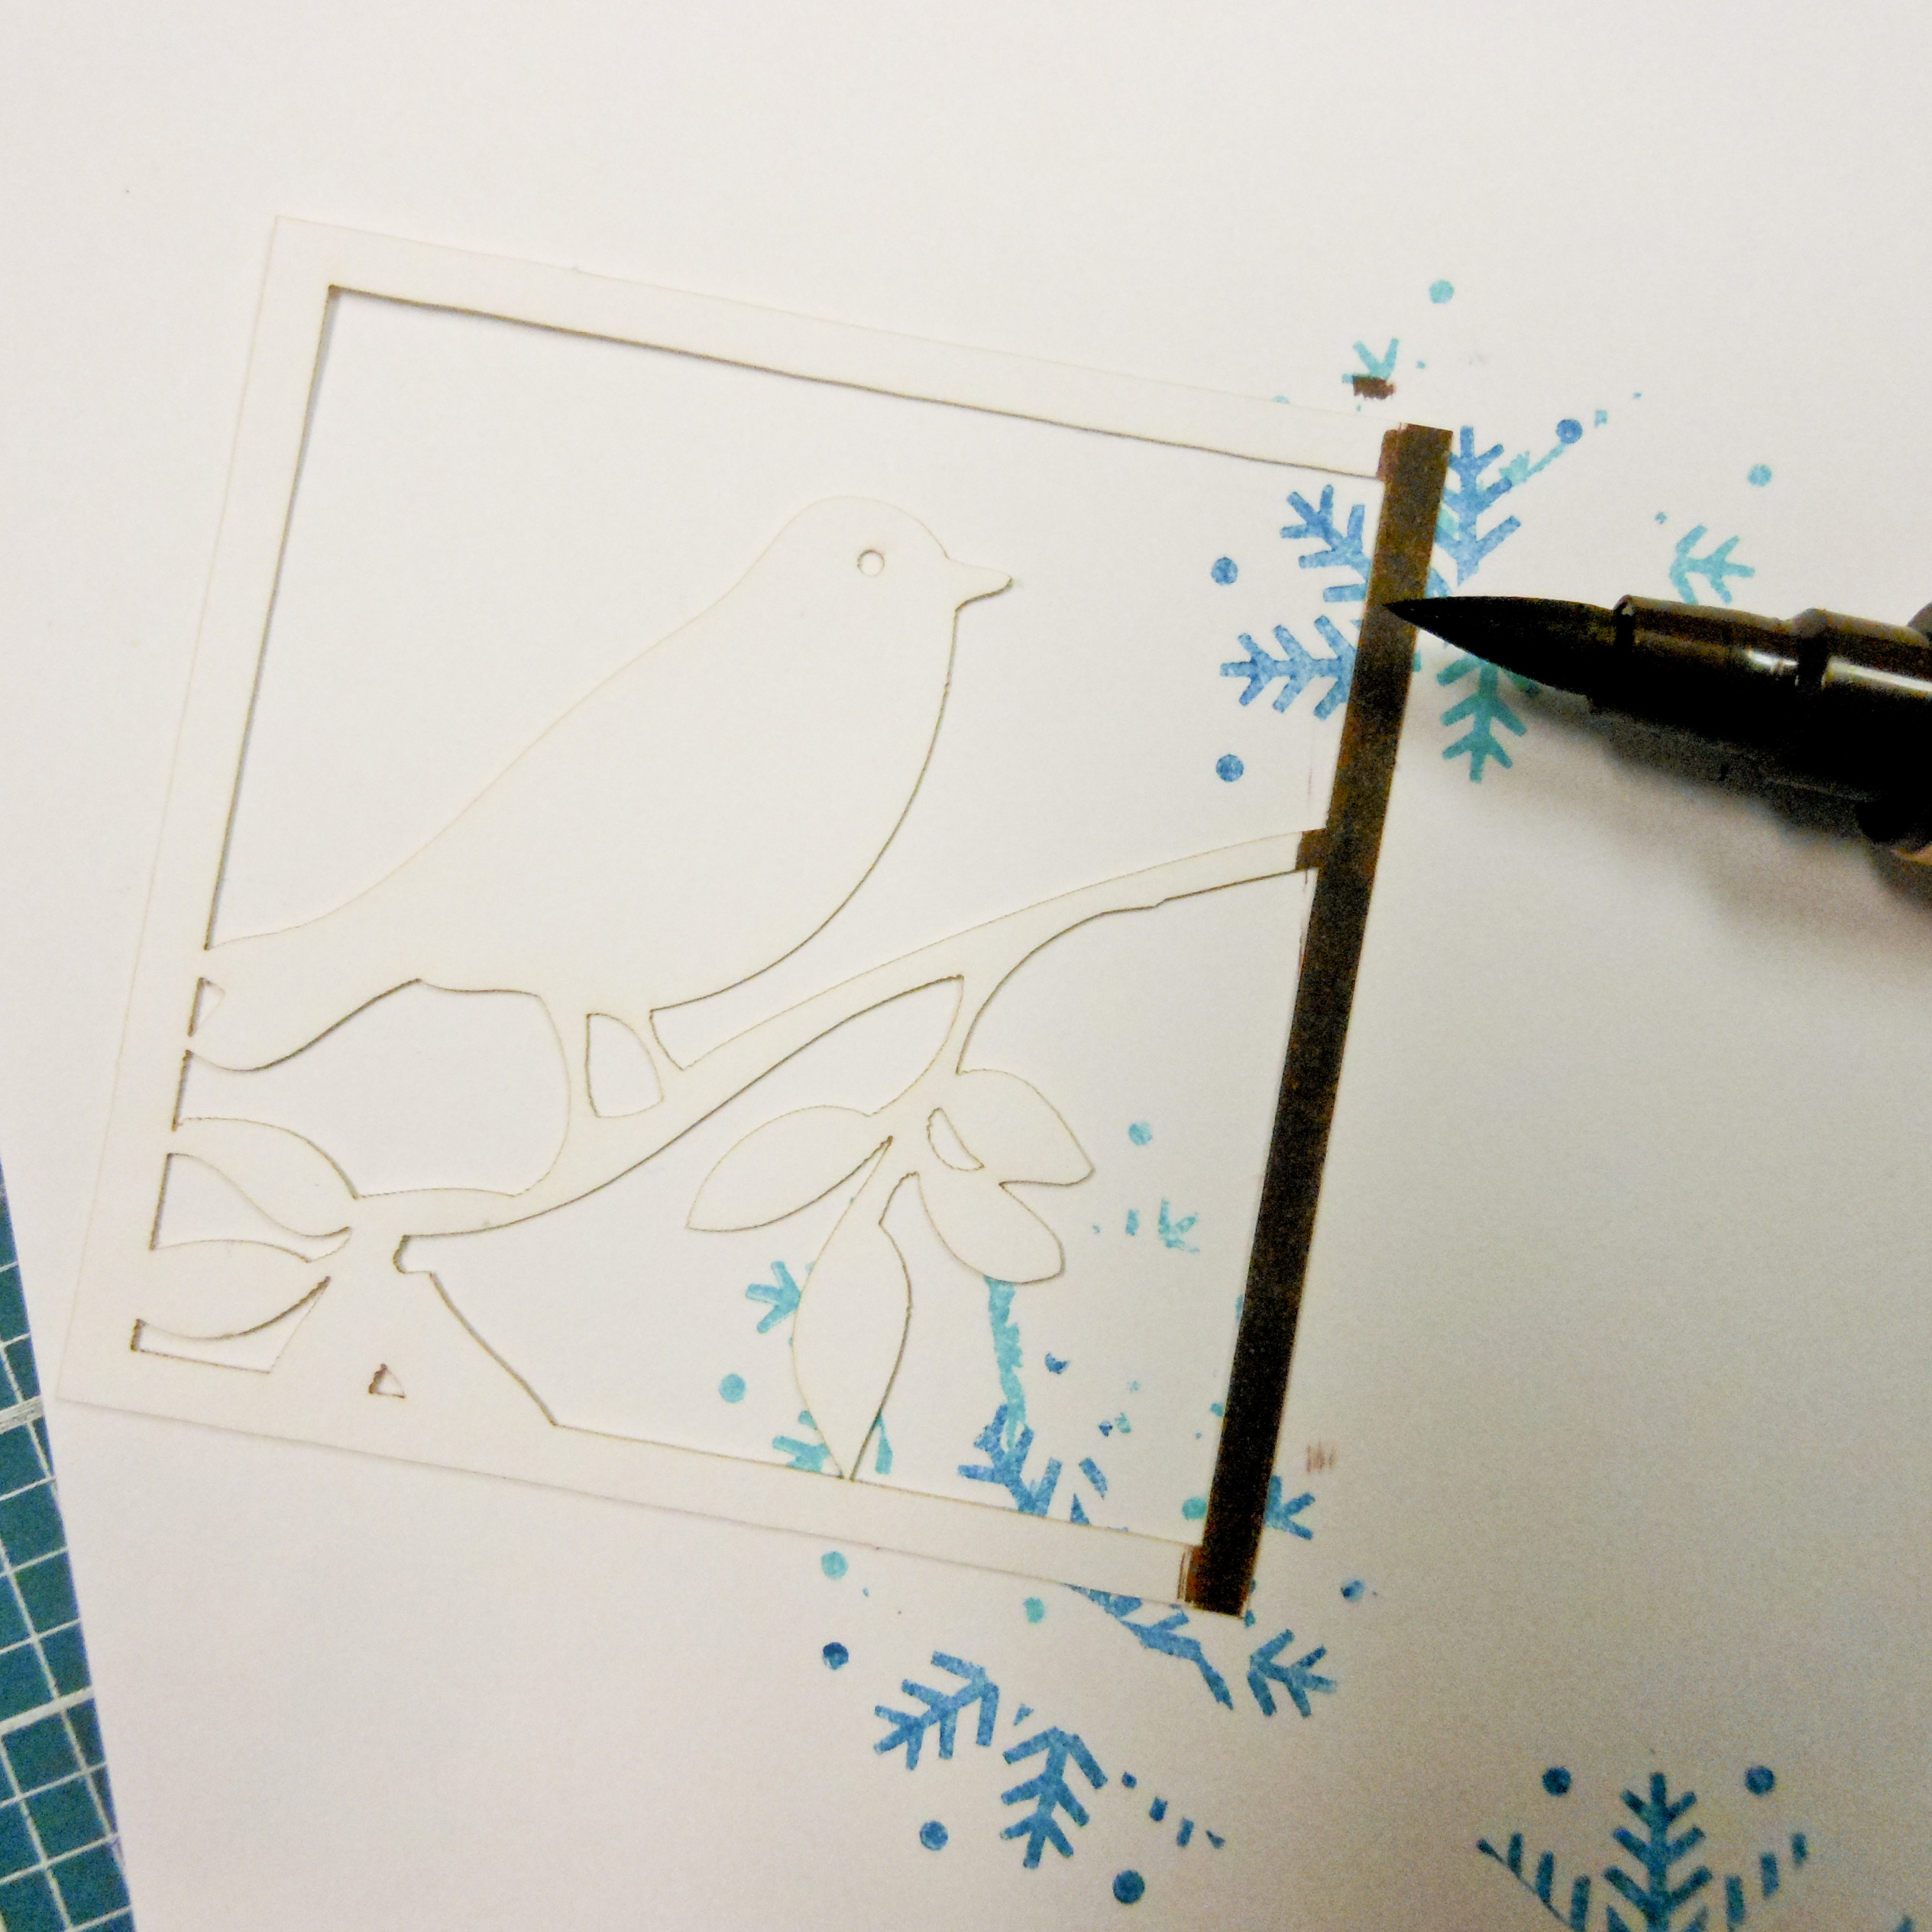
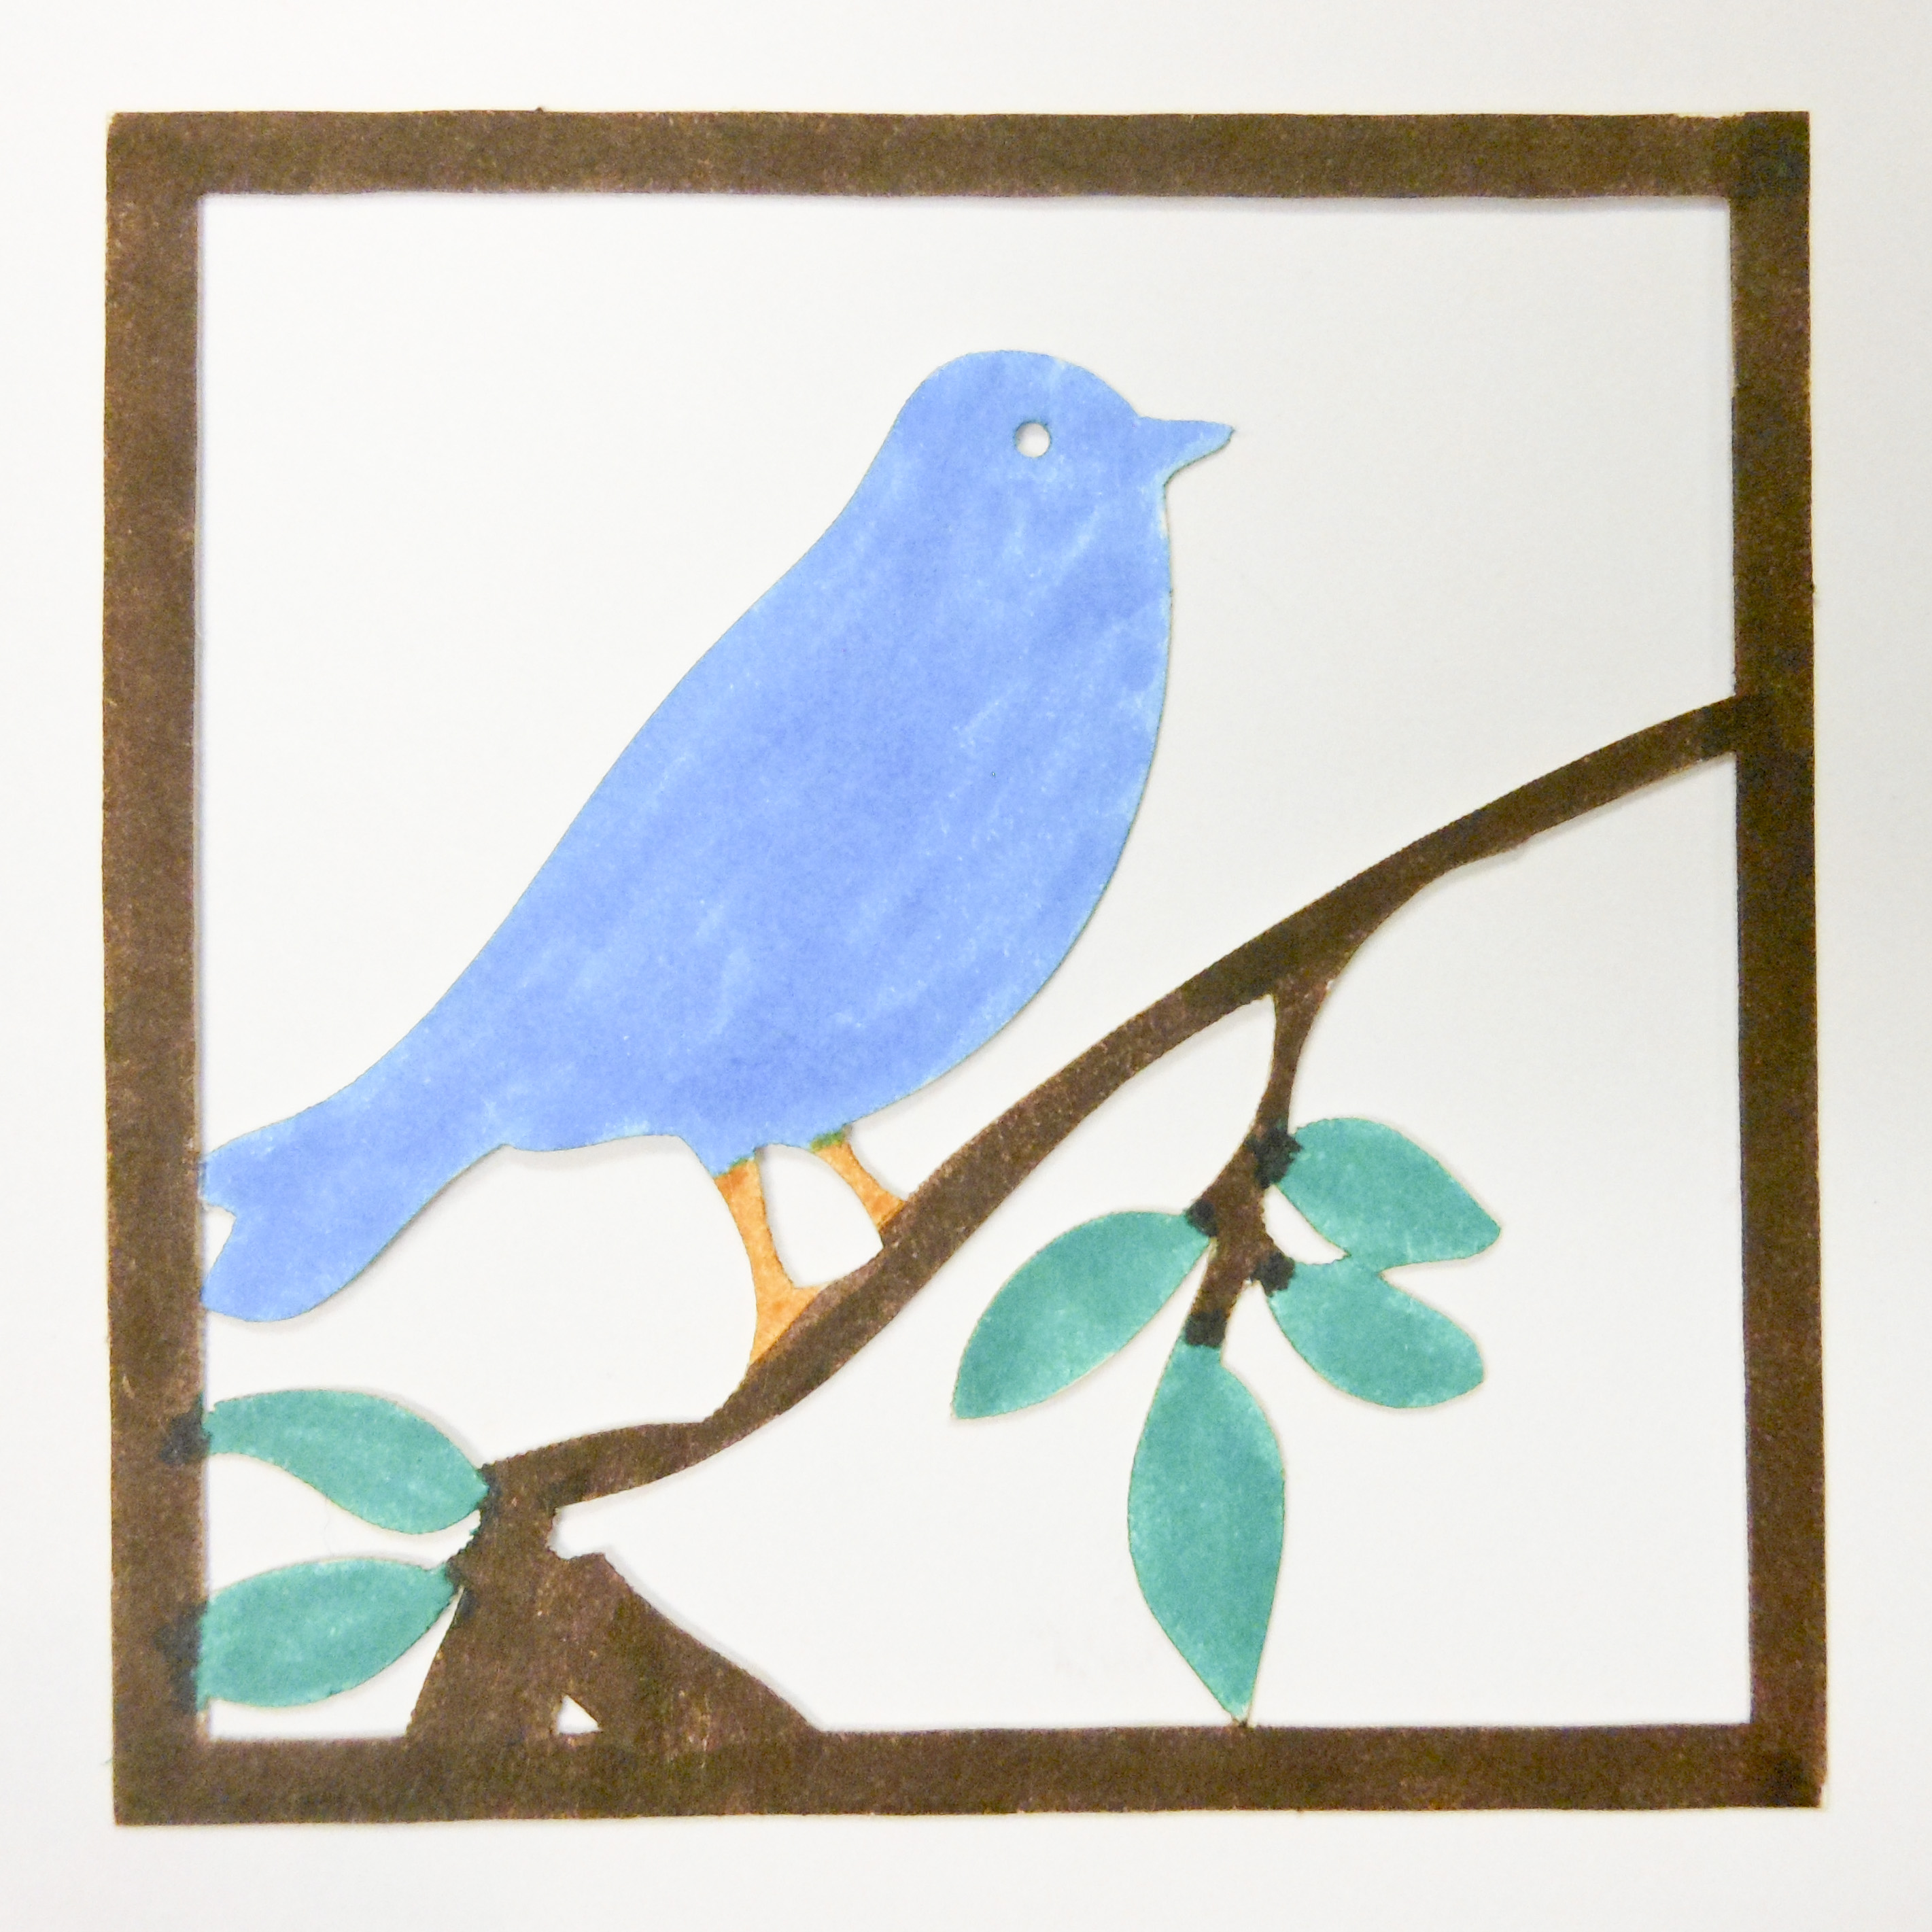
For this little bird I used a Marker with a brush tip (shown in top photo). I personally like using this kind since I can spread the color easier and it has a fine tip for small areas. But you can use any type of marker. You can use markers to add multiple colors or just one. This is a great way to get a “painterly” look. Start with the light colors and steadily work to the dark colors.
[/vc_column][/vc_row][vc_row padding_top=”0px” padding_bottom=”0px” border=”none”][vc_column width=”1/1″][/vc_column][/vc_row][vc_row no_margin=”true” padding_top=”0px” padding_bottom=”0px” border=”none”][vc_column width=”1/1″]
4. Add Buttons and Jewels
[/vc_column][/vc_row][vc_row no_margin=”true” padding_top=”0px” padding_bottom=”0px” border=”none”][vc_column width=”1/1″]If you want to add a little pizazz, consider adding some buttons or Jewels. These are easy ways to make your Cornerstones Pop and it’s so cute!
[/vc_column][/vc_row][vc_row no_margin=”true” padding_top=”0px” padding_bottom=”0px” border=”none”][vc_column width=”1/1″][/vc_column][/vc_row][vc_row no_margin=”true” padding_top=”0px” padding_bottom=”0px” border=”none”][vc_column width=”1/2″]
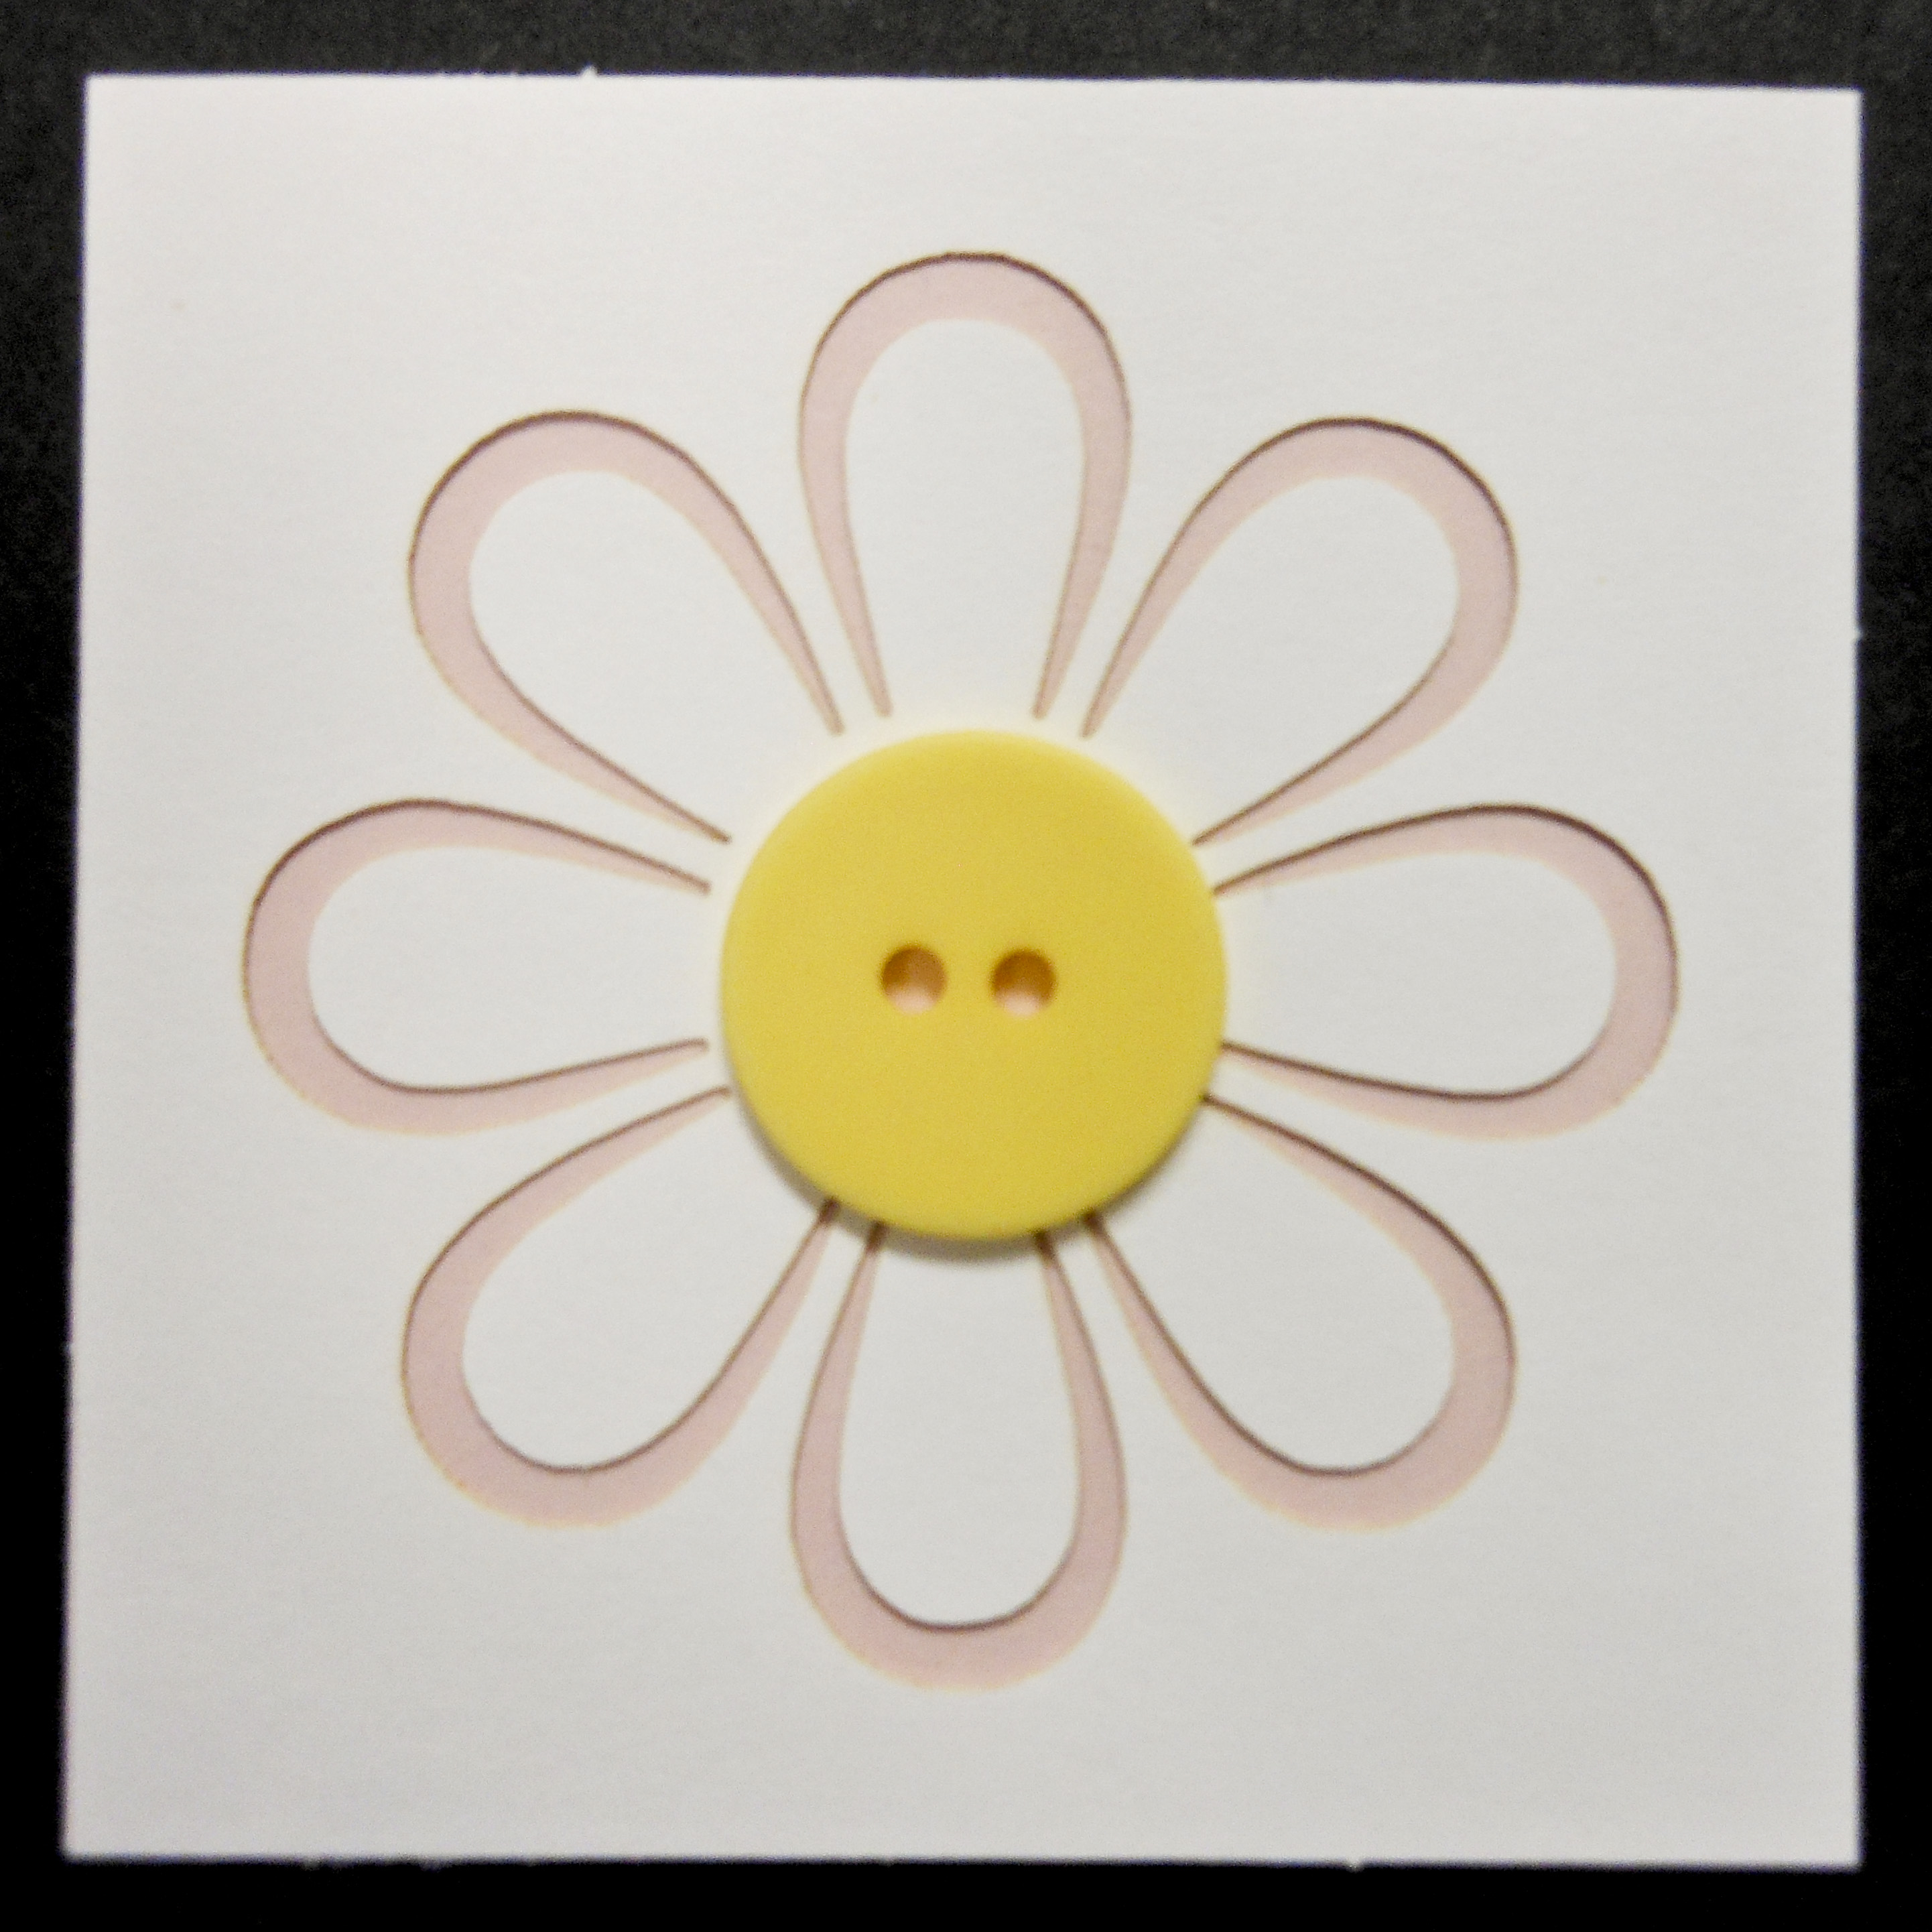
Well I went back to the Pop-A-Daisy (It’s adorable!). I thought it would be cute with a big yellow button right in the center. This would be great for a spring page or for a little girl. You could even put it on a card. This Cornerstone is as cute as button 🙂 .
[/vc_column][vc_column width=”1/2″]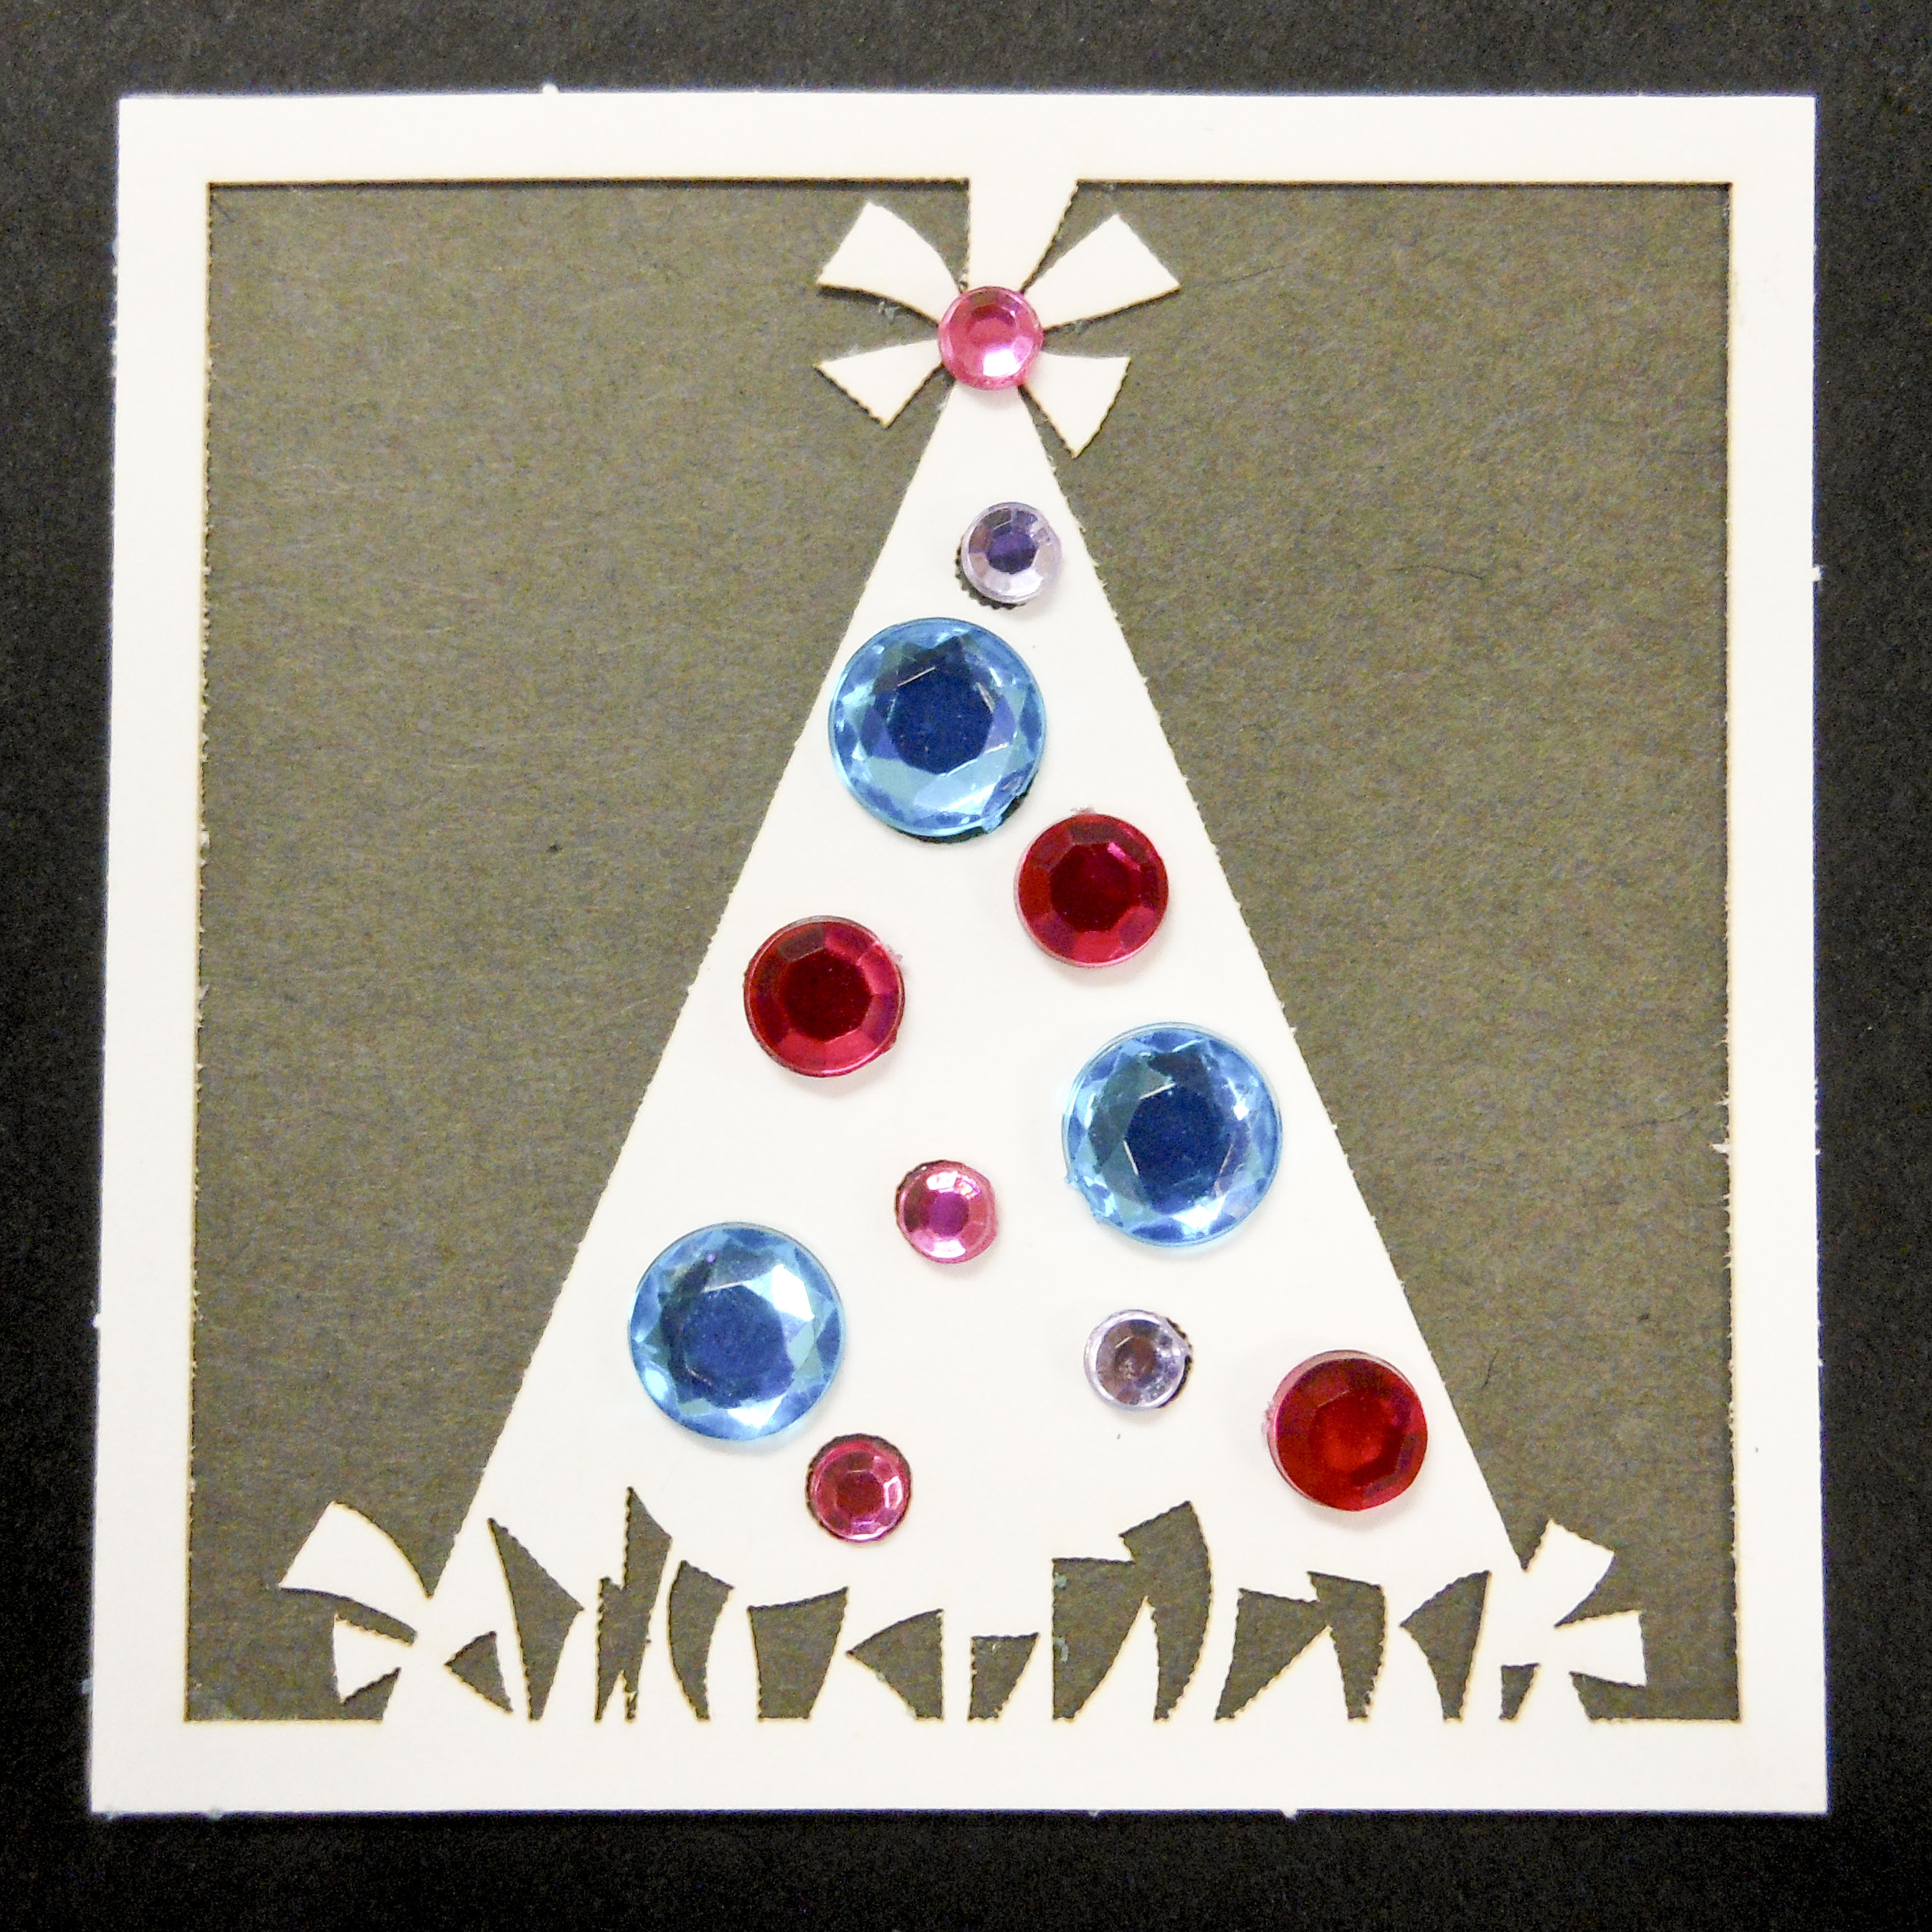
Bling! Add some jewels to your Cornerstones to make them sparkle. The Birthday hat Cornerstone has some circles cut out of it, so I decided to add these colorful jewels over them. It adds more interest and color – let the jewels show your personality.
[/vc_column][/vc_row][vc_row padding_top=”0px” padding_bottom=”0px” border=”none”][vc_column width=”1/1″][/vc_column][/vc_row][vc_row no_margin=”true” padding_top=”0px” padding_bottom=”0px” border=”none”][vc_column width=”1/1″]
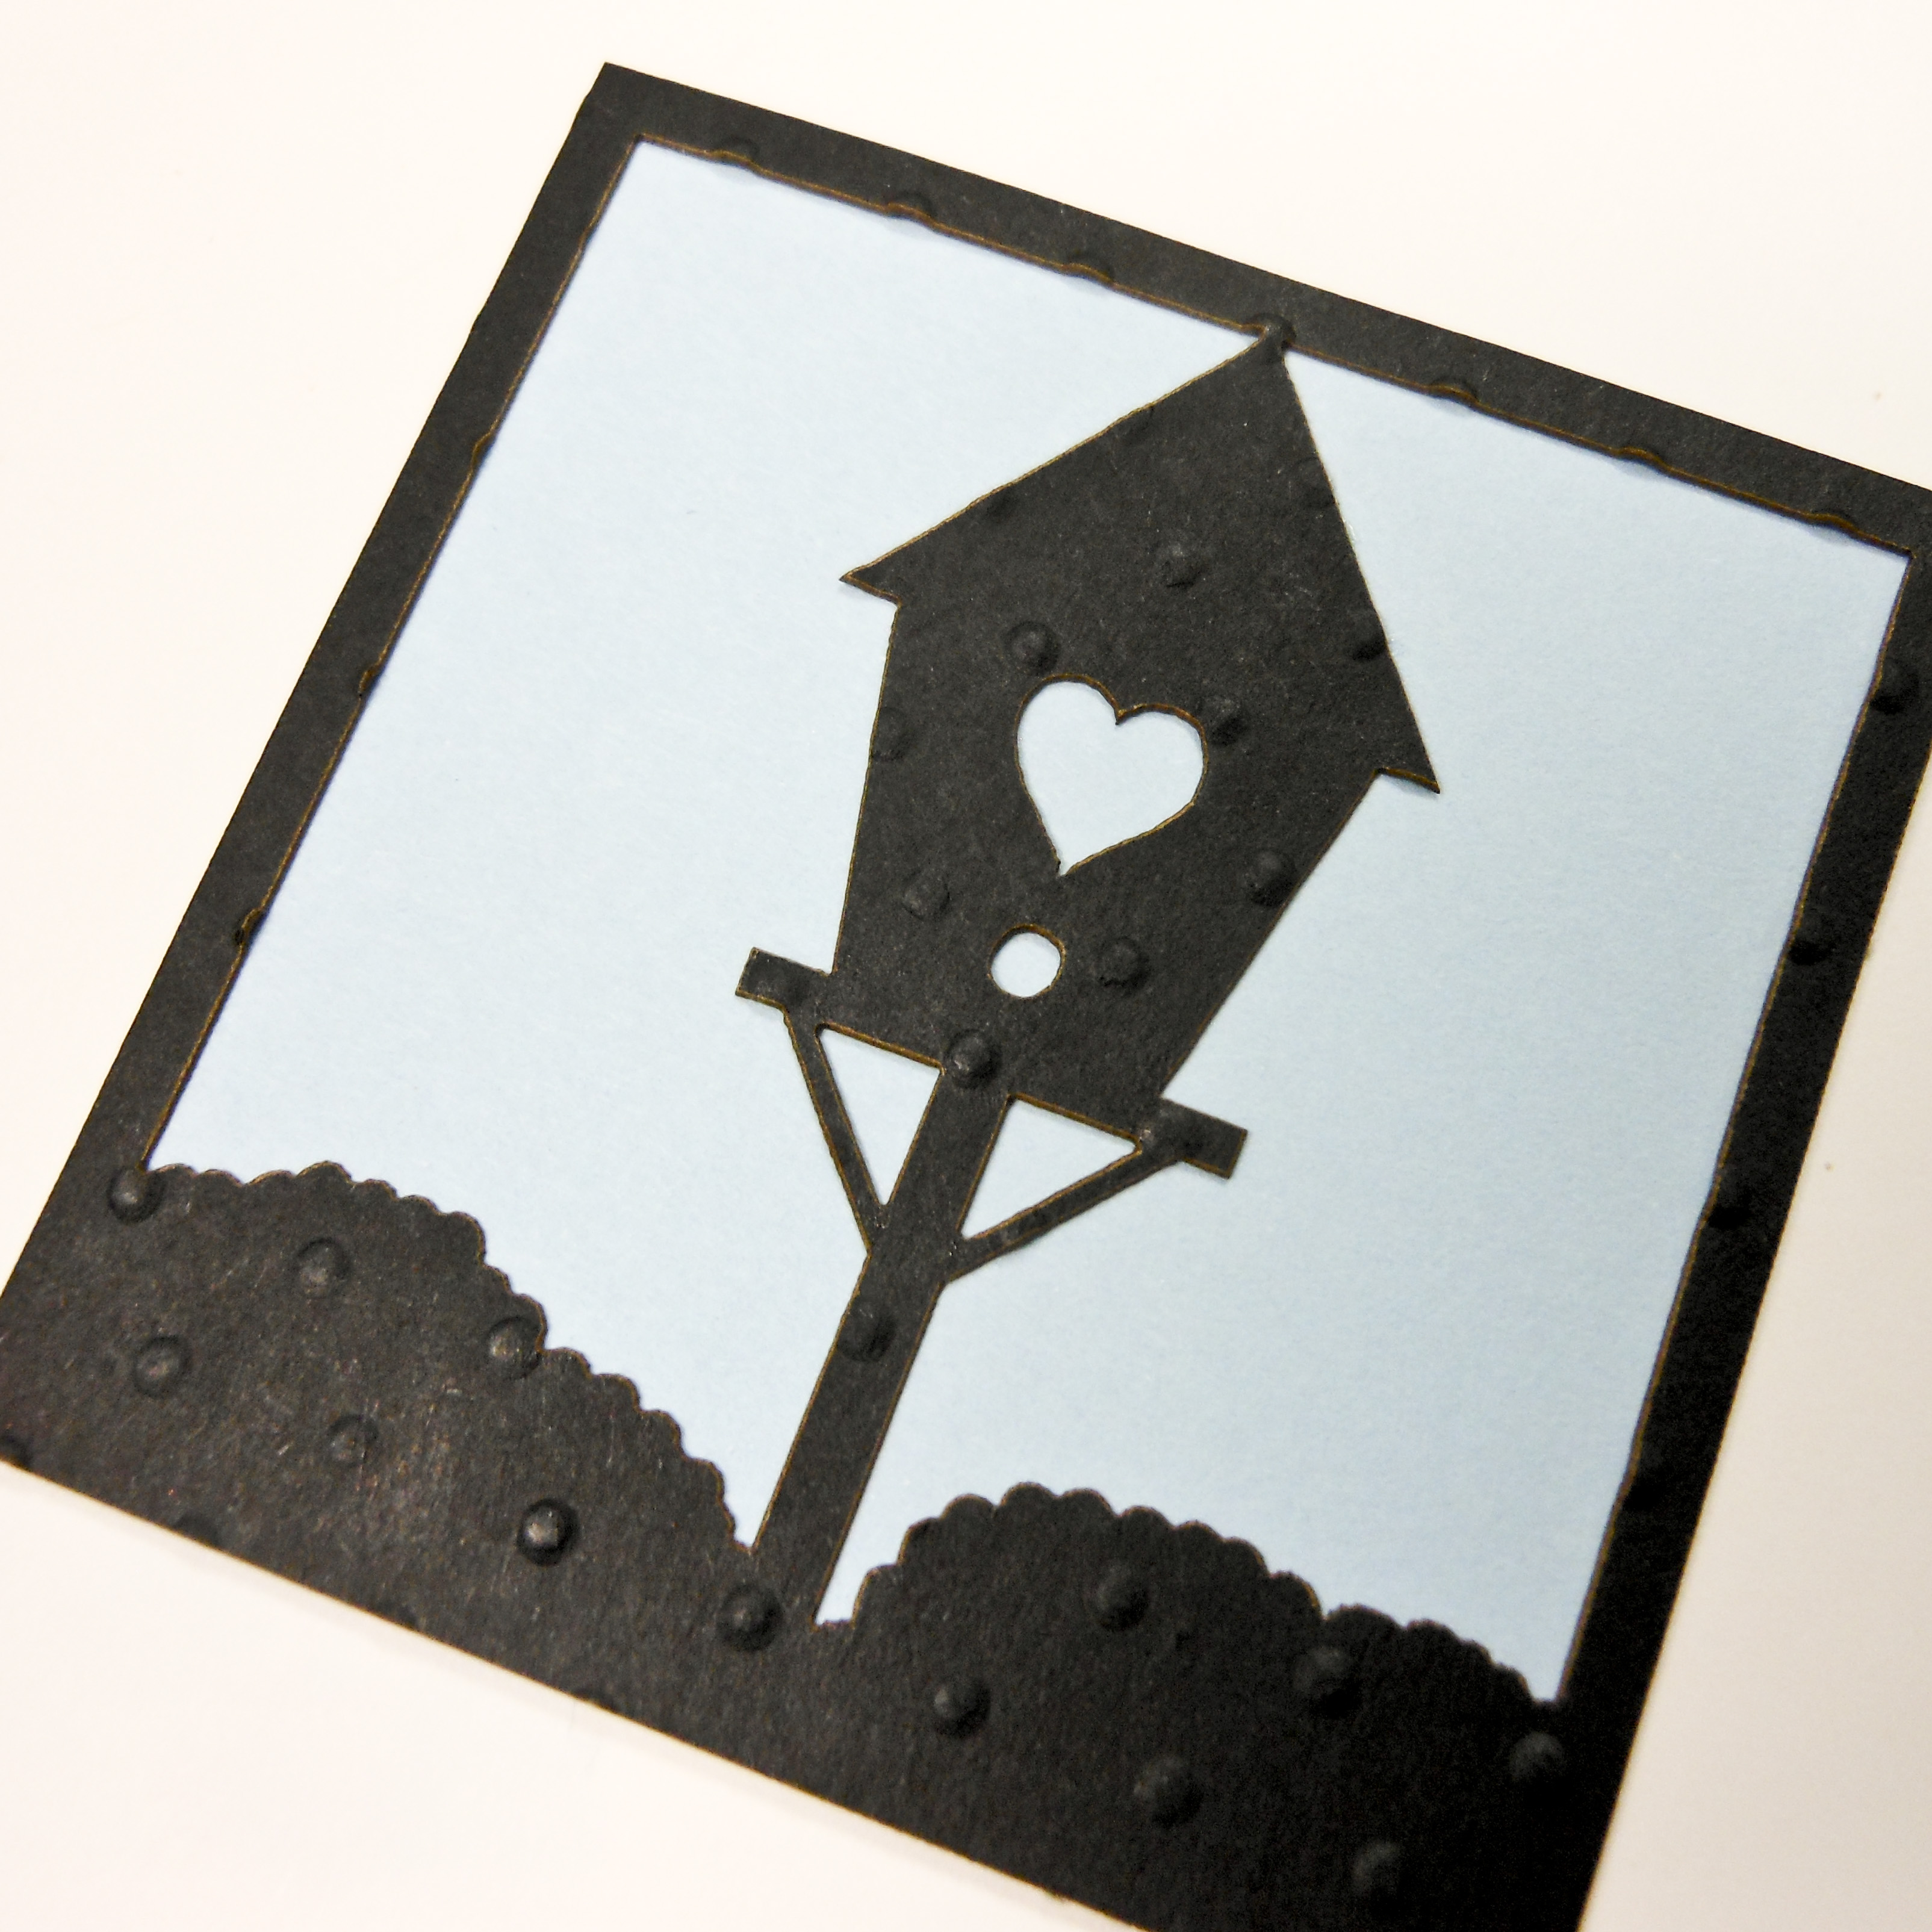
5. So Distressed!
[/vc_column][/vc_row][vc_row no_margin=”true” padding_top=”0px” padding_bottom=”0px” border=”none”][vc_column width=”1/1″]I love to distress! I think it’s fun and sometimes I just like things to be a little rustic. I tend to use chalk-ink quite a bit on my Paper Tiles, but I think it looks good with Cornerstones too. Here are two Cornerstones with chalk-ink. The first one is very easy since I just spread it around the edges. The second is completely wrinkled and very rustic.
[/vc_column][/vc_row][vc_row no_margin=”true” padding_top=”0px” padding_bottom=”0px” border=”none”][vc_column width=”1/1″][/vc_column][/vc_row][vc_row no_margin=”true” padding_top=”0px” padding_bottom=”0px” border=”none”][vc_column width=”1/2″]
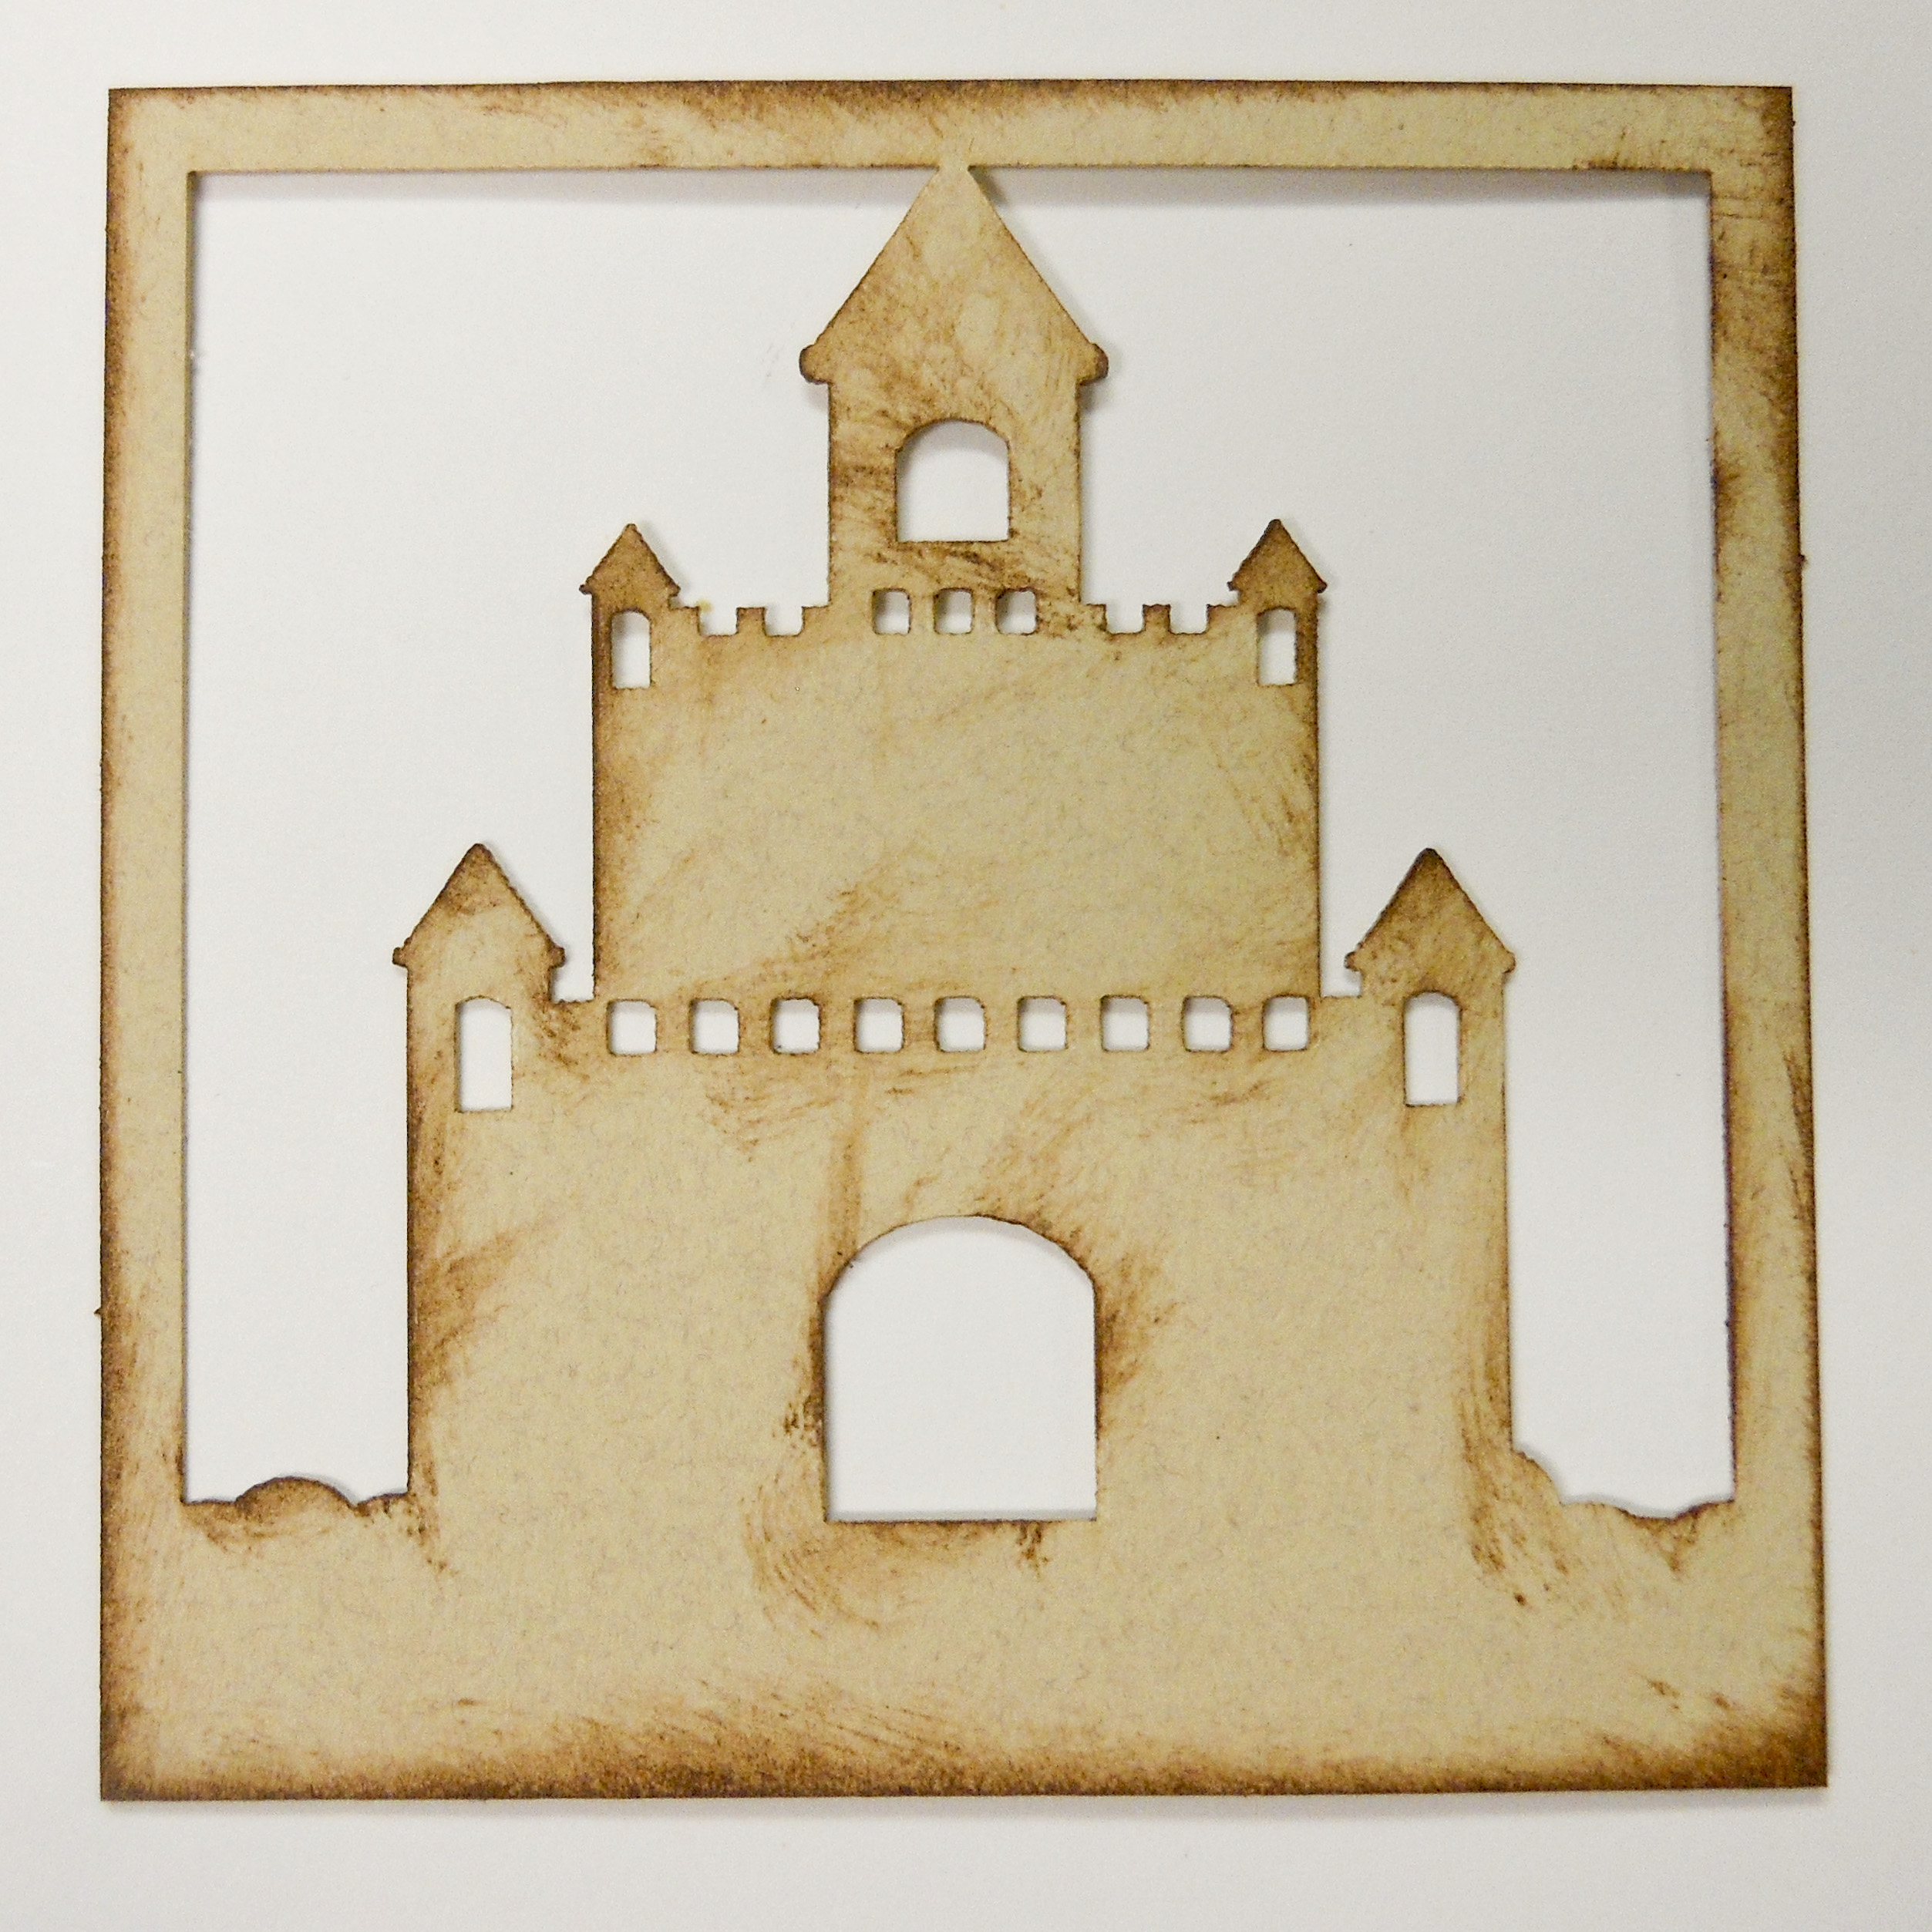
I wanted this sandcastle to have a ‘wet sand’ look. Add brown distress ink around the edges was a great touch. Try it out on your next beach page! I also like to add blue chalk ink on winter Cornerstones to give a frosty feel. This is quick and easy and also fun!
[/vc_column][vc_column width=”1/2″]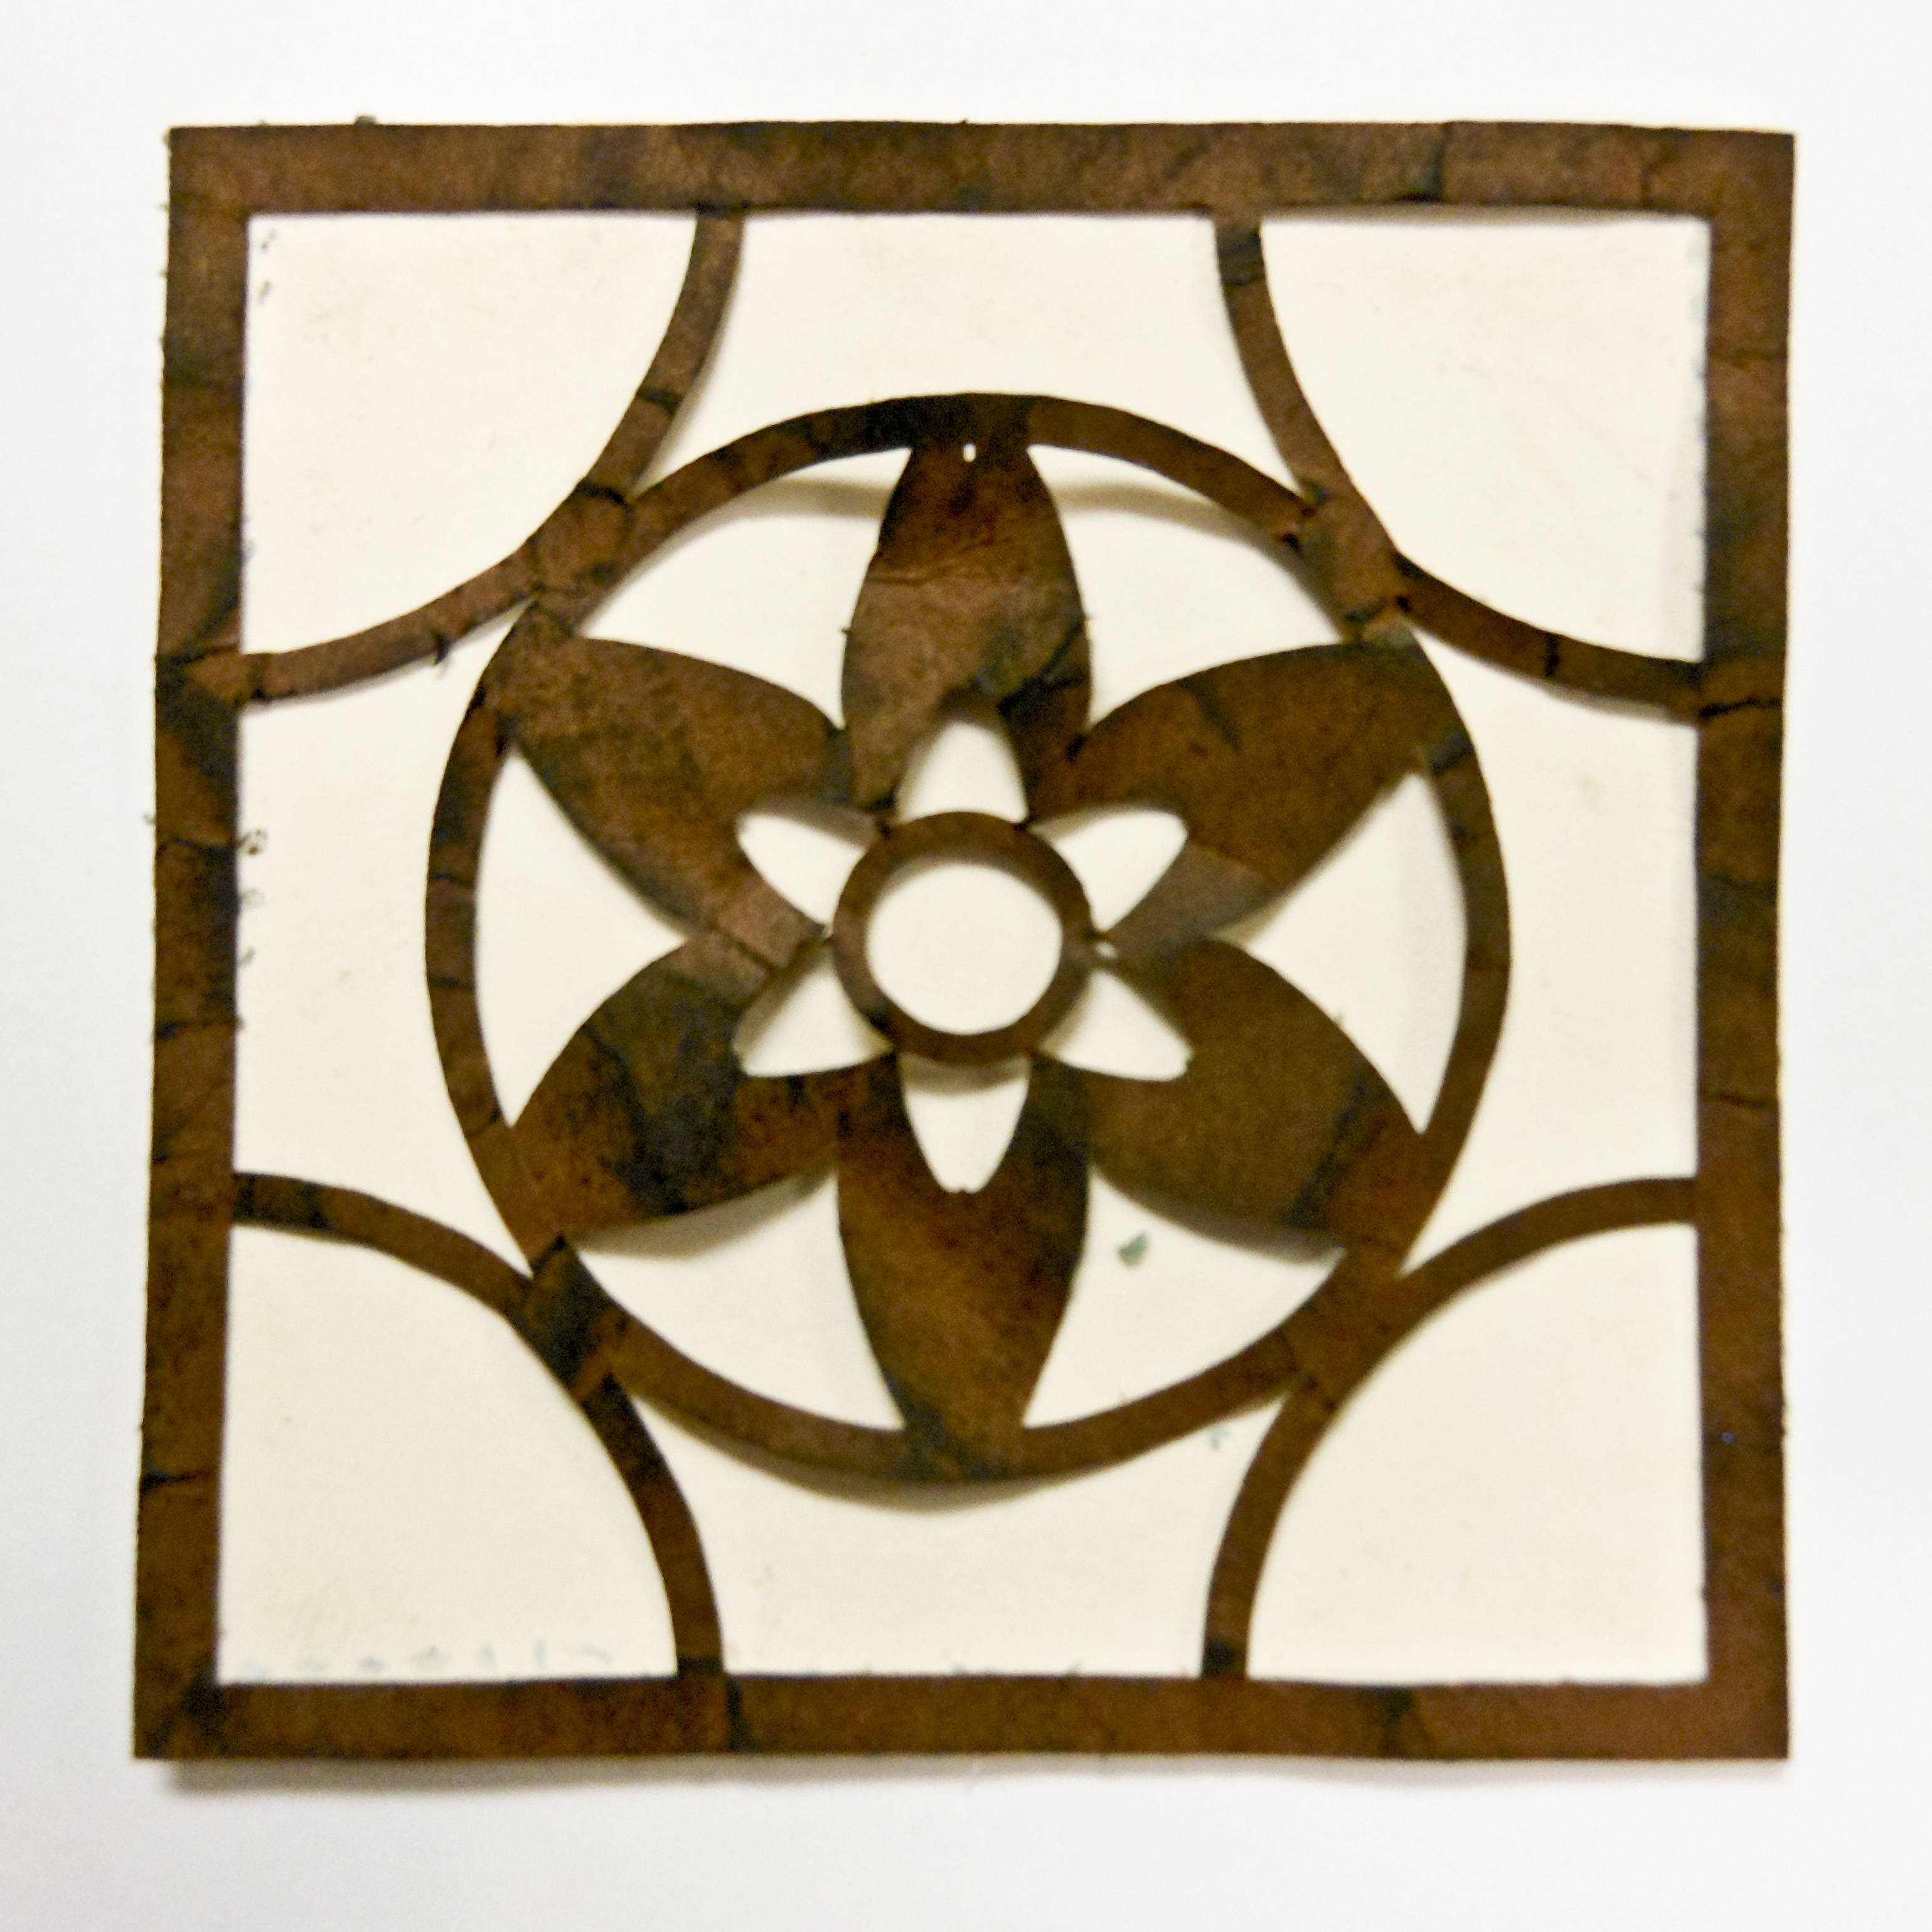
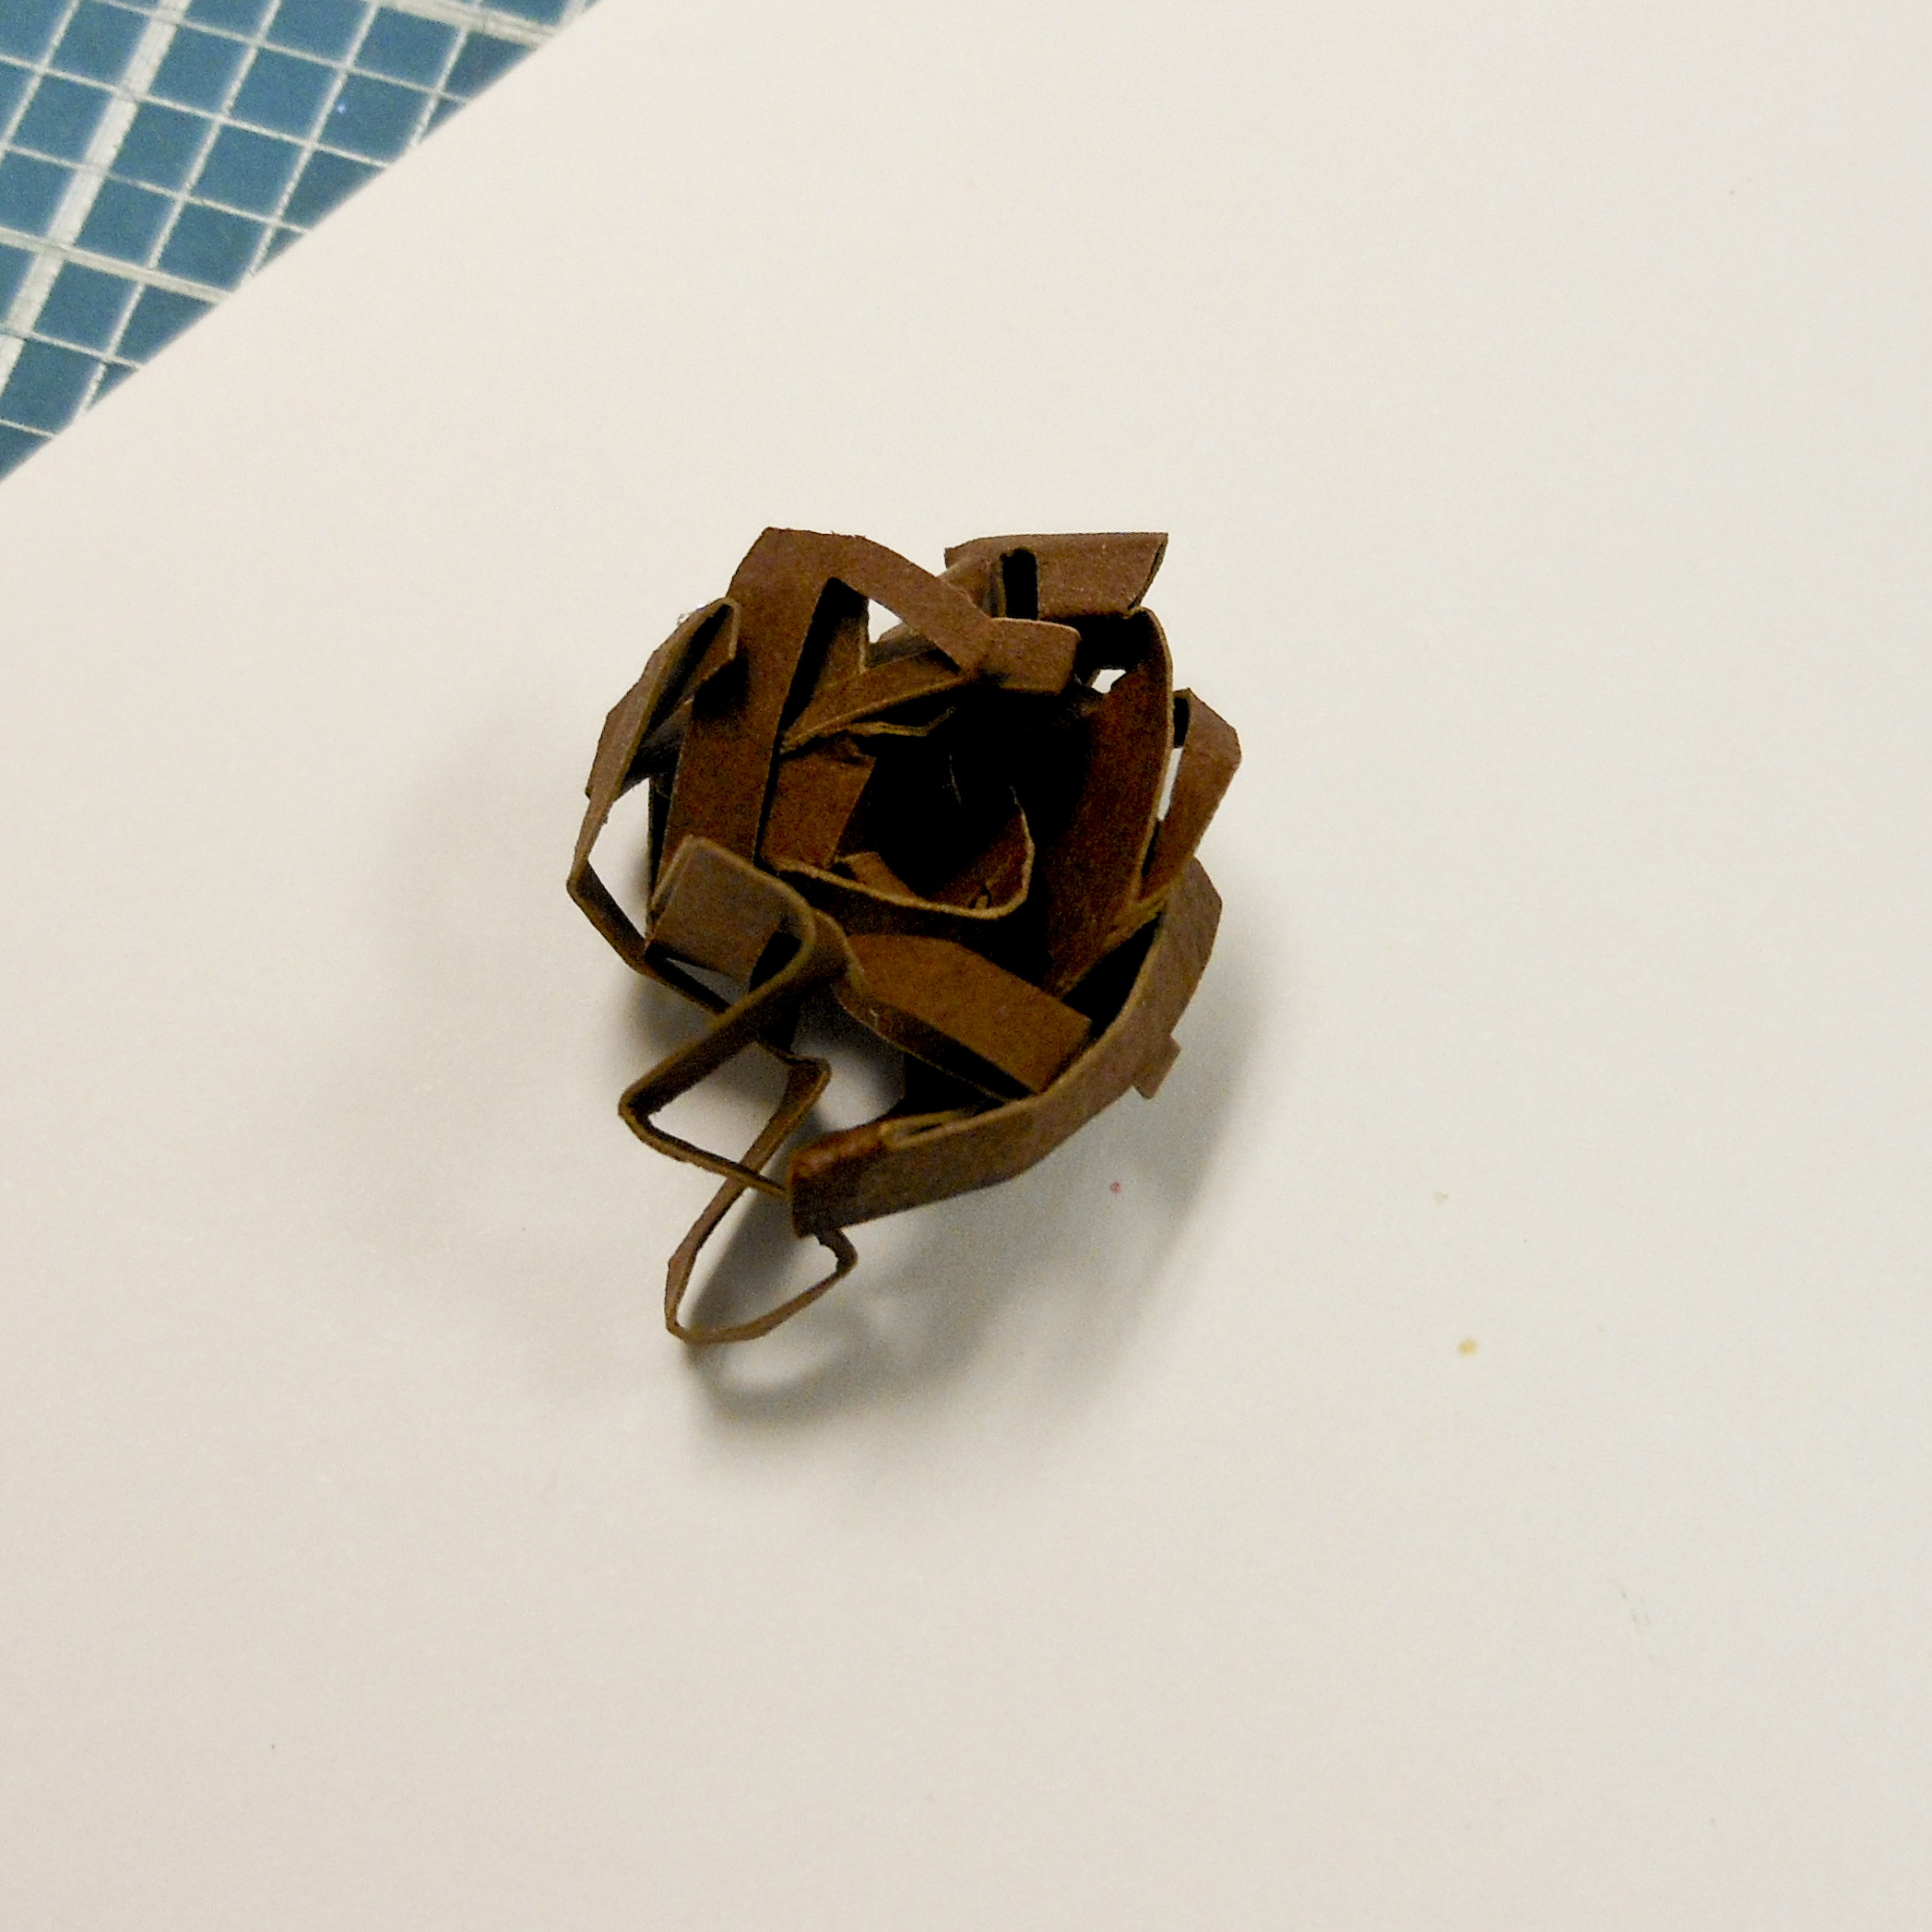
As you can tell, this Cornerstone looks VERY Rustic. This Cornerstone is Giovanni, and it’s one of my favorite designs. If you take a trip to Europe or visit a lovely garden, this is is a great embellishment for those pages. To begin you will want to wrinkle the paper. I wanted mine to be very wrinkled so I made it into a little ball (as shown in second photo… I don’t recommend this for Cornerstones with very small pieces). Be Careful when you unfold it. After this I just added dark brown distressed ink all over. So Pretty easy!
[/vc_column][/vc_row][vc_row padding_top=”0px” padding_bottom=”0px” border=”none”][vc_column width=”1/1″][/vc_column][/vc_row][vc_row no_margin=”true” padding_top=”0px” padding_bottom=”0px” border=”none”][vc_column width=”1/1″]
6. Adding Multiple Background Colors
[/vc_column][/vc_row][vc_row no_margin=”true” padding_top=”0px” padding_bottom=”0px” border=”none”][vc_column width=”1/1″]Sometimes a Cornerstone needs a little more detail. Adding multiple colors in the background is a great way to enhance them, and gives them a unique look. Be experimental and see what colors look good together. For this method you will need to cut the paper so it’s big enough to fit behind the section you want, without sticking outside the edges. See the Photos below to get the directions:
[/vc_column][/vc_row][vc_row no_margin=”true” padding_top=”0px” padding_bottom=”0px” border=”none”][vc_column width=”1/1″][/vc_column][/vc_row][vc_row][vc_column width=”1/2″]
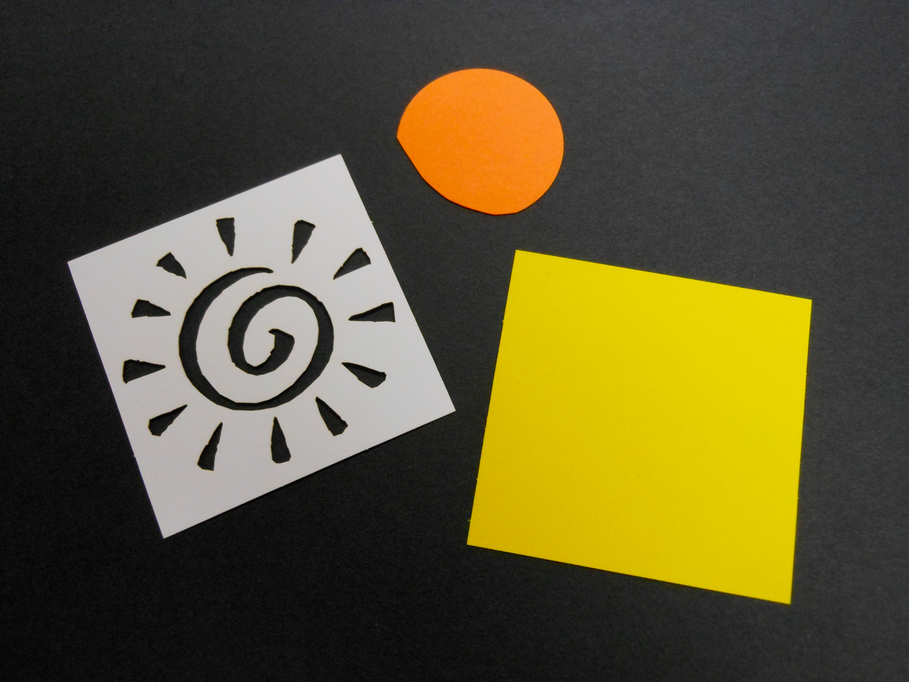
For this sun Cornerstone, I wanted to add a different color in the center. In the picture you can see a piece of orange paper that forms a circular like shape. I cut an orange piece of paper into this shape (Or you could use a circle punch) and checked to make sure it would cover the whole circle without overlapping into the triangle shapes.
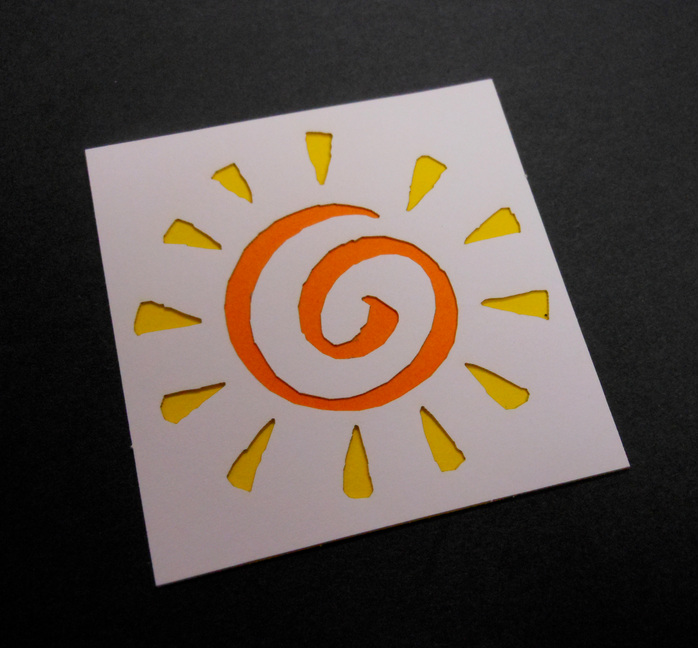
After attaching the Yellow Background, It’s finished! Luckily the White Sun Cornerstone comes with a Yellow background already.
[/vc_column][vc_column width=”1/2″]
This picture shows that I placed the orange piece first. Now I can add the Yellow Background to cover the rest.
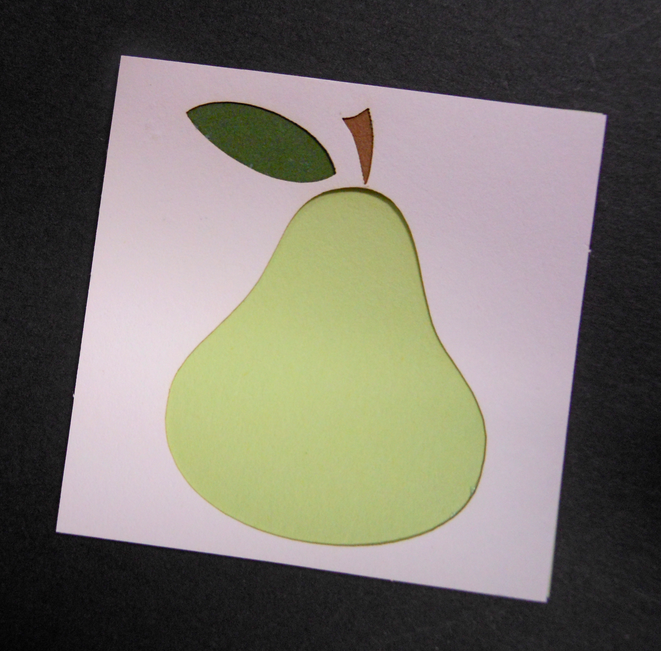
Here is another example of a multi-colored background. Here, you would place a small piece of brown paper behind the stem, then place a larger dark green color for the leaf behind it. Last, you would attach a light green square background in the back.
[/vc_column][/vc_row][vc_row no_margin=”true” padding_top=”0px” padding_bottom=”0px” border=”none”][vc_column width=”1/1″]7. Emboss It!
[/vc_column][/vc_row][vc_row no_margin=”true” padding_top=”0px” padding_bottom=”0px” border=”none”][vc_column width=”1/1″]The last technique in this post is embossing. Many of you probably have a die machine with some embossing folders or other embossing tools. Have you ever tried this on a Cornerstone? If not here is your chance! I used the Evolution Advanced Die Machine to emboss the two Cornerstones below.
[/vc_column][/vc_row][vc_row no_margin=”true” padding_top=”0px” padding_bottom=”0px” border=”none”][vc_column width=”1/1″][/vc_column][/vc_row][vc_row no_margin=”true” padding_top=”0px” padding_bottom=”0px” border=”none”][vc_column width=”1/2″]
I love these little dots! I think this is a must for embossing! It will make any Cornerstone look cuter.
[/vc_column][vc_column width=”1/2″]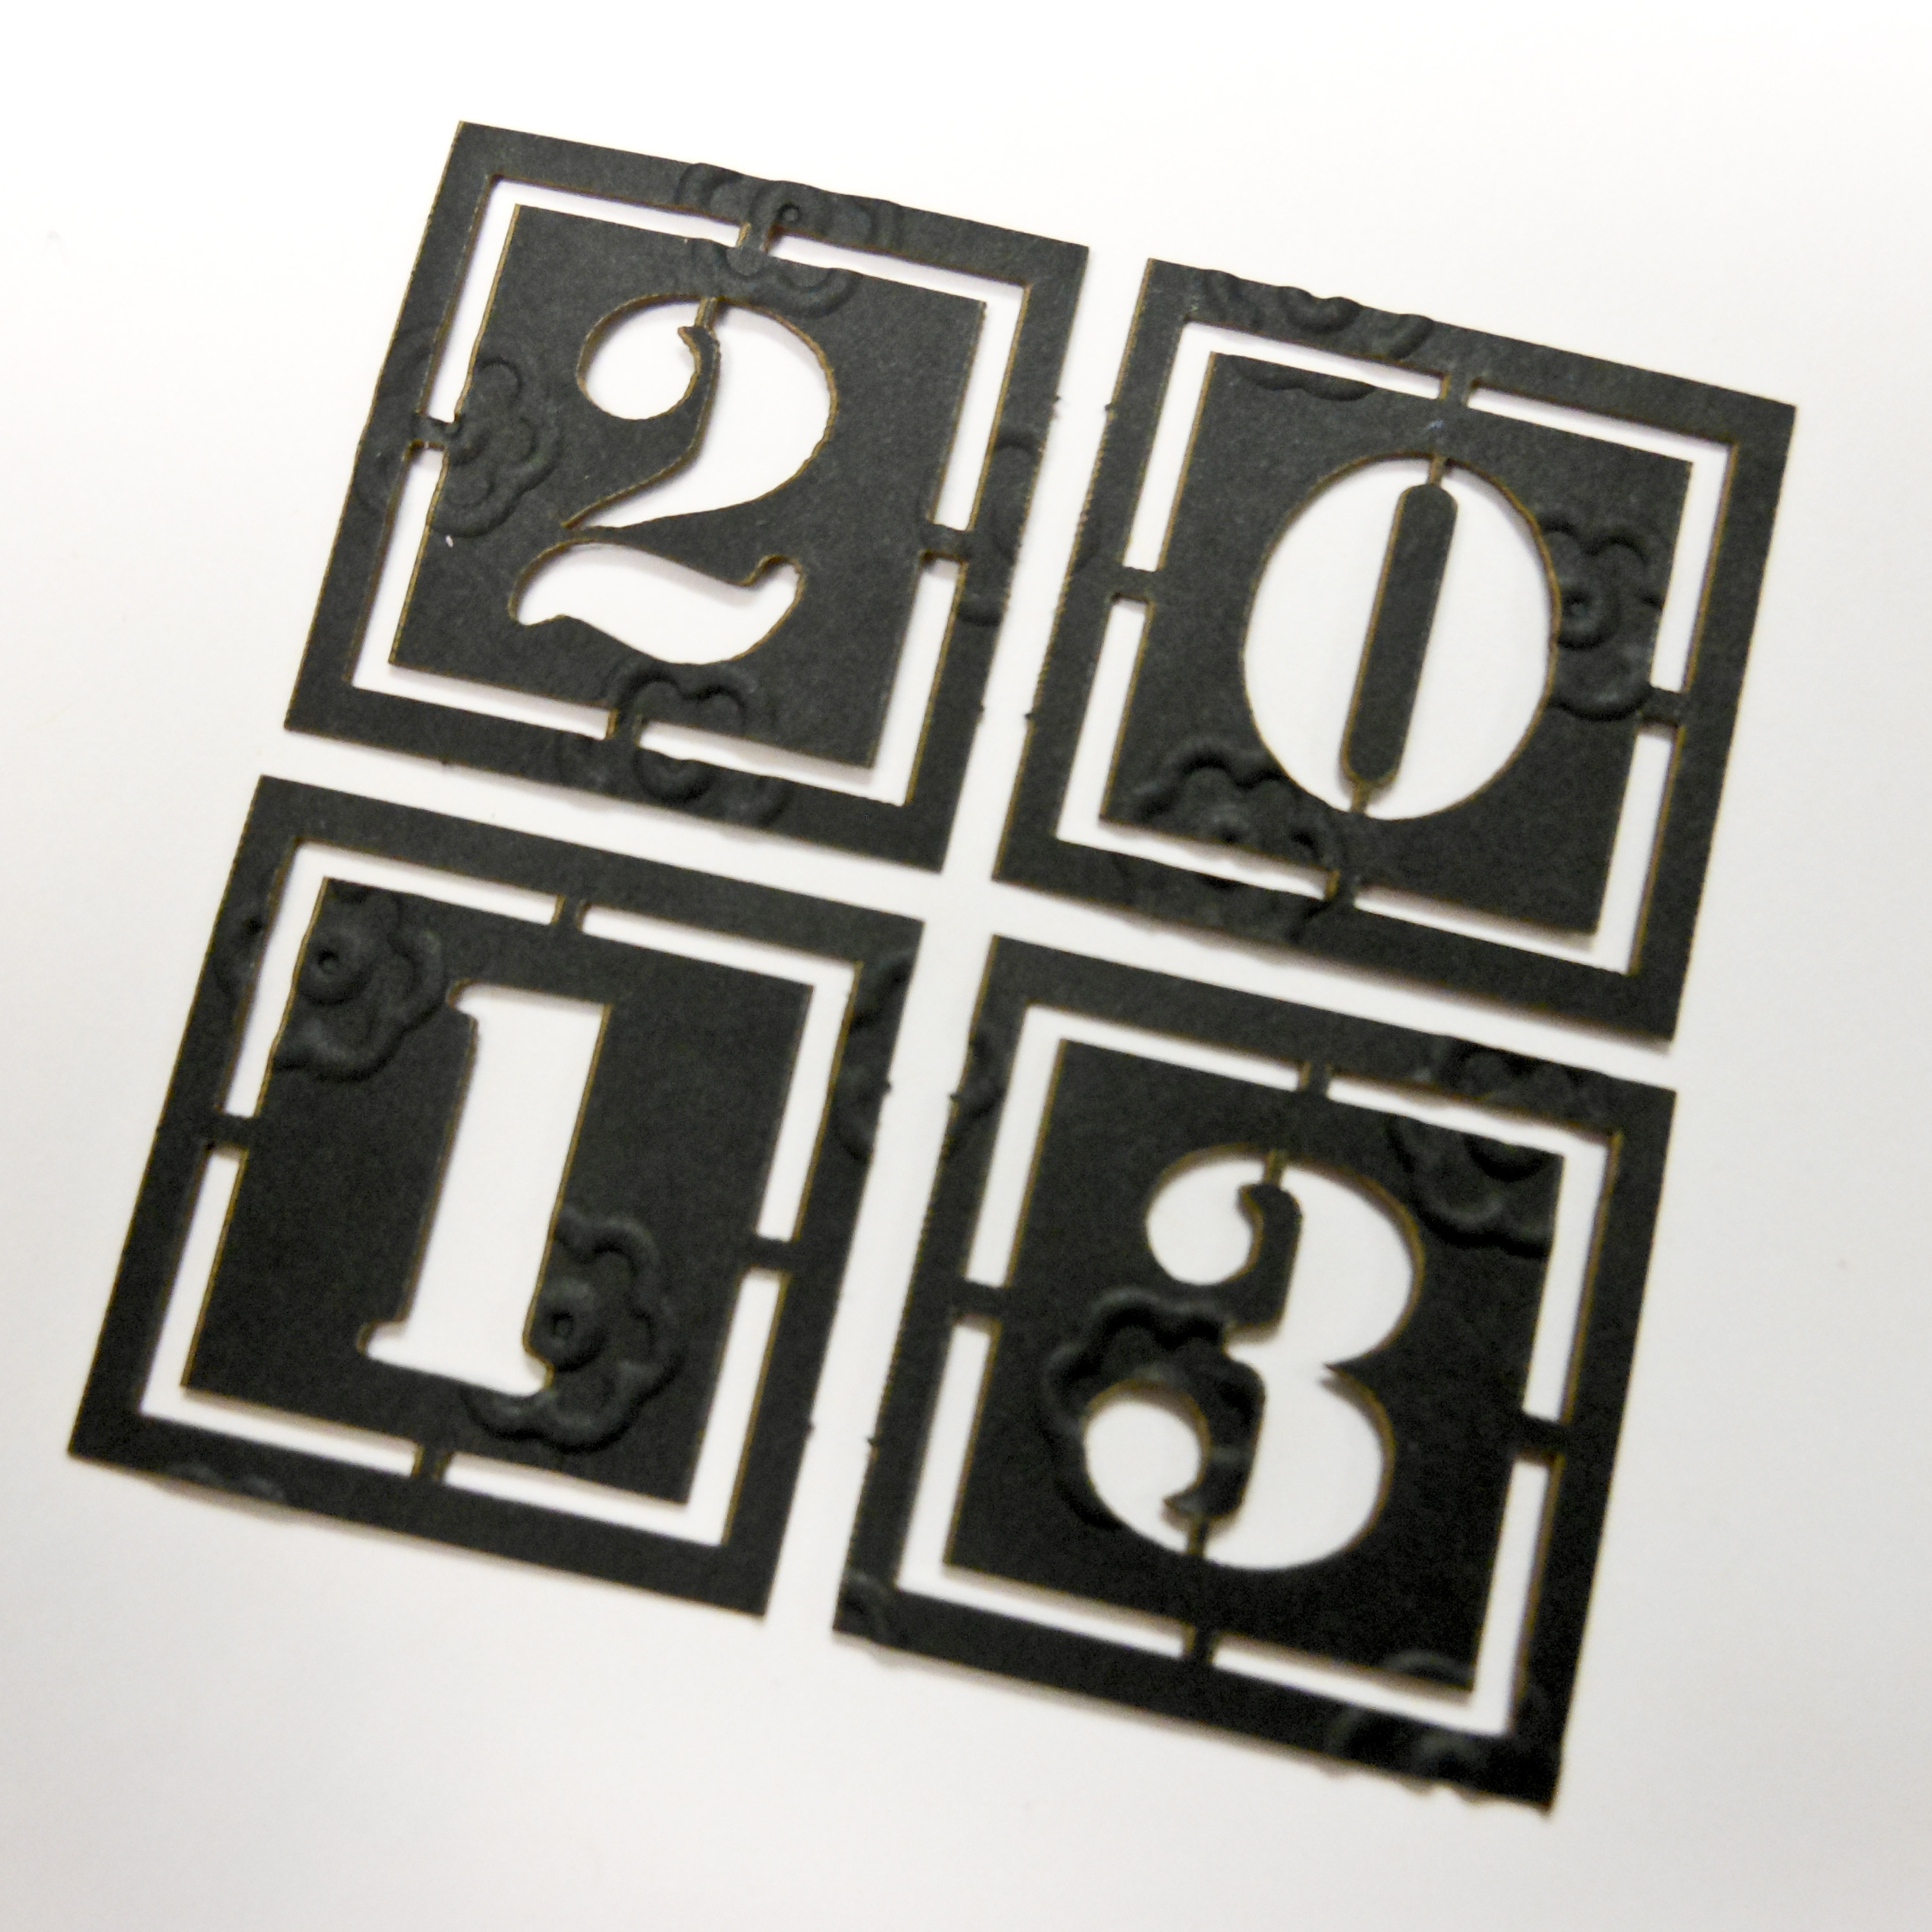
Here I took a 2013 Four Letter Cornerstone and embossed it with small flowers. This is a great way to add texture and to make your year Cornerstones a little more interesting.
[/vc_column][/vc_row][vc_row][vc_column width=”1/1″]I hope you enjoyed today’s post. You can get all of these Cornerstones on Snapncrop.com. I hope when you start making another page or you get a new Page Kit you will have some of these techniques in mind! Happy Scrapping!
[/vc_column][/vc_row][vc_row][vc_column width=”1/2″] [/vc_column][vc_column width=”1/2″][/vc_column][/vc_row]