
Are you looking for a new way to jazz up your mosaic pages? In this post you will be getting two new scrapbook techniques: Silhouettes & Dimension. But Wait! You might be wondering ‘how do I do this on a mosaic page? Would it work with the grid?’ To that I say, “Of Course! Let me Show you how”:
Unique Technique 1: A Simple Silhouette
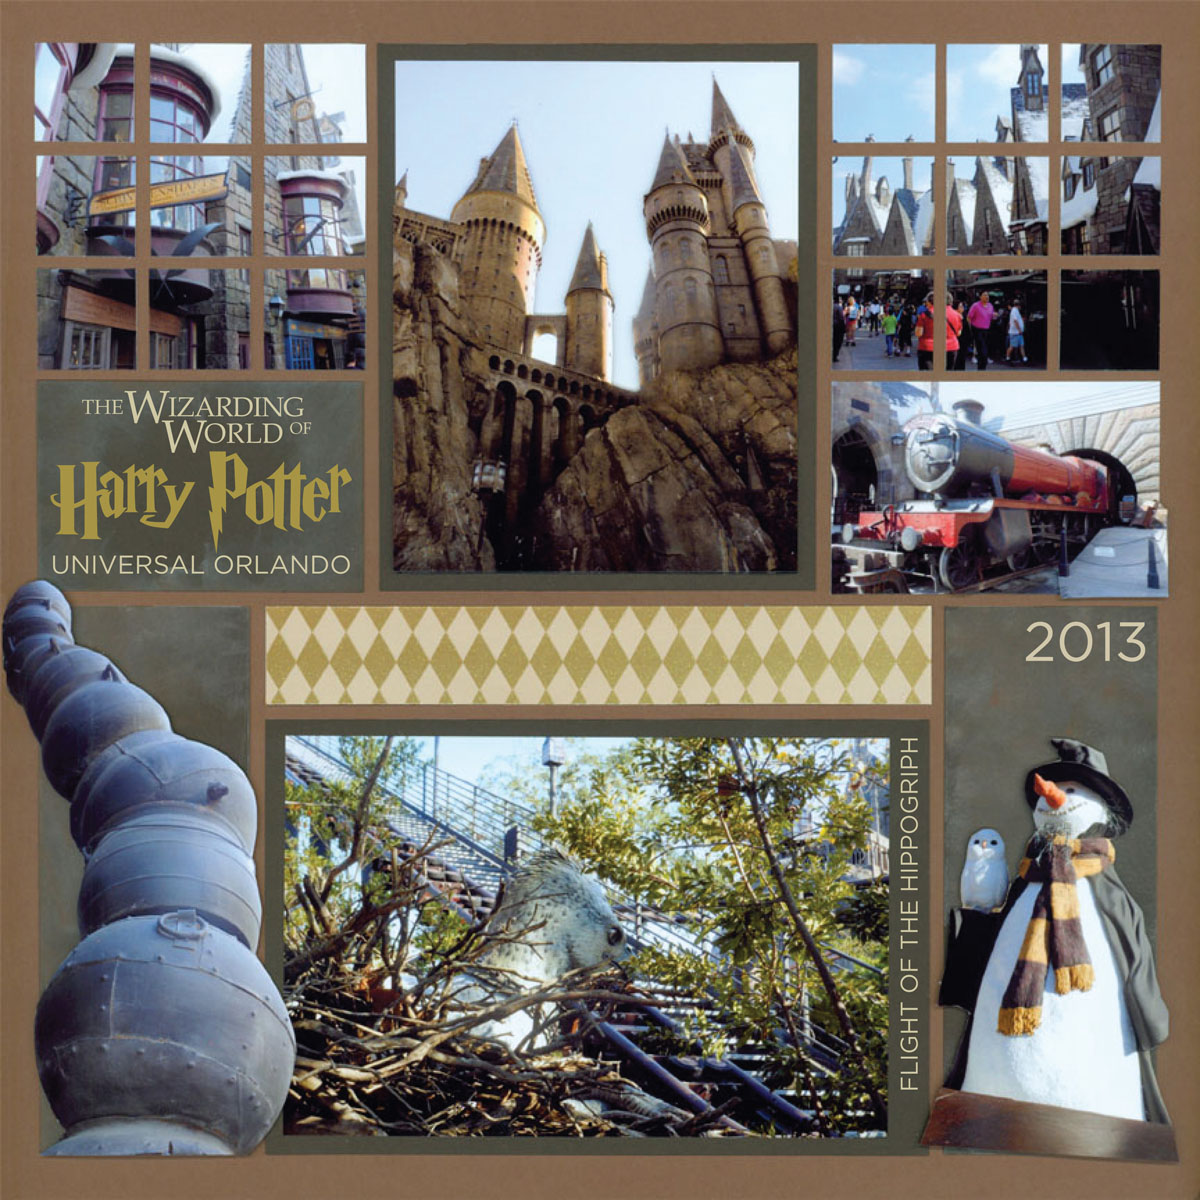
If you do not know this technique, a silhouette is when you cut out a subject from your photograph. For example, I took this photo of the oranges at a friend’s wedding. The background is distracting, so I’m just going to take the oranges out!
Here are the steps for creating a Silhouette:
Step 1: Get a Good Pair of scissors and Carefully cut out the main subject. You may want to print an extra photo just in case!
Tip: Make sure the subject is large & easy to cut around! If there are too many complicated details, it might be more difficult to make an accurate cut.
The image is cut out – So, how do you place it on a mosaic page?
Step 2: Create Background for your subject. This might be card stock or patterned paper. I used a Paper Tile large enough to sit behind most of my image, but it’s also okay if your subject sticks out a little.
A second option is to put a mosaic background behind your image. You can use photos as your mosaic background and add one or two large photos on top for a unique look!
Unique Technique 2: Dimension
You can also use the silhouettes to create a 3D effect on your pages. In this case you will need two copies of the same photograph. Here is the process:
Step 1: Make sure both copies are cut to fit the grid.
Step 2: Cut out ONLY ONE of the images. Use the same steps from the Silhouette section above.
Step 3: Flip your cut out image over and place pop dots in various sections.
Step 4: Glue the Original image down on the grid paper. Next, carefully place the silhouette piece on top of the original image. Take your time to make sure the images line up together. When you are finished, you should have two layers like in the image above.
The Finished Layout:
Isn’t this cool? I used the castle image I made for the step-by-step process, plus I added a dimensional layer to the train. You can see that I also made silhouettes out of the cauldron and snowman! I just placed some Cocoa Paper Tiles behind them as the background. They really pop off the page!
These techniques really create a fun atmosphere on the page… don’t you think? They are a must for your scrapbook!
“Harry Potter – Universal Studios” supplies used:
- Mosaic Moments™ 12×12 Coffee Grid Paper (Discontinued)
- Cocoa Paper Tiles
- Gold Diamond Pattern Paper