
… for your scrapbook layouts
Now that you have all your fall photos, I thought a few ideas for adding a bit of fall flourish to your layouts would be fun!
First up, Garland Borders
This border was inspired by a burlap garland I saw in the local craft store. I wanted to incorporate a few of those elements on that garland like beads, leaves and leather cording. I began by punching out small maple leaves and then coloring them with various inks
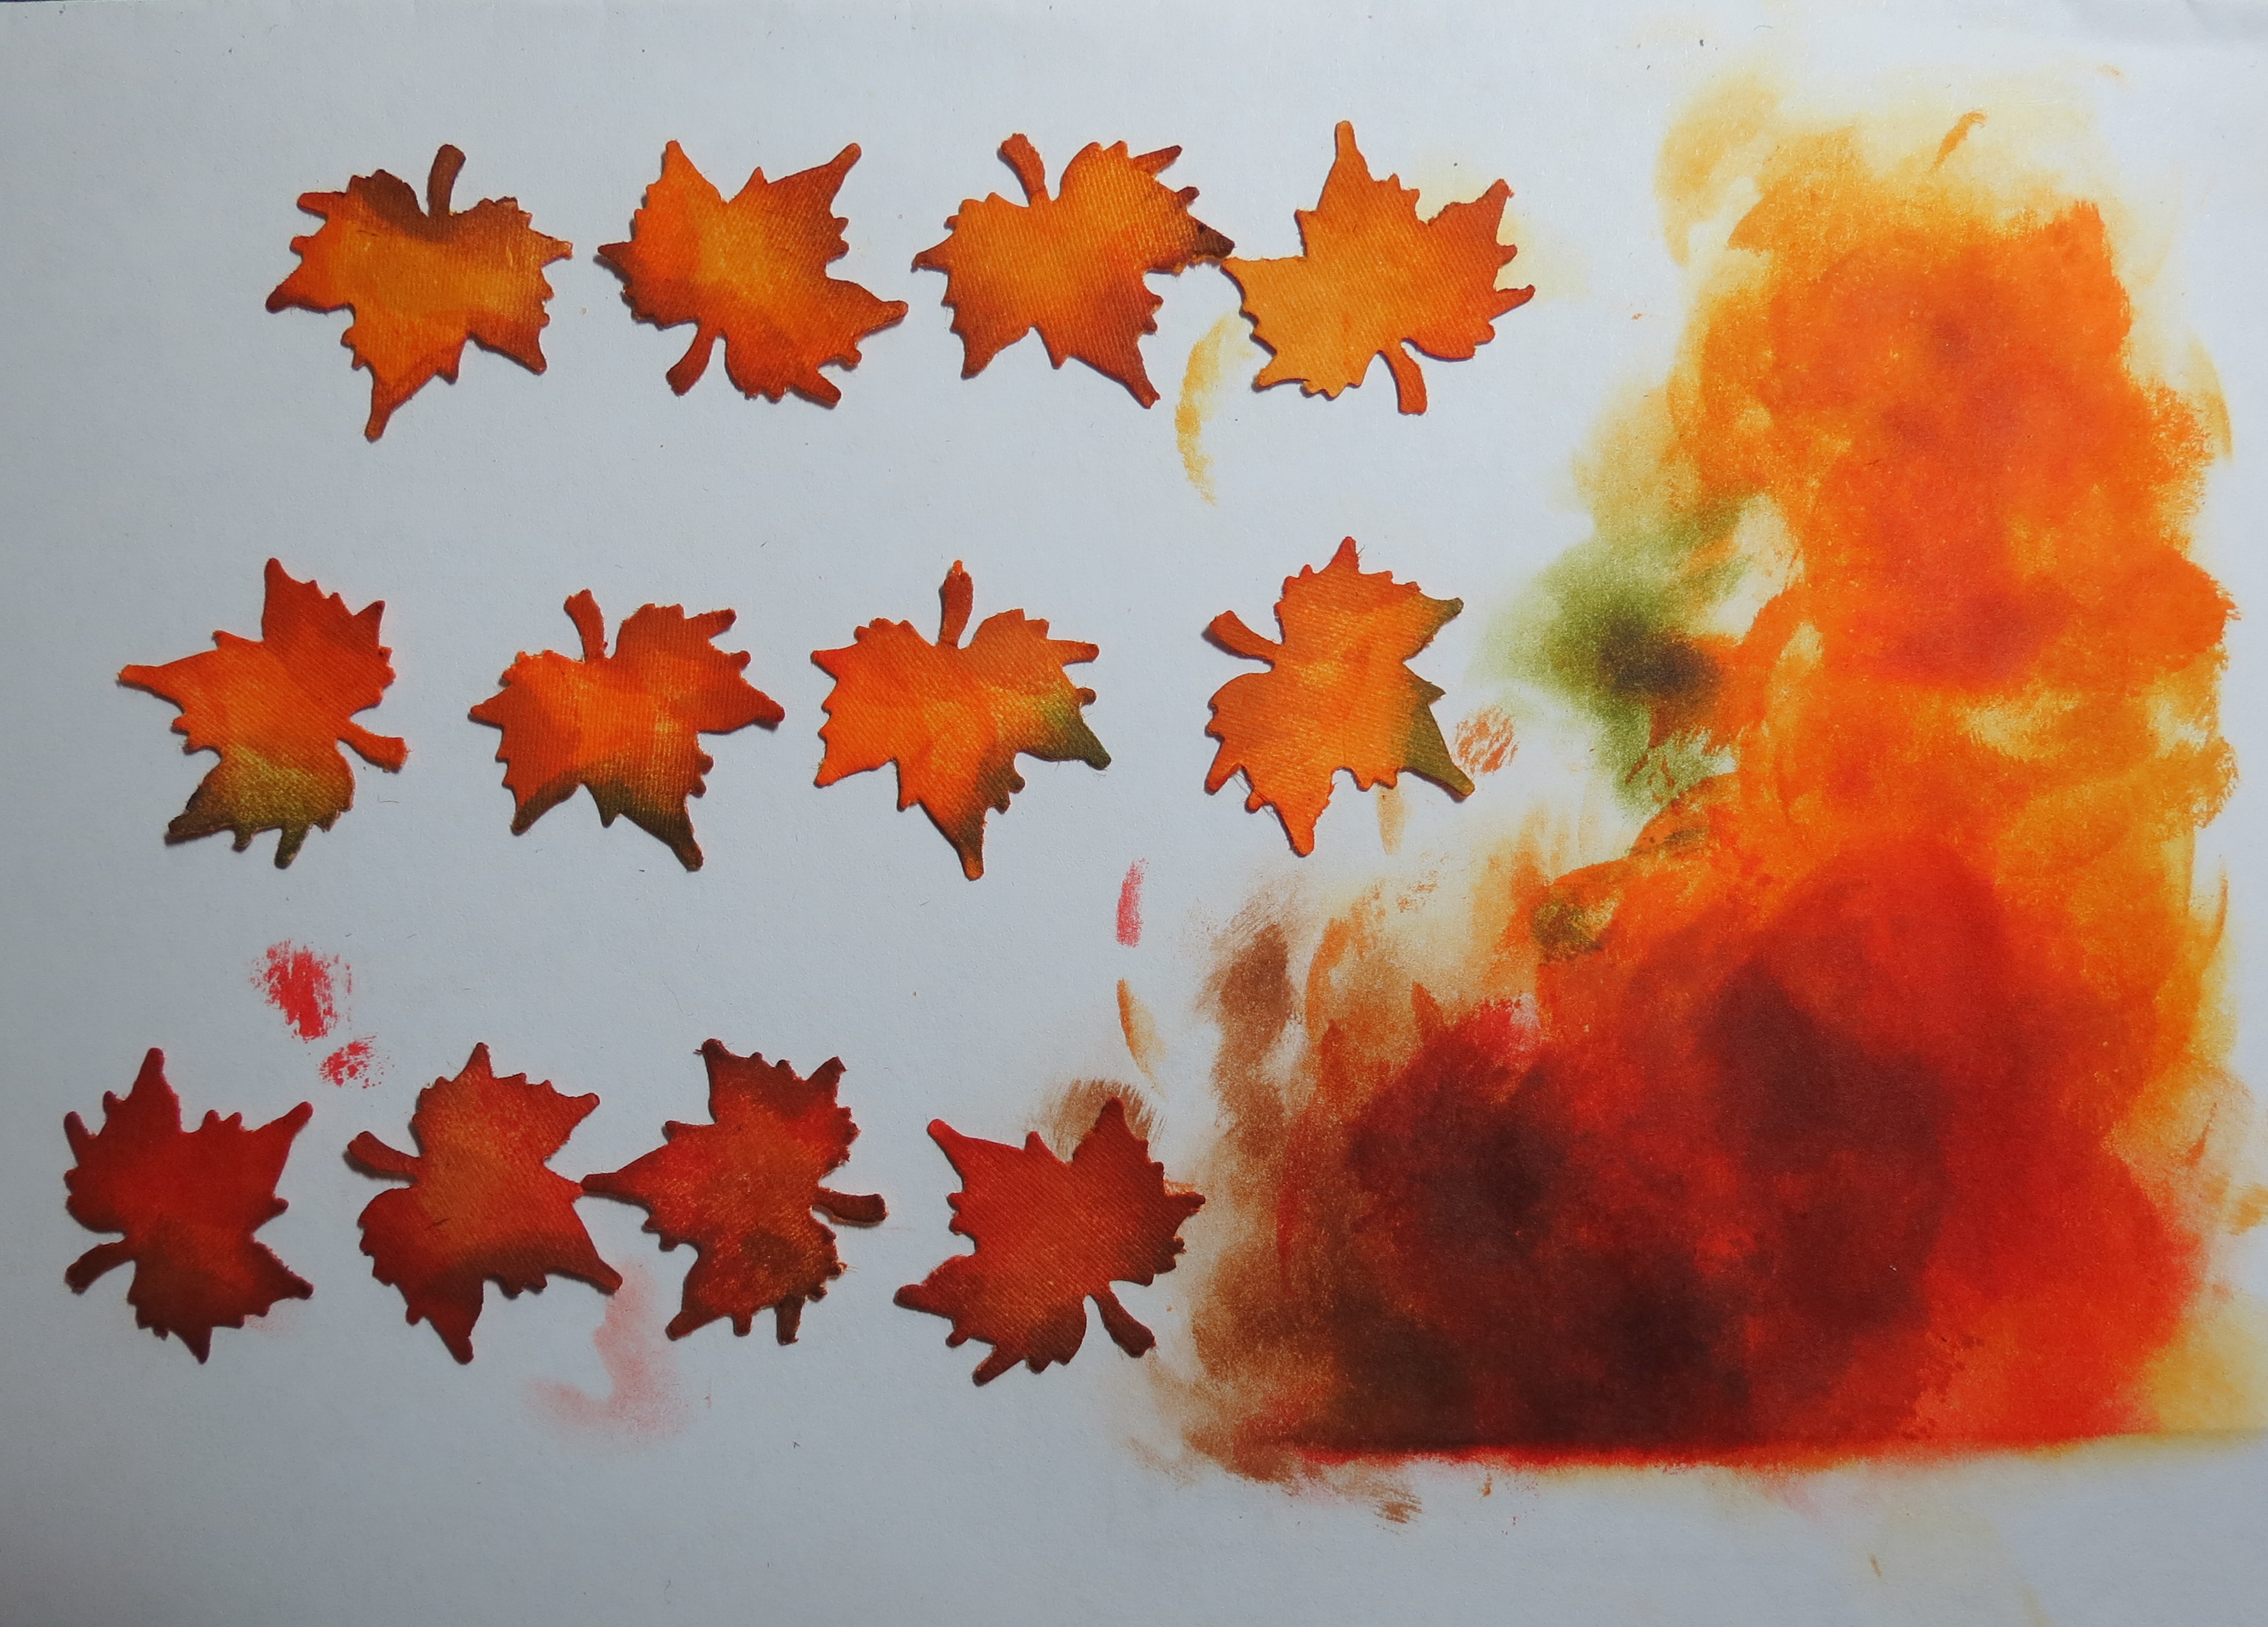
Fall Flourish #1- border of leaves, leather, paper twine and hemp cording. Punched and being inked.
A small hole was punched so that I could string the paper cording through. The yellow hemp twine easily threaded through the beads. To hold the beads in place, I knotted the twine on each side of the bead. I used the leather cording as the centerpiece to weave the other two above and below. I laid the three strips out on my mat and planned where I wanted each leaf and bead to go, it took a little bit extra time, but liked the spacing once completed.
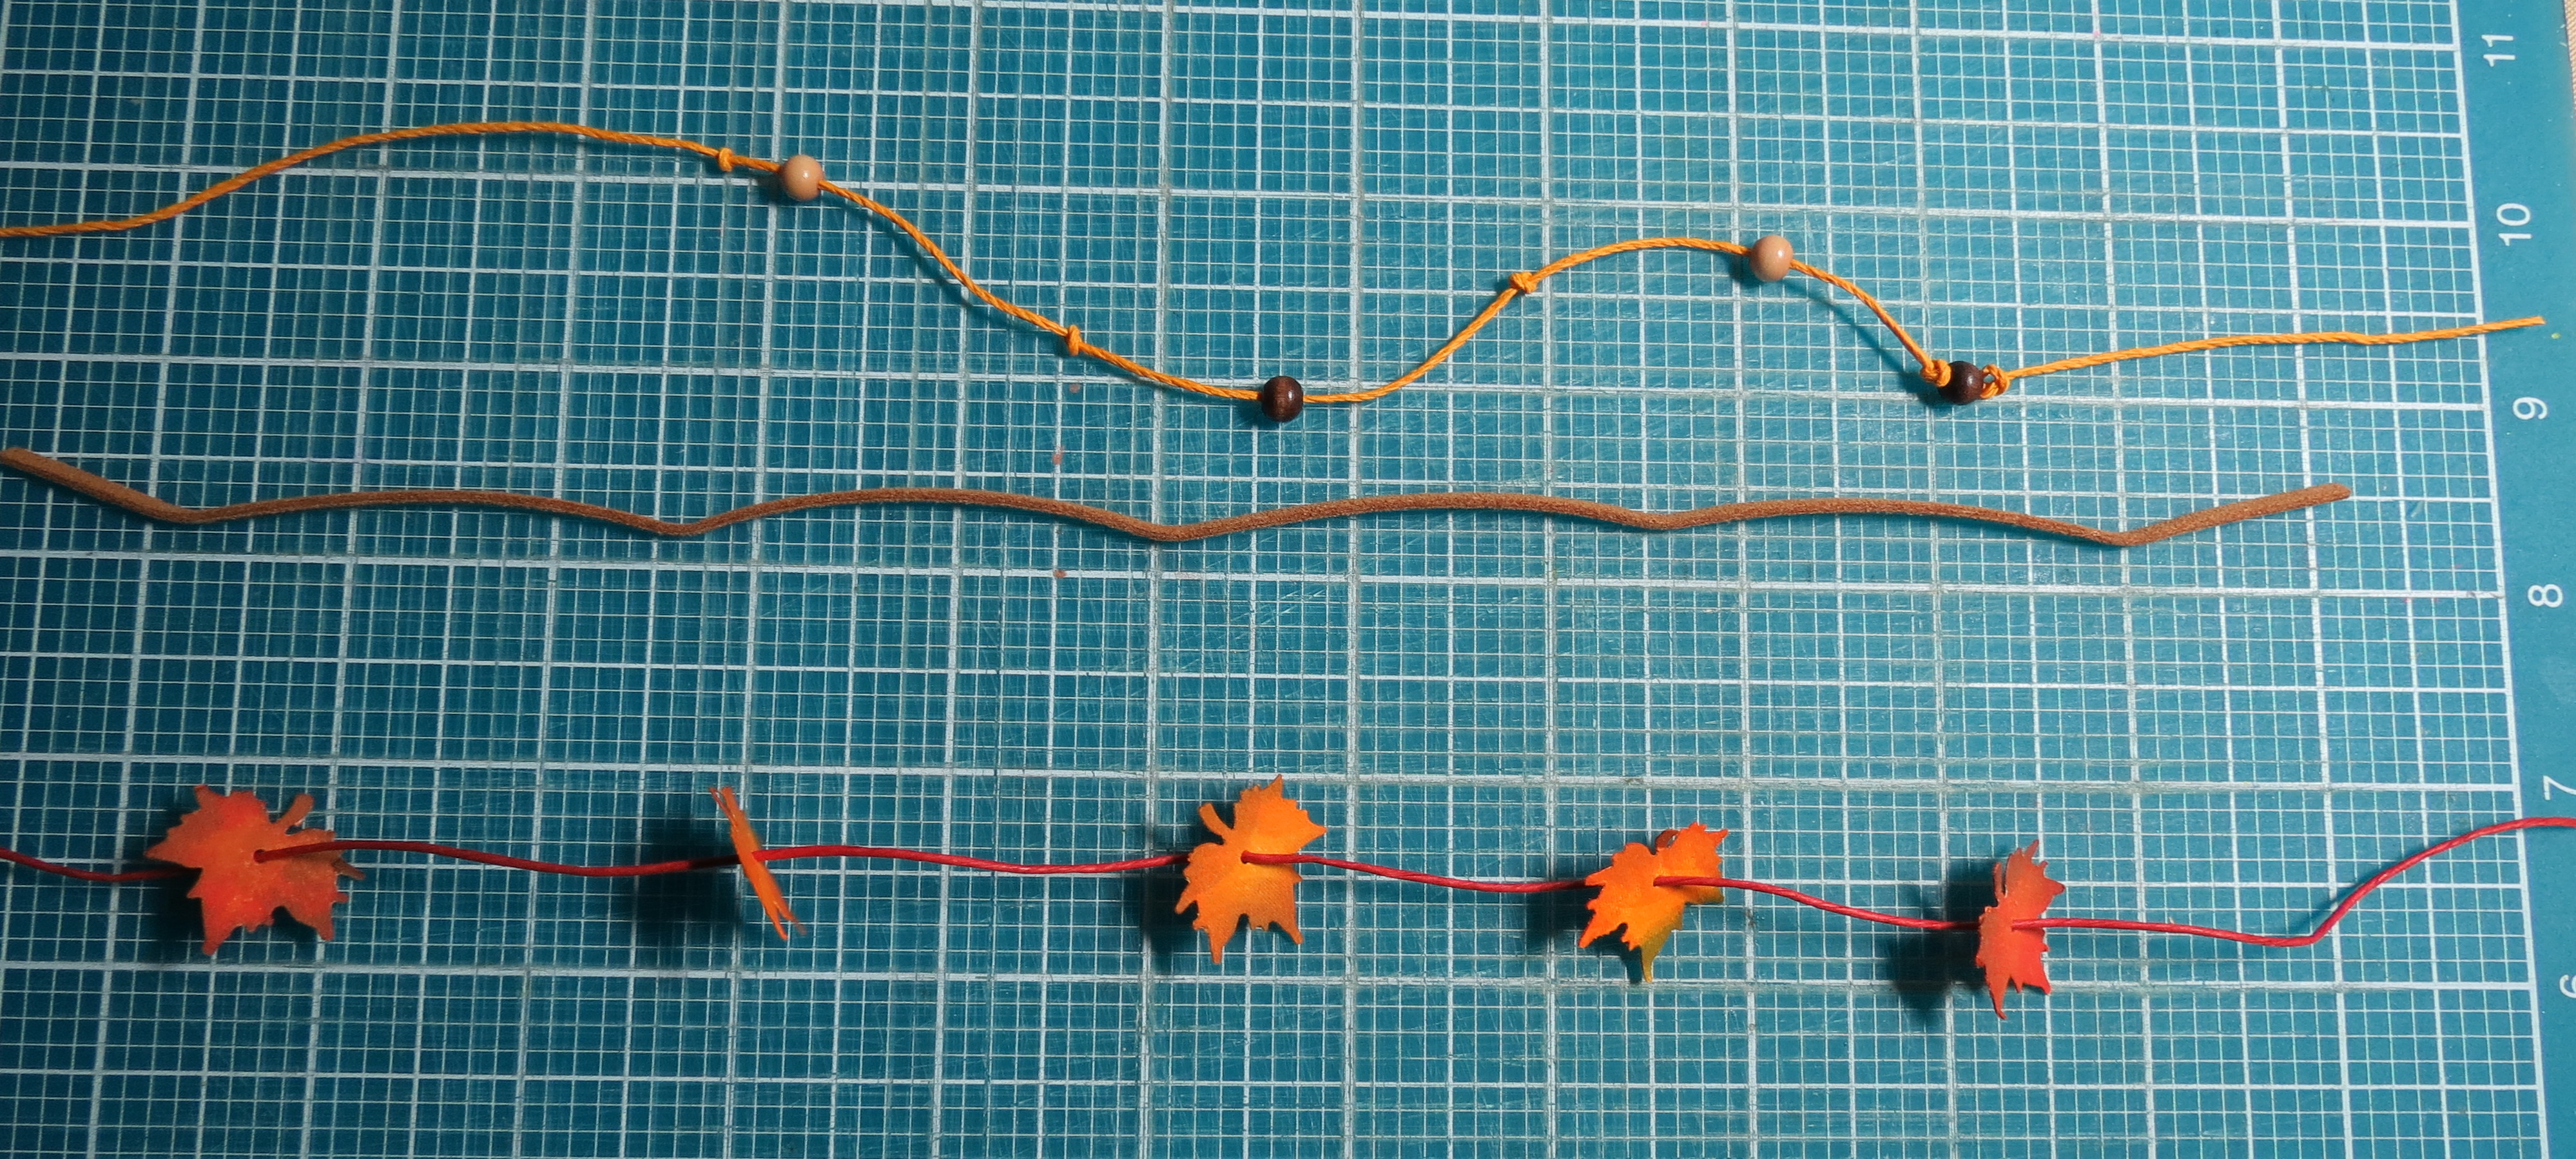
Fall Flourish #1 Border arranging strands of leaves, beads and leather to weave into border.
To hold the positions on the background tile, I used a micro glue dot to the underside of the leaf. I anchored the strands at each end with a punched button, sliding through the holes and fastening to the foam mounting tape between the layered button sections.

Fall Flourish #1 Border strands woven together anchored in place with a punched button.
Second, Quilt Tile Borders
For this, I used quilt tile dies to create several blocks on a vertical strip. The centers are filled with patterned papers from a fall pack of papers. Stitches are inked on the topside and the squares arranged on the point.
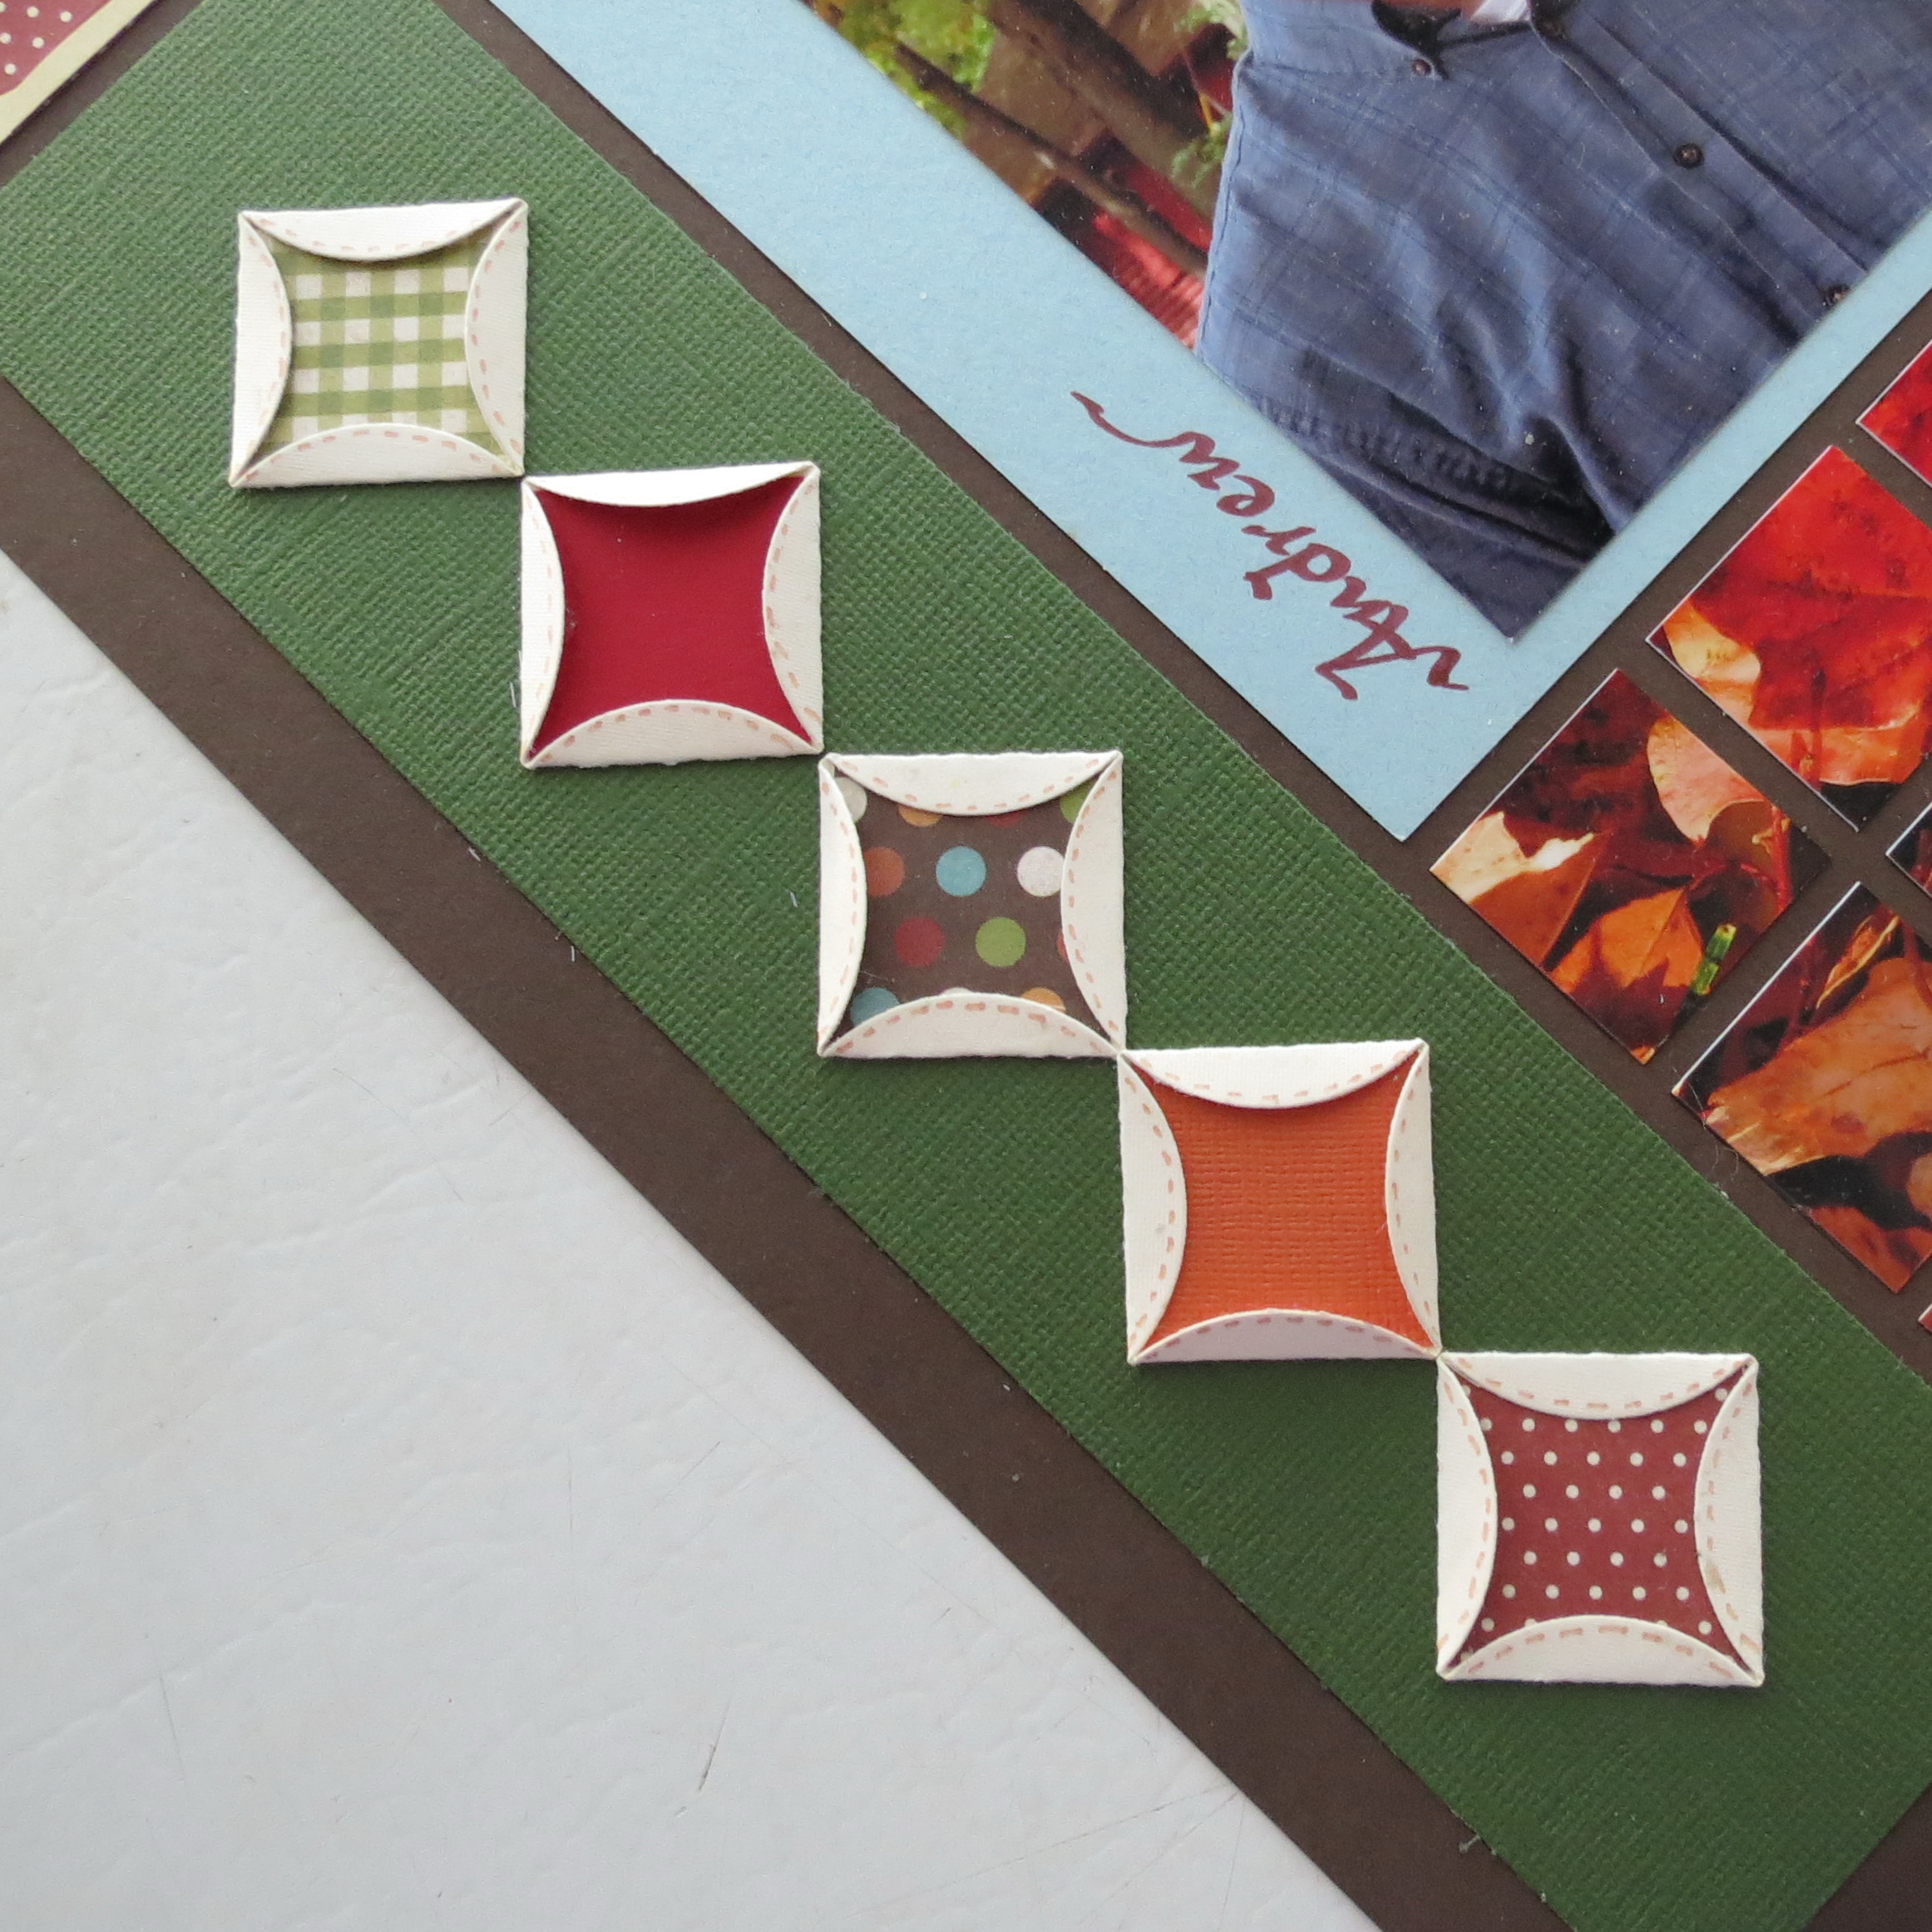
Fall Flourish #2 Quilt Tile Border
Third, Cornerstones
The apple cornerstone is a perfect complement to fall layouts. I used a white cornerstone and added antique linen ink to shade. Then I replaced the under layer with patterned paper to match the layout and a piece of green cardstock for the leaf. I ran an embossing stylus around the edge from the backside of the patterned paper to raise it a bit, doesn’t really show as well as I had hoped.
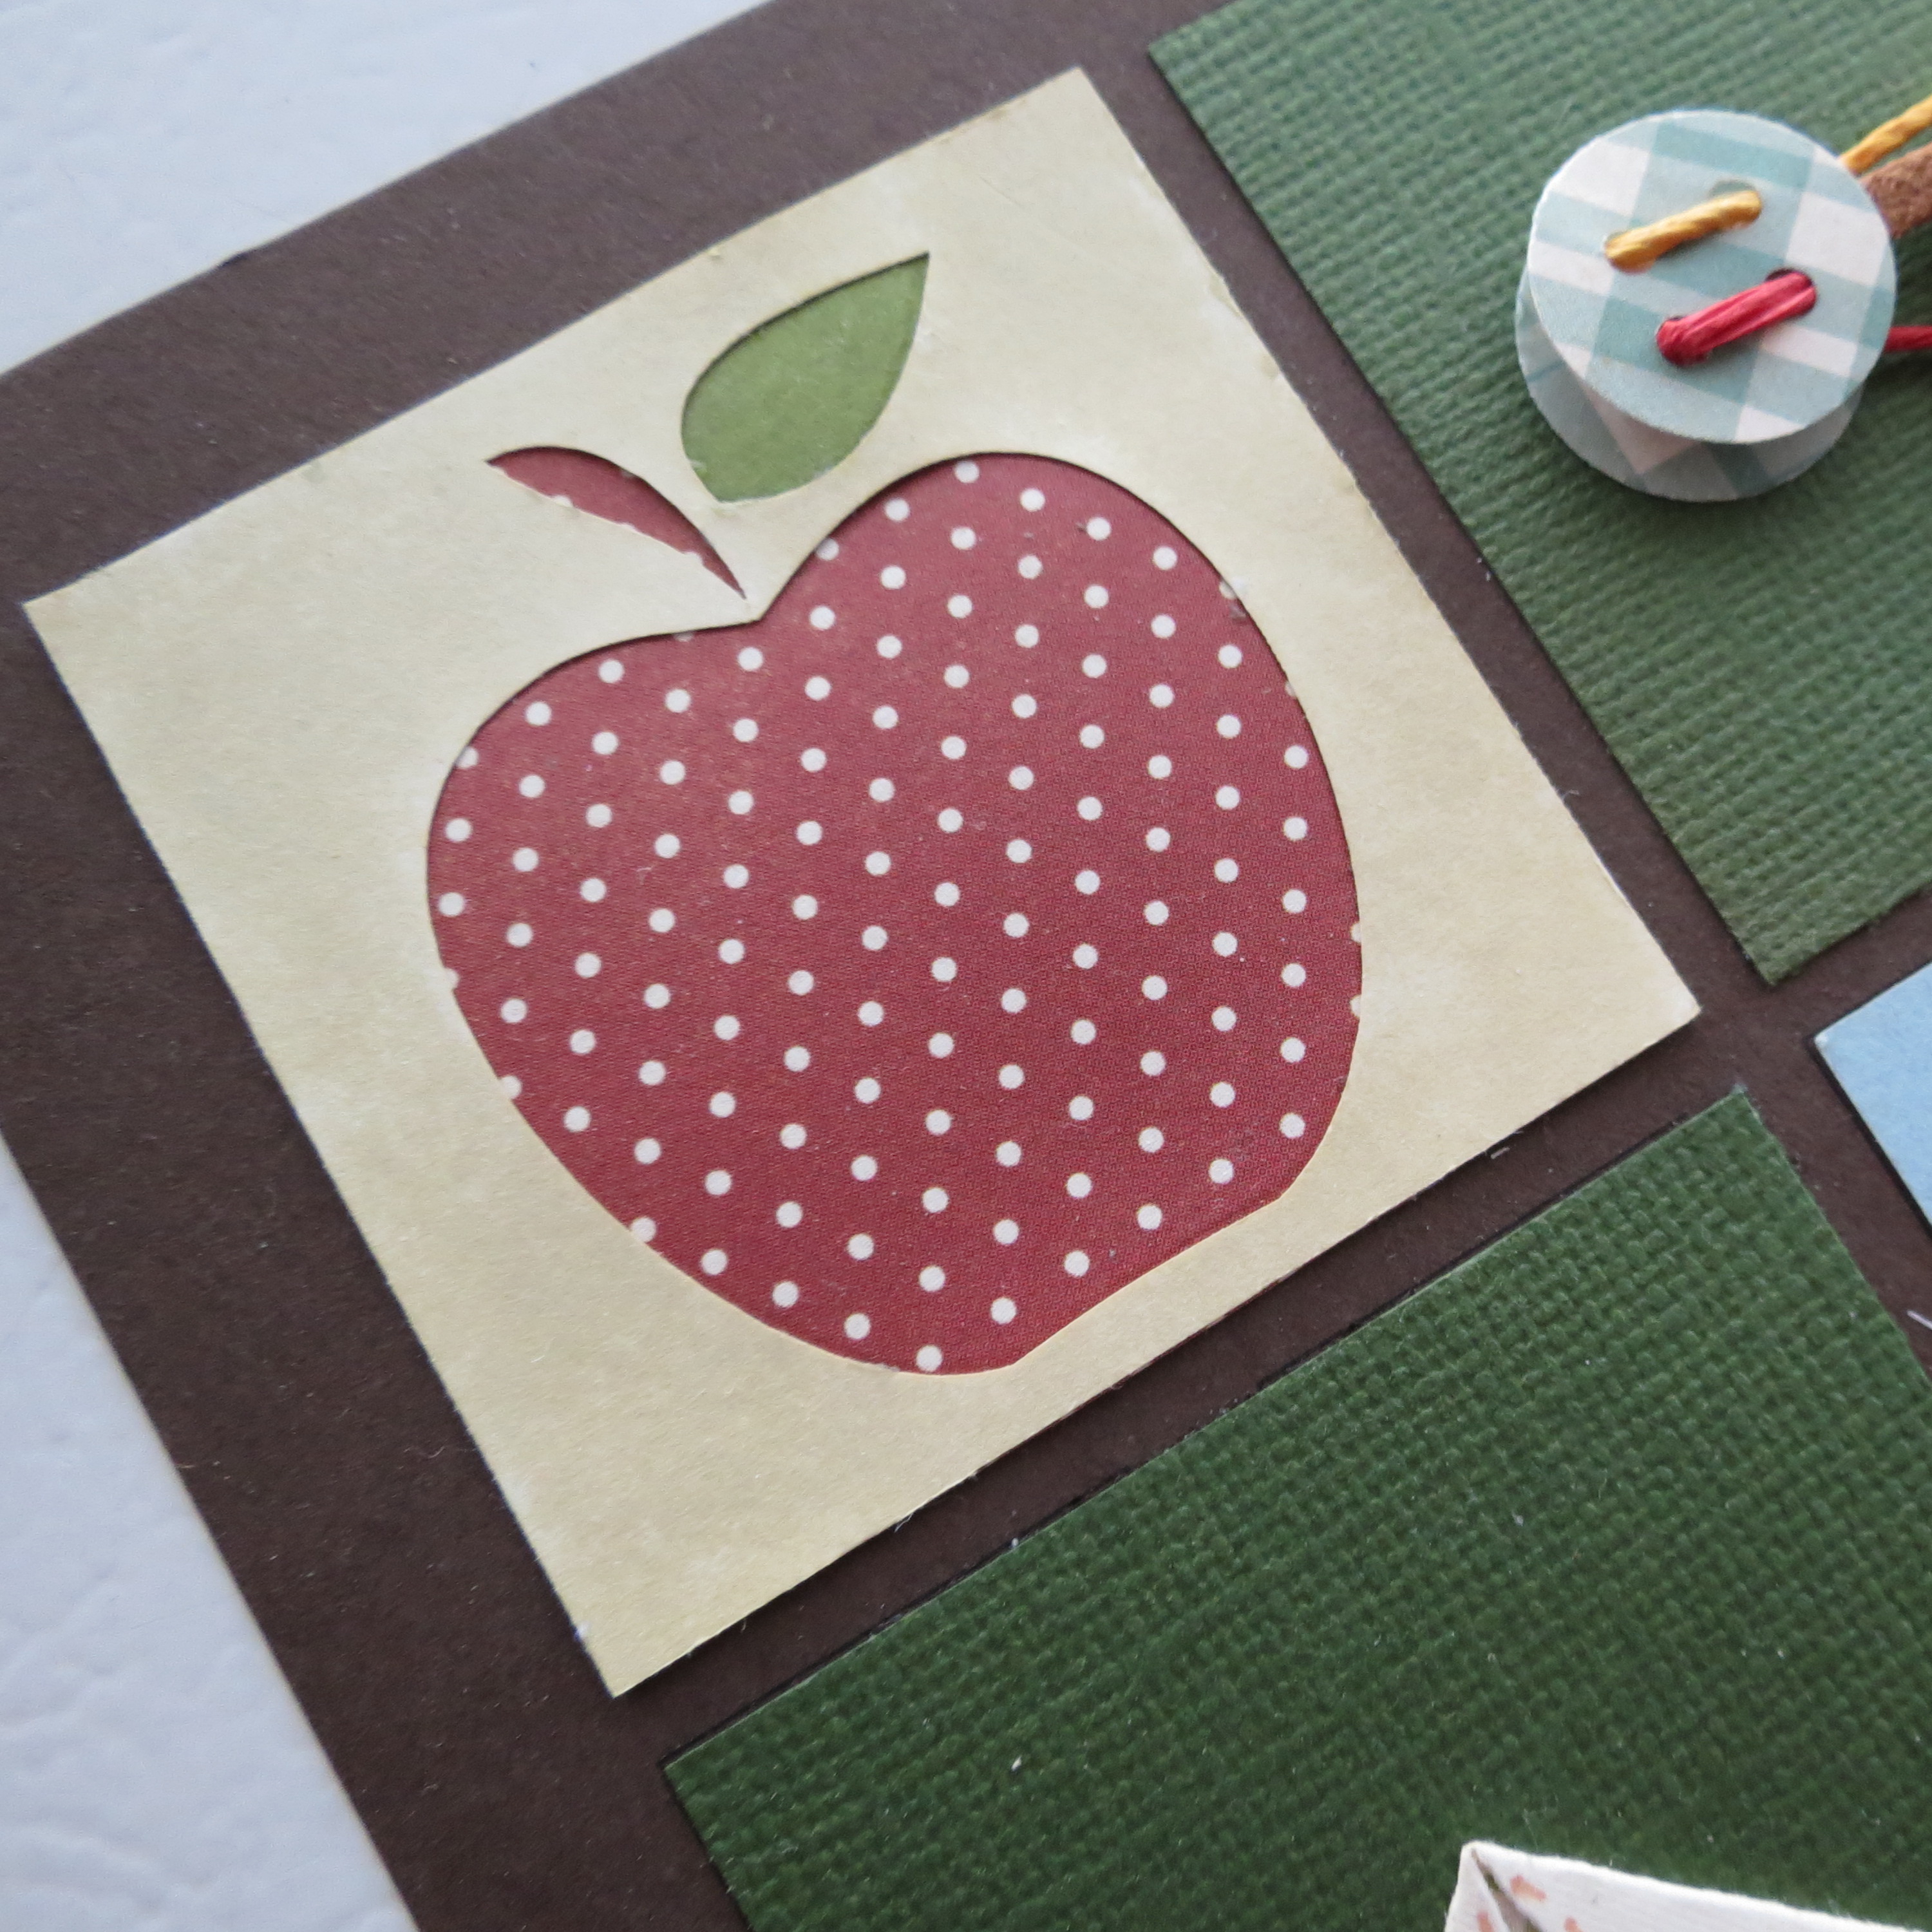
Fall Flourish #3 Cornerstones. Patterned paper to coordinate with colors of the layout.
On the opposite corner I used a fall leaf, but only inked the white background layer.
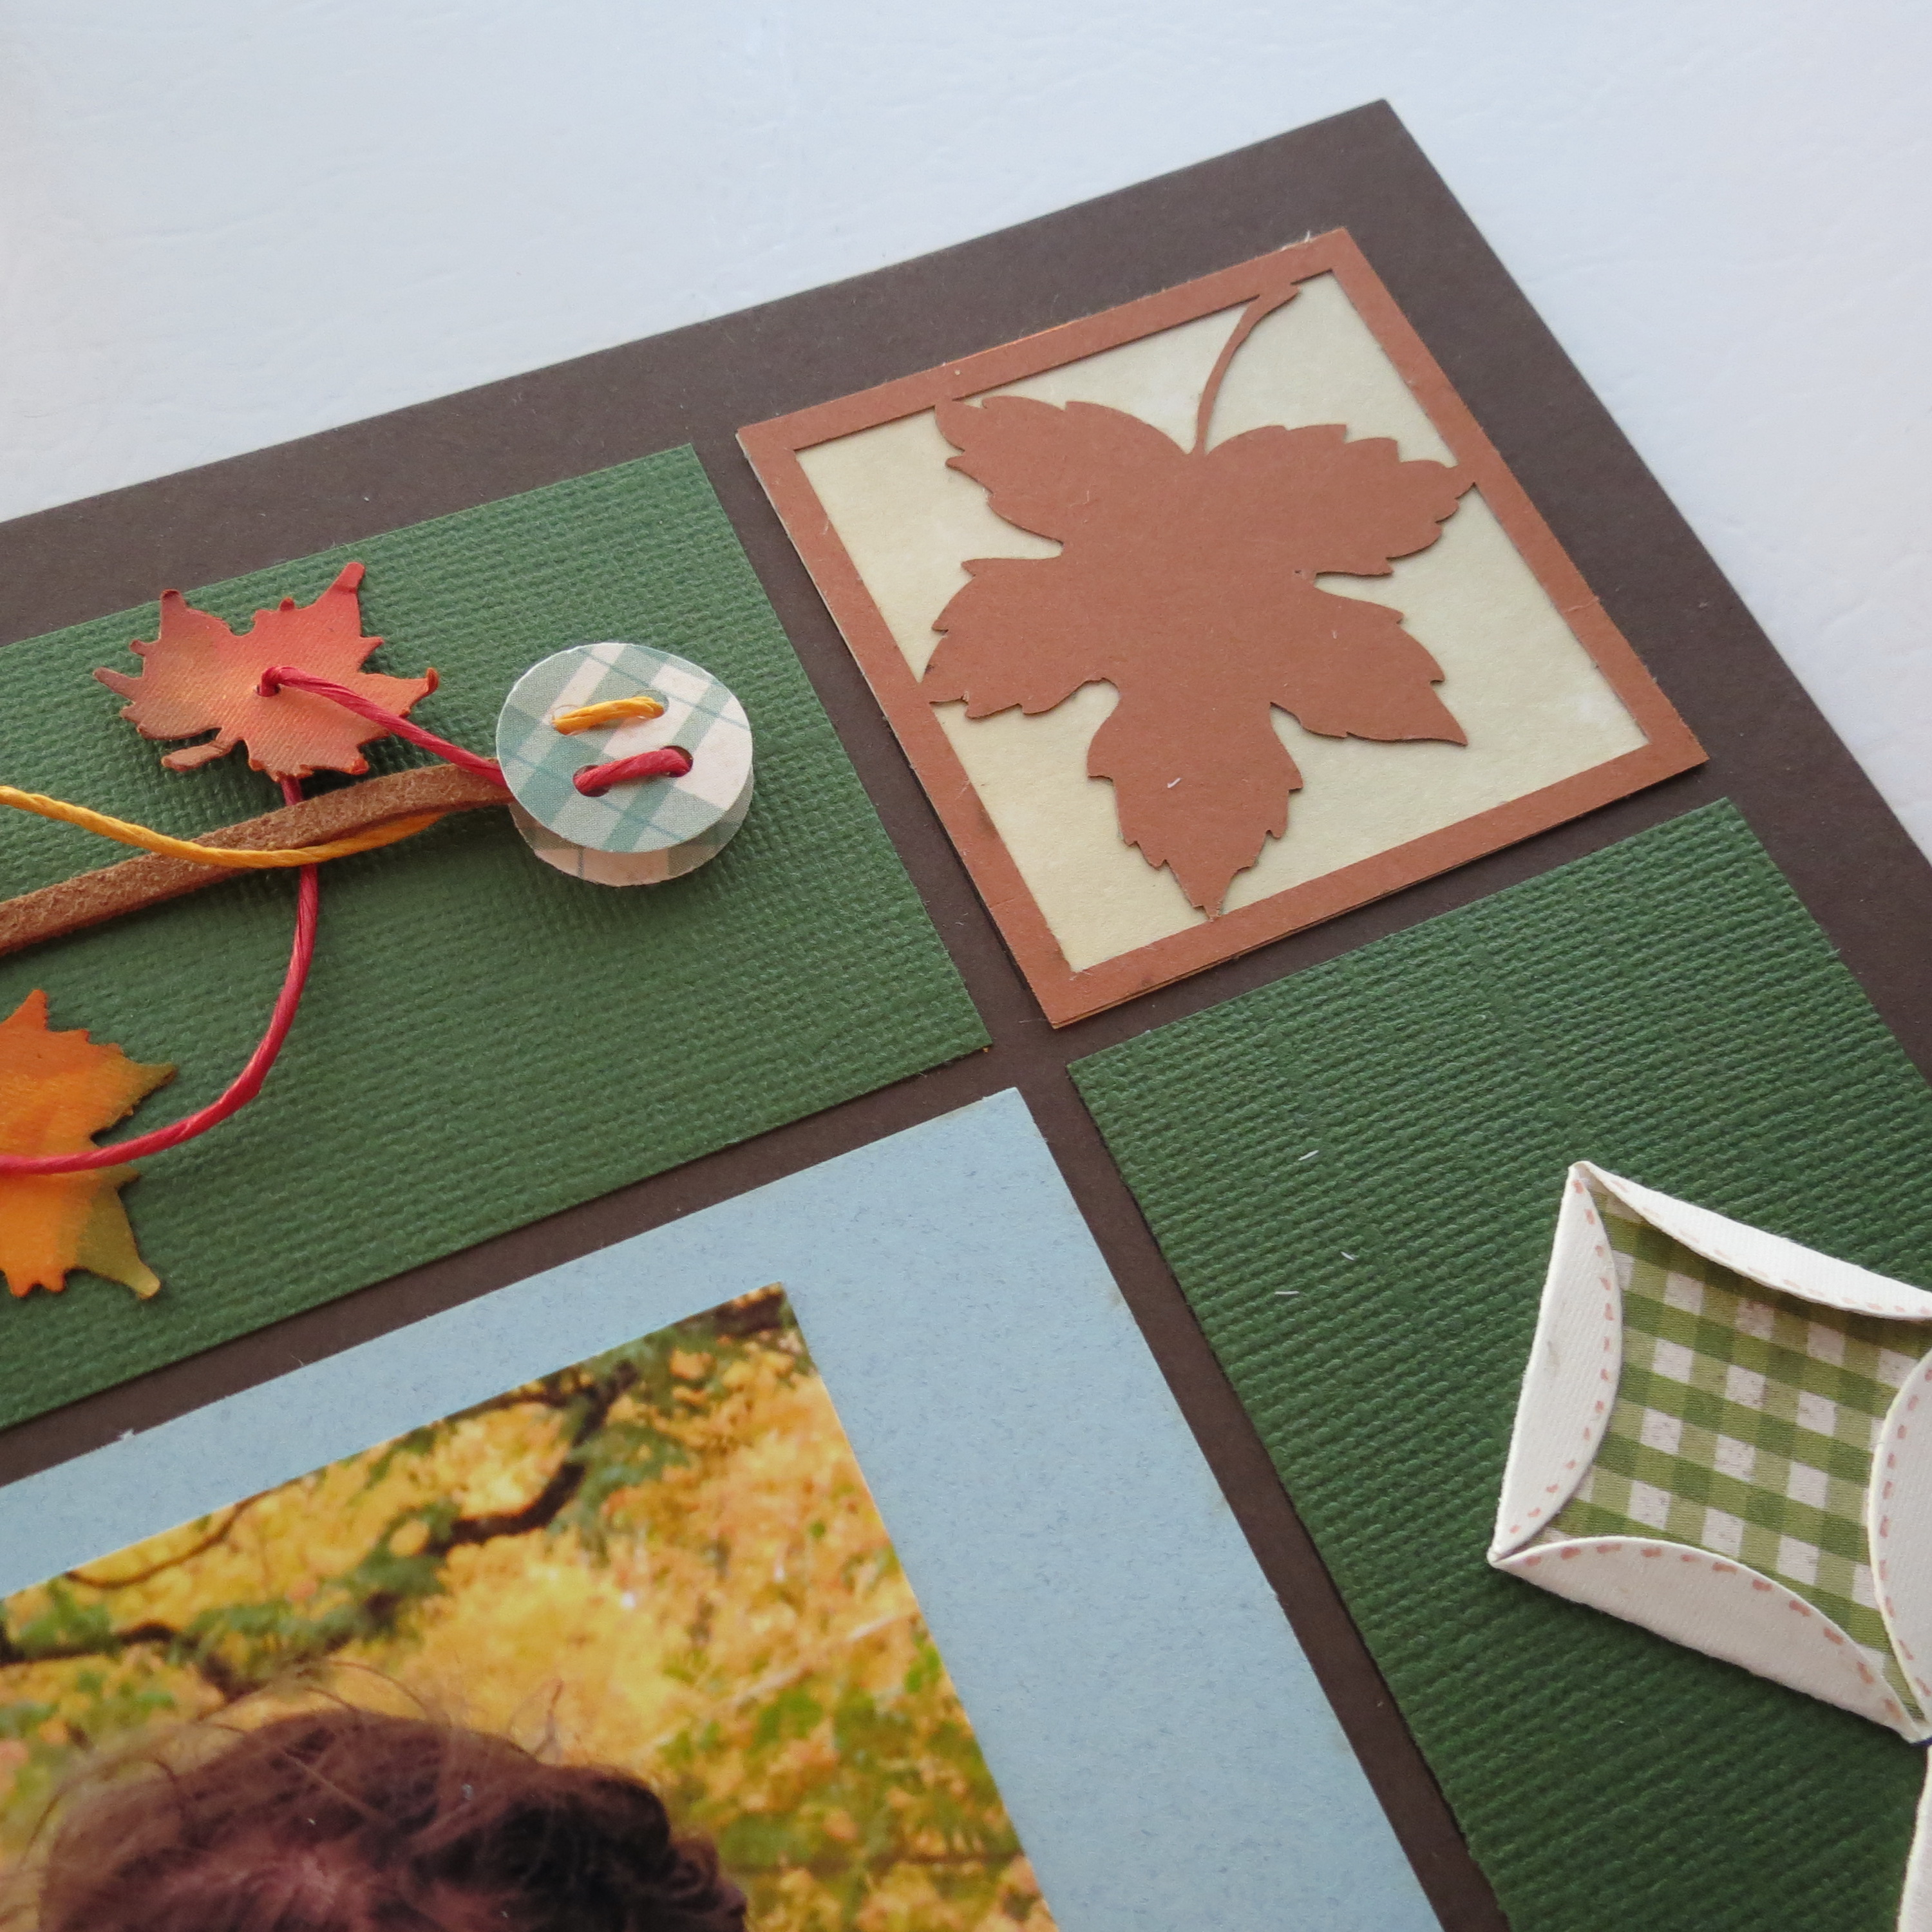
Fall Flourish #3 Cornerstones with inked background to match color scheme of layout.
How it all comes together:
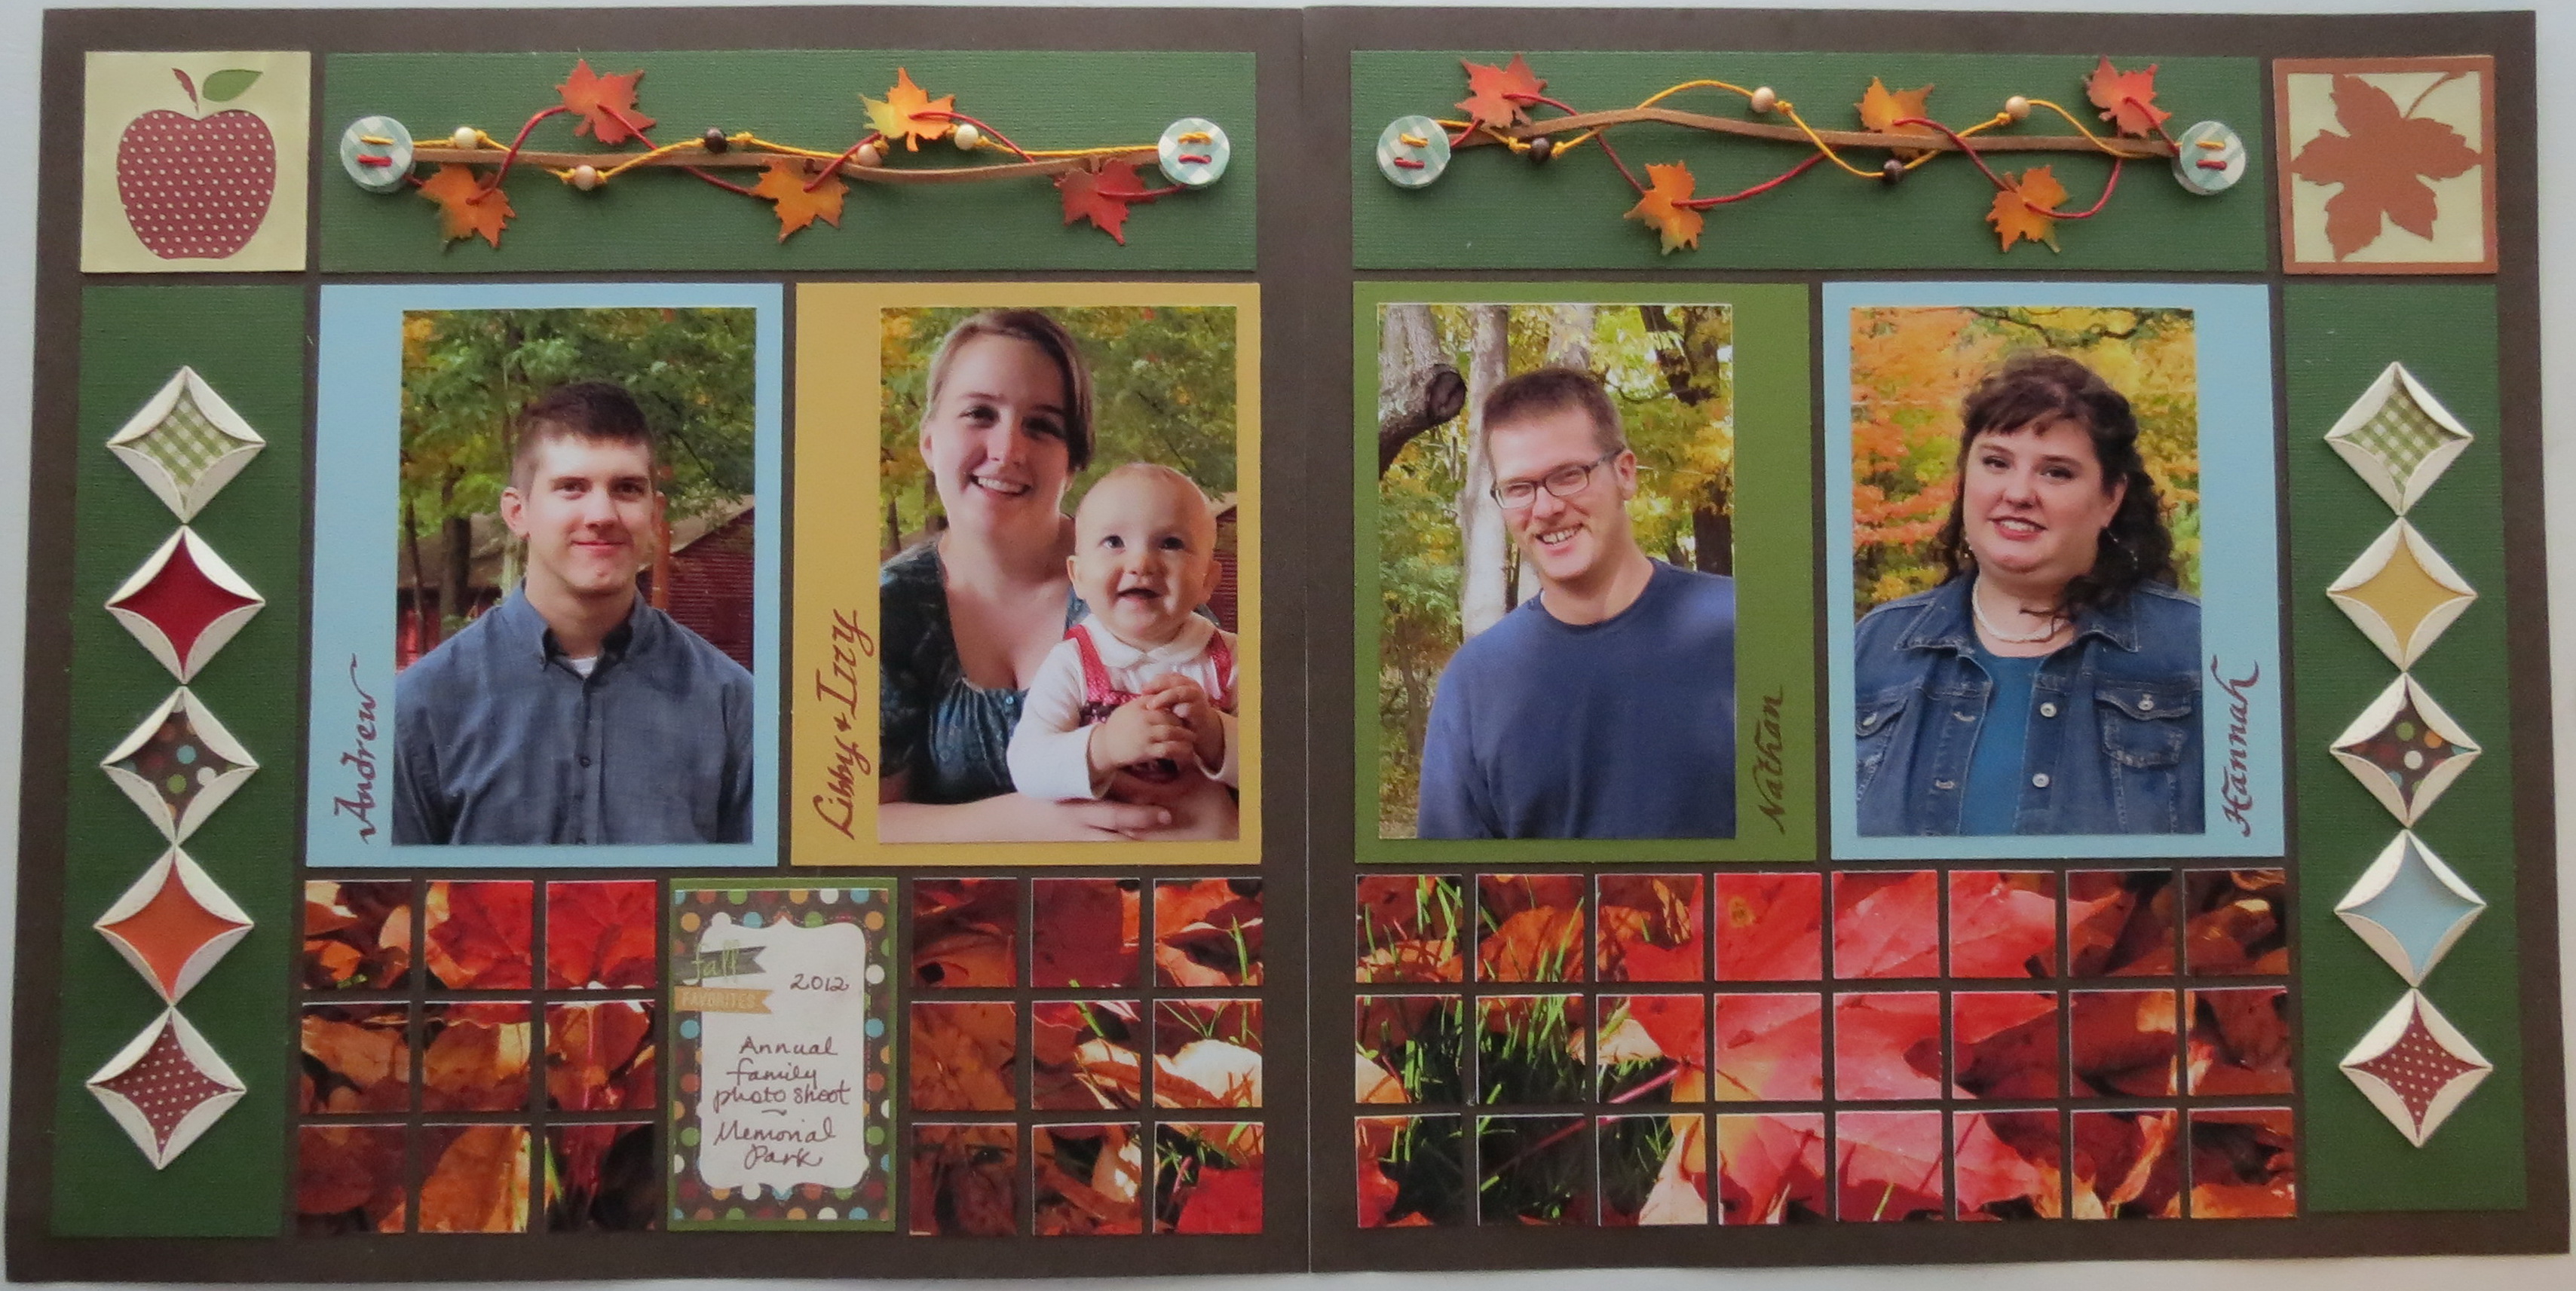
Fall Flourish Borders #1 and #2 on final layout.
I have previously used this same cornerstone and stamped on top and below using Tami Potter’s fall stamp set.
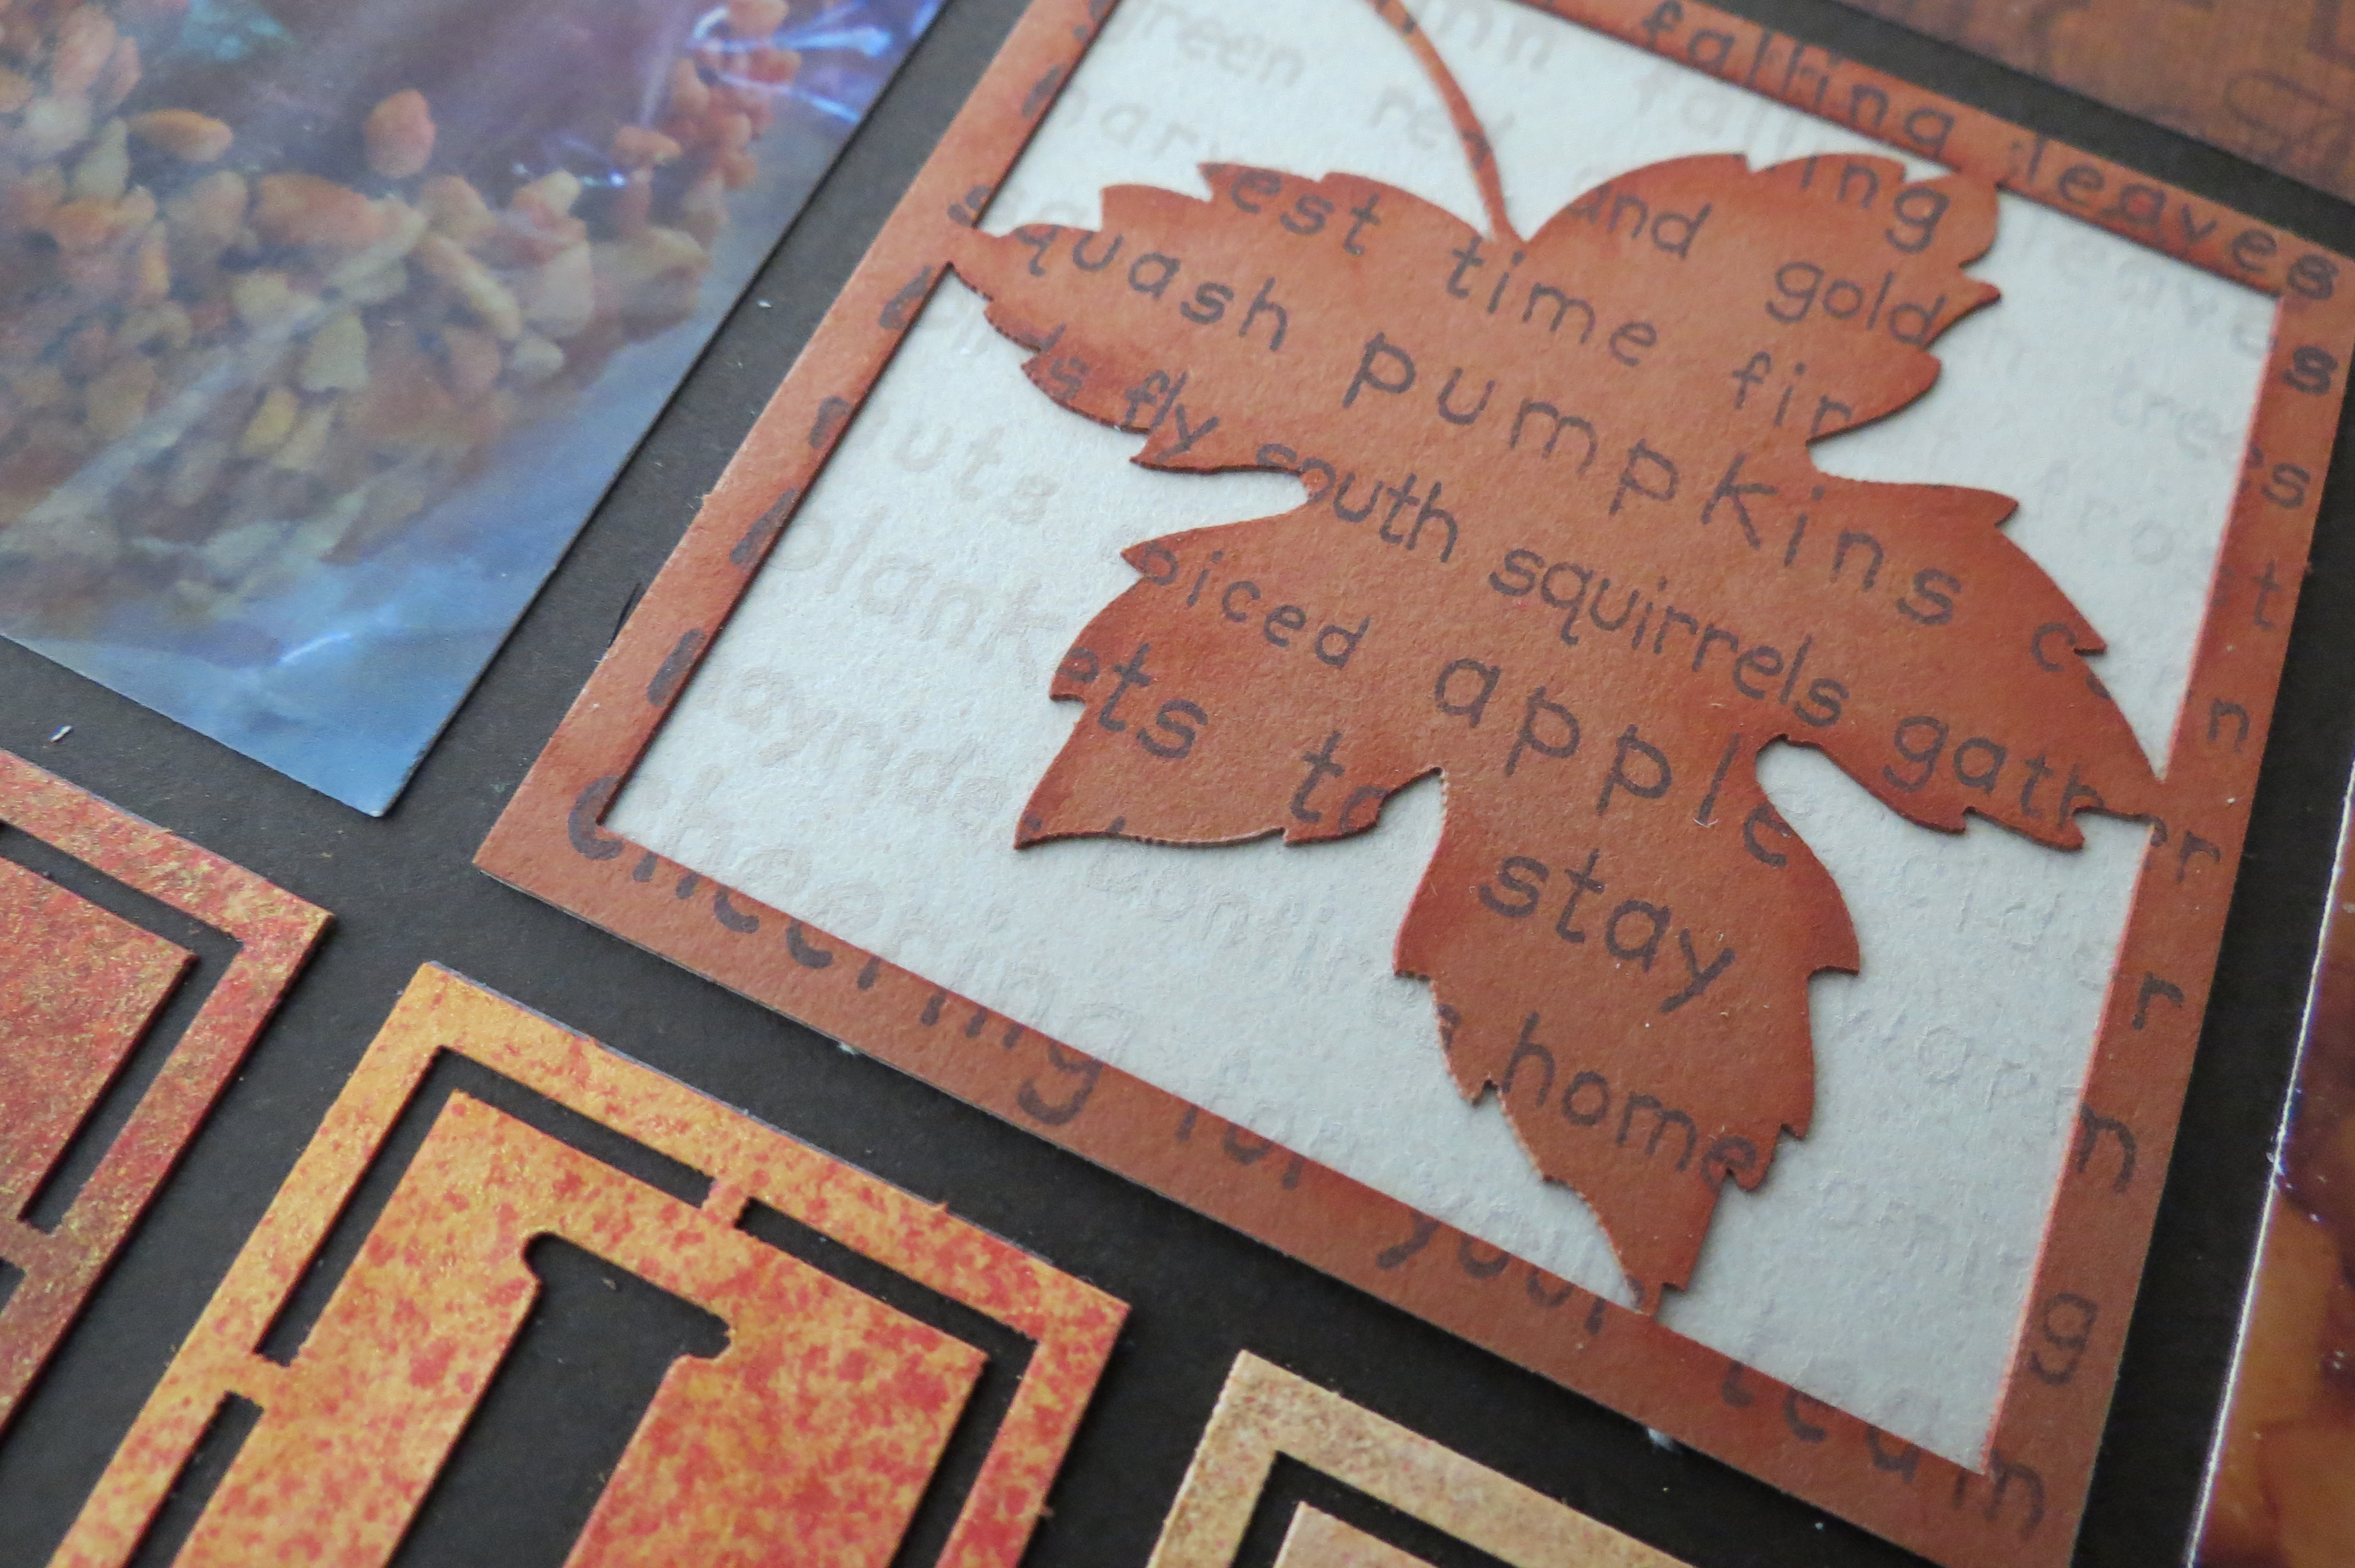
Fall Flourish #3 Cornerstones This cornerstone has been double stamped with fall words for added interest and also inked edges.
Other cornerstones used were spruced up by misting to add color.
Fall Flourishes #3 Cornerstones These word and date cornerstone tiles have been misted with Tattered Angels mists for festive fall colors.
You can find the complete layout on the Story Board on Journella HERE.
Finally, Sequin Shaker Blocks
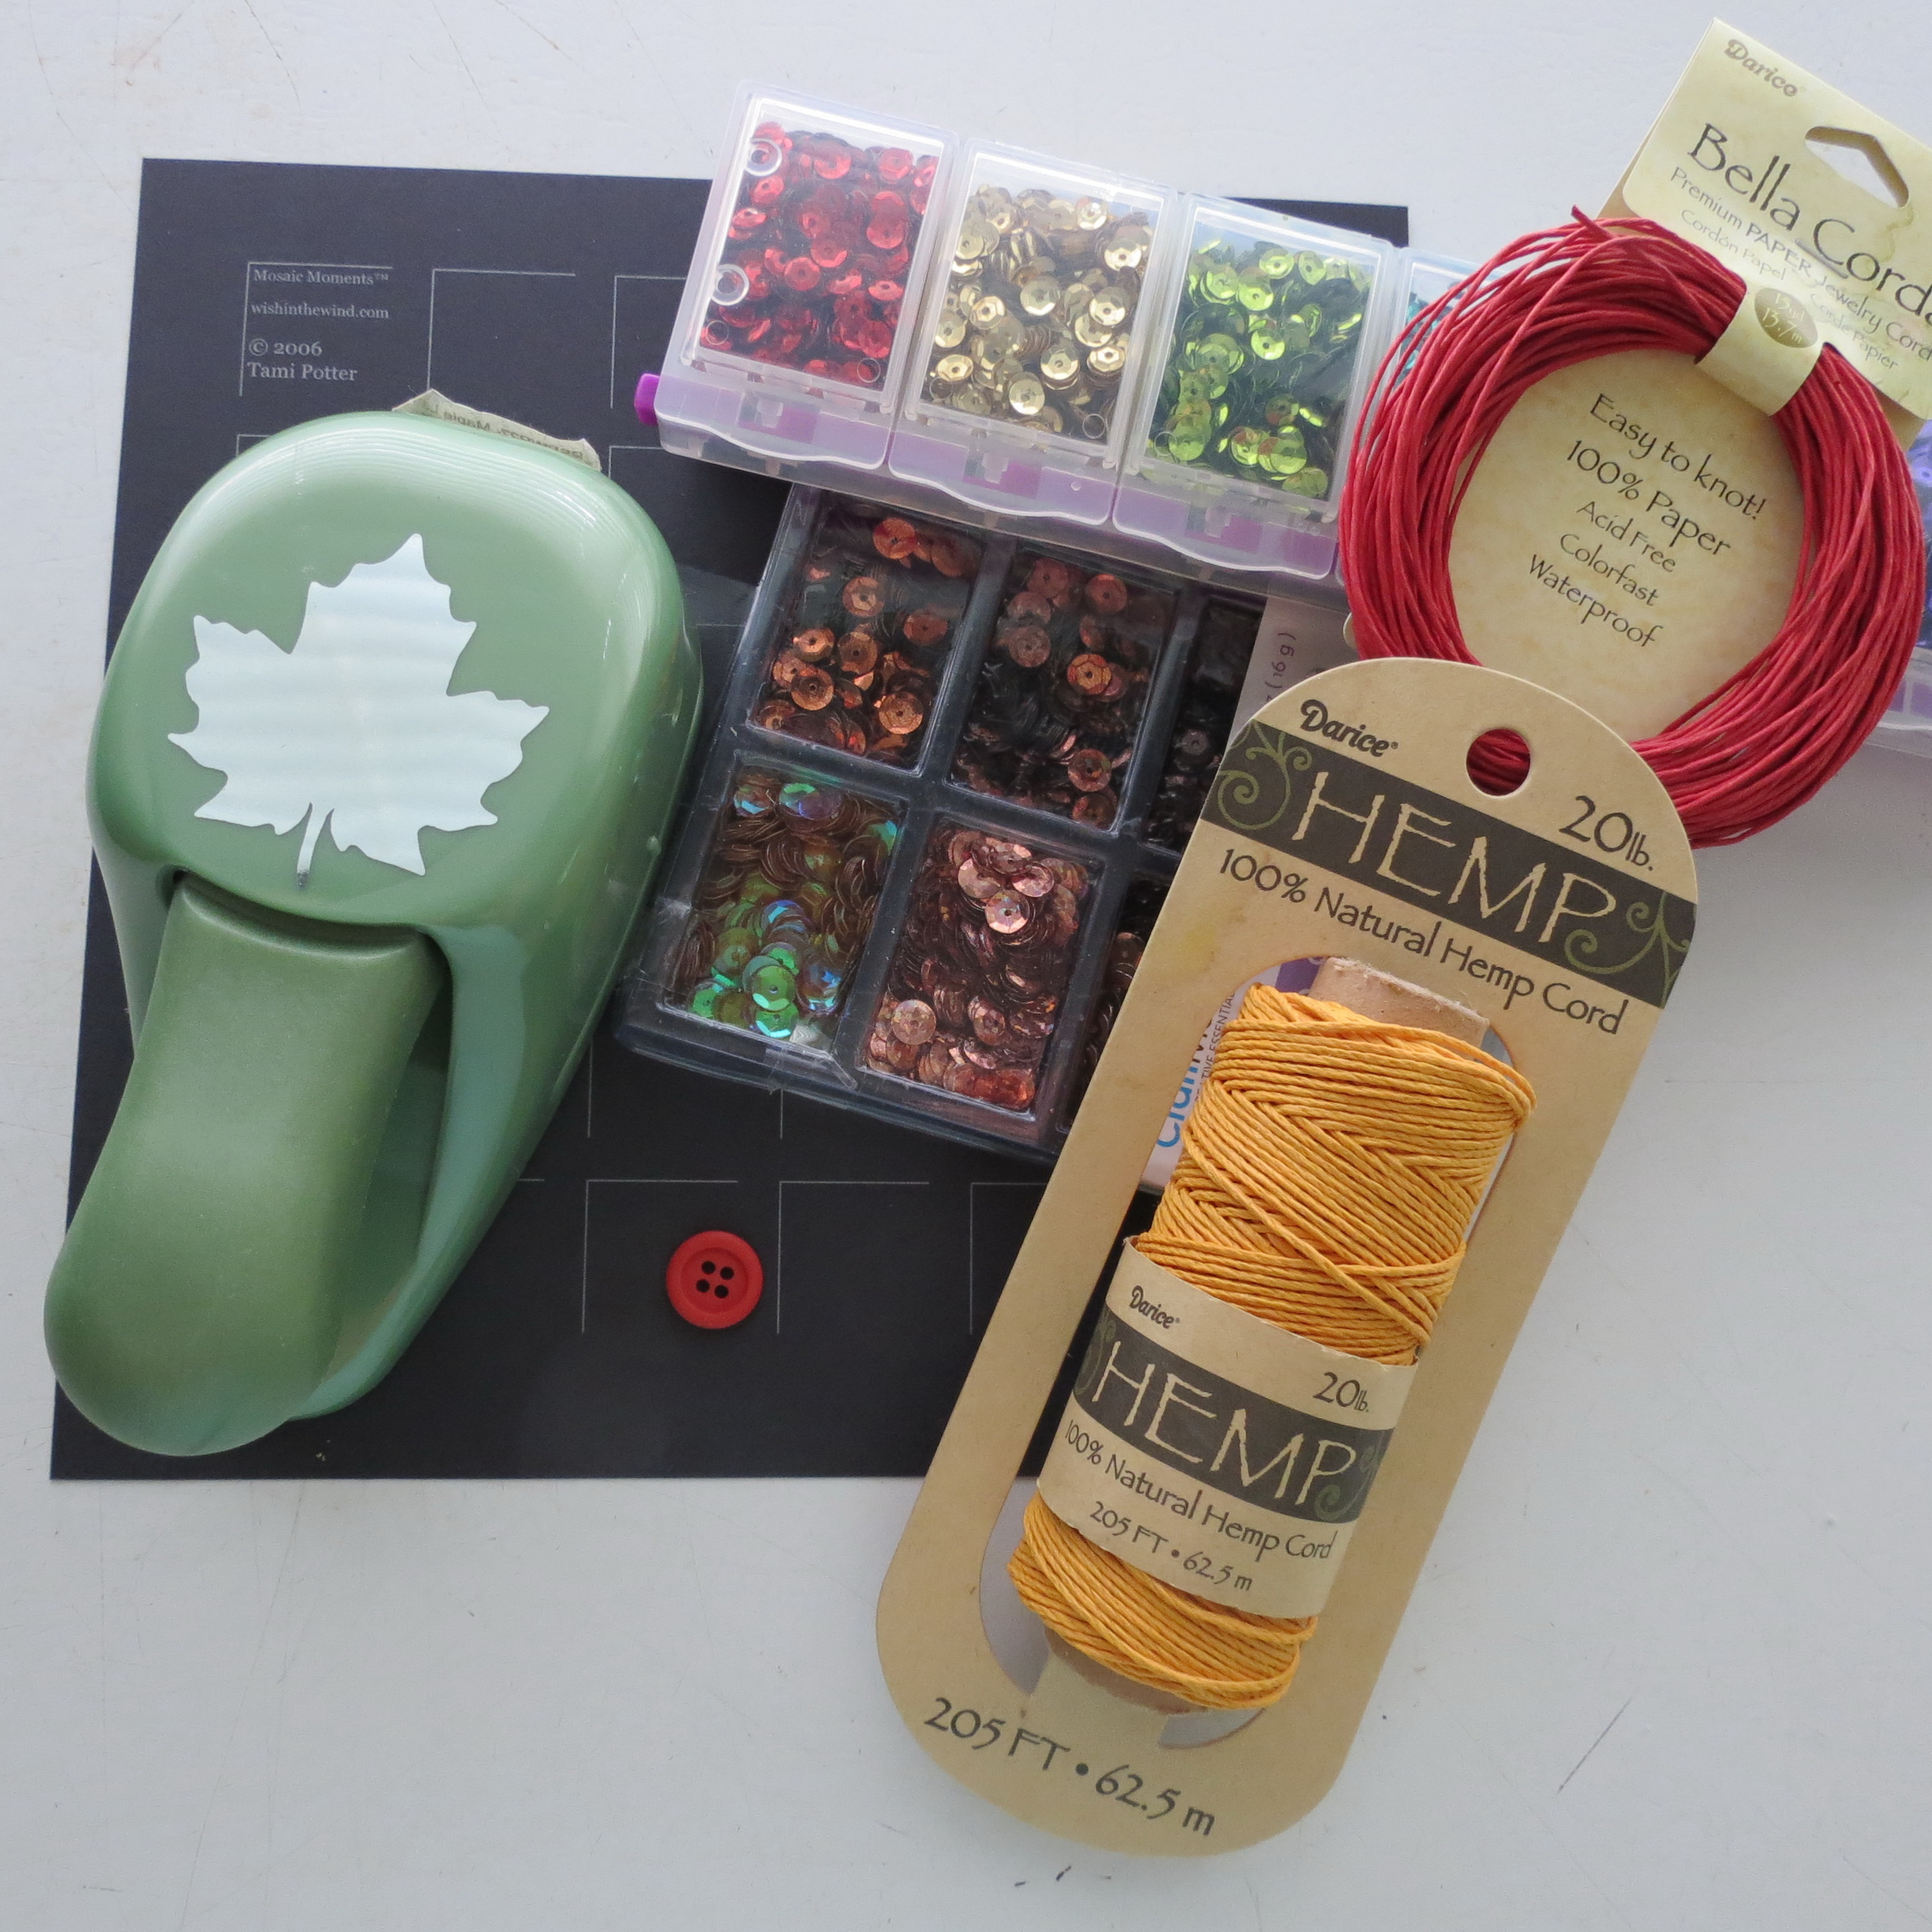
Fall Flourishes- Gathering supplies to create a page with a shaker sequins block.
This fall flourish border creates a shaker style box to fit a block section that can go anywhere on your page as a top, side or bottom border, or any block in a number of sections within your layout. I’ve chosen to run the side length of the 8 x 8” Black Mosaic Moments Grid Paper with my border and fill the remaining page with three photos.
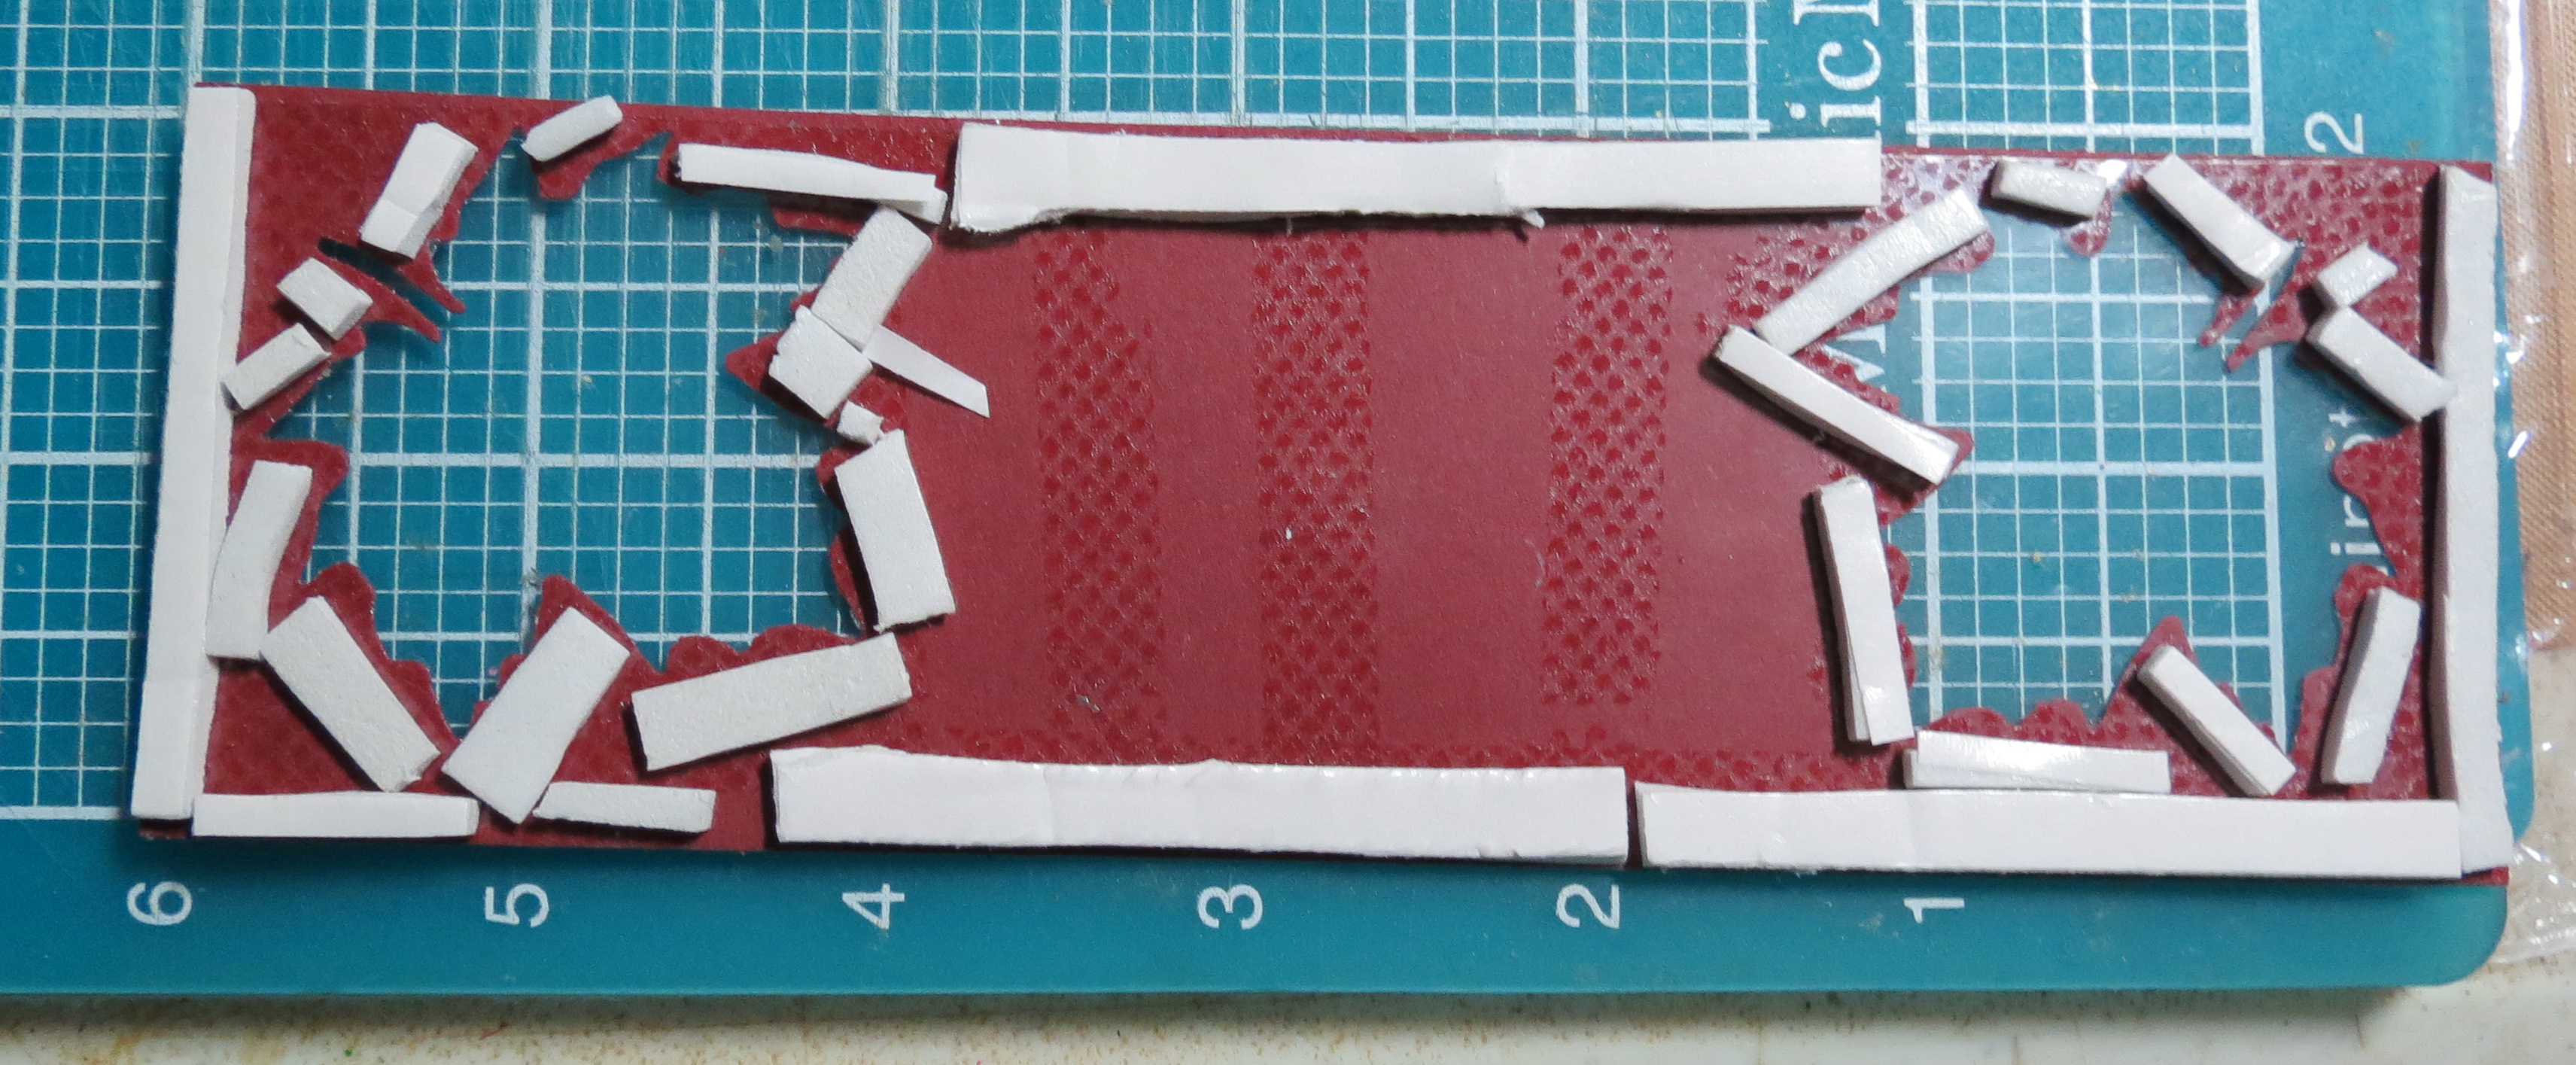
This border piece requires a punched leaf section that is enhanced with gold or copper ink stamped the length of the tile. Then punch the leaf out of the section at the top and the bottom.
Fall Flourish #4 Shaker Sequin Block Top is inked in gold and punched, sequins fill space backed with orange.
For the next step you will also need a bit of clear acetate, foam mounting tape and sequins. Sequins are one of the newest trends showing up in scrapbooking, and the colors are endless!
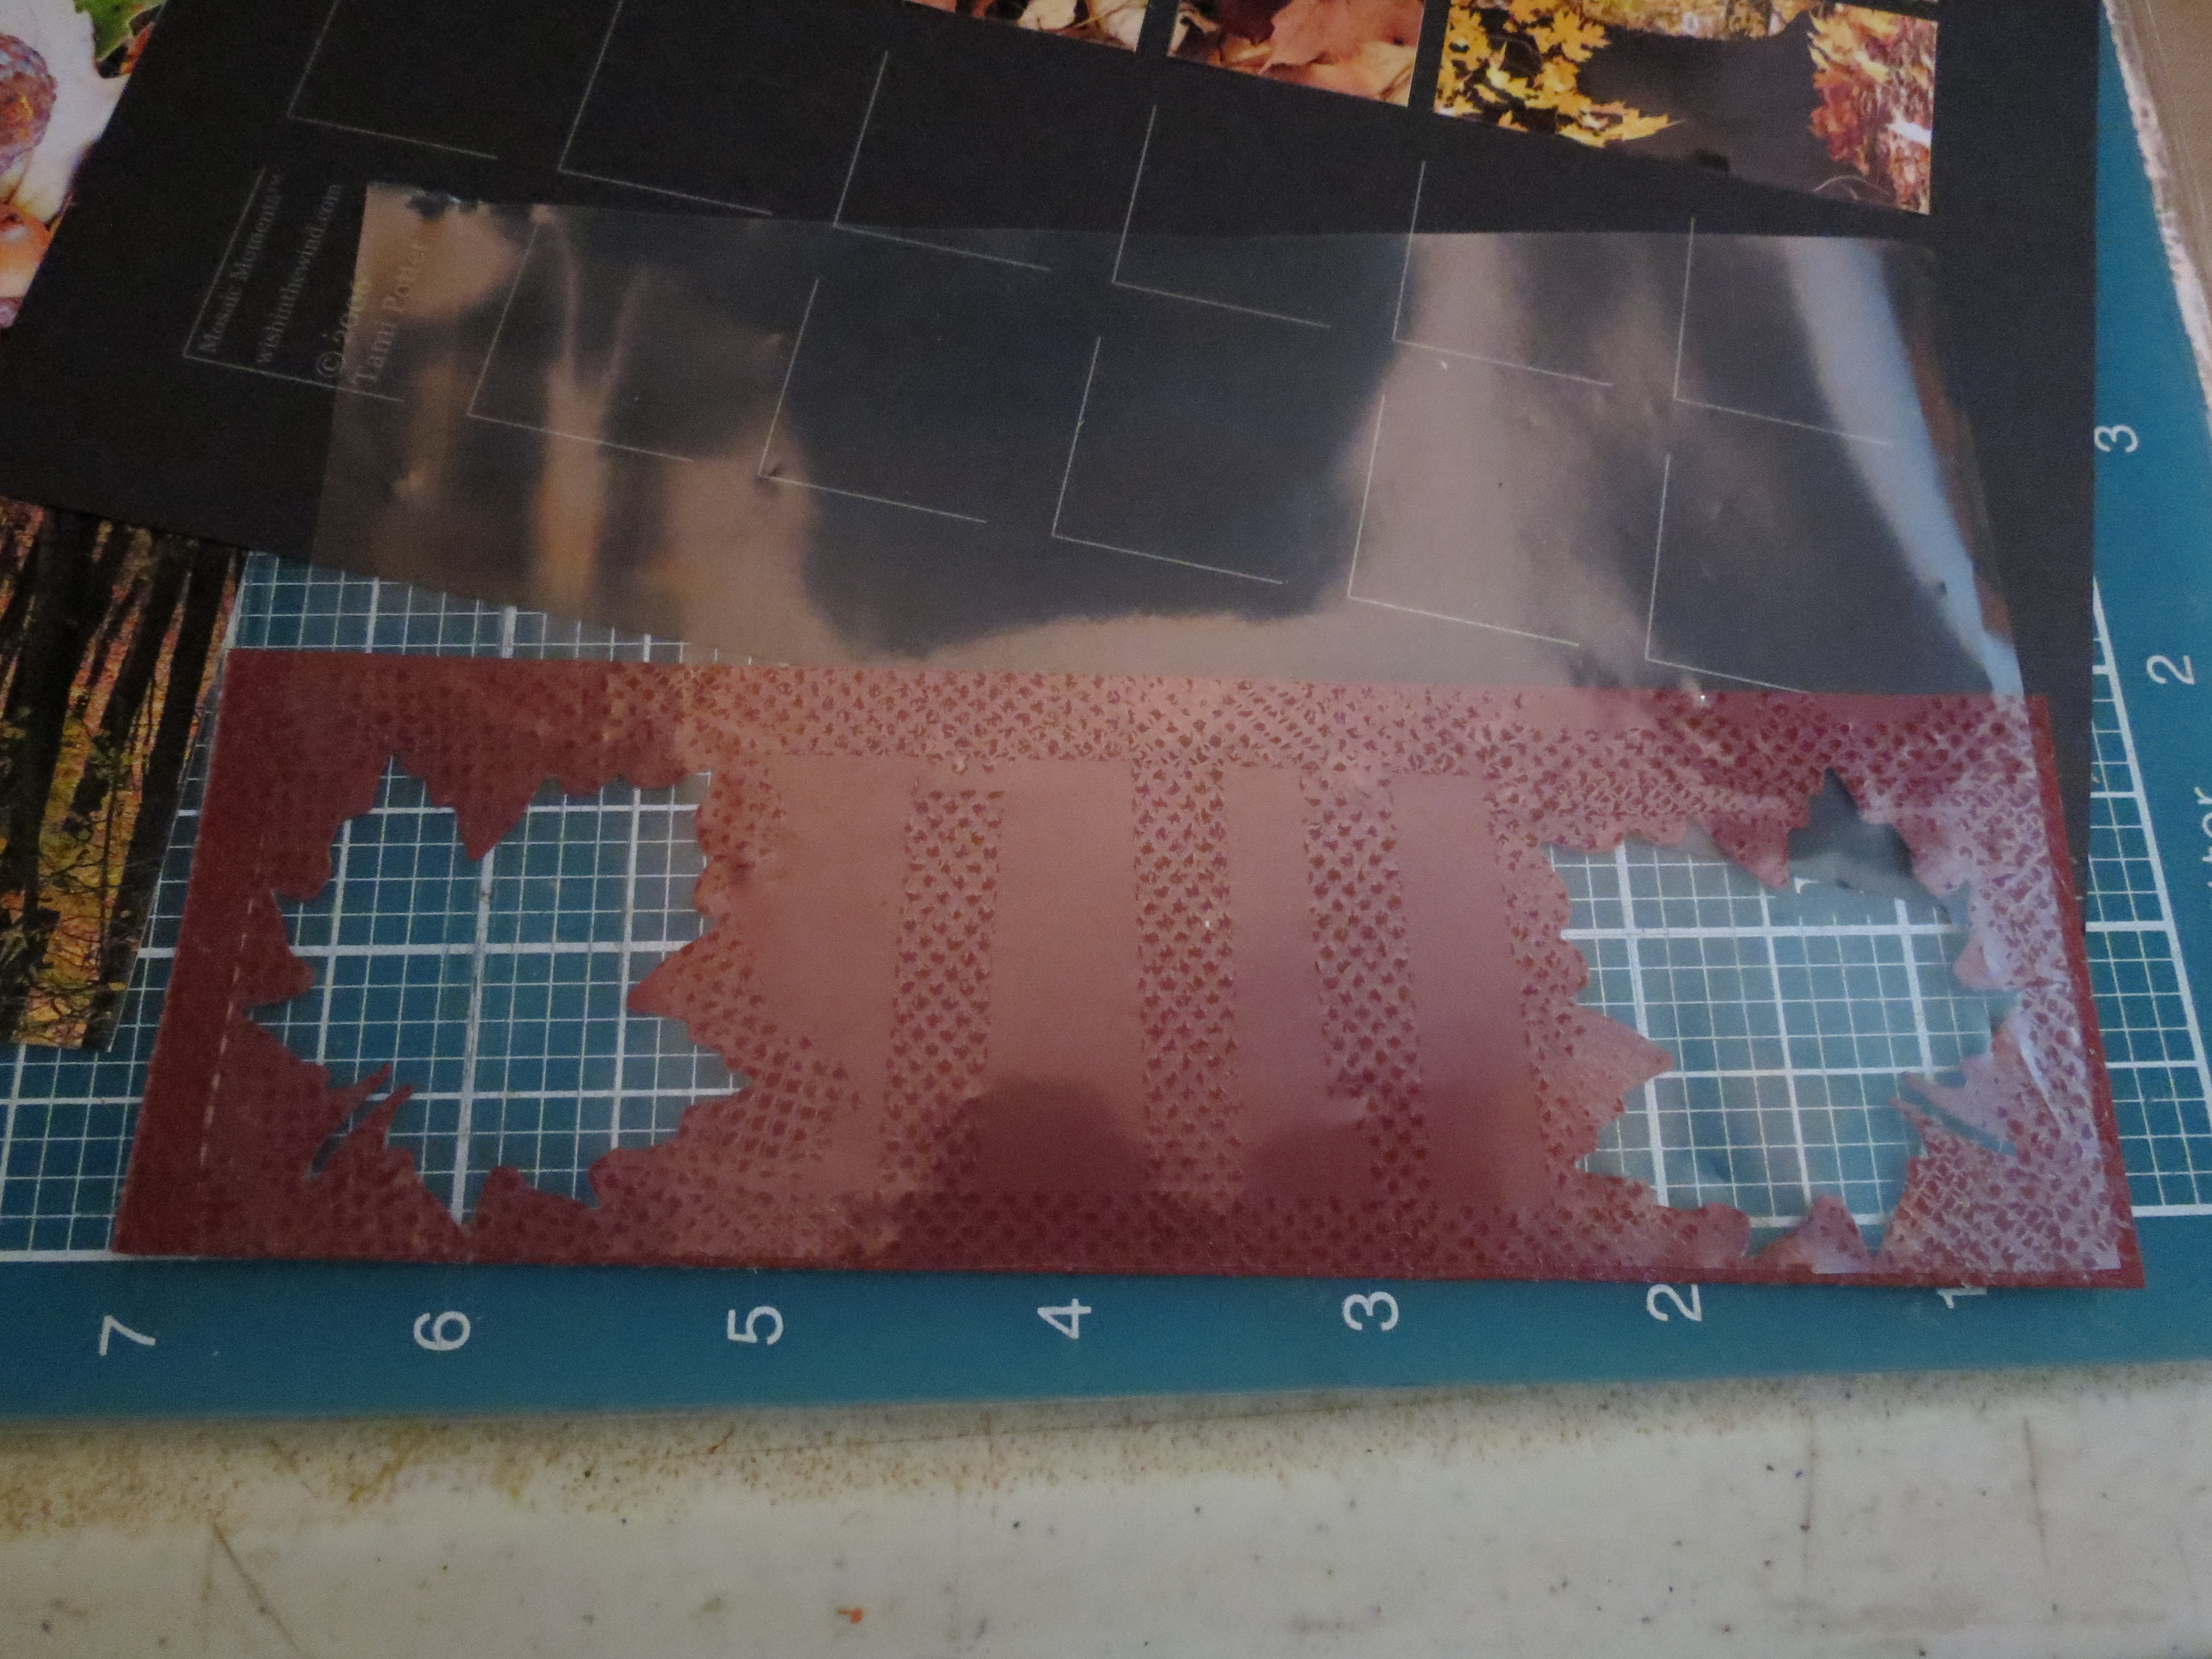
Fall Flourish #4 Shaker Sequin Block Applying acetate over punched shape.
On the backside of your tile you will apply the acetate with adhesive to cover the punched area and then apply bits of foam mounting tape around the shape edges (on the acetate) to create a space where the sequins will move freely, without falling out.
Fall Flourish #4 Shaker Sequin Block Foam Mounting tape to outline shape and hold sequins in securely.
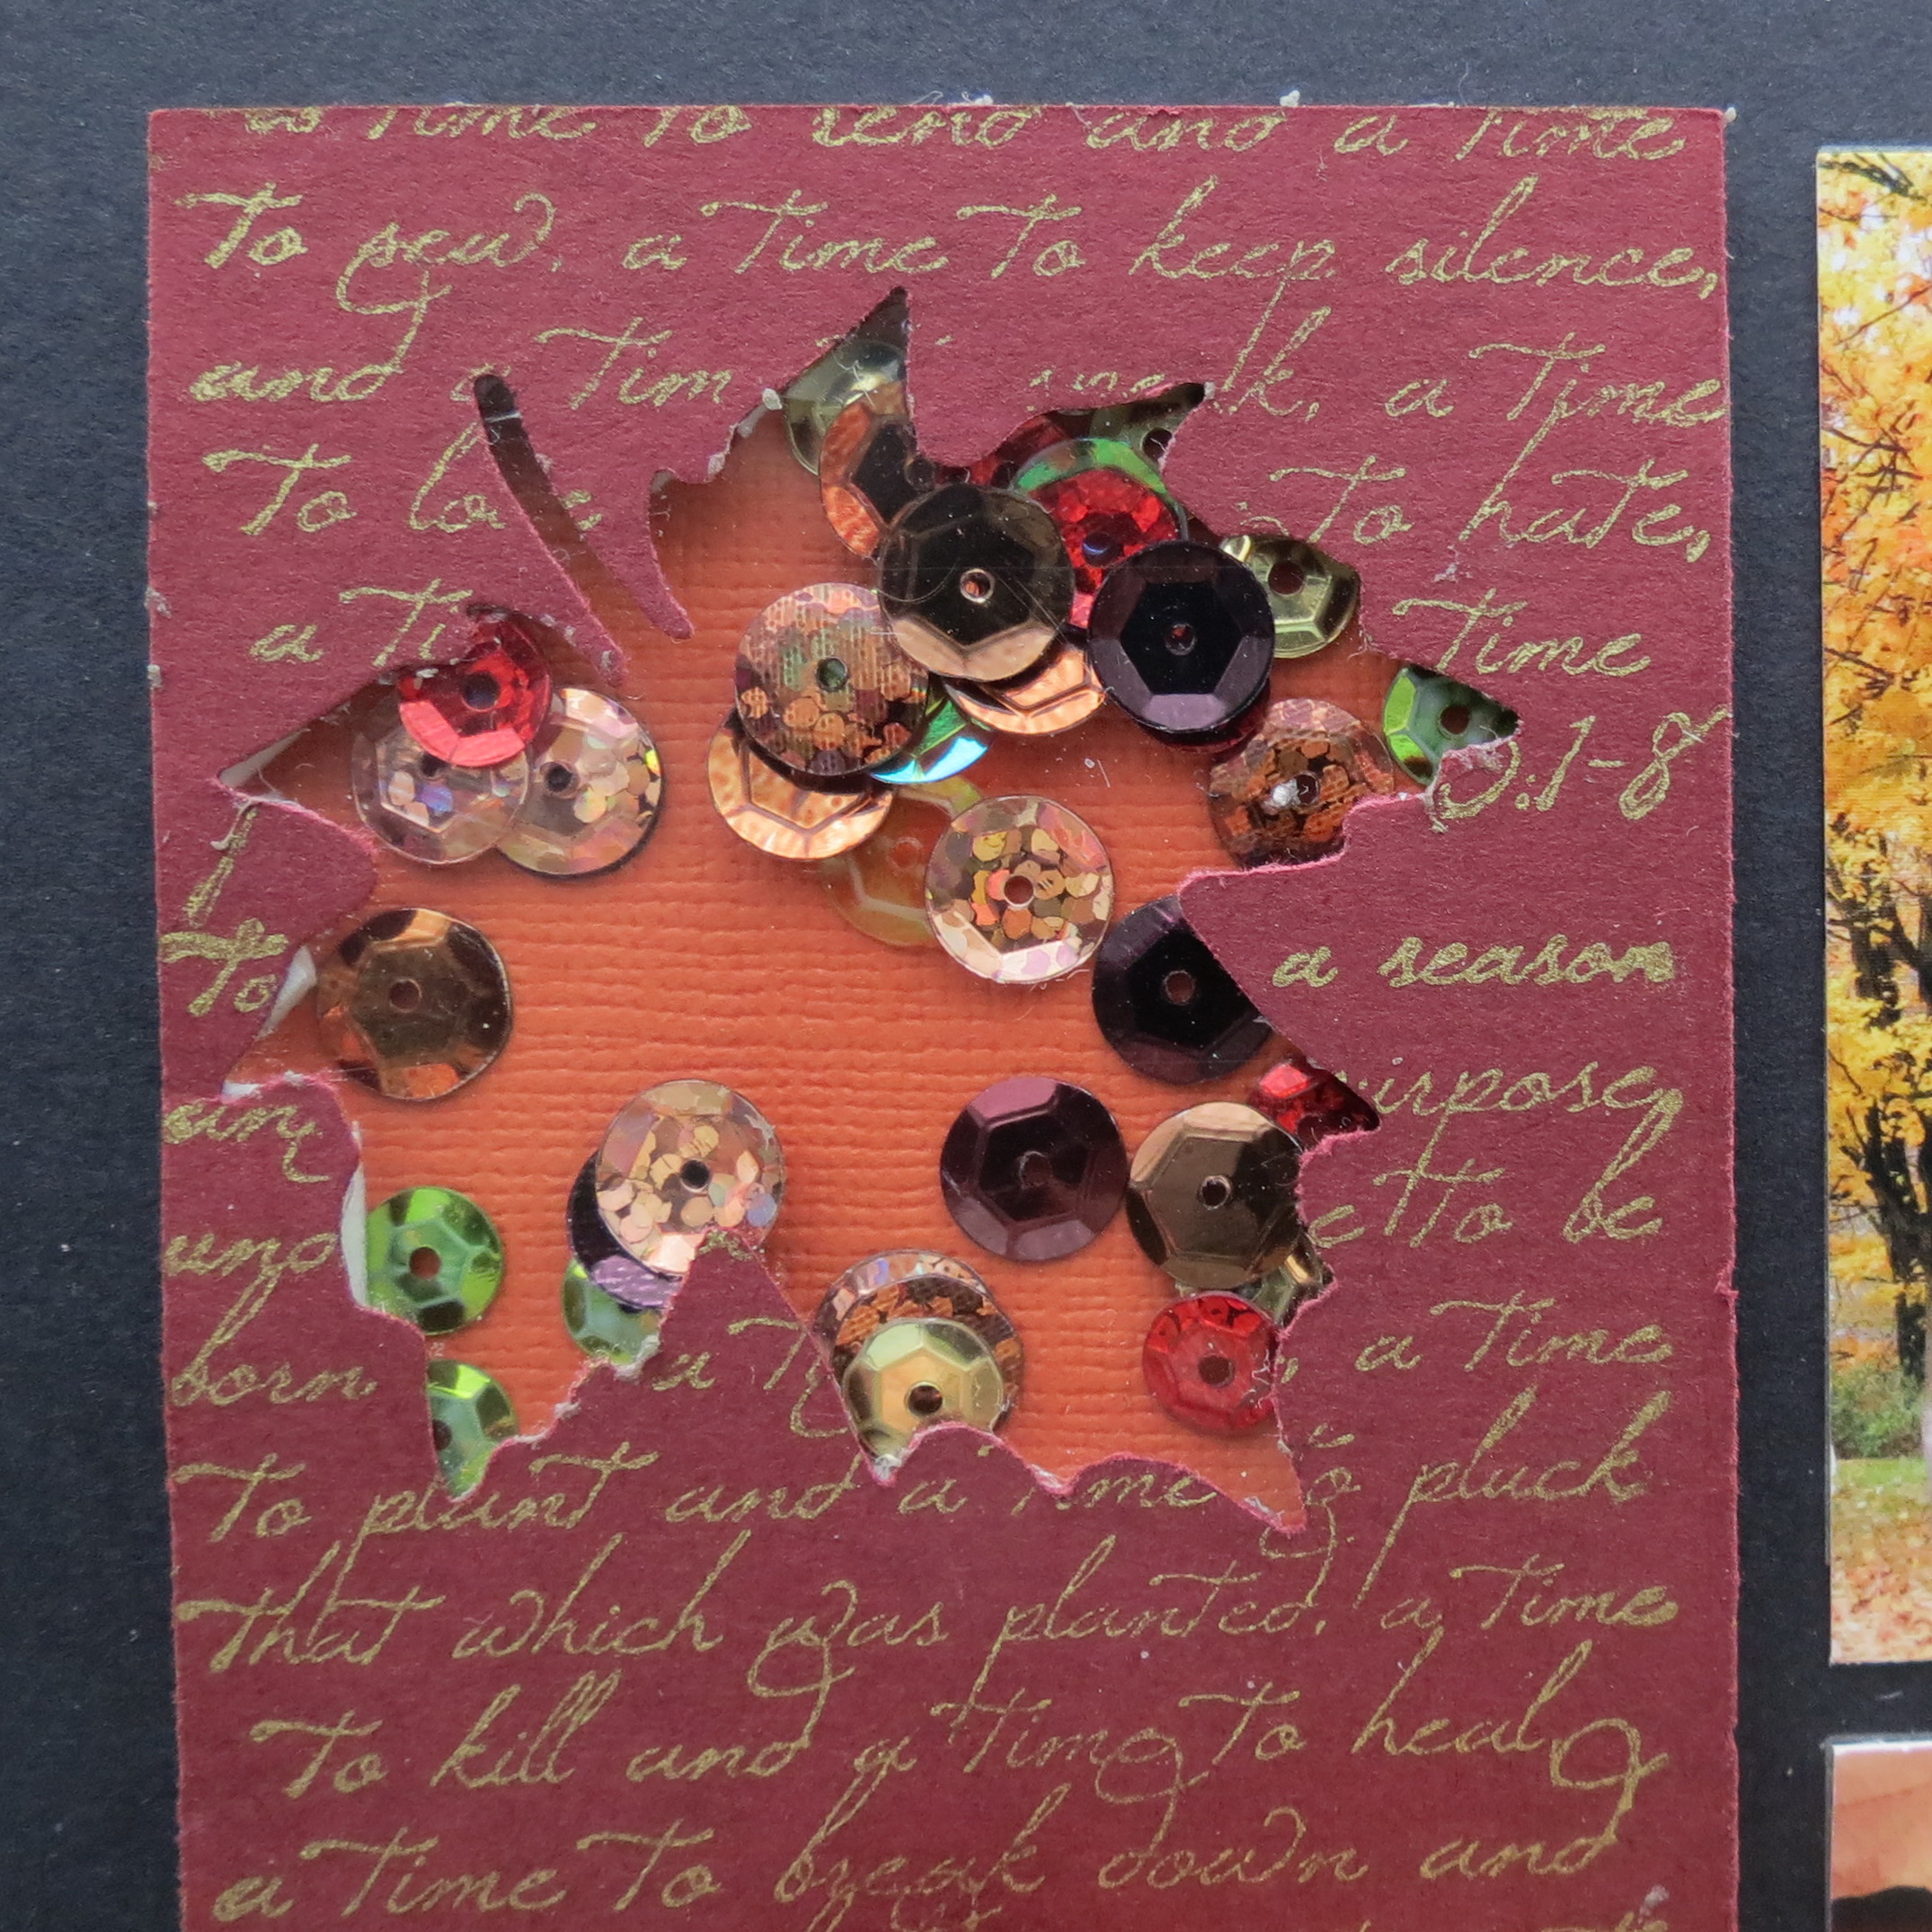
I have chosen sequins in several colors, red, green, gold, copper, bronze and several shades of brown. In the open space, toss in a few sequins of each color and then apply a backing to match the size of the front creating an enclosed shaker tile. I used a lighter color for the backing than the top, for some contrast.
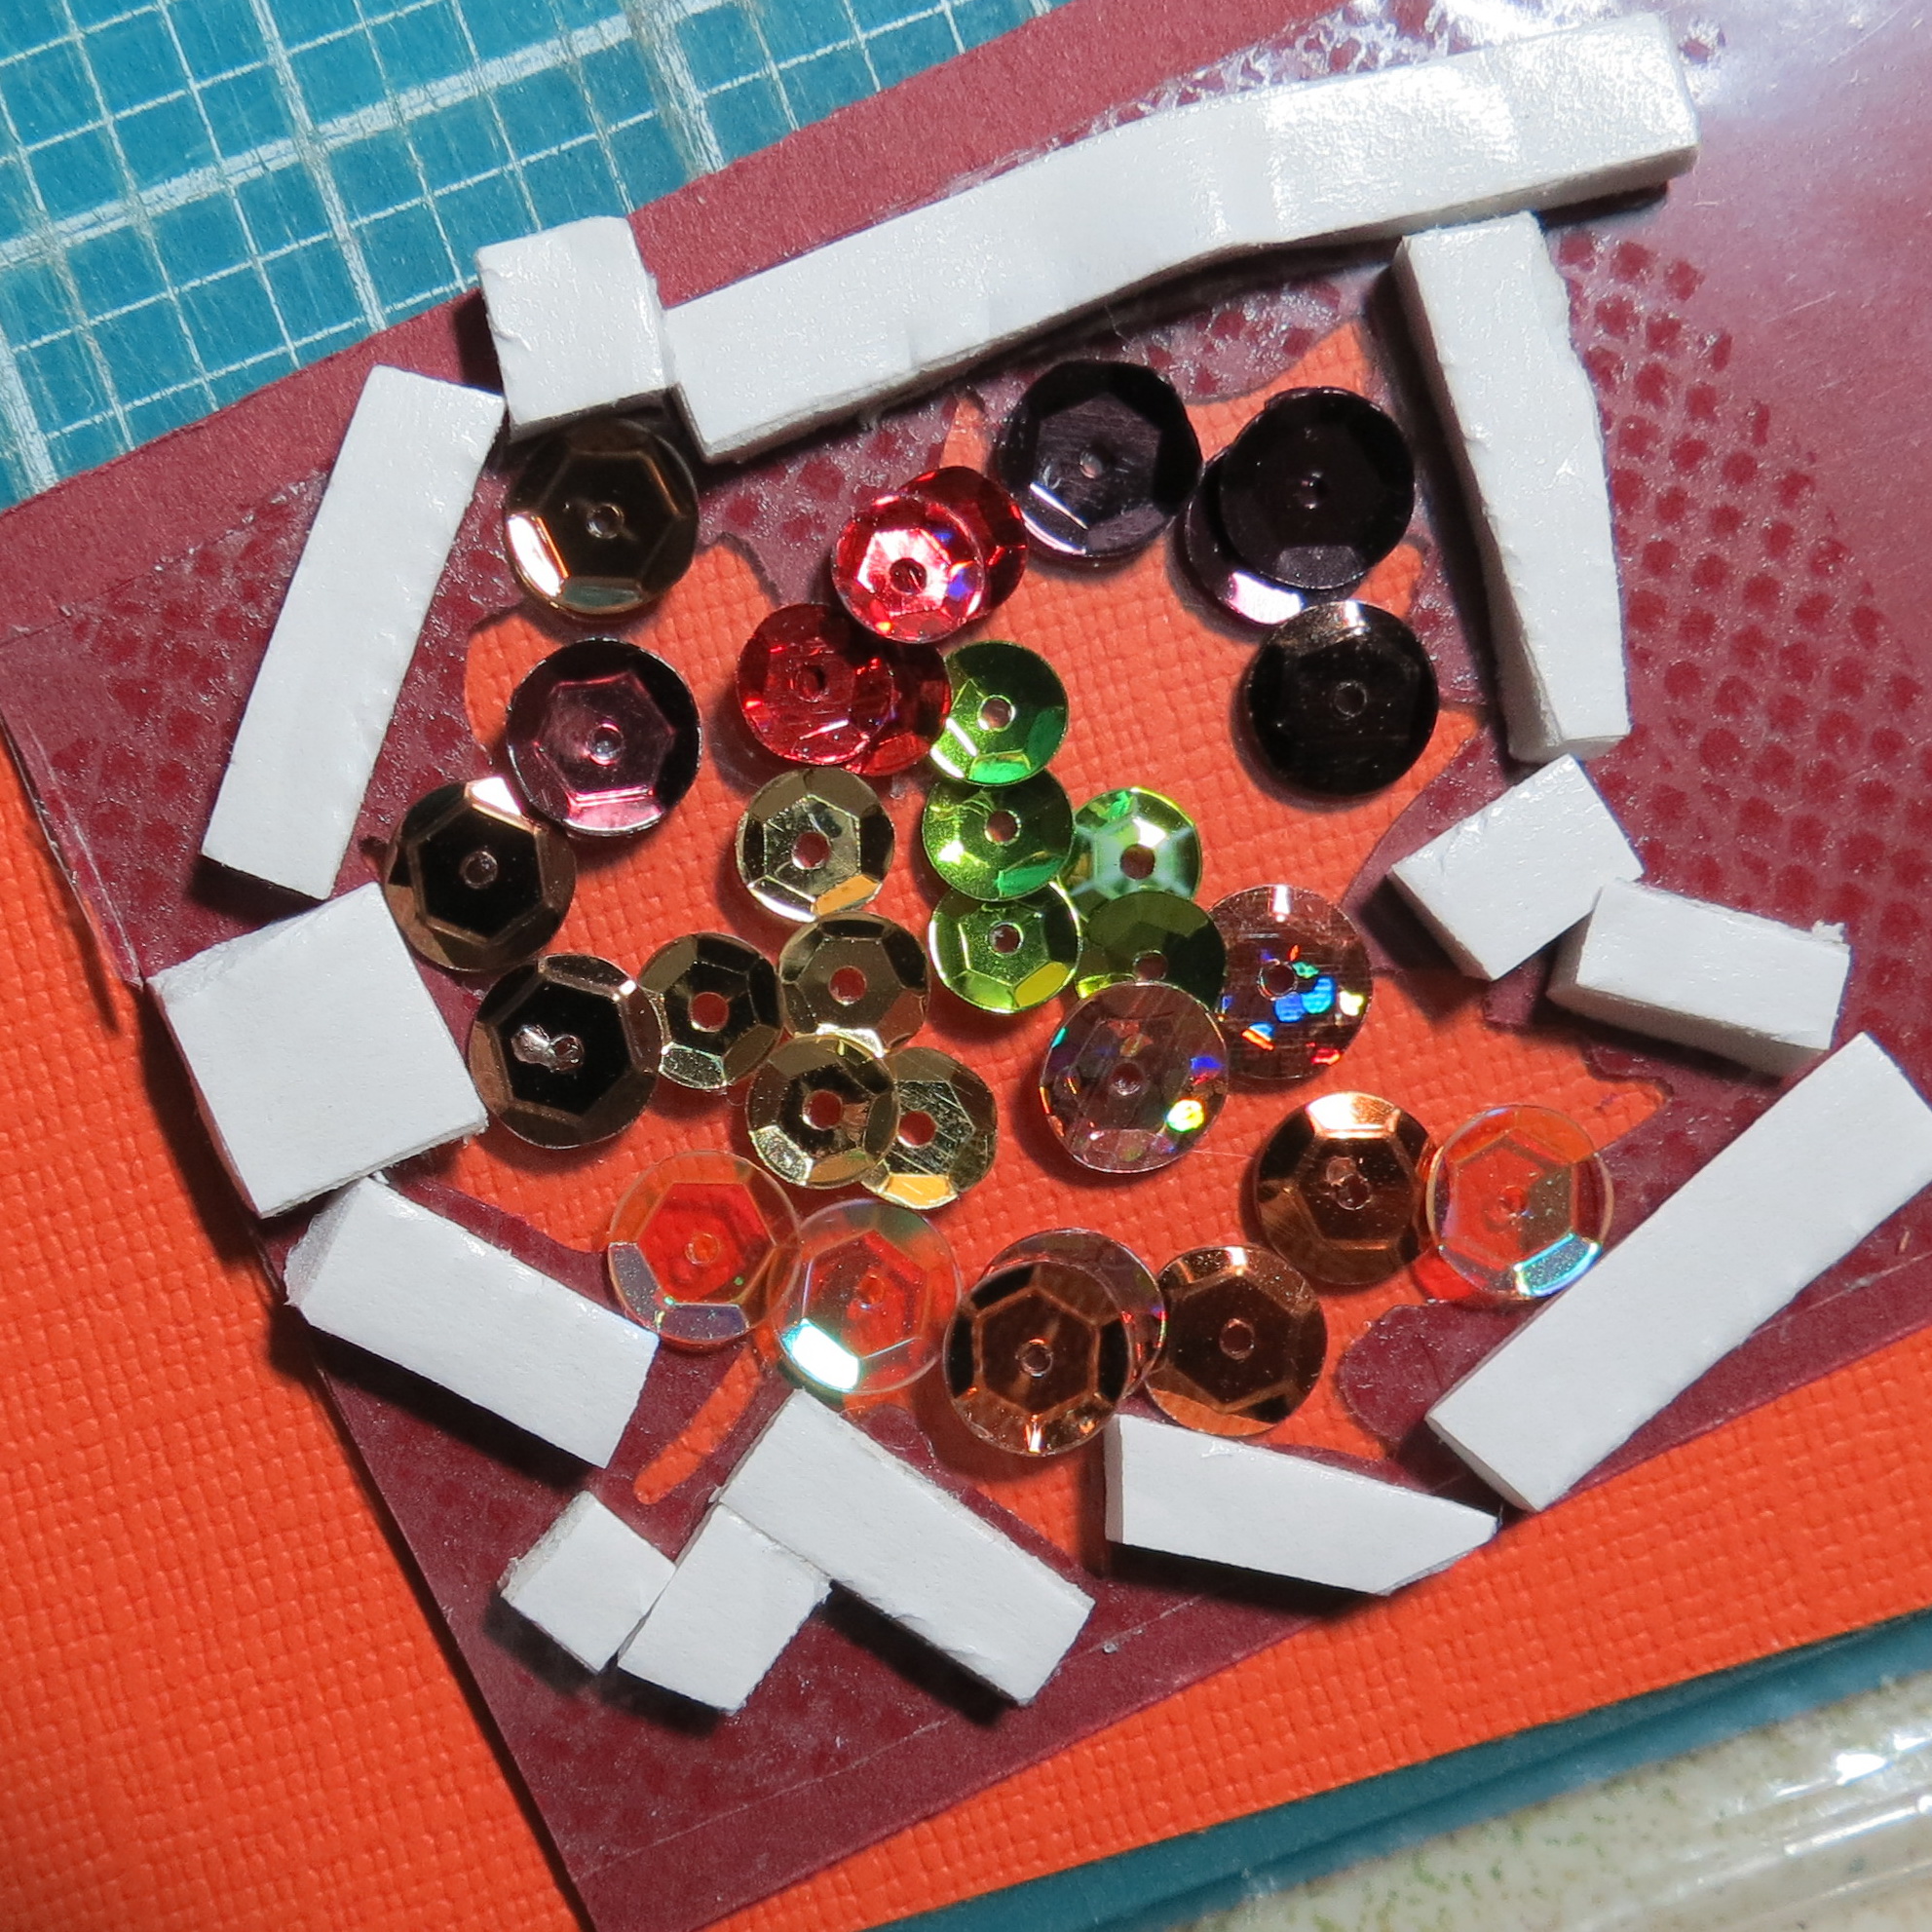
Fall Flourish #4 Shaker Sequin Block Fill the area with a variety of sequins in fall colors.
To finish off the front of this tile block I added a double bow of hemp cording, a piece of paper cording with two of the maple leaves knotted at the ends and a button to the center of the tile.
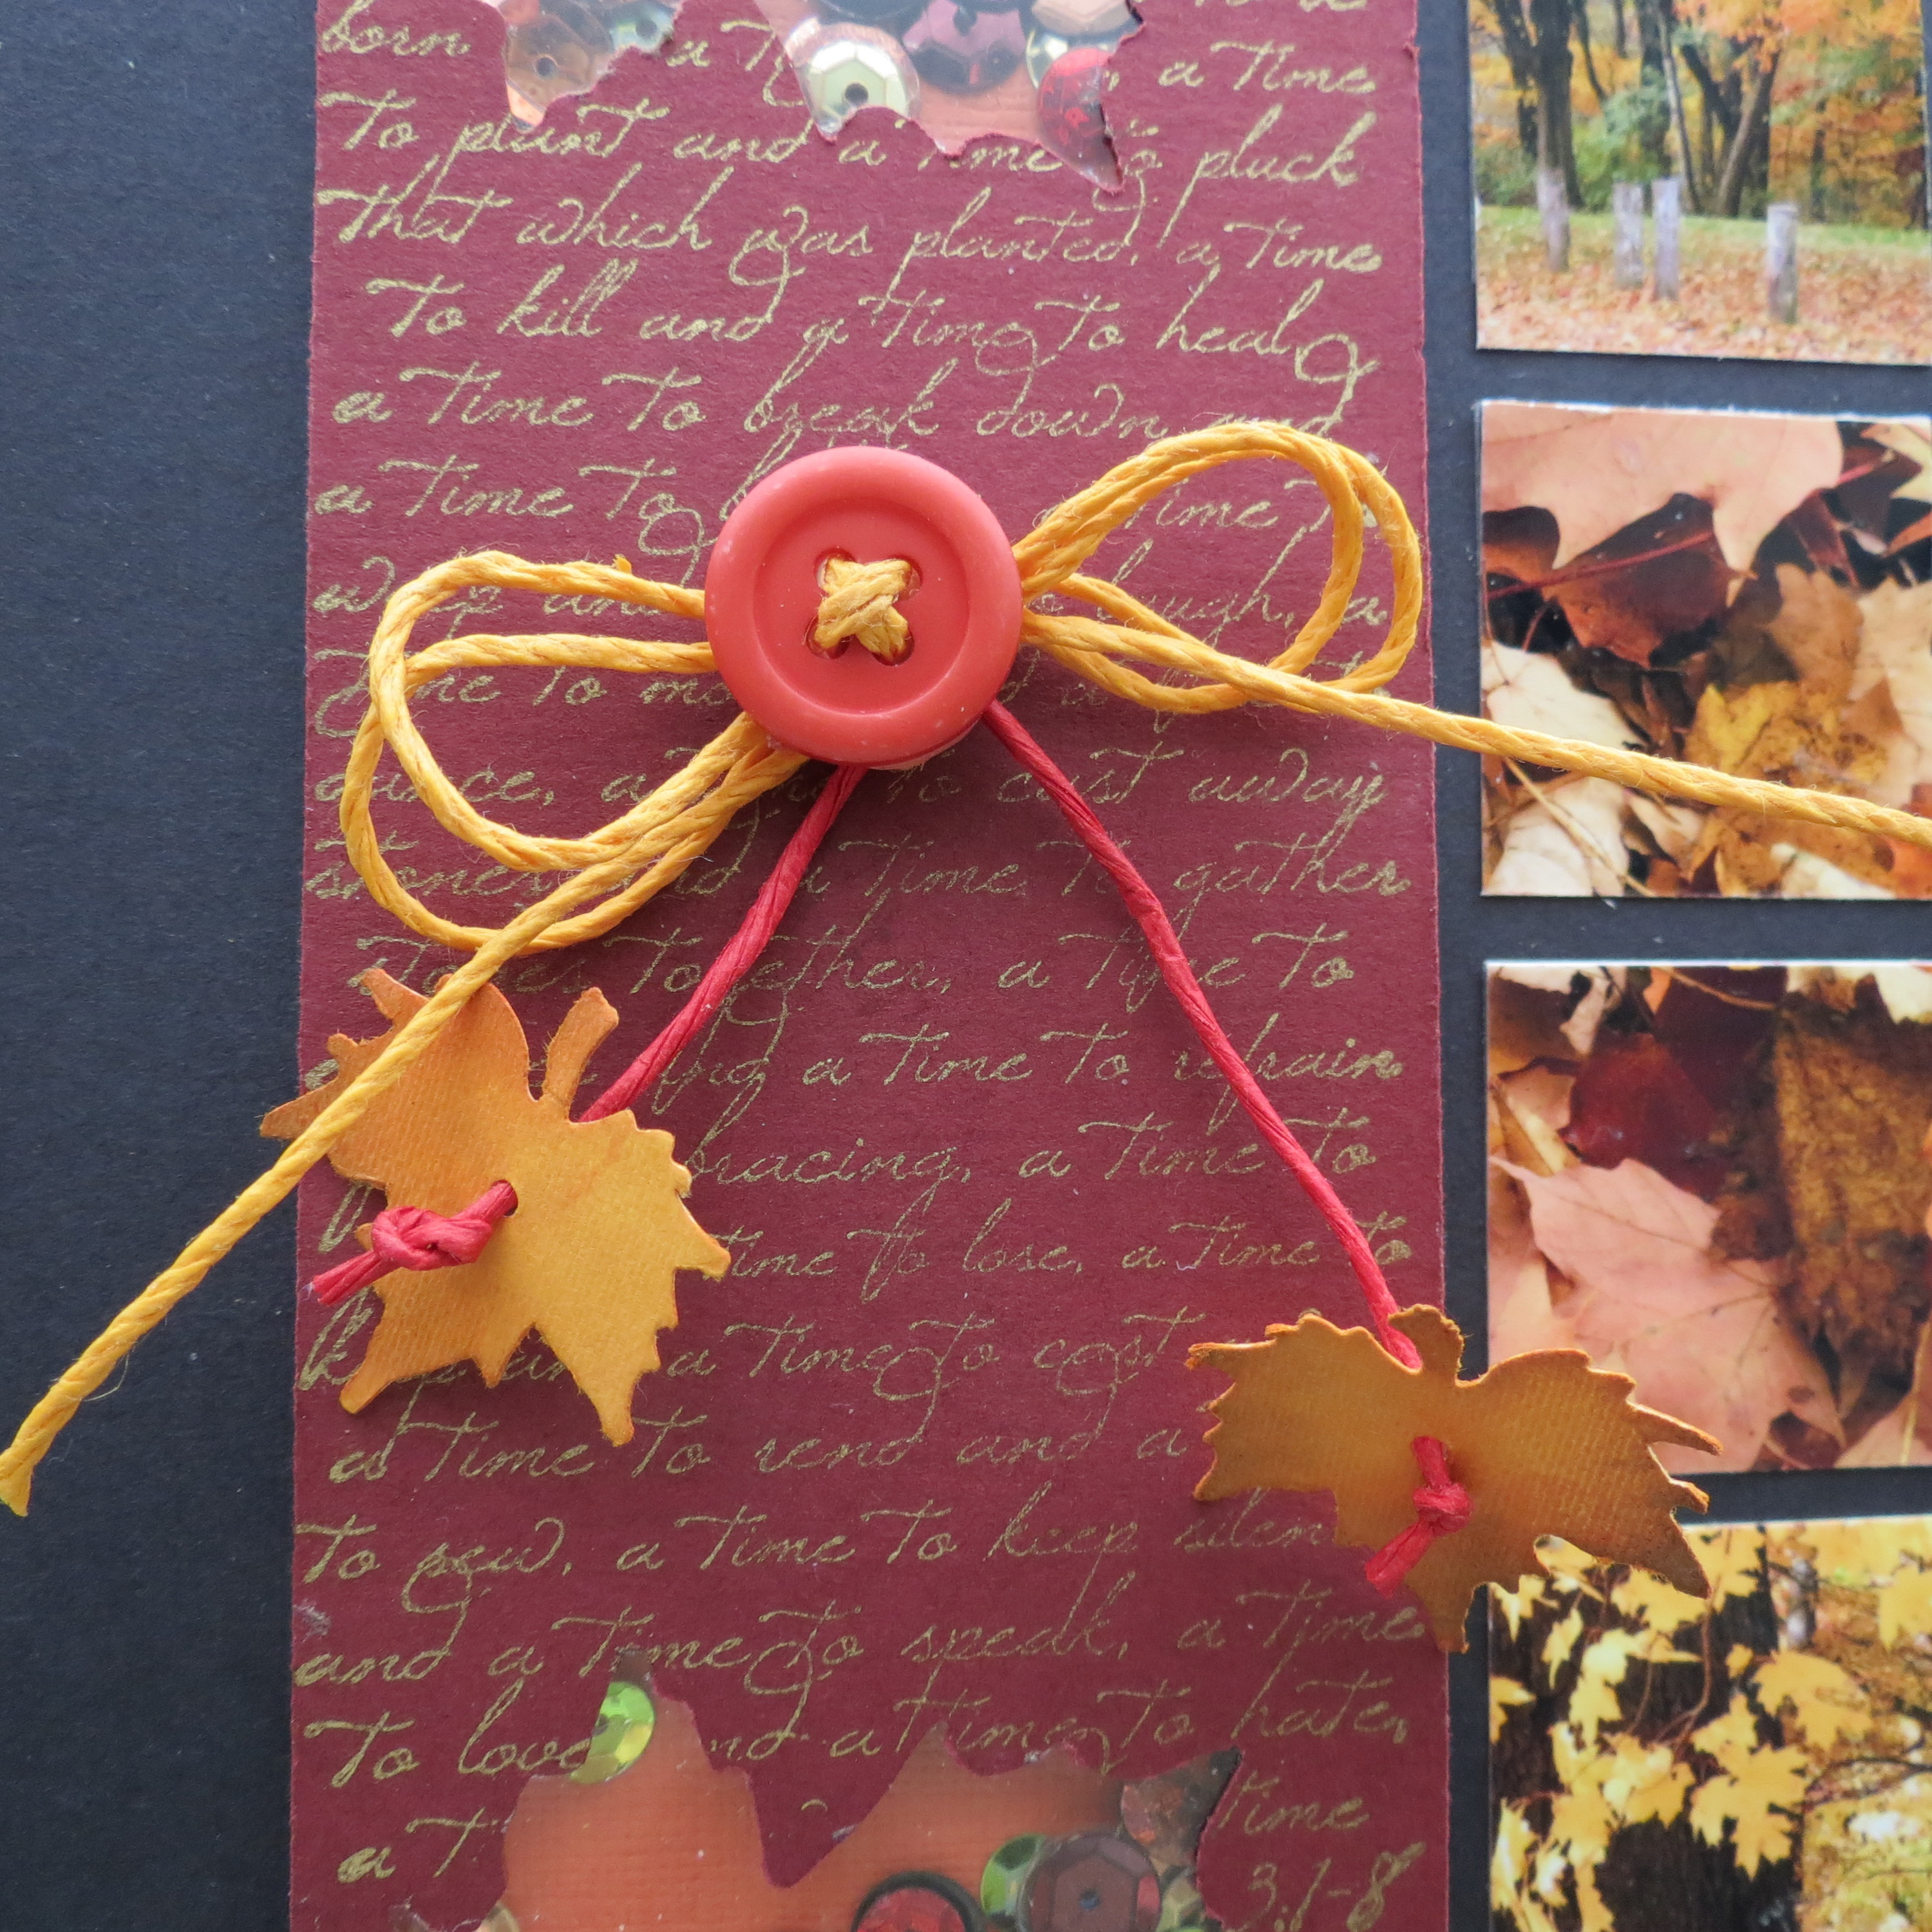
Fall Flourish #4 Shaker Sequin Block Final touches with a bow!
I saw a tag on a card made using this technique and thought it would be a nice addition as an embellishment and be a perfect fit for the Mosaic Moments Grid style. What do you think?
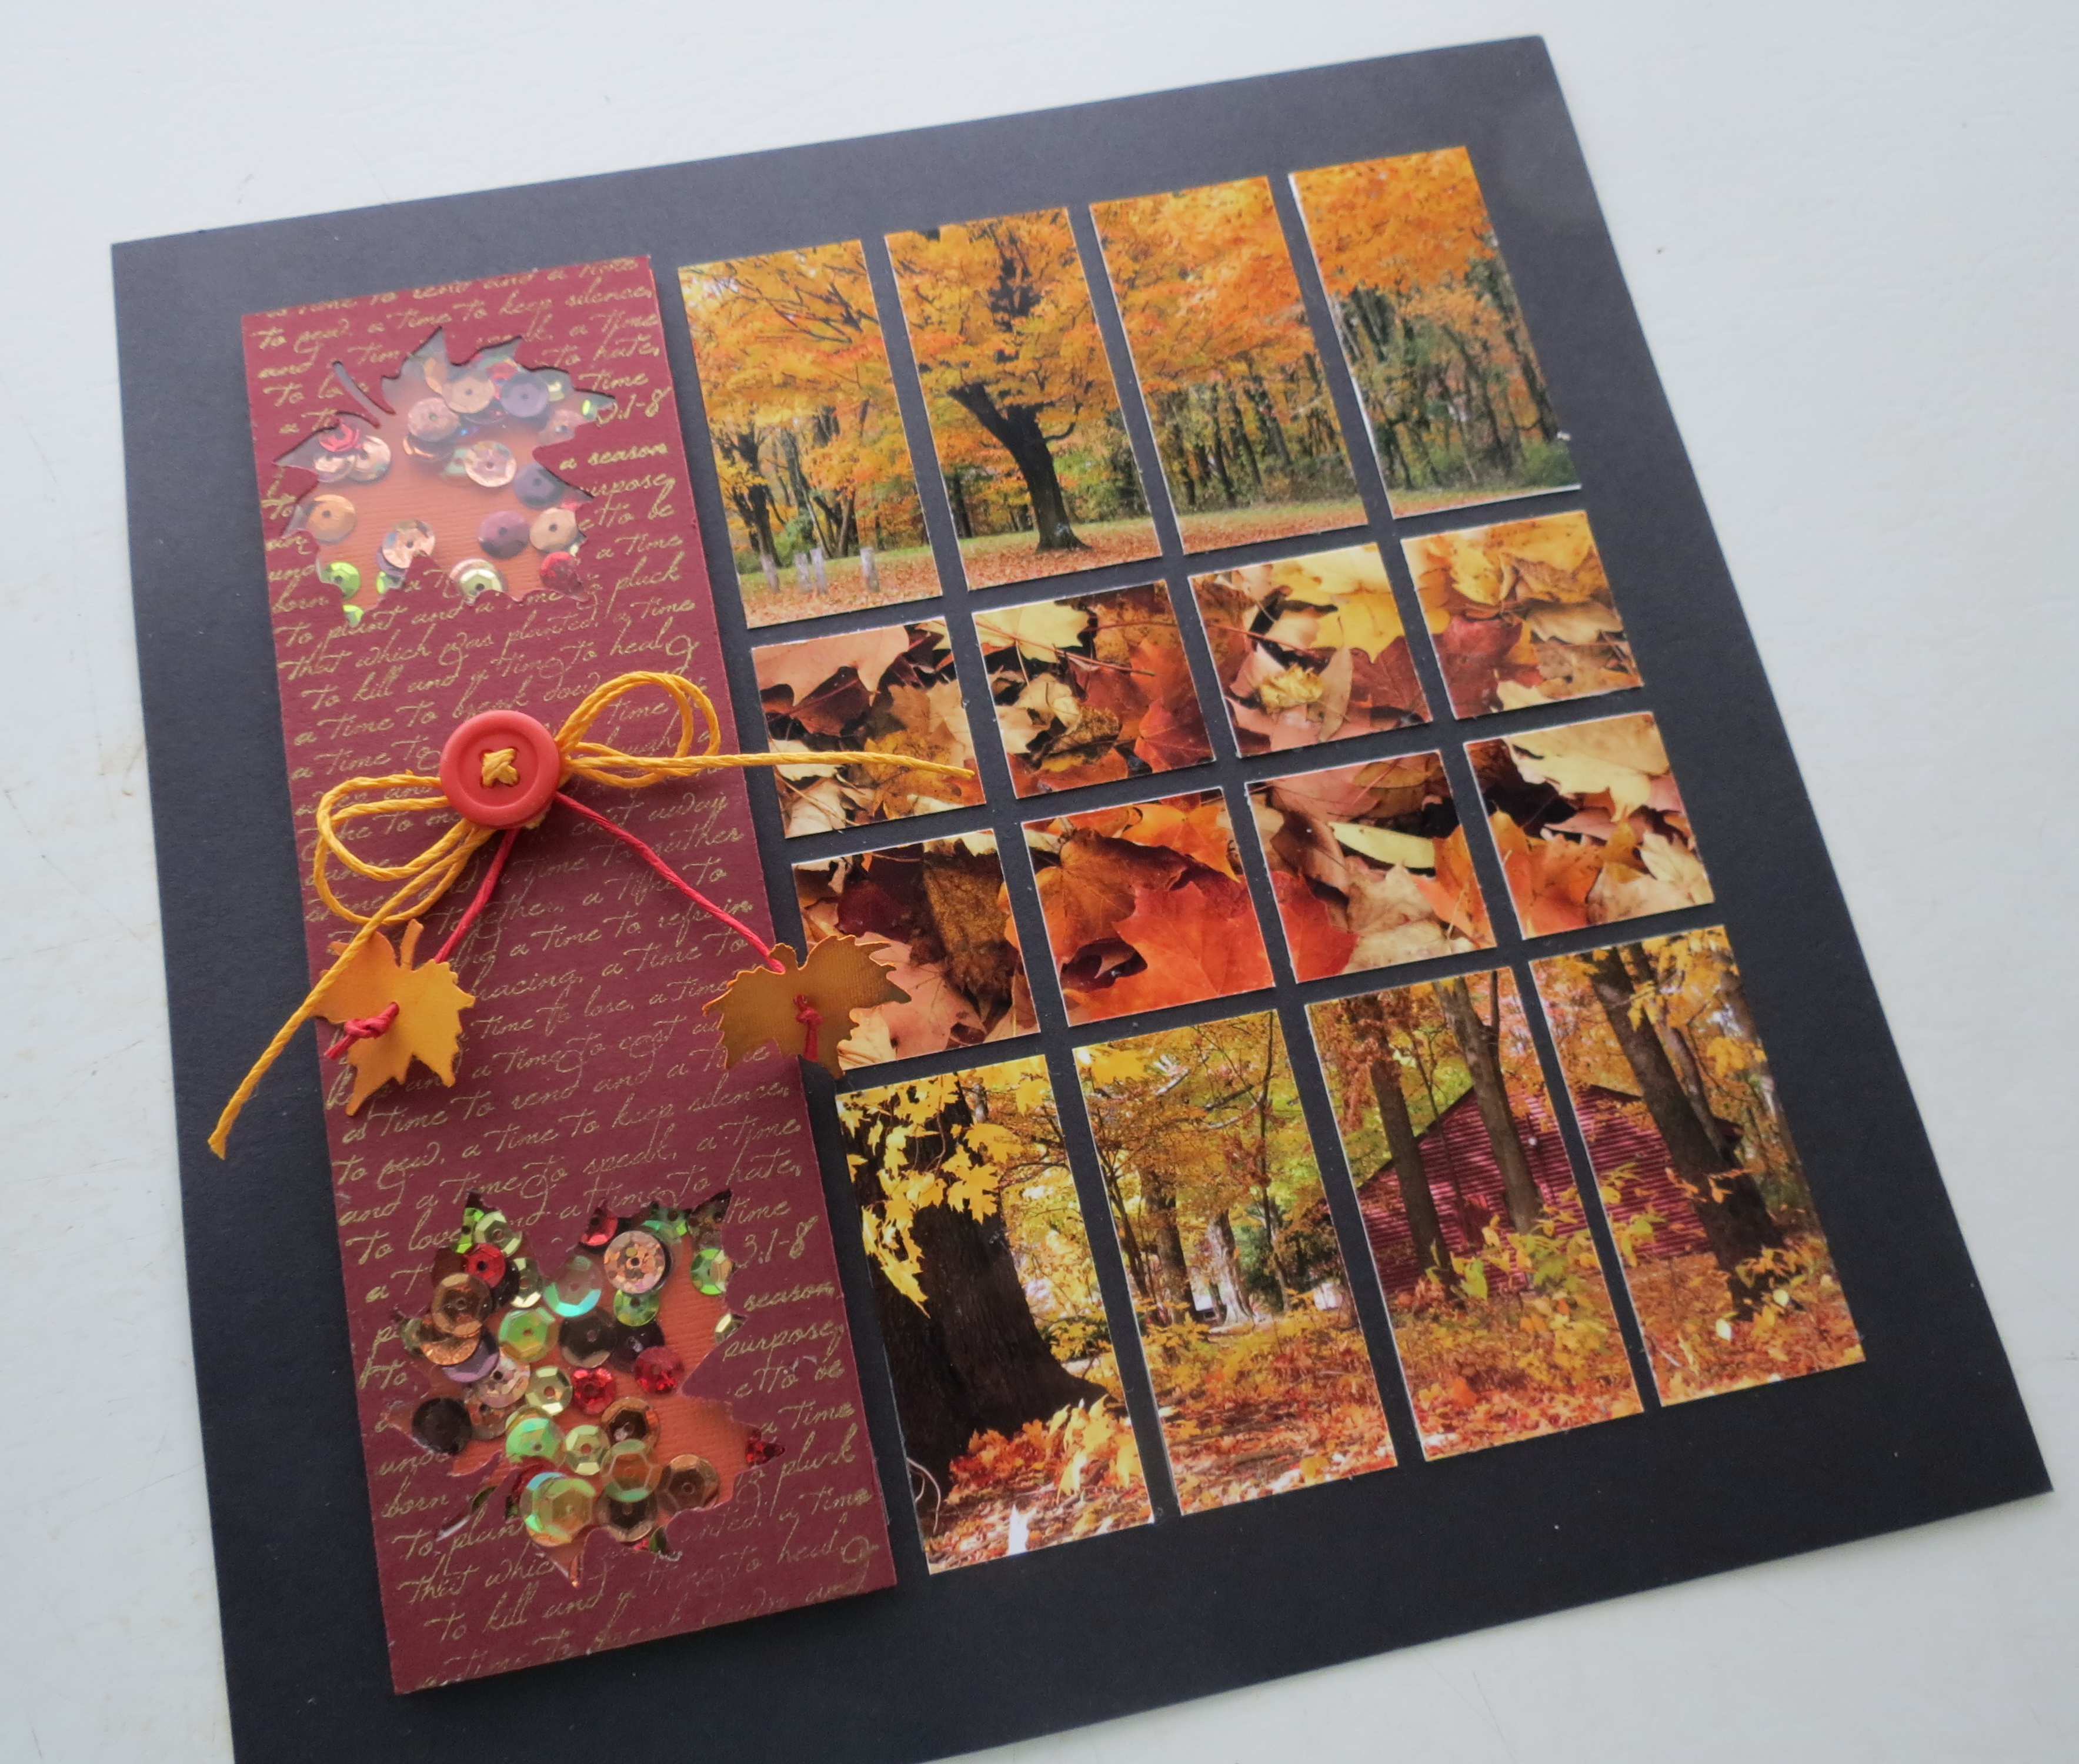
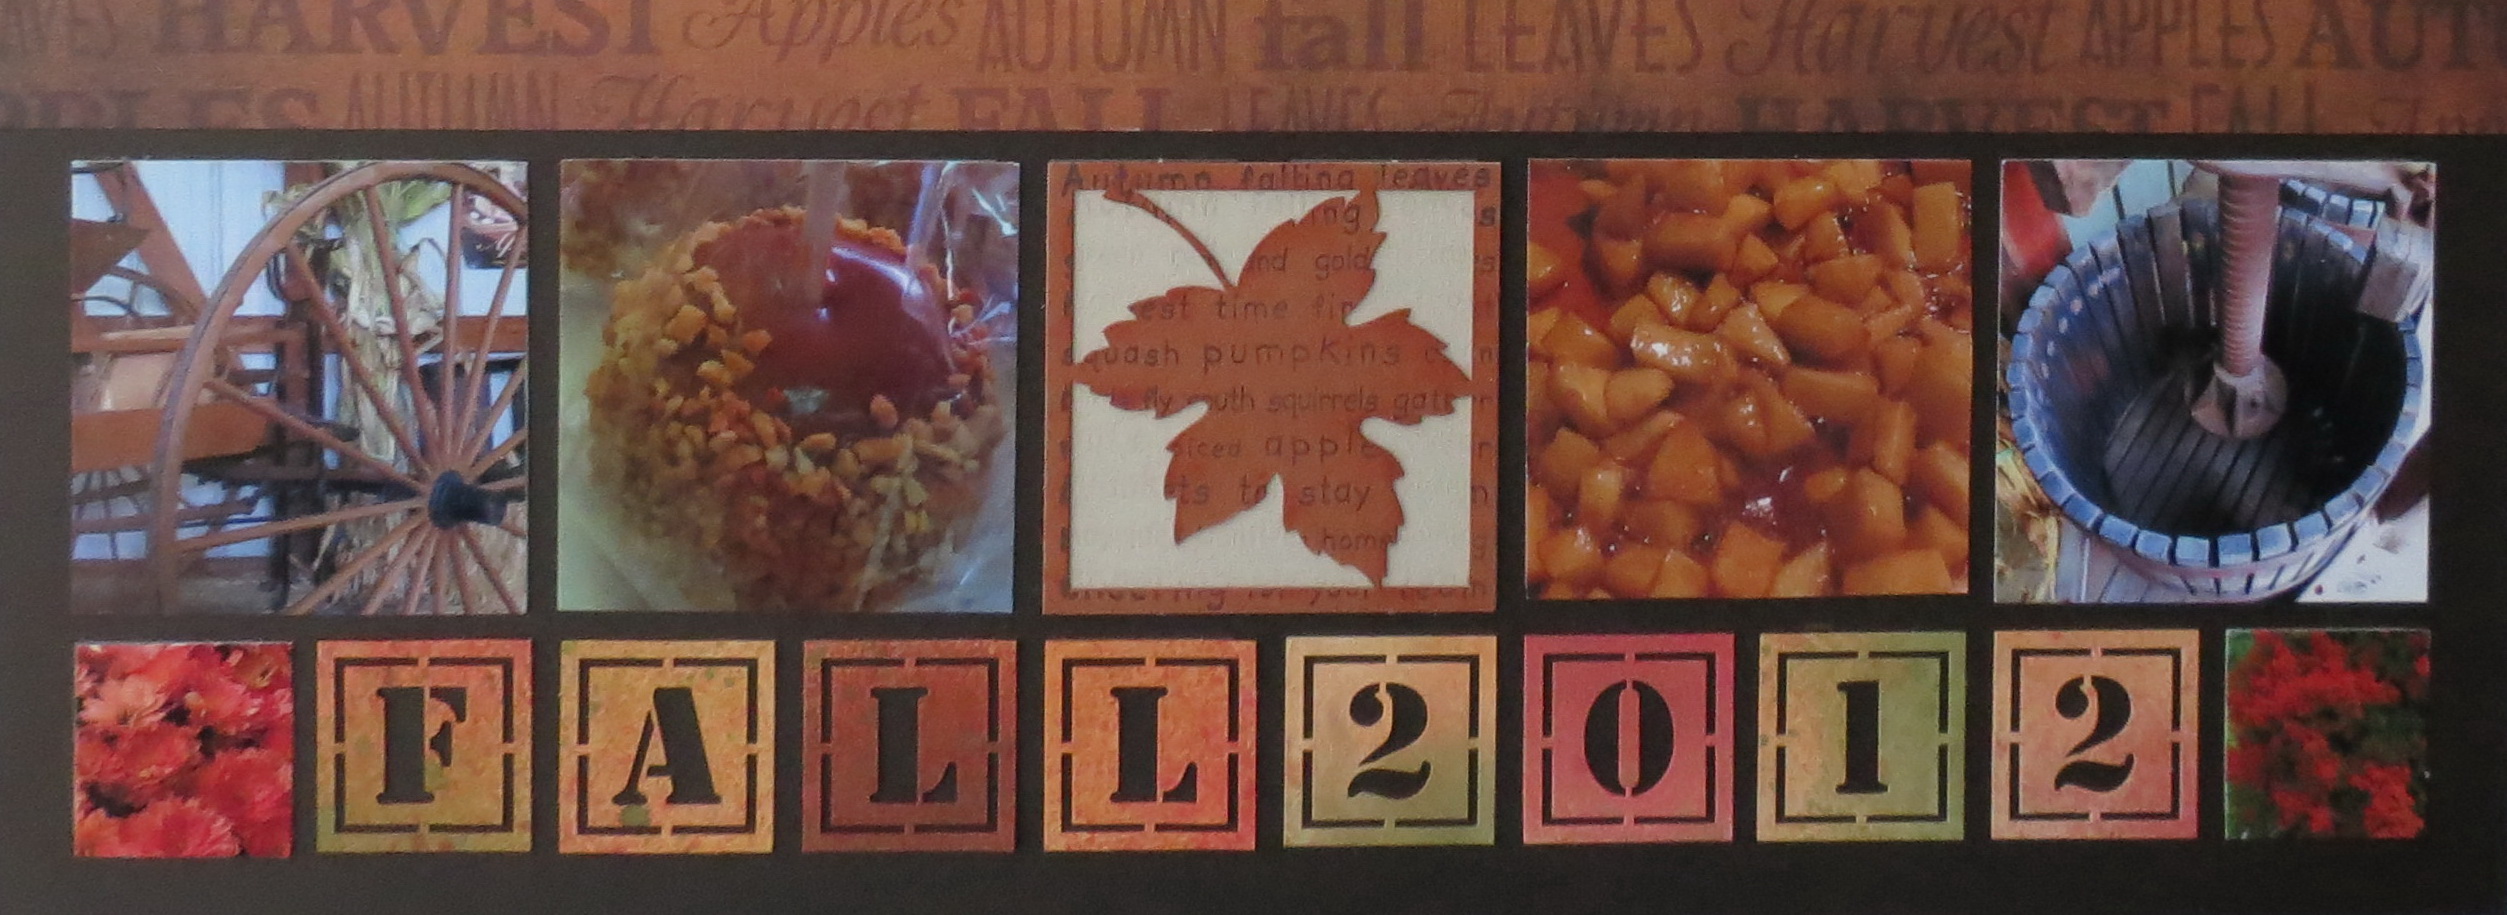
Fall Flourishes #4 An 8 x 8 Layout with the Shaker Sequin Block.
Sometimes a few extra touches, in this case, our fall flourishes, can bring just a little more interest to our pages. I hope you are out there getting photos taken and ready to do some scrapping! Maybe you’ll try something new to embellish your pages this year…have some fun! Let us see what you are doing and share with us on the Story Board on Journella.com or our Facebook page.
Andrea Fisher